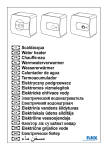
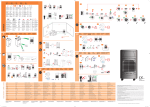
Download Piccolo - User Manual
Transcript
Piccolo - ARKS 50
GB
Open outlet water heater
Other languages have been omited
from this manual for ease of use
ATTENZIONE!
Scaldacqua a scarico libero.
Lo scarico agisce da sfiato, usare rubinetti adatti per scaldacqua a scarico libero.
Prima di accendere l’apparecchio, assicurarsi che esso sia pieno d’acqua: aprire il rubinetto
dell’acqua calda (a sinistra) e attendere fino alla fuoriuscita dell’acqua.
ACHTUNG!
Offener Speicher. Dieser Speicher arbeitet drucklos.
Spezialarmaturen verwenden.
Vor der elektrischen Inbetriebnahme muß sicher gestellt sein, daß der Speicher mit Wasser
gefüllt ist. Dazu muß mann das Heißwasserventil (links) öffnen und abwarten, bis Wasser aus
dem Auslauf kommt.
WARNING!
Open outlet water heater.
The outlet acts as a vent, use mixing taps suitable for open outlet water heaters only.
Before switching on the appliance make sure it is full of water open the hot water tap (to the
left) and wait until water flows through.
ATTENTION!
Chauffe-eau à écoulement libre.
Ce chauffe-eau travaille hors pression. Utiliser une robinetterie speciale.
S’assurer que l’appareil est rempli d’eau avant la mise sous tension. Pour se faire, ouvrir le
robinet d’eau chaude (coté gauche), jusqu’à ecoulement.
OPGELET!
Dit toestel mag enkel met open (zonder druk) worden geinstalleerd. Op de afvoerpijp mogen
derhalve geen straalregelaars, gummislangen of afsluitkranen worden bevestigd.
Voor dat men de boiler in werking zet moet men ervan overtuigd zijn dat de boiler vol (water)
is.
Men moet om dat te bereiken de warmwaterkraan (links) openen en afwachten totdat geen
water e meer uit de draan komt.
FIGYELEM!
A vízmelegítő szabad kifolyású. Csak a gyártó által tartozékként csomagolt szabadkifolyású
keverőcsappal lehet szerelni.
Mielőtt a készüléket bekapcsolja, győződjön meg arról, hogy a keszüléket vízzel feltöltötték:
nyissa ki a melegvízcsapot (balra) és varja meg, amíg víz folyik a csapból.
UPOZORNĚNĺ!
Ohřívač je beztlakový. Není třeba odvzdušňovat, je nutné ale používat baterie určené pro
beztlakové ohřívače.
Před uvedením ohřívače do provozu je nutné ověřit, zda je naplněn vodou: otevřít výtok teplé
vody (na levé straně) a čekat až bude voda vytékat bez vzduchových bublinek.
UWAGA!
Podgrzewacz o opróżnianiu grawitacyjnym (bezciśnieniowy). Opróżnianie działa jak system
odpowietrzania, należy zastosować krany / baterie jedynie te odpowiednie o podgrzewaczy o
opróżnianiu grawitacyjnym (podgrzewaczy bezciśnieniowych) Przed włączeniem urządzenia
należy upewnić się, czy jest ono napełnione wodą: w tym celu należy otworzyć kran ciepłej
wody (lewy) i odczekać aż do momentu, gdy zacznie wylewać się woda.
I
D
Istruzioni per l’installazione
l’uso e la manutenzione pag. 7
Installations und Gebrauchs
und wartungs anweisungen pag. 17
GB
Instructions for installation,
use, and maintenance pag. 27
F
Intructions pour l’installation,
l’emploi, l’entretien pag. 37
NL
Installatie en
onderhoudsvoorschriften pag. 47
H
Beszerelési, használati
és karbantartási útmutató pag. 57
CZ
Návod k obsluze,
použití a instalaci pag. 67
PL
Instrukcja instalacji
użytkowania i obsługi str. 77
GB
GENERAL WARNINGS
1. This manual is an integral and essential part of the appliance. It should
be preserved with care alongside the appliance even if the latter is
transferred to another owner or user and/or moved to another location.
2. Carefully read the instructions and warnings contained in this manual;
they provide important information for the safe installation, use and
maintenance of your new appliance.
3. The installation is the responsibility of the buyer and should be performed by
a competent person in accordance with the instructions contained herein.
4. This is an open outlet water heater (without pressure) and can supply hot water
for domestic use at one point of use only. To this end, it should be connected
to the distribution mains for domestic hot water compatible with the appliance
performance and power rating. The hot water pipe should never be blocked or
clogged; if you wish to use mixer taps, use those designed especially for open
outlet water heaters.
5. The use of this appliance for purposes other than those specified is strictly
forbidden. The manufacturer is not to be held responsible for any damage due
to improper, incorrect and unreasonable use or due to failure to comply with
the instructions set forth herein.
6. Installation, maintenance and all other interventions must be carried out by a
competent person in full conformity with the applicable legal regulations and
the directions provided by the manufacturer.
7. Incorrect installation can cause personal injury, property damage and damage
to animals; the manufacturer will not be held responsible for such damage.
8. Keep all packing material (clips, plastic bags, polystyrene foam, etc.) out of
children’s reach as they are hazardous.
9. It is strictly prohibited for children or inexperienced people to use the appliance.
10. It is strictly forbidden to touch the appliance barefoot or with wet hands or feet.
11. All repairs should be carried out by a competent person only, using only original
spare parts. Failure to comply with the above instructions could compromise
safety and invalidate all liability on the part of the manufacturer.
12. The temperature of the hot water is adjusted by an operating thermostat that
acts as a resettable safety device to avoid any dangerous rises in temperature.
13. The appliance electrical connection should be made in accordance with the
instructions provided in the relevant paragraph.
14. No inflammable items should be left in the vicinity of the appliance.
GENERAL SAFETY NORMS
Key to symbols:
Symbol
!
Meaning
Failure to comply with this warning implies the risk of personal injury, in some circumstances
even fatal
Failure to comply with this warning implies the risk of damage, in some circumstances even
serious, to property, plants or animals
!
Obligation to keep to the general safety norms and appliance specifications
23
GB
Ref.
Warning
Risk
Symbol
1
Do not perform operations that involve opening
the appliance.
E l e c t r o c u t i o n f r o m l i ve c o m p o n e n t s.
Personal injury from burns due to overheated
components or wounds caused by sharp edges
or protrusions.
!
2
Do not perform operations that involve removing
the appliance from its place of installation.
Electrocution from live components.
!
Flooding due to water leaking from disconnected
piping.
3
Do not start or stop the appliance by simply
plugging it into or out of the electricity mains.
Electrocution from a damaged cable or plug,
or socket.
4
Do not damage the power supply cable.
Electrocution from live unsheathed wires.
5
Do not leave anything on top of the appliance.
Personal injury from an object falling off the
appliance following vibrations.
!
!
!
Damage to the appliance or any objects
underneath it due to the object falling off
following vibrations.
Personal injury due to the appliance falling.
!
6
Do not climb onto the appliance.
7
Do not climb onto chairs, stools, ladders or
unstable supports to clean the appliance.
8
Do not attempt to clean the appliance without
first turning it off and unplugging it or switching Electrocution from live components.
the dedicated switch off.
!
9
Install the appliance on a solid wall that is not
subjected to any vibrations.
!
10
Damage to the appliance or any objects
underneath it due to the appliance falling off
from its place of installation.
Personal injury from falling from a height or from
cuts (stepladders shutting accidentally).
Noisiness during operation.
Electrocution from contact with live wires.
Explosions, fires or intoxication from the
When piercing the wall for installation, take care discharge of gas leaking from damaged piping.
not to damage any electrical wiring or existing
piping.
Damage to existing installations.
Flooding due to water leaking from damaged
piping.
Electrocution from contact with live wires.
11
12
24
Protect all connection pipes and cables in order
to prevent their being damaged.
Make sure the installation site and any systems
to which the appliance must be connected
comply with the applicable norms in force.
!
!
!
Flooding due to water leaking from damaged
piping.
Electrocution from contact with live wires
installed incorrectly.
Damage to the appliance due to improper
operating conditions.
!
GB
Ref.
13
14
15
Warning
Risk
Use manual tools and equipment suitable for
the intended use (in particular, make sure that
the tool is not worn and that the handle is intact
and fully fastened to the rest of the tool); use
them correctly and make sure they don’t fall from
a height. Put them safely back in place after use.
Personal injury from the falling splinters or
fragments, inhalation of dust, shocks, cuts, pricks
and abrasions.
Damage to the appliance or surrounding objects
from falling splinters, knocks and incisions.
Use electrical equipment suitable for the intended
use (in particular, make sure that the power supply
cable and plug are intact and that the parts featuring
rotary or reciprocating motion are fastened
correctly); use this equipment correctly; do not
obstruct passageways with the power supply cable,
make sure no equipment could fall from a height.
Disconnect it and put it safely back in place after
use.
Make sure any portable ladders are positioned
securely, and that they are suitably resistant and
that the steps are intact and not slippery and
do not slide around when someone climbs them
and ensure someone supervises at all times.
Personal injury from electrocution, falling splinters
or fragments, inhalation of dust, shocks, cuts,
pricks, abrasions, noise and vibration.
Symbol
!
!
Damage to the appliance or surrounding
objects from falling splinters, knocks and
incisions.
Personal injury from falling from a height or
from cuts (stepladders shutting accidentally).
!
16
Make sure any rolling ladders are positioned
securely, that they are suitably resistant, that
the steps are intact and not slippery, that they
are fitted with handrails on either side of the
ladder and parapets on the landing.
Personal injury from falling from a height.
!
17
During all work carried out at a certain height
(generally with a difference in height of more
than two metres), make sure that parapets are
used to surround the works area or individual
harnesses designed to prevent falls, and that
the space covered during any accidental fall is Personal injury from falling from a height.
free from dangerous obstacles, and that any
impact upon falling is cushioned by semi-rigid
or deformable surfaces.
!
18
Make sure the place of work has suitable hygiene
and sanitary conditions in terms of lighting,
Personal injury due to knocks, stumbling
ventilation, the solidity of the structures and
and injuries.
emergency exits.
19
During all work, wear individual protective
clothing and equipment.
20
21
All operations on the inside of the appliance
must be performed with the necessary caution
in order to avoid abrupt contact with the sharp
parts.
Do not use any insecticides, solvents or
aggressive detergents to clean the appliance.
!
Personal injury from electrocution, falling splinters
or fragments, inhalation of dust, shocks, cuts,
pricks, abrasions, noise and vibration.
!
Personal injury from cuts, pricks and abrasions.
!
Damage to the plastic and painted parts.
22
Do not use the appliance for any use other than Damage to the appliance due to operation
overload.
normal domestic use.
Damage to objects treated inappropriately.
23
Do not allow children or inexperienced people
to use the appliance.
Damage to the appliance due to improper
use.
25
GB
Ref.
Warning
Risk
24
Make all electrical connections using conductors Fire due to overheating from electrical current
passing through undersized cables.
with a suitable section.
25
Protect the appliance and all areas in the vicinity Damage to the appliance or surrounding objects
from falling splinters, knocks and incisions.
of the work place using suitable material.
26
Handle the appliance with suitable protection
and with care.
27
Organise the dislocation of all debris and
equipment in such a way as to make movement Damage to the appliance or surrounding objects
easy and safe, avoiding any piles that could yield from shocks, knocks, incisions and squashing.
or collapse.
28
Reset all the safety and control functions affected
by any interventions performed on the appliance
and make sure they operate correctly before
re-using the appliance.
Symbol
Damage to the appliance or surrounding objects
from shocks, knocks, incisions and squashing.
Damage or shutdown of the appliance due to
out-of-control operation.
SPECIFIC SAFETY NORMS FOR THIS APPLIANCE
Key to symbols:
Symbol
!
Meaning
Failure to comply with this warning implies the risk of personal injury, in some circumstances
even fatal
Failure to comply with this warning implies the risk of damage, in some circumstances
even serious, to property, plants or animals
!
Obligation to keep to the general safety norms and appliance specifications
Ref.
Warning
29
Before handling, empty all components that may
contain hot water, carrying out any bleeding if
necessary.
30
Descale the components, in accordance with
the instructions provided on the “safety data
sheet” of the product used, airing the room,
wearing protective clothing, avoid mixing different
products, and protect the appliance and
surrounding objects.
26
Risk
Symbol
Personal injury from burns.
!
Personal injury due to contact of the skin or eyes
with acidic substances, inhalation or swallowing
of harmful chemical agents.
!
Damage to the appliance or surrounding objects
due to corrosion caused by acidic substances.
GB
DESCRIPTION OF THE WATER HEATER (see fig. 4)
A. Pilot lamp
B. Control knob
C. Front cover
TECHNICAL CHARACTERISTICS
For the technical characteristics of the appliance, please refer to the information provided on
the data plate.
Date of
manufacture
Model
Maximum working
pressure
Capacity
Absorbed power
Power supply voltage
M a d e i n I TA LY
Current intensity
Mains frequency
Capacity
Approvals
Degree of protection
against water
l
5
Power
W
See data plate
Voltage
V
See data plate
Pa (bar)
0
kg
2,6
Mains water pressure
Weight
This appliance complies with the provisions set forth in the EEC/89/336
EMC directive on electromagnetic compatibility.
INSTALLATION NORMS (for the installer)
!
WARNING! Follow the general warnings and the safety norms listed at the
beginning of the text and keep to all the instructions given under all circumstances.
The installation and set-up of the water heater must be carried out by a competent person in
conformity with the applicable norms in force and with any provisions set forth by local authorities
and public health bodies.
Warning: this is an open outlet appliance (no pressure) and can be installed in one point of
use only. The electrical and plumbing connections must be made in compliance with the
applicable norms in force.
The appliance heats water to a temperature below boiling point. It must be linked up to a mains
water supply according to the appliance performance levels and capacity.
Before connecting the appliance, it is first necessary to:
- Check whether the characteristics (please refer to the data plate) meet the customer’s
requirements.
- Make sure the installation conforms to the IP degree (of protection against the penetration
of liquids) of the appliance according to the applicable norms in force.
- Read the instructions provided on the packaging label and on the appliance data plate.
Installing the appliance
This appliance was designed to be installed only inside buildings in compliance with
the applicable norms in force. Furthermore, installers are requested to keep to the
following advice in the presence of:
27
GB
- Damp: do not install the appliance in closed (unventilated) and damp rooms.
- Frost: do not install the appliance in areas where the temperature may drop critically
and there may be a risk that ice may form.
- Sunlight: do not expose the appliance to direct sunrays, even in the presence of
windows.
- Dust/vapours/gas: do not install the appliance in the presence of particularly aggressive
atmospheres such as acidic vapours, dust or those saturated with gas.
- Electrical discharges: do not install the appliance directly on electrical supplies that
aren’t protected against sudden voltage jumps.
!
See warning no. 26
!
See warning no. 9 - In the case of walls made of bricks or perforated blocks,
partition walls featuring limited static, or masonry different in some way from
those stated, you first need to carry out a preliminary static check of the supporting
system.
Install the appliance using the special bracket provided in the box, fastening it
using 2 screws/Rawlplugs measuring 6 mm in diameter.
!
See warning no. 10
Local norms could set forth restrictions regarding the installation in a bathroom
environment. Therefore keep to the minimum distances foreseen by the applicable
norms in force.
The appliance should be installed as close as possible to the point of use
to limit heat dispersion along the piping.
!
See warning no. 20
Plumbing connection
Before making the plumbing connection, you must arrange for the system to be
cleaned thoroughly to eliminate any residue or dirt that could compromise the
proper operation of the water heater.
Connect the water heater inlet and outlet to resistant pipes or pipefittings, as well as
to the operating pressure, the temperature of the hot water that could at times reach
well over 80°C. We advise against the use of materials that cannot withstand such high
temperatures.
We recommend you use dielectric joints for the electrical insulation of the appliance
from the water mains.
Connect the inlet pipe (marked with a blue rubber washer) and the outlet pipe (red
rubber washer) to the corresponding pipes of the system. Tighten couplings E using
a pair of spanners as illustrated in fig. 4
In the event of low mains pressure values, install the appliance at no more than one
metre above the tap (fig. 3) and no more than 2 metres form the side of the latter.
Should these distances be greater than the recommended values, you must include
an air valve on the hot water pipe.
Fill the appliance up and let the water flow out of the tap for a few seconds.
The water flow rate, with the tap turned on fully, should not be more than 5 l/min; for
this reason, in accordance with DIN 44531 norm, you should adjust the small valve
(fig. 5) to limit the water flow.
In the presence of particularly hard waters, there will be a considerable and rapid
formation of limescale inside the appliance, with a consequent loss in efficiency and
damage to the electric heating element.
Electrical connection
For greater safety, have qualified personnel carry out a careful inspection of the electrical
system, ensuring it complies with the applicable norms in force, because the appliance
manufacturer will not be held responsible for any damage caused by the lack of earthing
of the system or for faults in the electricity supply.
28
GB
See warning no. 24 - Check that the system is suitable for the maximum power
absorbed by the water heater (please refer to the data plate) and that the crosssection of the electrical connection cables is suitable, and no less than 1.5 mm2.
The power supply cable (type H05 W-F 3x1.5, 8.5 mm in diameter) should be inserted
in the corresponding hole (X fig. 6) situated in the vicinity of the control knob and feed
it until it reaches the thermostat slots (T fig. 6). The electrical connection should be
made directly on the terminals (D fig. 6) of the thermostat (respect the L-N polarity).
The appliance is fitted with a cable and plug. For installations without a plug, use a
bipolar switch in conformity with the applicable norms in force (fused with a minimum
contact opening of 3 mm).
The appliance must be earthed and the earth wire (yellow-green colour) should be
fastened to the special faston on the heating element and marked with the
(PE fig.
6). Secure the power supply cable in place using the special cable clamp provided with
the appliance
!
See warning no. 11
The use of multiplugs, extensions or adaptors is strictly prohibited.
It is strictly forbidden to use the piping from the plumbing, heating and gas
systems for the appliance earthing connection.
The appliance is not protected against the effects caused by lightning.
Before turning the appliance on, make sure the supply voltage complies with the value
stated on the appliance data plate and that the appliance itself is filled with water.
If the appliance is not supplied with a power supply cable, make a fixed connection to
the mains using a rigid pipe or cable for permanent installation.
!
Starting and testing the appliance
Before powering the appliance, fill the tank up with mains water.
Set the knob (F fig. 6) to the desired position, plug the appliance into the socket or
switch the main switch to “ON”.
Check the appliance operation until the end of the first heating cycle, indicated by the
relative pilot lamp turning off. During the heating phase, the water expansion could
cause some trickling from the tap: this is completely normal and does not mean the
tap is faulty. Do not screw the taps too tightly to prevent damaging their seals.
In the event of a malfunction, read the paragraph regarding the MAINTENANCE
REGULATIONS.
Adjusting the operating temperature
The temperature of the water can be selected on the knob (F fig. 6) and can be adjusted
from 40 to 80°C approximately.
We recommend you set the temperature of the water heater to 60°C to:
- reduce the formation of limescale;
- reduce heat dispersion;
- avoid the risk of bacteria proliferation.
Anti-freeze function
If the temperatures in the room where the appliance is installed can reach particularly
low values, set the knob (F fig. 6) to setting *.
The pilot lamp (A fig. 4) stays on during the heating phase.
MAINTENANCE REGULATIONS (for competent persons)
!
WARNING! Follow the general warnings and the safety norms listed at the
beginning of the text and keep to all the instructions given under all circumstances.
29
GB
All maintenance operations and service visits should be performed by a competent
person (who have the skills required by the applicable norms in force).
Before performing any maintenance operations and/or replacing any components,
disconnect the appliance from the electricity mains using the external switch;
empty out the water heater if necessary.
!
See warning nos. 20 - 26 - 28
Replacing parts, when necessary
To access the electrical parts (heating element, thermostat, pilot lamp), remove the
cover C by unscrewing screws D (fig. 4).
In the event of an intervention on the thermostat, disconnect the latter from the electricity
mains and slide it out of its seat on the heating element. In the event of an intervention
on the heating element, unscrew the bolts (A fig. 6) using a 10 mm spanner.
When remounting the components, make sure you put the flange seal, the thermostat,
the heating element and all pipes back in their original position.
We recommend you replace the seal each time you dismount the flange.
Once the aforementioned operations are complete, make sure you fill the appliance
with water before powering it.
Periodic maintenance
The following operations should be performed annually:
- empty the appliance and dismount the heating element;
- carefully remove all limescale from the heating element parts; if you prefer not to use
acids designed especially for this purpose, use non-metallic objects to break off the
limescale crust that has formed, taking care not to damage the heating element’s
armour.
- We recommend you replace the seal each time you dismount the heating element.
To remount the heating element, the tightening torque of the bolts (A fig. 6) should be
between 7 and 10 N/m. You must respect the “criss-cross” type of tightening.
Once the aforementioned operations are complete, make sure you fill the appliance
with water before powering it.
Resetting the bipolar safety
In the event of an abnormal overheating of the water, a thermal safety switch in
compliance with CEI-EN norms cuts off the electrical circuit on both the power supply
phases of the heating element.
To reset the operation of the appliance, proceed as follows:
- leave it to cool;
- set the knob (F fig. 6) to the maximum temperature position;
- remove the cover C by unscrewing screws D (fig. 4);
- disconnect the thermostat (T fig. 6) from the electricity mains;
- using a cross-head screwdriver, press on point A fig. 9 until you hear it click.
Remount everything in the reverse order, paying particular attention to repositioning
the components correctly.
Once the aforementioned operations are complete, make sure you fill the appliance
with water before powering it.
USER INSTRUCTIONS
!
30
WARNING! Follow the general warnings and the safety norms listed at the
beginning of the text and keep to all the instructions given under all circumstances.
GB
Advice for user
- Avoid positioning any objects and/or appliances that could be damaged by water
leaks beneath the water heater.
- Should you not use any water for an extended period of time, you should:
disconnect the appliance from the electrical supply by switching the external
switch to “OFF”;
turn off the plumbing circuit taps.
- Hot water at above 50°C flowing out of the taps at the point of use could cause
serious scalds or even death from burns. Children, the disabled and the elderly are
more exposed to the risk of burns.
- It is strictly forbidden for the user to perform any routine or extraordinary maintenance.
- Before calling the after-sales service centre for assistance in the event of a suspected
malfunction, check first whether this is due to other causes, such as for example a
temporary power failure or water shortage.
!
See warning nos. 1 - 2 - 3
!
See warning no. 4 – Contact a competent person for the replacement of the
power supply cable.
!
See warning nos. 5 - 6 - 8
!
See warning no. 21 - To clean the outer parts of the appliance, use a damp
cloth soaked in soapy water.
!
See warning no. 21 - To clean the outer parts of the appliance, use a damp
cloth soaked in soapy water.
!
See warning nos. 22 - 23
Operation
To turn the water heater on, insert the plug into the wall socket or switch on the bipolar
switch.
The pilot lamp (A fig. 4) only stays on during the heating cycle; during this time, the
expanding water could cause some water to trickle from the tap: this is completely
normal and does not mean the tap is faulty. Do not screw the taps too tightly to
prevent damaging their seals.
The thermostat will automatically disable the heating element as soon as the selected
water temperature is reached.
During the final stage of heating, it is normal for a few cycles of thermostat starting
and stopping to take place.
During normal operation, the electric heating element may make a little noise inside
the appliance, which is due to the heat exchange; the plumbing connections may also
become hot to the touch.
Adjusting the operating temperature
The temperature of the water can be selected on the knob (F fig. 6) and can be adjusted
from 40 to 80°C approximately.
We recommend you set the temperature of the water heater to 60°C to:
- reduce the formation of limescale;
- reduce heat dispersion;
- avoid the risk of bacteria proliferation.
31
Fig. 1
(I) Attenzione: Utilizzare un rubinetto per scaldacqua sopralavello.
(D) Vorsicht: Mischbatterie für Übertischwarmwasserspeicher benützen.
(GB)Warning: To use mixing-tap for above sink water heater.
(F) Attention: Utiliser une robinetterie pour chauffe-eau modèle sur-évier.
(NL) Opgelet: gebruik een kraan voor een boiler model boven de gootskeen.
(H) Figyelem: Csaptelep a mosogató fölötti vízmelegítőhöz!
(CZ) Upozornìní: Pouzivat baterie pro typ ohøivaèe s umístìním nad døez.
(PL) Uwaga: należy zamontować baterię mieszającą przeznaczoną do ogrzewaczy instalowanych nad zlewem
R
R
=
Acqua calda (rosso)
Warmwasser (rot)
Hot water (red)
Eau chaude (rouge)
Warmwater (rood)
Melegvíz (piros)
Teplá voda (èervená)
Woda gorąca (czerwony)
=
Acqua fredda (blu)
Kaltwasser (blau)
Cold water (blue)
Eau froide (bleu)
Koudwater (blauw)
Hidegvíz (kék)
Studená voda (modrá)
Woda zimna (niebieski)
B
B
R
B
83
Fig. 2
R
R
84
(I) Attenzione: Utilizzare un rubinetto per scaldacqua sottolavello.
(D) Vorsicht: Mischbatterie für Üntertischwarmwasserspeicher benützen.
(GB)Warning: To use mixing-tap for under sink water heater.
(F) Attention: Utiliser une robinetterie pour chauffe-eau modèle sous-évier.
(NL) Opgelet: gebruik een kraan voor een boiler model boven de gootskeen.
(H) Figyelem: Csaptelep, mosogató alatti vízmelegítőhöz!
(CZ) Upozornìní: Pouzivat baterie pro typ ohøivaèe s umístìním pod døez.
(PL) Uwaga: należy zamontować baterię mieszającą przeznaczoną do ogrzewaczy instalowanych nad zlewem
R
=
Acqua calda (rosso)
Warmwasser (rot)
Hot water (red)
Eau chaude (rouge)
Warmwater (rood)
Melegvíz (piros)
Teplá voda (èervená)
Woda gorąca (czerwony)
B
=
Acqua fredda (blu)
Kaltwasser (blau)
Cold water (blue)
Eau froide (bleu)
Koudwater (blauw)
Hidegvíz (kék)
Studená voda (modrá)
Woda zimna (niebieski)
B
B
Fig. 3
85
Fig. 4
E
D
C
E
B
A
Fig. 5
A
D
86
Fig. 6
F
X
PE
D
T
A
Fig. 7
87
Fig. 8
88
Fig. 9
A
89
PE
L
2
3
N
1 - Regolatore di temperatura
2 - Resistenza
3 - Lampada spia
4 - Limitatore di temperatura (RESET SYSTEM))
1 - Temperatuurregelaar
2 - Weerstand
3 - Controlelampje
5 - Temperatuurbegrenzer (RESET SYSTEM)
1 - Temperaturregler
2 - Heizkörper
3 - Signallampe
4 - Temperaturbegrenzer (RESET SYSTEM)
1
2
3
4
-
Hőmérsékletszabályozó
Fűtőtest
Jelzőlámpa
Hőmérséklet határoló (RESET SYSTEM)
1
2
3
4
1
2
3
4
-
Regulace teploty
Odpor
Kontrolní zárovka
Havarijní termostat (RESET SYSTEM)
1
2
3
4
- Regulator temperatury
- Grzałka
- Lampka kontrolna
- Termostat ogranicznik temperatury
(RESET SYSTEM)
- Temperature regulator
- Heating element
- Indicator lamp
- Temperature limiter (RESET SYSTEM)
1 - Régulateur de température
2 - Résistance
3 - Lampe-témoin
4 - Limiteur de température (RESET SYSTEM)
Litograf s.r.l. Jesi
4
029.1.60.008.2.01 0104
1


