1
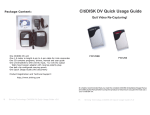
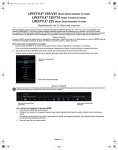
A M A C O M
B A B Y
D V D - R W
T E C H N O L O G I E S
User’s Manual for
BABY DVD-RW
used in conjunction with one of the Amacom Intelligent Interface Cables.
A M A C O M
B A B Y
D V D - R W
1
A M A C O M
2
B A B Y
D V D - R W
A M A C O M
B A B Y
D V D - R W
Copyrights:
© 2003 Amacom Technologies Limited, all rights reserved.
Under the copyright laws, this manual may not be copied, in whole or in part, without the written consent of Amacom Technologies Limited. Your
rights to the software are governed by the accompanying software license agreement.
Trademarks:
The stylised “Amacom” logo, Amacom and BABY DVD-RW are either registered trademarks or trademarks of Amacom Technologies Limited in
the United Kingdom and/or other countries.
Microsoft and Windows are either registered trademarks or trademarks of Microsoft Corporation in the United States and/or other countries.
Apple, Macintosh, Firewire and Mac are either registered trademarks or trademarks of Apple Computer, Inc., in the United States and/or other
countries.
Certain other product names, brand names and company names may be trademarks or designations of their respective owners.
Changes:
The material in this document is for information only and subject to change without notice. While reasonable efforts have been made in the
preparation of this document to assure its accuracy, Amacom assumes no liability resulting from errors or omissions in this document, or from the
use of the information contained herein. Amacom reserves the right to make changes or revisions in the product design or the product manual
without reservation and without obligation to notify any person of such revisions and changes.
Legal Disclaimer:
Amacom Technologies Limited accepts no responsibility for any data loss or other problems that may occur as a result of using this product,
regardless of the cause. Users should ensure that they run Anti-Virus software on all supplied software or drivers and that they have recent backup
of all important data.
Amacom Technologies Limited makes no guarantee about the compatibility of discs using this drive and all discs created should be tested prior to
distribution.
Mention of third-party products is for informational purposes only and constitutes neither an endorsement nor a recommendation. Amacom
Technologies Limited assumes no responsibility with regard to the performance or use of these products.
Federal Communications Commission Radio Frequency Interference Statement (FCC)
WARNING: Changes or modifications to this unit not expressly approved by the party responsible for compliance could void the user’s authority
to operate the equipment. This equipment has been tested and found to comply with the limits for a Class B digital device, pursuant to Part 15
of the FCC Rules. These limits are designed to provide reasonable protection against harmful interference when the equipment is operated in a
commercial environment. This equipment generates, uses, and can radiate radio frequency energy, and if not installed and used in accordance
with the instructions, may cause harmful interference to radio communications. However, there is no guarantee that interference will not occur in
a particular installation. If this equipment does cause harmful interference to radio or television reception, which can be determined by turning the
equipment off and on, the user is encouraged to correct the interference by one of the following measures:
• Reorient or relocate the receiving antennas.
• Increase the separation between the equipment and the receiver.
• Connect the equipment into an outlet on a circuit different from that to which the receiver is connected.
• Consult the reseller or an experienced radio/TV technician for help.
Shielded cables and I/O cards must be used for this equipment to comply with the relevant FCC regulations. This device complies with Part 15
of the FCC rules. Operation is subject to the following two conditions: (1) this device may not cause harmful interference, and (2) this device must
accept any interference received, including interference that may cause undesired operation.
Canada Compliance Statement:
This Class A digital apparatus meets all requirements of the Canadian Interference – Causing Equipment Regulations.
Manufacturer’s Declaration for CE Certification:
We, Amacom, solemnly declare that this product conforms to the following European standards:
Class B EN60950, EN55022, EN50082-1, EN60555-2
With reference to the following conditions:
73/23/EEC Low Voltage Directive
89/336/EEC EMC Directive
Laser Products:
This equipment is certified to comply with DHHS Rule 21 CFR Chapter I, subchapter J in effect as of date of manufacture. This equipment is
classified as a Class I Laser product and no hazardous laser radiation is emitted outside the drive.
3
A M A C O M
B A B Y
D V D - R W
CONTENTS
PRECAUTIONS
GETTING
STARTED
What is DVD-RW
Copyright Warning
Unpacking the BABY DVD-RW
Setting up the Hardware
DEVICE
DRIVER
USB 2.0
INSTALLATION
- Win 98 / Win 98SE / Win ME / Win 2000 / Win XP
- Mac OS 9.1 and above
FireWire
- Win 98SE / Win ME / Win 2000 / Win XP
- Mac OS 9.1 and above
CardBus
- Win 95 / Win NT / Win 98 / Win 98SE / Win ME / Win 2000 / Win XP
ADDITIONAL
SOFTWARE
Easy CD Creator
- For PC
Toast Lite
- For Mac
VideoWave Movie Creator
- For PC
DVD PlayBack Software
- For PC
USING
YOUR
INSTALLATION
BABY DVD-R W
Inserting Discs
Emergency Ejection of Discs
Reading Discs
Playing Audio CDs through the HeadPhone Socket
Playing Audio CDs through the Phono Sockets
Writing Discs
SYSTEM
CONTACT
4
REQUIREMENTS
DETAILS
A M A C O M
B A B Y
D V D - R W
PRECAUTIONS
The drive you have just purchased includes a laser diode device, which classifies it as a “Laser Class I”
product. This laser is not dangerous for the user under normal operating conditions. However, we strongly
advise you not to place any reflective objects in the disc loading system, due to the risk of exposure to laser
emissions that may be reflected by such objects.
Always follow the basic precautions listed below to use your Amacom drive safely and correctly. Following
these guidelines will help to avoid the possibility of personal injury to yourself or others, as well as to prevent
damage to your device and other computer equipment. These precautions include, but are not limited to,
the following:
Health and Safety Precautions:
Handling Precautions:
NOTE: Your drive is equipped with laser diodes.
Due to the possibility of potentially dangerous laser
radiation, only qualified persons are authorized to
carry out maintenance on this device.
Do not expose the drive to temperatures
outside the range 5° C to 45° C (41° F to
104° F). Doing so may damage the drive.
Read this User Manual carefully, and ensure
that you follow the instructions correctly when
setting up the device.
Do not look directly or indirectly at the laser
diode, even when the device is not in
operation.
Do not open your drive or attempt to
disassemble or modify it. This will invalidate
your warranty.
Never insert any metallic object into the drive,
as this may present a risk of electrical shock,
fire or short-circuiting.
Amacom’s products contain no userserviceable parts. If your product appears
to be malfunctioning, you must return it to
Amacom to be inspected by a qualified
Amacom representative.
Never expose your device to rain or use it
near water or in damp or wet conditions.
Never place containers on it containing liquids,
which may spill into its openings.
Avoid placing your drive near a source of
heat or exposing it to sunlight (even through
a window).
Always unplug the drive from the electrical
outlet if there is a risk of lightning or if it will not
be used for an extended period of time.
Use only interface cables and mains
adapters
supplied
by
Amacom
Technologies Limited, as otherwise
damage may occur to your drive and/or
your computer, invalidating your warranty.
Do not place heavy objects on top of the
drive or use excessive force on its buttons,
connectors and tray.
Always place your drive in a horizontal
position on a flat, stable surface and away
from the edge of the desk before using it.
Always remove the media from the disc tray
before transporting your drive.
Never use excessive force on the disc
loading system; discs should be inserted
effortlessly into your drive.
Protect your drive from excessive exposure
to dust during use or storage.
Use a soft, dry, lint-free cloth if you need
to clean the outside of the drive. Use of
chemical cleaning agents or abrasive cloths
may cause damage to the drive.
Note: The drive’s warranty may be invalidated as a result of failure to follow the precautions listed above.
5
A M A C O M
B A B Y
D V D - R W
GETTING STARTED
Thank you for purchasing the Amacom® BABY DVD-RW drive, the 6 in 1 functions of this drive will allow
you to quickly and easily create and record your own data, audio and video discs on DVD-R, DVD-RW,
CD-R or CD-RW discs. You can use the BABY DVD-RW drive to archive data, create your own Audio
CDs or make a DVD-Video of your home movies to share with friends and family.
The BABY DVD-RW will also allow you to read CD-ROMs and DVD-ROMs, and allow the playback of
Audio CDs and DVD-Video discs.
This User Manual will help you to become familiar with the BABY DVD-RW drive features and show you
how to set the drive up on your computer. Please read it carefully, as this will ensure that you fully benefit
from the new features that the BABY DVD-RW will offer you.
WHAT IS DVD-RW?
DVD-RW has been developed from existing
technologies such as rewritable CD technology
and is an extension to the DVD Video and DVDROM technology that offers you the ability to create
custom DVDs. The format was designed for
beginners and experts to record video, photos and
data onto a DVD disc.
WHAT CAN I USE BABY DVD-RW FOR?
WHAT ARE THE BENEFITS OF USING
DVD-RW?
DVD-R/RW 4.7GB discs, allow you can store up to
two hours of video, 4,700 color photos, or as many
as 500,000 documents. The DVD+R/RW discs you
burn with your Amacom drive can be played on most
DVD-ROM drives and DVD players. Your CD-RW
media can be read in any MultiRead CD-ROM, CDR, CD-RW, DVD-ROM, DVD-RAM, DVD-RW or
DVD-RW drives.
DVD-RW is as easy to use as CDR/RW but offers
a higher capacity per disc.
DVD-RW can be used for storing large files or
creating DVD Video discs.
The DVD-RW discs can be used in almost any
DVD compatible system. Whether it be a Computer
or DVD Player.
DVD-RW allows you to be creative with Music,
Photos and Video. You can make your own movies
with graphical, animated menus, special effects and
soundtracks that you will easily be able to share with
your friends and family.
Your Amacom BABY DVD-RW drive enables you
to read CD-ROMs and Audio CDs, as well as DVDROM, DVD-Video, and DVD-Audio media. You can
record your own CD-Rs or rewrite to CD-RW media,
record to 4.7GB DVD-R/RWs.
You can use DVD-RW for;
High Quality Presentations
Professional Video Compilations
Archiving/Backup
Home/Family Movies
Large Audio Compilations
and much much more!
COPYRIGHT WARNING
Copyright laws usually protect data, Audio and Video CDs and DVDs. Before you copy a CD or DVD in
full or in part you should check the License Agreement that came with the software or with the publisher
or manufacturer of the disc that you have permission to copy that disc. It is against the law to copy, use or
distribute copyrighted material without the legal consent of the owner, and is punishable in a court law.
6
A M A C O M
B A B Y
D V D - R W
U N P A C K I N G T H E BABY DVD-RW
When you unpack your BABY DVD-RW drive you should check the contents of the box against the list
below. In the event that you are missing any of the items you should contact Amacom as soon as possible
using one of the methods in the “Contacting Amacom” section of this manual.
BABY DVD-RW Drive
USB 2.0 or Firewire Cable (depending on version purchased)
Mains Cable
Roxio Easy CD Creator Basic (PC Only)
Roxio VideoWave Movie Creator (PC Only)
Roxio Toast Lite (Mac OS Only)
PowerDVD (PC Only)
User Manual & Drivers CD
1 x Blank CD-R Disc
1 x Blank CD-RW Disc
1 x Blank DVD-R Disc
1 x Blank DVD-RW Disc
Warranty Card
Once you have unpacked the contents of the box please continue to the “Setting Up The Hardware”
section of this manual and follow the instructions to setup your new BABY DVD-RW drives hardware.
SETTING UP THE
HARDWARE
Setting Up The Hardware
1.
Place the BABY DVD-RW drive on a flat, stable surface and away from the desk edge.
2.
Attach the mains cable to the rear of the BABY DVD-RW.
3.
Plug the mains cable into the wall socket and turn the wall socket switch on.
4.
Switch on the BABY DVD-RW drive using the switch on the rear of the unit.
5.
Attach the interface cable supplied to the interface port on the rear of the BABY DVD-RW drive,
ensuring that it is pushed on firmly to prevent a loose connection.
Your hardware is now setup and you should consult the “Device Driver Installation” section of this manual
that is relevant to your chosen interface and operating system.
7
A M A C O M
B A B Y
D V D - R W
DEVICE DRIVER INSTALLATION
USB® – Windows® ME, 2000 and XP
USB® - Mac® OS 9.1 and Above
1.
Setup your hardware by following the instructions
under the “Setting Up The Hardware” section of
this Quickstart Guide.
1.
Setup your hardware by following the
instructions under the
“Setting Up The Hardware”
section of this manual.
2.
Turn on your computer and wait for
Windows® to finish loading. You must log
in as a user with Administrator privileges to
install the device drivers
(2000 and XP only).
2.
Turn on your computer and wait for Mac OS to
finish loading.
3.
The drivers required to use the Amacom drive
are installed as part of the Roxio Toast
installation. Before proceeding to the next step
you should install Roxio Toast by following the
instructions in the
“Additional Software Installation” section of this
manual.
4.
Plug the USB cable into the USB port on your
computer or hub, ensuring that it is pushed
firmly in.
7.
Windows® will now search the
Amacom® User Manuals and Driver CD
for a device driver and when finished
will prompt you to install the device
driver that it found. Click “Ok” to
continue.
8.
Windows® will now install the
device driver, during this installation
Windows® may say that it cannot
find a file and ask you to specify the
location. If this error occurs change
the location in the dialog box to
“d:\drivers\usb\98se\”
(without the quotes and where D: is the
letter of your Computer’s
CD-Rom Drive) and click “Ok”.
9.
When Windows® has completed
the installation of the device driver
click “Finish”. You may be asked
to restart your computer for the
changes to take effect. If this
happens click “Yes” and your
3.
Plug the USB® cable into the USB®
port on your computer or hub, ensuring
that it is pushed firmly in.
4.
Windows will detect the insertion of
the USB® cable and install the device
driver automatically.
USB® – Windows® 98/98SE
1.
Setup your hardware by following the instructions
under the “Setting Up The Hardware” section of
this Quickstart Guide.
2.
Turn on your computer and wait for
Windows® to finish loading.
3.
Plug the USB® cable into the USB®
port on your computer or hub, ensuring
that it is pushed firmly in.
4.
Windows will prompt for drivers for the device.
5.
Insert the User Manuals and Drivers CD into
your CD-Rom drive.
6.
Ensure that the option for Windows®
to search for a device driver is selected
and click “Next”.
Firewire® – Windows® 98SE/ME/2000
and XP
8
1.
Setup your hardware by following the instructions
under the “Setting Up The Hardware” section of
this Quickstart Guide.
2.
Turn on your computer and wait for
Windows® to finish loading. You must log
in as a user with Administrator privileges to
install the device drivers
(2000 and XP only).
3.
Plug the Firewire® cable into the Firewire®
port on your computer or hub, ensuring
that it is pushed firmly in.
4.
Windows will detect the insertion of
the Firewire® cable and install the device
driver automatically.
Firewire® - Mac® OS 9.1 and Above
1.
Setup your hardware by following the
instructions under the
“Setting Up The Hardware”
section of this manual.
2.
Turn on your computer and wait for Mac OS to
finish loading.
3.
The drivers required to use the Amacom drive
are installed as part of the Roxio Toast
installation. Before proceeding to the next step
you should install Roxio Toast by following the
instructions in the
“Additional Software Installation” section of this
manual.
4.
Plug the Firewire cable into the Firewire port on
your computer or hub, ensuring that it is pushed
firmly in.
A M A C O M
B A B Y
D V D - R W
CardBus - Windows NT 4.0 SP5 and Higher
Cardbus – Windows® 95/98/98SE and ME
PLEASE NOTE: Windows NT 4.0 does not
support Plug & Play when using PCMCIA
cards.
This means that when using your Amacom
product with Windows NT you must ensure that
the PCMCIA Card is only inserted and removed
from the PCMCIA slot when the computer is
turned off.
1.
Setup your hardware by following the
instructions under the
“Setting Up The Hardware”
section of this Quickstart Guide.
2.
Turn on your computer and wait for
Windows® to finish loading.
3.
Insert the Cardbus card
into the PCMCIA slot of your computer,
ensuring that it is pushed firmly in.
1.
Setup your hardware by following the relevant
instructions under the ‘Hardware Setup’ section
of the manual.
4.
Windows will detect the insertion of the
card and ask you to install a device
driver.
2.
Insert the card into the PCMCIA slot, ensuring
that it is firmly pushed in and turn your computer on.
5.
Insert the User Manuals and
Driver CD into your CD-Rom drive.
3.
When Windows NT has finished loading double
click on the ‘My Computer’ icon, then double click
on ‘Control Panel’.
6.
Ensure that the option for Windows®
to search for a device driver is selected
and click “Next”.
4.
When the ‘Control Panel’ opens double click on the
‘SCSI Adapters’ icon. On the window that opens
select the tab labelled ‘Drivers’ and click the ‘Add’
button.
7.
5.
Insert the User Manuals and
Driver CD into your CD-Rom drive.
Windows® will now search the
Amacom® software CD for a
device driver and when finished
will prompt you to install the device
driver that it found. Click “Ok” to
continue.
6.
Next click the button ‘Have Disk’ and in the
‘Copy Files From’ box type
“D:\drivers\cables\pcmcia\nt\”
(without the quotes and where D: is the letter
of your Computer’s CD-Rom Drive) and
click “Ok”.
8.
Windows® will now install the
device driver, during this installation
Windows® may say that it cannot
find a file and ask you to specify the
location. If this error occurs change
the location in the dialog box to
“d:\\drivers\pcmcia\9x_me”
7.
From the list that appears select the device driver
and click ’OK’.
9.
8.
When asked to enter the OEM path type
‘d:\drivers\cables\pcmcia\nt’ (without the quotes) into
the path box and click ‘Continue’.
9.
Windows NT will copy the driver to your computer.
When asked if you would like to reboot your
computer, click on ‘Yes’.
When Windows® has completed
the installation of the device driver
click “Finish”. You may be asked
to restart your computer for the
changes to take effect. If this
happens click “Yes” and your
computer will restart.
Cardbus – Windows 2000/XP
1.
Setup your hardware by following the
instructions under the
“Setting Up The Hardware”
section of this Quickstart Guide.
2.
Turn on your computer and wait for
Windows® to finish loading.
3.
Windows will detect the insertion of
the Cardbus cable and install the device driver
automatically.
9
A M A C O M
B A B Y
D V D - R W
ADDITIONAL SOFTWARE INSTALLATION
Roxio Easy CD Creator Basic - PC Only
Roxio VideoWave Movie Creator - PC Only
1.
Insert the Roxio Easy CD Creator
Basic installation CD into your CD
drive.
1.
Insert the Roxio VideoWave Movie
Creator installation CD into your
CD drive.
2.
The Roxio installation program
should launch automatically and ask
you if you want to install the software.
2.
3.
Click “Yes” and follow the on screen
instructions on screen to complete
the installation.
The Roxio installation program
should launch automatically and
ask you if you want to install the
software.
3.
Click “Yes” and follow the on screen
instructions on screen to complete
the installation.
4.
When the installation is finished you
may be asked to reboot. You should
answer Yes to this, as the software
will not work otherwise.
When the installation is finished you may
be asked to reboot. You should answer
Yes to this, as the software will not work
otherwise.
You will find detailed User Manuals for
Roxio Easy CD Creator Basic on the
installation CD. We would advise all users
to read these before using the software to
ensure that they benefit from the full range
of features available to them.
You will find detailed User Manuals for
Roxio VideoWave Movie Creator on the
installation CD. We would advise all users
to read these before using the software to
ensure that they benefit from the full range
of features available to them.
Roxio Toast Lite - Mac Only
1.
Insert the Roxio Lite installation CD
into your CD drive.
2.
The Roxio installation program
should appear in a new window on
the Desktop
3.
4.
When the installation is finished you
may be asked to reboot. You should
answer Yes to this, as the software
will not work otherwise.
You will find detailed User Manuals for
Roxio Toast Lite on the installation CD.
We would advise all users to read these
before using the software to ensure that
they benefit from the full range of features
available to them.
Double click the installer icon and
follow the on screen instructions on
screen to complete the installation.
Cyberlink PowerDVD - PC Only
10
1.
Insert the Cyberlink PowerDVD
installation CD into your CD drive.
2.
The Cyberlink installation program
should launch automatically and
ask you if you want to install the
software.
3.
Click “Yes” and follow the on screen
instructions on screen to complete
the installation.
4.
When the installation is finished you
may be asked to reboot. You should
answer Yes to this, as the software
will not work otherwise.
A M A C O M
USING YOUR
BABY DVD-RW
Inserting Discs Into The Drive
1.
Press the tray eject button in the
bottom right hand corner of the drive
once.
2.
The tray will eject from the drive.
3.
Place the disc that you want to
use on to the tray, ensuring that it
is placed with the label side facing
upwards and located within the
circular locating slot.
4.
Do not push the tray back into the
drive using your hand, you should
always use the eject button by
pressing it once to return the tray
back into the drive.
5.
Your disc is now ready for use.
Emergency Ejection of Discs
1.
Ensure that the power cable is
disconnected from your
BABY DVD-RW unit
2.
Place a straightened out paperclip into
the small hole situated at the front of the
unit.
3.
The tray should eject and you will now be
able to remove any discs that were stuck
inside the unit.
B A B Y
D V D - R W
DRIVE
Reading Discs
CD-ROMs & DVD-ROMs - You should
follow the instructions in the user manual that
accompanies the software for details on how to
install or run the program.
Audio CDs - When these are inserted into the
drive the disc may automatically launch an Audio
CD playback program like Windows Media Player
or Real Player and start playback automatically. If
this is not the case you will need to run an Audio
CD playback program manually or possibly install
one if your computer does not have one installed by
default. You can find more information on Audio CD
playback applications using any good search engine.
Writing Discs
There are many different types of discs that can
be created and recorded using the BABY DVDRW and the supplied software.
To ensure that you fully benefit from the
multitude of options available, Amacom
recommends reading the online user manuals
that accompany the software on their installation
CDs.
DVD-Videos - To playback DVD videos
on your computer you will need to use a
software or hardware decoder to watch the
film. Amacom supply a software decoder called
PowerDVD (PC Only) with the BABY DVDRW drive, which when installed will allow the
playback of DVD movies on your computer.
Apple Macintosh users will be able to use the
Apple DVD Player that is available from Apple’s
website.
11
A M A C O M
B A B Y
D V D - R W
SYSTEM REQUIREMENTS
System Requirements - PC
Operating Systems:
DOS, Windows 3.xx, Windows 95, Windows NT.
Windows®98 Second Edition, Windows® Millennium,
Windows® 2000, and Windows® XP
Minimum Computer System Requirements:
Pentium® Compatible 350mhz, 64MB RAM.
Recommended Computer:
Pentium® PIII 500mhz, 128MB RAM
Graphics Card:
SVGA Video Card with at least 4MB Video RAM
Minimum display resolution of 1024x768 at 16 bit color
Interfaces:
SBP2 Compliant IEEE1394 FireWire Controller
OR
USB 2.0 Compliant USB Controller
OR
Cardbus Controller
Disk Space/Drive:
350 MB for application, 1GB working space (6GB
recommended).
4x or Higher CDROM Drive (for driver/software
installation)
System Requirements - Mac
Operating Systems:
Mac OS 9.1 or Higher
Minimum Computer System Requirements:
Apple iBook™, iMac™ or Power Macintosh™
Disk Space/Drive:
350 MB for application, 1GB working space (6GB
recommended).
4x or Higher CDROM Drive (for driver/software
installation)
12
Graphics Card:
Minimum display resolution of 1024x768 at 16
bit color.
Interfaces:
SBP2 Compliant IEEE1394 FireWire Controller
OR
USB 2.0 Compliant USB Controller
A M A C O M
B A B Y
D V D - R W
CONTACT DETAILS
Worldwide:
Web site: www.amacom-tech.com
E-mail:
Technical Support – [email protected]
Sales Enquiries – [email protected]
General Enquiries – [email protected]
Post:Amacom Technologies Limited,
7 Western Avenue Business Park,
Mansfield Road,
London,
W3 0BZ,
United Kingdom
13