1
File No. SME06002500
R060721C4500-TTEC
Ver00_2006-09
© 2006 TOSHIBA TEC CORPORATION All rights reserved
Under the copyright laws, this manual cannot be reproduced in any form without prior written
permission of TOSHIBA TEC CORPORATION. No patent liability is assumed, however, with respect
to the use of the information contained herein.
Revision Record
File No. SME06002500
Date
September, 2006
Rev.No
00
Item
---
Descriptions
Issue of the first version
Remarks
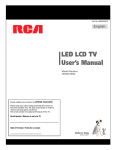
Purpose of the Imaging Manual
The Imaging Manual is intended for customers using the Toshiba e-STUDIO2500c/3500c/3510c with a variety
of specific needs and inquiries for high image quality, such as:
x How to obtain a clearer copy image
x How to maintain the current image quality
x How to make the text look sharper on the copy
The Toshiba MFPs are factory-configured to provide image quality settings that satisfy the majority of customers.
However, these settings may not be necessarily optimal for the specific needs of all customers. Proper image
quality adjustments can satisfy such needs. Most of the adjustments described in this manual must be performed
by a service technician, but a few of them can also be performed by the customer.
It is strongly recommended that this manual be fully utilized by not only the service technician, but also the sales
representative, who also has opportunities of obtaining customer feedback on the image quality. This manual
helps the sales representative to study and comprehend what kind of customer requirements for image quality
can be satisfied, to make proposals to customers to improve image quality, and to communicate the customers’
specific requirements with ease to the service technician. In addition, this manual is expected to facilitate the
marketing of Toshiba MFPs to prospective customers that have a specific demand for image quality and the
expansion of sales.
The adjustments described in this manual are all based on the requests of actual customers. Meeting their
specific wishes will only add to their satisfaction.
Please remember to read "Precautions after the completion of the adjustment," to which you must pay close
attention, after finishing the adjustment.
Precautions in Servicing
• For adjustments to be performed by the service technician, the precautions given in the Service Manual must be
stringently followed. The adjustments must be performed by a qualified service technician who has completed
the service training course.
• The default listed mentioned in this manual may be different from the actual ones, due to the timing of shipping
(firmware version). But note that the recommended values and acceptable value range stated in this manual
remain the same.
Purpose of the Imaging Manual
Icons
The following icons used in this manual denote the following:
: • Copy ——— An adjustment having an effect on copying in the Black mode (excluding
the Image smoothing mode)
• Printer ——– An adjustment having an effect on Black and White mode printing
* The adjustment will be effective, if "Black and White" is selected from
among the "Color" options on the Windows printer driver or if "Mono"
is selected from among the "Color Type" options on the Macintosh print
dialog.
• Scan ——— An adjustment having an effect on scanning in the Black mode
: • Copy ——–– An adjustment having an effect on copying in the Image smoothing mode
in the Black mode
• Scan ——— An adjustment having an effect on scanning in the Gray scale mode
: • Copy ——— An adjustment having an effect on copying in the Full color mode
• Printer ——– An adjustment having an effect on full-color printing
* The adjustment will be effective, if "Auto" or "Color" is selected from
among the "Color" options on the Windows printer driver or if "Auto" or
"Color" is selected from among the "Color Type" options on the
Macintosh print dialog.
• Scan ——— An adjustment having an effect on scanning in the Full color mode
: • Copy ——— An adjustment having an effect on copying in the Auto color mode
• Scan ——— An adjustment having an effect on scanning in the Auto color mode
PCL6
: An adjustment having an effect on printing with the Windows PCL6 emulation printer
driver
PS3
: An adjustment having an effect on printing with the Windows PS3 emulation printer
driver
Mac
Scan to Box
: An adjustment having effect on printing with the Macintosh printer driver
: An adjustment having an effect on an image stored in the e-Filing box by the scanning
functions (including Scan to Box, Scan to File and Scan to E-mail)
Copy to Box
: An adjustment having an effect on an image stored in the e-Filing box by the copying
functions (Copy to Box)
Print to Box
: An adjustment having an effect on an image stored in the e-Filing box by the printing
functions (Print to Box)
Fax to Box
: An adjustment having an effect on an image stored in the e-Filing box by the Fax and
Internet Fax functions (including Received Fax to Box and Received Internet Fax to Box)
Table of Contents
1. General Adjustments – Copying, Printing and e-Filing (Output from Box)
1.1
1.2
To Obtain a Darker Image
To Adjust the Density of an Entire Copy
1.2.1 To Adjust the Density on a Solid Colored Image
1.2.2 To Adjust the Density on a Photo or Gradational Image
1.3
To Achieve the Image Quality Most Suitable for the Paper Used
(To eliminate blur and graininess from an image)
1.4
To Minimize Variations in the Image Quality under the Operating Conditions
(To optimally program image quality control)
1.5
To Correct Out-of-Registration Colors
2. Copier-specific Adjustments
2.1
To Copy Text Clearly (To eliminate faint, smudged or blurred text)
2.1.1 To Adjust the Copy Image Quality in the Black Mode
2.1.2 To Adjust the Copy Image Quality in the Full Color Mode
2.1.3 To Adjust the Copy Image Quality in the Auto Color Mode
2.2
2.3
2.4
2.5
To Closely Match the Color Balance of the Original
To Improve the Reproducibility of Gray
To Copy in Vivid Colors
To Make the Pale Area of the Original Look Darker and Sharper
(To improve the highlight reproducibility)
2.6
To Eliminate the Background Color
2.6.1 To Adjust the Copy Image Quality in the Black Mode
2.6.2 To Adjust the Copy Image Quality in the Full Color Mode
2.7
To Avoid Copying the Image Seen through the Back of a Page Printed on Thin Paper
2.7.1 To Adjust the Copy Image Quality in the Black Mode
2.7.2 To Adjust the Copy Image Quality in the Full Color Mode
2.8
2.9
2.10
2.11
2.12
2.13
2.14
2.15
To Eliminate Moiré
To Copy Sharply (To enhance sharpness)
To Make Photo Edges Look Softer
To Make Solid Filled Bold Text (Logo) Highly Colored
2.11.1
To Adjust the Copy Image Quality of a Black Logo
2.11.2
To Adjust the Copy Image Quality of a Colored Logo
To Sharply Contrast the Hues of Highlighters on the Copy
To Obtain a Good Color Balance on Thick Paper
To Obtain Smooth Gray-Scale Photo Images
To Change the Threshold in Auto Color Mode
(To change the threshold between the Full Color mode and the Black mode to meet the user’s needs)
i
Table of Contents
2.16 To Adjust the Twin-Color Copy Image Quality
2.16.1
To Adjust the Tint of Colors other than Black
2.16.2
To Adjust the Reproducibility of Black in the Red and Black Mode
2.16.3
To Adjust the Boundary between Black and Colors other than Black
2.17 To Adjust the Image Quality Scanned from the RADF
3. Printer-specific Adjustments
3.1
3.2
3.3
3.4
3.5
To Maintain a Steady Color Balance
To Maintain a Steady Color Balance on Thick Paper or Special Paper
To Obtain the Desired Color Balance
To Closely Match the Color Balance on the Monitor
To Maintain a Uniform Gray Hue
(To maintain Consistency in Gray among Text, Photos and Graphics)
3.6
To Use Only the Black Toner to Reproduce Gray Areas
(To use only the black toner to reproduce black-and-white photos or gradational images)
3.7
3.8
3.9
3.10
3.11
3.12
3.13
To Easily Adjust the Overall Brightness
To Adjust the Overall Saturation
To Easily Adjust the Overall Contrast
To Obtain a Sharper Print Image
To Obtain a Softer Image
To Make Low-resolution Data Look Finer (To soften an image)
To Eliminate Smudges from Highly Colored Text and Lines
(To prevent toner scattering around text and lines where a large amount of toner is used)
3.14 To Clearly Print Light-Colored Thin Lines or Text
3.15
3.16
3.17
3.18
3.19
3.20
3.21
3.22
3.23
3.14.1
To Adjust the Print Image Quality in the Color Mode
3.14.2
To Adjust the Print Image Quality in the Black and White Mode
To Make the Light-Colored Area Darker on the Printout
To Clearly Print Thin Lines/Double Lines
To Decrease the Image Density and Save Toner (To Print in the Toner Save Mode)
To Adjust the Image Density in the Toner Save Mode
To Print Illegible Gray or Colored Text in Black
To Ignore Blank Pages for Printing
To Sharply Print Black Text
To Prevent Dark Toner from Coming Off
To Register the Image Quality Adjusted Corresponding to a Preference
(To use the Custom Color Settings)
3.24 To Print a Full-Color Original in Two Colors
ii
Table of Contents
4. e-Filing-specific Adjustments
4.1
4.2
4.3
4.4
To Clearly Store a B/W Image in the Auto Color Mode
To Store an Original while Reducing the File Size
To Store a Color Photo Image, while Minimizing Moiré
To Match the Color Balance on the Original
(To adjust the color balance in Print to Box)
4.5
4.6
To Scan and Print, while Minimizing Moiré
To Finely Print the Image Stored in the e-Filing box
(To print images stored through Copy to Box or Print to Box)
4.7
4.8
To Store an Image Suitable for Displaying on the Monitor or Image Editing
To Finely Print Color Images Scanned and Stored
(To print images stored through Scan to Box)
5. Scanning-specific Adjustments
5.1
5.2
To Clearly Scan Text (To reduce noise around text)
To Scan an Original, while Eliminating the Background Color
(To eliminate the background density)
5.3
To Clearly Scan and Print an Original in Black and White
(To improve gradation and reduce graininess)
5.4
To Scan the Original, while Reducing the File Size
5.4.1 To Reduce the File Size by Changing the Options when Scanning the Original
5.4.2 To Reduce the File Size in Slim PDF
5.5
5.6
5.7
5.8
To Sharply Scan the Original (To increase the sharpness intensity)
To Scan an Original, while Enhancing Black
To Scan an Original with the Desired Gradation
To Register the Original Mode Optimal for a Particular Type of Original
(To have "Custom" selected)
iii
1. General Adjustments – Copying, Printing and e-Filing (Output from Box)
1.1 To Obtain a Darker Image
Before the adjustment
After the adjustment
The output image looks light and blurred.
The output image looks darker and sharper.
Explanation
When an original containing photo images or gradational images is printed, the output image sometimes looks
light and blurred. Perform image quality control or automatic calibration, and adjust the transfer roller bias
output, in order to obtain a darker and sharper image.
Procedures
* Perform the adjustment in accordance with the procedures below.
* Only the service technician must use procedures (1), (3) and (4).
* Both the service technician and the user can use procedure (2).
(1) Enter adjustment mode [05]. Select code [396]. Press the [START] button.
• Image quality control will be forcibly performed to correct variations in density.
After exercising image quality control, use the next procedure.
(2) Perform automatic calibration to correct variations in image density.
* "ADMIN" is selected from among the "CALIBRATION DISPLAY LEVEL" options by default. In other
words, an administrator is authorized to operate automatic calibration. But "USER" can also be selected to
allow the user to operate it. Refer to the User Functions Guide for further information regarding how to
select the "CALIBRATION DISPLAY LEVEL" option.
1.1
e-STUDIO2500c/3500c/3510c
1. General Adjustments – Copying, Printing and e-Filing (Output from Box)
To adjust the copy image quality
Use steps (a) through (i) to perform automatic calibration.
(a) Press the [USER FUNCTIONS] button on the Control Panel to enter the "User Functions" menu.
(b) Press the [ADMIN] button.
(c) Enter the 6 to 10 digit administrator password. Press the [ENTER] button.
(d) Press the [GENERAL] button.
(e) Press the [CALIBRATION] button.
(f) Press the [COPY] button.
(g) Press the [CALIBRATION] button to print out the test chart.
(h) Place the printed test chart on the original glass.
(i) Press the [START] button to perform calibration. When the calibration comes to an end, the message
"Scanning and calibrating" will disappear.
* As a result of the above steps, the copy image quality will be corrected in the Full Color mode and
Black and White mode simultaneously.
To adjust the print image quality
Use steps (a) through (j) to perform automatic calibration.
(a) Press the [USER FUNCTIONS] button on the Control Panel to enter the "User Functions" menu.
(b) Press the [ADMIN] button.
(c) Enter the 6 to 10 digit administrator password. Press the [ENTER] button.
(d) Press the [GENERAL] button.
(e) Press the [CALIBRATION] button.
(f) Press the [PRINT] button.
(g) Press the [CALIBRATION] button to print out the test chart.
(h) Place the printed test chart on the original glass.
(i) Press the [START] button to perform calibration. When the calibration comes to an end, the message
"Scanning and calibrating" will disappear.
(j) The message "Is a result made to reflect?" will appear. Press the [YES] button.
<Hint> During automatic calibration, the automatic image quality control option is also available. This
option is particularly recommended for a user who frequently adjusts the image quality.
However, performing this option increases each adjustment time.
Use steps (a) to (b) to perform automatic image quality control.
(a) Enter setting mode [08]. Set "1" for code [9059].
Image quality control operation during
Value for 08-9059
automatic calibration
0
OFF (default)
1
ON (with paper selection disabled)
2
ON (with paper selection enabled)
(b) Perform automatic calibration.
* Refer to the above procedure to perform automatic calibration.
* When the [COPY] button or [PRINT] button is pressed after step (f), image quality
control will be automatically performed.
After performing automatic calibration, print and check the image quality.
If further image quality adjustments are still necessary, use the next procedure.
e-STUDIO2500c/3500c/3510c
1.1
1. General Adjustments – Copying, Printing and e-Filing (Output from Box)
(3) Enter adjustment mode [05]. Change the values for codes [2934 to 2937] to adjust the transfer (2nd
transfer) roller bias output.
(Adjust the offset voltage of transfer roller bias so as to increase the density of the image.)
• The code to use varies according to the paper type. Adjust the value for [05] code corresponding to the
paper type for which you would like to improve the image quality. Set the value within a range of "2" to
"8" to obtain the highest density of the image.
Paper type
Front
Full color
Back
Front
Black
Back
Plain paper
Thick 1
Thick 2
Thick 3
OHP
Special 1
Special 2
Recycled paper
Plain paper
Thick 1
Thick 2
Thick 3
OHP
Special 1
Special 2
Recycled paper
Plain paper
Thick 1
Thick 2
Thick 3
OHP
Special 1
Special 2
Recycled paper
Plain paper
Thick 1
Thick 2
Thick 3
OHP
Special 1
Special 2
Recycled paper
[05] code
05-2934
05-2935
05-2936
05-2937
Subcode
0
1
2
3
4
5
6
7
0
1
2
3
4
5
6
7
0
1
2
3
4
5
6
7
0
1
2
3
4
5
6
7
Recommended
value
Acceptable
value range
Default
2 to 8
0 to 10
5
2 to 8
0 to 10
5
2 to 8
0 to 10
5
2 to 8
0 to 10
5
* "Front" refers to the printed side in the simplex mode or the side that is delivered facing upwards in the duplex mode.
"Back" refers to the printed side that is delivered facing downwards in the duplex mode.
* The table below shows you the acceptable paper weight for the paper type.
Paper type
Acceptable paper weight
Plain paper
64 to 105 g/m²
16 to 20 lb. Bond
Thick 1
106 to 163 g/m²
Max. 60 lb. Cover
Thick 2
164 to 209 g/m²
Max. 110 lb. Index
Thick 3
210 to 256 g/m²
Max. 140 lb. Index
• After adjusting the transfer roller bias output, perform automatic calibration in the same manner as in
procedure (2).
1.1
e-STUDIO2500c/3500c/3510c
1. General Adjustments – Copying, Printing and e-Filing (Output from Box)
<Hint>
The transfer voltage increases as the set value is increased. It is usually recommended that the
set value be increased, when you print on thick paper or paper with asperities on its surface. On
the other hand, the set value should be decreased, when you print on thin paper.
After adjusting the density, print and check the image quality.
If further image quality adjustments are still necessary, use the next procedure.
(4) Check the life of the consumables (particularly the drum, developer material and fuser unit) and replace
them, if necessary.
• When replacing any consumable, use steps (a) to (c).
(a) Enter the PM support mode. Reset the counter corresponding to the replaced consumable to "0."
* For further information regarding the PM support mode, refer to the Service Handbook.
(b) Enter adjustment mode [05]. Select code [396]. Press the [START] button.
• Image quality control will be performed and the image quality control value will be initialized.
(c) Perform automatic calibration in the same manner as in procedure (2).
* After replacing any consumable, remember to reset the counter corresponding to it to "0." Otherwise, it
may cause a loss in MFP performance, including degradation in the image quality and a reduction in the
life of the consumables.
* While replacing any consumable, also check the slit glass in the laser optical unit, and thoroughly clean it,
if it is soiled.
Precautions after the completion of the adjustment
Nothing in particular.
Remarks
• Enter the value mentioned in the procedures or one within the recommended value range for the adjustment.
Otherwise, it may cause a loss in MFP performance, including degradation in the image quality and a reduction
in the life of the consumables.
• If printing on another type of paper causes a problem with the image quality after the adjustment, return the set
values (for codes 05-2934 to 2937) to the default (set value: 5) and then perform the adjustment again.
• When replacing any consumable, refer to the relevant information in the Service Manual and Service Handbook.
e-STUDIO2500c/3500c/3510c
1.1
1. General Adjustments – Copying, Printing and e-Filing (Output from Box)
1.2 To Adjust the Density of an Entire Copy
Explanation
The density on a solid colored image and a photo or gradational image (halftones) can be adjusted as desired by
the user.
Procedures
* The use procedure varies, depending on whether you are going to adjust the density on a solid colored image or
a photo or gradational image. Refer to "To Adjust the Density on a Solid Colored Image" in order to adjust the
density on a solid colored image. Refer or "To Adjust the Density on a Photo or Gradational Image" in order to
adjust the density on a gradational image (halftones).
1.2.1 To Adjust the Density on a Solid Colored Image
If the density is decreased
If the density is increased
The solid colored area becomes lighter.
The solid colored area becomes darker.
Explanation
A particular color can be intensely darker or lighter, depending on the type of paper or original used. Adjust the
developer bias output, in order to adjust the amount of toner on the solid colored area and obtain the image
quality the user desires.
Procedures
* The service technician must perform the adjustment in accordance with the procedures below.
1.2
e-STUDIO2500c/3500c/3510c
1. General Adjustments – Copying, Printing and e-Filing (Output from Box)
(1) Enter setting mode [08]. Change the value to adjust the density of a solid area during the copying/printing
operation.
• Use steps (a) to (c) to perform the adjustment.
(a) Enter setting mode [08]. Change the values for codes [2513 to 2515] to adjust the developer bias
output value.
• Decreasing the value will make the solid colored area become lighter (decrease the amount of toner
on the solid colored area). On the other hand, increasing the value will make the solid colored area
become darker (increase the amount of toner on the area).
* The value to use varies according to the paper type and color to adjust. Check the code to use in
accordance with the following "Code" list, and refer to the "Value" list to select a proper value.
Code
Paper type
Plain paper
Full color
Thick
Color to adjust
Y (yellow)
M (magenta)
C (cyan)
K (black)
Y (yellow)
M (magenta)
C (cyan)
K (black)
Black
[08] code
08-2513
08-2514
08-2515
Subcode
0
1
2
3
0
1
2
3
---
Value
Value
0
1
2
3
4
5
6
7
8
9
10
<Hint>
Correction value for developer bias
output
Value automatically set −100
Value automatically set −80
Value automatically set −60
Value automatically set −40
Value automatically set −20
Value automatically set
Value automatically set +20
Value automatically set +40
Value automatically set +60
Value automatically set +80
Value automatically set +100
Density of the solid colored
area
Light
↑
↑
↑
↑
↑
Default
↓
↓
↓
Dark
Adjust the values for the following codes, in order to adjust colors with RGB.
Adjustment of R (Red):
Adjust Y (Yellow) and M (Magenta).
Adjustment of G (Green): Adjust Y (Yellow) and C (Cyan).
Adjustment of B (Blue):
Adjust M (Magenta) and C (Cyan).
(b) Enter adjustment mode [05]. Select code [396]. Press the [START] button.
• Image quality control will be forcibly performed and the image density will be corrected.
e-STUDIO2500c/3500c/3510c
1.2
1. General Adjustments – Copying, Printing and e-Filing (Output from Box)
<Note>
The above corrections will be effective immediately after the values for codes [08-2513
to 2515] are changed. After changing the values for codes [08-2513 to 2515], remember
to perform image quality control for code 05-396.
(c) After completing image quality control, print and check the print image quality.
Repeatedly use steps (a) to (c) as necessary, to select a proper value.
If further image quality adjustments are still necessary, use the next procedure.
(2) Check the life of the consumables (particularly the drum, developer material and transfer belt unit) and
replace them, if necessary.
• When replacing any consumable, use steps (a) to (b).
(a) Enter the PM support mode. Reset the counter corresponding to the replaced consumable to "0."
* For further information regarding the PM support mode, refer to the Service Handbook.
(b) Enter adjustment mode [05]. Select code [396]. Press the [START] button.
• Image quality control will be performed and the image quality control value will be initialized.
* After replacing any consumable, remember to reset the counter corresponding to it to "0." Otherwise, it
may cause a loss in MFP performance, including degradation in the image quality and a reduction in the
life of the consumables.
* While replacing any consumable, also check the slit glass in the laser optical unit, and thoroughly clean it,
if it is soiled.
Precautions after the completion of the adjustment
• The adjustment may possibly cause an increase in the amount of toner consumed, scattering of the toner,
diminished photo images or gradations (less accurate reproducibility of halftones), extremely dark images
(decreased resolving power), extremely light images (faint thin lines), and shorten the life of the consumables.
Therefore, carefully perform the adjustment, while checking the copy or print image.
• No effect of the adjustment may appear, depending on the operating environment of the MFP. Therefore,
carefully perform the adjustment, while checking the copy or print image.
Remarks
• The effect of the adjustment may vary, depending on the usage pattern of the consumables, such as the
developer material and drum, and the operating environment of the MFP.
• When replacing any consumable, refer to the relevant information in the Service Manual and Service Handbook.
1.2
e-STUDIO2500c/3500c/3510c
1. General Adjustments – Copying, Printing and e-Filing (Output from Box)
1.2.2 To Adjust the Density on a Photo or Gradational Image
If the density is decreased
If the density is increased
An original containing halftones, such as a
photo image becomes lighter.
An original containing halftones, such as a
photo image becomes darker.
Explanation
A particular color can be intensely darker or lighter, depending on the type of paper or original used. Adjust the
intensity of the laser, in order to adjust the density on the photo or gradational image (halftones) and obtain the
image quality the user desires.
Procedures
* The service technician must perform the adjustment in accordance with the procedures below.
e-STUDIO2500c/3500c/3510c
1.2
1. General Adjustments – Copying, Printing and e-Filing (Output from Box)
(1) Enter setting mode [08]. Change the value to adjust the image density of halftones during the
copying/printing operation.
• Use steps (a) to (c) to perform the adjustment.
(a) Enter setting mode [08]. Change the values for codes [2525 to 2525] to correct the intensity of the
laser.
• Decreasing the value will make a photo or gradational image become lighter, easily blurring the
image, but it will increase the gradation. On the other hand, increasing the value will make the
photo or gradational image become darker and clearer, but it will decrease the gradation.
* The value to use varies according to the paper type and color to adjust. Check the code to use in
accordance with the following "Code" list, and refer to the "Value" list to select a proper value.
Code
Paper type
Plain paper
Full color
Thick
Color to adjust
Y (yellow)
M (magenta)
C (cyan)
K (black)
Y (yellow)
M (magenta)
C (cyan)
K (black)
[08] code
Black
08-2525
08-2526
08-2527
Paper type
0
1
2
3
0
1
2
3
---
Value
Value
Correction value for intensity of the laser
0
1
2
3
4
5
6
7
8
9
10
<Hint>
Value automatically set −50
Value automatically set −40
Value automatically set −30
Value automatically set −20
Value automatically set −10
Value automatically set
Value automatically set +10
Value automatically set +20
Value automatically set +30
Value automatically set +40
Value automatically set +50
Density on the
photo/gradational image
Light (gradation: more)
↑
↑
↑
↑
Default
↓
↓
↓
↓
Dark (gradation: less)
Adjust the values for the following codes, in order to adjust colors with RGB.
Adjustment of R (Red):
Adjust Y (Yellow) and M (Magenta).
Adjustment of G (Green): Adjust Y (Yellow) and C (Cyan).
Adjustment of B (Blue):
1.2
e-STUDIO2500c/3500c/3510c
Adjust M (Magenta) and C (Cyan).
1. General Adjustments – Copying, Printing and e-Filing (Output from Box)
(b) Enter adjustment mode [05]. Select code [396]. Press the [START] button.
• Image quality control will be forcibly performed and the image density will be corrected.
<Note>
The above corrections will be effective immediately after the values for codes [08-2525
to 2527] are changed. After changing the values for codes [08-2525 to 2527], remember
to perform image quality control for code 05-396.
(c) After completing image quality control, print and check the print image quality.
Repeatedly use steps (a) to (c) as necessary to select a proper value.
If further image quality adjustments are still necessary, use the next procedure.
(2) Check the life of the consumables (particularly the drum, developer material and transfer belt unit) and
replace them, if necessary.
• When replacing any consumable, use steps (a) to (b).
(a) Enter the PM support mode. Reset the counter corresponding to the replaced consumable to "0."
* For further information regarding the PM support mode, refer to the Service Handbook.
(b) Enter adjustment mode [05]. Select code [396]. Press the [START] button.
• Image quality control will be performed and the image quality control value will be initialized.
* After replacing any consumable, remember to reset the counter corresponding to it to "0." Otherwise, it
may cause a loss in MFP performance, including degradation in the image quality and a reduction in the
life of the consumables.
* While replacing any consumable, also check the slit glass in the laser optical unit, and thoroughly clean it,
if it is soiled.
Precautions after the completion of the adjustment
• The adjustment may possibly provide extremely dark images (decreased resolving power, inadequate
reproducibility of gradations), and extremely light images (blurred images, faint thin lines). Therefore,
carefully perform the adjustment, while checking the copy or print image.
• No effect of the adjustment may appear, depending on the operating environment of the MFP. Therefore,
carefully perform the adjustment, while checking the copy or print image.
Remarks
• The effect of the adjustment may vary, depending on the usage pattern of the consumables, such as the
developer material and drum, and the operating environment of the MFP.
• When replacing any consumable, refer to the relevant information in the Service Manual and Service Handbook.
e-STUDIO2500c/3500c/3510c
1.2
1. General Adjustments – Copying, Printing and e-Filing (Output from Box)
1.3 To Achieve the Image Quality Most Suitable for the Paper Used
(To eliminate blur and graininess from an image)
Before the adjustment
The image looks grained, depending on the
type of paper.
After the adjustment
A clear image quality, most suitable for a type
of paper used, is obtained.
Explanation
The image sometimes looks slightly blurred or grained on the copy or printout, depending on the type of paper
used. Adjust the transfer roller bias output, in order to achieve the image quality most suitable for the paper used.
Procedures
* The service technician must perform the adjustment in accordance with the procedures below.
(1) Enter adjustment mode [05]. Change the values for codes [2934 to 3937] to adjust the transfer (2nd
transfer) roller bias output.
(Adjust the offset voltage of transfer roller bias so as to optimize the halftones.)
• The code to use varies according to the paper type. Adjust the value for [05] code corresponding to the
paper type for which you would like to improve the image quality. Set the value within a range of "2" to
"8" to optimize the halftones.
1.3
e-STUDIO2500c/3500c/3510c
1. General Adjustments – Copying, Printing and e-Filing (Output from Box)
Paper type
Front
Full color
Back
Front
Black
Back
Plain paper
Thick 1
Thick 2
Thick 3
OHP
Special 1
Special 2
Recycled paper
Plain paper
Thick 1
Thick 2
Thick 3
OHP
Special 1
Special 2
Recycled paper
Plain paper
Thick 1
Thick 2
Thick 3
OHP
Special 1
Special 2
Recycled paper
Plain paper
Thick 1
Thick 2
Thick 3
OHP
Special 1
Special 2
Recycled paper
[05] code
05-2934
05-2935
05-2936
05-2937
Subcode
0
1
2
3
4
5
6
7
0
1
2
3
4
5
6
7
0
1
2
3
4
5
6
7
0
1
2
3
4
5
6
7
Recommended
value
Acceptable
value range
Default
2 to 8
0 to 10
5
2 to 8
0 to 10
5
2 to 8
0 to 10
5
2 to 8
0 to 10
5
*"Front" refers to the printed side in the simplex mode or the side that is delivered facing upwards in the duplex mode.
"Back" refers to the printed side that is delivered facing downwards in the duplex mode.
* The table below shows you the acceptable paper weight for the paper type.
Paper type
Acceptable paper weight
Plain paper
64 to 105 g/m²
16 to 20 lb. Bond
Thick 1
106 to 163 g/m²
Max. 60 lb. Cover
Thick 2
164 to 209 g/m²
Max. 110 lb. Index
Thick 3
210 to 256 g/m²
Max. 140 lb. Index
• After adjusting the transfer roller bias output, perform automatic calibration.
* For further information regarding the procedures, refer to procedure (2) in 1.1 To Obtain a Darker Image.
<Hint>
The transfer voltage increases as the set value is increased. It is usually desirable that the set
value be decreased to obtain a clearly highlighted area.
After performing the adjustment, print and check the image quality.
If further image quality adjustments are still necessary, use the next procedure.
e-STUDIO2500c/3500c/3510c
1.3
1. General Adjustments – Copying, Printing and e-Filing (Output from Box)
(2) Check the life of the consumables (particularly the drum, developer material and fuser unit) and replace
them, if necessary.
• When replacing any consumable, use steps (a) to (c).
(a) Enter the PM support mode. Reset the counter corresponding to the replaced consumable part to "0."
* For further information regarding the PM support mode, refer to the Service Handbook.
(b) Enter adjustment mode [05]. Select code [396]. Press the [START] button.
• Image quality control will be performed and the image quality control value will be initialized.
(c) Perform automatic calibration.
* For further information regarding the procedures, refer to procedure (2) in 1.1 To Obtain a Darker
Image.
* After replacing any consumable, remember to reset the counter by making it correspond to "0." Otherwise,
it may cause a loss in MFP performance, including degradation in the image quality and a reduction in the
life of the consumables.
* While replacing any consumable, also check the slit glass in the laser optical unit, and thoroughly clean it,
if it is soiled.
1.3
e-STUDIO2500c/3500c/3510c
1. General Adjustments – Copying, Printing and e-Filing (Output from Box)
Precautions after the completion of the adjustment
Nothing in particular.
Remarks
• Enter the value mentioned in the procedures or one within the recommended value range for the adjustment.
Otherwise, it may cause a loss in MFP performance, including degradation in the image quality and a reduction
in the life of the consumables.
• The desired image quality may not be obtained, depending on the type of paper used. In this case, use the
recommended paper and then print or adjust the image quality.
• If printing on another type of paper causes a problem with the image quality after the adjustment, return the set
values (for codes 05-2934 to 2937) to the default (set value: 5) and then perform the adjustment again.
• When replacing any consumable, refer to the relevant information in the Service Manual and Service Handbook.
e-STUDIO2500c/3500c/3510c
1.3
1. General Adjustments – Copying, Printing and e-Filing (Output from Box)
1.4 To Minimize Variations in the Image Quality under the Operating Conditions
(To optimally program image quality control)
Before the adjustment
The image contrast varies, depending on the
date and time when copying or printing is
performed or the type of job.
1.4
e-STUDIO2500c/3500c/3510c
After the adjustment
The image quality is constantly maintained.
1. General Adjustments – Copying, Printing and e-Filing (Output from Box)
Explanation
The image contrast may vary, depending on the date and time when copying or printing is performed or the type
of copy/print job. To constantly maintain image quality, shorten the waiting period until image quality control is
performed.
Procedures
* The service technician must perform the adjustment in accordance with the procedures below.
(1) Enter setting mode [08]. Change the value for code [566], [570] or [572] to specify the best interval during
which image quality control should be performed, according to use of the MFP.
The MFP is installed in a place where the temperature and humidity vary widely:
Set "1" (value × 5%R.H.) for code 08-570 to increase the frequency of image quality control, in response to
a change in humidity.
* Image quality control will be performed, when the relative humidity changes in accordance with the
specified difference from the previous image quality control. If the difference in the relative humidity
exceeds the specified value, image quality control is performed first. Then a copy or print job will be
performed.
Value for 08-570
1
2
Difference in relative humidity
5%R.H.
10%R.H. (default)
• After setting the value for code 08-570, forcibly perform image quality control, as follows:
Enter adjustment mode [05]. Select code [396]. Press the [START] button.
e-STUDIO2500c/3500c/3510c
1.4
1. General Adjustments – Copying, Printing and e-Filing (Output from Box)
To Have Uniform Variations in the Image Quality after Return from the Auto Power Save Mode:
Set the value for code 08-571 within a range of "1" to "3" to shorten the operating condition period when
image quality control is performed after the MFP is returned from the auto power save mode (time when no
MFP operations are being performed and when the MFP is left for image quality control). Image quality
control can now be easily performed.
* This adjustment will improve the image quality, but only if the sleep mode / auto shut off mode have been
disabled ("20" is set for code 08-206). Remember that there will be no positive affect on the image quality,
if the sleep mode / auto shut off mode have been enabled.
Value for
08-571
1 to 3
4
Time when the MFP is being left for image quality control
Performed before the MFP resumes operations after being left for 1 to 3 hour or more.
Performed before the MFP resumes operations after being left for 4 hours or more.
(default)
• After setting the value for code 08-571, forcibly perform image quality control, as follows:
Enter adjustment mode [05]. Select code [396]. Press the [START] button.
A large number of sheets are printed (hundreds of copies or more per day) and the image
quality needs to be constantly maintained:
Set the value for code 08-572 within a range of "1" to "9" (Value × 100 sheets) to reduce the accumulated
number of printed sheets. It will determine the interval until the next image quality control is performed.
* After a copy or print job is completed, if the accumulated number of printed sheets exceeds the specified
value, image quality control will be performed.
Value for 08-572
1 to 9
10
Accumulated number of printed sheets before image quality control is performed
100 to 900 sheets
1,000 sheets (default)
• After setting the value for code 08-572, forcibly perform image quality control, as follows:
Enter adjustment mode [05]. Select code [396]. Press the [START] button.
After performing the adjustment, print and check the image quality.
If further image quality adjustments are still necessary, use the next procedure.
1.4
e-STUDIO2500c/3500c/3510c
1. General Adjustments – Copying, Printing and e-Filing (Output from Box)
(2) Check the life of the consumables (particularly the drum, developer material and transfer belt unit) and
replace them, if necessary.
• When replacing any consumable, use steps (a) to (c).
(a) Enter the PM support mode. Reset the counter corresponding to the replaced consumable to "0."
* For further information regarding the PM support mode, refer to the Service Handbook.
(b) Enter adjustment mode [05]. Select code [396]. Press the [START] button.
• Image quality control will be performed and the image quality control value will be initialized.
(c) Perform automatic calibration.
* For further information regarding the procedures, refer to procedure (2) in 1.1 To Obtain a Darker
Image.
* After replacing any consumable, remember to reset the counter corresponding to it to "0." Otherwise, it
may cause a loss in MFP performance, including degradation in the image quality and a reduction in the
life of the consumables.
* While replacing any consumable, also check the slit glass in the laser optical unit, and thoroughly clean it,
if it is soiled.
Precautions after the completion of the adjustment
The adjustment may possibly slow down the copying or printing speed, extend the warm-up time when the MFP
is returned from the auto power save mode, and shorten the life of the consumables, because of an increase in the
number of times image quality control is performed. Therefore, carefully perform the adjustment, while
checking the copy or print image.
Remarks
• Enter the value mentioned in the procedures or one within the recommended value range for the adjustment.
Otherwise, it may cause a loss in MFP performance, including slowdown in the copying or printing speed.
• When replacing any consumable, refer to the relevant information in the Service Manual and Service Handbook.
e-STUDIO2500c/3500c/3510c
1.4
1. General Adjustments – Copying, Printing and e-Filing (Output from Box)
1.5 To Correct Out-of-Registration Colors
Before the adjustment
After the adjustment
Paper feeding direction
Paper feeding direction
The text and background are misaligned or out
of registration.
Text is aligned with the background and a clear
copy/print image is obtained.
Explanation
Colors of text or a thin line are sometimes printed out of alignment. Perform color registration control, in order
to print or copy without out-of-registration colors.
Procedures
* The service technician must perform the adjustment in accordance with the procedure below.
(1) Make sure that no out-of-registration colors are visible on an original.
(2) Check the direction in which colors are misaligned.
* This adjustment is intended to correct misaligned colors due to differences between the paper feeding
speed and rotating speed of the transfer belt. Therefore, it will be effective, only if colors are misaligned in
the paper feeding direction (or the secondary scanning direction). This adjustment cannot improve
misaligned colors in the direction perpendicular to paper feeding (or primary scanning) or in the secondary
scanning direction periodically (partially at regular intervals). Refer to "5.2 Troubleshooting for the Image
1) Color deviation" in the Service Handbook.
(3) Enter adjustment mode [05] and print out the test print pattern to correct out-of-registration colors.
(a) Enter adjustment mode [05]. Select code [4719]. Press the [START] button.
• Registration control will be forcibly performed.
(b) Enter code [104] corresponding to a desired test print pattern. Press the [FAX] button.
• Paper is fed from the drawer to print out a test print pattern.
Code
Test print pattern
Test print pattern for identifying
104
out-of-registration colors
Paper size
No. of copies
A3/LD
2
* Jot down the "paper feeding direction" on the printed test print pattern beforehand. This facilitates
identifying out-of-registration colors in the subsequent adjustment. Use only the second page of
the test print pattern.
1.5
e-STUDIO2500c/3500c/3510c
1. General Adjustments – Copying, Printing and e-Filing (Output from Box)
(4) Check the second page of the printed test print pattern to identify a pattern for the out-of-registration colors.
* There are 2 patterns for the out-of-registration colors. Check which pattern the out-of-registration colors to
adjust on the body are included.
Pattern A for out-of-registration colors
Patch eliminated at
the leading edge
Patch eliminated
trailing edge
Page 2
Paper feeding speed
slower than transfer belt
Page number
rotating speed
Paper feeding direction
Black belt at the leading edge in the paper feeding direction
Pattern B for out-of-registration colors
Patch eliminated at
the trailing edge
Patch eliminated at
the leading edge
Paper feeding speed
Page 2
faster than transfer belt
rotating speed
Paper feeding direction
e-STUDIO2500c/3500c/3510c
1.5
1. General Adjustments – Copying, Printing and e-Filing (Output from Box)
(5) Finely adjust the rotating speed of the registration motor, in accordance with a pattern for the out-ofregistration colors.
• Use steps (a) to (b) to perform the adjustment.
(a) Enter adjustment mode [05]. Select code [483]. Finely adjust the rotating speed of the registration
motor.
• Adjust the values in accordance with a pattern for the out-of-registration colors as shown in the
table below.
Pattern for
out-ofregistration
colors
[05] code
Subcode
Recommended value
Acceptable
value range
Default
0
123 to 127
(Set a value smaller than 128)
129 to 132
(Set a value larger than 128)
0 to 255
128
Pattern A
05-483
Pattern B
(b) After performing registration control, print out the test print pattern to check whether the misaligned
colors have been improved.
* For further information regarding the adjustment procedures, refer to procedures (3) and (4).
* Repeatedly use procedures (3) to (5) as necessary, to select a proper value.
<Hint>
When subcode "0" is adjusted for code 05-483, the correlation between the paper feeding speed
and rotating speed of the transfer belt will be corrected in every paper mode. However, when
colors are misaligned on an image printed in the thick paper mode after the adjustment for
subcode "0", adjust subcode "3" (during deceleration in the thick paper mode).
* For subcode "3," use the steps and recommended values for subcode "0."
* Paper for printing a test print pattern will only be fed from the drawer. Load the desired
number of sheets of thick paper in the drawer, in order to print the test print pattern on thick
paper.
* Adjust subcode "0" and then subcode "3," in order to adjust only misaligned colors in the thick
paper mode.
1.5
e-STUDIO2500c/3500c/3510c
1. General Adjustments – Copying, Printing and e-Filing (Output from Box)
Precautions after the completion of the adjustment
Nothing in particular.
Remarks
• Enter a value within the recommended value range mentioned in the procedures. Otherwise, it may cause a
loss in MFP performance, including degradation in the image quality.
•Out-of-registration colors cannot always be perfectly corrected; this depends on the type of text or lines to print.
• Also, refer to the relevant information in the Service Handbook for further information regarding color
registration control procedures.
e-STUDIO2500c/3500c/3510c
1.5
2. Copier-specific Adjustments
2.1 To Copy Text Clearly (To eliminate faint, smudged or blurred text)
Before the adjustment
When a light print image is copied, the text
looks blurred.
After the adjustment
The graphic image and text look darker and
sharper.
Explanation
Perform image processing, in order to obtain a sharp and dark copy image when copying an original containing
light text and graphic images, or a light copy image when copying an original containing a highly colored text
and copy image.
Procedures
* The procedure to use varies, depending on whether to adjust the copy image quality in the Black mode, Full
color mode or Auto color mode. Refer to the procedure corresponding to the particular user’s request.
* Refer to the procedure to adjust the copy image quality in the Full color mode with the Printed image mode selected,
in order to adjust the copy image quality in the Black mode with the Photo mode selected. The values are shared in
the Black mode with the Photo mode selected and in the Full Color Mode with the Printed image mode selected.
Therefore, adjusting the copy image quality in either of the modes affects the one in the other mode.
2.1
e-STUDIO2500c/3500c/3510c
2. Copier-specific Adjustments
2.1.1 To Adjust the Copy Image Quality in the Black Mode
* You can start with any of the procedures. But it is recommended to perform the procedures in order, as listed
below. You can use one procedure in conjunction with another. But if this changes the image quality more
than required or loses the effectiveness of the adjustment, restore the settings made in the previously used
procedure to the original ones. Then use other procedures.
* Both the service technician and the user can use procedures (1), (2) and (4).
* Only the service technician must use procedures (3), (5), (6) and (7).
(1) Press the [BASIC] button on the Control Panel. Press the [
] button to increase the copy density.
After increasing the copy density, copy and check the copy image quality.
With the copy density set to the maximum, if further image quality adjustments are still necessary, use the
next procedure.
(2) Press the [IMAGE] button on the Control Panel. Press the [SHARPNESS] button.
Press the [SHARP] button to increase the sharpness intensity.
After increasing the sharpness intensity, copy and check the copy image quality.
With the sharpness intensity set to the maximum, if further image quality adjustments are still necessary, the
service technician must use the following procedures.
(3) Enter adjustment mode [05]. Increase the values for codes [604/605] to strengthen the copy density of text (or
increase the sharpness intensity).
• The code to use varies according to the original mode (Text/Photo or Text). Adjust the value for [05] code
corresponding to the original mode in which you would like to improve the image quality and set values
larger than "128" for codes 05-604/605.
Original mode
Text/Photo
Text
[05] code
05-604
05-605
Recommended value
Acceptable value range
Default
Set a value larger than 128.
0 to 255
128
* Setting "0" provides the softest image, while setting "255" provides the sharpest image.
Changing the values for these codes will change the sharpness intensity, when the "Sharpness" indicator in
the "IMAGE" menu is set to the center. Remember that 1 step of the indicator will increase or decrease the
sharpness intensity by 25. If the sharpness intensity of the center value is changed, each step of the indicator
will be changed accordingly. (For instance, if the center value is increased by 25 (sharper), the value of each
step of the indicator will also be increased by 25 (sharper).)
After increasing the sharpness intensity, copy and check the copy image quality.
If further image quality adjustments are still necessary, use the next procedure.
e-STUDIO2500c/3500c/3510c
2.1
2. Copier-specific Adjustments
(4) Press the [BASIC] button on the Control Panel. Select "TEXT" from among the original mode options.
* To have "TEXT" selected from among the original mode options by default, refer to procedure (1) in 2.8
To Eliminate Moiré.
After selecting the Text mode, copy and check the copy image quality.
If further image quality adjustments are still necessary, use the next procedure.
(5) Enter adjustment mode [05]. Decrease the values for codes [648/649] to increase the copy density of text.
(To improve faint, smudged text or thin lines)
Original mode [05] code
Recommended value
Text/Photo
05-648
Set a value smaller than 2.
Text
05-649
Acceptable value range
Default
0 to 4
2
* Set the value in increments of approximately 1, while checking the copy image until the optimum value is
obtained.
After increasing the copy density, copy and check the copy image quality.
If further image quality adjustments are still necessary, use the next procedure.
(6) Enter adjustment mode [05]. Change the values for codes [590/591] to adjust the gamma curve balance of
the medium- and high-density areas.
Original mode
[05] code
Subcode
Recommended value
Acceptable
value range
Default
Text/Photo
Text
05-590
05-591
1/2
1/2
Set a value larger than 128.
0 to 255
128
* Set the value in increments of approximately 20, while checking the copy image until the optimum value is
obtained.
(Please be careful because the gradation (or density) of the medium-density area may exceed that of the
high-density area, depending on the set value.)
* The subcode varies according to the area where the density is adjusted. Refer to the table below and set
the subcode for the area to be adjusted. The density of light text or a graphic image will vary, if the
medium- or high-density area is mainly adjusted. Setting "0" for the subcode allows you to adjust the lowdensity area. But it will not affect the light text or graphic images. Therefore, never change the value for
the low-density area.
Subcode
Area where the density is adjusted
1
Medium-density area
2
High-density area
After adjusting the gamma curve balance, copy and check the copy image quality.
If further image quality adjustments are still necessary, use the next procedure.
2.1
e-STUDIO2500c/3500c/3510c
2. Copier-specific Adjustments
(7) Enter adjustment mode [05]. Change the values for codes [570/572] or [693/695] to set the background
peak of range correction to "fixed" in the manual copy density mode.
• The code to use varies according to the density option (auto or manual), original mode, (Text/Photo, Photo
or Text) and use of the RADF (MR-3018). Adjust the value for [05] code corresponding to the condition
for which you would like to improve the image quality and set "1" in the ten’s place.
* Set value (Ex.: To set the background/text peak in the manual and auto copy density mode to "fixed")
1 1
One’s place: Set the background/text peak in auto copy density mode to "fixed" — See the table
below for further information.
Ten’s place: Set the background/text peak in manual copy density mode to "fixed" — See the
table below for further information.
Value
1
2
3
4
Background peak
Fixed
Varied
Fixed
Varied
Text peak
Fixed
Fixed
Varied
Varied
* Change the value only for the manual copy density mode (ten’s place). Never change the value for the
auto copy density mode (one’s place).
To scan an original placed manually on the original glass
Original
mode
Text/Photo
Text
[05] code
05-570
05-572
Copy density Recommended value
Default
mode
Ten’s place One’s place Ten’s place One’s place
Manual
1
Current value
2
2
Manual
1
Current value
2
2
To scan an original fed from the RADF
Original
mode
Text/Photo
Text
[05] code
05-693
05-695
Copy density Recommended value
Default
mode
Ten’s place One’s place Ten’s place One’s place
Manual
1
Current value
2
2
Manual
1
Current value
2
2
Precautions after the completion of the adjustment
The adjustment may possibly cause an increase in the amount of toner used, moiré, blurred text (small, dark text
blurred), diminished photo images or gradational images (less accurate reproducibility of halftones). Therefore,
carefully perform the adjustment, while checking the copy image.
Remarks
Enter a value within the recommended value range mentioned in the procedures. Otherwise, it may cause a loss in
MFP performance, including degradation in the image quality and a reduction in the life of the consumables.
e-STUDIO2500c/3500c/3510c
2.1
2. Copier-specific Adjustments
2.1.2 To Adjust the Copy Image Quality in the Full Color Mode
* You can start with any of the procedures. But it is recommended to perform the procedures in order, as listed
below. You can use one procedure in conjunction with another. But if this changes the image quality more
than required or loses the effectiveness of the adjustment, restore the settings made in the previously used
procedure to the original ones. Then use other procedures.
* Both the service technician and the user can use procedures (1), (2) and (5).
* Only the service technician must use procedures (3) and (4).
(1) Press the [BASIC] button on the Control Panel. Press the [
] button to increase the copy density.
After increasing the copy density, copy and check the copy image quality.
With the copy density set to the maximum, if further image quality adjustments are still necessary, use the
next procedure.
(2) Press the [IMAGE] button on the Control Panel. Press the [SHARPNESS] button.
Press the [SHARP] button to increase the sharpness intensity.
After increasing the sharpness intensity, copy and check the copy image quality.
With the sharpness intensity set to the maximum, if further image quality adjustments are still necessary, the
service technician must use the following procedures.
(3) Enter adjustment mode [05]. Increase the values for codes [1737 to 1741] to strengthen the copy density of
text (or increase the sharpness intensity).
• The code to use varies according to the original mode (Text/Photo, Text, Printed image, Photo or Map).
Adjust the value for [05] code corresponding to the original mode in which you would like to improve the
image quality and set values larger than "128" for codes 05-1737 to 1741.
Original mode [05] code
Recommended value
Acceptable value range
Text/Photo
05-1737
Text
05-1738
Set a value larger than 128.
0 to 255
Printed image
05-1739
Photo
05-1740
Map
05-1741
Default
128
* Setting "0" provides the softest image, while setting "255" provides the sharpest image.
Changing the values for these codes will change the sharpness intensity, when the "Sharpness" indicator in
the "IMAGE" menu is set to the center. Remember that 1 step of the indicator will increase or decrease the
sharpness intensity by 25. If the sharpness intensity of the center value is changed, each step of the indicator
will be changed accordingly. (For instance, if the center value is increased by 25 (sharper), the value of each
step of the indicator will also be increased by 25 (sharper).)
2.1
e-STUDIO2500c/3500c/3510c
2. Copier-specific Adjustments
* The values adjusted for the sharpness intensity are shared in the Full color mode with the Printed image
mode selected and in the Black mode with the Photo mode selected. Therefore, adjusting the copy image
quality in either of the modes affects that in the other mode. Perform copy image quality adjustment in the
mode that is used for the adjustment, while checking the one in the other mode.
After increasing the sharpness intensity, copy and check the copy image quality.
If further image quality adjustments are still necessary, use the next procedure.
(4) Enter adjustment mode [05]. Change the values for codes [1630 to 1633] to adjust the maximum color
density of the text.
Color to
[05] code
adjust
Y
05-1630
(Yellow)
M
05-1631
(Magenta)
C
05-1632
(Cyan)
K
05-1633
(Black)
Recommended value
Acceptable
value range
Default
0 to 10
5
Set a value larger than 5 to
increase the density.
Set a value smaller than 5 to
decrease the density.
* Set the value in increments of 1, while checking the copy image until the optimum value is obtained.
* This adjustment will be effective, only if the "TEXT/PHOTO" or "TEXT" mode is selected from among
the original mode options. If the "TEXT/PHOTO" mode is selected, the adjustment will affect only text
(or an area which is recognized as text).
After adjusting the maximum color density of the text, copy and check the copy image quality.
If further image quality adjustments are still necessary, use the next procedure.
(5) Press the [BASIC] button on the Control Panel. Select "TEXT" from among the original mode options.
* To have "TEXT" selected from among the original mode options by default, refer to procedure (1) in 2.8
To Eliminate Moiré.
Precautions after the completion of the adjustment
The adjustment may possibly cause an increase in the amount of toner used, moiré, blurred text (small, dark text
blurred), diminished photo images or gradational images (less accurate reproducibility of halftones), and noise
around the text on the copy. Therefore, carefully perform the adjustment, while checking the copy image.
Remarks
Enter a value within the recommended value range mentioned in the procedures. Otherwise, it may cause a loss in
MFP performance, including degradation in the image quality and a reduction in the life of the consumables.
e-STUDIO2500c/3500c/3510c
2.1
2. Copier-specific Adjustments
2.1.3 To Adjust the Copy Image Quality in the Auto Color Mode
* You can start with any of the procedures. But it is recommended to perform the procedures in order, as listed
below. You can use one procedure in conjunction with another. But if this changes the image quality more
than required or loses the effectiveness of the adjustment, restore the settings made in the previously used
procedure to the original ones. Then use other procedures.
* Both the service technician and the user can use procedures (1) and (2).
* Only the service technician must use procedure (3).
(1) Press the [BASIC] button on the Control Panel. Press the [
] button to increase the copy density.
After increasing the copy density, copy and check the copy image quality.
With the copy density set to the maximum, if further image quality adjustments are still necessary, use the
next procedure.
(2) Press the [IMAGE] button on the Control Panel. Press the [SHARPNESS] button.
Press the [SHARP] button to increase the sharpness intensity.
After increasing the sharpness intensity, copy and check the copy image quality.
With the sharpness intensity set to the maximum, if further image quality adjustments are still necessary, the
service technician must use the following procedure.
(3) Enter adjustment mode [05]. Increase the value for code [1757] to strengthen the copy density of text (or
increase the sharpness intensity).
• The sharpness intensity can be adjusted only when the "TEXT/PHOTO" mode is selected from among the
Auto Color original mode options in adjustment mode [05]. Set a value larger than "128" for code 051757.
Original mode
Text/Photo
[05] code
05-1757
Recommended value
Set a value larger than 128.
Acceptable value range
0 to 255
Default
128
* Setting "0" provides the softest image, while setting "255" provides the sharpest image.
Changing the value for this code will change the sharpness intensity, when the "Sharpness" indicator in the
"IMAGE" menu is set to the center. Remember that 1 step of the indicator will increase or decrease the
sharpness intensity by 25. If the sharpness intensity of the center value is changed, each step of the indicator
will be changed accordingly. (For instance, if the center value is increased by 25 (sharper), the value of each
step of the indicator will also be increased by 25 (sharper).)
2.1
e-STUDIO2500c/3500c/3510c
2. Copier-specific Adjustments
Precautions after the completion of the adjustment
The adjustment may possibly cause an increase in the amount of toner used, moiré, blurred text (small, dark text
blurred), diminished photo images or gradational images (less accurate reproducibility of halftones). Therefore,
carefully perform the adjustment, while checking the copy image.
Remarks
Enter a value within the recommended value range mentioned in the procedures. Otherwise, it may cause a loss in
MFP performance, including degradation in the image quality and a reduction in the life of the consumables.
e-STUDIO2500c/3500c/3510c
2.1
2. Copier-specific Adjustments
2.2 To Closely Match the Color Balance of the Original
Before the adjustment
After the adjustment
Copy
The copy image looks yellowish, compared
with the original.
Copy
The color balance of the copy image is closely
matched with that of the original.
Explanation
Depending on the color balance of the original, the copy image sometimes looks different from the original.
Perform image quality control, automatic calibration, color adjustment (color balance adjustment or RGB
adjustment) and the color density adjustment, in order to match the color balance of the copy image with that of
the original.
Procedures
* You can start with any of the procedures. But it is recommended to perform the procedures in order, as listed
below. You can use one procedure in conjunction with another. But if this changes the image quality more
than required or loses the effectiveness of the adjustment, restore the settings made in the previously used
procedure to the original ones. Then use other procedures.
* Only the service technician must use procedures (1) and (5).
* Both the service technician and the user can use procedures (2) to (4).
*Procedure (3) "Hue adjustment" cannot be selected concurrently with procedure (4) "Color balance/RGB
adjustments." Performing either of the adjustments and then another adjustment clears what has been previously
adjusted. For example, using procedure (3) and then procedure (4) clears the adjusted hue using procedure (3).
2.2
e-STUDIO2500c/3500c/3510c
2. Copier-specific Adjustments
(1) Enter adjustment mode [05]. Select code [396]. Press the [START] button.
• Image quality control will be forcibly performed to correct the color balance and copy density.
After exercising image quality control, use procedure (2).
(2) Perform automatic calibration to correct variations in the copy density.
* [ADMIN] is selected from among the [CALIBRATION DISPLAY LEVEL] options by default. In other
words, an administrator is authorized to operate automatic calibration. But the [USER] option can also be
selected to allow the user to operate it. Refer to the User Functions Guide for further information
regarding how to select the [CALIBRATION DISPLAY LEVEL] option.
• Use steps (a) through (i) to perform automatic calibration.
(a) Press the [USER FUNCTIONS] button on the Control Panel to enter the "User Functions" menu.
(b) Press the [ADMIN] button.
(c) Enter an administrator password of 6 to 10 digits. Press the [ENTER] button.
(d) Press the [GENERAL] button.
(e) Press the [CALIBRATION] button.
(f) Press the [COPY] button.
(g) Press the [CALIBRATION] button to print out the test chart.
(h) Place the printed test chart on the original glass.
(i) Press the [START] button to perform calibration. When the calibration comes to an end, the
message "Scanning and calibrating" will disappear.
* As a result of the above steps, the copy image quality will be corrected in the Full color mode and
the Black and White mode simultaneously.
After performing automatic calibration, copy and check the copy image quality.
If further image quality adjustments are still necessary, use the next procedure.
(3) Perform hue adjustment to adjust the tint of the color in the color area to change.
• Use steps (a) through (d) to perform the adjustment.
(a) Press the [IMAGE] button on the Control Panel.
(b) Press [HUE] button.
(c) Press the [+] or [-] button on the indicator of the color to adjust.
* Pressing the [+] or [-] button on the indicator changes the hue as shown below.
(For instance, press the [+] button at R (Red). Then the tint of R (Red) is closely matched with that of Y (Yellow).
Press the [-] button at R (Red). Then the tint of R (Red) will be closely matched with that of M (Magenta).
R: -2
R: +2
(d) Enter the [ENTER] button.
After adjusting the hue, copy and check the copy image quality.
If further image quality adjustments are still necessary, use the next procedure.
e-STUDIO2500c/3500c/3510c
2.2
2. Copier-specific Adjustments
(4) Perform color balance adjustment or RGB adjustment to adjust the tint of colors in general.
• Use steps (a) through (d) to perform the adjustment.
(a) Press the [IMAGE] button on the Control Panel.
(b)Press the [COLOR BALANCE] button to adjust the color balance by changing the amount of toner
(C, M, Y and K) or the [RGB ADJUSTMENT] button to adjust the color balance by changing the
intensity of R, G and B.
(c) Press the [+] button to enhance the tint of the color or the [-] button to decrease it.
* After selecting the color balance by changing the amount of toner (C, M, Y and K), press the
[DETAIL] button. The tint of the color can be adjusted according to density area (low-, mediumor high-density area).
(d) Press the [ENTER] button.
After adjusting the tint of the colors, copy and check the copy image quality.
If further image quality adjustments are still necessary, use the next procedure.
(5) Enter adjustment mode [05]. Change the values for codes [1779 to 1798] to adjust the color density.
Color to
Acceptable
Original mode [05] code Subcode Recommended value
Default
adjust
value range
Text/Photo
05-1779
0/1/2
Text
05-1780
0/1/2
Y
Printed image
05-1781
0/1/2
(Yellow)
Photo
05-1782
0/1/2
Map
05-1783
0/1/2
Text/Photo
05-1784
0/1/2
Text
05-1785
0/1/2
M
Printed image
05-1786
0/1/2
(Magenta)
Set a value larger than 128
Photo
05-1787
0/1/2
to increase the density.
Map
05-1788
0/1/2
0 to 255
128
Text/Photo
05-1789
0/1/2
Set a value smaller than 128
Text
05-1790
0/1/2
to decrease the density.
C
Printed
image
05-1791
0/1/2
(Cyan)
Photo
05-1792
0/1/2
Map
05-1793
0/1/2
Text/Photo
05-1794
0/1/2
Text
05-1795
0/1/2
K
Printed image
05-1796
0/1/2
(Black)
Photo
05-1797
0/1/2
Map
05-1798
0/1/2
* Set the value in increments of approximately 10, while checking the copy image until the optimum value is
obtained.
* The value for the code corresponding to the original mode (Text/Photo, Text, or Printed image) will affect
the copy image quality in the Full color mode and the Auto color mode.
* The subcode varies according to the area where the density is adjusted. Refer to the table below and set
the subcode for the area to be adjusted.
Subcode
Area where the density is adjusted
0
Low-density area
1
Medium-density area
2
High-density area
2.2
e-STUDIO2500c/3500c/3510c
2. Copier-specific Adjustments
Precautions after the completion of the adjustment
The adjustment may possibly cause offset failure, particularly when the highly colored original is copied in the
Photo mode. Therefore, carefully perform the adjustment, while checking the copy image.
Remarks
Enter a value within the recommended value range mentioned in the procedures. Otherwise, it may cause a loss in
MFP performance, including degradation in the image quality and a reduction in the life of the consumables.
e-STUDIO2500c/3500c/3510c
2.2
2. Copier-specific Adjustments
2.3 To Improve the Reproducibility of Gray
Before the adjustment
Another color (M) is blended in the gray area.
After the adjustment
No undesired color is blended. A clear copy
image is obtained.
Explanation
When an original containing gray is copied, another color may be blended in the gray area. Perform image quality
control, automatic calibration, color adjustment (color balance adjustment or RGB adjustment) and color density
adjustment, in order to avoid this problem (or to obtain an achromatic color, for instance).
Procedures
* You can start with any of the procedures. But it is recommended to perform the procedures in order, as listed
below. You can use one procedure in conjunction with another. But if this changes the image quality more
than required or loses the effectiveness of the adjustment, restore the settings made in the previously used
procedure to the original ones. Then use other procedures.
* Only the service technician must use procedures (1) and (4).
* Both the service technician and the user can use procedures (2) and (3).
(1) Enter adjustment mode [05]. Select code [396]. Press the [START] button.
• Image quality control will be forcibly performed to correct the color balance and copy density.
After exercising image quality control, copy and check the copy image quality.
If further image quality adjustments are still necessary, use the next procedure.
(2) Perform automatic calibration to correct variations in the copy density.
* For further information regarding the adjustment procedures, refer to procedure (2) in 2.2 To Closely
Match the Color Balance of the Original.
* [ADMIN] is selected from among the [CALIBRATION DISPLAY LEVEL] options by default. In other
words, an administrator is authorized to operate automatic calibration. But the [USER] option can also be
selected to allow the user to operate it. Refer to the User Functions Guide for further information
regarding how to select the [CALIBRATION DISPLAY LEVEL] option.
After performing automatic calibration, copy and check the copy image quality.
If further image quality adjustments are still necessary, use the next procedure.
2.3
e-STUDIO2500c/3500c/3510c
2. Copier-specific Adjustments
(3) Perform color balance adjustment or RGB adjustment to adjust the tint of colors in general.
* For further information regarding the adjustment procedures, refer to procedure (4) in 2.2 To Closely
Match the Color Balance of the Original.
After adjusting the tint of colors, copy and check the copy image quality.
If further image quality adjustments are still necessary, use the next procedure.
(4) Enter adjustment mode [05]. Change the values for codes [1779 to 1798] to adjust the color density.
Color to
Acceptable
Original mode [05] code Subcode Recommended value
Default
adjust
value range
Text/Photo
05-1779
0/1/2
Text
05-1780
0/1/2
Y
Printed image
05-1781
0/1/2
(Yellow)
Photo
05-1782
0/1/2
Map
05-1783
0/1/2
Text/Photo
05-1784
0/1/2
Text
05-1785
0/1/2
M
Printed image
05-1786
0/1/2
(Magenta)
Set a value larger than 128
Photo
05-1787
0/1/2
to increase the density.
Map
05-1788
0/1/2
0 to 255
128
Text/Photo
05-1789
0/1/2
Set a value smaller than 128
Text
05-1790
0/1/2
to decrease the density.
C
Printed image
05-1791
0/1/2
(Cyan)
Photo
05-1792
0/1/2
Map
05-1793
0/1/2
Text/Photo
05-1794
0/1/2
Text
05-1795
0/1/2
K
Printed image
05-1796
0/1/2
(Black)
Photo
05-1797
0/1/2
Map
05-1798
0/1/2
* Set the value in increments of approximately 10, while checking the copy image until the optimum value is obtained.
* The value for the code corresponding to the original mode (Text/Photo, Text, or Printed image) will affect
the copy image quality in the Full color mode and the Auto color mode.
* The subcode varies according to the area where the density is adjusted. Refer to the table below and set
the subcode for the area to be adjusted.
Subcode
Area where the density is adjusted
0
Low-density area
1
Medium-density area
2
High-density area
Precautions after the completion of the adjustment
The adjustment may possibly cause offset failure, particularly when a highly colored original is copied in the Photo mode.
Also, it may cause degradation in the color reproducibility. (Excessively enhancing the tint of black makes other colors,
such as skin tones, look dull.) Therefore, carefully perform the adjustment, while checking the copy image.
Remarks
Enter a value within the recommended value range mentioned in the procedures. Otherwise, it may cause a loss in
MFP performance, including degradation in the image quality and a reduction in the life of the consumables.
e-STUDIO2500c/3500c/3510c
2.3
2. Copier-specific Adjustments
2.4 To Copy in Vivid Colors
Before the adjustment
After the adjustment
When a copy is made without any adjustments,
the vividness is insufficient on the copy image.
The copy image is obtained in vivid colors.
Explanation
When a copy is made without any adjustments, the vividness may be insufficient on the copy image. Perform
saturation adjustment, color adjustment (color balance adjustment or RGB adjustment), and color density
adjustment, in order to obtain a copy image in vivid colors.
Procedures
* You can start with any of the procedures other than (5). But it is recommended to perform the procedures in
order, as listed below. You can use one procedure in conjunction with another. But if this changes the image
quality more than required or loses the effectiveness of the adjustment, restore the settings made in the
previously used procedure to the original ones. Then use other procedures.
* Both the service technician and the user can use procedures (1) to (3).
* Only the service technician must use procedure (4).
* Only if the vividness of R (Red) is still insufficient even after procedures (1) to (4) have been used, the service
technician must use procedure (5).
2.4
e-STUDIO2500c/3500c/3510c
2. Copier-specific Adjustments
(1) Press the [IMAGE] button on the Control Panel. Press the [ONE TOUCH ADJUSTMENT] button.
Press the [VIVID] button.
After selecting the "Vivid" option, copy and check the copy image quality.
When the copy image quality with the "Vivid" option is insufficient, cancel the "Vivid" option and use the
next procedure.
(The one-touch adjustment can be canceled by pressing the [ONE TOUCH ADJUSTMENT] button again.)
(2) Perform saturation adjustment to adjust the overall saturation.
• Use steps (a) through (d) to perform the adjustment.
(a) Press the [IMAGE] button on the Control Panel.
(b)Press the [SATURATION] button.
(c) Press the [+] button to increase the saturation of the copy image.
(d) Press the [ENTER] button.
After adjusting the saturation, copy and check the copy image quality.
If further image quality adjustments are still necessary, use the next procedure.
(3) Perform color balance adjustment or RGB adjustment to adjust the tint of colors in general.
* For further information regarding the adjustment procedures, refer to procedure (4) in 2.2 To Closely
Match the Color Balance of the Original.
<Note>
When you use procedure (2) "Saturation adjustment" in conjunction with (3) "Color
balance/RGB adjustments," the following restrictions are imposed:
• Combination of saturation adjustment + color balance adjustment:
Valid
• Combination of saturation adjustment + RGB adjustment:
Invalid
After adjusting the tint of colors, copy and check the copy image quality.
If further image quality adjustments are still necessary, the service technician must use the next procedure.
e-STUDIO2500c/3500c/3510c
2.4
2. Copier-specific Adjustments
(4) Enter adjustment mode [05]. Change the values for codes [1779 to 1798] to adjust the color density.
Color to
Acceptable
Original mode [05] code Subcode Recommended value
Default
adjust
value range
Text/Photo
05-1779
0/1/2
Text
05-1780
0/1/2
Y
Printed image
05-1781
0/1/2
(Yellow)
Photo
05-1782
0/1/2
Map
05-1783
0/1/2
Text/Photo
05-1784
0/1/2
Text
05-1785
0/1/2
M
Printed image
05-1786
0/1/2
(Magenta)
Set a value larger than 128
Photo
05-1787
0/1/2
to increase the density.
Map
05-1788
0/1/2
0 to 255
128
Text/Photo
05-1789
0/1/2
Set a value smaller than 128
Text
05-1790
0/1/2
to decrease the density.
C
Printed
image
05-1791
0/1/2
(Cyan)
Photo
05-1792
0/1/2
Map
05-1793
0/1/2
Text/Photo
05-1794
0/1/2
Text
05-1795
0/1/2
K
Printed image
05-1796
0/1/2
(Black)
Photo
05-1797
0/1/2
Map
05-1798
0/1/2
* Set the value in increments of approximately 10, while checking the copy image until the optimum value is
obtained.
* The value for the code corresponding to the original mode (Text/Photo, Text, or Printed image) will affect
the copy image quality in the Full color mode and the Auto color mode.
* The subcode varies according to the area where the density is adjusted. Refer to the table below and set
the subcode for the area to be adjusted.
Subcode
Area where the density is adjusted
0
Low-density area
1
Medium-density area
2
High-density area
After setting the values, copy and check the copy image quality.
Only if the vividness of R (Red) is still insufficient even after all the above procedures have been used, must
the service technician use the next procedure.
2.4
e-STUDIO2500c/3500c/3510c
2. Copier-specific Adjustments
(5) Enter adjustment mode [05]. Change the value for code [2905] to adjust the transfer (1st transfer) roller bias
output.
(Adjust the offset voltage of transfer roller bias for C (Cyan) and K (Black) so as to increase the density of R
(Red).)
• The code to use varies according to the paper type and color to adjust. Adjust the value for the subcode
corresponding to the color for which you would like to improve the image quality. Set the value within a
range of "2" to "5" to obtain the highest density of R (Red).
Paper type
Plain paper
Thick
Color to
adjust
C (Cyan)
K (Black)
C (Cyan)
K (Black)
[05] code
Subcode
Recommended
value
Acceptable
value range
Default
05-2905
2
3
8
9
2 to 5
0 to 10
5
* Never change the values for subcodes other than the above. Otherwise, it may cause a loss in MFP
performance, including degradation in the image quality.
<Note>
• The adjustment may possibly decrease the density of G (Green), B (Blue) and K (Black)
extremely. Therefore, carefully perform the adjustment, while checking the copy image.
• Unless this adjustment changes the density of R (Red), return the values to the default (set
value: 5).
• This adjustment may affect not only the copy image but also every image quality such as the
printout. Therefore, perform the adjustment, being aware that the image quality of all future
printouts will be changed, when printing out originals other than the one that is used for the
adjustment.
Precautions after the completion of the adjustment
The adjustment may possibly cause offset failure, particularly when the highly colored original is copied in the
Photo mode. Therefore, carefully perform the adjustment, while checking the copy image.
Remarks
Enter a value within the recommended value range mentioned in the procedures. Otherwise, it may cause a loss in
MFP performance, including degradation in the image quality and a reduction in the life of the consumables.
e-STUDIO2500c/3500c/3510c
2.4
2. Copier-specific Adjustments
2.5 To Make the Pale Area of the Original Look Darker and Sharper
(To improve the highlight reproducibility)
Before the adjustment
The splashing area (highlight) is blurred.
After the adjustment
A clear copy image of the splashing area
is obtained.
Explanation
Perform the copy density adjustment and background adjustment, in order to make the pale area (highlight) of
the original look darker and sharper on the copy.
Procedures
* You can start with any of the procedures. But it is recommended to perform the procedures in order, as listed
below. You can use one procedure in conjunction with another. But if this changes the image quality more
than required or loses the effectiveness of the adjustment, restore the settings made in the previously used
procedure to the original ones. Then use other procedures.
* Both the service technician and the user can use procedures (1) and (3).
* Only the service technician must use procedures (2) and (4).
(1) Press the [IMAGE] button on the Control Panel. Press the [BACKGROUND ADJUSTMENT] button.
Press the [DARK] button to darken the background.
After increasing the background density, copy and check the copy image quality.
With the background density set to the maximum, if further image quality adjustments are still necessary,
the service technician must use the next procedure.
2.5
e-STUDIO2500c/3500c/3510c
2. Copier-specific Adjustments
(2) Enter adjustment mode [05]. Change the values for codes [1688 to 1692] and [1698 to 1702] to adjust the
background density.
* The highlighted area will become highly visible, if the background density is increased.
Acceptable
Adjustment
Original mode [05] code Recommended value
Default
value range
Text/Photo
05-1688
Text
05-1689
Automatic offsetting
adjustment for
Printed image
05-1690
background processing
Photo
05-1691
Map
05-1692 Set a value larger than 128
0 to 255
128
Text/Photo
05-1698 to increase the density.
Manual offsetting
Text
05-1699
adjustment for
Printed image
05-1700
background processing
Photo
05-1701
Map
05-1702
* The value for automatic offsetting adjustment for background processing will be applied, only if the
automatic copy density mode is selected. On the other hand, the value for manual offsetting adjustment for
background processing will be applied, only if the manual copy density mode is selected.
* Set the value in increments of approximately 10, while checking the copy image until the optimum value is
obtained.
* The value for the code corresponding to the original mode (Text/Photo, Text, or Printed image) will affect
the copy image quality in the Full color mode and the Auto color mode.
* The value adjusted for the background density is shared in the Full color mode with the Printed image
mode selected and in the Black mode with the Photo mode selected. Therefore, adjusting the copy image
quality in either of the modes affects that in the other mode. Perform copy image quality adjustment in the
mode that is used for the adjustment, while checking that in the other mode.
<Note>
"Making the highlighted area more visible (or increasing the background density)" and
"eliminating the background color (or decreasing the background density)" are mutually
contradictory. If the background color is darkened to make the highlighted area more visible,
the hue of the background may change.
After adjusting the background density, copy and check the copy image quality.
If further image quality adjustments are still necessary, use the next procedure.
(3) Press the [BASIC] button on the Control Panel. Press the [
] button to increase the copy density.
After increasing the copy density, copy and check the copy image quality.
With the copy density set to the maximum, if further image quality adjustments are still necessary, the
service technician must use the next procedure.
e-STUDIO2500c/3500c/3510c
2.5
2. Copier-specific Adjustments
(4) Enter adjustment mode [05]. Change the values for codes [1779 to 1798] to adjust the color density.
Color to
Acceptable
Original mode [05] code Subcode Recommended value
Default
adjust
value range
Text/Photo
05-1779
0/1
Text
05-1780
0/1
Y
Printed image
05-1781
0/1
(Yellow)
Photo
05-1782
0/1
Map
05-1783
0/1
Text/Photo
05-1784
0/1
Text
05-1785
0/1
M
Printed image
05-1786
0/1
(Magenta)
Set a value larger than 128
Photo
05-1787
0/1
to increase the density.
Map
05-1788
0/1
0 to 255
128
Text/Photo
05-1789
0/1
Set a value smaller than 128
Text
05-1790
0/1
to decrease the density.
C
Printed
image
05-1791
0/1
(Cyan)
Photo
05-1792
0/1
Map
05-1793
0/1
Text/Photo
05-1794
0/1
Text
05-1795
0/1
K
Printed image
05-1796
0/1
(Black)
Photo
05-1797
0/1
Map
05-1798
0/1
* Set the value in increments of approximately 10, while checking the copy image until the optimum value is
obtained.
* The value for the code corresponding to the original mode (Text/Photo, Text, or Printed image) will affect
the copy image quality in the Full color mode and the Auto color mode.
* The subcode varies according to the area where the density is adjusted. Refer to the table below and set the
subcode for the area to be adjusted. The density of the highlighted area will vary, if the low- or mediumdensity area is mainly adjusted. Setting "2" for subcode allows you to adjust the high-density area. But it
will not affect the highlighted area. Therefore, never change the value for the high-density area.
Subcode
Area where the density is adjusted
0
Low-density area
1
Medium-density area
Precautions after the completion of the adjustment
The adjustment may possibly provide an excessively dark background. Therefore, carefully perform the
adjustment, while checking the copy image.
Remarks
Enter a value within the recommended value range mentioned in the procedures. Otherwise, it may cause a loss
in MFP performance, including degradation in the image quality and a reduction in the life of the consumables.
2.5
e-STUDIO2500c/3500c/3510c
2. Copier-specific Adjustments
2.6 To Eliminate the Background Color
Before the adjustment
The background color of the original is also
copied. Therefore, no clear contrast is made
between the background and text.
After the adjustment
The background color is eliminated, allowing
clear contrast between the background and text.
Explanation
When a full-color original, such as colored paper, is copied, its background color is also copied. Therefore, no
clear contrast is made between the background and the text on the copy. Perform background adjustment, in
order to copy an original with a highly colored background, while eliminating the background color or making it
white.
Procedures
* The procedure to use varies, depending on whether to adjust the copy image quality in the Black mode or the
Full color mode. Refer to the procedure corresponding to the user’s particular request.
* Refer to the procedure to adjust the copy image quality in the Full color mode with the Printed image mode
selected, in order to adjust the copy image quality in the Black mode with the Photo mode selected. The value
adjusted is shared in the Black mode with the Photo mode selected and in the Full color mode with the Printed
image mode selected. Therefore, adjusting the copy image quality in either of the modes affects that in the
other mode.
e-STUDIO2500c/3500c/3510c
2.6
2. Copier-specific Adjustments
2.6.1 To Adjust the Copy Image Quality in the Black Mode
* You can start with any of the procedures. But it is recommended to perform the procedures in order, as listed
below. You can use one procedure in conjunction with another. But if this changes the image quality more
than required or loses the effectiveness of the adjustment, restore the settings made in the previously used
procedure to the original ones. Then use other procedures.
* Both the service technician and the user can use procedure (1).
* Only the service technician must use procedures (2) to (4).
(1) Press the [IMAGE] button on the Control Panel. Press the [BACKGROUND ADJUSTMENT] button.
Press the [LIGHT] button to decrease the background density.
After decreasing the background density, copy and check the image quality.
With the background density set to the minimum, if further image quality adjustments are still necessary, the
service technician must use the next procedure.
(2) Enter adjustment mode [05]. Change the values for codes [600/601] to adjust the background density.
Original
Acceptable
[05] code
Recommended value
Default
mode
value range
Text/Photo
05-600
Set a value smaller than 5.
1 to 9
5
Text
05-601
* Set the value in increments of approximately 1, while checking the copy image until the optimum value is obtained.
After adjusting the background density, copy and check the copy image quality.
If further image quality adjustments are still necessary, use the next procedure.
(3) Enter adjustment mode [05]. Change the values for codes [590/591] to adjust the gamma curve balance of
the low- and medium-density areas.
Original
mode
Text/Photo
Text
[05] code
Subcode
Recommended value
Acceptable
value range
Default
05-590
05-591
0/1
0/1
Set a value smaller than 128.
0 to 255
128
* Set the value in increments of approximately 20, while checking the copy image until the optimum value is obtained.
* The subcode varies according to the area where the density is adjusted. Refer to the table below and set
the subcode for the area to be adjusted. The background density will vary, if the low- or medium-density
area is mainly adjusted. Setting "2" for the subcode allows you to adjust the high-density area. But it will
not affect the background density. Therefore, never change the value for the high-density area.
Subcode
Area where the density is adjusted
0
Low-density area
1
Medium-density area
After adjusting the gamma curve balance, copy and check the copy image quality.
If further image quality adjustments are still necessary, use the next procedure.
2.6
e-STUDIO2500c/3500c/3510c
2. Copier-specific Adjustments
(4) Adjust the background peak of range correction to lighten the copy image.
• Use steps (a) to (b) to adjust the background peak of range correction.
(a) Enter adjustment mode [05]. Change the values for codes [570/572] or [693/695] to set the background
peak of range correction to "fixed."
• The code to use varies according to the density option (auto or manual), original mode, (Text/Photo or
Text) and use of the RADF (MR-3018). Adjust the value for [05] code corresponding to the condition
for which you would like to improve the image quality and set "1 in the one’s or the ten’s place.
* Set value (Ex.: To set the background/text peak in the manual and auto copy density mode to "fixed")
1 1
One’s place: Set the background/text peak in auto copy density mode to "fixed" — See the table
below for further information.
Ten’s place: Set the background/text peak in manual copy density mode to "fixed" — See the
table below for further information.
Value
1
2
3
4
Background peak
Fixed
Varied
Fixed
Varied
Text peak
Fixed
Fixed
Varied
Varied
To scan an original placed manually on the original glass
Original
mode
[05] code
Text/Photo
05-570
Text
05-572
Copy density Recommended value
Default
mode
Ten’s place One’s place Ten’s place One’s place
Manual
1
Current value
2
2
Current value
1
Auto
Manual
1
Current value
2
2
Current value
1
Auto
To scan an original fed from the RADF
Original
mode
[05] code
Text/Photo
05-693
Text
05-695
Copy density Recommended value
Default
mode
Ten’s place One’s place Ten’s place One’s place
Manual
1
Current value
2
2
Current value
1
Auto
Manual
1
Current value
2
2
Auto
Current value
1
e-STUDIO2500c/3500c/3510c
2.6
2. Copier-specific Adjustments
(b) Enter adjustment mode [05]. Increase the values for codes [532/534] to adjust the background peak of
range correction and lighten the copy image.
(Increase the number of pixels to be identified as "white" by range correction.)
• The code to use varies according to the original mode (Text/Photo or Text). Adjust the value for [05]
code corresponding to the original mode for which you would like to improve the image quality and
increase the current value by 10 to 30.
Original mode
[05] code
Recommended value
Acceptable
value range
Default
Text/Photo
Text
05-532
05-534
Current value + 10 or more
Current value + 10 or more
0 to 255
40
40
Precautions after the completion of the adjustment
The adjustment may possibly cause text handwritten with a pencil or light text to become illegible on the copy.
Therefore, carefully perform the adjustment, while checking the copy image.
Remarks
Enter a value within the recommended value range mentioned in the procedures. Otherwise, it may cause a loss in
MFP performance, including degradation in the image quality.
2.6
e-STUDIO2500c/3500c/3510c
2. Copier-specific Adjustments
2.6.2 To Adjust the Copy Image Quality in the Full Color Mode
* You can start with any of the procedures. But it is recommended to perform the procedures in order, as listed
below. You can use one procedure in conjunction with another. But if this changes the image quality more
than required or loses the effectiveness of the adjustment, restore the settings made in the previously used
procedure to the original ones. Then use other procedures.
* Both the service technician and the user can use procedures (1) and (4).
* Only the service technician must use procedures (2) and (3).
(1) Press the [IMAGE] button on the Control Panel. Press the [BACKGROUND ADJUSTMENT] button.
Press the [LIGHT] button to decrease the background density.
After decreasing the background density, copy and check the image quality.
With the background density set to the minimum, if further image quality adjustments are still necessary, the
service technician must use the next procedure.
(2) Enter adjustment mode [05]. Change the values for codes [1688 to 1692] and [1698 to 1702] to adjust the
background density.
Adjustment
Automatic offsetting
adjustment for
background processing
Manual offsetting
adjustment for
background processing
Original mode [05] code
Text/Photo
Text
Printed image
Photo
Map
Text/Photo
Text
Printed image
Photo
Map
05-1688
05-1689
05-1690
05-1691
05-1692
05-1698
05-1699
05-1700
05-1701
05-1702
Recommended value
Set a value smaller than 128.
Acceptable
Default
value range
0 to 255
128
* The value for automatic offsetting adjustment for background processing will be applied, only if the
automatic copy density mode is selected. On the other hand, the value for manual offsetting adjustment for
background processing will be applied, only if the manual copy density mode is selected.
* Set the value in increments of approximately 10, while checking the copy image until the optimum value is
obtained.
* The value for the code corresponding to the original mode (Text/Photo, Text, or Printed image) will affect
the copy image quality in the Full color mode and the Auto color mode.
* The value adjusted for the background density is shared in the Full color mode with the Printed image
mode selected and in the Black mode with the Photo mode selected. Therefore, adjusting the copy image
quality in either of the modes affects that in the other mode. Perform copy image quality adjustment in the
mode that is used for the adjustment, while checking that in the other mode.
e-STUDIO2500c/3500c/3510c
2.6
2. Copier-specific Adjustments
<Note>
"Making the highlighted area more visible (or increasing the background density)" and
"eliminating the background color (or decreasing the background density)" are mutually
contradictory. If the density of the background color is decreased, the highlighted area may
become less visible.
After adjusting the background density, copy and check the copy image quality.
If further image quality adjustments are still necessary, or background elimination is necessary according to
color, use the next procedure.
(3) Enter adjustment mode [05]. Change the values for codes [1779 to 1798] to adjust the color density.
Color to
Acceptable
Original mode [05] code Subcode Recommended value
Default
adjust
value range
Text/Photo
05-1779
0/1
Text
05-1780
0/1
Y
Printed image
05-1781
0/1
(Yellow)
Photo
05-1782
0/1
Map
05-1783
0/1
Text/Photo
05-1784
0/1
Text
05-1785
0/1
M
Printed image
05-1786
0/1
(Magenta)
Set a value larger than 128
Photo
05-1787
0/1
to increase the density.
Map
05-1788
0/1
0 to 255
128
Text/Photo
05-1789
0/1
Set a value smaller than 128
Text
05-1790
0/1
to decrease the density.
C
Printed
image
05-1791
0/1
(Cyan)
Photo
05-1792
0/1
Map
05-1793
0/1
Text/Photo
05-1794
0/1
Text
05-1795
0/1
K
Printed image
05-1796
0/1
(Black)
Photo
05-1797
0/1
Map
05-1798
0/1
* Set the value in increments of approximately 10, while checking the copy image until the optimum value is
obtained.
* The value for the code corresponding to the original mode (Text/Photo, Text, or Printed image) will affect
the copy image quality in the Full color mode and the Auto color mode.
* The subcode varies according to the area where the density is adjusted. Refer to the table below and set
the subcode for the area to be adjusted. The background (highlight) density will vary, if the low- or
medium-density area is mainly adjusted. Setting "2" for the subcode allows you to adjust the high-density
area. But it will not affect the background density. Therefore, never change the value for the high-density
area.
Subcode
0
1
Area where the density is adjusted
Low-density area
Medium-density area
After adjusting the background density, copy and check the copy image quality.
If further image quality adjustments are still necessary, use the next procedure.
2.6
e-STUDIO2500c/3500c/3510c
2. Copier-specific Adjustments
(4) Press the [BASIC] button on the Control Panel. Select "TEXT" from among the original mode options.
* To have "TEXT" selected from among the original mode options by default, refer to procedure (1) in 2.8
To Eliminate Moiré.
Precautions after the completion of the adjustment
The adjustment may possibly cause the highlighted area to become less visible on the copy. Therefore, carefully
perform the adjustment, while checking the copy image.
Remarks
Enter a value within the recommended value range mentioned in the procedures. Otherwise, it may cause a loss
in MFP performance, including degradation in the image quality.
e-STUDIO2500c/3500c/3510c
2.6
2. Copier-specific Adjustments
2.7 To Avoid Copying the Image Seen through the Back of a
Page Printed on Thin Paper
Original printed on thin paper (front)
Before the adjustment
When a double-sided original printed on thin
paper is copied, the images seen through the
back of the page are also copied.
Original printed on thin paper (back)
After the adjustment
The images seen through the back of the page
are not copied any more in duplex copying.
Explanation
When a double-sided original printed on thin paper, such as a brochure and leaflet, is copied, the images seen
through the back of the page are also copied. Perform background adjustment, in order to avoid this problem.
2.7
e-STUDIO2500c/3500c/3510c
2. Copier-specific Adjustments
Procedures
* The procedure to use varies, depending on whether to adjust the copy image quality in the Black mode or the
Full color mode. Refer to the procedure corresponding to the user’s particular request.
* Refer to the procedure to adjust the copy image quality in the Full color mode with the Printed image mode selected,
in order to adjust the copy image quality in the Black mode with the Photo mode selected. The value adjusted is
shared in the Black mode with the Photo mode selected and in the Full color mode with the Printed image mode
selected. Therefore, adjusting the copy image quality in either of the modes affects that in the other mode.
2.7.1 To Adjust the Copy Image Quality in the Black Mode
* You can start with any of the procedures. But it is recommended to perform the procedures in order, as listed
below. You can use one procedure in conjunction with another. But if this changes the image quality more
than required or loses the effectiveness of the adjustment, restore the settings made in the previously used
procedure to the original ones. Then use other procedures.
* Both the service technician and the user can use procedure (1).
* Only the service technician must use procedures (2) to (5).
(1) Press the [IMAGE] button on the Control Panel. Press the [BACKGROUND ADJUSTMENT] button.
Press the [LIGHT] button to decrease the background density.
After decreasing the background density, copy and check the image quality.
With the background density set to the minimum, if further image quality adjustments are still necessary, the
service technician must use the next procedure.
(2) Enter adjustment mode [05]. Change the values for codes [600/601] to adjust the background density.
Original
Acceptable
[05] code
Recommended value
Default
mode
value range
Text/Photo
05-600
Set a value smaller than 5.
1 to 9
5
Text
05-601
* Set the value in increments of approximately 1, while checking the copy image until the optimum value is
obtained.
After adjusting the background density, copy and check the copy image quality.
If further image quality adjustments are still necessary, use the next procedure.
(3) Press the [BASIC] button on the Control Panel. Press the [
* Move the copy density indicator to the "
] button to decrease the copy density.
" side for 1 or 2 steps. The images seen through the back of the page
will no longer be copied. But remember that text will also be lightly copied, depending on the type of original.
After decreasing the copy density, copy and check the copy image quality.
With the copy density set to the minimum, if the images seen through the back of the page are still copied, or if
you would like to prevent this problem without changing the copy density of text, use the next procedure.
e-STUDIO2500c/3500c/3510c
2.7
2. Copier-specific Adjustments
(4) Adjust the background peak of range correction to lighten the copy image.
• Use steps (a) to (b) to adjust the background peak of range correction.
(a) Enter adjustment mode [05]. Change the values for codes [570/572] or [693/695] to set the background
peak of range correction to "fixed."
• The code to use varies according to the density option (auto or manual), original mode, (Text/Photo or
Text) and use of the RADF (MR-3018). Adjust the value for [05] code corresponding to the condition
for which you would like to improve the image quality and set "1" in the one’s or the ten’s place.
* Set value (Ex.: To set the background/text peak in the manual and auto copy density mode to "fixed")
1 1
One’s place: Set the background/text peak in auto copy density mode to "fixed" — See the table
below for further information.
Ten’s place: Set the background/text peak in manual copy density mode to "fixed" — See the
table below for further information.
Value
1
2
3
4
Background peak
Fixed
Varied
Fixed
Varied
Text peak
Fixed
Fixed
Varied
Varied
To scan an original placed manually on the original glass
Original
mode
[05] code
Text/Photo
05-570
Text
05-572
Copy density Recommended value
Default
mode
Ten’s place One’s place Ten’s place One’s place
Manual
1
Current value
2
2
Current value
1
Auto
Manual
1
Current value
2
2
Current value
1
Auto
To scan an original fed from the RADF
2.7
Original
mode
[05] code
Text/Photo
05-693
Text
05-695
e-STUDIO2500c/3500c/3510c
Copy density Recommended value
Default
mode
Ten’s place One’s place Ten’s place One’s place
Manual
1
Current value
2
2
Current value
1
Auto
Manual
1
Current value
2
2
Current value
1
Auto
2. Copier-specific Adjustments
(b) Enter adjustment mode [05]. Increase the values for codes [532/534] to adjust the background peak of
range correction and lighten the copy image.
(Increase the number of pixels to be identified as "white" by range correction.)
• The code to use varies according to the original mode (Text/Photo or Text). Adjust the value for [05]
code corresponding to the condition for which you would like to improve the image quality and
increase the current value by 10 to 30.
Original mode
[05] code
Recommended value
Acceptable
value range
Default
Text/Photo
Text
05-532
05-534
Current value + 10 or more
Current value + 10 or more
0 to 255
40
40
After adjusting the background peak, copy and check the copy image quality.
If further image quality adjustments are still necessary, use the next procedure.
(5) Enter adjustment mode [05]. Change the values for codes [590/591] to adjust the gamma curve balance of
the low- and medium-density areas.
Original
mode
Text/Photo
Text
[05] code
Subcode
Recommended value
Acceptable
value range
Default
05-590
05-591
0/1
0/1
Set a value smaller than 128.
0 to 255
128
* Set the value in increments of approximately 20, while checking the copy image until the optimum value is
obtained.
* Since the subcode varies according to the area where the density is adjusted, refer to the table below and
set the appropriate subcode. Remember that mainly adjusting the low- or medium-density area will change
the copy density of the images seen through the back of the page. Setting "2" for the subcode will allow
you to adjust the high-density area. But this will not solve the problem. Therefore, never change the value
for the high-density area.
Subcode
Area where the density is adjusted
0
Low-density area
1
Medium-density area
Precautions after the completion of the adjustment
The adjustment may possibly cause text handwritten with a pencil or light text to become illegible on the copy.
Therefore, carefully perform the adjustment, while checking the copy image.
Remarks
Enter a value within the recommended value range mentioned in the procedures. Otherwise, it may cause a loss
in MFP performance, including degradation in the image quality and a reduction in the life of the consumables.
e-STUDIO2500c/3500c/3510c
2.7
2. Copier-specific Adjustments
2.7.2 To Adjust the Copy Image Quality in the Full Color Mode
* You can start with any of the procedures. But it is recommended to perform the procedures in order, as listed
below. You can use one procedure in conjunction with another. But if this changes the image quality more
than required or loses the effectiveness of the adjustment, restore the settings made in the previously used
procedure to the original ones. Then use other procedures.
* Both the service technician and the user can use procedures (1) and (3).
* Only the service technician must use procedure (2).
(1) Press the [IMAGE] button on the Control Panel. Press the [BACKGROUND ADJUSTMENT] button.
Press the [LIGHT] button to decrease the background density.
After decreasing the background density, copy and check the copy image quality.
With the background density set to the minimum, if the images seen through the back of the page are still
copied, the service technician must use the next procedure.
(2) Enter adjustment mode [05]. Change the values for codes [1688 to 1692] and [1698 to 1702] to adjust the
background density.
Adjustment
Automatic offsetting
adjustment for
background processing
Manual offsetting
adjustment for
background processing
Original mode [05] code
Text/Photo
Text
Printed image
Photo
Map
Text/Photo
Text
Printed image
Photo
Map
05-1688
05-1689
05-1690
05-1691
05-1692
05-1698
05-1699
05-1700
05-1701
05-1702
Recommended value
Set a value smaller than 128.
Acceptable
Default
value range
0 to 255
128
* The value for automatic offsetting adjustment for background processing will be applied, only if the
automatic copy density mode is selected. On the other hand, the value for manual offsetting adjustment for
background processing will be applied, only if the manual copy density mode is selected.
* Set the value in increments of approximately 10, while checking the copy image until the optimum value is
obtained.
* The value for the code corresponding to the original mode (Text/Photo, Text, or Printed image) will affect
the copy image quality in the Full color mode and the Auto color mode.
* The value adjusted for the background density is shared in the Full color mode with the Printed image
mode selected and in the Black mode with the Photo mode selected. Therefore, adjusting the copy image
quality in either of the modes affects that in the other mode. Perform copy image quality adjustment in the
mode that is used for the adjustment, while checking that in the other mode.
2.7
e-STUDIO2500c/3500c/3510c
2. Copier-specific Adjustments
<Note>
"Making the highlighted area more visible (or increasing the background density)" and
"eliminating the background color (or decreasing the background density)" are mutually
contradictory. If the density of the background color is decreased, the highlighted area may
become less visible.
After adjusting the background density, copy and check the copy image quality.
If further image quality adjustments are still necessary, use the next procedure.
(3) Press the [BASIC] button on the Control Panel. Select "TEXT" from among the original mode options.
* To have "TEXT" selected from among the original mode options by default, refer to procedure (1) in 2.8
To Eliminate Moiré.
Precautions after the completion of the adjustment
The adjustment may possibly cause the highlighted area to become less visible on the copy. Therefore, carefully
perform the adjustment, while checking the copy image.
Remarks
Enter a value within the recommended value range mentioned in the procedures. Otherwise, it may cause a loss
in MFP performance, including degradation in the image quality.
e-STUDIO2500c/3500c/3510c
2.7
2. Copier-specific Adjustments
2.8 To Eliminate Moiré
Before the adjustment
Moiré occurs on the photo image.
After the adjustment
Moiré is eliminated and a clear copy image is
obtained.
Explanation
When an original containing photo images or gradational images (halftones) is copied, moiré sometimes occurs
on the copy. Perform adjustment regarding image processing (sharpness intensity), in order to obtain a clear
copy image, while eliminating moiré.
Procedures
* You can start with any of the procedures. But it is recommended to perform the procedures in order, as listed
below. You can use one procedure in conjunction with another. But if this changes the image quality more
than required or loses the effectiveness of the adjustment, restore the settings made in the previously used
procedure to the original ones. Then use other procedures.
* Both the service technician and the user can use procedures (1) and (2).
* Only the service technician must use procedure (3).
2.8
e-STUDIO2500c/3500c/3510c
2. Copier-specific Adjustments
(1) Press the [BASIC] button on the Control Panel and select the original mode option, as follows:
• To copy in the Full color or the Auto color mode:
Select the Printed image mode option.
• To copy in the Black mode:
Select the Photo mode option.
* To have the above original mode options selected by default, use the following procedures:
To change the default original mode on the Control Panel
Use steps (a) to (d) to change default original mode.
(a) Press the [USER FUNCTIONS] button on the Control Panel to enter the "User Functions" menu.
(b) Press the [USER] button.
(c) Press the [COPY] button.
(d) In the "ORIGINAL MODE FOR COLOR" or "BLACK" option, press the button corresponding to
the desired original mode option.
To change the default original mode in setting mode [08]
Enter setting mode [08]. Change the value for code [550] or [585] to change the original mode option,
which is selected by default at power-on.
• In the Black mode
Value for 08-550
0
1
2
3
4
Default original mode at power-on
Text/Photo (default)
Photo
Text
Image smoothing
Custom
• In the Full color mode
Value for 08-585
0
1
2
3
4
5
Default original mode at power-on
Text/Photo (default)
Text
Printed image
Photo
Map
Custom
* Press the [BASIC] button on the Control Panel. Select "Custom" from among the original mode options in
the Black or the Full color mode.
If the [CUSTOM] button is not displayed in the original mode option, change the values for the following
codes to enable the "Custom" mode option.
In the Black mode:
Enter setting mode [08]. Set "1" for code [508].
In the Full color mode:
Enter setting mode [08]. Set "1" for code [506].
After changing the default original mode option, copy and check the copy image quality.
If further image quality adjustments are still necessary, use the next procedure.
e-STUDIO2500c/3500c/3510c
2.8
2. Copier-specific Adjustments
(2) Press the [IMAGE] button on the Control Panel. Press the [SHARPNESS] button.
Press the [SOFT] button to soften the copy image.
After softening the copy image, copy and check the copy image quality.
With the sharpness intensity set to the minimum (softest), if further image quality adjustments are still
necessary, the service technician must use the next procedure.
(3) Enter adjustment mode [05]. Change the values for codes [604/605], [1737 to 1741] and [1757] to adjust
the sharpness intensity.
* Decreasing the sharpness intensity will minimize moiré.
Color mode
Black
Full color
Auto color
Original mode [05] code
Text/Photo
Text
Text/Photo
Text
Printed image
Photo
Map
Text/Photo
05-604
05-605
05-1737
05-1738
05-1739
05-1740
05-1741
05-1757
Recommended value
Acceptable
value range
Default
Set a value smaller than 128.
0 to 255
128
Set a value smaller than 128.
0 to 255
128
Set a value smaller than 128.
0 to 255
128
* Setting "0" provides the softest image, while setting "255" provides the sharpest image.
Changing the values for these codes will change the sharpness intensity, when the "Sharpness" indicator in
the "IMAGE" menu is set to the center. Remember that 1 step of the indicator will increase or decrease the
sharpness intensity by 25. If the sharpness intensity of the center value is changed, each step of the indicator
will be changed accordingly. (For instance, if the center value is decreased by 25 (softer), the value of each
step of the indicator will also be decreased by 25 (softer).)
* The value adjusted for the sharpness intensity is shared in the Full color mode with the Printed image
mode selected and in the Black mode with the Photo mode selected. Therefore, adjusting the copy image
quality in either of the modes affects that in the other mode. Perform copy image quality adjustment in the
mode that is used for the adjustment, while checking that in the other mode.
<Note>
"Minimizing moiré" and "Sharpening the copy image" are mutually contradictory. When the
adjustment is performed to minimize moiré, the resolution of the copy image may decrease.
2.8
e-STUDIO2500c/3500c/3510c
2. Copier-specific Adjustments
Precautions after the completion of the adjustment
Nothing in particular.
Remarks
• Enter a value within the recommended value range mentioned in the procedures. Otherwise, it may cause a
loss in MFP performance, including degradation in the image quality.
• Procedures (2) and (3) provide the same adjustment effect. However, procedure (3) allows more flexible
adjustment.
e-STUDIO2500c/3500c/3510c
2.8
2. Copier-specific Adjustments
2.9 To Copy Sharply (To enhance sharpness)
Before the adjustment
The image looks light and blurred on the copy.
After the adjustment
The edges are enhanced and the copy image
becomes sharper.
Explanation
Perform adjustment regarding image processing (sharpness intensity), in order to obtain a sharper copy image,
when a light or blurred original is copied.
Procedures
* You can start with any of the procedures. But it is recommended to perform the procedures in order, as listed
below. You can use one procedure in conjunction with another. But if this changes the image quality more
than required or loses the effectiveness of the adjustment, restore the settings made in the previously used
procedure to the original ones. Then use other procedures.
* Both the service technician and the user can use procedures (1) and (2).
* Only the service technician must use procedure (3).
(1) Press the [IMAGE] button on the Control Panel. Press the [ONE TOUCH ADJUSTMENT] button.
Press the [CLEAR] button.
After selecting the "Clear" option, copy and check the copy image quality.
When the copy image quality with the "Clear" option selected is insufficient, cancel the "Clear" option and
use the next procedure.
(The one-touch adjustment can be canceled by pressing the [ONE TOUCH ADJUSTMENT] button again.)
(2) Press the [IMAGE] button on the Control Panel. Press the [SHARPNESS] button.
Press the [SHARP] button to increase the sharpness intensity.
After increasing the sharpness intensity, copy and check the copy image quality.
With the sharpness intensity set to the maximum (sharpest), if further image quality adjustments are still
necessary, the service technician must use the next procedure.
2.9
e-STUDIO2500c/3500c/3510c
2. Copier-specific Adjustments
(3) Enter adjustment mode [05]. Change the values for codes [604/605], [1737 to 1741] and [1757] to adjust
the sharpness intensity.
* Increasing the sharpness intensity will enhance the edges of the image.
Color mode
Black
Full color
Auto color
Original mode [05] code
Text/Photo
Text
Text/Photo
Text
Printed image
Photo
Map
Text/Photo
05-604
05-605
05-1737
05-1738
05-1739
05-1740
05-1741
05-1757
Recommended value
Acceptable
value range
Default
Set a value larger than 128.
0 to 255
128
Set a value larger than 128.
0 to 255
128
Set a value larger than 128.
0 to 255
128
* Setting "0" provides the softest image, while setting "255" provides the sharpest image.
Changing the values for these codes will change the sharpness intensity, when the "Sharpness" indicator in
the "IMAGE" menu is set to the center. Remember that 1 step of the indicator will increase or decrease the
sharpness intensity by 25. If the sharpness intensity of the center value is changed, each step of the indicator
will be changed accordingly. (For instance, if the center value is increased by 25 (sharper), the value of each
step of the indicator will also be increased by 25 (sharper).)
* The value adjusted for the sharpness intensity is shared in the Full color mode with the Printed image
mode selected and in the Black mode with the Photo mode selected. Therefore, adjusting the copy image
quality in either of the modes affects that in the other mode. Perform copy image quality adjustment in the
mode that is used for the adjustment, while checking that in the other mode.
<Note>
"Sharpening the copy image" and "Minimizing moiré" are mutually contradictory. When an
adjustment is performed to sharpen the copy image, moiré may occur.
Precautions after the completion of the adjustment
Nothing in particular.
Remarks
• Enter a value within the recommended value range mentioned in the procedures. Otherwise, it may cause a
loss in copier performance, including degradation in the image quality.
• Procedures (2) and (3) provide the same adjustment effect. However, procedure (3) allows more flexible
adjustment.
e-STUDIO2500c/3500c/3510c
2.9
2. Copier-specific Adjustments
2.10 To Make Photo Edges Look Softer
Before the adjustment
The edges (contours) of the image are highly
visible.
After the adjustment
The edges look soft.
Explanation
When a photo image is copied, the contours or edges of the image sometimes become highly visible on the copy.
Perform adjustment regarding image processing (sharpness intensity), in order to soften the edges of the image.
Procedures
* You can start with any of the procedures. But it is recommended to perform the procedures in order, as listed
below. You can use one procedure in conjunction with another. But if this changes the image quality more
than required or loses the effectiveness of the adjustment, restore the settings made in the previously used
procedure to the original ones. Then use other procedures.
* Both the service technician and the user can use procedures (1) and (2).
* Only the service technician must use procedures (3) to (6).
2.10
e-STUDIO2500c/3500c/3510c
2. Copier-specific Adjustments
2.
(1) Press the [BASIC] button on the Control Panel and select the original mode option, as follows:
• To copy in the Full color or the Auto color mode: Select the Printed image mode option.
• To copy in the Black mode:
Select the Photo mode option.
* When copying a photo image in the Full color mode, select the Photo mode option from among the
original mode options.
* To have the above original mode options selected by default, refer to procedure (1) in 2.8 To Eliminate
Moiré.
After changing the default original mode option, copy and check the copy image quality.
If further image quality adjustments are still necessary, use the next procedure.
(2) Press the [IMAGE] button on the Control Panel. Press the [SHARPNESS] button.
Press the [SOFT] button to soften the copy image.
After softening the copy image, copy and check the copy image quality.
With the sharpness intensity set to the minimum (softest), if further image quality adjustments are still
necessary, the service technician must use the next procedure.
(3) Press the [BASIC] button on the Control Panel. Select "Custom" from among the original mode options in
the Full color mode.
* If the [CUSTOM] button is not displayed in the original mode option in the Full color mode, enter setting
mode [08] and set "1" for code [506] to enable the "Custom" mode option in the Full color mode.
* To have "Custom" selected from among the original mode options by default, refer to procedure (1) in 2.8
To Eliminate Moiré.
After changing the default original mode option, copy and check the copy image quality.
If further image quality adjustments are still necessary, use the next procedure.
e-STUDIO2500c/3500c/3510c
2.10
2.8
2. Copier-specific Adjustments
(4) Enter adjustment mode [05]. Change the values for codes [604/605], [1737 to 1741] and [1757] to adjust
the sharpness intensity.
* Decreasing the sharpness intensity will minimize the edges of the image.
Color mode
Black
Full color
Auto color
Original mode [05] code
Text/Photo
Text
Text/Photo
Text
Printed image
Photo
Map
Text/Photo
05-604
05-605
05-1737
05-1738
05-1739
05-1740
05-1741
05-1757
Recommended value
Acceptable
value range
Default
Set a value smaller than 128.
0 to 255
128
Set a value smaller than 128.
0 to 255
128
Set a value smaller than 128.
0 to 255
128
* Setting "0" provides the softest image, while setting "255" provides the sharpest image.
Changing the values for these codes will change the sharpness intensity, when the "Sharpness" indicator in
the "IMAGE" menu is set to the center. Remember that 1 step of the indicator will increase or decrease the
sharpness intensity by 25. If the sharpness intensity of the center value is changed, each step of the indicator
will be changed accordingly. (For instance, if the center value is decreased by 25 (softer), the value of each
step of the indicator will also be decreased by 25 (softer).)
* The value adjusted for the sharpness intensity is shared in the Full color mode with the Printed image
mode selected and in the Black mode with the Photo mode selected. Therefore, adjusting the copy image
quality in either of the modes affects that in the other mode. Perform copy image quality adjustment in the
mode that is used for the adjustment, while checking that in the other mode.
<Note>
"Minimizing the edges of the copy image" and "Sharpening the copy image" are mutually
contradictory. When the adjustment is performed to minimize the edges, the resolution of the
copy image may decrease.
After decreasing the sharpness intensity, copy and check the copy image quality.
If further image quality adjustments are still necessary, use the next procedure.
(5) Enter adjustment mode [05]. Change the values for codes [1630 to 1633] to adjust the maximum color
density of text.
Color to adjust
[05] code
Y
(Yellow)
M
(Magenta)
C
(Cyan)
K
(Black)
Recommended value
Acceptable
Default
value range
05-1630
05-1631
Set a value larger than 5 to
increase the density.
0 to 10
05-1632
5
Set a value smaller than 5 to
decrease the density.
05-1633
* Set the value in increment of 1, while checking the copy image until the optimum value is obtained.
After adjusting the maximum color density of the text, copy and check the copy image quality.
If further image quality adjustments are still necessary, use the next procedure.
2.10
e-STUDIO2500c/3500c/3510c
2. Copier-specific Adjustments
(6) Enter adjustment mode [05]. Change the value for code [1725] to adjust the level of reproducibility in
Text/Photo mode.
Color mode
[05] code
Recommended value
Full color
05-1725
Set a value smaller than 3.
Acceptable
value range
0 to 5
Default
0
* Set the value in increment of 1, while checking the copy image until the optimum value is obtained.
First, set "3" for this code and check the copy image. If further image quality improvements are still
necessary, set "2." If even further improvements are still necessary, set "1" for this code.
* Remember that if a value larger than "3" is set, the edges of the image are enhanced (attaching importance
to the reproducibility of text). The table below shows you the correlation between the value and image
quality.
Value
0
1
2
3
4
5
Advantage of image quality
Default
Intended to improve the reproducibility of photos
more than the one obtained when "2" is set.
Intended to improve the reproducibility of photos
more than the one obtained when "3" is set.
Equivalent to the one obtained when the default
value ("0") is set.
Intended to improve the reproducibility of text more
than the one obtained when "3" is set.
Intended to improve the reproducibility of text more
than the one obtained when "4" is set.
Reproducibility of edges
Intermediate
Soft
↓
Intermediate
↓
Sharp
Precautions after the completion of the adjustment
When an original containing text is copied, the adjustment may possibly cause the text to become blurred on the
copy. Therefore, carefully perform the adjustment, while checking the copy image.
Remarks
• Enter a value within the recommended value range mentioned in the procedures. Otherwise, it may cause a
loss in MFP performance, including degradation in the image quality.
• Procedures (2) and (4) provide the same adjustment effect. However, procedure (3) allows more flexible
adjustment.
e-STUDIO2500c/3500c/3510c
2.10
2. Copier-specific Adjustments
2.11 To Make Solid Filled Bold Text (Logo) Highly Colored
Before the adjustment
The solid filled graph is not highly colored
enough.
After the adjustment
The solid filled graph becomes highly colored
and sharper.
Explanation
Solid filled bold text, such as a logo, is sometimes not highly colored on the copy. Change the original mode option,
perform copy density adjustment and level adjustment for black headline text, in order to make the solid filled
image more highly colored.
* This adjustment will have an effect only on copying in the Full color mode.
Procedures
* The procedure to use varies, depending on whether to adjust the copy image quality of a black or colored logo.
Refer to the procedure corresponding to the user’s particular request.
2.11
e-STUDIO2500c/3500c/3510c
2. Copier-specific Adjustments
2.11.1 To Adjust the Copy Image Quality of a Black Logo
* You can start with any of the procedures. But it is recommended to perform the procedures in order, as listed
below. You can use one procedure in conjunction with another. But if this changes the image quality more
than required or loses the effectiveness of the adjustment, restore the settings made in the previously used
procedure to the original ones. Then use other procedures.
* Only the service technician must use procedures (1), (2), and (5).
* Both the service technician and the user can use procedures (3) and (4).
(1) Make sure that the color of the solid filled logo is not printed out of registration. If it is, perform color
registration control.
* For further information regarding the adjustment procedures, refer to 1.5. To Correct Out-of-Registration
Colors or the Service Manual.
After correcting out-of-registration colors, copy and check the copy image quality.
If further image quality adjustments are still necessary, use the next procedure.
(2) Enter adjustment mode [05]. Change the values for codes [7811/7812] or [7827/7828] to adjust the level of
black headline text.
Color mode
Full color
Auto color
Original mode
[05] code
Text/Photo
Text
Text/Photo
Text
05-7811
05-7812
05-7827
05-7828
Recommended value
Acceptable
value range
Default
Set a value larger than 4.
0 to 8
0
Set a value larger than 4.
0 to 8
0
* Set the value in increments of approximately 1, while checking the copy image until the optimum value is
obtained.
After adjusting the level of black headline text, copy and check the copy image quality.
If further image quality adjustments are still necessary, use the next procedure.
(3) Perform color balance adjustment to enhance black.
• Use steps (a) through (d) to perform the adjustment.
(a) Press the [IMAGE] button on the Control Panel.
(b)Press the [COLOR BALANCE] button.
(c) Press the [+] button to enhance the tint of [BLACK].
* Press the [DETAIL] button. The tint of the color can be adjusted according to the density area
(low-, medium- or high-density area).
(d) Press the [ENTER] button.
After adjusting the tint of black, copy and check the copy image quality.
With the tint of black set to the maximum, if further image quality adjustments are still necessary, use the
next procedure.
e-STUDIO2500c/3500c/3510c
2.11
2. Copier-specific Adjustments
(4) Press the [BASIC] button on the Control Panel. Select "TEXT" from among the original mode options.
* To have "TEXT" selected from among the original mode options by default, refer to procedure (1) in 2.8
To Eliminate Moiré.
After selecting the Text mode, copy and check the copy image quality.
If further image quality adjustments are still necessary, the service technician must use the next procedure.
(5) Enter adjustment mode [05]. Change the value for code [1795] to adjust the black density.
Color to
Acceptable
Original mode [05] code Subcode Recommended value
Default
adjust
value range
K
Text
05-1795
0/1/2
Set a value larger than 128.
0 to 255
128
(Black)
* Set the value in increments of approximately 10, while checking the copy image until the optimum value is
obtained.
* The subcode varies according to the area where the density is adjusted. Refer to the table below and set
the subcode for the area to be adjusted.
Subcode
Area where the density is adjusted
0
Low-density area
1
Medium-density area
2
High-density area
Precautions after the completion of the adjustment
The adjustment may possibly cause the highly or deeply colored area, such as in a photo, to become blurred on
the copy. Also, it may also cause offset failure, grained images and degradation in gradation. Therefore,
carefully perform the adjustment, while checking the copy image.
2.11
e-STUDIO2500c/3500c/3510c
2. Copier-specific Adjustments
2.11.2 To Adjust the Copy Image Quality of a Colored Logo
* You can start with any of the procedures. But it is recommended to perform the procedures in order, as listed
below. You can use one procedure in conjunction with another. But if this changes the image quality more
than required or loses the effectiveness of the adjustment, restore the settings made in the previously used
procedure to the original ones. Then use other procedures.
* Both the service technician and the user can use procedures (1) to (3).
* Only the service technician must use procedure (4).
(1) Press the [BASIC] button on the Control Panel. Press the [
] button to increase the copy density.
After increasing the copy density, copy and check the copy image quality.
With the copy density set to the maximum, if further image quality adjustments are still necessary, use the
next procedure.
(2) Perform color balance adjustment or RGB adjustment to adjust the tint of the colors in general.
• Use steps (a) through (d) to perform the adjustment.
(a) Press the [IMAGE] button on the Control Panel.
(b)Press the [COLOR BALANCE] button to adjust the color balance by changing the amount of toner
(c) Press the [+] button to enhance the tint of the color or the [-] button to decrease it.
* After selecting the color balance by changing the amount of toner (C, M, Y and K), press the
[DETAIL] button. The tint of the color can be adjusted according to density area (low-, mediumor high-density area).
(d) Press the [ENTER] button.
After adjusting the tint of the colors, copy and check the copy image quality.
If further image quality adjustments are still necessary, use the next procedure.
(3) Press the [BASIC] button on the Control Panel. Select "TEXT" or "MAP" from among the original mode
options.
* To have "TEXT" or "MAP" selected from among the original mode options by default, refer to procedure
(1) in 2.8 To Eliminate Moiré.
After selecting the Text or Map mode, copy and check the copy image quality.
If further image quality adjustments are still necessary, the service technician must use the next procedure.
e-STUDIO2500c/3500c/3510c
2.11
2. Copier-specific Adjustments
(4) Enter adjustment mode [05]. Change the values for codes [1780/1785/1790/1795] or [1783/1788/1793/1798]
to adjust the color density.
Color to
Original mode
adjust
Y
Text
(Yellow)
Map
M
Text
(Magenta)
Map
C
Text
(Cyan)
Map
K
Text
(Black)
Map
[05] code Subcode
05-1780
05-1783
05-1785
05-1788
05-1790
05-1793
05-1795
05-1798
0/1/2
0/1/2
0/1/2
0/1/2
0/1/2
0/1/2
0/1/2
0/1/2
Recommended value
Set a value larger than 128.
Acceptable
Default
value range
0 to 255
128
* Set the value in increments of approximately 10, while checking the copy image until the optimum value
is obtained.
* The subcode varies according to the area where the density is adjusted. Refer to the table below and set
the subcode for the area to be adjusted.
Subcode
Area where the density is adjusted
0
Low-density area
1
Medium-density area
2
High-density area
Precautions after the completion of the adjustment
The adjustment may possibly cause a dark-colored area, such as in a photo, to become blurred on the copy. Also,
it may also cause offset failure, grained images and degradation in gradation. Therefore, carefully perform the
adjustment, while checking the copy image.
2.11
e-STUDIO2500c/3500c/3510c
2. Copier-specific Adjustments
2.12 To Sharply Contrast the Hues of Highlighters on the Copy
Before the adjustment
After the adjustment
Copy
The hues of highlighters are not accurately
reproduced. The areas marked with 2 different
colored highlighters are reproduced in the
same hue. They are indistinguishable.
Copy
The areas marked with 2 different colored
highlighters are accurately reproduced
and distinguishable on the copy.
Explanation
When an original containing text or areas marked with highlighters is copied, their hues may sometimes not be
accurately reproduced on the copy. The inks of highlighters are special. Therefore, their hues cannot be accurately
reproduced. To reproduce the hues of similar highlighters, such as yellow and green, while producing sharp
contrasts on the copy, perform color adjustment (color balance adjustment or RGB adjustment) and color density
adjustment. Also, the e-STUDIO2500c/3500c/3510c offers the "ONE TOUCH ADJUSTMENT" option to allow
the setting specifically for reproducing text or areas marked with highlighters.
e-STUDIO2500c/3500c/3510c
2.12
2. Copier-specific Adjustments
Procedures
* You can start with any of the procedures. But it is recommended to perform the procedures in order, as listed
below. You can use one procedure in conjunction with another. But if this changes the image quality more
than required or loses the effectiveness of the adjustment, restore the settings made in the previously used
procedure to the original ones. Then use other procedures.
* Both the service technician and the user can use procedures (1) and (3).
* Only the service technician must use procedures (2) and (4).
(1) Press the [IMAGE] button on the Control Panel. Press the [ONE TOUCH ADJUSTMENT] button.
Press the [MARKER] button.
After selecting the "Marker" option, copy and check the copy image quality.
When the copy image quality with the "Marker" option is insufficient, cancel the "Marker" option and use
the next procedure.
(The one-touch adjustment can be canceled by pressing the [ONE TOUCH ADJUSTMENT] button again.)
(2) Enter adjustment mode [05]. Change the value for code [1769] to adjust the tint of colors in Marker mode.
[05] code
Subcode
Acceptable value range
Default
05-1769
0 to 5
0 to 6
3
* Set the value in increments of approximately 1, while checking the copy image until the optimum value is
obtained.
* The subcode varies according to the color where the adjustment is performed. Refer to the table below and
set the subcode for the color to be adjusted.
Subcode
Color to adjust
0
Y (Yellow)
1
M (Magenta)
2
C (Cyan)
3
R (Red)
4
G (Green)
5
B (Blue)
* Setting a value larger than the default value moves the hue of the color selected to [+] as shown below. On
the other hand, setting a value smaller than the default value moves it to [-].
(For instance, set 6 for R (Red). Then the tint of the red is closely matched with that of Y (Yellow). Set 0
for R (Red). Then the tint of the red will be closely matched with that of M (Magenta).
After adjusting the hue, copy and check the copy image quality.
If further image quality adjustments are still necessary, use the next procedure.
2.12
e-STUDIO2500c/3500c/3510c
2. Copier-specific Adjustments
(3) Perform color balance adjustment or RGB adjustment to adjust the tint of the colors in general.
* For further information regarding the adjustment procedures, refer to procedure (4) in 2.2 To Closely Match
the Color Balance of the Original.
After adjusting the tint of colors, copy and check the copy image quality.
If further image quality adjustments are still necessary, the service technician must use the next procedure.
(4) Enter adjustment mode [05]. Change the values for codes [1779 to 1798] to adjust the color density.
Color to
Acceptable
Original mode [05] code Subcode Recommended value
Default
adjust
value range
Text/Photo
05-1779
0/1/2
Text
05-1780
0/1/2
Y
Printed image
05-1781
0/1/2
(Yellow)
Photo
05-1782
0/1/2
Map
05-1783
0/1/2
Text/Photo
05-1784
0/1/2
Text
05-1785
0/1/2
M
Printed image
05-1786
0/1/2
(Magenta)
Set a value larger than 128
Photo
05-1787
0/1/2
to increase the density.
Map
05-1788
0/1/2
0 to 255
128
Text/Photo
05-1789
0/1/2
Set a value smaller than 128
Text
05-1790
0/1/2
to decrease the density.
C
Printed
image
05-1791
0/1/2
(Cyan)
Photo
05-1792
0/1/2
Map
05-1793
0/1/2
Text/Photo
05-1794
0/1/2
Text
05-1795
0/1/2
K
Printed image
05-1796
0/1/2
(Black)
Photo
05-1797
0/1/2
Map
05-1798
0/1/2
* Set the value in increments of approximately 10, while checking the copy image until the optimum value is
obtained.
* The value for the code corresponding to the original mode (Text/Photo, Text, or Printed image) will affect
the copy image quality in the Full color mode and the Auto color mode.
* The subcode varies according to the area where the density is adjusted. Refer to the table below and set
the subcode for the area to be adjusted.
Subcode
Area where the density is adjusted
0
Low-density area
1
Medium-density area
2
High-density area
Precautions after the completion of the adjustment
The adjustment may possibly vary the hues of areas (including photo images and text) other than those marked
with highlighters. Therefore, carefully perform the adjustment, while checking the copy image.
Remarks
Enter a value within the recommended value range mentioned in the procedures. Otherwise, it may cause a loss
in MFP performance, including degradation in the image quality.
e-STUDIO2500c/3500c/3510c
2.12
2. Copier-specific Adjustments
2.13 To Obtain a Good Color Balance on Thick Paper
Before the adjustment
The copy image looks light on thick paper.
After the adjustment
The copy image looks darker and sharper even
on thick paper.
Explanation
When a copy is made on thick paper in the thick paper mode, the copy image sometimes looks light. In the thick
paper mode, the amount of toner used is reduced in advance, in order to avoid a toner fixing problem. Adjust the
amount of toner used, while checking the toner fixing, in order to obtain a dark and sharp copy image on thick paper.
Procedures
* You can start with any of the procedures. But it is recommended to perform the procedures in order, as listed
below. You can use one procedure in conjunction with another. But if this changes the image quality more
than required or loses the effectiveness of the adjustment, restore the settings made in the previously used
procedure to the original ones. Then use other procedures.
* Only the service technician must use procedures (1) and (3).
* Both the service technician and the user can use procedure (2).
2.13
e-STUDIO2500c/3500c/3510c
2. Copier-specific Adjustments
(1) Enter adjustment mode [05]. Change the values for codes [1613 to 1618] to adjust the amount of toner used.
• The code to use varies according to the paper type. Adjust the value for [05] code corresponding to the
paper type for which you would like to improve the image quality and increase the value to obtain the copy
density that the user desires.
Paper type
[05] code
Recommended value
Thick 1
Thick 2
Thick 3
OHP
SPECIAL 1
SPECIAL 2
05-1613
05-1614
05-1615
05-1616
05-1617
05-1618
Set a value larger than 252.
Set a value larger than 252.
Set a value larger than 252.
Set a value larger than 240.
Set a value larger than 252.
Set a value larger than 252.
Acceptable
value range
Default
0 to 255
252
252
252
240
252
252
* Set the value in increments of approximately 4, while checking the copy image until the optimum value is
obtained.
* The table below shows you the acceptable paper weight for the paper type.
Paper type
Acceptable paper weight
Thick 1
106 to 163 g/m²
Max. 60 lb. Cover
Thick 2
164 to 209 g/m²
Max. 110 lb. Index
Thick 3
210 to 256 g/m²
Max. 140 lb. Index
* Use the recommended OHP transparencies and special paper.
After adjusting the amount of toner used, copy and check the copy image quality.
If further image quality adjustments are still necessary, the service technician must use the next procedure.
(2) Perform color balance adjustment or RGB adjustment to adjust the tint of the colors in general.
* For further information regarding the adjustment procedures, refer to procedure (4) in 2.2 To Closely
Match the Color Balance of the Original.
After adjusting the tint of colors, copy and check the copy image quality.
If further image quality adjustments are still necessary, use the next procedure.
e-STUDIO2500c/3500c/3510c
2.13
2. Copier-specific Adjustments
(3) Enter adjustment mode [05]. Change the values for codes [1779 to 1798] to adjust the color density.
Color to
Acceptable
Original mode [05] code Subcode Recommended value
Default
adjust
value range
Text/Photo
05-1779
0/1/2
Text
05-1780
0/1/2
Y
Printed image
05-1781
0/1/2
(Yellow)
Photo
05-1782
0/1/2
Map
05-1783
0/1/2
Text/Photo
05-1784
0/1/2
Text
05-1785
0/1/2
M
Printed image
05-1786
0/1/2
(Magenta)
Set a value larger than 128
Photo
05-1787
0/1/2
to increase the density.
Map
05-1788
0/1/2
0 to 255
128
Text/Photo
05-1789
0/1/2
Set a value smaller than 128
Text
05-1790
0/1/2
to decrease the density.
C
Printed
image
05-1791
0/1/2
(Cyan)
Photo
05-1792
0/1/2
Map
05-1793
0/1/2
Text/Photo
05-1794
0/1/2
Text
05-1795
0/1/2
K
Printed image
05-1796
0/1/2
(Black)
Photo
05-1797
0/1/2
Map
05-1798
0/1/2
* Set the value in increments of approximately 10, while checking the copy image until the optimum value is
obtained.
* The value for the code corresponding to the original mode (Text/Photo, Text, or Printed image) will affect
the copy image quality in the Full color mode and the Auto color mode.
* The subcode varies according to the area where the density is adjusted. Refer to the table below and set
the subcode for the area to be adjusted.
Subcode
Area where the density is adjusted
0
Low-density area
1
Medium-density area
2
High-density area
2.13
e-STUDIO2500c/3500c/3510c
2. Copier-specific Adjustments
Precautions after the completion of the adjustment
Nothing in particular.
Remarks
• Enter a value within the recommended value range mentioned in the procedures. Otherwise, it may cause a
loss in MFP performance, including degradation in the image quality and a reduction in the life of the
consumables
• If the adjustment causes a toner fixing problem, decrease the values for codes 05-1613 to 1618.
e-STUDIO2500c/3500c/3510c
2.13
2. Copier-specific Adjustments
2.14 To Obtain Smooth Gray-Scale Photo Images
Before the adjustment
Halftones are not accurately reproduced.
After the adjustment
Halftones are reproduced better.
Explanation
When a photo image or gradational image is copied in the Black mode with the Text/Photo mode selected,
halftones are not accurately reproduced. Select the Photo mode or the Image smoothing mode from among the
original mode options, in order to reproduce halftones better in the Black mode.
2.14
e-STUDIO2500c/3500c/3510c
2. Copier-specific Adjustments
Procedures
* Both the service technician and the user can perform all adjustments.
(1) Press the [BASIC] button on the Control Panel. Select "PHOTO" from among the original mode options.
* To have "PHOTO" selected from among the original mode options by default, refer to procedure (1) in 2.8
To Eliminate Moiré.
After selecting the Photo mode, copy and check the copy image quality.
If further image quality adjustments are still necessary, use the next procedure.
(2) Press the [BASIC] button on the Control Panel. Select "IMAGE SMOOTHING" from among the original
mode options.
* To have "IMAGE SMOOTHING" selected from among the original mode options by default, refer to
procedure (1) in 2.8 To Eliminate Moiré.
Precautions after the completion of the adjustment
Nothing in particular.
Remarks
When "PHOTO" or "IMAGE SMOOTHING" is selected from among the original mode options, image processing
is performed to give a higher priority to the accurate reproducibility of halftones. As a result, the copying speed
will be slowed down, compared to other modes.
e-STUDIO2500c/3500c/3510c
2.14
2. Copier-specific Adjustments
2.15 To Change the Threshold in Auto Color Mode
(To change the threshold between the Full Color mode and the Black mode to meet the user’s needs)
Original
Copied in the Auto color mode
Before the adjustment
It is copied in the Full color mode.
After the adjustment
Changing the threshold value will allow a
colored original to be copied in the Black
mode.
Explanation
When the Auto color mode is selected, it will be automatically determined whether an original is colored or
black-and-white. Then it will be copied in the Full color mode or the Black mode. But adjust the threshold
value, in order to change the threshold between the Black mode and the Full color mode and suit the preferences
of the user.
2.15
e-STUDIO2500c/3500c/3510c
2. Copier-specific Adjustments
Procedures
* You can start with any of the procedures. But it is recommended to perform the procedures in order, as listed
below. You can use one procedure in conjunction with another. But if this changes the image quality more
than required or loses the effectiveness of the adjustment, restore the settings made in the previously used
procedure to the original ones. Then use other procedures.
* Both the service technician and the user can use procedure (1).
* Only the service technician must use procedure (2).
(1) Press the [BASIC] button on the Control Panel. Press the [ZOOM] button. Specify an original size and a
copy size.
* When a non-standard sized original is copied, an area outside the original (or the original cover) may also
be scanned. This may prevent the original size from being accurately detected. If the original size is
specified in the reduction and enlargement copying functions beforehand, the area outside the original will
no longer be scanned. As a result, the original size will be accurately detected. Also, clean the original
cover, if it is soiled. Otherwise, the type of original cannot be accurately detected.
After specifying the original size and copy size, copy and check the copy image quality.
If further image quality adjustments are still necessary, the service technician must use the next procedure.
(2) Enter adjustment mode [05]. Change the values for codes [1675/1676] to adjust the threshold value in the
Auto color mode.
* As the set value is increased, the original will be more likely to be recognized as black-and-white. On the
other hand, if the value is decreased, it will be more likely to be recognized as full color.
Acceptable
Threshold to adjust
[05] code
Default
value range
Threshold when an original is manually
05-1675
0 to 255
70
placed on the original glass
Threshold when an original is placed on the
original glass from the RADF (MR-3018)
05-1676
0 to 255
70
* Set the value in increments of approximately 30, while checking the copy image until the optimum value is
obtained.
Precautions after the completion of the adjustment
• When a non-standard sized original is copied, an area outside the original (or the original cover) may also be
scanned. This may prevent the original size from being accurately detected. If the original cover is soiled, the
type of original cannot be accurately detected. Therefore, instruct the users to clean the original cover on a
routine basis (once a week).
• After the threshold in the Auto color mode is adjusted, based on a particular type of original, other types of
original may not be correctly detected. Therefore, carefully perform the adjustment, while checking whether
any type of original is correctly detected.
e-STUDIO2500c/3500c/3510c
2.15
2. Copier-specific Adjustments
2.16 To Adjust the Twin-Color Copy Image Quality
Before the adjustment
After the adjustment
When a twin-color copy is made in the red
and black mode, red is blended into a part
of the black area.
The blend of undesired colors in the black area
is reduced.
Explanation
When a twin-color copy is made, red may be blended into the black area or colors other than black on the twincolor copy may look different from what the user desires. Adjust the tint of the colors, the reproducibility of
black in the Red and black mode, or the boundary between black and colors other than black, in order to reduce a
blend of undesired colors into the black area or adjust the tint of colors other than black.
Procedures
* The procedure to use varies, depending on whether to adjust the tint of colors other than black, the
reproducibility of black in the Red and black mode, or the boundary between black and colors other than black.
Refer to the procedure corresponding to the user’s particular request.
2.16
e-STUDIO2500c/3500c/3510c
2. Copier-specific Adjustments
2.16.1 To Adjust the Tint of Colors other than Black
* Both the service technician and the user can perform all adjustments.
(1) Press the [IMAGE] button on the Control Panel. Press the [TWIN COLOR COPY] button.
Select the Twin-color copy mode from among the twin color copy mode options.
• To select Red and black mode:
Press the [RED & BLACK] button.
• To select the Twin-color selectable mode:
Use steps (a) through (d) to select the Twin-color selectable mode.
(a) Press the [TWIN COLOR SELECTABLE] button.
(b) Press the [CHANGE BLACK TO] button. Press the button for the desired color.
(c) Press the [SECOND COLOR] button. Press the button for the desired color.
(d) Press the [ENTER] button.
Use procedure (2).
(2) Press the [ADJUST] button. Press the [+] button or the [-] button for the color to be adjusted, in order to
adjust the tint of colors other than black.
• In the Red and black mode:
• Press the [-] button to decrease yellow and the [+] button to enhance magenta, in order to enhance the
tint of red.
• Press the [+] button to enhance yellow and the [-] button to decrease magenta, in order to decrease the
tint of red.
• In the Twin-color selectable mode:
Press the [+] button to enhance the tint of the color or the [-] button to decrease it.
* Press the [DETAIL] button. The tint of the color can be adjusted according to the density area (low-,
medium- or high-density area).
Precautions after the completion of the adjustment
Nothing in particular.
e-STUDIO2500c/3500c/3510c
2.16
2. Copier-specific Adjustments
2.16.2 To Adjust the Reproducibility of Black in the Red and Black Mode
* The service technician must perform all adjustments.
(1) Enter adjustment mode [05]. Set "1" for code [1761] to change the setting, which is intended to improve the
reproducibility of black areas.
* If you are making a twin-color copy in the red and black mode, red may be blended into the black area. In
this case, switching the value for this code reduces a blend of red in the black area on the copy.
Reproducibility of black in the red and black mode
Value for 05-1761
for a twin-color copy
0
Default
1
Intended to improve the reproducibility of black
Precautions after the completion of the adjustment
Setting "1" for code 05-1761 may not provide a clear boundary between red and black. Therefore, carefully
perform the adjustment, while checking the copy image.
2.16
e-STUDIO2500c/3500c/3510c
2. Copier-specific Adjustments
2.16.3 To Adjust the Boundary between Black and Colors other than Black
* Both the service technician and the user can use procedures (1) and (2).
* Only the service technician must use procedure (3).
(1) Press the [IMAGE] button on the Control Panel. Press the [TWIN COLOR COPY] button.
Press the [RED&BLACK] button to enter the Red and black mode.
Use procedure (2).
(2) Press the [ADJUST] button. Press the [Å] button or the [Æ] button for Range Adjustment, in order to
adjust the boundary between red and black.
• [Å] "RED":
The black area decreases and the red area increases.
• [Æ] "BLACK":
The black area increases and the red area decreases.
After adjusting the boundary, copy and check the copy image quality.
If further image quality adjustments are still necessary, the service technician must use the next procedure.
(3) Enter adjustment mode [05]. Change the values for codes [7641/7642] to adjust the boundary between
black and colors other than black.
* As the set value is increased, the area of "CHANGE BLACK TO" will become larger. On the other hand,
if the value is decreased, the area of "SECOND COLOR" will become larger.
Recommended
Mode to adjust
[05] code
Subcode
value
Red and black mode
05-7641
Twin color – Red and black mode
("RED" selected in Twin color selectable
mode)
05-7642
0/1/2
0 to 255
Default
128
* The subcode varies according to the area where the density is adjusted. Refer to the table below and set
the subcode for the area to be adjusted.
Subcode
Area where the density is adjusted
0
High-density area
1
Medium-density area
2
Low-density area
Precautions after the completion of the adjustment
Nothing in particular.
e-STUDIO2500c/3500c/3510c
2.16
2. Copier-specific Adjustments
2.17 To Adjust the Image Quality Scanned from the RADF
Before the adjustment
After the adjustment
To scan an original placed on the original glass
To scan an original placed on the original glass
To scan an original fed from the RADF
To scan an original fed from the RADF
The reproducibility of background may vary,
depending on how to scan an original.
The gap in the reproducibility of background
is reduced.
Explanation
The reproducibility of the background may vary, depending on the type of original, or whether the scanning is of
an original placed on the original glass or one fed from the RADF (MR-3018). Adjust the reproducibility of
background, while scanning an original fed from the RADF, in order to minimize the gap in the reproducibility
of the background, using either method of how to scan an original.
* Before performing this adjustment, make sure that the MFP and RADF are correctly adjusted. Therefore,
perform all the necessary adjustments. Only if further adjustment is still desired for the reproducibility of
background, should this adjustment be performed.
2.17
e-STUDIO2500c/3500c/3510c
2. Copier-specific Adjustments
Procedures
* The service technician must perform all adjustments.
(1) Enter adjustment mode [05]. Change the value for code [361] or [362] to adjust the reproducibility of
background, while scanning an original fed from the RADF.
Color mode
[05] code
Recommended value
Full color
05-361
Set a value larger than 3 to increase the
background density.
Black
05-362
Acceptable
value range
Default
0 to 4
0
Set a value smaller than 2 to decrease the
background density.
* Set the value in increments of approximately 1, while checking the copy image until the optimum value is
obtained. (When changing the value from the default value for the first time, it is recommended to set
"2.")
* The table below shows you the correlation between the value and image quality.
Value
0
1
2
3
4
Reproductivity
of background
Advantage of image quality
Default (equivalent to the one obtained when an original placed on the
original glass is scanned)
Lighter background is reproduced than the one obtained when "2" is
set.
Lighter background is reproduced than the one obtained when the
default value is set.
Darker background is reproduced than the one obtained when the
default value is set.
Darker background is reproduced than the one obtained when "3" is
set.
--Light
↓
↓
Dark
Precautions after the completion of the adjustment
Correctly adjusting the MPF and RADF is a prerequisite to perform this adjustment. Therefore, perform all the
necessary adjustments. Only if further adjustment is still desired for the reproducibility of background, should this
adjustment be performed.
e-STUDIO2500c/3500c/3510c
2.17
3. Printer-specific Adjustments
3.1 To Maintain a Steady Color Balance
Before the adjustment
The color balance varies according to a change
in the environment or a lapse of time.
After the adjustment
The color balance is constantly maintained.
Explanation
The color balance varies according to a change in the environment, replacement of the consumables and so forth.
Periodically adjust the color reproducibility (automatic calibration), in order to constantly maintain a steady
color balance on the printouts.
Automatic calibration is the basic adjustment to accurately reproduce colors on the printouts. When you would
like to accurately reproduce the desired hue or when you have replaced the consumables and changed the
operating conditions, perform automatic calibration to ensure the color reproducibility.
Procedures
* Perform the adjustment in accordance with the procedures below.
* Only the service technician must use procedure (1).
* Both the service technician and the user can use procedure (2).
3.1
e-STUDIO2500c/3500c/3510c
3. Printer-specific Adjustments
PCL6
PS3
Mac
(1) Enter adjustment mode [05]. Select code [396]. Press the [START] button.
• Image quality control will be forcibly performed to correct variations in image contrast.
After exercising image quality control, use the next procedure.
PCL6
PS3
Mac
(2) Perform automatic calibration to correct variations in image density.
* [ADMIN] is selected from among the [CALIBRATION DISPLAY LEVEL] options by default. In other
words, an administrator is authorized to operate automatic calibration. But the [USER] option can also be
selected to allow the user to operate it. Refer to the User Functions Guide for further information
regarding how to select the [CALIBRATION DISPLAY LEVEL] option.
* Use steps (a) through (j) to perform the automatic calibration.
(a) Press the [USER FUNCTIONS] button on the Control Panel to enter the "User Functions" menu.
(b)Press the [ADMIN] button.
(c) Enter an administrator password of 6 to 10 digits. Press the [ENTER] button.
(d) Press the [GENERAL] button.
(e) Press the [CALIBRATION] button.
(f) Press the [PRINT] button.
(g)Press the [CALIBRATION] button to print out the test chart.
(h)Place the printed test chart on the original glass.
(i) Press the [START] button to perform calibration. When the calibration comes to an end, the message
"Scanning and calibrating" will disappear.
(j) The message "Is a result made to reflect?" will appear. Press the [YES] button.
<Hint> During automatic calibration, the automatic image quality control option is also available. This
option is particularly recommended for users who frequently adjust the image quality.
Use steps (a) to (b) to perform automatic image quality control.
(a) Enter setting mode [08]. Set "1" for code [9059].
Image quality control operation during the
Value for 08-9059
automatic calibration
0
OFF (default)
1
ON (with paper selection disabled)
2
ON (with paper selection enabled)
(b) Perform automatic calibration.
* Refer to the above procedure to perform automatic calibration.
* When the [COPY] button or [PRINT] button is pressed after step (f), image quality
control will be automatically performed.
Precautions after the completion of the adjustment
• When image quality control is repeatedly performed, the color balance may slightly vary due to an error even
in the same environment.
• During automatic calibration, when the automatic image quality control option is selected (procedure (2)
<Hint>), the processing time will increase by approximately 30 seconds, when compared to before when the
automatic image quality control option is selected.
e-STUDIO2500c/3500c/3510c
3.1
3. Printer-specific Adjustments
3.2 To Maintain a Steady Color Balance on Thick Paper or Special Paper
Before the adjustment
After the adjustment
Plain paper
Plain paper
Thick paper
Thick paper
The color balance varies according to the
paper type.
The color balance is constantly maintained on
any type of paper.
Explanation
The color balance varies according to a change in the environment, replacement of the consumables and so forth.
The amount of the change varies significantly, according to the paper type. Periodically adjust the color
reproducibility (automatic calibration) corresponding to the paper type, in order to constantly maintain a steady
color balance on any type of paper.
Automatic calibration is the basic adjustment to accurately reproduce colors on the printouts. When you would
like to accurately reproduce the desired hue or when you have replaced the consumables and changed the
operating conditions, perform automatic calibration to ensure the color reproducibility.
Procedures
* Perform the adjustment in accordance with the procedures below.
* Only the service technician must use procedure (1).
* Both the service technician and the user can use procedure (2).
3.2
e-STUDIO2500c/3500c/3510c
3. Printer-specific Adjustments
PCL6
PS3
Mac
(1) Enter setting mode [08]. Set "2" for code [9059].
• During automatic calibration, the paper type can be selected and image quality control will be
automatically performed.
Value for 08-9059
0
1
2
Image quality control operation during the
automatic calibration
OFF (default)
ON (with paper selection disabled)
ON (with paper selection enabled)
After setting the value, use the next procedure.
PCL6
PS3
Mac
(2) Perform automatic calibration to correct variations in image density.
* [ADMIN] is selected from among the [CALIBRATION DISPLAY LEVEL] options by default. In other
words, an administrator is authorized to operate the automatic calibration. But the [USER] option can also
be selected to allow the user to operate it. Refer to the User Functions Guide for further information
regarding how to select the [CALIBRATION DISPLAY LEVEL] option.
* Use steps (a) through (l) to perform the automatic calibration.
(a) Press the [USER FUNCTIONS] button on the Control Panel to enter the "User Functions" menu.
(b)Press the [ADMIN] button.
(c) Enter an administrator password of 6 to 10 digits. Press the [ENTER] button.
(d) Press the [GENERAL] button.
(e) Press the [CALIBRATION] button.
(f) Press the [PRINT] button.
(g) Press the button for the paper type to be corrected.
* After the paper type is selected, image quality control is automatically performed.
(h) Load A4/LT-sized paper selected at step (g).
(i) Press the [CALIBRATION] button to print out the test chart.
(j) Place the printed test chart on the original glass.
(k)Press the [START] button to perform calibration. When the calibration comes to an end, the message
"Scanning and calibrating" will disappear.
(l) The message "Is a result made to reflect?" will appear. Press the [YES] button.
Precautions after the completion of the adjustment
When image quality control is automatically performed during automatic calibration, the processing time will
increase by approximately 30 seconds, when compared to before when the automatic image quality control
option is selected.
e-STUDIO2500c/3500c/3510c
3.2
3. Printer-specific Adjustments
3.3 To Obtain the Desired Color Balance
Before the adjustment
After the adjustment
–
The natural color balance is obtained.
The desired color balance is obtained.
(Ex. Yellowness is enhanced.)
Explanation
If you would like to change the color balance or darkness of the printouts and reproducibility of halftones in
accordance with a type of original or the user’s requirements, change the "Image Quality Type" option on the
printer driver or adjust the color balance.
Procedures
* Perform the adjustment in accordance with the procedures below.
* Both the service technician and the user can use procedures (1) and (2).
* Only the service technician must use procedure (3).
3.3
e-STUDIO2500c/3500c/3510c
3. Printer-specific Adjustments
(1) Change the "Image Quality Type" option on the printer driver.
* This adjustment will be effective, only if a file created on a general application, such as Microsoft Office,
is printed in PostScript (PS3 or Macintosh). It may not be effective, if a file created on a graphic
application (e.g. Illustrator) or a DTP application (e.g. QuarkXPress) is printed, or a PDF file created on
these applications is printed using the C, M, Y and K toners. Unmark the "Use PostScript Passthrough"
checkbox in the "PostScript Setting" options in the "Others" tab. The "Image Quality Type" option will be
effective, if printing on Windows (PS3) is performed (but not on Macintosh) or if a file created on the
above applications is printed. However, the color balance may be changed, and also the image quality may
be diminished, depending on the type of file.
For Windows
PCL6
PS3
* This adjustment will have an effect only on Auto or Color mode printing.
Open the property page of the printer driver. Change the "Image Quality Type" option in the "Image
Quality" tab.
e-STUDIO2500c/3500c/3510c
3.3
3. Printer-specific Adjustments
For Macintosh
Mac
* This adjustment will have an effect only on full-color printing.
Open the print dialog box. Change the "Image Type" option.
* The menu to select varies according to the operating system. Refer to the table below and select the menu.
OS
Menu
8.6 / 9.x
"Color Settings 2" Ö "Image Type"
10.2.x
"Printer Features" Ö "Feature Sets: Color settings 2" Ö "Image Type"
10.3.x / 10.4.x "Color Settings 1" Ö "Image Type"
3.3
e-STUDIO2500c/3500c/3510c
3. Printer-specific Adjustments
* The Image Quality Type options feature the following:
• General:
"General" is the best-rounded option to offer fine printouts of any type of original,
including text, photographs and graphics. It is suitable for printing using wordprocessing and spreadsheet software. If "General" is selected, "Smooth," which
is intended to improve the reproducibility of gradations, will be applied to
graphics and images, while "Detail," which is intended to improve the resolving
power, will be applied to text, from among the "Halftone" options (screen).
• Photograph:
"Photograph" is intended to improve the reproducibility of halftones, such as
photos and gradational images. This provides the color balance closely
matching the one on the monitor with sRGB selected as a color space. If
"Photograph" is selected, "Smooth," which is intended to improve the
reproducibility of gradations, will be applied to graphics and images, while
"Detail," which is intended to improve the resolving power, will be applied to
text, from among the "Halftone" options.
• Presentation:
"Presentation" is intended to improve to the reproducibility of vivid colors. It is
suitable for printing presentation materials and graphics, which require sharpcontrast images. The color balance this option provides does not match the one
on the monitor, because priority is given to printing in highly vivid colors. If
"Presentation" is selected, "Smooth," which is intended to improve the
reproducibility of gradations, will be applied to graphics and images, while
"Detail," which is intended to improve the resolving power, will be applied to
text, " from among the "Halftone" options.
• Line Art:
"Line Art" is intended to reproduce thin lines clearly without jaggies visible on
the printout. It is suitable for printing out line drawings. The color
reproduction this option provides is the same as the one the Presentation option
provides. But if "LineArt" is selected, a special operation is provided to
reproduce thin lines more clearly. If "Line Art" is selected, "Detail," which is
intended to print halftones in detail (with the high frequency), will be applied to
graphics, images and text, from among the "Halftone" options.
After changing the option on the printer driver, print and check the print image quality.
If further image quality adjustments are still necessary, use the next procedure.
e-STUDIO2500c/3500c/3510c
3.3
3. Printer-specific Adjustments
(2) Change the "Color Balance" option, the "Brightness" or "Saturation" option on the printer driver.
For Windows
PCL6
PS3
* This adjustment will have an effect only on Auto or Color mode printing.
Open the property page of the printer driver. Press the [Image Type Quality] button in the "Image Quality"
tab.
Change the option in the "Color Balance" or "Image Attribute" tab.
* Initially, change the value by 4 steps, while checking the printouts until the optimum value is obtained.
• "Color Balance" tab: Change the "All Colors" or "Each Color" option
• "Image Attribute" tab: Change the "Brightness" or "Saturation" option.
3.3
e-STUDIO2500c/3500c/3510c
3. Printer-specific Adjustments
For Macintosh
Mac
* This adjustment will have an effect only on full-color printing.
Open the print dialog box. Change the "Color Balance" option, the "Brightness" or "Saturation" option.
* The menu to select varies according to the operating system. Refer to the table below and select the menu.
OS
Menu
"Color Settings 3" Ö "Color Balance"
8.6 / 9.x
"Color Settings 4" Ö "Brightness" or "Saturation"
"Printer Features" Ö "Feature Sets: Color settings 3" Ö "Color Balance"
10.2.x
"Printer Features" Ö "Feature Sets: Color settings 4" Ö "Brightness" or "Saturation"
10.3.x / 10.4.x "Color Settings 2" Ö "Color Balance," "Brightness" or "Saturation"
* Initially, change the value by 4 steps, while checking the printouts until the optimum value is obtained.
After changing the option on the printer driver, print and check the print image quality.
If further image quality adjustments are still necessary, the service technician must use the next procedure.
e-STUDIO2500c/3500c/3510c
3.3
3. Printer-specific Adjustments
PCL6
PS3
Mac
* This adjustment will have an effect only on Auto or Color mode printing.
(3) Enter adjustment mode [05]. Change the values for codes [8050 to 8065] to adjust the color density.
• Adjust the value for [05] code corresponding to the print option to be applied (PDL and Halftone).
Ex.: • When printing on Windows is performed with the following options selected: PCL6, Image Quality
Type = General, Halftone = Auto
> Text area
Change the values for Y: 05-8062, M: 05-8063, C: 05-0864 and K: 05-8065.
> Graphic and image area
Change the values for Y: 05-8058, M: 05-8059, C: 05-8060 and K: 05-8061.
• When printing on Macintosh is performed with the following option selected: Image Type =
Photograph, Halftone = Smooth
> Change the values for Y: 05-8050, M: 05-8051, C: 05-8052 and K: 05-8053.
* Printing on Macintosh is performed in PostScript. (See the "PS3" row in the table below.)
Color to
adjust
Y
(Yellow)
M
(Magenta)
C
(Cyan)
K
(Black)
PDL
PCL5c
PS3
PCL5c
PS3
PCL5c
PS3
PCL5c
PS3
Halftone [05] code Subcode
Smooth
Detail
Smooth
Detail
Smooth
Detail
Smooth
Detail
Smooth
Detail
Smooth
Detail
Smooth
Detail
Smooth
Detail
05-8058
05-8062
05-8050
05-8054
05-8059
05-8063
05-8051
05-8055
05-8060
05-8064
05-8052
05-8056
05-8061
05-8065
05-8053
05-8057
0/1/2
0/1/2
0/1/2
0/1/2
0/1/2
0/1/2
0/1/2
0/1/2
0/1/2
0/1/2
0/1/2
0/1/2
0/1/2
0/1/2
0/1/2
0/1/2
Recommended value
Acceptable
Default
value range
Set a value larger than 128
to increase the density.
0 to 255
128
Set a value smaller than 128
to decrease the density.
* Set the value in increments of approximately 20, while checking the printouts until the optimum value is
obtained.
3.3
e-STUDIO2500c/3500c/3510c
3. Printer-specific Adjustments
* "Halftone" refers to how halftones are printed. Two options are available: "Smooth" which is intended to
improve the reproducibility of gradation and "Detail" which is intended to print halftones in details (with
the high frequency).
The halftone option to be applied in printing can be selected from among the "Halftone" options on the
printer driver (Windows) or in the print dialog box (Macintosh).
"Auto" is selected from among the "Apply to" options by default. It is intended to automatically select
"Smooth" or "Detail" in accordance with "Apply to" of the halftone option, the selected "Color" and
"Image Quality Type" options, as described in the table below.
Apply to
General
"Color" and "Image Quality Type" options
Auto/Color
Black and
White
Photograph Presentation
Line Art
Twin
Color
Text
Detail
Detail
Detail
Detail
Detail
Detail
Graphic
(Illustration, line, etc.)
Smooth
Smooth
Smooth
Detail
Detail
Smooth
Image
(Photograph, etc.)
Smooth
Smooth
Smooth
Detail
Smooth
Smooth
* The subcode varies according to the area where the density is adjusted. Refer to the table below and set
the subcode for the area to be adjusted.
Subcode
Area where the density is adjusted
0
Low-density area
1
Medium-density area
2
High-density area
<Note>
• This adjustment changes the values set in the MFP. Therefore, it will affect every user who
uses the printer by connecting it to the MFP. After the adjustment, the values changed will be
applied to all printouts for the "Image Quality Type" and "Halftone" options. (For instance, if
the value for [05] code for PCL6 and Smooth is changed, it will be applied to printing
performed with PCL6 and Halftone = "Smooth" (or "Auto") selected.) Carefully perform the
adjustment, being aware that the image quality of all future printouts will be changed, when
printing out originals other than the one that is used for the adjustment.
• This code is commonly used in the Color mode and the Twin-color mode. After the
adjustment, the values changed will be also applied to the image quality in the Twin-color
mode. When adjusting the image quality in the Color mode, carefully perform the adjustment,
being aware that the image quality of all future printouts will be changed, when performing
printing in the Twin-color mode.
Precautions after the completion of the adjustment
Nothing in particular.
e-STUDIO2500c/3500c/3510c
3.3
3. Printer-specific Adjustments
3.4 To Closely Match the Color Balance on the Monitor
As viewed on the monitor
Before the adjustment
After the adjustment
The color balance as viewed on the monitor
looks different from the printout.
The color balance of the printout is closely
matched with the one on the monitor
Explanation
The color balance on the printouts is initially programmed to provide the maximum color saturation within the
range of colors reproducible in printing. In general, colors, which can be reproduced, vary, depending on
whether they are reproduced on the printout or on the monitor (or depending on whether they are reproduced in
"ink" or with the "light"). Consequently, the color balance on the printout cannot be perfectly matched with the
one on the monitor. Change the "Image Quality Type" option, in order to closely match the color balance on the
printout with the one on the monitor, at a user’s request.
* This adjustment will be effective in closely matching the color balance on the printout with the one on the
monitor, if the sRGB is selected as a color space. Therefore, remember that it may not be matched with the
color balance on the monitor, which does not support sRGB or if a color space other than sRGB is selected.
On commercially available monitors, sRGB is not selected as a color space by default.
3.4
e-STUDIO2500c/3500c/3510c
3. Printer-specific Adjustments
Procedures
* Both the service technician and the user can perform all adjustments.
(1) Select "Photograph" from among the "Image Quality Type" options.
* This adjustment will be effective, only if a file created on a general application, such as Microsoft Office,
is printed in PostScript (PS3 or Macintosh). It may not be effective, if a file created on a graphic
application (e.g. Illustrator) or a DTP application (e.g. QuarkXPress) is printed, or a PDF file created on
these applications is printed using the C, M, Y and K toners. Unmark the "Use PostScript Passthrough"
checkbox in the "PostScript Setting" options in the "Others" tab. The "Image Quality Type" option will be
effective, if printing on Windows (PS3) is performed (but not on Macintosh) or if a file created on the
above applications is printed. However, the color balance may be changed, and also the image quality may
be diminished, depending on the type of file.
For Windows
PCL5c
PS3
* This adjustment will have an effect only on Auto or Color mode printing.
Open the property page of the printer driver. Select "Photograph" from among the "Image Quality Type"
options.
e-STUDIO2500c/3500c/3510c
3.4
3. Printer-specific Adjustments
For Macintosh
Mac
* This adjustment will have an effect only on full-color printing
Open the print dialog box. Select "Photograph" from among the "Image Type" options.
* The menu to select varies according to the operating system. Refer to the table below and select the menu.
OS
Menu
8.6 / 9.x
"Color Settings 2" Ö "Image Type"
10.2.x
"Printer Features" Ö "Feature Sets: Color settings 2" Ö "Image Type"
10.3.x / 10.4.x "Color Settings 1" Ö "Image Type"
Precautions after the completion of the adjustment
Nothing in particular.
Remarks
• Setting a color space to sRGB is a prerequisite to maximize the effectiveness of this adjustment. Therefore, if
the monitor does not support sRGB or if color management cannot be performed, the effectiveness of the
adjustment may be significantly lost.
• In general, it is impossible to reproduce color saturation closely matching the true colors, as viewed on the
monitor, because the range of colors reproducible in toner colors is narrower than the one on the monitor.
3.4
e-STUDIO2500c/3500c/3510c
3. Printer-specific Adjustments
3.5 To Maintain a Uniform Gray Hue
(To maintain Consistency in Gray among Text, Photos and Graphics)
Before the adjustment
After the adjustment
Photo area
Photo area
Text area
Text area
How gray is reproduced varies depending on
the type of original. As a result, there are
variations in gray.
All color toners are used to reproduce gray.
As a result, consistency is maintained in the
gray hue.
Explanation
For printing, only the K toner is usually used to reproduce gray areas of drawing data, lines and text. On the
other hand, all color toners (C, M, Y and K) are used to reproduce gray areas of image data, such as BMP, GIF,
JPEG and TIFF. This provides a deeper gray on the printouts. Change the option on the printer driver, in order
to maintain consistency in the gray hue between the drawing data and the image data.
e-STUDIO2500c/3500c/3510c
3.5
3. Printer-specific Adjustments
Procedures
* Both the service technician and the user can perform all adjustments.
(1) Change the "Pure Gray" option on the printer driver.
("Pure Gray" allows gray areas to always be reproduced using all color toners (C, M, Y and K) without
changing the hue of color areas.)
* This adjustment will be effective, only if a file created on a general application, such as Microsoft Office,
is printed. It may not be effective, if a file created on a graphic application (e.g. Illustrator) or a DTP
application (e.g. QuarkXPress) is printed, or a PDF file created on these applications is printed.
For Windows
PCL5c
PS3
* This adjustment will have an effect only on Auto or Color mode printing.
Open the property page of the printer driver. Press the [Setting] button in the "Image Quality" tab.
Unmark the "Pure Gray" checkbox in the "Basic" tab.
3.5
e-STUDIO2500c/3500c/3510c
3. Printer-specific Adjustments
For Macintosh
Mac
* This adjustment will have an effect only on full-color printing.
Open the print dialog box. Select "Black - Auto" from among the "Pure Black and Gray" options.
* The menu to select varies according to the operating system. Refer to the table below and select the menu.
OS
Menu
8.6 / 9.x
"Color Settings 2" Ö "Pure Black and Gray"
10.2.x
"Printer Features" Ö "Feature Sets: Color settings 2" Ö "Pure Black and Gray"
10.3.x / 10.4.x "Color Settings 1" Ö "Pure Black and Gray"
Precautions after the completion of the adjustment
The adjustment allows gray areas always to be reproduced using all color toners (C, M, Y and K). As a result,
undesired colors may look blended, depending on the print image. Therefore, carefully perform the adjustment,
while checking the printouts.
e-STUDIO2500c/3500c/3510c
3.5
3. Printer-specific Adjustments
3.6 To Use Only the Black Toner to Reproduce Gray Areas
(To use only the black toner to reproduce black-and-white photos or
gradational images)
Before the adjustment
After the adjustment
Photo area
Photo area
Text area
Text area
Using all color toners to reproduce black-andwhite photo images (bitmap data) blends
undesired colors in the image.
Using only the black toner to reproduce blackand-white photo images can diminish undesired
colors.
Explanation
For printing, only the K toner is usually used to reproduce gray areas of drawing data, lines and text. On the
other hand, all color toners (C, M, Y and K) are used to reproduce gray areas of image data, such as BMP, GIF,
JPEG and TIFF. This provides a deeper gray on the printouts.
The following are examples when image data are reproduced using C, M, Y and K:
• A gray-scale or black-and-white photo is pasted in photo editing software such as Imaging and Paint Shop
Pro, in Internet Explorer, word-processing or spreadsheet software.
• A semi-transparent gray color or gradient of gray is used in the Format AutoShape dialog box on Microsoft
Office.
(The gray area printed out as raster data in the same manner as a photo image is reproduced using C, M and
Y toners, or C, M, Y and K toners.)
Change the option on the printer driver, in order to use only the black toner to reproduce the gray area where C,
M, Y and K are used as described above.
Procedures
* Both the service technician and the user can perform all adjustments.
3.6
e-STUDIO2500c/3500c/3510c
3. Printer-specific Adjustments
(1) Mark the "Pure Gray" checkbox on the printer driver. Select "Text, Graphic & Image" from among the
"Apply to" options. ("Pure Gray" allows gray areas to always be reproduced using only the K toner without
changing the hue of color areas.)
* This adjustment will be effective, only if a file created on a general application, such as Microsoft Office,
is printed. It may not be effective, if a file created on a graphic application (e.g. Illustrator) or a DTP
application (e.g. QuarkXPress) is printed, or a PDF file created on these applications is printed.
For Windows
PCL6
PS3
* This adjustment will have an effect only on Auto or Color mode printing.
Open the property page of the printer driver. Press the [Setting] button in the "Image Quality" tab.
Mark the "Pure Gray" checkbox in the "Basic" tab. Select "Text, Graphic & Image" from among the "Apply
to" options.
e-STUDIO2500c/3500c/3510c
3.6
3. Printer-specific Adjustments
For Macintosh
Mac
* This adjustment will have an effect only on full-color printing.
Open the print dialog box. Select "Black & Gray - Text, Graphic & Image" from among the "Pure Black
and Gray" options.
* The menu to select varies according to the operating system. Refer to the table below and select the menu.
OS
Menu
8.6 / 9.x
"Color Settings 2" Ö "Pure Black and Gray"
10.2.x
"Printer Features" Ö "Feature Sets: Color settings 2" Ö "Pure Black and Gray"
10.3.x / 10.4.x "Color Settings 1" Ö "Pure Black and Gray"
Precautions after the completion of the adjustment
The adjustment allows gray areas to always be reproduced using only the K toner. As a result, color photos may
look more grained. Therefore, carefully perform the adjustment, while checking the printouts.
3.6
e-STUDIO2500c/3500c/3510c
3. Printer-specific Adjustments
3.7 To Easily Adjust the Overall Brightness
Before the adjustment
The image is printed with a natural brightness.
(Default printing)
After the adjustment
After the adjustment
A darker print image is obtained.
A brighter print image is obtained.
Explanation
The brightness of the print image can be easily adjusted by changing the "Brightness" setting on the printer
driver.
e-STUDIO2500c/3500c/3510c
3.7
3. Printer-specific Adjustments
Procedures
* Both the service technician and the user can perform all adjustments.
(1) Change the "Brightness" option on the printer driver.
• Select the desired value for brightness on a scale of -4 (Darkest) to 4 (Lightest).
For Windows
PCL5c
PS3
* This adjustment will have an effect only on Auto or Color mode printing.
Open the property page of the printer driver. Press the [Setting] button in the "Image Quality" tab.
Change the "Brightness" option in the "Image Attribute" tab.
3.7
e-STUDIO2500c/3500c/3510c
3. Printer-specific Adjustments
For Macintosh
Mac
* This adjustment will have an effect only on full-color printing.
Open the print dialog box. Change the "Brightness" option.
* The menu to select varies according to the operating system. Refer to the table below and select the menu.
OS
Menu
8.6 / 9.x
"Color Settings 4" Ö "Brightness"
10.2.x
"Printer Features" Ö "Feature Sets: Color settings 4" Ö "Brightness"
10.3.x / 10.4.x "Color Settings 2" Ö "Brightness"
Precautions after the completion of the adjustment
Nothing in particular.
Remarks
The brightness adjustment does not affect black text (CMY = 100%, K = 100% or RGB = 0%).
e-STUDIO2500c/3500c/3510c
3.7
3. Printer-specific Adjustments
3.8 To Adjust the Overall Saturation
Before the adjustment
The image is printed with a natural saturation.
(Default printing)
After the adjustment
After the adjustment
The saturation is decreased.
The saturation is increased.
Explanation
The saturation of the print image can be easily adjusted by changing the "Saturation" option on the printer driver.
3.8
e-STUDIO2500c/3500c/3510c
3. Printer-specific Adjustments
Procedures
* Both the service technician and the user can use procedure (1).
* Only if the saturation of R (Red) is still insufficient even after procedure (1) has been used, must the service
technician use procedure (2).
(1) Change the "Saturation" option on the printer driver.
• Select the desired value for saturation on a scale of -4 (Palest) to 4 (Brightest).
For Windows
PCL6
PS3
* This adjustment will have an effect only on Auto or Color mode printing.
Open the property page of the printer driver. Press the [Setting] button in the "Image Quality" tab.
Change the "Saturation" option in the "Image Attribute" tab.
e-STUDIO2500c/3500c/3510c
3.6
3.8
3. Printer-specific Adjustments
For Macintosh
Mac
* This adjustment will have an effect only on full-color printing.
Open the print dialog box. Change the "Saturation" option.
* The menu to select varies according to the operating system. Refer to the table below and select the menu.
OS
Menu
8.6 / 9.x
"Color Settings 4" Ö "Saturation"
10.2.x
"Printer Features" Ö "Feature Sets: Color settings 4" Ö "Saturation"
10.3.x / 10.4.x "Color Settings 2" Ö "Saturation"
After changing the option on the printer driver, print and check the print image quality.
Only if the saturation of R (Red) is still insufficient even after all the above procedures have been used, must
the service technician use the next procedure.
3.8
e-STUDIO2500c/3500c/3510c
3. Printer-specific Adjustments
(5) Enter adjustment mode [05]. Change the value for code [2905] to adjust the transfer (1st transfer) roller bias
output.
(Adjust the offset voltage of the transfer roller bias for C (Cyan) and K (Black) so as to increase the density
of R (Red).)
• The code to use varies according to the paper type and color to adjust. Adjust the value for the subcode
corresponding to the color for which you would like to improve the image quality. Set the value within a
range of "2" to "5" to obtain the highest density of R (Red).
Paper type
Plain paper
Thick
Color to
adjust
C (Cyan)
K (Black)
C (Cyan)
K (Black)
[05] code
Subcode
Recommended
value
Acceptable
value range
Default
05-2905
2
3
8
9
2 to 5
0 to 10
5
* Never change the values for subcodes other than the above. Otherwise, it may cause a loss in MFP
performance, including degradation in the image quality.
<Note>
• The adjustment may possibly decrease the density of G (Green), B (Blue) and K (Black)
extremely. Therefore, carefully perform the adjustment, while checking the printout.
• Unless this adjustment changes the density of R (Red), return the values to the default (set
value: 5).
• This adjustment may affect not only the printouts but also every type of image quality such as
the copy image. Therefore, perform the adjustment, being aware that the image quality of all
future printouts will be changed, when printing out originals other than the one that is used for
the adjustment.
Precautions after the completion of the adjustment
Nothing in particular.
Remarks
The saturation adjustment does not affect black or gray areas on the printout.
e-STUDIO2500c/3500c/3510c
3.8
3. Printer-specific Adjustments
3.9 To Easily Adjust the Overall Contrast
Before the adjustment
The image is printed with a natural contrast.
(Default printing)
After the adjustment
After the adjustment
The contrast is decreased.
The contrast is increased.
Explanation
The contrast of the print image can be easily adjusted by changing the "Contrast" option on the printer driver.
3.9
e-STUDIO2500c/3500c/3510c
3. Printer-specific Adjustments
3.
Procedures
* Both the service technician and the user can perform all adjustments.
(1) Change the "Contrast" option on the printer driver.
• Select the desired value for contrast on a scale of -4 (Lowest) to 4 (Highest).
For Windows
PCL5c
PS3
* This adjustment will have an effect only on Auto or Color mode printing.
Open the property page of the printer driver. Press the [Setting] button in the "Image Quality" tab.
Change the "Contrast" option in the "Image Attribute" tab.
e-STUDIO2500c/3500c/3510c
3.9
3. Printer-specific Adjustments
For Macintosh
Mac
* This adjustment will have an effect only on full-color printing.
Open the print dialog box. Change the "Contrast" option.
* The menu to select varies according to the operating system. Refer to the table below and select the menu.
OS
Menu
8.6 / 9.x
"Color Settings 4" Ö "Contrast"
10.2.x
"Printer Features" Ö "Feature Sets: Color settings 4" Ö "Contrast"
10.3.x / 10.4.x "Color Settings 2" Ö "Contrast"
Precautions after the completion of the adjustment
Nothing in particular.
3.9
e-STUDIO2500c/3500c/3510c
3. Printer-specific Adjustments
3.10 To Obtain a Sharper Print Image
Print data
Before the adjustment
Unadjusted settings.
After the adjustment
The edge of the print image is so enhanced
that it looks sharper.
Explanation
Increase the sharpness intensity under the menu on the printer driver, in order to obtain a sharper print image.
* The sharpness adjustment will have an effect particularly on photo images, such as BMP, GIF, JPEG and TIFF.
e-STUDIO2500c/3500c/3510c
3.10
3. Printer-specific Adjustments
Procedures
* Both the service technician and the user can perform all adjustments.
(1) Change the "Sharpness" option on the printer driver.
For Windows
PCL6
PS3
* This adjustment will have an effect only on Auto or Color mode printing.
Open the property page of the printer driver. Press the [Setting] button in the "Image Quality" tab.
Set the value for "Sharpness" within a range of "1" to "4" in the "Image Attribute" tab.
• Setting "4" provides the sharpest print image.
3.10
e-STUDIO2500c/3500c/3510c
3. Printer-specific Adjustments
For Macintosh
Mac
* This adjustment will have an effect only on full-color printing.
Open the print dialog box. Set the value for "Sharpness" within a range of "1" to "4."
• Setting "4" provides the sharpest print image.
* The menu to select varies according to the operating system. Refer to the table below and select the menu.
OS
Menu
8.6 / 9.x
"Color Settings 4" Ö "Sharpness"
10.2.x
"Printer Features" Ö "Feature Sets: Color settings 4" Ö "Sharpness"
10.3.x / 10.4.x "Color Settings 2" Ö "Sharpness"
Precautions after the completion of the adjustment
The adjustment may possibly cause rough edges of the image contained in low-resolution bitmap data. As a
result, outlined edges may look shaded, black bands may appear, and toner may be scattered around the lines.
Therefore, carefully perform the adjustment, while checking the printouts.
e-STUDIO2500c/3500c/3510c
3.10
3. Printer-specific Adjustments
3.11 To Obtain a Softer Image
Before the adjustment
After the adjustment
Unadjusted settings.
A softer image is obtained.
Explanation
Decrease the sharpness intensity under the menu on the printer driver, in order to obtain a softer print image.
* The sharpness adjustment will have an effect particularly on photo images, such as BMP, GIF, JPEG and TIFF.
3.11
e-STUDIO2500c/3500c/3510c
3. Printer-specific Adjustments
Procedures
* Both the service technician and the user can perform all adjustments.
(1) Change the "Sharpness" option on the printer driver.
For Windows
PCL6
PS3
* This adjustment will have an effect only on Auto or Color mode printing.
Open the property page of the printer driver. Press the [Setting] button in the "Image Attribute" tab.
Set the value for "Sharpness" within a range of "-1" to "-4."
• Setting "-4" provides the smoothest (softest) image.
e-STUDIO2500c/3500c/3510c
3.11
3. Printer-specific Adjustments
For Macintosh
Mac
* This adjustment will have an effect only on full-color printing.
Open the print dialog box. Set the value for "Sharpness" within a range of "-1" to "-4."
• Setting "-4" provides the smoothest (softest) print image.
* The menu to select varies according to the operating system. Refer to the table below and select the menu.
OS
Menu
8.6 / 9.x
"Color Settings 4" Ö "Sharpness"
10.2.x
"Printer Features" Ö "Feature Sets: Color settings 4" Ö "Sharpness"
10.3.x / 10.4.x "Color Settings 2" Ö "Sharpness"
Precautions after the completion of the adjustment
The adjustment provides a soft or blurred image in general. Therefore, carefully perform the adjustment, while
checking the printouts. Especially text and lines on the background of a gradational image, and text in the
Format AutoShape dialog box with transparency selected on Microsoft Office may be blurred.
3.11
e-STUDIO2500c/3500c/3510c
3. Printer-specific Adjustments
3.12 To Make Low-resolution Data Look Finer (To soften an image)
Print data
Before the adjustment
After the adjustment
Unadjusted settings.
A smoother (softer) image is obtained.
Explanation
When a low-resolution image is printed, the edges may be jagged. Decrease the sharpness intensity, in order to
eliminate the jaggies from the print image.
* The sharpness adjustment will have an effect particularly on photo images, such as BMP, GIF, JPEG and TIFF.
e-STUDIO2500c/3500c/3510c
3.12
3. Printer-specific Adjustments
Procedures
* Both the service technician and the user can perform all adjustments.
(1) Change the "Sharpness" option on the printer driver.
For Windows
PCL6
PS3
* This adjustment will have an effect only on Auto or Color mode printing.
Open the property page of the printer driver. Press the [Setting] button in the "Image Quality" tab.
Set the value for "Sharpness" within a range of "-1" to "-4" in the "Image Attribute" tab.
• Setting "-4" provides the smoothest (softest) print image.
3.12
e-STUDIO2500c/3500c/3510c
3. Printer-specific Adjustments
For Macintosh
Mac
* This adjustment will have an effect only on full-color printing.
Open the print dialog box. Set the value for "Sharpness" within a range of "-1" to "-4."
• Setting "-4" provides the smoothest (softest) print image.
* The menu to select varies according to the operating system. Refer to the table below and select the menu.
OS
Menu
8.6 / 9.x
"Color Settings 4" Ö "Sharpness"
10.2.x
"Printer Features" Ö "Feature Sets: Color settings 4" Ö "Sharpness"
10.3.x / 10.4.x "Color Settings 2" Ö "Sharpness"
Precautions after the completion of the adjustment
The adjustment provides a soft or blurred image in general. Therefore, carefully perform the adjustment, while
checking the printouts. Especially text and lines on the background of a gradational image, and text in the
Format AutoShape dialog box with transparency selected on Microsoft Office may be blurred.
e-STUDIO2500c/3500c/3510c
3.12
3. Printer-specific Adjustments
3.13 To Eliminate Smudges from Highly Colored Text and Lines
(To prevent toner scattering around text and lines where a large amount of
toner is used)
Before the adjustment
Black text looks smudged due to toner
scattering around the text.
After the adjustment
Smudges are eliminated.
Explanation
When highly colored text and lines where a large amount of toner is used, created on raster data (image), such as
BMP, GIF, JPEG and TIFF are printed, the text and lines look smudged due to toner scattering around the text
and lines. Adjust the sharpness intensity or the amount of toner used, in order to obtain a clearer print image.
<Hint>
If smudged text and lines appear on the print image in PDF format on Adobe Reader, unmark the
"Print as image" checkbox to print out the image. If the "Print as image" checkbox is marked, text
and lines will be printed as raster data (bitmap image) and may be smudged.
Procedures
* Perform the adjustment in accordance with the procedures below.
* Both the service technician and the user can use procedure (1).
* Only the service technician must use procedures (2) and (3).
3.13
e-STUDIO2500c/3500c/3510c
3. Printer-specific Adjustments
(1) Set "-1" for "Sharpness" on the printer driver.
For Windows
PCL6
PS3
* This adjustment will have an effect only on Auto or Color mode printing.
Open the property page of the printer driver. Press the [Setting] button in the "Image Quality" tab.
Set "-1"for "Sharpness" in the "Image Attribute" tab.
* Always set "-1." Setting "-2" or a smaller value may provide blurred print images.
e-STUDIO2500c/3500c/3510c
3.13
3. Printer-specific Adjustments
For Macintosh
Mac
* This adjustment will have an effect only on full-color printing.
Open the print dialog box. Set "-1"for "Sharpness."
* Always set "-1." Setting "-2" or a smaller value may provide blurred print images.
* The menu to select varies according to the operating system. Refer to the table below and select the menu.
OS
Menu
8.6 / 9.x
"Color Settings 4" Ö "Sharpness"
10.2.x
"Printer Features" Ö "Feature Sets: Color settings 4" Ö "Sharpness"
10.3.x / 10.4.x "Color Settings 2" Ö "Sharpness"
3.13
e-STUDIO2500c/3500c/3510c
3. Printer-specific Adjustments
<Hint>
The following options are recommended for users who frequently perform the adjustment using
procedure (1).
Performing these options allows users to easily select the same conditions as the ones adjusted
in procedure (1).
• Perform these options by registering the Custom Color Settings where "-1" is set for the
sharpness option (only on Windows).
* For further information regarding how to register the Custom Color Settings, refer to
3.23 To Register the Image Quality Adjusted Corresponding to a Preference.
• Set "1" for code 05-8120.
* Setting "-1" for the sharpness option disables the sharpness adjustment by default.
Setting "1" for code 05-8120 switches the position where the sharpness adjustment is
disabled from "-1" to"0." Therefore, the sharpness adjustment is always disabled
without the sharpness option changed (with "0" set).
However, this adjustment changes the values set in the MFP. Therefore, it will affect
every user who uses the printer by connecting it to the MFP. After the adjustment, the
values changed will be applied to all printouts for the "Sharpness" option. Carefully
perform the adjustment, being aware that the image quality of all future printouts will
be changed, when printing out originals other than the one that is used for the
adjustment.
After performing these options, print and check the print image quality.
If further image quality adjustments are still necessary, return the value for the sharpness option to "0" and
use the next procedure according to the image quality problem you have.
• If the photo image contrast is insufficient:
Go to procedure (2).
• If smudges (toner scattering) are not eliminated:
Go to procedure (3).
e-STUDIO2500c/3500c/3510c
3.13
3. Printer-specific Adjustments
PCL6
PS3
Mac
* This adjustment will have an effect only on Auto or Color mode printing.
(2) If the photo image contrast is insufficient after the adjustment in procedure (1), enter adjustment mode [05].
Decrease the values for codes [8110 to 8117] to perform fine adjustment and decrease the sharpness
intensity.
• Adjust the value for [05] code corresponding to the print option to be applied (PDL, Color mode, and
Image quality type).
* Printing on Macintosh is performed in PostScript. (See the "PS3" row in the table below.)
PDL
PS3
PCL6
Color mode
Auto/Color
Auto/Color
Image
quality type
General
Photograph
Presentation
Line Art
General
Photograph
Presentation
Line Art
[05] code
05-8110
05-8111
05-8112
05-8113
05-8114
05-8115
05-8116
05-8117
Recommended
value
Acceptable
value range
Default
0 to 255
128
Set a value
smaller than 128
* Set the value in increments of approximately 5, while checking the printouts until the optimum value is
obtained.
* Setting "108" provides an effect corresponding to "-1" for the sharpness option. It is recommended to set
approximately "118" corresponding to an intermediate value between "0" (default) and "-1" for the
sharpness option, and then perform fine adjustment, while checking the printouts.
<Note>
• This adjustment changes the values set in the MFP. Therefore, it will affect every user who
uses the printer by connecting it to the MFP. After the adjustment, the values changed will be
applied to all printouts for the "Sharpness" option. Carefully perform the adjustment, being
aware that the image quality of all future printouts will be changed, when printing out originals
other than the one that is used for the adjustment.
• The code in the Standard Auto/Color mode is commonly used in the Twin-color mode. After
the adjustment, the values changed will be also applied to the image quality in the Twin-color
mode. When adjusting the image quality in the Standard mode, carefully perform the
adjustment, being aware that the image quality of all future printouts will be changed, when
performing printing in the Twin-color mode.
3.13
e-STUDIO2500c/3500c/3510c
3. Printer-specific Adjustments
PCL6
PS3
Mac
* This adjustment will have an effect only on Auto or Color mode printing.
(3) If smudges (toner scattering) are not eliminated after the adjustment in procedure (1), enter adjustment mode
[05]. Decrease the values for codes [8076 to 8078], [8080 to 8088] or [1092 to 1096] to reduce the amount
of toner used.
• Adjust the value for [05] code corresponding to the print option to be applied (Paper type, Image quality
type, Halftone, and PDL).
* Printing on Macintosh is performed in PostScript. (See the "PS3" row in the table below.)
Paper
type
Special 1
Image quality
type
General/Photograph/
Presentation
Line Art
Special 2
General/Photograph/
Presentation
Line Art
Recycled
paper
Plain
paper
Thick 1
General/Photograph/
Presentation
Line Art
General/Photograph/
Presentation
Line Art
General/Photograph/
Presentation
Line Art
Thick 2
General/Photograph/
Presentation
Line Art
Thick 3
General/Photograph/
Presentation
Line Art
OHP
General/Photograph/
Presentation
Line Art
Halftone
[05] code
Auto/Smooth
Detail
Smooth
Auto/Detail
Auto/Smooth
Detail
Smooth
Auto/Detail
Auto/Smooth
Detail
Smooth
Auto/Detail
Auto/Smooth
Detail
Smooth
Auto/Detail
Auto/Smooth
Detail
Smooth
Auto/Detail
Auto/Smooth
Detail
Smooth
Auto/Detail
Auto/Smooth
Detail
Smooth
Auto/Detail
Auto/Smooth
Detail
Smooth
Auto/Detail
05-8076
05-8085
05-8076
05-8085
05-8077
05-8086
05-8077
05-8086
05-8078
05-8087
05-8078
05-8087
05-8080
05-1092
05-8080
05-1092
05-8081
05-1093
05-8081
05-1093
05-8082
05-1094
05-8082
05-1094
05-8083
05-1095
05-8083
05-1095
05-8084
05-1096
05-8084
05-1096
Subcode Recommended Acceptable
(PDL)
value
value range
Default
113
113
128
128
PCL6: 0
PS3: 1
Set a value
smaller than
the default.
0 to 255
113
113
113
128
* Set the value in increments of approximately 30, while checking the printouts until the optimum value is
obtained.
e-STUDIO2500c/3500c/3510c
3.13
3. Printer-specific Adjustments
Precautions after the completion of the adjustment
• The adjustment in procedure (1) may possibly provide insufficient photo contrast images. Therefore, carefully
perform the adjustment, while checking the printouts.
• If the value set for the amount of toner used is too small in procedure (2), the photo image (head hair and
shadows) may look unnaturally white. Therefore, carefully perform the adjustment, while checking the
printouts.
3.13
e-STUDIO2500c/3500c/3510c
3. Printer-specific Adjustments
3.14 To Clearly Print Light-Colored Thin Lines or Text
Before the adjustment
After the adjustment
Light-colored thin lines and text are dotted on
the printout.
The light-colored thin lines and text are clearly
printed out.
Explanation
When light-colored thin lines and text are printed, they may be dotted on the printout. Change the options on the
printer driver, adjust the color balance or gamma curve balance, in order to print them out clearly.
Procedures
* The procedure to use varies, depending on whether to adjust the print image quality in the Color mode or in the
Black and White mode. Refer to the procedure corresponding to the user’s particular request.
* The item to set varies depending on the type of data to adjust. Select the effective option according to the data
format to adjust, such as a print image (raster data), text (font), and line drawing (graphic data).
e-STUDIO2500c/3500c/3510c
3.14
3. Printer-specific Adjustments
3.14.1 To Adjust the Print Image Quality in the Color Mode
* Perform the adjustment in accordance with the procedures below.
* Both the service technician and the user can use procedures (1), (2), and (3).
* Only the service technician must use procedures (4) and (5).
(1) Change the "Image Quality Type" and "Halftone" options.
For Windows
PCL6
PS3
* This adjustment will have an effect only on Auto or Color mode printing.
Open the property page of the printer driver. Change the "Image Quality Type" and "Halftone" options in
the Image Quality tab.
• Set either of the following options, in accordance with the type of original to print:
• Image Quality Type:
Halftone:
• Image Quality Type:
Halftone:
3.14
e-STUDIO2500c/3500c/3510c
"Presentation" (To make color darker)
"Detail" (To make the halftone screen high frequency)
"Line Art" (To make the color darker and enhance thin lines)
"Auto" or "Detail" (To make the halftone screen high frequency)
3. Printer-specific Adjustments
For Macintosh
Mac
* This adjustment will have an effect only on full-color printing.
Open the print dialog box. Change the "Image Type" and "Halftone" options.
* The menu to select varies according to the operating system. Refer to the table below and select the menu.
OS
Menu
"Color Settings 2" Ö "Image Type"
8.6 / 9.x
"Color Settings 1" Ö "Halftone"
"Printer Features" Ö "Feature Sets: Color settings 2" Ö "Image Type"
10.2.x
"Printer Features" Ö "Feature Sets: Color settings 1" Ö "Halftone"
10.3.x / 10.4.x "Color Settings 1" Ö "Image Type", "Halftone"
• Set either of the following options, in accordance with the type of original to print:
• Image Type:
Halftone:
• Image Type:
Halftone:
"Presentation" (To make color darker)
"Detail" (To make the halftone screen high frequency)
"Line Art" (To make the color darker and enhance thin lines)
"Auto" or "Detail" (To make the halftone screen high frequency)
After changing the options on the printer driver, print and check the print image quality.
If further image quality adjustments are still necessary, use the next procedure.
e-STUDIO2500c/3500c/3510c
3.14
3. Printer-specific Adjustments
(2) In procedure (1), if "LineArt" is selected from among the "Image Quality Type" options, in order to adjust
raster data (print image) or graphic data (line drawing), change the "Sharpness" option on the printer driver.
For Windows
PCL6
PS3
* This adjustment will have an effect only on Auto or Color mode printing.
Open the property page of the printer driver. Press the [Setting] button in the "Image Quality" tab.
Set the value for "Sharpness" within a range of "1" to "4" in the "Image Attribute" tab.
• Setting "4" provides the sharpest print image.
* Initially, set "4" and check the printout. If further image quality adjustments are still necessary, refer to
<Hint> to do this.
3.14
e-STUDIO2500c/3500c/3510c
3. Printer-specific Adjustments
For Macintosh
Mac
* This adjustment will have an effect only on full-color printing.
Open the print dialog box. Set the value for "Sharpness" within a range of "1" to "4."
• Setting "+4" provides the sharpest print image.
* Initially, set "4" and check the printout. If further image quality adjustments are still necessary, refer to
<Hint> to do this.
* The menu to select varies according to the operating system. Refer to the table below and select the menu.
OS
Menu
8.6 / 9.x
"Color Settings 4" Ö "Sharpness"
10.2.x
"Printer Features" Ö "Feature Sets: Color settings 4" Ö "Sharpness"
10.3.x / 10.4.x "Color Settings 2" Ö "Sharpness"
<Hint>
In addition to the sharpness adjustment, decreasing "Brightness" (moving to the [-] side),
changing "Contrast" or increasing "Saturation" (moving to the [+] side) may improve the image
quality.
After changing the option on the printer driver, print and check the print image quality.
If further image quality adjustments are still necessary, use the next procedure.
e-STUDIO2500c/3500c/3510c
3.14
3. Printer-specific Adjustments
PCL6
PS3
* This adjustment will have an effect only on Auto or Color mode printing.
(3) Open the property page of the printer driver. Press the [Setting] button in the "Image Quality" tab.
Mark the "Detail" checkbox in the "Color Balance" tab. Press the [Edit] button.
Set the value for the Low/Medium density of the color you would like to adjust, within a range of "1" to "4"
in the "Color Balance Details" option.
*This adjustment will have an effect only on printing on the Windows PCL6 or PS3 emulation printer driver.
(This adjustment cannot be performed on a Macintosh printer driver.)
* Initially, set "4" and check the printout.
After changing the option on the printer driver, print and check the print image quality.
If further image quality adjustments are still necessary, use the next procedure.
PCL6
PS3
Mac
* This adjustment will have an effect only on Auto or Color mode printing.
(4) Enter adjustment mode [05]. Adjust the color balance.
• Use steps (a) to (b) to adjust the color balance.
(a) Enter adjustment mode [05]. Select code [396]. Press the [START] button.
• Image quality control will be forcibly performed to correct variations in image contrast.
(b) Enter adjustment mode [05]. Change the values for codes [8054 to 8057] or [8062 to 8065] to adjust
the color balance and increase the color density.
• Adjust the value for [05] code corresponding to the print option to be applied (PDL and Halftone).
3.14
e-STUDIO2500c/3500c/3510c
3. Printer-specific Adjustments
Ex.: • When printing on Windows is performed with the following options selected: PCL6, Image
Quality Type = Presentation, Halftone =Detail
> Change the values for Y: 05-8062, M: 05-8063, C: 05-8064 and K: 05-8065.
• When printing on Macintosh is with the following option selected: Image Type = Line Art,
Halftone = Auto
> Change the values for Y: 05-8054, M: 05-8055, C: 05-8056 and K: 05-8057.
* Printing on Macintosh is performed in PostScript. (See the "PS3" row in the table below.)
Color to
adjust
Y
(Yellow)
M
(Magenta)
C
(Cyan)
K
(Black)
PDL
Halftone
PCL6
PS3
PCL6
PS3
PCL6
PS3
PCL6
PS3
Detail
Detail
Detail
Detail
Detail
Detail
Detail
Detail
[05]
code
05-8062
05-8054
05-8063
05-8055
05-8064
05-8056
05-8065
05-8057
Subcode
Recommended
value
Acceptable
value range
Default
0/1/2
0/1/2
0/1/2
0/1/2
0/1/2
0/1/2
0/1/2
0/1/2
Set a value larger
than 128.
0 to 255
128
* Set the value in increments of approximately 20, while checking the printouts until the optimum
value is obtained.
* The value for [05] code for K (black) will affect black-and-white images (including text, lines and
photos) on the printout.
* The subcode varies according to the area where the density is adjusted. Refer to the table below
and set the subcode for the area to be adjusted.
Subcode
Area where the density is adjusted
0
Low-density area
1
Medium-density area
2
High-density area
<Note>
• This adjustment changes the values set in the MFP. Therefore, it will affect every user who
uses the printer by connecting it to the MFP. After the adjustment, the values changed will be
applied to all printouts for the "Image Quality Type" and "Halftone" options. (For instance, if
the value for [05] code for PCL6 and Detail is changed, it will be applied to printing performed
with PCL6 and Halftone = "Detail" (or "Auto") selected.)
Carefully perform the adjustment, being aware that the image quality of all future printouts
will be changed, when printing out originals other than the one that is used for the adjustment.
If "Smooth" is selected from among the "Halftone" options, this adjustment will have no affect.
• This code is commonly used in the Twin-color mode and the Color mode. After the adjustment,
the values changed will be also applied to the image quality in the Color mode. When
adjusting the image quality in the Twin-color mode, carefully perform the adjustment, being
aware that the image quality of all future printouts will be changed, when performing printing
in the Color mode.
After adjusting the color balance, print and check the print image quality.
If further image quality adjustments are still necessary, use the next procedure.
e-STUDIO2500c/3500c/3510c
3.14
3. Printer-specific Adjustments
PCL6
PS3
Mac
* This adjustment will have an effect only on Auto or Color mode printing.
(5) Enter adjustment mode [05]. Increase the values for codes [8110 to 8117] to perform fine adjustment and
increase the sharpness intensity.
• Adjust the value for [05] code corresponding to the print option to be applied (PDL, Color mode, and
Image quality type).
* Printing on Macintosh is performed in PostScript. (See the "PS3" row in the table below.)
PDL
PS3
PCL6
Color mode
Auto/Color
Auto/Color
Image
quality type
General
Photograph
Presentation
Line Art
General
Photograph
Presentation
Line Art
[05] code
05-8110
05-8111
05-8112
05-8113
05-8114
05-8115
05-8116
05-8117
Recommended
value
Set a value lager
than 128
Acceptable
value range
Default
0 to 255
128
* Set the value in increments of approximately 5, while checking the printouts until the optimum value is
obtained.
<Hint>
This adjustment affects on the following areas according to Image Quality Type:
• General, Photograph, and Presentation: Only raster data (print image)
• Line Art:
<Note>
Only thin lines, small text and raster data
• This adjustment changes the values set in the MFP. Therefore, it will affect every user who
uses the printer by connecting it to the MFP. After the adjustment, the values changed will be
applied to all printouts for the "Sharpness" option. Carefully perform the adjustment, being
aware that the image quality of all future printouts will be changed, when printing out originals
other than the one that is used for the adjustment.
• The code in Standard Auto/Color mode is commonly used in the Twin-color mode. After the
adjustment, the values changed will be also applied to the image quality in the Twin-color
mode. When adjusting the image quality in Standard mode, carefully perform the adjustment,
being aware that the image quality of all future printouts will be changed, when performing
printing in the Twin-color mode.
Precautions after the completion of the adjustment
The adjustment may possibly cause outlined edges, incorrect color of thin lines, jaggies, and variations in
gradation. As a result the photo image may look unnatural. Therefore, carefully perform the adjustment, while
checking the printouts.
3.14
e-STUDIO2500c/3500c/3510c
3. Printer-specific Adjustments
3.14.2 To Adjust the Print Image Quality in the Black and White Mode
* Perform the adjustment in accordance with the procedures below.
* Both the service technician and the user can use procedure (1).
* Only the service technician must use procedures (2) and (3).
(1) Change the "Halftone" option on the printer driver.
For Windows
PCL6
PS3
* This adjustment will have an effect only on Black and white mode printing.
Open the property page of the printer driver. Press the [Setting] button in the "Image Quality" tab.
Select "Detail" from among the "Halftone" options.
For Macintosh
Mac
* This adjustment will have an effect only on Black and white mode printing.
Open the print dialog box. Select "Detail" from among the "Halftone" options.
* The menu to select varies according to the operating system. Refer to the table below and select the menu.
OS
Menu
8.6 / 9.x
"Color Settings 1" Ö "Halftone"
10.2.x
"Printer Features" Ö "Feature Sets: Color settings 1" Ö "Halftone"
10.3.x / 10.4.x "Color Settings 1" Ö "Halftone"
After changing the option on the printer driver, print and check the print image quality.
If further image quality adjustments are still necessary, use the next procedure.
e-STUDIO2500c/3500c/3510c
3.14
3. Printer-specific Adjustments
PCL6
PS3
Mac
* This adjustment will have an effect only on Black and white mode printing.
(2) Enter adjustment mode [05]. Increase the values for codes [7315 to 7318] to adjust the gamma curve
balance and increase the density on Black and White mode printing.
• Adjust the value for [05] code corresponding to the print option to be applied (PDL and Halftone).
* Printing on Macintosh is performed in PostScript. (See the "PS3" row in the table below.)
PDL
PS3
PCL6
Halftone
[05] code
Subcode
Recommended value
Acceptable
value range
Default
Smooth
Detail
Smooth
Detail
05-7315
05-7316
05-7317
05-7318
0/1/2
0/1/2
0/1/2
0/1/2
Set a value larger than 128
0 to 255
128
* Set the value in increments of approximately 10, while checking the printouts until the optimum value is
obtained.
* The subcode varies according to the area where the density is adjusted. Refer to the table below and set
the subcode for the area to be adjusted.
Subcode
Area where the density is adjusted
0
Low-density area
1
Medium-density area
2
High-density area
<Note>
• This adjustment changes the values set in the MFP. Therefore, it will affect every user who
uses the printer by connecting it to the MFP. After the adjustment, the values changed will be
applied to all printouts for the "Halftone" option. (For instance, if the value for [05] code for PCL
and Detail is changed, it will be applied to printing performed with PCL6 and Halftone = "Detail"
(or "Auto") selected.) Carefully perform the adjustment, being aware that the image quality of all
future printouts will be changed, when printing out originals other than the one that is used for the
adjustment.
• When "Mono" is selected from among the "Color" options and "Auto" (default) is selected from
among the "Halftone" options, "Detail" of the "Halftone" options is applied to text and graphics
(illustrations), and "Smooth" is applied to raster data (images). Therefore, particular attention is
required since the adjustment may have a different impact according to the patterns of the image to
be printed.
After increasing the density, print and check the print image quality.
If further image quality adjustments are still necessary, use the next procedure.
3.14
e-STUDIO2500c/3500c/3510c
3. Printer-specific Adjustments
PCL6
PS3
Mac
* This adjustment will have an effect only on Black and white mode printing.
(3) Enter adjustment mode [05]. Increase the value for code [7330] or [7335] to perform fine adjustment and
increase the sharpness intensity.
• Adjust the value for [05] code corresponding to the print option to be applied (PDL and Color mode).
* Printing on Macintosh is performed in PostScript. (See the "PS3" row in the table below.)
PDL
Color mode
[05] code
Recommended value
Acceptable
value range
Default
PS3
PCL6
Black and White
Black and White
05-7330
05-7335
Set a value lager than 128
0 to 255
128
* Set the value in increments of approximately 5, while checking the printouts until the optimum value is
obtained.
<Note>
This adjustment changes the values set in the MFP. Therefore, it will affect every user who uses
the printer by connecting it to the MFP. After the adjustment, the values changed will be applied
to all printouts for the "Sharpness" option. Carefully perform the adjustment, being aware that
the image quality of all future printouts will be changed, when printing out originals other than
the one that is used for the adjustment.
Precautions after the completion of the adjustment
The adjustment may possibly cause outlined edges, jaggies and variations in gradation. As a result the photo
image may look unnatural. Therefore, carefully perform the adjustment, while checking the printouts.
e-STUDIO2500c/3500c/3510c
3.14
3. Printer-specific Adjustments
3.15 To Make the Light-Colored Area Darker on the Printout
Before the adjustment
After the adjustment
Print
The light-colored area becomes darker but the
highly colored area becomes blurred.
Print
Only the light-colored area becomes darker.
Explanation
When the entire image is printed darker to make the light-colored area darker, the highly colored area may
become much darker and blurred. Change the options on the printer driver or adjust the color balance, in order
to make only the light-colored area darker while leaving the highly colored area as it is.
3.15
e-STUDIO2500c/3500c/3510c
3. Printer-specific Adjustments
Procedures
* Perform the adjustment in accordance with the procedures below.
* Both the service technician and the user can use procedure (1).
* Only the service technician must use procedures (2) and (3).
* The item to set varies depending on the type of data to adjust. Select an effective option according to the data
format to adjust, such as a print image (raster data), text (font), and line drawing (graphic data).
PCL6
PS3
* This adjustment will have an effect only on Auto or Color mode printing.
(1) Open the property page of the printer driver. Press the [Setting] button in the "Image Quality" tab.
Mark the "Detail" checkbox in the "Color Balance" tab. Press the [Edit] button.
Set the value for the Low/Medium density of the color you would like to adjust, within a range of "1" to "4"
in the "Color Balance Details" option.
* This adjustment will have an effect only on printing on a Windows PCL6 or PS3 emulation printer driver.
(This adjustment cannot be performed on a Macintosh printer driver.)
* Initially, set "4" and check the printout.
After changing the option on the printer driver, print and check the print image quality.
If further image quality adjustments are still necessary, the service technician must use the next procedure
according to the image type.
• To adjust the color image:
Go to procedure (2).
• To adjust the black and white image:
Go to procedure (3).
e-STUDIO2500c/3500c/3510c
3.15
3. Printer-specific Adjustments
PCL6
PS3
Mac
* This adjustment will have an effect only on Auto or Color mode printing.
(2) Enter adjustment mode [05]. Increase the values for codes [8050 to 8065] to increase the Low/Medium
density of the color.
• Adjust the value for [05] code corresponding to the print option to be applied (PDL and Halftone).
Ex.: • When printing on Windows is performed with the following options selected: PCL6, Image Quality
Type = General, Halftone = Auto
> Text area
Change the values for Y: 05-8062, M: 05-8063, C: 05-0864 and K: 05-8065.
> Graphic and image area
Change the values for Y: 05-8058, M: 05-8059, C: 05-8060 and K: 05-8061.
• When printing on Macintosh is performed with the following option selected: Image Type =
Photograph, Halftone = Smooth
> Change the values for Y: 05-8050, M: 05-8051, C: 05-8052 and K: 05-8053.
* Printing on Macintosh is performed in PostScript. (See the "PS3" row in the table below.)
Color to
adjust
Y
(Yellow)
M
(Magenta)
C
(Cyan)
K
(Black)
PDL
PCL5c
PS3
PCL5c
PS3
PCL5c
PS3
PCL5c
PS3
Halftone [05] code Subcode
Smooth
Detail
Smooth
Detail
Smooth
Detail
Smooth
Detail
Smooth
Detail
Smooth
Detail
Smooth
Detail
Smooth
Detail
05-8058
05-8062
05-8050
05-8054
05-8059
05-8063
05-8051
05-8055
05-8060
05-8064
05-8052
05-8056
05-8061
05-8065
05-8053
05-8057
0/1
0/1
0/1
0/1
0/1
0/1
0/1
0/1
0/1
0/1
0/1
0/1
0/1
0/1
0/1
0/1
Recommended value
Set a value larger than 128.
Acceptable
Default
value range
0 to 255
128
* Set the value in increments of approximately 20, while checking the printouts until the optimum value is
obtained.
3.15
e-STUDIO2500c/3500c/3510c
3. Printer-specific Adjustments
* "Halftone" refers to how halftones are printed. Two options are available: "Smooth" which is intended to
improve the reproducibility of gradation and "Detail" which is intended to print halftones in details (with
the high frequency).
The halftone option to be applied in printing can be selected from among the "Halftone" options on the
printer driver (Windows) or in the print dialog box (Macintosh).
"Auto" is selected from among the "Apply to" options by default. It is intended to automatically select
"Smooth" or "Detail" in accordance with "Apply to" of the halftone option, the selected "Color" and
"Image Quality Type" options, as described in the table below.
"Color" and "Image Quality Type" options
Apply to
Auto/Color
Black and
White
General
Photograph Presentation
Line Art
Twin
Color
Text
Detail
Detail
Detail
Detail
Detail
Detail
Graphic
(Illustration, line, etc.)
Smooth
Smooth
Smooth
Detail
Detail
Smooth
Image
(Photograph, etc.)
Smooth
Smooth
Smooth
Detail
Smooth
Smooth
* The subcode varies according to the area where the density is adjusted. Refer to the table below and set
the subcode for the area to be adjusted.
Subcode
Area where the density is adjusted
0
Low-density area
1
Medium-density area
2
High-density area
<Note>
• This adjustment changes the values set in the MFP. Therefore, it will affect every user who
uses the printer by connecting it to the MFP. After the adjustment, the values changed will be
applied to all printouts for the "Image Quality Type" and "Halftone" options. (For instance, if
the value for [05] code for PCL6 and Smooth is changed, it will be applied to printing
performed with PCL6 and Halftone = "Smooth" (or "Auto") selected.) Carefully perform the
adjustment, being aware that the image quality of all future printouts will be changed, when
printing out originals other than the one that is used for the adjustment.
• This code is commonly used in the Twin-color mode and the Color mode. After the
adjustment, the values changed will be also applied to the image quality in the Color mode.
When adjusting the image quality in the Twin-color mode, carefully perform the adjustment,
being aware that the image quality of all future printouts will be changed, when performing
printing in the Color mode.
e-STUDIO2500c/3500c/3510c
3.15
3. Printer-specific Adjustments
PCL6
PS3
Mac
* This adjustment will have an effect only on Black and white mode printing.
(3) Increase the values for codes [7315 to 7318] to adjust the gamma curve balance and increase the
Low/Medium density on Black and White mode printing.
• Adjust the value for [05] code corresponding to the print option to be applied (PDL and Halftone).
* Printing on Macintosh is performed in PostScript. (See the "PS3" row in the table below.)
PDL
PS3
PCL6
Halftone
[05] code
Subcode
Recommended value
Acceptable
value range
Default
Smooth
Detail
Smooth
Detail
05-7315
05-7316
05-7317
05-7318
0/1/2
0/1/2
0/1/2
0/1/2
Set a value larger than 128
0 to 255
128
* Set the value in increments of approximately 10, while checking the printouts until the optimum value is
obtained.
* The subcode varies according to the area where the density is adjusted. Refer to the table below and set
the subcode for the area to be adjusted.
Subcode
Area where the density is adjusted
0
Low-density area
1
Medium-density area
2
High-density area
<Note>
• This adjustment changes the values set in the MFP. Therefore, it will affect every user who
uses the printer by connecting it to the MFP. After the adjustment, the values changed will be
applied to all printouts for the "Halftone" option. (For instance, if the value for [05] code for PCL
and Detail is changed, it will be applied to printing performed with PCL6 and Halftone = "Detail"
(or "Auto") selected.) Carefully perform the adjustment, being aware that the image quality of all
future printouts will be changed, when printing out originals other than the one that is used for the
adjustment.
• When "Mono" is selected from among the "Color" options and "Auto" (default) is selected from
among the "Halftone" options, "Detail" of the "Halftone" options is applied to text and graphics
(illustrations), and "Smooth" is applied to raster data (images). Therefore, particular attention is
required since the adjustment may have a different impact according to the patterns of the image to
be printed.
Precautions after the completion of the adjustment
Nothing in particular.
3.15
e-STUDIO2500c/3500c/3510c
3. Printer-specific Adjustments
3.16 To Clearly Print Thin Lines/Double Lines
Before the adjustment
After the adjustment
–
Thin lines or double lines are dotted on the
printout.
The thin lines or double lines are clearly
printed out.
Explanation
When thin lines or double lines, which are laid out on a solid filled area, are printed out, they may be dotted on
the printout. Change the option on the printer driver, in order to clearly print them out.
Procedures
* Both the service technician and the user can perform all adjustments.
e-STUDIO2500c/3500c/3510c
3.16
3. Printer-specific Adjustments
(1) Enable the "Distinguish Thin Line" option on the printer driver.
For Windows
PCL6
PS3
Open the property page of the printer driver. Press the [Setting] button in the "Image Quality" tab.
Mark the "Distinguish Thin Line" checkbox in the "Basic" tab.
3.16
e-STUDIO2500c/3500c/3510c
3. Printer-specific Adjustments
For Macintosh
Mac
Open the print dialog box. Enable the "Distinguish Thin Line" option.
* The menu to select varies according to the operating system. Refer to the table below and select the menu.
OS
Menu
8.6 / 9.x
"Color Settings 4" Ö "Distinguish Thin Lines"
10.2.x
"Printer Features" Ö "Feature Sets: Color settings 1" Ö "Distinguish Thin Lines"
10.3.x / 10.4.x "Color Settings 1" Ö "Distinguish Thin Lines"
Precautions after the completion of the adjustment
Performing this adjustment on thin lines may not provide satisfactory results. In this case, it is recommended to
perform the adjustment in conjunction with 3.14 To Clearly Print Light-Colored Thin Lines or Text be made.
e-STUDIO2500c/3500c/3510c
3.16
3. Printer-specific Adjustments
3.17 To Decrease the Image Density and Save Toner
(To Print in the Toner Save Mode)
Before the adjustment
Default printing.
After the adjustment
Printing is performed, while the toner is
being saved.
Explanation
The e-STUDIO2500c/3500c/3510c offers a toner save mode. It is intended to automatically decrease the image
density and reduce the amount of toner used. Change the option on the printer driver and perform printing in the
toner save mode, for instance, if a large number of copies have to be printed, or if the image density is too high.
Procedures
* Both the service technician and the user can perform all adjustments.
3.17
e-STUDIO2500c/3500c/3510c
3. Printer-specific Adjustments
(1) Enable the "Toner Save" option on the printer driver.
For Windows
PCL6
PS3
Open the property page of the printer driver. Mark the "Toner Save" checkbox in the "Others" tab.
e-STUDIO2500c/3500c/3510c
3.17
3. Printer-specific Adjustments
For Macintosh
Mac
Open the print dialog box. Enable the "Toner Save" option.
* The menu to select varies according to the operating system. Refer to the table below and select the menu.
OS
Menu
8.6 / 9.x
"Printing Modes" Ö "Toner Save"
10.2.x
"Printer Features" Ö "Printing Modes" Ö "Toner Save"
10.3.x / 10.4.x "Color Settings 1" Ö "Toner Save"
Precautions after the completion of the adjustment
The adjustment may possibly provide the image density lower than the user desires, when printing is performed
in the toner save mode. Therefore, carefully perform the adjustment, while checking the printouts.
Remarks
The print density in the toner save mode can also be adjusted. For further information regarding the adjustment
procedures, refer to 3.18 To Adjust the Image Density in the Toner Save Mode.
3.17
e-STUDIO2500c/3500c/3510c
3. Printer-specific Adjustments
3.18 To Adjust the Image Density in the Toner Save Mode
Before the adjustment
After the adjustment
–
The image density is too dark, even when
printing is performed in the toner save
mode.
The image density in the toner save mode
is adjustable, as desired.
Explanation
The e-STUDIO2500c/3500c/3510c offers a toner save mode. It is intended to automatically decrease the image
density and reduce the amount of toner used. Adjust the upper limit of the image density in the toner save mode,
in order to obtain the desired image density requested by a particular user.
Procedures
* The service technician must perform all adjustments.
e-STUDIO2500c/3500c/3510c
3.18
3. Printer-specific Adjustments
PCL6
PS3
Mac
(1) Enter adjustment mode [05]. Change the value to adjust the image density in the toner save mode.
* The [05] code to use varies, depending on whether to adjust the image quality on Full Color or Twin Color
printing or on Black and White printing. Use either of the procedures below corresponding to the type of
original to print.
To adjust the image quality in Full Color or Twin Color printing
("Auto," "Color" or "Twin Color" is selected from among the "Color" options on the PCL6 or PS3 printer
driver. "Auto," "Color" or "Twin Color" is selected from among the "Color Type" options on Macintosh.)
* The "Color" options are available in the "Basic" tab on the PCL6 and PS3 printer drivers. The "Color
Type" options are available in the "Color Settings 1" menu in the print dialog box on Macintosh.
(a) Enter adjustment mode [05]. Change the value for code [1055] or [1057] to adjust the upper limit of the
image density in the toner save mode.
* Printing on Macintosh is performed in PostScript. (See the "PS3" row in the table below.)
PDL
[05] code
Recommended value
PS3
05-1055
Set a value smaller than 176 to
decrease the density.
05-1057
Set a value larger than 176 to
increase the density.
Acceptable
Default
value range
0 to 255
PCL6
176
* Set the value in increments of approximately 10, while checking the printouts until the optimum value
is obtained.
3.18
e-STUDIO2500c/3500c/3510c
3. Printer-specific Adjustments
To adjust the image quality on Black and White printing
("Black and White" is selected from among the "Color" options on the PCL6 or PS3 printer driver. "Mono"
is selected from among the "Color Type" options on Macintosh.)
* The "Color" options are available in the "Basic" tab on the PCL6 and PS3 printer drivers. The "Color
Type" options are available in the "Color Settings 1" menu in the print dialog box on Macintosh.
(a) Enter adjustment mode [05]. Increase the value for code [664] or [665] to adjustment the upper limit of
the image density in the toner save mode.
* Printing on Macintosh is performed in PostScript. (See the "PS3" row in the table below.)
PDL
[05] code
Recommended value
PS3
05-664
Set a value smaller than 176 to
decrease the density.
05-665
Set a value larger than 176 to
increase the density.
Acceptable
Default
value range
0 to 255
PCL6
176
* Set the value in increments of approximately 10, while checking the printouts until the optimum value
is obtained.
Precautions after the completion of the adjustment
The adjustment may possibly cause an increase of the amount of toner used (if the image density is increased) or provide
faint print images (if the image density is decreased). Therefore, carefully perform the adjustment, while checking the
printouts.
e-STUDIO2500c/3500c/3510c
3.18
3. Printer-specific Adjustments
3.19 To Print Illegible Gray or Colored Text in Black
Before the adjustment
Gray, yellow and cyan text is illegible on the
printouts.
After the adjustment
The gray, yellow or cyan text is printed in
black. This makes it more legible on the
printouts.
Explanation
Text may look illegible on the printout, depending on the hues of the background and the text contained in the
original, particularly, when printing an original containing yellow, light blue or gray text on a light-colored
background. In addition, when a full-color original is printed in the Black and White mode, the colored text may
turn gray on the printout and eventually become illegible. In this case, change the option on the printer driver, in
order to reproduce the colored text (except the white text) in black and make it more legible on the printout.
* This adjustment will have an effect only on printing on a Windows PCL6 or PS3 emulation printer driver.
(This adjustment cannot be performed on a Macintosh printer driver.)
Procedures
* Both the service technician and the user can perform all adjustments.
3.19
e-STUDIO2500c/3500c/3510c
3. Printer-specific Adjustments
PCL6
PS3
(1) Open the property page of the printer driver. Press the [Setting] button in the "Image Quality" tab.
Mark the "Use Black for All Text" checkbox in the "Basic" tab.
* This adjustment will be effective, only if a file created on a general application, such as Microsoft Office,
is printed in PostScript (PS3). It may not be effective, if a file created on a graphic application (e.g.
Illustrator) or a DTP application (e.g. QuarkXPress) is printed, or a PDF file created on these applications
is printed.
Precautions after the completion of the adjustment
Nothing in particular.
Remarks
Not all colored text may be printed in black, depending on the type of text (e.g. text larger than 72 points).
e-STUDIO2500c/3500c/3510c
3.11
3.19
3. Printer-specific Adjustments
3.20 To Ignore Blank Pages for Printing
Before the adjustment
After the adjustment
A blank page is also delivered.
A blank page is ignored for printing.
Explanation
Some applications may be designed to automatically insert blank pages for laying out the pages of a document.
Change the option on the printer driver, in order to ignore all blank pages for printing.
Procedures
* Both the service technician and the user can perform all adjustments.
3.20
e-STUDIO2500c/3500c/3510c
3. Printer-specific Adjustments
(1) Enable the "Do not Print Blank Pages" option on the printer driver.
For Windows
PCL6
PS3
Open the property page of the printer driver. Mark the "Do not Print Blank Pages" checkbox in the "Others"
tab.
e-STUDIO2500c/3500c/3510c
3.20
3. Printer-specific Adjustments
For Macintosh
Mac
Open the print dialog box. Enable the "Do not Print Blank Pages" option.
* The menu to select varies according to the operating system. Refer to the table below and select the menu.
OS
Menu
8.6 / 9.x
"Printing Modes" Ö "Do not Print Blank Pages"
10.2.x
"Printer Features" Ö "Printing Modes" Ö "Do not Print Blank Pages"
10.3.x / 10.4.x "Print Mode" Ö "Do not Print Blank Pages"
Precautions after the completion of the adjustment
The adjustment may not possibly operate the following options as programmed. Therefore, pay special attention
to the combination of options.
• Booklet printing
• N-up printing
• Use Back Cover
• Interleave Pages
• Use Front Cover
Remarks
If any data are inserted in the header or footer of a particular page on Excel or Word, even though no data are
present in the body, the page will not be recognized as a blank page. The header or footer will be printed out.
3.20
e-STUDIO2500c/3500c/3510c
3. Printer-specific Adjustments
3.21 To Sharply Print Black Text
Before the adjustment
After the adjustment
Text looks black on the monitor. But the hue
will vary, if it is printed out in the Full color
mode.
The hue of the text is nearly matched with the
black hue on the monitor.
Explanation
Text looks black on the monitor. But if it is printed in the Full color mode (with "Auto" selected from among the
"Color" options), all color toners (C, M, Y and K) will be used to print it, depending on the application in use.
As a result, the black hue on the printout looks different from what the user desires. This problem is caused by
the application specifications, not by the printer.
Particularly, the following factors may print black text using all color toners (C, M, Y and K) when a PDF file is
printed out:
• The file of black text (CMY = 0%, K = 100%) is printed on the PCL6 printer driver.
• Black text is treated as image data instead of text data on the file.
• Black text is not defined as 100% black (RGB = 0% or CMY = 0%, K = 100%) on the file.
Change the option on the printer driver or adjust the color balance, in order to nearly match the hue of the black
text on the file, in which these factors may be included, with the black hue.
As a point to remember, determine whether the text to adjust is entered as an actual text (font) or as a graphic or
image data.
Procedures
* Perform the adjustment in accordance with the procedures below.
* Both the service technician and the user can use procedures (1) to (3).
*Only the service technician must use procedures (4) and (5).
e-STUDIO2500c/3500c/3510c
3.21
3. Printer-specific Adjustments
(1) If printing is performed on a PCL6 printer driver, select a PS3 printer driver.
<Hint>
If printing is performed on a PCL6 printer driver, or if a file or a graphic application created on a
DTP application, such as Illustrator, QuarkXPress, FreeHand, or CorelDraw, is printed using the
CMYK toners, or a high-definition PDF file created on these applications is printed, black text
may not be converted into 100% black. But if printing is performed on a PS3 printer driver,
black text can be printed in black, as shown on the file.
After printing on the PS3 driver, print and check the print image quality.
If further image quality adjustments are still necessary, use the next procedure.
(2) Mark the "Pure Black" checkbox on the printer driver. Select "Text, Graphic & Image" from among the
"Apply to" options.
<Hint>
Text on the Web page may be raster data (image) created in GIF or JPEG format. Black-and-white
data created in PDF format by scanning the original are also raster data. If the "Pure Black"
checkbox is marked on the printer driver, "Auto" is selected from among the "Apply to" options by
default. Raster data are handled as an image, which is intended to improve the texture, and the 4
color toners (C, M, Y and K) will be used to print black. If "Text, Graphic & Image" is selected
from among the "Apply to" options, only the K toner will be used to print black on raster data.
For Windows
PCL6
PS3
* This adjustment will have an effect only on Black and white mode printing.
Open the property page of the printer driver. Press the [Setting] button in the "Image Quality" tab.
Mark the "Pure Black" checkbox in the "Basic" tab. Select "Text, Graphic & Image" from among the
"Apply to" options.
3.21
e-STUDIO2500c/3500c/3510c
3. Printer-specific Adjustments
For Macintosh
Mac
* This adjustment will have an effect only on full-color printing.
Open the print dialog box. Select "Black – Text, Graphic & Image" from among the "Pure Black and Gray"
options.
* The menu to select varies according to the operating system. Refer to the table below and select the menu.
OS
Menu
8.6 / 9.x
"Color Settings 2" Ö "Pure Black and Gray"
10.2.x
"Printer Features" Ö "Feature Sets: Color settings 2" Ö "Pure Black and Gray"
10.3.x / 10.4.x "Color Settings 1" Ö "Pure Black and Gray"
After changing the option on the printer driver, print and check the print image quality.
If further image quality adjustments are still necessary, use the next procedure.
e-STUDIO2500c/3500c/3510c
3.21
3. Printer-specific Adjustments
PCL6
PS3
(3) Open the property page of the printer driver. Press the [Setting] button in the "Image Quality" tab.
Mark the "Use Black for All Text" checkbox in the "Image Quality" tab.
* This adjustment will have an effect only on printing on a Windows PCL6 or PS3 emulation printer driver.
(This adjustment cannot be performed on a Macintosh printer driver.)
* This adjustment will be effective, only if a file created on a general application, such as Microsoft Office,
is printed in PostScript (PS3). It may not be effective, if a file created on a graphic application (e.g.
Illustrator) or a DTP application (e.g. QuarkXPress) is printed, or a PDF file created on these applications
is printed.
<Note>
The adjustment may provide all colored text in black.
After changing the option on the printer driver, print and check the print image quality.
If further image quality adjustments are still necessary, the service technician must use the next procedure,
because text may not be defined as 100% black on the file.
3.21
e-STUDIO2500c/3500c/3510c
3. Printer-specific Adjustments
3.
PCL6
PS3
Mac
* This adjustment will have an effect only on Black and white mode printing.
(4) Enter adjustment mode [05]. Change the values for codes [8210 to 8215] or [8252 to 8257] to adjust the
threshold values for "Pure Gray" and "Pure Black" (to adjust the area to print only using the K toner).
• Adjust the value for [05] code corresponding to the print option to be applied (Apply to, PDL, Item,
Subcode (Image quality type)).
* Printing on Macintosh is performed in PostScript. (See the "PS3" row in the table below.)
* The effect with PureBlack/Gray selected will be invalid, if "Photo" is selected from among the "Image
Quality Type" options and CIE-Based RGB/CMYK data are printed. The effect will be invalid, if Device
CMYK data are printed, regardless of which "Image Quality Type" option is selected.
The effect will be valid, only if "General," "Presentation" or "Line Art" is selected and CIE Based
RGB/CMYK data or Device RGB data are printed.
Apply to
PDL
Item
[05] code
Subcode
PureBlack
05-8210
0/1/2/3
PureGray
05-8213
0/1/2/3
05-8252
0/1/2/3
05-8255
0/1/2/3
PureBlack
05-8211
0/1/2/3
PureGray
05-8214
0/1/2/3
05-8254
0/1/2/3
05-8257
0/1/2/3
PureBlack
05-8212
0/1/2/3
PureGray
05-8215
0/1/2/3
05-8253
0/1/2/3
05-8256
0/1/2/3
Recommended value
PCL6
Text
PS3
PCL6
Graphic
PS3
PCL6
Image
PS3
Device RGB
PureBlack/Gray
CIE-Based
PureBlack/Gray
Device RGB
PureBlack/Gray
CIE-Based
PureBlack/Gray
Device RGB
PureBlack/Gray
CIE-Based
PureBlack/Gray
Set a value smaller than the default to
decrease the area to print only using
the K toner.
Acceptable
value range
Default
1 to 15
8
113 to 143
(121 to 143)
128
1 to 15
1/1/1/8
Set a value larger than the default to
113 to 143
increase the area to print only using the (128 to 143) *1
K toner.
(121 to 143) *2
128
1 to 15
1/1/1/8
113 to 143
(128 to 143) *1
(121 to 143) *2
128
* The values in the parentheses in the acceptable range column indicate valid values, which provide the
effect. "*1" is a valid value, if "General," "Photograph" or "Presentation" is selected from among the
"Image Quality Type" options. "*2" is a valid value, if "Line Art" " is selected.
* The subcode varies according to the Image quality type where the adjustment is performed. Refer to the
table below and set the subcode for the Image quality type to adjust.
Subcode
Image Quality Type
0
General
1
Photographic
2
Presentation
3
Line Art
e-STUDIO2500c/3500c/3510c
3.21
3. Printer-specific Adjustments
<Hint>
Refer to the information below to select "Item," in order to perform the adjustment on a PS3
printer driver:
• PDF data:
CIE-Based RGB/CMYK data and Device
RGB/CMYK data
• Data on Windows and Microsoft Office:
Device RGB data in most cases
• Data on Mac OS X:
CIE-Based RGB/CMYK data in many cases
<Note> If the graphic and image options are changed, the adjustment may possibly cause the unnatural hue
of gradational and photo images, and the inadequate reproducibility of gradations. Therefore,
carefully perform the adjustment, while checking the printouts.
PCL5c
PS3
Mac
* This adjustment will have an effect only on Black and white mode printing.
(5) Enter adjustment mode [05]. Change the values for codes [8050 to 8065] to adjust the color density (Color balance).
• Adjust the value for [05] code corresponding to the print option to be applied (PDL and Halftone).
Ex.: • When printing on Windows is performed with the following options selected: PCL6, Image Quality
Type = General, Halftone = Auto
> Text area
Change the values for Y: 05-8062, M: 05-8063, C: 05-0864 and K: 05-8065.
> Graphic and image area
Change the values for Y: 05-8058, M: 05-8059, C: 05-8060 and K: 05-8061.
• When printing on Macintosh is performed with the following option selected: Image Type =
Photograph, Halftone = Smooth
> Change the values for Y: 05-8050, M: 05-8051, C: 05-8052 and K: 05-8053.
* Printing on Macintosh is performed in PostScript. (See the "PS3" row in the table below.)
* The hue of the black text printed using all color toners (C, M, Y and K) will look much clearer, if the amount
of the C (cyan) toner used is larger than the M (magenta) or Y (yellow) toner. Remember that adjusting the
density of K (black) does not affect the hue of the black text, if all color toners are used to print the text.
Color to
adjust
Y
(Yellow)
M
(Magenta)
C
(Cyan)
K
(Black)
PDL
PCL5c
PS3
PCL5c
PS3
PCL5c
PS3
PCL5c
PS3
Halftone [05] code Subcode
Smooth
Detail
Smooth
Detail
Smooth
Detail
Smooth
Detail
Smooth
Detail
Smooth
Detail
Smooth
Detail
Smooth
Detail
05-8058
05-8062
05-8050
05-8054
05-8059
05-8063
05-8051
05-8055
05-8060
05-8064
05-8052
05-8056
05-8061
05-8065
05-8053
05-8057
0/1/2
0/1/2
0/1/2
0/1/2
0/1/2
0/1/2
0/1/2
0/1/2
0/1/2
0/1/2
0/1/2
0/1/2
0/1/2
0/1/2
0/1/2
0/1/2
Recommended value
Acceptable
Default
value range
Set a value larger than 128
to increase the density.
0 to 255
128
Set a value smaller than 128
to decrease the density.
* Set the value in increments of approximately 20, while checking the printouts until the optimum value is
obtained.
3.21
e-STUDIO2500c/3500c/3510c
3. Printer-specific Adjustments
* "Halftone" refers to how halftones are printed. Two options are available: "Smooth" which is intended to
improve the reproducibility of gradation and "Detail" which is intended to print halftones in details (with
the high frequency).
The halftone option to be applied in printing can be selected from among the "Halftone" options on the
printer driver (Windows) or in the print dialog box (Macintosh).
"Auto" is selected from among the "Apply to" options by default. It is intended to automatically select
"Smooth" or "Detail" in accordance with "Apply to" of the halftone option, the selected "Color" and
"Image Quality Type" options, as described by the table below.
"Color" and "Image Quality Type" options
Apply to
Auto/Color
Black and
White
General
Photograph Presentation
Line Art
Twin
Color
Text
Detail
Detail
Detail
Detail
Detail
Detail
Graphic
(Illustration, line, etc.)
Smooth
Smooth
Smooth
Detail
Detail
Smooth
Image
(Photograph, etc.)
Smooth
Smooth
Smooth
Detail
Smooth
Smooth
* The subcode varies according to the area where the density is adjusted. Refer to the table below and set
the subcode for the area to be adjusted.
Subcode
Area where the density is adjusted
0
Low-density area
1
Medium-density area
2
High-density area
<Note>
• This adjustment changes the values set in the MFP. Therefore, it will affect every user who
uses the printer by connecting it to the MFP. After the adjustment, the values changed will be
applied to all printouts for the "Image Quality Type" and "Halftone" options. (For instance, if
the value for [05] code for PCL6 and Smooth is changed, it will be applied to printing
performed with PCL6 and Halftone = "Smooth" (or "Auto") selected.) Carefully perform the
adjustment, being aware that the image quality of all future printouts will be changed, when
printing out originals other than the one that is used for the adjustment.
• This code is commonly used in the Twin-color mode and the Color mode. After the
adjustment, the values changed will be also applied to the image quality in the Color mode.
When adjusting the image quality in the Twin-color mode, carefully perform the adjustment,
being aware that the image quality of all future printouts will be changed, when performing
printing in the Color mode.
e-STUDIO2500c/3500c/3510c
3.21
3. Printer-specific Adjustments
Precautions after the completion of the adjustment
The adjustment may possibly change the hue of the text and the image, such as a photo image, on the printout.
Therefore, carefully perform the adjustment, while checking the printouts.
Remarks
To check the definition of black text
When creating a PDF file, 100% black may not be defined as follows, depending on the application settings:
"100% black" indicates the following values:
• RGB data:
RGB = 0%
• CMYK data:
CMY = 0%, K = 100%
As a result, text, which should be defined as 100% black on the application, is not defined as 100% black on
the saved PDF file. (A small percent of color data is defined.) Eventually, all color toners (C, M, Y and K)
will be used to print it.
If printing is performed on a PCL6 printer driver, print data are captured as RGB data. If black text is
defined as 100% black (CMY=0%, K = 100%) for CMYK data on a PDF file, it will not be converted into
100% black (RGB = 0%) for RGB data on Acrobat, and it will be printed in colors. (It is recommended to
print CMYK data on a PS3 printer driver instead of a PCL6 printer driver.)
Use "Output Preview" on Acrobat 7.0 Professional to examine the color definition on the PDF file.
* For further information regarding the Output Preview, refer to an appropriate manual or the Help menu of
Acrobat 7.0 Professional.
3.21
e-STUDIO2500c/3500c/3510c
3. Printer-specific Adjustments
(1) Open a PDF file on Acrobat 7.0 Professional.
(2) Select "Output Preview" in the "Advanced" menu.
(3) Select a profile from among the "Simulation Profile" options.
* Select the profile to use for the Monitor Simulation, in order to print RGB data, and the one to use for the
Ink Simulation, in order to print CMYK data from among the "Simulation Profile" options.
(4) Move the cursor over the data to check the color definition. Then the color calibration will be displayed
in percentage on "Separations."
(3)
(4)
e-STUDIO2500c/3500c/3510c
3.21
3. Printer-specific Adjustments
3.22 To Prevent Dark Toner from Coming Off
Before the adjustment
After the adjustment
The dark toner comes off.
The dark toner is securely fixed.
Explanation
When highly colored lines, where a large accumulated amount of C, M, Y and K toners are used, are created on
raster data (image), such as BMP, GIF, JPEG and TIFF, and printed on the rough surface of paper or thick paper,
the toner may come off the paper. This is because the C, M, Y and K toners may be overlaid, the paper may be
extremely thick or the surface may be rough, and the amount of toner used may be insufficient. Adjust the limit
value of the maximum amount of toner used, in order to avoid a toner fixing problem.
This adjustment does not affect a single color of C, M, Y and K, or bright colors such as red and green.
Procedures
* The service technician must perform all adjustments.
PCL6
PS3
Mac
* This adjustment will have an effect only on Auto or Color mode printing.
(1) Enter adjustment mode [05]. Decrease the values for code [8076 to 8078], [8080 to 8088] or [1092 to 1096]
to reduce the limit value of the maximum amount of toner used.
• Adjust the value for [05] code corresponding to the print option to be applied (Paper type, Image quality
type, Halftone, and PDL).
*Printing on Macintosh is performed in PostScript. (See the "PS3" row in the table below.)
3.22
e-STUDIO2500c/3500c/3510c
3. Printer-specific Adjustments
Paper
type
Special 1
Image quality
type
General/Photograph/
Presentation
Line Art
Special 2
General/Photograph/
Presentation
Line Art
Recycled
paper
Plain
paper
Thick 1
General/Photograph/
Presentation
Line Art
General/Photograph/
Presentation
Line Art
General/Photograph/
Presentation
Line Art
Thick 2
General/Photograph/
Presentation
Line Art
Thick 3
General/Photograph/
Presentation
Line Art
OHP
General/Photograph/
Presentation
Line Art
Halftone
[05] code
Auto/Smooth
Detail
Smooth
Auto/Detail
Auto/Smooth
Detail
Smooth
Auto/Detail
Auto/Smooth
Detail
Smooth
Auto/Detail
Auto/Smooth
Detail
Smooth
Auto/Detail
Auto/Smooth
Detail
Smooth
Auto/Detail
Auto/Smooth
Detail
Smooth
Auto/Detail
Auto/Smooth
Detail
Smooth
Auto/Detail
Auto/Smooth
Detail
Smooth
Auto/Detail
05-8076
05-8085
05-8076
05-8085
05-8077
05-8086
05-8077
05-8086
05-8078
05-8087
05-8078
05-8087
05-8080
05-1092
05-8080
05-1092
05-8081
05-1093
05-8081
05-1093
05-8082
05-1094
05-8082
05-1094
05-8083
05-1095
05-8083
05-1095
05-8084
05-1096
05-8084
05-1096
Subcode Recommended Acceptable
(PDL)
value
value range
Default
113
113
128
128
PCL6: 0
PS3: 1
Set a value
smaller than
the default.
0 to 255
113
113
113
128
* Set the value in increments of approximately 30, while checking the printouts until the optimum value is
obtained.
Precautions after the completion of the adjustment
The adjustment may possibly cause dark areas such as shades on photo images to look unnaturally faint.
Therefore, carefully perform the adjustment, while checking the printouts.
e-STUDIO2500c/3500c/3510c
3.22
3. Printer-specific Adjustments
3.23 To Register the Image Quality Adjusted Corresponding to a Preference
(To use the Custom Color Settings)
Explanation
The option to obtain the desired print image quality can be registered as Custom Color Settings.
* This adjustment will have an effect only on printing on a Windows PCL6 or PS3 emulation printer driver.
(This adjustment cannot be performed on a Macintosh printer driver.)
Procedures
* Both the service technician and the user can perform all adjustments.
* As an example of using Customer Color Settings, if "Presentation" is selected as the base type from among the
"Image Quality Type" options, the procedure below is to set a larger value for the Medium density of the color
in the "Color Balance Details" option, and register the name of "Draft agenda."
PCL6
PS3
(1) Open the property page of the printer driver in the "Printers and Faxes" folder. Press the [Setting] button in
the "Image Quality" tab. Change the options in the "Basic," "Color Balance" and "Image Attribute" tabs, in
order to obtain the desired print image quality.
Ex:
Mark the "Detail" checkbox in the "Color Balance" tab. Press the [Edit] button.
Set the value for the Medium density of the color in the "Color Balance Details" option.
After setting the values, use the procedure.
3.23
e-STUDIO2500c/3500c/3510c
3. Printer-specific Adjustments
PCL6
PS3
(2) Register the name for what has been specified in procedure (1), in the "Basic" tab in the "Setting" option.
• Use steps (a) to (c) to register the name.
(a) Mark the "Save Current setting as" checkbox in the "Custom Color Settings" option.
(b) Enter an optional name in the "Name" option.
(c) Select the type you would like to use as the base one from among the "Image Quality Type" options
in "Original Image Quality Type."
(a)
(b)
(c)
e-STUDIO2500c/3500c/3510c
3.23
3. Printer-specific Adjustments
After registering the name, open the property page of the printer driver. Make sure that the name created for
the "Image Quality Type" option in the "Image Quality" tab has been registered.
* The icon of the base "Image Quality Type" will be displayed in the background of the icons for the
registered Custom Color Settings.
(The icon of "Presentation" is displayed in the background as illustrated below.)
Precautions after the completion of the adjustment
The Custom Color Settings indicate a condition where the default setting has been changed.
Adjusting the values in detail in the "Setting" option allows the user to register the desired print image quality.
Remarks
The checkbox in the "Custom Color Settings" option will be effective, only if you login using a user name
belonging to Administrator or Power Users (only on Windows NT4.0 / 2000 / XP / Server 2003), and open the
property page of the printer driver in the "Printers and Faxes" folder.
3.23
e-STUDIO2500c/3500c/3510c
3. Printer-specific Adjustments
3.24 To Print a Full-Color Original in Two Colors
Before the adjustment
The original is printed in the Full color mode.
After the Adjustment
The areas other than black is printed in the
same color (Red).
Explanation
Select the twin color print mode option, in order to change colored text and lines on full-color original and print
out the original.
* The Twin-color print mode particularly affects originals containing clear text and lines. It does not affect
originals where gradations of photo images are required.
Procedures
* Perform the adjustment in accordance with the procedures below.
* Both the service technician and the user can use procedure (1).
*Only the service technician must use procedures (2) and (3).
e-STUDIO2500c/3500c/3510c
3.24
3. Printer-specific Adjustments
(1) Select "Twin Color" from among the "Color" options on the printer driver.
For Windows
PCL6
PS3
Open the property page of the printer driver. Select "Twin-Color" from among the "Color" options in the
"Basic" tab. Press the [Details] button. Select the color to use for the area other than black, from among
the "Color" options.
3.24
e-STUDIO2500c/3500c/3510c
3. Printer-specific Adjustments
For Macintosh
Mac
Open the print dialog box. Select "Twin color (Black & ***)" from among the "Color Type" options.
* The menu to select varies according to the operating system. Refer to the table below and select the menu.
OS
Menu
8.6 / 9.x
"Color Settings 1" Ö "Color Type"
10.2.x
"Printer Features" Ö "Feature Sets: Color settings 1" Ö "Color Type"
10.3.x / 10.4.x "Color Settings 1" Ö "Color Type"
After selecting these options, print and check the print image quality.
If further image quality adjustments are still necessary, the service technician must use the next procedure
according to the image quality problem the user has.
• To obtain a shaper or softer print image:
Go to procedure (2).
• To make only the light-colored area darker:
Go to procedure (3).
e-STUDIO2500c/3500c/3510c
3.24
3. Printer-specific Adjustments
PCL6
PS3
Mac
* This adjustment will have an effect only on Auto or Color mode printing.
(2) Enter adjustment mode [05].
To obtain a shaper or softer print image, change the values for codes
[8110/8114] to perform fine adjustment, and increase or decrease the sharpness intensity.
• Adjust the value for [05] code corresponding to the print option to be applied (PDL).
*Printing on Macintosh is performed in PostScript. (See the "PS3" row in the table below.)
PDL
Color mode
[05] code
PS3
Twin color
05-8110
Set a value larger than 128 to
obtain a sharper print image.
05-8114
Set a value smaller than 128 to
obtain a softer print image.
PCL6
Twin color
Recommended value
Acceptable
value range
Default
0 to 255
128
* Setting "108" provides an effect corresponding to "-1" for the sharpness option. It is recommended to set
approximately "118" corresponding to an intermediate value between "0" (default) and "-1" for the
sharpness option, and then perform fine adjustment, while checking the printouts.
<Note>
• This adjustment changes the values set in the MFP. Therefore, it will affect every user who
uses the printer by connecting it to the MFP. After the adjustment, the values changed will be
applied to all printouts for the "Sharpness" option. Carefully perform the adjustment, being
aware that the image quality of all future printouts will be changed, when printing out originals
other than the one that is used for the adjustment.
• The code in the Twin-color mode is commonly used in the Standard Auto/Color mode. After
the adjustment, the values changed will be also applied to the image quality in the Standard
Auto/Color mode. When adjusting the image quality in the Twin-color mode, carefully
perform the adjustment, being aware that the image quality of all future printouts will be
changed, when performing printing in the Standard Auto/Color mode.
3.24
e-STUDIO2500c/3500c/3510c
3. Printer-specific Adjustments
PCL6
PS3
Mac
* This adjustment will have an effect only on Auto or Color mode printing.
(3) Enter adjustment mode [05].
To make only the light-colored area darker while leaving the highly colored
area as it is, increase the values for codes [8050 to 8065] to adjustment the Low/Medium density of the
color..
• Adjust the value for [05] code corresponding to the print option to be applied (PDL and Halftone).
Ex.: • When printing on Windows is performed with the following options selected: PCL6, Color = Twin
color, Details = RED, Halftone = Auto
> Text area
Change the values for Y: 05-8062, M: 05-8063 and K: 05-8065.
> Graphic and image area
Change the values for Y: 05-8058, M: 05-8059 and K: 05-8061.
• When printing on Macintosh is performed with the following option selected: Color Type = Black &
Green, Halftone = Smooth
> Change the values for Y: 05-8050, C: 05-8052 and K: 05-8053.
* Printing on Macintosh is performed in PostScript. (See the "PS3" row in the table below.)
Color to
adjust
Y
(Yellow)
M
(Magenta)
C
(Cyan)
K
(Black)
PDL
PCL5c
PS3
PCL5c
PS3
PCL5c
PS3
PCL5c
PS3
Halftone [05] code Subcode
Smooth
Detail
Smooth
Detail
Smooth
Detail
Smooth
Detail
Smooth
Detail
Smooth
Detail
Smooth
Detail
Smooth
Detail
05-8058
05-8062
05-8050
05-8054
05-8059
05-8063
05-8051
05-8055
05-8060
05-8064
05-8052
05-8056
05-8061
05-8065
05-8053
05-8057
0/1
0/1
0/1
0/1
0/1
0/1
0/1
0/1
0/1
0/1
0/1
0/1
0/1
0/1
0/1
0/1
Recommended value
Acceptable
Default
value range
Set a value larger than 128.
0 to 255
128
* Set the value in increments of approximately 20, while checking the printouts until the optimum value is
obtained.
* The color to adjust varies according to the color (color to use for the area other than black) selected in the
Twin-color mode. Refer to the table below and select the color to adjust.
Color to adjust
Selected color
Y (Yellow)
M (Magenta)
9
9
Red
9
Green
9
Blue
Cyan
9
Magenta
9
Yellow
C (Cyan)
9
9
9
e-STUDIO2500c/3500c/3510c
3.24
3. Printer-specific Adjustments
* "Halftone" refers to how halftones are printed. Two options are available: "Smooth" which is intended to
improve the reproducibility of gradation and "Detail" which is intended to print halftones in detail (with
the high frequency).
The halftone option to be applied in printing can be selected from among the "Halftone" options on the
printer driver (Windows) or in the print dialog box (Macintosh).
"Auto" is selected from among the "Apply to" options by default. It is intended to automatically select
"Smooth" or "Detail" in accordance with "Apply to" of the halftone option, the selected "Color" and
"Image Quality Type" options, as described by the table below.
"Color" and "Image Quality Type" options
Apply to
Auto/Color
Black and
White
General
Photograph Presentation
Line Art
Twin
Color
Text
Detail
Detail
Detail
Detail
Detail
Detail
Graphic
(Illustration, line, etc.)
Smooth
Smooth
Smooth
Detail
Detail
Smooth
Image
(Photograph, etc.)
Smooth
Smooth
Smooth
Detail
Smooth
Smooth
* The subcode varies according to the area where the density is adjusted. Refer to the table below and set
the subcode for the area to be adjusted.
Subcode
Area where the density is adjusted
0
Low-density area
1
Medium-density area
2
High-density area
<Note>
• This adjustment changes the values set in the MFP. Therefore, it will affect every user who
uses the printer by connecting it to the MFP. After the adjustment, the values changed will be
applied to all printouts for the "Image Quality Type" and "Halftone" options. (For instance, if
the value for [05] code for PCL6 and Smooth is changed, it will be applied to printing
performed with PCL6 and Halftone = "Smooth" (or "Auto") selected.) Carefully perform the
adjustment, being aware that the image quality of all future printouts will be changed, when
printing out originals other than the one that is used for the adjustment.
• This code is commonly used in the Twin-color mode and the Color mode. After the
adjustment, the values changed will be also applied to the image quality in the Color mode.
When adjusting the image quality in the Twin-color mode, carefully perform the adjustment,
being aware that the image quality of all future printouts will be changed, when performing
printing in the Color mode.
3.24
e-STUDIO2500c/3500c/3510c
3. Printer-specific Adjustments
Precautions after the completion of the adjustment
If "White" is selected in the Twin-color mode, all areas other than black will not be printed. Double toner will
not be used to print these areas.
e-STUDIO2500c/3500c/3510c
3.24
4. e-Filing-specific Adjustments
4.1 To Clearly Store a B/W Image in the Auto Color Mode
After the adjustment
After the threshold value was adjusted
Before the adjustment
Stored in the Gray scale mode
The light image becomes blurred and text
becomes illegible.
Even the light image is not blurred. Text is
clear and legible.
Explanation
When a black-and-white original containing black-and-white photo images is scanned in the Auto color mode
and stored in the e-Filing box (Scan to Box), it is stored with binary data, with reference to a threshold value.
This may make a dark area blurred and a light area eliminated. Adjust the threshold value, in order to clearly
store the black-and-white original in the Auto color mode.
* Please remember that the e-Filing functions are available only on the Windows platform, and not on the
Macintosh or UNIX platform.
* This adjustment will have an effect on the image stored using Scan to File and Scan to E-mail.
4.1
e-STUDIO2500c/3500c/3510c
4. e-Filing-specific Adjustments
Procedures
* Both the service technician and the user can perform all adjustments.
Scan to Box
* This adjustment will have an effect only on images stored in the Auto color mode.
(1) Adjust the threshold value, in order to store black-and-white originals with the appropriate density.
• Use steps (a) to (d) to adjust the threshold value.
(a) Press the [USER FUNCTIONS] button on the Control Panel to enter the "User Functions" menu.
(b) Press the [USER] button.
(c) Press the [SCAN] button.
(d) In the "THRESHOLD" option, press [
] or [
] to adjust the threshold value.
• If the threshold value is set to "
," the original will be stored with the low density.
• If the threshold value is set to "
," the original will be stored with the high density.
After adjusting the threshold value, scan and store the original in the e-Filing box. Then check the image
quality.
Only if the user’s desired image quality is still not obtained after the threshold value has been adjusted, use
the next procedure.
Scan to Box
* This adjustment will have an effect only on images stored in the Auto color mode.
(2) Select "HIGH QUALITY" from among the "IMAGE QUALITY FOR BLACK" options, to store the blackand-white original in the Gray scale mode.
• Use steps (a) to (d) to select the "IMAGE QUALITY FOR BLACK" option.
(a) Press the [USER FUNCTIONS] button on the Control Panel to enter the "User Functions" menu.
(b) Press the [USER] button.
(c) Press the [SCAN] button.
(d) Press the [HIGH QUALITY] button in the "IMAGE QUALITY FOR BLACK" option.
Precautions after the completion of the adjustment
All scanning functions are implemented with reference to the threshold value and the "IMAGE QUALITY FOR
BLACK" option. They will affect the image quality of black-and-white originals stored in the Auto color mode.
Therefore, carefully perform the adjustment, being aware that the image quality of all future images will be
changed, when storing originals other than the one that is used for the adjustment.
Remarks
• If "HIGH QUALITY" is selected from among the "IMAGE QUALITY FOR BLACK" options and black-andwhite originals are scanned in the Auto color mode and stored in the e-Filing box (Scan to Box), this allows
them to be stored in the Gray scale mode rather than in the binary mode, and eventually provides better
halftones. The data will increase in size, compared to those in the binary mode.
• The adjustment of threshold values will be effective, only if "STANDARD" is selected from among the
"IMAGE QUALITY FOR BLACK" options.
e-STUDIO2500c/3500c/3510c
4.1
4. e-Filing-specific Adjustments
4.2 To Store an Original while Reducing the File Size
Before the adjustment
After the adjustment
Ex.: A4, 200 dpi, LOW = Approx. 1000 KB
Ex.: A4, 200 dpi, HIGH = Approx. 400 KB
When "LOW" is from among the JPEG
compression rate options, the file size will
become larger than required.
When "HIGH" is from among the JPEG
compression rate options, the file size will
be reduced.
Explanation
When an original is scanned in the Full color or the Gray scale mode and stored in the e-Filing box (Scan to
Box), it will be compressed into JPEG format. The data compression rate can be selected on a job-by-job basis.
The file size significantly varies depending on the selected data compression rate. (When "LOW" is selected
from among the JPEG compression rate options, the file size will be 2 to 3 times larger than the one when
"HIGH" is selected.) When storing the original, if a higher priority is given to file size reduction than the image
quality, change the JPEG compression rate.
* Please remember that the e-Filing functions are available only on the Windows platform, and not on the
Macintosh or UNIX platform.
* This adjustment will have an effect on images stored using Scan to File and Scan to E-mail.
Procedures
* Both the service technician and the user can perform all adjustments.
4.2
e-STUDIO2500c/3500c/3510c
4. e-Filing-specific Adjustments
Scan to Box
* This adjustment will have an effect only on images stored in the Full color mode (including the Auto color mode) or the Gray scale mode.
(1) Select "HIGH" from among the JPEG compression rate options.
* "MID" is selected from among the JPEG compression rate options by default.
* The procedure to use varies, depending on whether to select the JPEG compression rate on a job-by-job
basis (without utilizing the template), utilize the template, or change the default JPEG compression rate.
Refer to "To select the JPEG compression rate on a job-by-job basis" in order to store an image at a high
compression rate for a particular job. Refer to "To utilize the template" in order to select an appropriate
JPEG compression rate, corresponding to the type of original to store and the purpose of the image stored.
Refer to "To change the default JPEG compression rate" in order to have "HIGH" selected from among the
JPEG compression rate options by default.
To select the JPEG compression rate on a job-by-job basis (without utilizing the template)
When scanning the original, press the [EDIT] button on the Control Panel. Select "HIGH" from among the
JPEG compression rate options.
To utilize the template
Recall the template where "HIGH" is selected from among the JPEG compression rate options and scan the
original.
* The user may want to select a compression rate, depending on the type of original or purpose of the image
stored. In this case, it is recommended to utilize the template. Initially, select the desired JPEG
compression rate in the template and recall it as necessary. This facilitates changing the compression rate
on a job-by-job basis. For further information regarding the template and its use, refer to the Operator’s
Manual for Basic Functions, Network Operator’s Guide and Network Administrator’s Guide.
To change the default JPEG compression rate
Use steps (a) to (d) to change the default JPEG compression rate.
(a) Press the [USER FUNCTIONS] button on the Control Panel to enter the "User Functions" menu.
(b) Press the [USER] button.
(c) Press the [SCAN] button.
(d) Press the [HIGH] button in the "JPEG COMPRESS" option.
Precautions after the completion of the adjustment
Changing the default JPEG compression rate of the scanning functions will affect the quality of originals, which
will be stored in the Full color (including the Auto color) or the Gray scale mode. Carefully perform the
adjustment, being aware that the image quality of all future images will be changed, when storing originals other
than the one that is used for the adjustment.
Remarks
If the full-color or gray-scale image is copied or printed and stored in the e-Filing box (Copy to Box or Print to Box), the
user can select a desired JPEG compression rate, when downloading the image using File Downloader on a client PC.
e-STUDIO2500c/3500c/3510c
4.2
4. e-Filing-specific Adjustments
4.3 To Store a Color Photo Image, while Minimizing Moiré
Before the adjustment
When the magazine article containing fullcolor photo images is stored in the Photo
mode, moiré is likely to occur.
After the adjustment
Storing it in the Printed image mode will
reduce moiré.
Explanation
When an original, such as a magazine article containing full-color photo images, is copied in the Full color mode,
with the Photo mode selected, and stored in the e-Filing box (Copy to Box), moiré is likely to occur on the photo
images. It may also occur, when it is copied on paper. But it will be more enhanced, if it is stored as image data.
Select the Printed image mode from among the original mode options, in order to store full-color photo images,
while minimizing moiré,
* Please remember that the e-Filing functions are available only on the Windows platform, and not on the
Macintosh or UNIX platform.
Procedures
* Both the service technician and the user can perform all adjustments.
4.3
e-STUDIO2500c/3500c/3510c
4. e-Filing-specific Adjustments
Copy to Box
* This adjustment will have an effect only on the image stored in the Full color mode.
(1) Press the [BASIC] button on the Control Panel. Select "PRINTED IMAGE" from among the original mode
options.
* Use either of the following procedures to switch the default original mode to the Printed image mode:
To change default original mode on the Control Panel
Use steps (a) to (d) to change default original mode.
(a) Press the [USER FUNCTIONS] button on the Control Panel to enter the "User Functions" menu.
(b) Press the [USER] button.
(c) Press the [COPY] button.
(d) Press the [PRINTED IMAGE] button in the "ORIGINAL MODE FOR COLOR" option.
To change default original mode in setting mode [08]
Enter setting mode [08]. Set "2" for code [585]. The printed image mode will be selected by default at
power-on.
Value for 08-585
0
1
2
3
4
5
Default original mode at power-on
Text/Photo (Default)
Text
Printed image
Photo
Map
Custom
Precautions after the completion of the adjustment
Nothing in particular.
e-STUDIO2500c/3500c/3510c
4.3
4. e-Filing-specific Adjustments
4.4 To Match the Color Balance on the Original
(To adjust the color balance in Print to Box)
Before the adjustment
Original image
After the adjustment
Original image
Print to Box
Stored
Stored
Downloaded
Downloaded
Client PC
Client PC
Displayed on the
computer monitor
The image stored in the e-Filing box looks
different in the color balance from the original.
4.4
e-STUDIO2500c/3500c/3510c
Print to Box
e-Filing box
e-Filing box
Displayed on the
computer monitor
The color balance of the image stored is closely
matched with that of the original.
4. e-Filing-specific Adjustments
Explanation
If a full-color image is printed on a client PC and stored in the e-Filing box (Print to Box), it will be optimized
for printing on paper. This is the reason why the image stored in the e-Filing box looks slightly different in the
color balance from the original displayed on the computer monitor. Change the "Image Quality Type" setting on
the printer driver, in order to minimize the difference in the color balance and closely match the color balance of
the image stored with that of the original.
* Please remember that the e-Filing functions are available only on the Windows platform, and not on the
Macintosh or UNIX platform.
Procedures
* Both the service technician and the user can perform all adjustments.
Print to Box
PCL5c
PS3
* This adjustment will have an effect only on the image stored in the Auto color mode or the Full color mode.
(1) Open the property page of the printer driver. Select "General" from among the "Image Quality Type"
options in the Image Quality tab.
* "General" allows the image to be stored in colors, which are closely matched with the original, compared
to the other Image Quality Type options.
Precautions after the completion of the adjustment
Nothing in particular.
e-STUDIO2500c/3500c/3510c
4.4
4. e-Filing-specific Adjustments
4.5 To Scan and Print, while Minimizing Moiré
Before the adjustment
When the image stored in the e-Filing box is
printed, moiré is likely to occur.
After the adjustment
The image stored in the e-Filing box can be
printed, while moiré is minimized.
Explanation
An original is scanned and stored in the e-Filing box (Scan to Box). When the image stored is printed directly
from the e-Filing box, moiré may occur, depending on the type of original. Also, it is likely to occur, particularly
when the original is scanned in the Full color mode or the Auto color mode in a high resolution (600 dpi) or even
in the Gray scale mode. Select an appropriate scan resolution or adjust the sharpness intensity in the scanning
functions, in order to store the original and print it from the e-Filing box, while minimizing moiré.
Procedures
* You can start with any of the procedures. But it is recommended to perform the procedures in order, as listed
below. You can use one procedure in conjunction with another. But if this changes the image quality more
than required or loses the effectiveness of the adjustment, restore the settings made in the previously used
procedure to the original ones. Then use other procedures.
* Both the service technician and the user can use procedures (1) to (3).
* Only the service technician must use procedure (4).
Scan to Box
(1) When scanning the original, press the [EDIT] button on the Control Panel. Select "PRINTED IMAGE"
from among the original mode options.
* This adjustment will be effective, only if "TEXT" or "PHOTO" is initially selected from among the original
mode options.
* This adjustment will have an effect only on the image stored in the Full color mode.
After changing the original mode, scan and store the original. Then print and check the print image quality.
If further image quality adjustments are still necessary, use other procedures.
4.5
e-STUDIO2500c/3500c/3510c
4. e-Filing-specific Adjustments
Scan to Box
(2) When scanning the original, press the [EDIT] button on the Control Panel. Select a lower resolution in the
resolution option.
* "200 (dpi)" is selected from among the resolution options by default. If moiré occurs in a resolution of 200
dpi, select a lower resolution (150 dpi is recommended.).
* This adjustment will have an effect only on an image stored in the Full color mode or the Gray scale mode.
After changing the resolution, scan and store the original. Then print and check the print image quality.
If you do not prefer to decrease a resolution, or if moiré still occurs even in a lower resolution, use other
procedures.
Scan to Box
(3) When scanning, press the [EDIT] button on the Control Panel. Adjust the sharpness intensity.
• Press the [+] button on the indicator to increase the sharpness intensity or the [-] button to decrease it.
* The sharpness intensity is set to the center (±) by default. If moiré occurs by default, press the [-] button to
decrease the sharpness intensity.
After adjusting the sharpness intensity, scan and store the original. Then print and check the print image
quality.
With the sharpness intensity set to the minimum, if moiré still occurs, use other procedures.
Scan to Box
(4) Enter adjustment mode [05]. Change the values for codes [1086 to 1088] and [843] to adjust the sharpness
intensity in the scanning functions.
* This adjustment will have an effect only on an image stored in the Full color mode or the Gray scale mode.
Color mode
Full color
Gray scale
Original mode [05] code
Text
Printed image
Photo
---
05-1086
05-1087
05-1088
05-843
Recommended value
Acceptable
value range
Default
Set a value smaller than 128.
0 to 255
128
* Setting "0" provides the softest image, while setting "255" provides the sharpest image.
Precautions after the completion of the adjustment
When the original containing text and lines is scanned and printed, the adjustment may possibly cause the
blurred text and lines or a blend of undesired colors. Therefore, carefully perform the adjustment, while
checking the scanned-in image or printout.
e-STUDIO2500c/3500c/3510c
4.5
4. e-Filing-specific Adjustments
4.6 To Finely Print the Image Stored in the e-Filing box
(To print images stored through Copy to Box or Print to Box)
Before the adjustment
After the adjustment
Copy to Box,
Print to Box
(Print data)
e-Filing box
Stored
Downloaded
(Converted into RGB)
Copy to Box,
Print to Box
(Print data)
e-Filing box
Stored
Client PC
Stored
Print
(Print data)
Print
(Converted into
print data again)
If the image stored in the e-Filing box is
downloaded to a PC and then printed out, the
image data conversion may diminish the image
quality.
4.6
e-STUDIO2500c/3500c/3510c
If the image is printed out directly from the eFiling box, the image quality will be
maintained.
4. e-Filing-specific Adjustments
Explanation
Initially, the original is copied or printed and stored in the e-Filing box (Copy to Box or Print to Box) as CMYK
data or optimized for printing on paper. While it is being downloaded to a client PC using File Downloader or
the TWAIN driver, it is converted into RGB data or optimized for displaying on the computer monitor. RGB
data are not suitable for printing on paper. Therefore, if printed out, the image quality may be diminished.
Therefore, it should be printed out directly from the e-Filing box, rather than downloaded to the PC, in order to
obtain a fine printout.
* Please remember that the e-Filing functions are available only on the Windows platform, and not on the
Macintosh or UNIX platform.
Procedures
* Both the service technician and the user can perform all adjustments.
Copy to Box
Print to Box
(1) Print out the image stored in the e-Filing box on the Control Panel or using the e-Filing Web utility.
* For further information regarding how to print it out, refer to the following documents:
• To print it out on the Control Panel:
Operator’s Manual for Basic Functions
• To print it out using the e-Filing Web utility: e-Filing Guide
<Note>
Scan to Box
Fax to Box
If the image is scanned or faxed and stored in the e-Filing box (Scan to Box or Fax to Box),
download it to the client PC once, select the desired Image Quality Type option on the printer
driver, and print it out, rather than printing it out directly from the e-Filing box. Then, the image
may be finely printed.
For further information regarding how to print full-color images scanned and stored, refer to 4.9
To Finely Print Color Images Scanned and Stored.
Precautions after the completion of the adjustment
Nothing in particular.
Remarks
When "Archive Document" of the e-Filing Web utility or "Backup" of the e-Filing Backup/Restore Utility is
used, image data stored in the e-Filing box can be converted to a file maintaining the image quality optimized for
printing. For example, you may want to temporarily move stored data to make some space in the box and save
them again in the box. When data are converted to a PDF or TIFF file and then moved using the File
Downloader, the image quality may be diminished. However, you can use Archive Document or Backup to
move the data while maintaining the image quality. The Backup feature can also collectively backs up all the
data in the e-Filing box. Note that files created through the Archive Document or Backup feature cannot be
directly opened on the PC or printed out. For further information regarding Archive Document and Backup,
refer to the e-Filing Guide.
e-STUDIO2500c/3500c/3510c
4.6
4. e-Filing-specific Adjustments
4.7 To Store an Image Suitable for Displaying on the Monitor or
Image Editing
Before the adjustment
Copy to Box
(Print data)
e-Filing box
After the adjustment
e-Filing box
Stored
Stored
Downloaded
(Converted into RGB)
Client PC
Downloaded
(RGB data)
Client PC
Stored and
edited
Displayed on the
computer monitor
(RGB data)
When the original is stored by Copy to Box, it
will be converted into RGB data, while being
downloaded to a PC. This may diminish the
image quality.
4.7
Scan to Box
(RGB data)
e-STUDIO2500c/3500c/3510c
Stored and
edited
Displayed on the
computer monitor
(RGB data)
The original is stored as RGB data by Scan to
Box. This can avoid unnecessary data
conversion. As a result, the image quality can
be maintained.
4. e-Filing-specific Adjustments
Explanation
Initially, a full-color original is copied and stored in the e-Filing box (Copy to Box) as CMYK data or optimized
for printing on paper. But while it is being downloaded to a client PC using the File Downloader or the TWAIN
driver, it is converted into RGB data or optimized for displaying on the computer monitor. Depending on the
type of original, this CMYK-to-RGB conversion may cause out-of-registration colors or graininess on the
printout. If the image is displayed on the monitor and further edited on the PC, the image quality may be
diminished.
To store a full-color original and display it on the computer monitor, while minimizing image degradation, scan
and store it in the e-Filing box (Scan to Box). This allows it to be stored as RGB data.
* Please remember that the e-Filing functions are available only on the Windows platform, and not on the
Macintosh or UNIX platform.
Procedures
* Both the service technician and the user can perform all adjustments.
Scan to Box
* This adjustment will have an effect only on the image stored in the Full color mode.
(1) Scan the full-color image and store it in the e-Filing box.
* For further information regarding how to scan and store images, refer to the Operator’s Manual for Basic
Functions.
Precautions after the completion of the adjustment
Nothing in particular.
e-STUDIO2500c/3500c/3510c
4.7
4. e-Filing-specific Adjustments
4.8 To Finely Print Color Images Scanned and Stored
(To print images stored through Scan to Box)
Before the adjustment
After the adjustment
Scan to Box
(RGB data)
e-Filing box
e-Filing box
Stored
Ex: Printing image mode = Presentation
Print
(Converted into
print data)
Unless the printing image mode is selected,
printing may be performed with image
processing not suitable for the stored data.
4.8
Scan to Box
(RGB data)
e-STUDIO2500c/3500c/3510c
Stored
Ex: Printing image mode = Photo
Print
(Converted into
print data)
When the printing image mode suitable for the
stored data is selected, the data can be printed
finely with optimal image processing.
4. e-Filing-specific
4.
Adjustments
Explanation
When an image is scanned stored in the e-Filing box (Scan to Box) in the Full color or the Auto color mode, and
printed as it is (without the printing image mode set), printing may be performed with image processing not
suitable for the image, and the user may not obtain the desired image quality. To finely print a full-color image
scanned and stored, select the printing image mode (General/Photo/Presentation/Line Art) suitable for the image.
Then, printing can be performed with image processing optimal for the image, in the same manner as printing on
the printer driver.
Procedures
* Perform the adjustment in accordance with the procedures below.
* Both the service technician and the user can perform all adjustments.
* This adjustment will have an effect only on the image stored in the Full color mode.
Scan to Box
(1) Scan the full-color image and store it in the e-Filing box.
* For further information regarding how to scan and store images, refer to the Operator’s Manual for Basic
Functions.
Scan to Box
(2) Select a printing image mode suitable for the stored image.
• Use steps (a) to (d) to change the printing image mode.
(a) Press the [USER FUNCTIONS] button on the Control Panel to enter the "User Functions" menu.
(b) Press the [USER] button.
(c) Press the [E-FILING] button.
(d) Press the button for the mode suitable for the image in the [PRINTING IMAGE MODE] option.
* For further information regarding the features of each printing image mode, refer to the explanation of the
"Image Quality Type" options in Procedure (1) of 3.2 To Obtain the Desired Color Balance.
<Note>
A change to the printing image quality mode will apply to all future printouts using the e-Filing
box. Carefully perform the adjustment while printing out images other than the one that is used
for the adjustment.
Scan to Box
(3) Print out the image stored in the e-Filing box on the Control Panel or using the e-Filing Web utility.
* For further information regarding how to print it out, refer to the following documents:
• To print it out on the Control Panel:
Operator’s Manual for Basic Functions
• To print it out using the e-Filing Web utility: e-Filing Guide
Precautions after the completion of the adjustment
Nothing in particular.
e-STUDIO2500c/3500c/3510c
4.7
4.8
5. Scanning-specific Adjustments
5.1 To Clearly Scan Text (To reduce noise around text)
Before the adjustment
If the original is scanned in the Full color
mode or the Gray scale mode, noise may occur
in text or edges of a solid filled area.
After the adjustment
The image quality is maintained, while noise
is being reduced.
Explanation
When an original is scanned in the Full color or the Gray scale mode, the data compression may cause noise
(toner scattering) around text or the edges of a solid filled area. Adjust the JPEG compression rate or change the
scan resolution, in order to obtain a better scanned-in image, while reducing noise.
* This adjustment will have an effect on the image scanned in the Full color mode (including the Auto color
mode) or the Gray scale mode.
Procedures
* You can start with any of the procedures. But it is recommended to perform the procedures in order, as listed
below. You can use one procedure in conjunction with another. But if this changes the image quality more
than required or loses the effectiveness of the adjustment, restore the settings made in the previously used
procedure to the original ones. Then use other procedures.
* Both the service technician and the user can use all procedures.
(1) When scanning the original, press the [EDIT] button on the Control Panel. Select "LOW" from among the
JPEG compression rate options.
* [MID] is selected from among the JPEG compression rate options by default.
After changing the compression rate, scan the original and check the scanned-in image quality.
If further image quality adjustments are still necessary, use procedure (2).
5.1
e-STUDIO2500c/3500c/3510c
5. Scanning-specific Adjustments
(2) When scanning the original, press the [EDIT] button on the Control Panel. Select a higher resolution in the
resolution option.
* "200 (dpi)" is selected from among the resolution options by default. If noise occurs in a resolution of 200
dpi, select a higher resolution (300 dpi, 400 dpi or 600 dpi).
After changing the resolution, scan the original and check the scanned-in image quality.
If further image quality adjustments are still necessary, use procedure (1).
Precautions after the completion of the adjustment
• The adjustment of the JPEG compression rate or resolution may possibly increase the size of the file to be
stored. Therefore, carefully perform the adjustment, while checking the scanned-in image quality. The table
below shows you the correlation between a resolution and file size. (The ratio of the file size may vary
depending on the type of original. Therefore, use the table below just for your reference.)
* The file size in a resolution of 200 dpi is 1.
Resolution
File size ratio
200 dpi
1
300 dpi
Approx. × 2
400 dpi
Approx. × 3
600 dpi
Approx. × 8
• If the resolution selected in procedure (2) is too high, moiré may possibly occur in the scanned-in image.
Therefore, carefully adjust the resolution, while checking the scanned-in image.
Remarks
Use the following steps to change the default JPEG compression rate and resolution options:
(a) Press the [USER FUNCTIONS] button on the Control Panel to enter the "User Functions" menu.
(b) Press the [USER] button.
(c) Press the [SCAN] button.
(d) In the "JPEG COMPRESS" or "RESOLUTION" option, press the button corresponding to the desired
compression rate or resolution option.
* The default resolution can be selected on a color mode basis: Full color mode (including the Auto color
mode), Gray scale mode and Black mode. But, remember that some of the resolution options cannot be
selected as the default. (The resolution options available vary depending on whether the optional GC-1260
expansion memory is installed or not.)
• The following resolution options are available as the default:
• Full color mode (including the Auto color mode):
400 / 300 / 200 / 150 / 100 (dpi)
• Gray scale mode:
400 / 300 / 200 / 150 / 100 (dpi)
• Black mode:
600 / 400 / 300 / 200 / 150 (dpi)
e-STUDIO2500c/3500c/3510c
5.1
5. Scanning-specific Adjustments
5.2 To Scan an Original, while Eliminating the Background Color
(To eliminate the background density)
Before the adjustment
The background color of the original is also
scanned. Therefore, no clear contrast is made
between the background and image.
After the adjustment
The background color is eliminated, allowing
clear contrast between the background and
image.
Explanation
When an original with a background is scanned, such as a newspaper and colored paper, the background color is
also scanned. Therefore, no clear contrast is made between the background and image. Perform background
adjustment, in order to clearly scan such originals.
* This adjustment will have an effect on the image scanned in all color modes. However, the adjustment
(procedure (2)) in adjustment mode [5] cannot be performed in the Gray scale mode and the Black mode.
Procedures
* You can start with any of the procedures. But it is recommended to perform the procedures in order, as listed
below. You can use one procedure in conjunction with another. But if this changes the image quality more
than required or loses the effectiveness of the adjustment, restore the settings made in the previously used
procedure to the original ones. Then use other procedures.
* Both the service technician and the user can use procedure (1).
* Only the service technician must use procedure (2).
(1) When scanning the original, press the [EDIT] button on the Control Panel. Press the [BACKGROUND
ADJUSTMENT] button. Press the [ ] button to decrease the background density.
After decreasing the background density, scan the original and check the scanned-in image quality.
With the background density set to the minimum, if further image quality adjustments are still necessary, the
service technician must use the next procedure.
5.2
e-STUDIO2500c/3500c/3510c
5. Scanning-specific Adjustments
(2) Enter adjustment mode [05]. Change the values for codes [1070 to 1072] to decrease the background density.
• The code to use varies according to color mode and original mode. Adjust the value for [05] code
corresponding to the color mode for which you would like to improve the image quality.
Acceptable
Color mode Original mode [05] code Recommended value
value range
Text
05-1070
Full color
0 to 50
Printed image
05-1071 Set a value smaller than 50.
Photo
05-1072
Default
50
* Set the value in increments of approximately 10, while checking the scanned-in image until the optimum value
is obtained.
* The background density in the Full color mode (code 05-1070, 1071 or 1072) will become the lowest, if
"0" is set. On the other hand, it will become the highest, if "50" is set. Changing the value will also
change the background density in the Full color mode, when the "Background Adjustment" indicator is set
to the center. Then, if the background density of the center value is changed, each step of the indicator will
be changed accordingly. (For instance, if the center value is decreased by 5 (lighter), the value of each step
of the indicator will also be decreased by 5 (lighter)).
Precautions after the completion of the adjustment
The adjustment may possibly diminish the quality of the light-colored image. Therefore, carefully perform the
adjustment, while checking the scanned-in image.
Remarks
When scanning the original, use the following steps to change the default indicator position in the background
adjustment option, which is displayed on the Control Panel:
(a) Press the [USER FUNCTIONS] button on the Control Panel to enter the "User Functions" menu.
(b) Press the [USER] button.
(c) Press the [SCAN] button.
(d) Press the [Next] button twice to display the screen to change the default values in the Full color mode and
the Auto color mode.
(e) Select the default background density in the "BACKGROUND ADJUSTMENT" option.
e-STUDIO2500c/3500c/3510c
5.2
5. Scanning-specific Adjustments
5.3 To Clearly Scan and Print an Original in Black and White
(To improve gradation and reduce graininess)
Before the adjustment
After the adjustment
If the original is scanned in the Black mode,
the halftones may become blurred in black.
The halftones of the scanned-in image are
clearly printed out.
Explanation
If an original is scanned in the Black mode, a difference in the density level of the halftones cannot be accurately
scanned. As a result, it may become blurred in black or grained. Scan a black-and-white original in the Gray
scale mode, in order to scan and print it out in black and white more clearly.
Procedures
* Both the service technician and the user can perform all adjustments.
(1) When scanning the original, press the [EDIT] button on the Control Panel. Select "IMAGE SMOOTHING"
from among the color mode options.
5.3
e-STUDIO2500c/3500c/3510c
5. Scanning-specific Adjustments
Precautions after the completion of the adjustment
The adjustment may possibly increase the size of the file to be stored. Therefore, carefully perform the
adjustment, while checking the scanned-in image quality. The correlation between color mode and file size is as
described below. (The ratio of the file size may vary depending on the type of original. Therefore, use the
description below just for your reference.)
* Ratio of the file size in the Black mode to the Gray scale mode
• If the file size in the Black mode with the Text mode selected is 1, it will be increased to approximately 7 times
in the Gray scale mode.
• If the file size in the Black mode with the Photo mode selected is 1, it will be approximately doubled in the
Gray scale mode.
e-STUDIO2500c/3500c/3510c
5.3
5. Scanning-specific Adjustments
5.4 To Scan the Original, while Reducing the File Size
Before the adjustment
Approx. 600 KB
After the adjustment
Approx. 100 KB
Approx. 200 KB
Approx. 900 KB
Approx.
550 KB
Approx. 30 KB
Approx. 150 KB
Approx.
90 KB
* The above file sizes are just for your reference.
* The above file sizes are just for your reference.
If the original is constantly scanned at the
default compression rate, the file size may
become larger than required.
If the original is scanned at a reasonable
compression rate, depending on the purpose of
the scanned-in image, the file size will be
successfully reduced.
Explanation
If an original is scanned in the default resolution and at the default compression rate, a proper image will be
obtained for general purposes. But the file size may become larger than required. The file size of the scanned-in
image significantly varies, depending on the selected resolution or JPEG compression rate. If an appropriate
resolution and a compression rate are selected in accordance with the purpose of the original, the image quality
will be maintained, while the file size is being reduced. Change the resolution, original mode, or JPEG
compression rate or perform the background adjustment, in order to minimize the file size of the scanned-in
image.
The e-STUDIO2500c/3500c/3510c offers the "Slim PDF" function. This will diminish the image quality but
reduce the file size to approximately 1/8 to 1/10, compared to the scanned-in image (300dpi, compression rate:
MID) in JPEG format.
Procedures
* The procedure to use varies, depending on whether to reduce the file size by changing the options when
scanning the original or in Slim PDF. Refer to "To Reduce the File Size by Changing the Options when
Scanning the Original" in order to reduce the file size without changing the file format. Refer to "To Reduce
the File Size in Slim PDF" in order to give a higher priority to the file size reduction than the image quality.
5.4
e-STUDIO2500c/3500c/3510c
5. Scanning-specific Adjustments
5.4.1 To Reduce the File Size by Changing the Options when Scanning the Original
* You can start with any of the procedures. But it is recommended to perform the procedures in order, as listed
below. You can use one procedure in conjunction with another. But if this changes the image quality more
than required or loses the effectiveness of the adjustment, restore the settings made in the previously used
procedure to the original ones. Then use other procedures.
* Both the service technician and the user can use all procedures.
(1) When scanning the original, press the [EDIT] button on the Control Panel. Select a lower resolution in the
resolution option.
* "200 (dpi)" is selected from among the resolution options by default. Select a lower resolution option (100
dpi or 150 dpi) to reduce the file size.
* This adjustment will have an effect on an image scanned in all color modes (Full color, Gray scale, Black
and Auto color).
After changing the resolution, scan the original and check the scanned-in image quality.
If further image quality adjustments are still necessary, use other procedures.
(2) When scanning the original, press the [EDIT] button on the Control Panel. Select "TEXT" from among the
original mode options.
* Perform this adjustment, only if a black-and-white original containing no photo images is scanned or if
degradation in the photo image quality is acceptable.
* This adjustment will be effective, only if [TEXT/PHOTO] or [PHOTO] is initially selected from among
the original mode options.
* This adjustment will have an effect only on an image scanned in the Black mode.
After changing original mode, scan the original and check the scanned-in image quality.
If further image quality adjustments are still necessary, use other procedures.
(3) When scanning the original, press the [EDIT] button on the Control Panel. Select "HIGH" from among the
JPEG compression rate options.
* [MID] is selected from among the JPEG compression rate options by default.
* This adjustment will have an effect only on an image scanned in the Full color mode (including the Auto
color mode) or the Gray scale mode.
After changing the compression rate, scan the original and check the scanned-in image quality.
If further image quality adjustments are still necessary, use other procedures.
e-STUDIO2500c/3500c/3510c
5.4
5. Scanning-specific Adjustments
(4) When scanning the original, press the [EDIT] button on the Control Panel. Press the [BACKGROUND
ADJUSTMENT] button. Press the [ ] button to decrease the background density. Then select "HIGH"
from among the JPEG compression rate options.
* This adjustment will be effective, only if the original with a color background, such as a newspaper and
color paper, is scanned.
* This adjustment will have an effect only on the image scanned in the Full color mode (including the Auto
color mode) or the Gray scale mode.
After decreasing the background density and changing the compression rate, scan the original and check the
scanned-in image quality.
With the background density set to the minimum, if further image quality adjustments are still necessary, use
other procedures.
Precautions after the completion of the adjustment
• The table below shows you the correlation between the adjustment and file size. (The ratio of the file size may
vary, depending on the type of original. Therefore, use the table below just for your reference.)
• Correlation between the resolution and the file size (procedure (1))
* The file size in a resolution of 200 dpi is 100%.
Resolution
File size ratio
200 dpi
100%
150 dpi
Approx. 60%
100 dpi
Approx. 30%
• Correlation between the original mode and the file size (procedure (2))
* The file size in the Photo mode is 100%.
Original mode
File size ratio
Photo
100%
Text
Approx. 20%
• Correlation between the JPEG compression rate and the file size (procedure (3))
* The file size is 100%, with [MID] selected.
JPEG compression rate
File size ratio
MID
100%
HIGH
Approx. 80%
• The adjustment may possibly diminish the image quality, as shown by the table below. Therefore, carefully
perform the adjustment, while checking the scanned-in image.
Procedures used
Possible image degradation
Any of procedures from (1) to (4) The photo image area may be blurred.
(1) or (3)
Noise may be increase around text.
(1) or (3)
Small-sized text may become illegible.
(4)
Light-colored images may not be clearly scanned.
5.4
e-STUDIO2500c/3500c/3510c
5. Scanning-specific Adjustments
Remarks
• Use the following steps to change the default resolution, original mode, JPEG compression rate and/or
background adjustment options:
(a) Press the [USER FUNCTIONS] button on the Control Panel to enter the "User Functions" menu.
(b) Press the [USER] button.
(c) Press the [SCAN] button.
(d) Press the [Next] button several times to display the screen to change the default value in the desired Color
mode.
(e) In the "RESOLUTION," "ORIGINAL MODE," "JPEG COMPRESS" and/or "BACKGROUND
ADJUSTMENT" option, press the desired button to change the default.
* The default resolution can be selected on a color mode basis: Full color mode (including the Auto color
mode), Gray scale mode and Black mode. But remember that some of the resolution options cannot be
selected as the default. (The resolution options available vary, depending on whether the optional GC-1260
expansion memory is installed or not.)
• The following resolution options are available as the default:
• Full color mode (including Auto color mode):
400 / 300 / 200 / 150 / 100 (dpi)
• Gray scale mode:
400 / 300 / 200 / 150 / 100 (dpi)
• Black mode:
600 / 400 / 300 / 200 / 150 (dpi)
• Remember that when scanning the original in the Full color mode, if the original mode option is switched from
the Photo mode or the Printed image to the Text mode, the file size may become larger.
e-STUDIO2500c/3500c/3510c
5.4
5. Scanning-specific Adjustments
5.4.2 To Reduce the File Size in Slim PDF
* Both the service technician and the user can use procedure (1).
* The service technician must use only procedure (2) in adjustment mode [05] (step (b) "To reduce the blurred
area of text and photos"). Both the service technician and the user can use other procedures.
<Note>
• Slim PDF will be available only if "SCAN TO FILE OR USB" or "SCAN TO E-MAIL" is
selected in scan mode to scan the original in the Full color mode or the Gray scale mode.
• The image quality or file size in Slim PDF may be more affected than in JPEG or PDF,
depending on the environment (original placing direction) when the original is scanned. In
addition, the scanning will be slowed down.
• Slim PDF is not suitable for the following originals. It is recommended to scan them in JPEG
or PDF.
• Originals blurred when scanned in JPEG or PDF
(If the original is scanned in Slim PDF, the image quality may be further diminished)
• Complicated originals such as tables or maps containing lines or small-sized text
• Originals where stable image quality is required, such as critical documents
(1) When scanning the original, press the [EDIT] button and the [SLIM PDF] button on the Control Panel.
After adjusting the original in Slim PDF, scan the original and check the scanned-in image quality.
If the image quality adjustment in Slim PDF is necessary, use the next procedure.
(2) Adjust the image quality in Slim PDF at a user’s request.
To reduce the blurred area of text and photos
Use steps (a) to (b) to perform the adjustment.
(a) Turn the original and place it. Or when scanning the original, press the [EDIT] button on the Control
Panel. Change the "Image Rotation" option to turn the original.
After changing the "Image Rotation" option, scan the original and check the scanned-in image
quality.
If further image quality adjustments are still necessary, the service technician must use the next procedure.
5.4
e-STUDIO2500c/3500c/3510c
5. Scanning-specific Adjustments
(b) Enter adjustment mode [05]. Change the values for code [9104] and [9107] to adjust the image
quality and resolution of a background.
Recommended
[05] code
value
05-9104
5
05-9107
1 or 2
Acceptable value range
Default
0 to 10
0 to 4
5
1
* Changing the value provides the effects below. Enter the value within the recommended value range.
Otherwise, it may cause a loss in MFP performance, including degradation in the image quality.
Set a smaller value: High compression (small file size), low image quality, and high scanning speed
Set a later value:
Low compression (large file size), high image quality, and low scanning speed
To leave the color of text as it is
Use steps (a) to (b) to perform the adjustment.
(a) Turn the original and place it. Or when scanning the original, press the [EDIT] button on the Control
Panel. Change the "Image Rotation" option to turn the original.
After changing the "Image Rotation" option, scan the original and check the scanned-in image
quality.
If further image quality adjustments are still necessary, use the next procedure.
(b) When scanning the original, press the [EDIT] button on the Control Panel. Press the [-] button to
decrease the sharpness intensity.
* Decrease the sharpness intensity by 1 step from the current value.
To eliminate the background density
Use steps (a) to (b) to perform the adjustment.
(a) When scanning the original, press the [EDIT] button on the Control Panel. Press the [
] button to
decrease the background density.
After decreasing the background density, scan the original and check the scanned-in image quality.
Only if the user’s desired image quality is still not obtained after the above procedure has been performed,
scan the original in JPEG or PDF.
Precautions after the completion of the adjustment
The adjustment may possibly cause blurred text, noise or vary the hues of areas. Therefore, carefully perform
the adjustment, while checking the scanned-in image quality.
Remarks
If the optional memory (GC-1250) is not installed, originals, which can be scanned in Slim PDF, are limited in
size (A4/LT size at maximum). Install the optional memory, in order to select A3/LD, Auto, or Mixed-size in the
original size option.
e-STUDIO2500c/3500c/3510c
5.4
5. Scanning-specific Adjustments
5.5 To Sharply Scan the Original (To increase the sharpness intensity)
Before the adjustment
After the adjustment
The image looks too soft and blurred.
The edges are enhanced. The image looks sharp.
Explanation
Adjust the sharpness intensity, in order to sharply scan the soft and blurred original.
* This adjustment will have an effect on the image scanned in all color modes (Full color, Gray scale, Black and Auto
color).
5.5
e-STUDIO2500c/3500c/3510c
5. Scanning-specific Adjustments
Procedures
* You can start with any of the procedures. But it is recommended to perform the procedures in order, as listed
below. You can use one procedure in conjunction with another. But if this changes the image quality more
than required or loses the effectiveness of the adjustment, restore the settings made in the previously used
procedure to the original ones. Then use other procedures.
* Both the service technician and the user can use procedure (1).
* Only the service technician must use procedure (2).
(1) When scanning the original, press the [EDIT] button on the Control Panel. Press the [+] button to increase
the sharpness intensity.
After increasing the sharpness intensity, scan the original and check the scanned-in image quality.
With the sharpness intensity set to the maximum, if further image quality adjustments are still necessary, the
service technician must use the next procedure.
(2) Enter adjustment mode [05]. Change the values for codes [1086 to 1088] and [840 to 843] to adjust the
sharpness intensity.
Color mode
Black
Full color
Gray scale
Original mode [05] code
Text/Photo
Text
Photo
Text
Printed image
Photo
---
05-840
05-841
05-842
05-1086
05-1087
05-1088
05-843
Recommended value
Acceptable
value range
Default
Set a value larger than 128.
0 to 255
128
* Setting "0" provides the softest image, while setting "255" provides the sharpest image.
Precautions after the completion of the adjustment
The adjustment may possibly cause moiré. In addition, when text and thin lines in a light-colored background
are scanned, the background around the text or line may be eliminated. Therefore, carefully perform the
adjustment, while checking the scanned-in image.
e-STUDIO2500c/3500c/3510c
5.5
5. Scanning-specific Adjustments
5.6 To Scan an Original, while Enhancing Black
Before the adjustment
Scan
Black is not dark enough, compared to the
original.
After the adjustment
Scan
Black is enhanced and closely matched with
the original hue.
Explanation
When a full-color original is scanned, black is not dark enough, compared to the original. (In general, the
scanned-in image is likely to become less dark.) Finely adjust the black density of the scanned-in image, in
order to darken black and closely match it with the original hue.
* This adjustment will have an effect only on the image scanned in the Full color mode (including the Auto color
mode).
5.6
e-STUDIO2500c/3500c/3510c
5. Scanning-specific Adjustments
Procedures
* The service technician must perform all adjustments.
(1) Enter adjustment mode [05]. Change the values for codes [1075 to 1077] to adjust the black density of a
scanned-in image.
Color mode
Full color
Original mode [05] code
Text
Printed image
Photo
05-1075
05-1076
05-1077
Recommended value
Acceptable
value range
Default
Set a value larger than 0.
0 to 4
0
* Setting "0" provides the lightest black, while setting "4" the darkest.
Precautions after the completion of the adjustment
The adjustment may possibly provide the extremely dark background. Therefore, carefully perform the
adjustment, while checking the scanned-in image.
e-STUDIO2500c/3500c/3510c
5.6
5. Scanning-specific Adjustments
5.7 To Scan an Original with the Desired Gradation
Before the adjustment
The image is scanned with natural gradation.
(Default scanning)
After the adjustment
Gradation is decreased.
After the adjustment
Gradation is increased.
Explanation
When an original is scanned in the Black mode or the Gray scale mode, changing the scan density according to
density area (low-, medium- or high-density area) allows a user to adjust the reproducibility of halftones
(gradation). Adjust the gamma curve balance, in order to change the gradation, depending on the type of original
or at a user’s request.
* This adjustment will have an effect only on the image scanned in the Black mode or the Gray scale mode.
5.7
e-STUDIO2500c/3500c/3510c
5. Scanning-specific Adjustments
Procedures
* The service technician must perform all adjustments.
(1) Enter adjustment mode [05]. Change the values for codes [880 to 883] to adjust the gamma curve balance
of the low-, medium- and high-density areas.
Color mode Original mode [05] code Subcode
Black
Gray scale
Text/Photo
05-880
0/1/2
Text
05-881
0/1/2
Photo
05-882
0/1/2
---
05-883
0/1/2
Recommended value
Acceptable
Default
value range
Set a value smaller than 128
to decrease the density.
0 to 255
128
Set a value larger than 128
to increase the density.
* Set the value in increments of approximately 20, while checking the scanned-in image until the optimum
value is obtained.
* The subcode varies according to the area where the density is adjusted. Refer to the table below and set
the subcode for the area to be adjusted.
Subcode
Area where the density is adjusted
0
Low-density area
1
Medium-density area
2
High-density area
* Gradation in the Black mode will vary, if the medium-density area is mainly adjusted. But remember that
adjusting the low- or high-density area will rarely affect the gradation in the Black mode.
Precautions after the completion of the adjustment
Nothing in particular.
e-STUDIO2500c/3500c/3510c
5.7
5. Scanning-specific Adjustments
5.8 To Register the Original Mode Optimal for a Particular Type of Original
(To have "Custom" selected)
Explanation
If the value for [05] code is adjusted in existing original mode (Text /Photo, Text, Photo, Printed image, Photo or
Gray scale), in order to clearly scan a particular type of original, other types of original may not be clearly
scanned. In this case, add the original mode option adjusted for a particular type of original as "Custom (User
custom)" mode. To have "Custom" selected, add the value adjusted for [05] code in "Custom" mode to the one
in reference original mode.
Select reference original mode for "Custom" from among the original mode options.
To have "Custom" in the Black mode, select the existing original mode option as reference original mode.
To have "Custom" in the Full color mode (including the Auto color mode) selected, select the existing original
mode or "e-document" mode option where the value has been adjusted to identify whiteout areas, as reference
original mode.
* This adjustment will have an effect only on the image scanned in the Black mode or the Full color mode
(including the Auto color mode).
Procedures
* Perform the adjustment in accordance with the procedures below.
* Only the service technician must use procedures (1) and (2).
* Both the service technician and the user can use procedure (3).
(1) Enter setting mode [08]. Change the value for code [580] or [590] to select reference original mode for
"Custom" mode from among the original mode options.
• Select the original mode option, which is most likely to be matched with the image quality the user desires.
For the Black mode
Value for 08-580
0
1
2
3
Reference original mode
Reserved (Default)
Text/Photo
Text
Photo
For the Full color mode
Value for 08-590
0
1
2
3
4
Reference original mode
Reserved (Default)
Text
Printed image
Photo
e-document
After selecting the reference original mode option, use the next procedure.
5.8
e-STUDIO2500c/3500c/3510c
5. Scanning-specific Adjustments
(2) Enter adjustment mode [05] to adjust the values in the Custom mode, in order to obtain the image quality the
user desires.
• Select the necessary value for [05] code in the table below.
Color mode
[05] code
Adjustment
05-7465
Range correction
05-7466
Black
Full color
Acceptable
value range
Default
11 to 14
21 to 24
31 to 34
41 to 44
12
05-7467
Background peak for range correction
56
05-7470
Sharpness adjustment
128
05-7475
Manual density adjustment center value
128
05-7476
Manual density adjustment light step value
05-7477
Manual density adjustment dark step value
20
05-7478
Automatic density adjustment
128
05-7480
Gannma curve balance adjustment
128
05-8370
Background adjustment
0 to 50
50
05-8371
Fine adjustment of black density
0 to 4
0
05-8372
RGB conversion method selection
0 to 3
0
05-8373
Saturation adjustment
128
05-8375
Sharpness adjustment
128
05-8380
Manual density adjustment center value
05-8381
Manual density adjustment light step value
20
05-8382
Manual density adjustment dark step value
20
0 to 255
0 to 255
20
128
* For further information regarding the codes, refer to the Service Handbook.
<Note>
Select the code for the Custom mode option, in order to adjust the value for [05] code in the
Custom mode. Never adjust any values for [05] code in existing original mode.
After adjusting the value in the Custom mode, use the next procedure.
(3) When scanning the original, press the [EDIT] button on the Control Panel. Select "Custom" from among
the original mode options.
Precautions after the completion of the adjustment
Nothing in particular.
e-STUDIO2500c/3500c/3510c
5.8
Company names and product names in this manual are the trademarks or registered
trademarks of their respective companies.