1
CUSH CORP
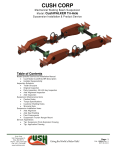
Mechanical Suspension Model: CushFLEX (CSP-CF)
Tandem Axle Independent Cantilever Springs
With Straddle-Mount Hanger
Suspension Installation & Product Service
50,000 lbs Rating
59 Axle Spacing Shown
Table of Contents
Model Specific Service and Installation Manual
Cush Model CushFLEX Description
Installer Responsibility
Inspection Schedule
Hanger Pre-welding
Original Inspection
Daily Inspection, 30 & 90 day Inspection
Axle Alignment Inspection
Axle Inspection
Suspension Maintenance Items
Caution Notes
Torque Specifications
Customer Welding Notes
Warranty Note
Suspension Service Items
Axle Alignment
Axle Seat Welding
Pivot Components
Suspension Trunion Straddle Mount Hanger
Service Appendixes
Typ. Suspension Parts Explosion Drawing
Typ. Application Drawing
Cush Corp
1001 Falconcrest Ct.
Nixa, Mo 65714
Phone: (417) 724-1239
Fax: (417) 724-0126
www.cushcorp.com
Giving the World a Better Ride!
Page: 1
Pub: 100610 Rev: 3
Nov 22, 2010
CUSH SUPENSIONS SYSTEMS
SERVICE MANUAL
Model CushFLEX (CSP-CF) Description
This model is designed to work with 4 wide Cantilever bushing eyed springs.
Independent cantilever springs allow more suspension articulation and a better ride than
rigid walking beam or spring leaf walking beam single point suspension. These springs
are rated per suspension capacity. The CushFLEX model is designed to have several
advantage features over competitive units: Track-Align adjustment on the axle, heavyduty hanger and rocker components, industry standard replacement pivot bushing,
common replacement bolts, rubber or urethane trunion bushing, heavy-duty keeper
sleeves, replaceable spring seat wear pads, low-profile compensator structure.
Installer Responsibility
INSTALLATION DISCLAIMER NOTES:
1) It is important that the proper Cush suspension is chosen for the trailer application.
The following criteria must be considered when selecting a suspension: required
suspension capacity, loaded frame-to-ground measurement, ride height, axle travel, axle
spacing, and axle GAWR.
2) It is the responsibility of the installer to determine the correct location of the
suspension in order to provide the proper trailer load distribution. The gross axle weight
rating (GAWR) of each axle must not exceed the rated capacity of any of the
components involved. The suspension capacity ratings are for suspension components
and axle beam only.
3) Required cross member locations maybe shown. Actual size and shape may vary per
trailer design. It is the responsibility of the suspension installer to ensure structural
adequacy of the trailer frame and related cross members. Verify that the actual trailer
cross member locations correspond with those specified on the suspension drawing.
4) It is the responsibility of the suspension installer to read the instructions on all the
drawing sheets thoroughly before proceeding with a suspension installation.
5) If additional lateral support is needed for the suspension it is the responsibility of the
suspension installer to install rub guides to support the appropriate load for your
application. Contact Cush with questions about lateral support guides.
Giving the World a Better Ride!
Page: 2
Pub: 100610 Rev: 3
Nov 22, 2010
CUSH SUPENSIONS SYSTEMS
SERVICE MANUAL
Inspection Schedule
The following inspection schedule is a guide to help with the preventative maintenance
of your suspension system. Your mechanical suspension will provide many trouble free
miles of service by using the information in this publication.
QC - CushFLEX Hanger Pre-Welding & Alignment
o Verify that you have the correct height and width straddle-mount hangers
for your application.
o It will be easier to mount the straddle-mount hanger if you first remove all
mounted components from the hanger set.
o Before welding the suspension straddle-mount trunion hanger to the frame
you need to first measure that the center of the trunion tube is aligned to
the kingpin of the trailer. Measure to the outer vertical hanger ear and not
to the trunion tube. Also, verify that the trunion hanger is centered on the
frame. Note: the straddle-mount trunion tube may not be centered on the
hanger ears and this is why it is best to measure to the hanger ears.
QC - CushFLEX Original Inspection After Installation
When reviewing the suspensions on your trailer for the first time, check the following:
The axles have been aligned properly.
The suspension frame bracketry have been properly supported.
Trailer is level
All welds are of good and acceptable quality
All fasteners are in place and securely torqued
No component interferences are visible
There should be 1" minimum clearance between top of tire and bottom of trailer
structure when axle is at full jounce. If not a bump stop will need to be added.
There should be 2" minimum clearance between inside of tire and trailer frame
structure for lateral movement.
There should be ample fore and aft clearances.
Giving the World a Better Ride!
Page: 3
Pub: 100610 Rev: 3
Nov 22, 2010
CUSH SUPENSIONS SYSTEMS
SERVICE MANUAL
Daily Inspection
A quick visual inspection before operating the trailer will often detect obvious problems
such as broken or loose parts.
CushFLEX 30-day Inspection
Check clearances around all moving suspension parts such as springs, tires, axle seats,
u-bolts, fasteners, and compensator for any signs of wear, loosening, or component
interferences.
Check each of the following:
Fasteners Not loose, broken or missing-retorque if needed
Pivot Bushings Not protruding, off-center, torn or worn
Frame Hangers Not worn, cracked, bent, or damaged
Compensator Not worn, cracked, bent, or broken
Cantilever Springs Not cracked, bent, out of alignment, or loose
Axle Beam Not cracked, bent, or broken
Tires No tire wear that might indicate an alignment problem.
Axle Alignment No pivot gear movement or inappropriate wear, axles tracking
properly
Trailer Trailer not leaning, trailer frame suspension attachment structurally
sound, no cracked or missing welds at suspension frame attachment.
CushFLEX 90-day Inspection and at every brake lining change
Thoroughly check all items checked at the 30-day inspection. Also check:
All welded connections for signs of deterioration
All frame attachment joints and pivoting or clamping joints for problems-retorque
All spring eye bushings intact
For any sagging or broken leaf springs
CushFLEX Axle Alignment Inspection
Check the Cush-Align connection for change of position at 30-day, 90-day, and every
brake lining change. Re-align if necessary. Re-tack the alignment gear after adjustment
to maintain position in heavy-duty applications.
Axle Inspection (general notes, see axle manufacture s service manual for
details). Visually inspect the all axle components, seals, and hub caps for leaks and oil
level every 6,000 miles (if oil bath type). Repair if necessary.
At 100,000 miles or 12 months, visually inspect seal and hub cap for contaminants, oil
level, or leaks. Check the wheel bearing adjustment. Repair & retorque if necessary.
Giving the World a Better Ride!
Page: 4
Pub: 100610 Rev: 3
Nov 22, 2010
CUSH SUPENSIONS SYSTEMS
SERVICE MANUAL
Suspension Maintenance Items
The Cush trailer suspension system is designed to minimize service issues. With proper
maintenance, the life of your suspension system can be extended.
Caution Notes
Trailer walk can occur due to loading, unloading, or damaged parts
For safe loading and unloading, leave trailer attached to vehicle.
Do not tow or pull on vehicle by suspension components.
Fasteners that have been in service should never be reused, over-torqued, or
lubricated.
Do not operate vehicle suspension with:
Broken welds or metal parts
Loose, broken, or missing fasteners or suspension components
Loss of air pressure in brake system
Giving the World a Better Ride!
Page: 5
Pub: 100610 Rev: 3
Nov 22, 2010
CUSH SUPENSIONS SYSTEMS
SERVICE MANUAL
Torque Specifications
It is the customer's responsibility to check and tighten fasteners to specified torque at
installation, after the suspension has been in operation for 3000 miles, and at
suspension inspection cycles. Failure to do so can result in loss of warranty.
CUSTOMER TORQUE INSTRUCTIONS:
2) It is the customer's responsibility to check and tighten fasteners to specified torque at
installation, after the suspension has been in operation for 3000 miles, and at
suspension inspection cycles. Failure to do so can result in loss of warranty.
3) Torque values given are specified for the fasteners in the condition supplied by Cush
Corporation. DO NOT APPLY ANY ADDITIONAL LUBRICANTS.
4) CAUTION: Fasteners should never be reused if removed or complete loss of clamp
load occurs. For proper joint clamping contact Cush for replacement fasteners.
5) CAUTION: Over-torquing fasteners could result in material failure.
Common Torque Specifications (Cush Trailer Safety and Inspection Sticker)
CSP-CF Tandem
Customer to torque all fasteners!
(Ft*Lbs)
General Fastener Torque Specs
Size
Thread
Spring Keeper Mount Nut/Bolt
3/4
(25K) U-Bolt Nut
7/8
Pivot Nut (SecureLok/Securex)
Trunnion Cap Nut/Bolt (torque Nut)
(Nm)
Grade
Min.
Max.
Min
Max.
10-UNC
5/B
210
235
285
319
14-UNF
8/C
475
525
644
712
7/8
9-UNC
8/C
550
600
746
813
1 1/8
7-UNC
8/C
900
1000
1220
1356
Giving the World a Better Ride!
Page: 6
Pub: 100610 Rev: 3
Nov 22, 2010
CUSH SUPENSIONS SYSTEMS
SERVICE MANUAL
Customer Welding Notes:
It is the responsibility of the suspension installer and vehicle designer to provide
adequate vehicle frame design, gusset support in the area of suspension
attachment, and proper securing method for the suspension system. The
suspension installer has the responsibility to determine the proper welding
parameters for the materials being used. For specifications of suspension
component materials, contact Cush.
Required vehicle support cross member locations may be shown. Actual size and
shape may vary per trailer design. It is the responsibility of the suspension
installer to ensure structural adequacy of the trailer frame and related cross
members.
No welding of any of the suspension components is permitted, except where
specified by Cush.
Any alteration of the suspension components or installation deviations must be
approved, in writing, by Cush Corporation.
Recommended Steel Welding Procedures, If Required:
WARNING: If these procedures and specifications are not followed, damage to the axle
or suspension could result. The resulting axle or suspension damage could cause an
accident, property damage, and/or serious injury.
A welder qualified in 2G positions per ANSI/AWS D1.1-94 Section 5 Part C "Welder
Qualification" must perform the welding.
The specification below is for horizontal (2F) positioning.
Suspension components and their mating parts must be at a minimum temperature of
60°F (15.5°C) and free from moisture, dirt, scale, paint, grease, and other contaminates.
All welds must be performed in a flat, or horizontal, position.
Achieve spray arc transfer with the following welding parameters:
Standard Electrode: AWS E-7018 (Oven Dried), 0.125"DIA., 120-140 AMPS D.C.,
Electrode positive.
Standard Wire: AWS ER-70S-6 or AWS ER-70S-3, 0.045"DIA
Volts: 26-30 DCRP
Current: 275-325 AMPS
Wire Feed Speed: 380-420 Inches per Minute
Electrode Extension: 0.75" to 1"
Gas: 86%AR 14%CO2 at 30 to 35 CFH
Any deviation from these welding parameters must be of equal strength or approved by
Cush Corporation in writing.
Warranty Note
If after review of the Cush Corp Warranty it is determined that there is a warranty issue
and Cush Corp has been notified, then a Warranty Labor Allowance may be needed.
The WLA for the following service items are shown with each itemized description. The
service item descriptions include the obvious parts involved, other parts may be involved
to complete the warranty repair. Shop per-hour labor rate allowances will not exceed
standard industry averages for the work done. Warranty claims should be filed per the
Cush Corp Warranty (publication P0202-01) with an itemized list of charges and copies
of all available receipts. NOTE: Get written approval/warranty estimate from Cush Corp
before working on item that you would like to submit for a warranty claim. Failure to do
so may eliminate your warranty claim.
Giving the World a Better Ride!
Page: 7
Pub: 100610 Rev: 3
Nov 22, 2010
CUSH SUPENSIONS SYSTEMS
SERVICE MANUAL
Suspension Service Items
Axle Alignment
Cush has several different alignment means available for different applications. Listed
here are some general alignment guidelines and alignment procedures for the styles of
Cush Alignment.
CAUTION: DO NOT APPLY undercoating to the pivot alignment area until after
alignment and torque of the suspension pivot bolts.
Check that the tire inflation pressure is correct on all tires.
Alignment should be performed with the vehicle empty and the brakes released.
On a level floor move the vehicle forward and back to straighten, make sure last
movement is forward.
Remove the outer tires and any other parts from under the chassis that obstruct
the measuring distances between the kingpin and the axle ends. If you use a
commercially available kingpin and axle spindle extenders or the edge of the
wheel rim, you will not need to remove this equipment.
Measuring from the trailer's kingpin, determine the alignment of the forward axle.
After achieving proper alignment of the forward axle, torque the Cush Pivot
fasteners per Cush torque specifications, see Cush Axle Alignment procedures in
this manual.
Align the next axle, to within 0.063" tolerance, & any additional axles to the
forward axle per the proper alignment method. Use a commercially available
alignment gauge or trammel bar if available (see Figure 2).
(Figure 2)
NOTE: Failure to follow the procedure for your axle alignment application and/or properly
torque the pivot fasteners can result in a failed pivot connection and a loss of warranty
coverage!
Giving the World a Better Ride!
Page: 8
Pub: 100610 Rev: 3
Nov 22, 2010
CUSH SUPENSIONS SYSTEMS
SERVICE MANUAL
Cush Alignment on CushFLEX
Trac-Align (1/2 alignment adjustment & optional locking rack)
The Trac-Align" was designed to give our customers extra pivot integrity with the
addition of the optional locking rack and a more familiar alignment means with the use
of an eccentric cam adjustment.
o
o
After axle alignment, clamp the joint per Cush torque specifications.
After torque of alignment fasteners, the suspension installer to weld the outside
washer to the compensator side with 1" welds to prevent tampering & for off-road
applications.
o
An alternative to welding the alignment gears is to use optional add-on rack or
ring locking plate that bolts into the alignment grounding nuts and secures the
alignment gear.
WARNING: After alignment, clamp the pivot bolt per Cush torque specifications.
Torque the ½ rack lock bolts to 25 ft*lbs, loosen the rack lock bolts to realign
pivot.
o
Adjusting the Alignment
If realigning, loosen the rack lock bolts to allow eccentric cam
movement. If gears are tack welded, grind off tacks.
The eccentric cam gear should always have the indicator pointer
to the top, so that the eccentric will be aligned with the
grounding nuts properly.
Set the alignment gear indicator tab at 12 o'clock, the neutral
position. Optional: snug the rack lock bolts and pivot bolts of
the "Trac-Align" to be tight enough to hold the joint together but
loose enough to permit use of the eccentric cam adjustment.
Be sure that the eccentric cam plate is clamped down flush
against the hanger side and is not riding up the grounding
nuts/bars or that there are any debris under the gear.
For adjustment use a breaker bar in the ½ square hole
The CushFLEX Trac-Align gives you 1/4 pivot movement fore
and aft per pivot.
To align the axle, rotate the alignment gear of one side of the
suspension to get the axle aligned. If needed, go to the other
side of the suspension and rotate the alignment gear in the
opposite direction to fully align the axle.
Giving the World a Better Ride!
Page: 9
Pub: 100610 Rev: 3
Nov 22, 2010
CUSH SUPENSIONS SYSTEMS
SERVICE MANUAL
Axle Spacing
Cush has several different axle spacing s available for different applications. See your
Cush installation drawing for your application.
NOTE: The axle spacing will be measured with the trailer unloaded. The axle spacing
and ride height will decrease as the suspension springs are loaded and defect up.
Axle Welding Installation Notes
o
o
Customers may have different axle tracks and applications that will
dictate the center spring beam spacing to mount the axle seat to the axle.
Spring seats may be pre-welded to axles prior to assembling to other
suspension components, see Cush installation drawings. Note cam-shaft
clocking for welding axles.
o Customers should also determine the clocking of the cam relative to the
suspension axle seat. Customers may want to vary this per their application.
Reference a typical installation of cams in the picture below.
o Note: Customers must check that cam/slack placement will not cause
interference with trailer components causing part failures.
Giving the World a Better Ride!
Page: 10
Pub: 100610 Rev: 3
Nov 22, 2010
CUSH SUPENSIONS SYSTEMS
SERVICE MANUAL
Cush Suspension to Axle Welding Procedures
RECOMMENDED STEEL WELDING PROCEDURES:
WARNING: If these procedures and specifications are not followed, damage to the axle or
suspension could result. The resulting axle or suspension damage could cause an accident,
property damage, and/or serious injury.
NOTE: A welder qualified in 2G position per ANSI/AWS D1.1-94 Section 5 Part C "Welder
Qualification" must perform the welding.
NOTE: The specification shown below is for horizontal (2F) positioning.
1) Suspension components and their mating parts must be at a minimum temperature of
60°F(15.5°C) and free from moisture, dirt, scale, paint, grease, and other contaminates. (Pre-heat
per axle manufacturer)
2) All welds must be performed in a flat, or horizontal, position. Clean welds between each pass.
Standard Wire: AWS ER-70S-6, 0.045"DIA
Volts: 26-30 DCRP
Current: 275-325 AMPS
Gas: 90%AR 10%CO2 at 30 to 35 CFH
Note: Brake camshaft to be located according to axle
manufacturer specifications & suspension/trailer model.
Use locating fixture or flat surface to space suspension axle
seats and center axle. Check that axle seats are: parallel, square
to axle, and perpendicular to axle.
The suspension axle seat must be tight against the axle
tube with no more that .063" gap at bottom.
Weld sequence, size, and weld direction should be
followed for proper installation.
Back-weld .38" over the start/ends of all welds
Fill all craters, avoid cold laps, and undercuts.
Place 1/2" tack welds in the center forward of both
suspension axle seats
Position and weld rear root pass
Do not wrap welds over axle seat ends, no weld .19"
from ends
Weld rear 2nd & 3rd cover pass
Position & weld front root pass
Weld front 2nd & 3rd cover pass
Weld axle seat side welds
Note: Move back and forth to allow welds to cool and minimize
distortion. You can skip in a X pattern for the axle welding.
Giving the World a Better Ride!
Page: 11
Pub: 100610 Rev: 3
Nov 22, 2010
CUSH SUPENSIONS SYSTEMS
SERVICE MANUAL
U-BOLT INSPECTION & INSTALLATION NOTES
CAUTION! Do not apply any additional lubricants to the u-bolts, improper clamp loading can
occur causing failure
Inspection
o
o
Check each U-bolt threaded area for damage or burrs.
After installation, an equal amount of thread should be visible beyond the head of the nut
on each side of the U-bolt.
Installation
o
U-Bolts should only be installed and torqued after completion of any axle welding. Allow
sufficient axle cooling time before applying torque to u-bolts.
o
Check that U-bolts fit properly in area, if U-bolt is to tight tap on top of U-bolt to hard
surface to open up. Be careful that U-bolt installation does not damage threads.
o
Snug all U-bolts evenly before applying clamping torque with hand wrench. Check that ubolts are parallel and square to axle.
o
Torque U-bolts in a three-step process to avoid an improperly clamped axle and
resulting damage. Torque the u-bolts in an "X" pattern with each torque step (12-3-4). This allows the U-bolt to stretch and relax for the clamp to hold torque.
Proper tightening will allow equal amount of tread above each nut.
o
Use a calibrated torque wrench to get the proper setting for the size of U-bolt you
are using:
o First Step-1/3 of Final torque
o Second Step-2/3 of Final torque
o Third Step-Final torque
o
After U-bolts have been torqued @ spec, weld bottom plate gussets sides to side
of spring end box to secure that cantilever springs do not delaminate. Use ¾
long welds.
Giving the World a Better Ride!
Page: 12
Pub: 100610 Rev: 3
Nov 22, 2010
CUSH SUPENSIONS SYSTEMS
SERVICE MANUAL
Trunion Pivot Component Replacement
The pivot of a trunion hanger on a mechanical suspension is the main link to connect the
suspension to your trailer. This link provides a resilient connection that allows a walking
beam or compensator to walk without excessive flexing. Re-bushing of a straddle-mount
hanger suspension does not require a shop press. You must remove the walking beam
and cap to get to the trunion bushing.
Disassembling Pivot Connection of an under-slung walking beam:
On level ground, securely chock the tires and apply trailer parking brakes
Support the trailer in a safe manner at a working height
Support the weight of the walking beam underneath the center
Remove tires so that you can lower walking beam with axles from trailer
Loosen and remove trunion cap nuts, bolts, and trunion cap
Inspect the trunion cap and throw away the nuts and bolts so you will use new
trunion fasteners.
Lower walking beam from trunion hanger
Disassemble any other parts that interfere with lowering the assembly out of the
suspension hangers
Inspect trunion area for any metal damage that could tear a new bushing.
Clean trunion area of any dirt or grime build-up.
If is rubber, no lubrication needs to be added.
If bushing is urethane, add a thin coating of silicone grease around trunion tube
area. Urethane bushings are used to allow freer articulation of the walking beam.
For rubber or urethane bushing, a new bushing might come without a slit: with a
box knife cut a straight line on the bushing horizontal, place the bushing on the
trunion tube with the slit on horizontal centerline and centered in hanger.
Lift up walking beam and remount trunion cap by torquing bolts to specifications.
Spring Pivot Component Replacement
The pivot of the cantilever spring allows for more articulation and softer ride
characteristics than a steel spring walking beam. This pivot bushing is made of rubber
compound to effectively absorb loads and maintain its shape. In order to use standard
off the shelf replacement components bushings may require insert reducers to allow for
spacing offsets and to accommodate smaller bolts that can be properly torqued to their
effective 90% of proof load.
Tools required: Shop wrenches, bushing press, bushing insertion tool per unit
Disassembling Pivot Connection of Cantilever Spring
On level ground, securely chock the tires and apply trailer parking brakes
Support the trailer in a safe manner at a working height
Support the weight of the walking beam underneath the center
Remove tires from the side that you will be removing the cantilever springs
Loosen and remove pivot hardware from spring side to be replaced
Inspect pivot connection area of compensator after removing spring
If spring is to be placed in shop press you will need to remove each from the axle
connection: remove u-bolts, grind away axle seat connection welds between
Giving the World a Better Ride!
Page: 13
Pub: 100610 Rev: 3
Nov 22, 2010
CUSH SUPENSIONS SYSTEMS
SERVICE MANUAL
bottom seat and top seat, leave axle welds connecting top seat to axle in place,
take apart axle seat top and bottom to be able to remove spring leaves from
bottom seat dowel pin.
Some models, remove the flanged inserts from the inner diameter of the bushing
tube
Take spring to shop press and remove old bushing
Clean debris from spring eye cavity
Bushing Replacement :
Use Cush bushing replacement kit shown on parts explosion for your
suspension, or contact Cush Corp for cross-reference.
Lubricate outside of new Cush bushing and inside of spring eye bushing sleeve
with proper rubber lubricant (P-80 or Ru-glyde)
Put bushing into bushing insertion tool to reduce bushing from free OD to smaller
OD of spring eye. Lubricate tool before placing bushing.
Press in bushing, try to center inner metal bushing sleeve with the outer metal
bushing housing, it may be necessary to push bushing thru a little and pull back
to center rubber and inner metal sleeve.
Reassembling pivot connection:
If required, replace the flanged inserts from to the inner diameter of the bushing
tube sleeve
If these inserts are loose and do not stay in place you may need to hold these
inserts while guiding the spring into the compensator walking beam hanger.
Giving the World a Better Ride!
Page: 14
Pub: 100610 Rev: 3
Nov 22, 2010
CUSH SUPENSIONS SYSTEMS
SERVICE MANUAL
Note: it is easier to do this with the compensator on the ground upside down and
use gravity to lower the spring eyes into the compensator.
Center the spring eye with inserts at the compensator pivot slot, use a tapered
rod to assist.
Gather the alignment gear hardware and new fasteners to remount the pivot.
Hand tighten the pivot hardware to hold the position of all loose items
If needed to spread the compensator hanger: using a hydraulic jack or other
spreading device, spread open the compensator until flanges of flanged inserts
enter the inside of the compensator, remove spreading device.
Place adjustment gear per suspension drawing (Always use new fastener
hardware)
Using a wrench, move alignment gear pointers to nominal position
Align axle with relation to the kingpin per Axle Alignment notes
Torque all the fasteners to specification
Suspension Trunion Straddle-Mount Frame Hanger
Cush manufactures various hangers for different applications; because of this it would
be best for you to contact Cush for an installation drawing per your application. On these
drawings we may show recommended cross-member and support locations, your trailer
manufacture may have an installation drawing for this. Failure to have the proper support
in place can cause a reoccurring failure mode. If for some reason it is required to replace
a frame hanger, please follow the guidelines below as a minimum safety procedure
when repairing these items.
To replace welded frame hanger:
Contact your trailer manufacturer or Cush Corp for replacement parts
On level ground, securely chock the tires and apply trailer parking brakes
Support the trailer in a safe manner at a working height
Remove Tires as required
Disassemble the pivot connection and any other parts that interfere with lowering
the walking beam out of the suspension hanger
Lower the assembly, check for any damaged or wear
Check that the bushings are in usable condition
Mark the hanger position on the frame side for reference
Cut away the frame hanger and clean up the frame with grinder, do not gouge
frame
Raise the new hanger assembly to the frame and clamp hanger to frame
squarely
Align hanger assembly to kingpin (see Hanger Alignment notes)
Weld hanger to frame per Cush Corp installation drawing
Reassemble any other parts that were disassembled to lower assembly
Align axles with relation to the kingpin (see Axle Alignment)
Torque all the fasteners to specification
Apply paint to prevent rust corrosion
Giving the World a Better Ride!
Page: 15
Pub: 100610 Rev: 3
Nov 22, 2010
CUSH SUPENSIONS SYSTEMS
SERVICE MANUAL
Figure 4
Giving the World a Better Ride!
Page: 16
Pub: 100610 Rev: 3
Nov 22, 2010
CUSH SUPENSIONS SYSTEMS
SERVICE MANUAL
Table 4 for Figure 4: CSP-50CF-S12-43 Parts List
Description: CSP-50CF-S12-43
Item
1
2
3
4
5
6a
6b
7
8
9
4
4
Pivot Bushing Kit (Per Spring Eye)
8a
HHCS 0.875"-9 UNC x 7.5"lg grd8
8b
Nut, SecureLok Nut 0.875"-9 UNC
8c Bushing Insert, .25" Spacer & Reducer from 1.125" OD to 0.9"ID
8d Bushing 1.125"ID x 3.92"lg x 3.25" housing (3.45"OD Free Rubber)
1
1
2
1
Trac-Align Pivot Alignment Kit (Per Spring Eye)
K0335
9a
1/2" thk Alignment Gear, Eccentric w/Square (Outer)
9b
Round Alignment Gear, Fixture/Bearing Plate (Inner)
4
H0135
H1106
C0402
C0250
4
F0552
F0626
Kit, Keeper Sleeve
10a
10b
10c
12
Qty
Compensator Assembly for 59" Axle Spacing
W0682
2
Weld on Axle / Spring seat for 5" round
W0681
4
U-Bolt on Bottom Spring seat w/ dowel
W0680
4
Straddle Mount Trunion Hanger w/ 4" tube for 43" BC
W0683-12-43
1
Trunion Bushing Cap (Hutch Style 898-00)
C0402
2
Rubber Trunion Bushing 9.125"Lg x 4"Id x 5"OD
C0403
2
Urethane Trunion Bushing 9.125"Lg x 4"Id x 5"OD
C0405
2
Kit, Trunion Bolt w/Nuts
2
7a
HHCS 1.125"-7 UNC x 12"lg grd8
H0136
7b
Nut 1.125"-7UNC Locking
H1109
10
11
Part Number
1
1
4
HHCS, 0.75"-10 UNC x 6"lg, Grd 5
Nut, Top-lock, 0.75"-10 UNC, grd C
HD Keeper Sleeve 1.38"OD x .81"ID x 4.4"LG
Kit, U-Bolt w/Nuts & Washers
11a
U-Bolt, 7/8"-14UNF x 5" Round x 11.5" lg Gr 8
11b
Nut, 7/8"-14 UNF
11c
Washer 0.875" SAE Thru-Hard
Ref-Cantilever Spring 4 leaf 50K style with eye (.78thk)
C0400-4
Giving the World a Better Ride!
H0202
H1201
T0035-4.4
1
1
1
4
HU102
H1101
H2101
1
2
2
4
Page: 17
Pub: 100610 Rev: 3
Nov 22, 2010
CUSH SUPENSIONS SYSTEMS
SERVICE MANUAL
Giving the World a Better Ride!
Page: 18
Pub: 100610 Rev: 3
Nov 22, 2010