Download Manual: Model RSV Sanitary Electronic Pressure Transmitter
Transcript
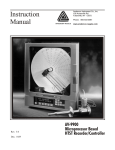
Instruction
Manual
Anderson Instrument Co. Inc.
156 Auriesville Road
Fultonville, NY 12072
1-800-833-0081
Fax 518-922-8997
Instrument Model Number_________________________________
Instrument Serial Number _________________________________
MODEL RSV
SANITARY ELECTRONIC
PRESSURE TRANSMITTER
Form Number AIC3678
© Nov. 1997 ~ Rev. 10/02
PAGE 2
Table of Contents
Page Number
SECTION 1 - INTRODUCTION
3
1.1 SPECIFICATIONS
3
SECTION 2 - THEORY OF OPERATION
5
SECTION 3 - INSTALLATION
5
SECTION 4 - SENSOR WIRING
6
SECTION 5 - INSTRUMENT WIRING
7
5.1 LOOP POWER
7
SECTION 6 - LIQUID CRYSTAL DISPLAY
8
6.1 LCD INSTALLATION
8
SECTION 7 - MAINTENANCE
8
SECTION 8 - CALIBRATION
9
8.1 CALIBRATION OF TRANSMITTER
9
8.2 CALIBRATION OF LCD DISPLAY
9
SECTION 9 - TROUBLESHOOTING
12
9.1 VOLTAGE CHECK
9.2 CURRENT CHECK
9.3 MISCELLANEOUS TROUBLESHOOTING
12
12
12
SECTION 10 - WARRANTY AND RETURN STATEMENT
13
FIGURES
1
2
3
4
5
Dimensional View
Wiring Terminal Connections
Loop Power Guidelines
Loop Diagram
LCD Display Calibration Adjustments
3
6
7
7
10
PAGE 3
Section 1 - Introduction
This manual has been designed to assist the end-user with the installation of the Anderson
model RSV Sanitary Electronic Pressure Transmitter. When followed properly, your sensor
will provide optimum performance with minimum maintenance.
FIGURE 1 - Dimensional View
1.1 SPECIFICATIONS
Excitation:
9-32 VDC (Absolute), 24 VDC Nominal, regulated or
unregulated
14-37 VDC (Absolute) with display
Output:
4-20 mA DC
Loop Resistance:
0-750 ohms at 24 VDC
0-1050 ohms at 30 VDC
Indication:
Optional, 3 1/2 digit, .5" high LCD, cap mounted
Accuracy:
(Includes Hysteresis,
Repeatability, and Linearity)
±.5% of span, full scale, (for standard ranges)
± 1.0% of span, full scale, (for ranges below 0-50 psig,
and all compound/psia ranges)
Over-Range Rating:
2 times base range
Stability:
± 0.3% of calibrated range/6 months
Storage Temperate:
-40 to 150°F (-40 to 65°C)
Zero and Span Adjustment:
± 10% of range
Repeatability:
± .3%
PAGE 4
Hysteresis:
± .1%
Linearity
± .1%
-6.7 to 135°C (up to 163°C if horizontal mount)
Process Temp. Range:
20° to 275°F (up to 325°F if horizontal mount)
Process Temp. Effect:
Less than 0.2% of full scale output/10°F change
Ambient Temp. Operating Range:
-17.8° to 48.9°C (0° to 120°F)
Storage Temperature:
-40° to 65°C (-40° to 149°F)
Mounting:
Direct connection
Housing Material:
316 Stainless Steel
Wetted Parts:
316L Stainless Steel standard; Hasteloy "C" diaphragm
optional
Surface Finish (wetted parts):
Ra max = 8 microinches (.2 microns) electropolished
Recommended Cable:
18-24 AWG, foil shielded, and PVC coated.
(3/16" - 1/4" O.D. insulation)
Wiring Connection:
Screw Terminal; Accessible via removable screw cap
conduit housing
PAGE 5
Section 2 - Theory of Operation
The Anderson RSV Pressure Transmitter can be utilized for applications in which a process
variable of pressure must be converted to an electronic signal. This unit utilizes an internal
pressure transducer to convert the process measurement into a corresponding mV signal.
The mV signal then passes through custom linearization and conditioning circuitry. The
resulting signal is an industry standard 4-20 mA. This mA signal is factory set over the
specified range of the unit. From here the signal may be sent to an Anderson Digital Display,
Microprocessor based controller, chart recorder, or customer supplied instrumentation. In
addition, the RSV may be supplied with an integral LCD display for readout directly at the
process.
Section 3 - Installation
The physical installation is the most important concern with regards to promoting sensor
reliability. Sensors must be installed in such a way that the housing and cable are not subject
to physical abuse. In addition, moisture or moist air must not be allowed to enter the sensor
housing or cable.
NOTE: The installer assumes responsibility for preventing water or water-vapor from entering
the sensor housing.
Your new RSV transmitter is supplied with a conduit housing. If mounted horizontally, the
conduit connection should point downward. Also, to prevent entry of excessive moisture, it is
highly recommended that flexible conduits not be connected directly to the sensor. If conduit
is to be run to the sensor, it is preferable that the watertight connector provided with each
sensor not be removed from the sensor. Instead, run the flexible conduit as near to the
sensor as possible and utilize a seal-tight connector at the end of the conduit. Allow a short
amount of cable to run between the sensor and the flexible conduit. This isolates the sensor
housing from the conduit system and any moisture it may contain. If the conduit is connected
directly to the sensor, the chances are high that the sensor will eventually fail due to excessive water or water vapor entry into the housing.
NOTE: It is recommended that a sensor "ZERO" be performed at time of installation. Refer to
section 8.1, page 9 for information on this procedure.
PAGE 6
Section 4 - Sensor Wiring
Anderson recommends a cable of 24 gauge, 4 conductor, shielded (Belden #9534) or
equivalent. Four conductor cable is utilized because of its roundness, which provides a
suitable seal when used with seal-tight connectors, strain reliefs and rubber grommets.
Irregular shaped cable does not allow for a watertight seal.
If utilizing customer supplied cable, select a round cable with 22-24 AWG wire and a shield.
In order for the Anderson provided seal-tight connector to seal on the cable, the O.D. of the
cable must be between 3/16" and 1/4". If smaller cable is utilized, a different neoprene
bushing must be used (must be customer supplied).
If an alternate seal-tight type connector is going to be used, be absolutely certain that the
rubber bushing will adequately seal on the cable. Do not use a connector intended for power
cable (large inside diameter) if the sensor cable is only 1/4". Be sure to use Teflon thread
tape when attaching the new seal-tight connector.
Wiring to the conduit housing sensors is accomplished as follows:
1. Remove the housing cap to expose the wiring terminal block.
2. Insert the cable through the seal-tight connector, stripping back approximately 2 inches of
sheathing to expose the wires.
3. Two wires will be utilized for connections at the transmitter end of the loop. Normal color
codes being RED (Loop +) and BLACK (Loop -). Trim off all unused wires, including the
bare shield ground wire. To prevent a GROUND LOOP condition, be sure the shield
material and the shield ground wire do not touch the sensor housing. Use an insulator
such as electrical tap or heat shrink tubing if necessary.
4. Strip the tips of the remaining wires back approximately 3/8 of an inch and twist strands
(tinning is highly recommended).
5. Using Figure 2, make the proper connections to the wiring terminal strip (located inside the
conduit housing).
Figure 2 - Wiring Terminal Connections
PAGE 7
Section 5 - Instrument Wiring
With the proper wiring connections made at the sensor end of the loop, it is now time to make
final connections at the instrument end of the loop. The RSV may feed instruments such as
Anderson digital display, microprocessor based controllers, chart recorders, or customer
supplied instrumentation.
5.1 LOOP POWER
The Anderson RSV requires loop power for operation. Ratings are as follows:
Standard RSV Transmitter:
9-32 VDC (Absolute), 24 VDC Nominal, regulated or
unregulated
RSV Transmitter with LCD Display: 14-37 VDC (Absolute), 24 VDC Nominal, regulated or
unregulated
As inherent resistance associated with cable length and signal receiver input may affect
operation of the transmitter, Figure 3 shows some guidelines for loop power required.
FIGURE 3 - Loop Power Guidelines
Please consult the Installation/Service Manual that was provided with your receiver for
specific wiring instruction. Most Anderson receivers (displays, chart recorders, etc.) are
capable of supplying loop power. Typical wiring would be as follows:
Figure 4 - Loop Diagram
PAGE 8
Section 6 - Liquid Crystal Display
The RSV transmitter is available from the factory, or field upgradeable, with an integral LCD
process display. The display is supplied from the factory pre-calibrated to the specified
parameters.
NOTE: Although re-calibration may be performed, no alteration to the decimal point location
may be made - this is a factory set function.
6.1 LCD INSTALLATION
Installation of an LCD Process Display into an already existing RSV transmitter is as follows:
1. To prevent possible damage to the transmitter or receiver, it is recommended that all
power be disconnected before proceeding.
2. Remove the conduit cap from the sensor. If upgrading a RSV in the field, you will be
supplied with a new conduit cap (hole in center).
3. To the left of the wiring terminal block will be a small YELLOW wire loop. It has an arrow
pointing to it stating "WITH DISPLAY CUT". Cut this loop, making sure the two ends don't
come in contact with each other or anything else.
4. Insert the LCD RED wire into the (DISP +) terminal and tighten.
5. Insert the LCD BLACK wire into the (DISP -) terminal and tighten.
6. Slide the LCD display into the end of the conduit housing, orienting for proper position.
7. Secure the new cap provided.
8. Apply power to the system.
9. At this point, check to be sure you are getting a proper reading. If the display is not active,
immediately power down the loop and check your connections. If you feel the display is
not reading properly, it may be necessary to perform calibration to the transmitter. Refer
to Section 8 - Calibration.
Section 7 - Maintenance
Anderson electronic sensors require very little maintenance, if any. We suggest that the
sensor be inspected at 6 month intervals to ensure that they are not being physically abused,
moisture is not entering the housing, and that the wiring is sound.
PAGE 9
Section 8 - Calibration
If you feel that the output of the RSV transmitter is not correct, calibration of the unit may be
required. Section 8.1 illustrates the procedures for calibration of the transmitter, with section
8.2 covering calibration of the LCD display.
Equipment required:
Pressure source
Accurate reference gauge
DC Milliamp Meter (accurate to .01 mA)
Small straight blade screwdriver
Calculator
mA Signal generator (helpful for LCD calibration)
8.1 CALIBRATION - TRANSMITTER
Adjustments to the transmitter are made via the "ZERO" and "SPAN" potentiometers. These
two adjustments are non-interactive, meaning changing the zero will not change the span. As
general maintenance to the unit, a zero check is recommended at approximately 6 month
intervals. If your unit is calibrated at a compound range, you will not see 4.00 mA at atmospheric zero. As reference, you may use the following chart to determine if your unit may
require calibration (most common ranges are shown).
The output of a properly calibrated transmitter may be calculated by using the following
formula:
NOTE: The transmitter should be wired in a complete loop at this point, or on a test bench
and configured per the diagram shown in Figure 4, page 7. Although no interaction between
zero and span occurs, when making adjustments you should be as close to the top and
bottom transmitter range as possible. This will ensure the best possible linearity in the final
signal output.
1. Expose the transmitter to a known zero reference point. If transmitter range starts at
atmospheric zero, zero adjust at atmospheric zero. If transmitter is a compound range,
you should be as close to sensor zero as possible. You must calculate the expected mA
signal (use formula proved at start of this section).
2. Remove cap from transmitter.
3. With your meter set to DC mA, connect the RED (Meter +) lead to the (DISP +) terminal.
Connect the BLACK (Meter - ) lead to the (DISP -) terminal.
4. DO NOT USE THE LCD TO MAKE INITIAL SENSOR ADJUSTMENTS. If the LCD is not
in calibration, an error will result in the calibration of the transmitter. The LCD should be
calibrated separately. See Section 8.2, page 10 for proper procedures.
PAGE 10
5. Adjust the transmitter ZERO potentiometer as shown in Figure 2, page 6, until you either
see 4.00 mA if you are at atmospheric zero, or your expected mA signal for a compound
range.
6. Expose the transmitter to a known process variable near the top end of the range.
7. Again, using the formula provided, calculate the mA reading expected.
8. Adjust the transmitter SPAN potentiometer, as shown in Figure 2, page 6, until you see
your expected mA output.
NOTE: For pressure transmitters with compound ranges, the ranges must first be converted
to all one type unit of measure. For example, a 30" Hg - 0-30 psig unit may be considered to
have a range of -14.7 psig - 0-30 psig and a span of 44.7 psig (2.036" Hg = 1 psi). Be careful
not to lose the (-) sign while performing the calculation of the proper reading.
8.2 CALIBRATION OF LCD DISPLAY
NOTE: Be sure the transmitter is in calibration before attempting to adjust the LCD display.
The LCD reading is based on mA output from the transmitter. Therefore, if the transmitter is
out of calibration, this error will be reflected in the LCD reading.
To perform calibration of the LCD display, you must first determine the Zero and Span. This
information is on a sticker located on the back of the display. Adjustments are made via Zero
and Span potentiometers, see Figure 5 for location. You may use either the RSV transmitter
itself to perform calibration of the display, or a 4-20 mA signal simulator.
Figure 5 - LCD Display Calibration Adjustments
CALIBRATION OF LCD USING 4-20 mA Simulator
1. Disconnect he LCD display from the transmitter by removing the RED and BLACK wires
from their respective terminals.
2. Attach the POSITIVE lead of the simulator to the RED lead of the LCD display, and the
NEGATIVE lead of the simulator to the BLACK lead of the LCD display.
3. The simulator should be set to POWERED output mode so that loop power is supplied. If
your simulator is not capable of this function, wire to 9 VDC batteries in series with the
4-20 mA simulator and the LCD display.
4. Apply 4.00 mA to the LCD display.
5. Adjust the ZERO potentiometer until the LCD matches the range indicated on the sticker in
the spot labeled ZERO CALIBRATION.
PAGE 11
6. Apply 20.00 mA to the LCD display.
7. Adjust the SPAN potentiometer until the LCD matches the range indicated on the
sticker in the spot labeled SPAN CALIBRATION.
8. The LCD display is now properly calibrated. Re-wire the transmitter at this time.
CALIBRATION OF LCD USING TRANSMITTER/PROCESS
1. To complete this calibration, you must have a pressure source and a known accurate
reference. At this point you MUST be certain that the transmitter is in proper calibration.
If necessary, start with section 8.1 - Transmitter Calibration, page 9.
2. Expose the transmitter to a known pressure near the LOW end of the calibrated range.
3. Adjust the potentiometer on the back of the LCD display labeled ZERO until the display
matches your known reference.
4. Expose the transmitter to a known pressure near the HIGH end of the calibrated range.
5. Adjust the potentiometer on the back of the LCD display labeled SPAN until the display
matches your known reference.
6. The LCD display is now properly calibrated.
PAGE 12
Section 9 - Troubleshooting
9.1 VOLTAGE CHECK
Using a digital multimeter on the DC volts scale and with the sensor connected to the
receiver, confirm that the sensor is being provided the correct loop power. Place the RED
(Meter +) lead on the (Loop +) terminal, and the BLACK (Meter -) lead on the (Loop -)
terminal. You should see between 9-32 VDC for a standard transmitter, and between 14-37
VDC if you have an optional LCD display installed.
9.2 CURRENT CHECK
To check the mA loop, be sure the sensor is connected to the receiver. Open the cap on the
transmitter to expose the wiring terminals. Using a digital multimeter on the mADC scale,
connect the RED (Meter +) lead to the (DISP +) terminal and the BLACK (Meter -) lead to the
(DISP -) terminal. You will be reading the mA current loop. A high current flow, approaching
30 mA, indicates a problem with the transmitter (internal source). If no current flow is
observed this indicates either an open loop or a problem with the transmitter. To check a
transmitter at a known pressure, refer to the Calibration section for information on how to
properly calculate the mA output at the known value.
9.3 MISCELLANEOUS TROUBLESHOOTING
Symptom
Action
No display on receiver
• Check loop for broken wire
• Check receiver for power out (loop power)
Display on receiver reading improperly
• Perform calibration check on RSP
• Perform calibration check on signal receiver
Transmitter not operating after LCD
removed
• Place a wire jumper from (DISP +) terminal to
(DISP -) terminal
When testing Loop, NO current flow
detected
• Check for broken connections
• Check loop wiring (incorrect polarity affects
loop)
Feel free to contact Anderson Technical Services Department at 1-800-833-0081 for further
assistance with troubleshooting.
PAGE 13
Section 10 - Warranty and Return Statement
These products are sold by The Anderson Instrument Company (Anderson) under the
warranties set forth in the following paragraphs. Such warranties are extended only with
respect to a purchase of these products, as new merchandise, directly from Anderson or from
an Anderson distributor, representative or reseller, and are extended only to the first buyer
thereof who purchases them other than for the purpose of resale.
Warranty
These products are warranted to be free from functional defects in materials and workmanship at the time the products leave the Anderson factory and to conform at that time to the
specifications set forth in the relevant Anderson instruction manual or manuals, sheet or
sheets, for such products for a period of one year.
THERE ARE NO EXPRESSED OR IMPLIED WARRANTIES WHICH EXTEND BEYOND
THE WARRANTIES HEREIN AND ABOVE SET FORTH. ANDERSON MAKES NO
WARRANTY OF MERCHANTABILITY OR FITNESS FOR A PARTICULAR PURPOSE
WITH RESPECT TO THE PRODUCTS.
Limitations
Anderson shall not be liable for any incidental damages, consequential damages, special
damages, or any other damages, costs or expenses excepting only the cost or expense of
repair or replacement as described above.
Products must be installed and maintained in accordance with Anderson instructions. Users
are responsible for the suitability of the products to their application. There is no warranty
against damage resulting from corrosion, misapplication, improper specifications or other
operating condition beyond our control. Claims against carriers for damage in transit must be
filed by the buyer.
This warranty is void if the purchaser uses non-factory approved replacement parts and
supplies or if the purchaser attempts to repair the product themselves or through a third party
without Anderson authorization.
Returns
Anderson’s sole and exclusive obligation and buyer’s sole and exclusive remedy under the
above warranty is limited to repairing or replacing (at Anderson’s option), free of charge, the
products which are reported in writing to Anderson at its main office indicated below.
Anderson is to be advised of return requests during normal business hours and such returns
are to include a statement of the observed deficiency. The buyer shall prepay shipping
charges for products returned and Anderson or its representative shall pay for the return of
the products to the buyer.
Approved returns should be sent to:
ANDERSON INSTRUMENT COMPANY INC.
156 AURIESVILLE ROAD
FULTONVILLE, NY 12072 USA
ATT: REPAIR DEPARTMENT
Notes
ANDERSON INSTRUMENT CO., INC • 156 AURIESVILLE RD. • FULTONVILLE, NY 12072 • USA • 800-833-0081 • FAX 518-922-8997
ANDERSON INSTRUMENT CO. LP • 400 BRITANNIA RD. EAST, UNIT 1 • MISSISSAUGA, ONTARIO L4Z 1X9 • CANADA • 905-568-1440 • FAX 905-568-1652
NEGELE MESSTECHNIK GmbH (A Division of Anderson) • RAIFFEISENWEG 7 • D-87743 EGG A. D. GÜNZ • GERMANY • +49 (0) 8333/9204-0 • FAX +49 (0) 8333/9204-49
www.anderson-negele.com


