1
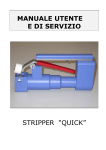
STRIPPER “QUICK”
OPERATOR AND
SERVICE MANUAL
MOELCA s.r.l.
Registered office: Via E.Toti, 101
Head Office: Via del Lavoro,19
22070 Limido Comasco (CO)
Italy
Tel +39 31-3520153/3520279/3524739
Fax +39 31-3524732
Email [email protected]
UNI EN ISO 9001:2000 approved Quality System
Manufacturer’s Liability
Operating instructions may contain a declaration by which the Manufacturer, the Assembler, the
Installer, and the Importer are liable of the instrument safety, reliability, and performance only if:
all assembling operations, extensions , setup, changes, and repairs are performed by
authorized personnel;
the electrical system of the room involved meets the relevant requirements;
the instrument is used according to the given operating instructions.
When using electric devices, the basic safety rules to reduce fire risk, shock hazard and injuries
are to be followed. Please read and keep all instructions contained in the present Manual
COPYRIGHT
All rights reserved. Unless otherwise noted, no part of this publication may be reproduced,
transmitted, transcribed, stored in a retrieval system, or translated into any language in any form
without the written permission of MOELCA .
The content of the present manual can be modified without notice.
The documentation herein contained has been collected and verified with the utmost care.
Nevertheless MOELCA cannot be liable for its incorrect use. The same is true for any person or
company involved in the creation and production of the present manual.
Page 2 of 23
Stripper QUICK Operator and Service Manual, Rev. 1.0
WARRANTY
All units are produced and checked with the utmost care by the manufacturer. However, should a
unit show a malfunction MOELCA gives each Stripper QUICK a warranty period of twelve months
from date of sale. Warranty is valid only if the user complies with the following rules:
Defective Stripper QUICK must be sent to MOELCA or to the nearest Authorized Service
Facility in the original packaging only.
Damages to units sent without original packaging will not be covered by warranty.
The purchase invoice should be included, along with a detailed description of the defect.
Damages resulting from operating errors, misuse, manipulation, carelessness, or any
⌧
intervention unauthorized by MOELCA are not subject to warranty. MOELCA can grant a
perfect operation only if Stripper QUICK is used with the original power supplier specifically
designed for this instrument.
Warranty does not include the rechargeable batteries and the necessary labour for their
replacement because they are considered consumable parts.
For further information concerning warranty please contact MOELCA.
Stripper QUICK Operator and Service Manual, Rev. 1.0
Page 3 of 23
SYMBOLS AND CONVENTIONS
The below list contains the symbols used in the present document.
Indicates an error condition.
Attention.
Page 4 of 23
Stripper QUICK Operator and Service Manual, Rev. 1.0
REVISIONS
Revision Log
Version
1.0
Date
13 Oct 2004
Author
I. Milani
Stripper QUICK Operator and Service Manual, Rev. 1.0
Description
Original Version
Page 5 of 23
CONTENT
Revision Log....................................................................................................................5
1 Introduction...............................................................................................................7
2 Installation ................................................................................................................9
2.1 Unpacking Stripper QUICK......................................................................................9
2.2 Stripper QUICK location .........................................................................................9
2.3 Before Using Stripper QUICK...................................................................................9
2.4 Stripper QUICK Operation Test.............................................................................. 10
3 Getting familiar with Stripper Quick. ............................................................................ 11
3.1 Use of Battery Charger......................................................................................... 11
3.2 How to use Stripper QUICK................................................................................... 12
3.3 How to position Stripper QUICK during Pause or when at the End of the Job. ............... 12
4 Troubleshooting........................................................................................................ 13
4.1 Problems and Possible Solutions ............................................................................ 13
5 Maintenance ............................................................................................................ 15
5.1 Cleaning of Protection Front Cap............................................................................ 15
5.2 Cleaning of Stripper QUICK................................................................................... 15
6 Test Sheet ............................................................................................................... 17
7 Spare Parts List ........................................................................................................ 19
7.1 Overall View.......................................................................................................... 19
7.2 Stripper QUICK Parts List .................................. Errore. Il segnalibro non è definito.
8 Electrical Diagram..................................................................................................... 20
9 Technical Features....................................................................................................... 22
Page 6 of 23
Stripper QUICK Operator and Service Manual, Rev. 1.0
GENERAL DESCRIPION
1 Introduction
Stripper QUICK is a little, ergonomic, compact, and heavy-duty device designed for
stripping of hemocompound bags tubes.
Stripper QUICK’s main features are the following:
It is a portable device, easily moved by the handle it is provided with. It can be used
anywhere since it is supplied by rechargeable batteries without need of uncomfortable
power cables.
Thanks to its self-slide system, it is not necessary to guide tubes manually during
stripping.
It is extremely handy and can be easily positioned at the end of each single activity.
Stripper QUICK is automatically started when the starting handle is closed, without
selecting any function or pressing any additional switch.
It is safe thanks to the front protection cap it is provided with.
It can strip bag-tubes of any diameter.
Batteries are quickly recharged.
Stripper QUICK Operator and Service Manual, Rev. 1.0
Page 7 of 23
GENERAL DESCRIPTION
Page 8 of 23
Stripper QUICK Operator and Service Manual, Rev. 1.0
INSTALLATION
2 Installation
2.1 Unpacking Stripper QUICK
Remove Stripper QUICK from its original package and check that it is not damaged.
In case you find any defect, please do not use the instrument!
Each Stripper QUICK is provided with:
•
•
•
Plastic case. When not in use, Stripper QUICK should always be kept in it.
Power supplier for batteries recharge.
Operator and Service Manual.
2.2 Stripper QUICK location
Although Stripper QUICK is a heavy duty and versatile instrument, some simple
precautions should always be taken.
• Never place it on little tables or other unstable supports.
• Chose a place protected from the damp, possibly away from direct
sunlight and heat sources.
Do not place Stripper QUICK on radiators. Do not expose it to direct
sunlight for a long time: higher temperatures than 50° C cause
damages! Batteries explosion hazard!
2.3 Before Using Stripper QUICK.
The very first step is batteries recharge.
As shown in the below figure, put the recharge plug into the proper socket in the
upper part of the instrument, near the handle. Connect the recharge power
supplier to power supply. When batteries are completely exhausted the recharge
takes about 5 hours.
Pay attention to the power supplier mains AC voltage!
Protect the power supplier from water! Always connect the batteries
recharger first to Stripper QUICK and then to mains !
Stripper QUICK Operator and Service Manual, Rev. 1.0
Page 9 of 23
INSTALLATION
2.4 Stripper QUICK Operation Test
To check the correct operation of the instrument, hold Stripper QUICK as shown in
the below figure.
Then press the upper handle as in the photograph.
The lower roller (visible only from above) will start turning quickly and with
uniform motion.
The instrument is now ready to be used.
Page 10 of 23
Stripper QUICK Operator and Service Manual, Rev. 1.0
GETTING FAMILIAR WITH STRIPPER QUICK
3 Getting familiar with Stripper Quick.
3.1 Use of Battery Charger
Batteries overheat when they are used for a long time. Let them cool down before
recharging!
From time to time it is necessary to exhaust batteries completely before recharging
them. This allows to obtain the maximum battery capacity.
Do not recharge batteries after each use.
In case of long idle periods, recharge the batteries only when the instrument has to be
used.
If Stripper QUICK is not used for a long period, it takes about 5 recharge and exhaust
cycles before it reaches its full performance again.
If battery operation lasts shorter and shorter it means that batteries are used up and
must be replaced.
Once the recharge is complete (maximum 5 hours), disconnect the
battery charger from mains!
Batteries (inside the instrument) can be replaced by qualified personnel
only.
Keep batteries in a dry place, protected from intense cold.
Do not throw batteries away with household waste, nor in fire or water.
Cover the contacts of the removed battery. In case of short-circuit there
is fire and explosion hazard!
Always comply with law regulations concerning environmental protection.
Batteries and battery charger are compatible. For recharge operation use
the original battery charger only. Batteries and battery charger will be
damaged if a combination of different battery-cells are used!
Stripper QUICK Operator and Service Manual, Rev. 1.0
Page 11 of 23
GETTING FAMILIAR WITH STRIPPER QUICK
3.2 How to use Stripper QUICK.
Put the initial end of the tube to be stripped (opposite the bag) in the two slides of
the front protection cap, as illustrated in the photograph.
Press the upper handle with strength, while holding the lower handle with the
fingers of the same hand.
When stripping is finished, release the upper handle.
3.3 How to position Stripper QUICK during Pause or when at
the End of the Job.
Stripper QUICK is provided with a front protection cap (that avoids contact with
the lower traction roller) having a flat lower part. This feature allows to position
the instrument so that the grip is easier.
Page 12 of 23
Stripper QUICK Operator and Service Manual, Rev. 1.0
TROUBLESHOOTING
4 Troubleshooting
4.1 Problems and Possible Solutions
STRIPPER QUICK DOES NOT WORK, THE LOWER TRACTION ROLLER IS STILL:
Cause:
Batteries are very low or battery charger does not charge properly.
The switch under the handle is defective.
Solution: Connect the battery charger and after 5 minutes check the operation
(keeping the battery charger connected). If the instrument works, go on
completing the recharge.
Please contact MOELCA Technical Service.
Batteries must be removed from the instrument before any electric service!
STRIPPING IS NOT SATISFACTORY
Cause:
The tube of the hemo-components bag is very hard.
Solution: Press the handle stronger. It is also possible to perform stripping putting
the Stripper QUICK on a bench and pressing the upper handle with
strength.
DURING STRIPPING ONE OF THE TUBES OF HEMOCOMPONENTS BAG HAS BROKEN AND THE
LIQUID CONTENT HAS SEEPED THROUGH THE FRONT PROTECTION CAP
Cause:
Defective tube of hemo-components bag or bad tube positioning.
Solution: Remove the protection cap as described in Section 5 “Maintenance” and
clean according to the current regulations for skin and face protection in
order to avoid possible contamination. Cleaning should be done with a
wad just damp with water or alcohol.
During cleaning the battery charger must be disconnected.
Never perform cleaning by immersion, even partial. Never put the Stripper
QUICK head under a water stream!
Do not use acetone, trichloroethylene, etc. If bleach or disinfectant are
used, clean the treated parts with water immediately after!
Stripper QUICK Operator and Service Manual, Rev. 1.0
Page 13 of 23
TROUBLESHOOTING
Page 14 of 23
Stripper QUICK Operator and Service Manual, Rev. 1.0
MAINTENANCE
5 Maintenance
Stripper QUICK requires few and simple maintenance operations.
5.1 Cleaning of Protection Front Cap
Stripper QUICK is provided with a safe front cap protecting the traction roller.
When internal cleaning is necessary (because of the breaking of a tube or for
scheduled clearance a suitable Allen wrench is needed to unscrew the cap
retaining screws and the traction roller retaining screws (two opposite screws).
During re-assembly remember to position the hollow part upwards, as
shown below.
5.2 Cleaning of Stripper QUICK
To clean the Stripper QUICK’s body use a cloth just damp with water or alcohol.
Do not wet or dampen the start switch under the handle and the battery supply
socket!
Never clean any part of the instrument by total or partial immersion!
Never put the instrument under a water stream!
Do not use acetone, trichloroethylene, etc. If bleach or disinfectant are used, clean
the treated parts with water immediately after!
Stripper QUICK Operator and Service Manual, Rev. 1.0
Page 15 of 23
MAINTENANCE
Page 16 of 23
Stripper QUICK Operator and Service Manual, Rev. 1.0
TEST REPORT
6 Test Sheet
Serial Number:
Date:
Tester Name:
Signature:
1 Check that all internal and external components are correctly positioned and free from
aesthetic/mechanical defects. Check quality of weldings.
2 Check that the external body does not have scratches or aesthetic imperfections.
3 Check that the hollow for lower traction roller cap is correctly positioned upwards.
4 Check that the return spring are correctly positioned.
5 Check that the switch under the handle and the jack socket are properly fixed, so that
components do not twist.
6. Using a digital amperometer, check the motor absorption keeping the battery charger
plugged in :
Without load (should be less than 1,9 A)
_______
With load
(should be less than 2,0 A)
_______
7. Recharge batteries with the battery charger supplied. After 5 hours recharge, disconnect
the battery charger and close the upper handle for 75 minutes uninterruptedly.
After this time, Stripper QUICK should still be able to strip without any effort of the
motor.
8. After recharging Stripper QUICK with the battery charger, perform some stripping tests
with tube for hemo components bags (at least 10 tests). Ensure that all tests are
performed correctly, without straining the motor and without too much noise.
9 Put Stripper Quick in the case supplied, along with the battery charger and one copy
of the Operator and Service Manual.
Sign the present test sheet and put original copy inside the case.
Stripper QUICK Operator and Service Manual, Rev. 1.0
Page 17 of 23
TEST REPORT
Page 18 of 23
Stripper QUICK Operator and Service Manual, Rev. 1.0
ELECTRICAL DIAGRAM
7 Spare Parts List
How to read the Parts List:
Pos.:
Code:
Quantity:
Description:
Material:
Indicates part position number in the photograph.
Indicates part code number.
Indicates quantity used.
Indicates part description.
Material used for part manufacturing.
Example:
Pos.:
Code:
Description:
7
STR07
Framework
N° identifying the
part in the figure
Seen from Above
Material
PVC
Material used
for part
manufacturing
Part description
7.1 Overall View
9
10
12
13
16
8
7
1
2
5
14
3
4
6
11
15
17
Stripper QUICK Operator and Service Manual, Rev. 1.0
Page 19 of 23
CARATTERISTICHE TECNICHE
7 Stripper QUICK Part list
Pos.
1
2
3
4
5
6
7
8
9
10
11
12
13
14
15
16
17
Code
STR01
STR02
STR03
STR04
STR05
STR06
STR07
STR08
STR09
STR10
STR11
STR12
STR13
STR14
STR15
STR16
STR17
Description
Tube drive
Traction Roller
Drive with bush
Reducer
Engine
Batteries
Roller closure screw
Teflon Roller
Lower handle complete
Handle Support Complete
Base for Handle support
Upper Handle with Switch
Cover for Upper Handle
Handle fixing box with jack connector
Rear Cover
Battery Charger
Framework
Material
PVC
Alluminium
PVC
---------------------------------------Inox
Teflon
Inox
Inox
Alluminium
Inox
PVC
PVC
PVC
-------------PVC
8 Electrical Diagram
SW1
1
2
SW ON-OFF
+
BT1
BATTERY 3.6V
C1
470 pF
DC Motor
-
+
MOELCA
Title
Schema Elettrico Quick Stripper
Size
A
Page 20 of 23
Date:
Document Number
Rev
1.0
Strip_SE_001
Saturday, February 14, 2004
Sheet
1
of
1
Stripper QUICK Operator and Service Manual, Rev. 1.0
ELECTRICAL DIAGRAM
Stripper QUICK Operator and Service Manual, Rev. 1.0
Page 21 of 23
TECHNICAL FEATURES
9 Technical Features
•
PVC body.
•
Instrument not suitable for use in environment containing anesthetic inflammable
mixture with oxygen or nitrous oxide.
•
Class 1 Instrument. This instrument is uniquely designed for stripping of hemo
components bags tube. Therefore it must be used in medical
environment, transfusion department. Any different use will be
considered unsuitable.
Attention:
The instrument is operated by internal batteries and the power
supplier must be used as battery charger only.
•
•
•
Environmental operation
and stocking requirements:
Temperature between 5 and 45 °C.
Operation and storage
humidity:
Less than 80 % without condensation.
Battery charger features:
Prim.: 230V 50-60 Hz. Sec.: 3,6V / 600 mA.
Do not use battery chargers other than the
original.
Verify that the data plate label reads:
“Stripper QUICK Power Supplier”
Internal battery recharge
procedure:
See section 3.1 of the present Manual.
Current absorption during operation
min. 1,9 A / max 2,1 A
Nominal operation tension,
Battery voltage:
3,6V =
Batteries number and type:
No. 3 Nichel Cadmium batteries 1,2V 600
mA (see note*)
Maximum Stripper Quick continuous
Operation time with charged batteries
(engine operating uninterruptedly):
Maximum performable strippings
(with charged batteries)
before next recharge:
Suggested instrument idle time
during Stripper QUICK use:
1 hour and 30 minutes
1000/1500 according to mechanical
consistency of the tube to be stripped
There are no contraindications to
uninterrupted use
•
Recharge time
5 hours
•
Rouns per minutes without load:
140 - 170 rounds/min.
•
Noise:
max 70 dB idling / max 85 dB working.
Page 22 of 23
Stripper QUICK Operator and Service Manual, Rev. 1.0
TECHNICAL FEATURES
•
Vibrations:
Vibrations on the hand-arm element
are twice lower than 2,5 m/s.
•
Maximum couple moment:
3,4 – 3,9 Nm.
•
Dimensions:
50 mm wide, 240 mm deep,
Max 140 mm high
•
Stripper QUICK weight:
1090 g.
•
Case dimensions:
320 mm wide, 250 mm deep, 75 mm high.
•
Overall package and instrument weight:
1840 g.
•
Shipping and storing temperature:
Temperature between -10°C and 50°C.
Relative humidity 20% to 90% without
condensation.
•
Reference regulations:
The product meets the requirements of
Directive 93/42/ECC “Medical Devices”. The
following harmonized regulations are
observed in particular:
EN 60601 –1 “Electromedical instruments
Part 1. General safety rules”.
EN 60601-1-2 “Electromedical instruments
Part 1. General safety rules”.
Collateral rule: Electromagnetic
compatibility, requirements and tests.
(*) Nichel Cadmium batteries must be replaced with original similar batteries.
Batteries should always be kept for recycling or ecological waste disposal.
Defective and exhausted batteries should be recycled according to CEE regulation 91/157.
Non-working recyclable batteries can be directly delivered (in Italia) to: Ecoelit, Corso
Sempione 15/A 20145 MILANO
Ecological measures:
Once the device has reached the end of its life-time, instrument, accessories, and package
should be sent to a suitable plant for ecological treatment.
--- Subject to change without notice---
Stripper QUICK Operator and Service Manual, Rev. 1.0
Page 23 of 23