1
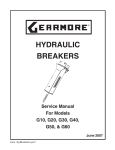
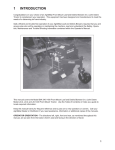
HYDRAULIC
BREAKER
Operator's Manual
For Models:
G10, G20, G30, G40,
G50, G60, & G100
June 2007
Form: HydBreaker.pm7
TABLE OF CONTENTS
SECTION
DESCRIPTION
PAGE
1
2
3
4
5
6
1.1
Introduction .............................................................. 1
Serial Number Location .......................................... 1
2.1
2.2
2.3
2.4
2.5
Safety............................................................................ 2
General Safety ......................................................... 3
Important Safety Guidelines................................... 4
Safety Training ........................................................ 5
Safety Signs ............................................................. 5
Hydraulic Safety ...................................................... 5
3.1
3.2
3.3
Specifications ............................................................. 6
Recommended Machine Weights ............................ 6
Breaker Specifications ............................................. 6
Available Tools ......................................................... 7
4.1
4.2
Installation ................................................................. 7
Hydraulic Installation ............................................. 7
Mechanical Installation ........................................... 7
5.1
5.2
5.3
5.4
5.5
5.6
Operation .................................................................... 8
Instructions for Use ................................................. 8
Initial Operation ...................................................... 9
Operating Hydraulic Breaker ................................. 9
Points to Note...................................................... 9-10
Removal and Mounting of Breaker ....................... 10
Changing Breaker Tool ......................................... 11
6.1
6.2
6.3
6.4
6.5
Maintenance ............................................................. 12
Daily Inspection ..................................................... 12
Maximum Clearance ............................................. 12
Gas Charging Kit ................................................... 13
Checking Gas Pressure ......................................... 13
Maximum Nitrogen GAs Pressures ...................... 14
7
Troubleshooting ...................................................... 15
8
Limited Warranty .................................................... 16
1
INTRODUCTION
Gearmore is the leading supplier of hydraulic breaker attachments for Skid-Steer Loaders, backhoe, and
mini-excavators. You can have confidence in the quality and durability of any of our hydraulic breakers.
Gearmore hydraulic breakers employ a unique cylinder design to provide a light, yet strong breaker which
are easily serviceable and require very little routine maintenance.
This comprehensive operators manual provides full instruction on the safe and productive use of our hydraulic breakers. Operators should read and understand all aspects of this manual to get the best service from
your hydraulic breaker.
1.1
SERIAL NUMBER LOCATION
Always give your dealer the serial number of your hydraulic breaker when ordering parts or requesting service or other information.
The serial number plate is located where indicated. Please mark the number in the space provided for easy
reference.
serial number
plate
DATE OF PURCHASE: ___________________________
MODEL NUMBER: ______________________________
SERIAL NUMBER: ______________________________
1
2
SAFETY
SAFETY ALERT SYMBOL
This Safety Alert symbol means
ATTENTION! BECOME
ALERT! YOUR SAFETY IS
INVOLVED!
The Safety Alert symbol identifies
important safety messages on the
Tandem Discs and in the manual.
When you see this symbol, be alert
to the possibility of personal injury
or death. Follow the instructions
in the safety message.
Why is SAFETY important to you?
3 Big Reasons
SIGNAL WORDS:
Note the use of the signal words DANGER,
WARNING and CAUTION with the safety
messages. The appropriate signal word for
each message has been selected using the
following guide-lines:
SI NO LEE INGLES, PIDA AYUDA
A AIGUIEN QUE SI LO LEA PARA
QUE LE TRADUZCA LAS
MIDIDAS DE SEGURIDAD.
Accidents Disable and Kill
Accidents Cost
Accidents Can Be Avoided
DANGER - Indicates an imminently hazardous
situation that, if not avoided, will result
in death or serious injury. This signal
word is to be limited to the most
extreme situations typically for
machine components which, for
functional purposes, cannot be guarded.
WARNING - Indicates a potentially hazardous
situation that, if not avoided, could
result in death or serious injury, and
includes hazards that are exposed
when guards are removed. It may
also be used to alert against unsafe
practices.
CAUTION - Indicates a potentially hazardous
situation that, if not avoided, may
result in minor or moderate injury.
It may also be used to alert against
unsafe practices.
If you have any questions not answered in this manual or require additional copies or the manual is
damaged, please contact your dealer.
2
2.1
GENERAL SAFETY
IMPORTANT SAFETY INFORMATION WHEN USING OUR HYDRAULIC BREAKERS
1. Operators and service personnel must read and thoroughly understand
this operators manual before using your breaker.
2. Keep all people clear of breaker while in operation.
3. Do not operate the breaker without checking that all of the applicable safety
equipment/shielding is on the operating machine and working correctly.
FAILURE TO COMPLY MAY RESULT IN INJURY OR DEATH.
4. TO PREVENT INJURY OR DEATH, do not disassemble a breaker before
discharging the nitrogen gas precharge.
5. Do not hardface or sharpen a tool with a cutting torch. Excessive heat from
torching or welding causes embrittlement, breakage, and flying pieces.
Resharpen only with a lathe or milling machine using sufficient cooling.
6. Fully extend tool while charging the breaker with nitrogen. STAY CLEAR
OF TOOL WHILE CHARGING.
7. For precharging the hydraulic breaker use nitrogen gas only.
8. Do not operate the breaker unless the operator is in full control of the machine.
Operate the breaker from the operators seat only.
9. Important safety decals are provided with each breaker. Keep them clean and
visible. Gearmore will provide decals free of charge as needed.
10. It is very important to have compatibility between the breaker and the
machine. Please refer to the Recommended Machine Weight section of this
manual.
11. Use the proper lifting equipment and tools when handling or servicing the
breaker or any of it's components.
12. Wear ear protection if conditions warrant.
13. Service personnel must take care handling pins and bushings when
exchanging the bucket for the breaker. The machine operator must move
the arm or boom only when directed by service personnel.
14. If it is necessary to hammer the pins in or out, beware of flying metal chips.
Eye protection should be worn.
15. Do not make any alterations to the breaker. Alterations must be made by trained
service personnel.
16. Use replacement parts only sold by Gearmore.
17. Have a first-aid kit available for use should the need arise
use it.
and know how to
18. Have a fire extinguisher available for use should the need arise and know
how to use it.
3
2.2
IMPORTANT SAFETY GUIDELINES
Safety of the operator and bystanders is one of the
main concerns in designing and developing a machine. However, every year many accidents occur
which could have been avoided by a few seconds of
thought and a more careful approach to handling
equipment. You, the operator, can avoid many
accidents by observing the following precautions
in this section. To avoid personal injury or death,
study the following precautions and insist those
working with you, or for you, follow them.
•
Avoid blank hammering.
•
DO NOT hammer in the same tool position for
over thirty (30) seconds.
•
DO NOT use the breaker to move material, pry
material or any other use that it is not designed
for.
•
DO NOT submerge the breaker under water
unless the breaker has been modified for underwater operation.
•
Replace any safety sign or instruction sign
that is not readable or is missing.
•
•
NEVER use alcoholic beverages or drugs
which can hinder alertness or coordination
while operating this equipment. Consult your
doctor about operating this machine while
taking prescription medications.
Prevent contaminiation from entering the
hydraulic hoses when mounting or dismounting
the breaker from the machine.
•
Maintain a clean hydraulic system.
•
Replace the filter element with a new one and
change hydraulic oil at the specified intervals.
•
Under no circumstances should young
children be allowed to work with this
equipment. Do not allow persons to
operate or assemble this unit until they
have read this manual and have developed a thorough understanding of the
safety precautions and of how it works.
Review the safety instructions with all users
annually.
•
This equipment is dangerous to children and
persons unfamiliar with its operation. The
operator should be a responsible, properly
trained and physically able person familiar
with the machine and trained in this equipment's operations.
•
Perform daily inspections.
4
Filter Element ------- Every 100 hours
Hydraulic Oil -------- Every 800 hours
•
Operate the breaker carefully. DO NOT hit the
boom of the machine with the breaker.
In addition to the design and configuration of this
implement, including Safety Signs and Safety Equipment, hazard control and accident prevention are
dependent upon the awareness, concern, prudence
and proper training of personnel involved in the operation, transport, maintenance and storage of the
machine.
Think SAFETY! Work SAFELY!
2.3
SAFETY TRAINING
Safety is a primary concern in the design and manufacture of our products. Unfortunately, our efforts to
provide safe equipment can be wiped out by a single
careless act of an operator or bystander.
How To Install Safety Signs:
In addition to the design and configuration of equipment, hazard control and accident prevention are
dependent upon the awareness, concern, prudence
and proper training of personnel involved in the operation, transport, maintenance and storage of this
equipment.
•
•
It has been said, "The best safety feature is an
informed, careful operator." We ask you to be that
kind of an operator. It is
the operator's responsibility to
read and understand ALL
Safety and Operating instructions
in the manual and to follow these. Accidents can be
avoided.
Working with unfamiliar equipment can lead to careless injuries. Read this manual, and the manual for
your machine, before assembly or operating, to acquaint yourself with the equipment. If this implement
is used by any person other than yourself, or is loaned
or rented, it is the machine owner's responsibility to
make certain that the operator, prior to operating:
a.
Reads and understands the operator's
manuals.
b.
Is instructed in safe and proper use.
Know your controls and how to stop machine quickly
in an emergency. Train all new personnel and review
instructions frequently with existing workers. Be certain only a properly trained and physically able person
will operate the machinery. A person who has not read
and understood all operating and safety instructions
is not qualified to operate the machine. An untrained
operator exposes himself and bystanders to possible
serious injury or death.
2.4
SAFETY SIGNS
1. Keep safety signs clean and legible at all times.
2. Replace safety signs that are missing or have
become illegible.
3. Safety signs are available from your authorized
dealer or from Gearmore.
•
•
•
•
•
2.5
Be sure that the installation area is clean
and dry.
Be sure temperature is above 50º F (10º C).
Determine exact position before you remove
the backing paper.
Remove the smallest portion of the split
backing paper.
Align the sign over the specified area and
carefully press the small portion with the
exposed sticky backing in place.
Slowly peel back the remaining paper and
carefully smooth the remaining portion of the
sign in place.
Small air pockets can be pierced with a pin and
smoothed out using the piece of sign backing
paper.
HYDRAULIC SAFETY
Make sure that all the components in the
hydraulic system are kept in good condition
and are clean.
Replace any worn, cut, abraded, flattened or
crimped hoses and metal lines.
Relieve pressure before working on
hydraulic system.
Do not attempt any makeshift repairs to the
hydraulic lines, fittings or hoses by using
tapes, clamps or cements. The hydraulic
system operates under extremely high
pressure. Such repairs will fail suddenly
and create a hazardous and unsafe
condition.
Wear proper hand and
eye protection when
searching for a high
pressure hydraulic leak.
Use a piece of wood or
cardboard as a backstop
instead of hands to isolate
and identify a leak.
If injured by a concentrated high pressure
stream of hydraulic fluid, seek medical
attention immediately. Serious infection or
toxic reaction can develop from hydraulic
fluid piercing the skin surface.
Before applying pressure to the system,
make sure all components are tight and
that lines, hoses and couplings are not
damaged.
When disconnecting hydraulic lines, shut off
hydraulic supply and relieve hydraulic
pressure.
5
3
SPECIFICATIONS
3.1
RECOMMENDED MACHINE WEIGHTS
Machine weight ranges are intended as a guideline only. Other factors, such as arm length, counterweights,
undercarriage, etc., must be taken into consideration.
MOUNTING A BREAKER THAT IS TOO HEAVY FOR THE MACHINE
CAN BE DANGEROUS AND DAMAGING.
MOUNTING A BREAKER THAT IS TOO SMALL FOR THE MACHINE
CAN DAMAGE THE BREAKER AND VOID THE WARRANTY
BREAKER MODEL
RECOMMENDED MACHINE WEIGHT RANGE
G10 ..................................................1560 to 2250 lbs.
G20 ..................................................2250 to 6750 lbs.
G30 ..................................................4450 to 8890 lbs.
G40 ................................................ 5600 to 11,000 lbs.
G50 ................................................ 8200 to 16,800 lbs.
G60 ................................................ 9000 to 18,700 lbs.
G100 ..............................................18,000 to 24,200 lbs.
3.2
BREAKER SPECIFICATIONS
Breaker
Model
Operating
Pressure
bar/psi
Required Oil Blows Per
Flows
Minute
Lpm/USgpm
(bpm)
G10
G20
G30
G40
G50
G60
G100
105 / 1525
95 / 1350
110 / 1600
114 / 1650
110 / 1700
128 / 1800
128 / 1800
15-30 / 4-7
20-40 / 5-10
30-50 / 8-13
30-60 / 8-16
45-80 / 12-21
56-61 / 14-26
68-110 / 18-29
650 - 1100
650 - 1150
700 - 1250
550 - 1250
650 - 1400
550 - 1200
550 - 1200
Nitrogen
Pressure
bar/psi
Overall
Weight
kg/lbs
Overall
Length
mm/inches
20 / 290
23 / 330
23 / 330
20 / 290
20 / 290
25 / 360
22 / 320
75 / 168
100 / 220
135 / 303
230 / 505
255 / 575
330 / 725
490 / 1078
1020 / 42
1170 / 46
1295 / 51
1448 / 57
1525 / 60
1600 / 63
1650 / 65
Please note working weights may vary with bracket/side plate configuration. Specifications subject to
change without notice.
6
3.3
TOOLS AVAILABLE FOR THE HYDRAULIC BREAKER
TOOL TYPE
Conical Point
Chisel
(Cross cut or In Line)
4
APPLICATION
• Concrete breaking
• General demolition
• Trenching
• Breaking oversize
• General demolition
INSTALLATION
4.1
HYDRAULIC INSTALLATION OF THE BREAKER
All hydraulic breakers can be adapted to use most hydraulic boom fittings and tubing found on backhoes /
excavators that are used for demolition breaking. Contact your nearest dealer for information on how to adapt
your currently fitted hydraulic kit.
Special hydraulic pressure regulators are not required as our hydraulic breaker operating pressure is self regulating.
4.2
MECHANICAL INSTALLATION OF THE BREAKER
The parts required for the mechanical adaptation of the hydraulic breaker to the machine boom are provided
as standard with every hydraulic breaker. There are various choices for mounting options. Please contact your
nearest dealer for these mounting kit options.
7
5
OPERATION
5.1
INSTRUCTIONS FOR USING THE HYDRAULIC BREAKER
BEFORE STARTING THE BREAKER:
•
CHECK THE NITROGEN GAS PRESSURE
The nitrogen gas precharge is factory checked before you receive your breaker, but it is recommended the pressure be checked before using the breaker for the first time. Please refer to the relevant section of this manual
to understand how to check the gas pressure.
•
PRE-OPERATION INSPECTION AND WARM UP
Before operating any of our hydraulic breakers, be sure to perform these routine inspection procedures. Please
carry out the following inspection before use:
•
Check for any signs of visual damage to the breaker. Early detection of any problems can
prevent further potentially serious damage to the breaker or the machine.
•
Lubricate the tool and tool bushing. To ensure that no damage occurs, caused by seizing, to
the tool or tool bushing by greasing the working parts every 2 - 3 hours. Introduce grease,
via a grease gun, through the fitting located near the working end of the breaker.
BREAKER
LUBRICATION SCHEDULE
All Models
5-6 Shots of grease every 2 to 3 hours
(dependent on working conditions)
•
Check for tool and tool bushing wear. Replace the tool and/or bushings if there is wear or
damage to either part. Please refer to the section highlighting the maximum allowable
clearances between the tool and tool bushing (see Clearances Between Tool and Tool
Bushing).
•
Check all bolts for tightness. The necessary tightening torque settings can be found in the
service manual.
•
Inspect all welds for cracking and damage and repair as necessary.
•
All hoses must be checked for leaks. Change all hoses that have incurred damage that could
cause failure of hose during operation of the hydraulic breaker.
•
Check for any signs of damage to the tool retaining pin.
YOU MUST CHECK THE HYDRAULIC OIL REGULARLY TO PREVENT DAMAGE
TO THE BREAKER AND/OR THE HYDRAULIC SYSTEM ON THE MACHINE.
Check the hydraulic oil tank for level and the contamination and/or deterioration of the hydraulic oil. Change
and filter element at specified number of hours as given in the relevant section of this manual. For instructions
on how to change oil and filter element refer to the operators manual of the machine.
Warm up the hydraulic breaker and the backhoe or excavator in accordance with the machine instruction
manual. The warming up procedure is essential during cold weather operation.
8
5.2
INITIAL OPERATION OF HYDRAULIC BREAKERS
Operate the breaker in the upright position, with the engine at half throttle for approximately one hour.
During this period it is essential to inspect the breaker for loose bolts and any leaks. Check the attached hoses
and tubing for any leaks as well.
ATTENTION: The breaker should be working in the
upright position during the initial start up period.
5.3
OPERATING YOUR HYDRAULIC BREAKER
Hydraulic breakers are very simple to use and the following operating procedure outlines the best way to use
your breaker. To get the most from your breaker the operator should understand the following points:
•
Press the tip of the tool vertically against the object to be broken.
•
Apply a slight downward force on the breaker tool by raising the backhoe / excavator / skid
steer and start the breaker by pressing the foot pedal/control lever.
ATTENTION: Do not raise the machine too high as
the application of excessive force on the breaker will
cause jolting of the machine during operation.
•
5.4
As soon as the material is broken the operator must stop hammering (Release control pedal/
lever).
ATTENTION:
Continuation of blank hammering
will cause damage to the breaker and the machine
hydraulic system.
POINTS TO NOTE WHEN USING YOUR HYDRAULIC BREAKER
•
DO NOT USE THE CHISEL AS A PRY BAR
Excessive prying can cause premature bushing wear, tool and/or side bolt breakage.
•
DO NOT HAMMER CONTINUOUSLY IN THE SAME POSITION FOR MORE THAN
THIRTY (30) SECONDS
If the tool cannot break or penetrate into the material after hammering in the same position
for thirty seconds, change the working location. Hammering in the same position for a long
time will reduce the working efficiency, increase the hydraulic oil temperature, and
accelerate tool wear (mushrooming of tool point).
•
ALWAYS WORK BY BREAKING TO A FREE FACE
•
DO NOT ALLOW THE TOOL TO HIT THE BOOM
Use caution when tucking the hammer in tight to the boom for transportation.
9
5.4
5.5
POINTS TO NOTE WHEN USING YOUR HYDRAULIC BREAKER
(continued)
•
DO NOT DROP THE BREAKER RAPIDLY ON AN OBJECT
Remember that a breaker is heavier than an empty bucket and will move faster than
expected.
•
DO NOT USE THE BREAKER TO MOVE LARGE OBJECTS
Do not use the hammer bracket for purposes other than for what it was intended.
•
AVOID OPERATING THE BREAKER WITH CYLINDERS AT THE END OF STROKE
Continuous operation with the boom cylinders fully closed or extended may damage the
hydraulic cylinders.
•
DANGER: BEWARE OF FLYING PROJECTILES FROM THE BREAKER TOOL
Do not use the breaker in such a way as to cause rock, concrete, etc. to be thrown towards the
machine's cab. Do not operate the breaker without checking that all of the applicable safety
equipment/shielding on the machine is fitting and working correctly. FAILURE TO
COMPLY MAY RESULT IN INJURY OR DEATH.
•
DO NOT USE THE BREAKER AS A HOIST
Breakers are not designed to pick up other objects. Do not use it as a hoist. We can not be
held responsible for injuries or damage caused by misuse.
•
DO NOT OPERATE BREAKERS UNDER WATER
Do not allow parts, other than the breaker tool, to be submerged in water. Underwater
operation will damage the breaker and the machine's hydraulic system.
REMOVAL AND MOUNTING OF HYDRAULIC BREAKER
REMOVAL FROM THE MACHINE
1. Close feed and return line stop valves.
2. Disconnect hydraulic hoses before laying the breaker down.
3. Cap the feed and return line on the mahcine and plug the hydraulic hoses.
4. Position the breaker horizontally on wood blocks.
IMPORTANT:
The hydraulic lines must be handled carefully and
sealed to prevent contamination from entering the
breaker or the machine's hydraulic system.
MOUNTING TO THE MACHINE
1. Place the breaker horizontally on wood blocks.
2. Align the pin holes. Install the boom pin before the dipper pin.
3. Connect hydraulic hoses. FEED is at the BOTTOM and RETURN is at the TOP.
4. Open stop valves.
10
5.6
CHANGING THE BREAKER TOOL
REMOVAL FROM THE MACHINE
1. If the breaker is mounted on the machine, close the stop valves on the end of the arm.
2. With a pry bar remove the rubber
retaining stopper that holds the
retainer pin in place.
3. Remove the retainer pin.
4. Remove the breaker tool.
INSTALLATION
1. Prior to installation, apply a liberal coating of molybdenum-based grease on the sliding
surfaces of the breaker tool and retainer pin.
2. Install the breaker tool.
3. Insert the retainer pin.
4. Drive in the roll pin, with a hammer, to hold the retainer pin in place.
11
6
MAINTENANCE AND INSPECTION
6.1
DAILY INSPECTION
1. TIE RODS AND SIDE BOLTS
Inspect all bolts, retighten as necessary. Refer to the service manual for tie rod tightening procedure.
2. WELDS
Check for cracks, repair as necessary.
3. BREAKER TOOL AND TOOL RETAINING PIN
Remove the breaker tool and retaining pin to inspect for damage caused by excessive blank
hammering. If necessary, grind edges smooth. Refer to the service manual.
6.2
MAXIMUM CLEARANCE BETWEEN BREAKER TOOL AND BUSHING
Replace the tool bushings when the clearance reaches the maximum limit listed below.
BREAKER MODEL
G10
G20
G30
G40
G50
G60
MAX. CLEARANCE LIMIT
mm/inch
MIN. TOOL DIAMETER
mm/inch
3.0 / 0.12
2.5 / 0.10
2.5 / 0.10
3.5 / 0.14
3.0 / 0.12
5.5 / 0.22
37 / 1.49
42 / 1.65
51 / 2.00
61 / 2.40
67 / 2.64
71 / 2.80
Replace the breaker tool when the outside diameter is worn to the limit for the minimum tool
diameter listed above.
Clearance
Bushing
Tool
OPERATING THE BREAKER WITH CLEARANCES EXCEEDING
THE LIMIT WILL VOID THE WARRANTY.
12
6.3
GAS CHARGING KIT
Hydraulic breakers require gas charging kits to allow the nitrogen precharge to be introduced into the
breaker. These charging kits are available from your local Gearmore dealer.
Charging Valve
High Pressure Hose
6.4
CHECKING THE GAS PRESSURE OF YOUR HYDRAULIC BREAKER
INSPECTING THE GAS PRESSURE
1. Remove the adapter cap.
2. Turn charging valve wheel counterclockwise
and the release valve wheel clockwise to prevent
nitrogen gas loss.
Charging Valve
Wheel
3. Attach the charging valve onto the adapter.
4. Tighten charging valve cap clockwise.
5. Turn the charging valve wheel clockwise to check
gas pressure.
6. Turn the charging valve wheel counterclockwise.
7. Turn the release valve wheel counterclockwise to
release gas pressure in the charging valve.
Release Valve
Wheel
CAUTION! Turning the wheel to excess will damage the charging
valve. Stop turning the wheel as soon as the gauge gives a read-
13
6.5
MAXIMUM NITROGEN GAS PRESSURES
BREAKER MODEL
GAS OPERATING PRESSURE
G10
G20
G30
G40
G50
G60
290 PSI / 20 Bar
330 PSI / 23 Bar
330 PSI / 23 Bar
290 PSI / 20 Bar
290 PSI / 20 Bar
365 PSI / 25 Bar
IMPORTANT! All readings should be taken at ambient
temperature before operation.
If used with pressures higher than the maximum gas pressure, the breaker tool, piston or the hydraulic
components of the excavator can be damaged. Gearmore does not take any responsibility for failures
resulting from neglect of this warning.
As the temperature of the hydraulic breaker rises, the gas pressure increases as well. Nitrogen gas pressure
should always be checked when the breaker is cold, which is normally before start up.
REDUCING THE GAS PRESSURE
1. Follow steps 1 to 5 in the previous section.
2. Turn the release valve wheel slowly counterclockwise paying close attention to the pressure gauge.
Turn the release valve wheel clockwise to prevent further loss of gas pressure.
GAS CHARGING PROCEDURE
1.
2.
3.
4.
Check that the nitrogen gas bottle valve is closed.
Connect the high pressure hose to the nitrogen gas bottle.
Connect the high pressure hose to the charging valve.
Carry out steps 1 to 5 from the "Inspecting the Gas Pressure"
section.
5. Turn the gas bottle valve wheel clockwise to allow gas to enter
the hose.
6. Turn the charging valve wheel to allow the gas to pressurize
the accumulator chamber.
7. Pay close attention to the gauge so the seals are not stretched
by application of excessive gas pressure. (DO NOT EXCEED
THE MAXIMUM GAS PRESSURE DURING CHARGING)
8. Turn the charging valve wheel counterclockwise to prevent any
more gas entering the breaker.
9. Turn the release valve counterclockwise to relieve gas in the
high pressure hose.
10. Disconnect the charging valve from adapter.
11. Install adapter cap on to adapter.
14
7
TROUBLESHOOTING
THREE COMMON COMPLAINTS:
"BREAKER DOES NOT HIT"
"BREAKER HITS SLOWLY"
"BREAKER HAS NO POWER"
"BREAKER DOES NOT HIT"
CHECK:
1.
2.
3.
4.
5.
6.
Tractor/Excavator - Is everything set up correctly?
Quick Release Couplings - Often break up internally
Hoses - Are they connected the right way around?
Tool - Has it broken?
Gas - Is the hammer low or have no gas?
Control Valve - Are foreign objects stopping the valve?
"BREAKER HITS SLOWLY"
CHECK:
1.
2.
3.
Tractor/Excavator - Low oil in the tank/incorrect settings
Quick Release Couplings - Broken and half open
Gas - The hammer is over charged
CLASSIC SYMPTOM: HAMMER GETS HOT!!!!
"BREAKER HAS NO POWER"
CHECK:
1.
2.
Gas - Is the hammer low or have no gas?
Tool - Has it broken?
A broken tool can absorb impact energy
15
8
LIMITED WARRANTY
GEARMORE, INC., warrants its Hydraulic Breakers to be free from defects in materials and workmanship for the period of twelve (12) months from the date of delivery to the original purchaser
or renter, if any part, except wear parts (namely tie rods, nuts, washers, bolts, pins, tool retainer
pins, wear bushings, working tools, or any rubber or polyurethane including o-rings/seals which
are covered by the LIMITED WARRANTY) shall fail within the stated period, GEARMORE will,
at its sole discretion, repair or replace such part free of charge.
Wear parts (as listed above) are covered by this LIMITED WARRANTY for a period of thirty (30)
days from the date of delivery. Since the said components are subject to wear GEARMORE
only warrants the components if they fail due to defects in materials or workmanship, not wear.
GEARMORE reserves the right to determine if and to what extent warranty adjustments may be
made for damage or breakage of the items in question.
GEARMORE IS NOT RESPONSIBLE FOR ANY LABOR, DURING THE REPLACEMENT OF
ANY WEAR PART, OR ANY INCIDENTAL OR CONSEQUENTIAL COSTS INVOLVED DURING THE REPAIR.
DO NOT ATTEMPT TO REPAIR OR REPLACE ANY BREAKER, OR COMPONENT THEREOF,
WITHOUT FIRST OBTAINING AUTHORIZATION TO DO SO.
GEARMORE SPECIFICALLY DISCLAIMS ANY RESPONSIBILITY FOR ANY DAMAGES OF
ANY KIND OR DESCRIPTION, WHETHER TO PROPERTY OR PERSON, IN ANY WAY CONNECTED WITH OR ARISING OUT OF THE USE OF THE SAID PRODUCT.
GEARMORE reserves the right to make improvements in design or changes in specification at
any time, without incurring any obligations to owners or units previously sold.
GEARMORE, INC.
13477 Benson Ave.
Chino, CA 91710
The serial number of this product is stored in our computer database, thus submitting a warranty registration card is not required.
16