1
SERVICE & OPERATING MANUAL
U.S. Patent #
400,210; 5,996,627;
6,241,487
Model S05 Conductive Acetal
Design Level 2
Table of Contents
Engineering Data and Temperature Limitations.........................................................1
CE
II 2GD T5
Overlay Option Drawing, Muffler Option Drawing....................................................12
Explanation of Pump Nomenclature..........................................................................2
Available Service and Conversion Kits....................................................................12
Performance Curve...................................................................................................3
Composite Repair Parts List....................................................................................13
Dimensions................................................................................................................4
Air Valve Assembly Drawing....................................................................................14
Metric Dimensions.....................................................................................................5
Air Valve Assembly Parts List..................................................................................14
Principle of Pump Operation......................................................................................6
Air Valve Servicing...................................................................................................15
Installation and Start-up............................................................................................6
Intermediate Assembly Drawing and Servicing.......................................................16
Air Supply..................................................................................................................6
Check Valve Drawing...............................................................................................17
Air Valve Lubrication..................................................................................................6
Check Valve Servicing.............................................................................................17
Air Line Moisture........................................................................................................6
Diaphragm Service Drawing, Non-Overlay..............................................................18
Air Inlet and Priming..................................................................................................6
Diaphragm Service Drawing, with Overlay..............................................................18
Between Uses...........................................................................................................6
Diaphragm Servicing...............................................................................................19
Installation Guide.......................................................................................................7
Overlay Diaphragm Servicing . ...............................................................................19
Troubleshooting ........................................................................................................8
Pumping Hazardous Liquids....................................................................................20
Warranty....................................................................................................................8
Converting the Pump for Piping the Exhaust Air.....................................................20
Important Safety Information.....................................................................................9
Exhaust Conversion Drawing..................................................................................20
Material Codes........................................................................................................10
Converted Exhaust Illustration.................................................................................20
Composite Repair Parts Drawing............................................................................12
Grounding the Pump...............................................................................................21
Declaration of Conformity........................................................................................22
WARREN RUPP, INC. • A Unit of IDEX Corporation • P.O. Box 1568, Mansfield, Ohio 44901-1568 USA • Telephone (419) 524-8388 • Fax (419) 522-7867 • www.warrenrupp.com
s05casm-REV0108
©Copyright 2008 Warren Rupp, Inc. All rights reserved.
S05 Conductive Acetal
Design Level 2
Ball Valve
Quality System
ISO9001 Certified
Environmental
Management System
ISO14001 Certified
Air Operated
Double-Diaphragm Pump
II 2GD T5
Intake/Discharge Pipe Size
1/2" NPT(Internal) or 1/2" BSPT (Tapered)
1" NPT(External) or 1" BSPT (Tapered)
U.S. Patent #
5,996,627; 6,241,487
Other U.S. Patents
Applied for
CE
ENGINEERING, PERFORMANCE
& CONSTRUCTION DATA
Capacity
Air Valve
Solids-Handling
Heads Up To
Displacement/Stroke
0 to 14 gallons per minute
(0 to 52 liters per minute)
No-lube, no-stall
design
Up to .125 in. (3mm)
100 psi or 231 ft. of water
(7 Kg/cm2 or 70 meters)
.026 Gallon / .098 liter
CAUTION! Operating temperature limitations are as follows:
Materials
Nitrile: General purpose, oil-resistant. Shows good solvent, oil, water and hydraulic fluid resistance. Should not be used with highly polar solvents like
acetone and MEK, ozone, chlorinated hydrocarbons and nitro hyrdrocarbons.
Operating Temperatures
Maximum*
Minimum*
190° F
88° C
-10° F
-23° C
Conductive Acetal:
190° F
88° C
-20° F
-29° C
Virgin PTFE: Chemically inert, virtually impervious. Very few chemicals are known to react chemically with PTFE- molten alkali metals, turbulent liquid or
gaseous fluorine and a few fluoro-chemicals such as chlorine trifluoride or oxygen difluoride which readily liberate free fluorine at elevated temperatures.
220° F
104° C
-35° F
-37° C
UHMW PE: High tensile material with excellent abrasion resistance. A general purpose material with excellent resistance to most oils.
180° F
82° C
-35° F
-37° C
Santoprene®: Injection molded thermoplastic elastomer with no fabric layer. Long mechanical flex life. Excellent abrasion resistance.
275° F
135° C
-40° F
-40° C
For specific applications, always consult the Warren Rupp “Chemical Resistance Chart”
SANDPIPER® pumps are designed to be powered only by compressed air.
s05casm-REV0108
Model S05 Conductive Acetal Design Level 2 Page 1
Explanation of Pump Nomenclature
S05 Conductive Acetal · Design Level 2· Ball Valve
Check
Model
Pump Pump Valve Design Wetted
Brand Size TypeLevel Material
S05B2G1TXNS000.
S05B2G2TXNS000.
S05B2GUTXNS000.
S05B2G1TXBS000.
S05B2G2TXBS000.
S05B2GUTXBS000.
S
S
S
S
S
S
05
05
05
05
05
05
B
B
B
B
B
B
2
2
2
2
2
2
G
G
G
G
G
G
Diaphragm/ Check Non-Wetted
Shipping
Check Valve Valve
Material Porting Pump PumpKit
Weight
Materials
Seat
Options Options Style Options Options lbs. (kg)
1
2
U
1
2
U
T
T
T
T
T
T
X
X
X
X
X
X
N
N
N
B
B
B
S
S
S
S
S
S
0
0
0
0
0
0
00.
00.
00.
00.
00.
00.
Pump Brand
S= SANDPIPER®
Design Level
2=Design Level
Check Valve Seat
T=Virgin PTFE
Pump Style
S=Standard
Pump Size
05=1/2"
Wetted Material
G=Conductive Acetal
Non-Wetted Material Options
X= Non-painted Aluminum
Check Valve Type
B= Soild Ball
Diaphragm/Check Valve Materials
1=Santoprene/Santoprene
2=Virgin PTFE-Santoprene
Backup/Virgin PTFE
B=Nitrile/Nitrile
U=Polyurethane/Polyurethane
Porting Options
N= NPT Threads
B= BSPT (Tapered) Threads
Pump Options
0=None
6=Metal Muffler
17 (8)
17 (8)
17 (8)
17 (8)
17 (8)
17 (8)
s05casm-REV0108
Model S05 Conductive Acetal Design Level 2 Page 2
MODEL S05 Conductive Acetal Performance Curve
PSI
90
80
HEAD
5
4
80
70
60
2
0
40
6 (10)
8B
ar)
8 (13.5)
10 (17)
PS
I (5
.44
12 (20)
Bar
)
14 (24)
.08 B
16 (27)
ar)
40 PS
I (2.7
30
2 Bar
20 PS
)
I (1.3
10
0
(6.
SI (4
20
1
SI
60 P
50
3
4 (7)
0P
0
0
6 Bar
) Air Inle
t
1
3
2
Pressur
e
4
5
6
7
8
9
10
11
12
13
14
15
METERS
10
NPSHR
7 100
6
Performance based on water at ambient temperature.
2 (3.5)
FEET
BAR
Performance Curve, S05 Conductive Acetal Design Level 2
30
25
20
15
10
5
9.1
7.6
6
4.5
3
1.5
16
U.S. Gallons per minute
10
20
30
40
50
60
Liters per minute
CAPACITY
s05casm-REV0108
Model S05 Conductive Acetal Design Level 2 Page 3
Dimensions: S05 Conductive Acetal
Dimensions in Inches
Dimensional tolerance: ±1/8"
Discharge Port
1/2" NPT (Internal)
1" NPT (External)
Manifold Can Rotate ±90°
From Vertical Centerline
Air Inlet 1/4" NPT
Integral Muffler:
3/8" NPT Exhaust Port For Metal
Muffler or Piping Exhaust Air
In Submerged Applications.
Suction Port
½" NPT (Internal)
1" NPT (External)
Bolt Pattern is
Symmetrical About
Centerlines
*Both Suction And Discharge
Ports Are available In: ½" BSP tapered
(Internal) BSP tapered (external)
Dimension A B
Integral Muffler
4 1/16"
7 1/16"
Metal Muffler5 1/8"
8 1/8"
s05casm-REV0108
Model S05 Conductive Acetal Design Level 2 Page 4
Metric Dimensions: S05 Conductive Acetal
Dimensions in millimeters
Dimensional tolerance: ±3mm
* Discharge Port
1/2" NPT (Internal)
1" NPT (External)
44mm
Manifold Can Rotate ± 90°
From Vertical Centerline.
Integral Muffler:
3/8" NPT Exhaust Port
For Metal Muffler or Piping
Exhaust Air In Submerged
Applications.
Air Inlet 1/4" NPT
* Suction Port
1/2" NPT (Internal)
1" NPT (External)
Bolt Pattern Is
Symmetrical About
Centerlines
*Both Suction And Discharge
Ports Are Available In 1/2" BSP
Tapered (Internal) 1" Tapered (External)
Dimension A B
Integral Muffler
103mm
179mm
Metal Muffler130mm
206mm
s05casm-REV0108
Model S05 Conductive Acetal Design Level 2 Page 5
Principle of Pump Operation
This ball type check valve pump
is powered by compressed air and is
a 1:1 ratio design. The inner side of
one diaphragm chamber is alternately
pressurized while simultaneously
exhausting the other inner chamber.
This causes the diaphragms, which
are connected by a common rod
secured by plates to the centers of the
diaphragms, to move in a reciprocating
action. (As one diaphragm performs the
discharge stroke the other diaphragm is
pulled to perform the suction stroke in
the opposite chamber.) Air pressure is
applied over the entire inner surface of
the diaphragm while liquid is discharged
from the opposite side of the diaphragm.
The diaphragm operates in a balanced
condition during the discharge stroke
which allows the pump to be operated
at discharge heads over 200 feet (61
meters) of water.
For maximum diaphragm life, keep
the pump as close to the liquid being
pumped as possible. Positive suction
head in excess of 10 feet of liquid
(3.048 meters) may require a back
pressure regulating device to maximize
diaphragm life.
Alternate pressurizing and
exhausting of the diaphragm chamber
is performed by an externally mounted,
pilot operated, four way spool type
air distribution valve. When the spool
shifts to one end of the valve body, inlet
pressure is applied to one diaphragm
chamber and the other diaphragm
chamber exhausts. When the spool
shifts to the opposite end of the valve
s05casm-REV0108
body, the pressure to the chambers
is reversed. The air distribution valve
spool is moved by a internal pilot valve
which alternately pressurizes one end
of the air distribution valve spool while
exhausting the other end. The pilot valve
is shifted at each end of the diaphragm
stroke when a actuator plunger is
contacted by the diaphragm plate. This
actuator plunger then pushes the end
of the pilot valve spool into position to
activate the air distribution valve.
The chambers are connected with
manifolds with a suction and discharge
check valve for each chamber,
maintaining flow in one direction through
the pump.
Installation And Start-up
Locate the pump as close to the
product being pumped as possible.
Keep the suction line length and number
of fittings to a minimum. Do not reduce
the suction line diameter.
For installations of rigid piping,
short sections of flexible hose should
be installed between the pump and
the piping. The flexible hose reduces
vibration and strain to the pumping
system. A Warren Rupp Tranquilizer®
surge suppressor is recommended to
further reduce pulsation in flow.
Air Supply
Air supply pressure cannot exceed
125 psi (8.6 bar). Connect the pump
air inlet to an air supply of sufficient
capacity and pressure required for
desired performance. When the air
supply line is solid piping, use a short
length of flexible hose not less than
1/2" (13mm) in diameter between the
pump and the piping to reduce strain
to the piping. The weight of the air
supply line, regulators and filters must
be supported by some means other
than the air inlet cap. Failure to provide
support for the piping may result in
damage to the pump. A pressure
regulating valve should be installed
to insure air supply pressure does not
exceed recommended limits.
Air Valve Lubrication
The air distribution valve and the pilot
valve are designed to operate WITHOUT
lubrication. This is the preferred mode
of operation. There may be instances
of personal preference or poor quality
air supplies when lubrication of the
compressed air supply is required.
The pump air system will operate with
properly lubricated compressed air
supply. Proper lubrication requires the
use of an air line lubricator (available
from Warren Rupp) set to deliver one
drop of SAE 10 non-detergent oil for
every 20 SCFM (9.4 liters/sec.) of air
the pump consumes at the point of
operation. Consult the pump’s published
Performance Curve to determine this.
and alleviates the icing or freezing
problems.
Air Inlet And Priming
To start the pump, open the air valve
approximately 1/2" to 3/4" turn. After
the pump primes, the air valve can be
opened to increase air flow as desired.
If opening the valve increases cycling
rate, but does not increase the rate of
flow, cavitation has occurred. The valve
should be closed slightly to obtain the
most efficient air flow to pump flow
ratio.
Between Uses
When the pump is used for materials
that tend to settle out or solidify when
not in motion, the pump should be
flushed after each use to prevent
damage. (Product remaining in the
pump between uses could dry out or
settle out. This could cause problems
with the diaphragms and check valves
at restart.) In freezing temperatures
the pump must be completely drained
between uses in all cases.
Air Line Moisture
Water in the compressed air supply
can create problems such as icing or
freezing of the exhaust air, causing
the pump to cycle erratically or stop
operating. Water in the air supply can
be reduced by using a point-of-use
air dryer to supplement the user’s air
drying equipment. This device removes
water from the compressed air supply
Model S05 Conductive Acetal Design Level 2 Page 6
iNSTAllATiON gUiDE
Top Discharge Ball Valve Unit
1
Available from
Warren Rupp
1 DA05 Surge Suppressor
2 020-049-000 Filter/Regulator
3 020-049-001 Lubricator
CAUTION
The air exhaust should be
piped to an area for safe
disposition of the product
being pumped, in the event
of a diaphragm failure.
2
s05casm-REV0108
3
Model S05 Conductive Acetal Design Level 2 Page 7
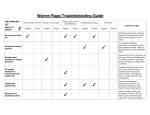
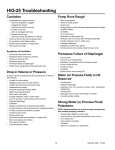
Troubleshooting
Possible Symptoms:
• Pump will not cycle.
• Pump cycles, but produces no flow.
• Pump cycles, but flow rate is
unsatisfactory.
• Pump cycle seems unbalanced.
• Pump cycle seems to produce
excessive vibration.
What to Check: Excessive suction lift
in system.
Corrective Action: For lifts exceeding
20 feet (6 meters), filling the pumping
chambers with liquid will prime the
pump in most cases.
What to Check: Excessive flooded
suction in system.
Corrective Action: For flooded
conditions exceeding 10 feet (3
meters) of liquid, install a back pressure
device.
What to Check: System head exceeds
air supply pressure.
Corrective Action: Increase the
inlet air pressure to the pump. Most
diaphragm pumps are designed for 1:1
pressure ratio at zero flow.
What to Check: Air supply pressure or
volume exceeds system head.
Corrective Action: Decrease inlet
air pressure and volume to the pump
as calculated on the published
PERFORMANCE CURVE. Pump is
cavitating the fluid by fast cycling.
s05casm-REV0108
What to Check: Undersized suction
line.
Corrective Action: Meet or exceed
pump connection recommendations
shown on the DIMENSIONAL
DRAWING.
What to Check: Restr icted or
undersized air line.
Corrective Action: Install a larger
air line and connection. Refer to air
inlet recommendations shown in your
pump’s SERVICE MANUAL.
What to Check: Check ESADS, the
Externally Serviceable Air Distribution
System of the pump.
Corrective Action: Disassemble and
inspect the main air distribution valve,
pilot valve and pilot valve actuators.
Refer to the parts drawing and air valve
section of the SERVICE MANUAL.
Check for clogged discharge or closed
valve before reassembly.
What to Check: Rigid pipe connections
to pump.
Corrective Action: Install flexible
connectors and a Warren Rupp
Tranquilizer® Surge Suppressor.
What to Check: Blocked air exhaust
muffler.
Corrective Action: Remove muffler
screen, clean or de-ice and reinstall.
Refer to the Air Exhaust section of your
pump SERVICE MANUAL.
What to Check: Pumped fluid in air
exhaust muffler.
Corrective Action: Disassemble pump
chambers. Inspect for diaphragm rupture
or loose diaphragm plate assembly. Refer
to the Diaphragm Replacement section
of your pump SERVICE MANUAL.
What to Check: Suction side air leakage
or air in product.
Corrective Action: Visually inspect
all suction side gaskets and pipe
connections.
What to Check: Obstructed check
valve.
Corrective Action: Disassemble the wet
end of the pump and manually dislodge
obstruction in the check valve pocket.
Refer to the Check Valve section of
the pump SERVICE MANUAL for
disassembly instructions.
What to Check: Worn or misaligned
check valve or check valve seat.
Corrective Action: Inspect check valves
and seats for wear and proper seating.
Replace if necessary. Refer to Check
Valve section of the pump SERVICE
MANUAL for disassembly instructions.
What to Check: Blocked suction line.
Corrective Action: Remove or flush
obstruction. Check and clear all suction
screens and strainers.
What to Check: Blocked discharge
line.
C o r r e c t i v e A c t i o n : C h e ck fo r
obstruction or closed discharge line
valves.
What to Check: Blocked pumping
chamber.
Corrective Action: Disassemble and
inspect the wetted chambers of the
pump. Remove or flush any obstructions.
Refer to the pump SERVICE MANUAL
for disassembly instructions.
What to Check: Entrained air or
vapor lock in one or both pumping
chambers.
Corrective Action: Purge chambers
through tapped chamber vent plugs.
PURGING THE CHAMBERS OF
AIR CAN BE DANGEROUS! Contact
the Warren Rupp Technical Services
Department before performing this
procedure. Any model with top-ported
discharge will reduce or eliminate
problems with entrained air.
If your pump continues to perform
below your expectations, contact your
local Warren Rupp Distributor or factory
Technical Services Group for a service
evaluation.
Warranty
Refer to the enclosed Warren Rupp
Warranty Certificate.
Model S05 Conductive Acetal Design Level 2 Page 8
Recycling
Many components of SANDPIPER®
Conductive Acetal AODD pumps are
made of recyclable materials (see chart
on page 10 for material specifications).
We encourage pump users to recycle
worn out parts and pumps whenever
possible, after any hazardous pumped
fluids are thoroughly flushed.
Important Safety
Information
WARNING
IMPORTANT
Read these safety warnings
and instructions in this
manual completely, before
installation and start-up
of the pump. It is the
responsibility of the purchaser to retain this
manual for reference. Failure to comply with
the recommendations stated in this manual will
damage the pump, and void factory warranty.
Take action to prevent static
sparking. Fire or explosion
can result, especially when
handling flammable liquids.
The pump, piping, valves,
containers or other miscellaneous equipment
must be grounded. (See Page 19)
WARNING
This pump is pressurized
internally with air pressure
during operation. Always
make certain that all bolting
is in good condition and
that all of the correct
bolting is reinstalled during assembly.
CAUTION
Before pump operation,
inspect all gasketed
fasteners for looseness
caused by gasket creep. Retorque loose fasteners to
prevent leakage. Follow recommended torques
stated in this manual.
WARNING
WARNING
Before maintenance or
repair, shut off the compressed air line, bleed the
pressure, and disconnect
the air line from the pump.
The discharge line may be
pressurized and must be bled of its pressure.
II 2GD T5
CE
s05casm-REV0108
Pump complies with EN809 Pumping Directive,
Directive 98/37/EC Safety of Machinery, and Directive
94/9/EC, EN13463-1 Equipment for use in Potentially
Explosive Environments. For reference to the directive
certificates visit: www.warrenrupp.com. The Technical
File No. AX1 is stored at KEMA, Notified Body 0344,
under Document #203040000.
WARNING
When used for toxic or
aggressive fluids, the pump
should always be flushed
clean prior to disassembly.
WARNING
In the event of diaphragm
rupture, pumped material
may enter the air end of the
pump, and be discharged
into the atmosphere. If
pumping a product which is hazardous or toxic,
the air exhaust must be piped to an appropriate
area for safe disposition.
Before doing any
maintenance on the pump,
be certain all pressure is
completely vented from the
pump, suction, discharge,
piping, and all other openings and connections.
Be certain the air supply is locked out or made
non‑operational, so that it cannot be started
while work is being done on the pump. Be certain
that approved eye protection and protective
clothing are worn all times in the vicinity of the
pump. Failure to follow these recommendations
may result in serious injury or death.
WARNING
Airborne particles and loud
noise hazards.
Wear ear
protection.
and
eye
Model S05 Conductive Acetal Design Level 2 Page 9
s05casm-REV0108
Model S05 Conductive Acetal Design Level 2 Page 10
s05casm-REV0108
Model S05 Conductive Acetal Design Level 2 Page 11
Composite Repair Parts Drawing
11
8
19
Available Service And Conversion Kits
3
476-221-000 476-202-360 476-202-354 476-202-357 476-202-654
AIR END KIT
Seals, O-ring, Gaskets, Retaining Rings, Air Valve Assembly, Pilot Valve Assembly
WET END KIT
Nitrile Diaphragms, Nitrile Check Balls, PTFE Seats and PTFE Seals
WET END KIT
Santoprene Diaphragms, Nitrile Spacer Gaskets,
Santoprene Check Balls, PTFE Seats and
PTFE Seals
WET END KIT
Polyurethane Diaphragms, Nitrile Spacer Gaskets,
Santoprene Check Balls, PTFE Seats and PTFE Seals
WET END KIT
Santoprene Diaphragms, PTFE Overlay
Diaphragm, PTFE Check Balls, PTFE Seats and PTFE Seals
20
9
1
32
22
9
32
10
28
21
7
25
29
10
23
17
10
24
30
31
4
12
1
9
6
2
14
27
33
18
10
14
14
10
15
24
10
2
24
26
33
32
16
22
32
5
24
9
10
s05casm-REV0108
Model S05 Conductive Acetal Design Level 2 Page 12
Composite Repair Parts List
Item
1
2
3
4
5
6
7
8
9
10
11
12
13
14
15
16
Part Number
031-186-003
031-191-001
050-027-354
050-027-357
050-027-360
050-022-600
095-116-000
114-023-157
115-140-115
132-034-360
135-036-506
165-110-157
171-062-115
171-063-115
171-076-115
171-077-115
196-178-502
286-095-354
286-095-357
286-095-360
286-116-000
286-096-600
312-106-502
s05casm-REV0108
Description
Air Valve Assembly
Air Valve Assembly (with integral muffler) Ball, Check
Ball, Check
Ball, Check
Ball, Check
Pilot Valve Assembly
Bracket, Intermediate
Bracket, Mounting
Bumper, Diaphragm
Bushing, Plunger
Cap, Air Inlet
Capscrew, Flanged 5/16-18 X 1.00
Capscrew, Flanged 5/16-18 X 1.25
Capscrew, Flanged 1/4-20 X 1.50
Capscrew, Flanged 1/4-20 X .75
Chamber, Outer
Diaphragm Diaphragm
Diaphragm
Diaphragm, One-Piece Bonded
Diaphragm, Overlay
Elbow, Suction
Qty
1
1
4
4
4
4
1
1
2
2
2
1
12
36
4
4
2
2
2
2
2
2
2
Item
17
18
19
20
21
22
23
24
25
26
27
28
29
30
31
32
33
34
Part Number
312-112-502
360-099-360
360-100-379
360-108-360
360-102-360
518-138-502
518-138-502E
530-035-000
544-005-115
560-001-360
612-091-502
612-177-330
612-221-330
620-019-115
675-042-115
685-056-120
720-012-360
720-045-600
722-099-600
920-025-000
Description
Qty
Elbow, Discharge
2
Gasket, Spacer (Use w/TPE Diaphragms Only) 2
Gasket, Air Inlet
1
Gasket, Pilot Valve
1
Gasket, Air Valve
1
Manifold, NPT
2
Manifold, BSPT (Tapered)
2
Muffler, Metal (not used with 031-191-001)
1
Nut, Flanged 5/16-18
24
O-ring
2
Plate, Outer Diaphragm
2
Plate, Inner Diaphragm
2
Plate, Inner Diaphragm (use with 286-116-000) 2
Plunger, Actuator
2
Ring, Retaining
2
Rod, Diaphragm 1
Seal, Diaphragm Rod
2
Seal, Manifold
4
Seat, Check Valve
4
Grounding Cable
1
Model S05 Conductive Acetal Design Level 2 Page 13
Air DistributionValve Assembly Drawing
MAIN Air Valve ASSEMBLY Parts List
Item
1
1-A
1-B
1-C
1-D
1-E
1-F
1-G
1-H
1-I
1-I
1-H
1-F
1-F
Part Number Description
031-191-001
031-132-000
095-106-157
132-038-357
165-128-157
171-076-115
560-101-360
530-030-550
165-109-503
706-027-115
Valve Assembly
Sleeve and Spool Set Valve Body
Bumper
End Cap
Hex Flange Capscrew 1/4-20 x .75
O-ring
Muffler
Muffler Cap
Machine Screw 6-32 x 1.25
Qty
1
1
1
2
2
8
4
1
1
4
MAIN AIR VALVE ASSEMBLY PARTS LIST
(For pumps equipped with metal muffler or piped exhaust)
1
031-186-003
Valve Assembly
1
(Same as above 031-191-001 minus items
1-G, 1-H, and 1-I)
1-G
1-E
1-C
1-D
1-A
1-C
1-D
1-E
1-B
1-F
1-F
s05casm-REV0108
Model S05 Conductive Acetal Design Level 2 Page 14
A IR D I S T RI B U T I O N
VA LV E
SERVICING
To service the air valve first shut
off the compressed air, bleed pressure
from the pump, and disconnect the air
supply line from the pump.
Step #1: See COMPOSITE REPAIR
PARTS DRAWING.
Using a 3/8" wrench or socket,
remove the four hex capscrews (items
11). Remove the air valve assembly
from the pump.
Remove and inspect gasket (item
22) for cracks or damage. Replace
gasket if needed.
Step #2: Disassembly of the air
valve.
Using a 3/8" wrench or socket,
remove the eight hex capscrews (items
1-E) that fasten the end caps to the
valve body. Next remove the two end
caps (items 1-D). Inspect the two
o-rings (items 1-F) on each end cap for
damage or wear. Replace the o-rings
as needed.
Remove the bumpers (items 1-C).
Inspect the bumpers for damage
or wear. Replace the bumpers as
needed.
Remove the spool (part of item
1-A) from the sleeve. Be careful not to
scratch or damage the outer diameter
of the spool. Wipe spool with a soft cloth
and inspect for scratches or wear.
s05casm-REV0108
Inspect the inner diameter of the
sleeve (part of item 1-A) for dirt,
scratches, or other contaminants. Remove
the sleeve if needed and replace with a
new sleeve and spool set (item 1-A).
Step #3: Reassembly of the air valve.
Install one bumper (item 1-C) and
one end cap (item 1-D), with two o-rings
(items 1-F), and fasten with four hex
capscrews (items 1-E) to the valve body
(item 1-B). Align hole in end cap with roll
pin on valve body.
Remove the new sleeve an spool
set (item 1-A) from the plastic bag.
Carefully remove the spool from the
sleeve. Install the six o-rings (item 1-F)
into the six grooves on the sleeve. Apply
a light coating of grease to the o-rings
before installing the sleeve into the
valve body (item 1-B), align the slots
in the sleeve with the slots in the valve
body. Insert the spool into the sleeve.
Be careful not to scratch or damage
the spool during installation. Install the
remaining bumper and end cap (with
o-rings), and fasten with the remaining
hex capscrews. Align hole in end cap
with roll pin on valve body.
Fasten the air valve assembly (item
1) and gasket to the pump.Connect the
air line to the pump. The pump is now
ready for operation.
IMPORTANT
Read these instructions
c o m p l e t e l y, b e f o r e
installation and start-up.
It is the responsibility of
the purchaser to retain
this manual for reference. Failure to
comply with the recommendations stated
in this manual will damage the pump, and
void factory warranty.
Model S05 Conductive Acetal Design Level 2 Page 15
Intermediate Assembly Drawing
Intermediate Assembly Servicing
ACTUATOR PLUNGER Servicing
To service the actuator plunger first
shut off the compressed air supply,
bleed the pressure from the pump, and
disconnect the air supply line from the
pump.
Step #1: See pump assembly
drawing.
Using a 3/8 " wrench or socket,
remove the four capscrews (items
12). Remove the air inlet cap (item 8)
and air inlet gasket (item 19). The pilot
valve assembly (item 3) can now be
removed.
Intermediate Repair Parts List
Item Part Number Description
Qty
4
114-023-157 Bracket, Intermediate 1
7
135-036-506 Bushing, Plunger
2
25
560-001-360 O-Ring
2
28
620-019-115 Plunger, Actuator
2
29
675-042-115 Ring, Retaining*
2
*Note: It is recommended that when plunger components are serviced,
new retaining rings be installed.
s05casm-REV0108
Step #2: Servicing the actuator
plungers.
S e e pump assembl y
drawing.
The actuator plungers (items 28) can
be reached through the stem cavity of
the pilot valve in the intermediate bracket
(item 4). To service bushings, o-rings
and retaining rings, see Intermediate
Drawing.
Remove the plungers (items 28) from
the bushings (item 7) in each end of the
intermediate cavity. Inspect for wear or
damage. Replace plunger as needed.
Apply a light coating of grease to each
o-ring and re-install the plungers in to
the bushings. Push the plungers in as
far as they will go.
Step #3: Re-install the pilot valve
assembly into the inter mediate
assembly.
Be careful to align the ends of
the stem between the plungers when
inserting the stem of the pilot valve into
the cavity of the intermediate.
Re-install the gasket (item 19),
air inlet cap (item 8) and capscrews
(items 12).
Connect the air supply to the pump.
The pump is now ready for operation.
Plunger Bushing, O-ring, And
Retaining Ring Servicing
To service the plunger bushing
components first remove the two
retaining rings (items 29) using a
small flat screwdriver. *Note: It is
recommended that new retaining rings
be installed.
Next remove the two plunger
bushings (items 7). Inspect the bushings
for wear or scratches. Replace the
bushings as necessary.
Inspect the two o-rings (25) for cuts
and/or wear.
IMPORTANT
Read these instructions
completely, before installation and start-up.
It is the responsibility of
the purchaser to retain
this manual for reference. Failure to
comply with the recommendations stated
in this manual will damage the pump, and
void factory warranty.
Model S05 Conductive Acetal Design Level 2 Page 16
Check Ball Valve Drawing
9
10
18
25
14
2
34
s05casm-REV0108
Modular Check Ball Valve
Servicing
Before servicing the check valves,
first shut off the suction line and then
the discharge line to the pump. Next,
shut off the compressed air supply,
bleed air pressure from the pump, and
disconnect the air supply line from
the pump. Drain any remaining fluid
from the pump. The pump can now be
removed for service.
To access the modular check valve,
remove the elbows (items 16 and 17
from pump composite repair parts
drawing). Use a 1/2" wrench or socket to
remove the fasteners. Once the elbows
are removed, the modular check valves
can be seen in the cavities of the outer
chamber (items 13).
Inspect the check balls (items 2) for
wear, abrasion, or cuts on the spherical
surface. The check valve seats (items
33) should be inspected for cuts,
abrasive wear, or embedded material
on the surfaces of both the external
and internal chamfers. The spherical
surface of the check balls must seat
flush to the surface of the inner chamfer
on the check valve seats for the pump to
operate to peak efficiency. Replace any
worn or damaged parts as necessary.
IMPORTANT
Read these instructions
completely, before installation and start-up.
It is the responsibility of
the purchaser to retain
this manual for reference. Failure to
comply with the recommendations stated
in this manual will damage the pump, and
void factory warranty.
Re-assemble the check valve
Place a check ball (item 2) in the
ball cage of either the discharge elbow
or the outer chamber. Install a check
valve seat in the counter on each end
of the chamber. Refasten the elbows to
the chamber.
Model S05 Conductive Acetal Design Level 2 Page 17
Diaphragm Service Drawing
Diaphragm Service Drawing,
with Overlay
30
30
6
6
30
27
27
10
10
18
*
Diaphragm Service Drawing
with One-Piece Bonded
(Use With TPE Diaphragms Only)
24
24
14
15
26
26
24
14
13
13
13
10
10
9
10
27
14
*
6
18
14
10
9
9
14
14
15
9
26
26
13
13
9
13
9
286.116.000
s05casm-REV0108
Model S05 Conductive Acetal Design Level 2 Page 18
Diaphragm Servicing
To service the diaphragms first
shut off the suction, then shut off the
discharge lines to the pump. Shut
off the compressed air supply, bleed
the pressure from the pump, and
disconnect the air supply line from the
pump. Drain any remaining liquid from
the pump.
Step #1: See the pump composite
repair parts drawing, and the diaphragm
servicing illustration.
Using a 1/2" wrench or socket,
remove the 16 capscrews (items 9 &
10), and flanged nuts that fasten the
elbows (items 17 and 18) to the outer
chambers (items 14). Remove the
elbows with the manifolds and spacers
attached.
Step #2: Removing the outer
chambers.
Using a 1/2" wrench or socket,
remove the 16 capscrews (items 11
and 13), and flanged nuts that fasten
the outer chambers, diaphragms, and
intermediate (item 4) together.
Step #3: Removing the diaphragm
assemblies.
Use a 3/4" (19mm) wrench or six
pointed socket to remove the diaphragm
assemblies (outer plate, diaphragm,
and inner plate) from the diaphragm rod
(item 32) by turning counterclockwise.
s05casm-REV0108
Insert a 6-32 set screw into the
smaller tapped hole in the inner
diaphragm plate (item 28). Inser t
the protruding stud and the 6-32
fastener loosely into a vise. Use a
3/4" wrench or socket to remove the
outer diaphragm plate (item 27) by
turning counterclockwise. Inspect the
diaphragm (item 15) for cuts, punctures,
abrasive wear or chemical attack.
Replace the diaphragms if necessary.
Step #4: Installing the diaphragms.
Push the threaded stud of the outer
diaphragm plate through the center hole
of the diaphragm. Thread the inner plate
clockwise onto the stud. Insert the loose
assembly with the above 6-32 fastener
back into the vise. Use a torque wrench
to tighten the diaphragm assembly
together to 90 in lbs. (10.17 Newton
meters) 120 in lbs. Santoprene (13.56
Newton meters). Allow a minimum of 15
minutes to elapse after torquing, then
re-torque the assembly to compensate
for stress relaxation in the clamped
assembly.
Step #5: Installing the diaphragm
assemblies to the pump.
Make sure the bumper (item 6) is
installed over the diaphragm rod.
Thread the stud of the one diaphragm
assembly clockwise into the tapped
hole at the end of the diaphragm rod
(item 31) until the inner diaphragm plate
is flush to the end of the rod. Insert rod
into pump.
Align the bolt holes in the diaphragm
with the bolt pattern in the intermediate
(item 4).
Fasten the outer chamber (item 14)
to the pump, using the capscrews (items
11 and 13) and flanged nuts.
On the opposite side of the pump,
pull the diaphragm rod out as far as
possible. Make sure the bumper (item 6)
is installed over the diaphragm rod.
Thread the stud of the remaining
diaphragm assembly clockwise into the
tapped hole at the end of the diaphragm
rod (item 31) as far as possible and still
allow for alignment of the bolt holes in
the diaphragm with the bolt pattern in
the inner chamber. Install diaphragms
with convolutions facing towards center
of pump. See sectional view on previous
page.
Fasten the remaining outer chamber
(item 14) to the pump, using the
capscrews (items 11 and 13) and
flanged nuts.
Step #6: Re-install the elbow/
spacer/manifold assemblies to the
pump, using the capscrews (items 9 &
10) and flanged nuts.
The pump is now ready to be
re-installed, connected and returned to
operation.
Overlay Diaphragm Servicing
The overlay diaphragm (item 16) is
designed to fit snugly over the exterior of
the standard TPE diaphragm (item15).
One Piece Diaphragm Servicing
(Bonded PTFE with intergral plate)
The One Piece diaphragm has a
treaded stud installed in the intergral
plate at the factory. The inner diaphragm
plate has a through hole instead of a
threaded hole.
Place the inner plate over the
diaphragm stud and thread the first
diaphragm / inner plate onto the
diapragm rod only until the inner plate
contacts the rod. Do not tighten.
A small amount of grease may be
applied between the inner plate and the
diaphragm to facilitate assembly.
Insert the diaphragm / rod assembly
into the pump and install the outer
chamber. Turn the pump over and
thread the second daiphragm / inner
plate onto the diaphragm rod. Turn the
diapragm until the inner plate contacts
the rod and hand tighten the assembly.
Continue tightening until the bolt holes
align with the inner chamber holes.
DO NOT LEAVE THE ASSEMBLY
LOOSE.
IMPORTANT
Read these instructions
completely, before installation and start-up.
It is the responsibility of
the purchaser to retain
this manual for reference. Failure to
comply with the recommendations stated
in this manual will damage the pump, and
void factory warranty.
Model S05 Conductive Acetal Design Level 2 Page 19
Pumping Hazardous Liquids
When a diaphragm fails, the pumped
liquid or fumes enter the air end of
the pump. Fumes are exhausted into
the surrounding environment. When
pumping hazardous or toxic materials,
the exhaust air must be piped to an
appropriate area for safe disposal. See
illustration #1 at right.
This pump can be submerged if
the pump materials of construction
are compatible with the liquid being
pumped. The air exhaust must be piped
above the liquid level. See illustration
#2 at right. Piping used for the air
exhaust must not be smaller than 1/2"
(2.54 cm) diameter. Reducing the pipe
size will restrict air flow and reduce
pump performance. When the pumped
product source is at a higher level than
the pump (flooded suction condition),
pipe the exhaust higher than the
product source to prevent siphoning
spills. See illustration #3 at right.
Converting the pump for
piping the exhaust air
The following steps are necessary to
convert the pump to pipe the exhaust
air away from the pump.
Use a Phillips screwdr iver
to remove the four machine screws
(item 1-I).
Remove the muffler cap and muffler.
The air distribution valve body has 3/8"
NPT threads for installation of metal
muffler or piped exhaust.
Important Installation Note:
The manufacturer recommends
installing a conductive flexible hose or
connection between the pump and any
rigid plumbing. This reduces stresses
on the molded plastic threads of the
air exhaust port. Failure to do so may
result in damage to the air distribution
valve body.
Any piping or hose connected to
the pump’s air exhaust port must be
groundable and physically supported.
Failure to support these connections
could also result in damage to the air
distribution valve body.
Converted Exhaust Illustration
PUMP iNSTAllATiON ArEA
SAFE Air
ExHAUST
DiSPOSAl
ArEA
1" DiAMETEr Air
ExHAUST PiPiNg
MUFFlEr
Illustration #1
MUFFlEr
1-A
liQUiD
lEVEl
1" DiAMETEr Air
ExHAUST PiPiNg
SUCTiON
liNE
Illustration #2
MUFFlEr
liQUiD
lEVEl
1" DiAMETEr Air
ExHAUST PiPiNg
SUCTiON
liNE
Illustration #3
s05casm-REV0108
Model S05 Conductive Acetal Design Level 2 Page 20
Grounding The Pump
One eyelet end is fastened to the pump hardware.
The other end is installed to a true earth ground.
This 8 foot long (244 centimeters) Ground Strap (Item
34) is shipped with the eyelet end fastened to the pump
hardware.
To reduce the risk of static electrical sparking, this pump
must be grounded. Check the local electrical code for
detailed grounding instruction and the type of equipment
required.
WARNING
Take action to prevent static
sparking. Fire or explosion can
result, especially when handling
flammable liquids. The pump,
piping, valves, containers or
other miscellaneous equipment
must be grounded.
s05casm-REV0108
Model S05 Conductive Acetal Design Level 2 Page 21
Declaration of Conformity
Warren Rupp, Inc., 800 North Main Street, Mansfield, Ohio,
certifies that Air-Operated Double Diaphragm Pumps Series:
HDB, HDF, M Non-Metallic, S Non-Metallic, M Metallic, S Metallic,
Containment Duty, Gas, UL, High Pressure, W, Submersible and
Tranquilizers comply with the European Community Directive 98/37/EC,
Safety of Machinery. This product has used EN 809, Pumps and Pump
Units for Liquids - Common Safety Requirements harmonized standard
to verify conformance.
October 20, 2005
Signature of authorized person
Date of issue
David Roseberry
Engineering Manager
Printed name of authorized person
Title
CE