Transcript
SWAY BAR END LINK
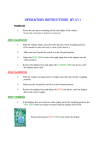
INSTALLATION INSTRUCTIONS
3560 Cadillac Ave., Costa Mesa, CA 92626
Please refer to a factory service manual before any disassembling or reassembling of your vehicle for
proper specifications. Check service manual to make sure all torque specs are properly done in the installation.
Prothane Motion Control highly recommends this and all our poly-urethane suspension kits
be installed by a qualified automotive technician.
1) With the vehicle side safely raised so that the suspension has no load on the assembly work
section, familiarize yourself with the basic components of the vehicle’s sway bar system.
2) Begin the bushing replacement process by removing the original sway bar end links from
both sides of the sway bar system, noting the original assembly order beforehand.
3) In the case of the (TYPE B) sway bar end link system- remove the original end link bushings by
trimming the outer lip of the bushings with a utility knife and pressing out the bushings from
the opposite side.
4) If the particular kit included suppled grease, lubricate the new bushing areas where a
suspension twisting action (metal contact area) would occur when fully assembled.
5) Assemble the new end link components to the system using original tool torque amounts.
SWAY BAR
SWAY BAR
BUSHING
ASSEMBLY
SWAY BAR
END LINK
ASSEMBLY
TYPE A
End Link
System
CONTROL ARM
SWAY BAR
BUSHING
ASSEMBLY
TYPE B
End Link
System
FORM 2-4-14
SWAY BAR
END LINK ASSEMBLY
LINK BUSHINGS
TWO
CENTER
LINK
TYPES