1
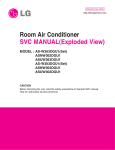
Internal Use Only
http://biz.lgservice.com
Ceiling & Floor Type Air Conditioner
SVC MANUAL(Exploded View)
MODEL : LV-C362FLA0
LV-C422FLA0
LV-C482GLA0
LV-C602HLA0
LV-C48BGLA0
LV-C60BHLA0
CAUTION
Before Servicing the unit, read the safety precautions in General SVC manual.
Only for authorized service personnel.
Contents
Functions .................................................................................................................................3
Product Specifications (Cooling only) ...................................................................................5
Dimensions ..............................................................................................................................7
Refrigeration Cycle Diagram ..................................................................................................9
Wiring Diagram ......................................................................................................................10
Operation Details ...................................................................................................................13
Installation of Indoor, Outdoor Unit .....................................................................................18
Connecting Pipes to the Indoor Unit ....................................................................................25
Connecting Pipes to the Outdoor Unit .................................................................................27
Checking the Drainage...........................................................................................................27
Connecting Cables between Indoor Unit and Outdoor Unit...............................................28
Air Purging of the Connecting Pipes and the Indoor Unit..................................................31
Operation ...............................................................................................................................32
3-way Valve ............................................................................................................................33
Cycle ........................................................................................................................................38
Troubleshooting .....................................................................................................................41
Exploded View ........................................................................................................................43
Copyright ©2008 LG Electronics. Inc. All right reserved.
Only for training and service purposes
-2-
LGE Internal Use Only
Functions
Indoor Unit
Operation ON/OFF by Remote controller
Sensing the Room Temperature
• Room temperature sensor. (Thermistor)
Room temperature control
• Maintains the room temperature in accordance with the Setting Temp.
Starting Current Control
• Indoor fan is delayed for 5 seconds at the starting.
Time Delay Safety Control
• Restarting is inhibited for approx. 3 minutes.
Indoor Fan Speed Control
• High, Med, Low, Chaos
Soft Dry Operation Mode
• Intermittent operation of fan at low speed.
Sleep Mode Auto Control
• The fan is switched to low(Cooling) speed.
• The unit will be stopped after 1, 2, 3, 4, 5, 6, 7 hours.
Natural Air Control by CHAOS Logic
• The fan is switched to intermittent or irregular operation
• The fan speed is automatically switched from high to low speed.
Airflow Direction Control
• The louver can be set at the desired position or swing
up and down automatically.
Auto Operation
• The setting temperature, indoor fan speed and desired
operation made are automatically set by fuzzy rule.
Copyright ©2008 LG Electronics. Inc. All right reserved.
Only for training and service purposes
-3-
LGE Internal Use Only
Remote Controller
Operation ON/OFF
Operation Mode Selection
(Cooling
model only)
Cooling Operation Mode.(
)
Soft Dry Operation Mode.(
)
Auto Operation Mode.(
)
Fan Speed Selection
(Low)
(Med)
(High)
(CHAOS)
Room Temperature Display
: High:39°C ↔ LOW:11°C
Temperature Setting
TEMPERATURE
LOW
HIGH
Cooling
Down to 18°C
Up to 30°C,
Setting the Time or Timer
Timer Selection
ON
OFF
: OFF, ON, OFF ↔ ON
Timer Setting
SET
Timer Cancel
CANCEL
: Cancel Sleep Mode, Timer ON or Timer OFF.
Sleep Operation
: 1, 2, 3, 4, 5, 6, 7hr, Off Timer
Airflow Direction Control
Fan Operation Mode
: Fan Operates without cooling. (Cooling model only)
Reset
Copyright ©2008 LG Electronics. Inc. All right reserved.
Only for training and service purposes
-4-
LGE Internal Use Only
Product Specifications (Cooling & Heating)
Items
Cooling Capacity
Outdoor
Outdoor
Indoor
General
Heating Capacity
Input
Running Current
Starting Current
Power Supply
Power Factor
E.E.R
Cooling/Heating
Cooling/Heating
Cooling/Heating
C.O.P
Heating
Cooling
Unit
kcal/hr(W)
Btu/hr
kcal/hr(W)
Btu/hr
W
A
A
Ø,V,Hz
%
kcal/hr W(W/W)
Btu/hr W
W/W(kcal/hr W)
Btu/hr W
Setting temperature range(cool/heat)
Dehumidification Rate
l/h
Refrigerant Control
Refrigerant charge
g(oz), type
Indoor fan motor
Output
w
Model
No. of Poles
Input
W
Running Current
A
Capacitor
µF/Vac
Indoor Fan
Type
No. Used / Diameter
EA/inch(mm)
Motor Step
Indoor Fan RPM
Cooling(H/M/L)
rpm
Heating(H/M/L)
rpm
Air Circulation
Indoor (H/M/L)
CMM(CFM)
Noise Level(Sound Press,1m) Indoor(H/M/L)
dB(A)±3
Temperature Controller
Indoor Coil
Tube Size (OD)
inch(mm)
Fins per inch
No. of Rows & Column
Dimensions (W*H*D)
Indoor
inch(mm)
Net Weight
indoor
kg(lbs)
Compressor
Locked Rotor Amp.
A
Type
Quantity
No
Model
Maker
Capacity
Btu/hr
Motor Type
Motor Input
W
Oil Type
Oil Charge
cc
O.L.P Type(model name)
Outdoor Coil
Tube Size (OD)
inch(mm)
Fins per inch
No. of Rows & Column
Outdoor fan motor
Output
W
Model
No. of Poles
Input
W
Running Current
A
Capacitor
µF/Vac
Outdoor Fan
Type
No. Used / Diameter
EA/mm
Discharge
Side/Top
Speed
rpm
Air Circulation
Outdoor
CMM(CFM)
Noise Level(Sound Press,1m) Outdoor
dB(A)±3
SVC Valve
Liquid
inch(mm)
Gas
inch(mm)
Dimensions (W*H*D)
Outdoor
inch(mm)
Net Weight
Outdoor
kg(lbs)
Power Supply Cable
No.* mm2
Connecting Cable
No.* mm2
Connecting Tube
Liquid Side
inch(mm)
(Ø. Socket Flare)
Gas Side
inch(mm)
Length, std
m
Max length/elevation
m
Drain hose(Inner Ø)
Indoor Unit/Outdoor Unit
mm
Packing Dimension
Indoor(W*H*D)
inch(mm)
Outdoor(W*H*D)
inch(mm)
Stuffing Quantity
With(Without) S/Parts
20/40ft
Copyright ©2008 LG Electronics. Inc. All right reserved.
Only for training and service purposes
LV-C362FLA0
9,072(10,551)
36,000
3,950
18.5
90
1, 220, 60
96.5
2.29(2.66)
9.1
18~30/4.26
Capillary Tube
1,830(64.55),R22
KDE2FS0654
4
250
1.17
5.0/370
Centrifugal
4/144
3
1400/1200/1000
31/27/22
56/54/52
Thermistor
9.7
13
3R 10C
1550/650/208
52(115)
102
Reciprocating
1
CR42K6-PFV-502
Copeland
10,559(41,900)
PCS
3,850
SUNISO 3GS
1,331
Internal
0.275(7.0)
18
2R36C
125
ARE306B01
6
190
6/370
Propeller
1/460
Side Discharge
1040
58(2,048)
58
3/8(9.52)
5/8(15.88)
34.3*31.5*12.6(870*800*320)
72(158.7)
3*8.5
4*0.75
3/8(9.52)
5/8(15.88)
7.5
15/12.5
22.22
1635/751/293
40.2*34.2*17.3(1020*870*440)
34/76
-5-
LV-C422FLA0
10,584(12,309)
42,000
4,400
19.5
90
1, 220, 60
97
2.18(2.55)
8.5
18~30/4.91
Capillary Tube
2,650(93.4),R22
LV-C482GLA0
12,096(1,4067)
48,000
5,100
20
90
1, 220, 60
97
2.27(2.64)
9
18~30/4.96
Capillary Tube
3,000(107.7),R22
KDE2FS0654
KHF2G4001
4
4
260
380
1.17
1.73
7.5/370
7.5/370
Centrifugal
centrifugal
4/144
3/164
3
3
1450/1250/1050
1470/1240/1040
33/29/24
36/32/27
57/55/53
59/57/55
Thermistor
Thermistor
9.7
9.7
13
13
3R 10C
4R 10C
1550/650/208
1550/650/272
52(115)
61(134)
92
92
120
Rotary
Rotary
Rotary
2
2
QP-306KC
QJ-278KC
QP-348KC
LG
LG
LG
22,600
19,200
25,700
PSC
PSC
PSC
2,152
1,980
2,424
SUNISO 4GSI
SUNISO 4GSI
SUNISO 4GSI
700
500
700
Internal
Internal
Internal
0.375(9.52)
0.375(9.52)
17
17
1R 44C
1R 44C
90*2
90*2
AMR071B9
AMR071B9
6
6
168*2
168*2
0.81*2
0.81*2
6.0/370
6.0/370
Propeller
Propeller
2/460
2/460
Side Discharge
Side Discharge
900
900
49(1,730)*2
49(1,730)*2
58
58
3/8(9.52)
1/2(12.7)
3/4(19.05)
3/4(19.05)
35.43*48.23*14.57(900*1225*370) 35.43*48.23*14.57(900*1225*370)
90(198.3)
90(198.3)
3*8.5
3*8.5
4*0.75
4*0.75
3/8(9.52)
1/2(12.7)
3/4(19.05)
3/4(19.05)
7.5
7.5
15/12.5
15/12.5
22.22
22.22/
1635/751/293
1635/751/358
42.1*52.1*19.5(1070*1300*495)
42.1*52.1*19.5(1070*1300*495)
22/48
21/45
LGE Internal Use Only
Items
Cooling Capacity
Outdoor
Outdoor
Indoor
General
Heating Capacity
Input
Running Current
Starting Current
Power Supply
Power Factor
E.E.R
Cooling/Heating
Cooling/Heating
Cooling/Heating
C.O.P
Heating
Cooling
Unit
kcal/hr(W)
Btu/hr
kcal/hr(W)
Btu/hr
W
A
A
Ø,V,Hz
%
kcal/hr W(W/W)
Btu/hr W
W/W(kcal/hr W)
Btu/hr W
Setting temperature range(cool/heat)
Dehumidification Rate
l/h
Refrigerant Control
Refrigerant charge
g(oz), type
Indoor fan motor
Output
w
Model
No. of Poles
Input
W
Running Current
A
Capacitor
µF/Vac
Indoor Fan
Type
No. Used / Diameter
EA/inch(mm)
Motor Step
Indoor Fan RPM
Cooling(H/M/L)
rpm
Heating(H/M/L)
rpm
Air Circulation
Indoor (H/M/L)
CMM(CFM)
Noise Level(Sound Press,1m) Indoor(H/M/L)
dB(A)±3
Temperature Controller
Indoor Coil
Tube Size (OD)
inch(mm)
Fins per inch
No. of Rows & Column
Dimensions (W*H*D)
Indoor
inch(mm)
Net Weight
indoor
kg(lbs)
Compressor
Locked Rotor Amp.
A
Type
Quantity
No
Model
Maker
Capacity
Btu/hr
Motor Type
Motor Input
W
Oil Type
Oil Charge
cc
O.L.P Type(model name)
Outdoor Coil
Tube Size (OD)
inch(mm)
Fins per inch
No. of Rows & Column
Outdoor fan motor
Output
W
Model
No. of Poles
Input
W
Running Current
A
Capacitor
µF/Vac
Outdoor Fan
Type
No. Used / Diameter
EA/mm
Discharge
Side/Top
Speed
rpm
Air Circulation
Outdoor
CMM(CFM)
Noise Level(Sound Press,1m) Outdoor
dB(A)±3
SVC Valve
Liquid
inch(mm)
Gas
inch(mm)
Dimensions (W*H*D)
Outdoor
inch(mm)
Net Weight
Outdoor
kg(lbs)
Power Supply Cable
No.* mm2
Connecting Cable
No.* mm2
Connecting Tube
Liquid Side
inch(mm)
(Ø. Socket Flare)
Gas Side
inch(mm)
Length, std
m
Max length/elevation
m
Drain hose(Inner Ø)
Indoor Unit/Outdoor Unit
mm
Packing Dimension
Indoor(W*H*D)
inch(mm)
Outdoor(W*H*D)
inch(mm)
Stuffing Quantity
With(Without) S/Parts
20/40ft
Copyright ©2008 LG Electronics. Inc. All right reserved.
Only for training and service purposes
LV-C602HLA0
15,120/(17,584)
60,000
6,300
29
101
1, 220, 60
98.8
2.33(2.72)
9.25
18~30/7.67
Capillary Tube
4,050(145.4),R22
LV-C48BGLA0
12,096(14,067)
48,000
5,200
14.5
90
3, 220, 60
92.6
2.22(2.57)
8.8
18~30/5.2
Capillary Tube
3,800(134),R22
LV-C60BHLA0
15,120(17,584)
60,000
6,300
18.2
124
3, 220, 60
89.3
2.14(2.48)
8.5
18~30/7.1
Capillary Tube
4,680(165),R22
KHF2G4002
KHF2G4001
KHF2G4002
4
4
4
450
380
450
2.1
1.73
2.1
10.0/370
7.5/370
10.0/370
Centrifugal
Centrifugal
Centrifugal
4/164
3/164
4/164
3
3
3
1,450/1,150/1,000
1,470/1,240/1,040
1,450/1,150/1,000
37/31/27
36/32/27
37/31/27
61/59/57
59/57/55
61/59/57
Thermistor
Thermistor
Thermistor
9.7
9.7
9.7
13
13
13
4R 12C
4R 10C
4R 12C
1,550/650/292
1,550/650/272
1,550/650/292
63(137)
61(134)
63(137)
142
92
124
Reciprocating
Reciprocating
Scroll
1
1
1
CRN5-0500-PFV
AVB5549EXT
SR061RAA
Copeland
TECUMSEH
LG
62,700
48,096
62,000
Condenser Inducted
PSC
Three Phase Induction Motor
6,270
4,610
5,535
SUNISO 4GDID
WITCO LP200T
SUNISO 4GSI
1,774
2,000
1,800
Internal
Internal
Internal
0.375(9.52)
0.375(9.52)
0.375(9.52)
16
17
16
2R22C
2R 44C
2R 44C
90*2
90*2
90*2
AMR071B9
AMR071B9
AMR071B9
6
6
6
168*2
168*2
168*2
0.81*2
0.81*2
0.81*2
6.0/370
6.0/370
6.0/370
Propeller
Propeller
Propeller
2/382
2/382
2/382
Side Discharge
Side Discharge
Side Discharge
900
900
900
49(1,730)*2
49(1,730)*2
49(1,730)*2
62
62
62
1/2(12.7)
1 / 2 (12.7)
1 / 2 (12.7)
3/4(19.05)
3 / 4 (19.05)
3 / 4 (19.05)
35.43*48.23*14.57(900*1225*370) 35.43*48.23*14.57(900*1225*370) 35.43*48.23*14.57(900*1225*370)
95(209)
95(209)
95(209)
3*8.5
3*8.5
3*8.5
4*0.75
4*0.75
4*0.75
1/2(12.7)
1/2(12.7)
1/2(12.7)
3/4(19.05)
3/4(19.05)
3/4(19.05)
7.5
7.5
7.5
15/12.5
15/12.5
15/12.5
22.22/
22.22
22.22/
1635/751/378
1635/751/358
1635/751/378
42.1*52.1*19.5(1070*1300*495)
42.1*52.1*19.5(1070*1300*495)
42.1*52.1*19.5(1070*1300*495)
21/44
21/45
21/44
-6-
LGE Internal Use Only
Dimensions
(1) Indoor Unit
90
400
400
90
1
2
94
1
3
B
94
C
650
A
Dimension
A
B
C
36K BTU/h
1550
1362
236
42K BTU/h
1550
1362
236
48K BTU/h
1550
1362
272
60K BTU/h
1550
1362
292
Capacity
Copyright ©2008 LG Electronics. Inc. All right reserved.
Only for training and service purposes
-7-
LGE Internal Use Only
(2) Outdoor Unit
D
W
D
W
H
H
(36K)
MODEL
(42K/48K/60K)
36K
42K
48K
60K
W(mm)
870
900
900
900
H(mm)
800
1,220
1,220
1,220
D(mm)
320
370
370
370
DIM
Copyright ©2008 LG Electronics. Inc. All right reserved.
Only for training and service purposes
-8-
LGE Internal Use Only
Refrigeration Cycle Diagram
• COOLING ONLY (LV-C362FLA0, LV-C422FLA0, LV-C482GLA0, LV-C602HLA0,
LV-C48BGLA0, LV-C60BHLA0)
INDOOR UNIT
CAPILLARY TUBE
OUTDOOR UNIT
LIQUID SIDE
HEAT
EXCHANGER
(CONDENSER)
HEAT
EXCHANGER
(CONDENSER)
COMPRESSOR
GAS SIDE
Gas
Liquid
Rated
Max.
Rated
Max.
*Additional
refrigerant
(g/m)
36K
5/8"
3/8"
7.5
15
5
10
30
42K
3/4"
3/8"
7.5
15
5
10
35
48K
3/4"
1/2"
7.5
15
5
10
40
60K
3/4"
1/2"
7.5
15
5
10
45
Pipe size(Diameter: ø)
Piping length(m)
Elevation(m)
MODEL
• Rated performance for refrigerant line length of: .7.5m
• If 36K Model is installed at a distance of 15m, 225g of refrigerant should be added (15-7.5)x30g=225g
Copyright ©2008 LG Electronics. Inc. All right reserved.
Only for training and service purposes
-9-
LGE Internal Use Only
Wiring Diagram
COOLING ONLY
Model : LV-C362FLA0
OUTDOOR WIRING DIAGRAM
INDOOR WIRING DIAGRAM
FUSE T3.15A
BK
1
OR
3
4
F1
6
7
3
N
WH
L1
L2
8
9
WH
A2
White Wire
Red Wire
TERMINAL BLOCK 30A
1(N)
2(L)
3
C
T1
T2
A1
1Ø, 220V, 60Hz
POWER SUPPLY
L
Fuse
Blue Wire
Red Wire
Black Wire
BK
SWITCH BOX
Red Wire
52C
OR
NEUTRAL
LINE
COMM.
HIGH.
Blue Wire
MED.
Red Wire
LOW.
SOCKET
BK
YL OR
RD
S
BK
WH
1(N) WH
BK
2(L)
3 BL
GN/YL
WH
C
R
4
5
CM
FMo
STEP
MOTOR
(2)
GN/YL
BLOWER
MOTOR
Ground
White Wire
Brown Wire
Run Cap.
STEP
MOTOR
(1)
STEP
MOTOR
(2)
FREEZE SENSOR
PTCR
ROOM SENSOR
Cr
OR
To the Indoor unit
Co
STEP
MOTOR
(1)
SOCKET
BL
DISPLAY
2
PIPE TH
WH
GN/YL
TM 1
L
5
BK
TO OUTDOOR UNIT
BK
BK
WH
TRIAC
WH
Low Ambient PCB
2
TMo
3854A20203Q
Model : LV-C422FLA0 / LV-C482GLA0
OUTDOOR WIRING DIAGRAM
INDOOR WIRING DIAGRAM
F1
F2
WH
WH
WH
YL
RD
Cr(B)
BK
TB1
WH
TB2
BK
RD
RD
WH
OR
RD
RD
WH
WH
WH
BK
BK
BK
WH
WH
Cr(A)
Cr(B)
BK
OR
BK
OR
WH
BL
BK
YL
BR
BK
C R S
COMP(B)
FMo
C
L
Fuse
Blue Wire
Red Wire
COMM.
HIGH.
Blue Wire
MED.
Red Wire
LOW.
SOCKET
SOCKET
BLOWER
MOTOR
Ground
White Wire
Brown Wire
Tmo
BK
OR
YL
C R S
COMP(A)
BK
OR
YL
5
POWER SUPPLY
1Ø,220V,60Hz~
4
2(N) Tm
RD
Cr(A)
1(L)
TO INDOOR UNIT
BR
1(N) 2(L) 3
BK
WH
SWITCH BOX
Red Wire
Black Wire
52C(A)
NEUTRAL
LINE
Run Cap.
FREEZE SENSOR
BL
1(N)
2(L)
3
ROOM SENSOR
52C(B)
BK
White Wire
Red Wire
TERMINAL BLOCK 30A
DISPLAY
TO OUTDOOR UNIT
WH
FMo
3854A20135S
Copyright ©2008 LG Electronics. Inc. All right reserved.
Only for training and service purposes
- 10 -
LGE Internal Use Only
COOLING ONLY
Model : LV-C602HLA0
OUTDOOR WIRING DIAGRAM
INDOOR WIRING DIAGRAM
BK
BK
GN/YL
WH
WH
1
52C
N
3
31
A
2
1Ø,60Hz,220V~
POWER SUPPLY
5
TO OUTDOOR UNIT
4
B
32
6
BK
OR
White Wire
Red Wire
TERMINAL BLOCK 30A
1(N)
2(L)
3
C
Fuse
Red Wire
COMM.
HIGH.
MED.
Red Wire
LOW.
F1
Blue Wire
STEP
MOTOR
(1)
SOCKET
FMo1
FMo2
49FMo
49FMo
WH
3
BL
S C
R
1(N)
2(L)
BK
4
5
COMP
GN/YL
TMo
BLOWER
MOTOR
Ground
White Wire
Brown Wire
Run Cap.
FREEZE SENSOR
OR
WH
RD
STEP
MOTOR
(2)
SOCKET
ROOM SENSOR
BK
OR
Cr
WH
PTCR
(OPTION)
BK
OR
BK YL
WH
To the indoor unit
Co
OR
L
Red Wire
Black Wire
WH
YL
SWITCH BOX
Blue Wire
BK
Co
NEUTRAL
LINE
DISPLAY
TM L
3854A20013K
COOLING ONLY
Model : LV-C488GLA0
OUTDOOR WIRING DIAGRAM
INDOOR WIRING DIAGRAM
FUSE
BK
(250V 5A)
BK
BK
WH
FUSE
R S T N
3
31
6
B
32
POWER
RELAY
BR
2
4
A
WH
BK
RD
BK
3Ø, 3WIRES, 220V
POWER SUPPLY
CAPACITOR
RD
BK
OR
BK
OR
BK
YL
1
2
3
BK
OR
WH
GN/YL
YL
OR
BK
TERMINAL
BLOCK
TO THE INDOOR UNIT
CAPACITOR
BK
TO OUTDOOR UNIT
5
White Wire
Red Wire
TERMINAL BLOCK 30A
1
2
3
FAN
MOTOR
SWITCH BOX
C
L
Fuse
Red Wire
Blue Wire
Red Wire
Black Wire
COMM.
HIGH.
Blue Wire
MED.
Red Wire
LOW.
STEP
MOTOR
(1)
SOCKET
STEP
MOTOR
(2)
SOCKET
BLOWER
MOTOR
Ground
White Wire
Brown Wire
FAN
MOTOR
NEUTRAL
LINE
Run Cap.
FREEZE SENSOR
1
ROOM SENSOR
(250V 5A)
WH
DISPLAY
RD
T1 T2 T3
COMP.
3854A20026J
Copyright ©2008 LG Electronics. Inc. All right reserved.
Only for training and service purposes
- 11 -
LGE Internal Use Only
COOLING ONLY
Model : LV-C608HLA0
OUTDOOR WIRING DIAGRAM
INDOOR WIRING DIAGRAM
F1
BK
BK
WH
RD
F1
WH
TM R S T N
1
3
5
31
2
4
6
32
A
TO OUTDOOR UNIT
52C
WH
B
POWER SUPPLY
OR
BK
RD
White Wire
Red Wire
TERMINAL BLOCK 30A
1
2
3
WH
C
63H2
Co
HIGH.
MED.
Red Wire
LOW.
FMo
49FMo
RD
1
2
3
BK
WH
SV
W
(T3)
U
V
(T1) (T2)
RD
TMo
STEP
MOTOR
(2)
SOCKET
BLOWER
MOTOR
Ground
White Wire
Brown Wire
Run Cap.
FREEZE SENSOR
BK
OR
STEP
MOTOR
(1)
SOCKET
ROOM SENSOR
FMo
49FMo
COMM.
Blue Wire
DISPLAY
BK
YL BK
OR
Fuse
BK
WH
YL BK
L
Blue Wire
Red Wire
BK
To the indoor unit
Co
SWITCH BOX
Red Wire
Black Wire
BK
NEUTRAL
LINE
CM
GN/YL
3854A20119T
Copyright ©2008 LG Electronics. Inc. All right reserved.
Only for training and service purposes
- 12 -
LGE Internal Use Only
Operation Details
(1) The function of main control
1. Time Delay Safety Control
• 3min… The compressor is ceased for 3minutes to balance the pressure in the refrigeration cycle.
(Protection of compressor)
…
• 30sec The 4-way valve is ceased for 30sec. to prevent the refrigerant-gas abnormal noise when the Heating
operation is OFF or switched to the other operation mode while compress is off.
While compressor is running, it takes 3~5 seconds to switch.
2. Airflow Direction Control
• This function is to swing the louver up and down automatically and to set it at the desired position.
• The procedure is as the following.
1st ; Press the ON/OFF Button to operate the product.
2nd ; Press the Airflow Direction Control Button to swing the louver up and down automatically.
3nd ; Repress the Airflow Direction Control Button to set the louver as the desired position.
MODE 0
MODE1
135°
MODE 2
MODE 3
Cooling
MODE 4
MODE 5
MODE 9
(CLOSE)
MODE 6
MODE 7
3. Cooling Mode Operation
• When selecting the Cooling( ) Mode Operation, the unit will operate according to the setting by the remote
controller and the operation diagram is as following
Intake Air temp.
COMP. ON
(SET TEMP.+0.5°C)
COMP. OFF
(SET TEMP. -0.5°C)
INDOOR FAN
COMPRESSOR
More than
More than
3 minutes
3 minutes
Selecting
fan speed
Low
Selecting
fan speed
Low
Selecting
fan speed
ON
OFF
ON
OFF
ON
Copyright ©2008 LG Electronics. Inc. All right reserved.
Only for training and service purposes
- 13 -
LGE Internal Use Only
4. Cooling Mode with Sleep Mode Auto Operation
• When selecting the Cooling( ) combined with the Sleep Mode Auto Operation(
), the operation diagram
is as following.
• The setting temperature will be raised by 1°C 30minutes later and by 2°C 1 hour later.
• The operation will be stopped after 1, 2, 3, 4, 5, 6, 7 hours.
30 minutes
Intake Air temp.
30 minutes
1°C
COMP. ON
(SET TEMP.+0.5°C)
1°C
COMP. OFF
(SET TEMP. -0.5°C)
More than
3 minutes
More than
3 minutes
INDOOR FAN
Low
Low
Low
Low
Low
COMPRESSOR
ON
OFF
ON
OFF
ON
5. Auto Operation
Operation Condition
When Auto Operation
initial start
Intake-air Temperature
Setting temperature
Over 26°C
25°C
Over 24°C~below 26°C
Intake air -1°C
Over 22°C~below 24°C
Intake air -0.5°C
Fan speed
Over 20°C~below 22°C intake air temperture
below 20°C
When pressing room temp- Over 20°C~below 30°C
erature setting button
below 20°C
during Auto Operation
over 30°C
20°C
Controlled
by Fuzzy logic
Fuzzy control
20°C
Air Direction Control
In this mode, when
pressing the vertical air diretion control.
Button, louvers
moves to 1/f
rhythm (refer to
page 15)
30°C
Intake-Air temp
Setting Temp. +0.5°C
(Compressor OFF)
Setting Temp.-0.5°C
(Compressor ON)
Fuzzy Speed
Indoor Fan
Compressor
ON
Copyright ©2008 LG Electronics. Inc. All right reserved.
Only for training and service purposes
OFF
- 14 -
ON
OFF
LGE Internal Use Only
• Auto Operation for Soft Dry
The Setting temperature will be same as that of the current intake-air temperature.
- Compressor ON temperature; Setting temperature +1°C
- Compressor OFF temperature; Setting temperature -0.5°C
• 1/f rhythm louver operation : In Auto operation mode, when pressing the vertical air direction control button,
louver moves as following cycle.
MODE0
Start
MODE1
MODE2
MODE3
MODE4
MODE5
End
MODE6
MODE9
(CLOSED)
6. Natural wind by CHAOS logic
For more fresh feeling than other fan speed mode, press
the indoor fan Speed Selector and set to CHAOS mode.
In this mode, the wind blows like natural breeze by automatically changing fan speed according to the CHAOS
logic.
Intake Air temp.
Setting CHAOS Natural wind
Cooling on temp.
(Setting temp.+0.5)
Setting temp.
Cooling off temp.
(Setting temp.-0.5)
INDOOR FAN
OUTDOOR FAN/COMP.
: Setting fan speed
: CHAOS Natural wind
: LOW
: COMP ON
: COMP OFF
GRAPH of Natural wind by the CHAOS logis (During Cooling operation)
Copyright ©2008 LG Electronics. Inc. All right reserved.
Only for training and service purposes
- 15 -
LGE Internal Use Only
7. Soft Dry Operation
• During Soft Dry Operation, the compressor ON temperature is the setting temperature plus 1°C, the compressor OFF temperature is the setting temperature minus 0.5°C.
• When the room temperature rises over the compressor ON temperature, the operation mode is switched to the
cooling mode.
• When the room temperature falls between the compressor ON temperature and OFF temperature, the operation mode is switched to the Soft Dry Operation.
In this temperature range, 10min. Dry Operation, 7min operation OFF. During 10min Dry operation, if the room
temperature falls below compressor OFF temperature, Compressor OFF.
• In micom dehumidify mode, control of fan speed is as following.
Intake Air temp.
Setting temp. +1.0˚C
(Compressor ON)
Setting temp.
Setting temp. -0.5˚C
(Compressor OFF)
Cooling 2min.58sec. 10min.
COMPRESSOR
7min.
10min. Within 7min. Cooling 2min.58sec.
ON
OFF
ON
OFF
ON
OFF
OUTDOOR FAN
ON
OFF
ON
OFF
ON
OFF
INDOOR FAN
Selected
Fan
Low Fan
ON
OFF
ON
OFF
ON
OFF
ON
OFF
Selected
Fan
Low Fan
8. Protection of the evaporator pipe from frosting
If the temperature of the indoor coil is below 0°C after 7 minutes from starting the compressor, the
compressor and the outdoor fan is stopped, and then after 3 minute delay of the compressor and the
temperature of the indoor coil is over 7°C, the compressor and the outdoor fan is reoperated.
Indoor fan operates at low speed (comp. OFF) or at selected speed (comp. ON)
9. Test Operation
• When pressing forced operation switch about 3 seconds, the unit operates in cooling mode at high speed fan
regardless of room temperature and resets in 18 min.
• During test operation, if remote controller signal is received, the unit operates as remote controller sets.
10. Auto Restarting Operation
• When the power is restored after a sudden power failure while in appliance operation, the mode before the
power failure is kept on the memory and the appliance should be on the automatically operates in the mode
on the memory.
• Operation Mode that is kept on the memory
- State of Operation ON/OFF
- Operation Mode/Setting Temp/Selected airflow Speed
- Sleep Timer Mode/Remaining Time of Sleep Timer(unit of hour)
• If no input by the remote controller or no switching of the slide switch within 7 hr after the appliance operates
by the Auto Restarting operation, the appliance is forced to stop at the moment of 7-hr elapse.
Copyright ©2008 LG Electronics. Inc. All right reserved.
Only for training and service purposes
- 16 -
LGE Internal Use Only
Display Function
Cooling Model
Operation Indicator
• Coolling, Soft Dry, Fan, Heating
Timer Indicator
• Timer Mode
Sleep Timer Indicator
• Sleep Mode
Outdoor Unit Operation
• Outdoor Unit Operating
Note)
For normal operation after checking by test mode, you should press SW1 nine times for resetting or reconnect
the power cord.
Copyright ©2008 LG Electronics. Inc. All right reserved.
Only for training and service purposes
- 17 -
LGE Internal Use Only
Installation of Indoor, Outdoor Unit
1. Selection of the best location
1) Indoor unit
• There should not be any heat source or steam near
the unit.
• There should not be any obstacles to prevent the air
circulation.
• A place where air circulation in the room will be
good.
• A place where drainage can be easily obtained.
• A place where noise prevention is taken into consideration.
• Do not install the unit near the door way.
• Ensure the spaces indicated by arrows from the
wall, ceiling, or other obstacles.
300
mm
300mm
or more
300
mm
Service space when the unit is mounted
under the celling.
100mm
or more
300
mm
300
mm
Service space when the unit is mounted
on the floor/wall.
Su
2) Outdoor unit
• If an awning is built over the unit to prevent direct
sunlight or rain exposure, be careful that heat radiation from the condenser is not restricted.
• There should not be any animals or plants which
could be affected by hot air discharged.
• Ensure the spaces indicated by arrows from the
wall, ceiling, fence or other obstacles.
nro
of
More than
30cm
Fe
ob nce
sta or
cle
s
More than
30cm
More than
70cm
3) Piping length and the elevation
Capacity
36K BTU/h
42K BTU/h
48K BTU/h
60K BTU/h
Pipe Size
Length A(m)
(Diameter: Ø)
Gas
Liquid Standard Max.
7.5
5/8"
3/8"
15
7.5
3/4"
3/8"
15
7.5
3/4"
1/2"
15
7.5
3/4"
1/2"
15
Elevation B(m)
Standard
5
5
5
5
Max.
10
10
10
10
*Additional
refrigerant
(g/m)
30
35
40
45
A
B
Outdoor unit
• If 36K Model is installed at a distance of 15m, 225g of
refrigerant should be added (15-7.5) x 30g = 225g
• Capacity is based on standard length and maximun
allowance length is on the basis of reliability.
• Improper refrigerant charge may result in abnormal cycle.
Copyright ©2008 LG Electronics. Inc. All right reserved.
Only for training and service purposes
Indoor unit
- 18 -
LGE Internal Use Only
2. Indoor unit installation
■ Installation of Unit
Unit should be installed for horizontal and vertical discharge application only.
90
CASE 1
400
POSITION OF SUSPENSION BOLT
• Apply a joint-canvas between the unit and duct to
absorb unnecessary vibration.
(Unit:mm)
Dimension
A
B
C
1550
1550
1550
1550
1362
1362
1362
1362
236
236
272
292
94
2
3
B
94
C
Capacity
36K BTU/h
42K BTU/h
48K BTU/h
60K BTU/h
A
400
90
1
1
650
CASE 2
• Install the unit leaning to a drainage hole side as
a figure for easy water drainage.
POSITION OF CONSOLE BOLT
• A place where the unit will be leveled and that
can support the weight of the unit.
• A place where the unit can withstand its vibration.
• A place where service can be easily performed.
Suspension
bolts
Spring
washer
Max.
12mm
Copyright ©2008 LG Electronics. Inc. All right reserved.
Only for training and service purposes
- 19 -
Nut
Washer
LGE Internal Use Only
• Select and mark the position for fixing bolts.
• Drill the hole for set anchor on the face of ceiling.
• Insert the set anchor and washer onto the suspension bolts for locking the suspension bolts on
the ceiling.
• Mount the suspension bolts to the set anchor
firmly.
• Secure the installation plates onto the suspension
bolts (adjust level roughly) using nuts, washers
and spring washers.
Old building
New building
1 Set anchor
2 Plate washer
3 Spring washer
CAUTION
4 Nut
5 Suspension
bolts
Tighten the nut and bolt to prevent unit falling
• Local supply
Set anchor
Plate washer
Spring washer
Nut
Suspension bolt
- M10
- M10
- W3/8 or M10
- W3/8 or M10
Opening the side panel method
Step1: Remove screw
Step1
Step2: Lift side-panel upward slightly
Step3: To move side panel along arrow as shown.
Step2
Copyright ©2008 LG Electronics. Inc. All right reserved.
Only for training and service purposes
- 20 -
Step3
LGE Internal Use Only
CAUTION
1. Install declination of the indoor unit is very important for the drain of the convertible type
air conditioner.
2. Minimum thickness of the insulation for the connecting pipe shall be 7mm.
3. If the Installation Plates are fixed to horizontal line, the indoor unit after installing will be
declined to the bottomside.
Front of view
• The unit must be horizontal or declined to the drain hose connected when finished installation.
Ceiling
Drain hose
Side of view
• The unit must be declined to the bottomside of the unit when finished installation.
Ceiling
Copyright ©2008 LG Electronics. Inc. All right reserved.
Only for training and service purposes
- 21 -
LGE Internal Use Only
• Drill the piping hole with 70mm dia, hole core drill.
• Piping hole should be slightly slant to the outdoor
side.
Indoor
WALL
Outdoor
5~7mm
INSULATION, OTHERS
THERMAL INSULATION
Insulate the joint and tubes completely.
All thermal insulation must comply with local requirement.
REFRIGERANT PIPE
• Insulate and tape both the gas piping and
liquid piping.
Power cable
Liquid pipe
Tape
Gas pipe
Thermal insulator
TEST AND CHECK
■ After all workings are finished, check the working and operation.
• Air distribution ...............Is the air circulation good?
• Drain .............................Is the drainage smoothly and no sweating?
• Gas leakage .................Is the piping connection correctly?
• Wiring ...........................Is the wiring connection correctly?
• Lock-bolt........................Is the lock-bolt of compressor loosened?
Copyright ©2008 LG Electronics. Inc. All right reserved.
Only for training and service purposes
- 22 -
LGE Internal Use Only
REFRIGERANT PIPING
Perform the work according to the Service Manual or Installation
Guide.
• Use two spanners when connecting the refrigerant
pipe to the unit.
• Make a bend with a radius as large as possible.
• Perform air purge with R-22 or vacuum drying.
• When piping work is finished, check all joints.
Flared connection (Union)
Use a seemliness tube
Indoor
■ Add refrigerant if piping is over 7.5m.
Capacity
36K BTU/h
42K BTU/h
48K BTU/h
60K BTU/h
Addition volume
30 g/m
35 g/m
40 g/m
45 g/m
Factory charged
Flared connection
(Service valve, Ball valve)
Outdoor
INSTALLATION OF OUT DOOR UNIT
Select a location that satisfies the following conditions. Install the
unit firmly in place.
■ Select the following location
• A place where the air conditioner can get good
ventilation.
• A place where it shall not annoy the neighbors.
• A place where the unit shall be leveled and that
can support the weight of unit and withstand its
vibrations.
Above 30Cm
Outdoor unit
Above 30Cm
■ Keep a maintenance space
Copyright ©2008 LG Electronics. Inc. All right reserved.
Only for training and service purposes
Above 70Cm
Above 50Cm
Face of wall
- 23 -
LGE Internal Use Only
ELECTRICAL WIRING
Perform the electrical wiring work according to the electrical wiring
connection.
• All wiring must comply with local requirements.
• Select a power source that is capable of supplying
the current required by the air conditioner.
• Use a recognized circuit breaker between the power source and the unit. A disconnection device to
adequately disconnect all supply lines must be fitted.
• Capacity of circuit breaker
Capacity
36K BTU/h
42K BTU/h
48K BTU/h
60K BTU/h
1 Phase
35A
40A
50A
50A
Circuit Breaker
Main
power source
Switch box
Outdoor
Indoor
3 Phase
25A
35A
Control terminal board
Cord damper
WIRING CONNECTION
INDOOR UNIT
• Remove side panel cover for electrical connection
between the indoor and outdoor unit.
(Remove crews ➀.)
• Use the cord clamper to fix the cord.
OUTDOOR UNIT
• Remove the control cover for wiring connection.
• Use the cord clamper to fix the cord.
• Earthing work
Connect the cable of diameter 1.6mm2 or more to
the earthing terminal provided in the control box
and do earthing.
Main terminal board
Control terminal board
Please check !!
Cord
clamper
Cover control
Copyright ©2008 LG Electronics. Inc. All right reserved.
Only for training and service purposes
- 24 -
LGE Internal Use Only
Connecting Pipes to the Indoor Unit
1. Preparation of Piping
Main cause of gas leakage is defect in flaring
work. Carry out correct flaring work in the following procedure.
Copper
tube
Slanted Uneven Rough
90°
1) Cut the pipes and the cable.
■ Use the accessory piping kit or the pipes purchased locally.
■ Measure the distance between the indoor and
the outdoor unit.
■ Cut the pipes a little longer than measured distance.
■ Cut the cable 1.5m longer than the pipe length.
Pipe
Reamer
Point down
2) Burrs removal
■ Completely remove all burrs from the cut cross
section of pipe/tube.
■ Put the end of the copper tube/pipe to downward
direction as you remove burrs in order to avoid to
let burrs drop in the tubing.
Flare nut
3) Putting nut on
■ Remove flare nuts attached to indoor and outdoor units, than put them on pipe/tube having
completed burr removal.
(Not possible to put them on after flaring work)
Copper tube
4) Flaring work
■ Carry out flaring work using flaring tool as shown
below.
Outside Diameter
1/4"
3/8"
1/2"
5/8"
3/4"
"A"
0~0.5
0.5~0.8
0.5~0.8
0.8~1.0
1.0~1.3
Handle
Bar
Bar
"A"
Yoke
Cone
Copper pipe
Firmly hold copper tube in a bar(or die) as indicated dimension in the table above.
Clamp handle
5) Check
Red arrow mark
Smooth all round
■ Compare the flared work with figure.
■ If flare is noted to be defective, cut off the flared
section and do flaring work again.
Inside is shining without scratches.
= Improper flaring =
Even length
all round
Copyright ©2008 LG Electronics. Inc. All right reserved.
Only for training and service purposes
- 25 -
Inclined Surface Cracked Uneven
damaged
thickness
LGE Internal Use Only
6) Pipe bending
Annealed copper pipe with small diameter (ø6.35 or ø9.52) can be easily bent manually. In this case, secure
large R(radius) for the bend section and gradually bend pipe. If annealed copper pipe is large in diameter
(ø15.88 or ø19.05), bend pipe with bender. Use bender appropriate for the pipe diameter.
7) Brazing
In refrigerant piping, bending (in particular, acute bending) must be minimized to reduce piping resistance.
Bending is, however, necessary in some places by virtue of the installation position of devices auxiliary to the
packaged air conditioner, or of the building structure, piping distance or finishing appearance. If a more acute
bend is required than that attainable by pipe bender, perform brazing using ready-made elbow. Aside from this
function, brazing also serves to connect straight pipes, generally using ready-made sockets. While brazing, protect piping against heat with wet cloth to avoid damaging valve packing or burning thermal insulator with burner
heat. While brazing, blow inert gas (nitrogen gas or carbonic gas) to prevent formation of oxidation film in copper piping; otherwise, the refrigerant circuit will clog. The blowing of nitrogen gas (or carbonic gas) through 3way valves is described in the following:
8) Refrigerant piping(Flare piping)
When connecting piping, be sure to keep piping dry(keep piping away from water), clean (keep piping away
from dust) and airtight (avoid refrigerant leakage).
When connecting piping on rainy days or making a through-hole in wall, take due care to prevent water or plaster from entering piping.
CAUTION
a. This procedure is designed to prevent formation of
oxidation film by filling piping with inert gas. Note
that excessive gas pressure will generate pinholes
at brazed points.
(Nitrogen gas: Supply pressure 0.05~0.1kg/cm2G)
b. When supplying inert gas, be sure to open one end
of piping.
Water enters
Copyright ©2008 LG Electronics. Inc. All right reserved.
Only for training and service purposes
- 26 -
Plaster enters
LGE Internal Use Only
Connecting Pipes to the Outdoor Unit
1) Connecting the pipes to the Outdoor
unit
1. Align the center of the pipings and sufficiently
tighten the flare nut with fingers.
2. Finally, tighten the flare nut with torque wrench
until the wrench clicks.
• When tightening the flare nut with torque wrench,
ensure the direction for tightening follows the
arrow on the wrench.
Outdoor unit
Pipe size
Torque
1/4"
1.8kg.m
3/8"
4.2kg.m
1/2"
5.5kg.m
5/8"
6.6kg.m
3/4"
6.6kg.m
Gas side piping
(Bigger Dia.)
Liquid side piping
(Smaller Dia.)
Torque wrench
Checking the Drainage
1) Checking the Drainage
1. Remove the Air Filter.
• To remove air filter, take hold of tab and pull
slightly upwards.
2. Check the drainage.
• Spray one or two glasses of water upon the
evaporator.
• Ensure that water flows drain hose of indoor unit
without any leakage.
Copyright ©2008 LG Electronics. Inc. All right reserved.
Only for training and service purposes
- 27 -
LGE Internal Use Only
Connecting Cables between Indoor Unit and Outdoor Unit
1) Connecting cables to the Indoor Unit
■ Connect the wires to the terminals on the control board individually according to the outdoor unit connection.
• Ensure that the color of the wires of outdoor unit and the terminal No. are the same as those of indoor unit
respectively
■ 36K/42K/48K/60K Btu (1Ø, 220V)
• Cooling only type
(1Ø, 220V)
1(N) 2(L) 3
4
5
Terminals on the outdoor unit 1(N) 2(L) 3
4
5
Terminals on the indoor unit
1(L)
2(N)
POWER INPUT
■ 48K/60K Btu (3Ø, 220V)
• Cooling only type
(3Ø, 220V)
Terminals on the indoor unit
1
2
3
Terminals on the outdoor unit
1
2
3
R
S
T
N
POWER INPUT
CAUTION
The power cord connected to the outdoor unit should be
The connecting cable connected to the indoor and outdoor
complied with the following specifications (Rubber
unit should be complied with the following specifications
insulation, type H05RN-F approved by HAR or SAA).
(Rubber insulation, type H05RN-F approved by HAR or SAA).
NORMAL CROSS-SECTIONAL AREA
GN
/YL
20
mm
Capacity
36K BTU/h
42K BTU/h
48K BTU/h
60K BTU/h
1 Phase
5.5mm2
8.5mm2
8.5mm2
8.5mm2
3 Phase
3.5mm2
5.5mm2
NORMAL
CROSS-SECTIONAL
AREA 0.75mm2 (36K/42K)
1.25mm2 (48K/60K)
GN
/YL
20
mm
If the supply cord is damaged, it must be replaced by a special cord or assembly availible from the manufacturer of its service agent.
Copyright ©2008 LG Electronics. Inc. All right reserved.
Only for training and service purposes
- 28 -
LGE Internal Use Only
3) Connecting the cable to the Outdoor
Unit
Outdoor unit
Terminal block
1. Remove the Cover control from the unit by loosening
a screw.
Connect the wires to the terminals on the control
board individually as following.
2. Secure the cable onto the control board with the
holder (clamper).
Cord Clamper
Power supply
cord
Over 5mm
3. Refix the cover control to the original position with
the screw.
Cover control
CAUTION
After the confirmation of the above conditions, prepare the wiring as follows:
1) Never fail to have an individual power specialized for the air conditioner. As for the method of wiring, be guided
by the circuit diagram pasted on the inside of control box cover.
2) Provide a circuit breaker switch between power source and the unit.
3) The screw which fasten the wiring in the casing of electrical fittings are liable to come loose from vibrations
to which the unit is subjected during the course of transportation. Check them and make sure that they are all
tightly fastened. (If they are loose, it could give rise to burn-out of the wires.)
4) Specification of power source
5) Confirm that electrical capacity is sufficient.
6) Be sure that the starting voltage is maintained at more than 90 percent of the rated voltage marked on the
name plate.
7) Confirm that the cable thickness is as specified in the power sources specification.
(Particularly note the relation between cable length and thickness.)
8) Never fail to equip a leakage breaker where it is wet or moist.
9) The following troubles would be caused by voltage drop-down.
• Vibration of a magnetic switch, damage on the contact point there of, fuse breaking, disturbance to the normal function of a overload protection device.
• Proper starting power is not given to the compressor.
Copyright ©2008 LG Electronics. Inc. All right reserved.
Only for training and service purposes
- 29 -
LGE Internal Use Only
4) Form the pipings
1. Wrap the connecting portion of indoor unit with
the Insulation material and secure it with two
Plastic Bands. (for the right pipings)
• If you want to connect an additional drain hose,
the end of the drain-outlet should keep distance
from the ground. (Do not dip it into water, and fix
it on the wall to avoid swinging in the wind.)
Seal a small opening
around the pipings
with gum type sealer.
Drain hose
Taping
In case of the Outdoor unit being installed below
position of the Indoor unit.
2. Tape the Pipings, drain hose and Connecting
Cable from bottom to top.
Pipings
Connecting
cable
3. Form the pipings gathered by taping along the
exterior wall and fix it onto the wall by saddle or
equivalent.
Power supply
cord
Trap is required to prevent water from entering
into electrical parts.
In case of the Outdoor Unit being installed above
position of the Indoor Unit.
Seal a small opening
around the pipings
with gum type sealer.
2. Tape the Pipings and Connecting cable from
bottom to top.
3. Form the pipings gathered by taping along the
exterior wall, and make the trap prevent water
from entering into the room.
Trap
4. Fix the pipings onto the wall by saddle or
equivalent.
Copyright ©2008 LG Electronics. Inc. All right reserved.
Only for training and service purposes
- 30 -
LGE Internal Use Only
Air Purging of the Connecting Pipes and the Indoor Unit
The air which contains moisture remaining in the refrigeration cycle may cause a malfunction on the compressor.
1. Confirm that both the liquid side valve and the gas side valve are set to the closed position.
2. After connecting the piping, check the joints for gas leakage with gas leak detector.
3. Remove the service port nut, and connect the gauge manifold and the vacuum pump to the service port by the
charge hose.
4. Vacuum the indoor unit and the connecting pipes until the pressure in them lowers to below -76cmHg.
5. Remove the valve stem nuts, and fully open the stems of the 2-way and 3-way valves with a hexagon wrench.
6. Tighten the valve stem nuts of the 2-way valve and 3-way valve.
7. Disconnect the charge hose and fit the nut to the service port.
(Tightening torque: 1.8kg.m)
Indoor unit
Liquid side
Closed
Outdoor unit
2-way valve/
3-way valve
Gas side
3-way
valve
Closed
Vaccum pump
OPEN
Copyright ©2008 LG Electronics. Inc. All right reserved.
Only for training and service purposes
CLOSE
- 31 -
LGE Internal Use Only
Operation
■ Name and Function-Remote controller
1) Cooling Model
Remote Controller
1
OPERATION DISPLAY
Displays the operation conditions.
Signal transmitter.
2
START/STOP BUTTON
Operation starts when this button is pressed and stops
when the button is pressed again.
3
OPERATION MODE SELECTION BUTTON
Used to select the operation mode.
4
ON/OFF TIMER BUTTONS
Used to set the time of starting and stopping operation.
5
TIME SETTING BUTTONS
Used to adjust the time.
6
TIMER SET/CANCEL BUTTONS
Used to set the timer when the desired time is obtained
and to cancel the Timer operation.
7
AIR FLOW DIRECTION START/STOP BUTTON
Used to stop or start louver movement and set the
desired up/down airflow direction.
Transmits the signals
to the room air conditioner.
1
7
3
2
8
ON
OFF
8
4
9
AIR CIRCULATION BUTTON
Used to circulate the room air without cooling or
heating (turns indoor fan on/off).
10
ROOM TEMPERATURE CHECKING BUTTON
Used to check the room temperature.
11
RESET BUTTON
Used prior to resetting time or after replacing batteries.
9
5
SET
SLEEP MODE AUTO BUTTON
Used to set Sleep Mode Auto operation.
CANCEL
6
10
11
Copyright ©2008 LG Electronics. Inc. All right reserved.
Only for training and service purposes
- 32 -
LGE Internal Use Only
3-way Valve
1. Pumping down
Liquid side
Indoor unit
3-Way
valve
Open
Outdoor unit
Gas side
Closed
3-Way
valve
Lo
CLOSE
CLOSE
Purge the air
• Procedure
(1) Confirm that both liquid side and gas side
valves are set to the open position.
– Remove the valve stem caps and confirm that
the valve stems are in the raised position.
– Be sure to use a hexagonal wrench to operate
the valve stems.
(2) Operate the unit for 10 to 15 minutes.
(3) Stop operation and wait for 3 minutes, then
connect the charge set to the service port of
the 3-way valve.
– Connect the charge hose to the service port.
(4) Air purging of the charge hose.
– Open the low-pressure valve on the charge set
slightly to air purge from the charge hose.
(6) Operate the air conditioner in cooling mode
and stop it when the gaug e indicates
1kg/cm2g.
(7) Immediately set the 3-way valve to the closed
position.
– Do this quickly so that the gauge ends up
indicating 3 to 5kg/cm2g.
(8) Disconnect the charge set, and mount the 2way and 3-way valve’s stem nuts and the
service port nut.
– Use torque wrench to tighten the service port
nut to a torque of 1.8 kg.m.
– Be sure to check for gas leakage.
(5) Set the liquid side valve to the closed
position.
Copyright ©2008 LG Electronics. Inc. All right reserved.
Only for training and service purposes
- 33 -
LGE Internal Use Only
1) Re-air purging
(Re-installation)
Liquid side
Indoor unit
2-Way
valve
Closed
Outdoor unit
Gas side
Closed
3-Way
valve
Gas cylinder
Lo
R22
OPEN
CLOSE
• Procedure
(1) Confirm that both the liquid side valve and the
gas side valve are set to the closed position.
(2) Connect the charge set and a gas cylinder to
the service port of the 3-way valve.
– Leave the valve on the gas cylinder closed.
(3) Air purging.
– Open the valves on the gas cylinder and the
charge set. Purge the air by loosening the flare
nut on the liquid side valve approximately 45°
for 3 seconds then closing it for 1 minute;
repeat 3 times.
– After purging the air, use a torque wrench to
tighten the flare nut on liquid side valve.
(6) Disconnect the charge set and the gas
cylinder, and set the 2-way and 3-way valves
to the open position.
– Be sure to use a hexagonal wrench to operate
the valve stems.
(7) Mount the valve stem nuts and the service
port nut.
– Use torque wrench to tighten the service port
nut to a torque of 1.8 kg.m.
– Be sure to check for gas leakage.
* CAUTION:
Do not leak the gas in the air during Air
Purging.
(4) Check for gas leakage.
– Check the flare connections for gas leakage.
(5) Discharge the refrigerant.
– Close the valve on the gas cylinder and
discharge the refrigerant until the gauge
indicates 3 to 5 kg/cm2g.
Copyright ©2008 LG Electronics. Inc. All right reserved.
Only for training and service purposes
- 34 -
LGE Internal Use Only
2) Balance refrigerant of the 3-way valve
(Gas leakage)
Liquid side
Indoor unit
Outdoor unit
2-Way
valve
Open
Gas side
3-Way
valve
Open
Lo
OPEN
CLOSE
• Procedure
(1) Confirm that both the liquid side and gas side
valves are set to the back seat.
(2) Connect the charge set to the 3-way valve’s
port.
– Leave the valve on the charge set closed.
– Connect the charge hose to the service port.
Copyright ©2008 LG Electronics. Inc. All right reserved.
Only for training and service purposes
(3) Open the valve (Lo side) on the charge set
and discharge the refrigerant until the gauge
indicates 0 kg/cm2G.
– If there is no air in the refrigerant cycle (the
pressure when the air conditioner is not
running is higher than 1 kg/cm2G), discharge
the refrigerant until the gauge indicates 0.5 to 1
kg/cm 2 G. if this is the case, it will not be
necessary to apply a evacuatin.
– Discharge the refrigerant gradually; if it is
discharged too suddenly, the refrigeration oil
will also be discharged.
- 35 -
LGE Internal Use Only
2. Evacuation
(All amount of refrigerant leaked)
Liquid side
Indoor unit
Outdoor unit
2-Way
valve
Open
Gas side
3-Way
valve
Open
Vacuum pump
Lo
OPEN
CLOSE
• Procedure
(1) Connect the vacuum pump to the center hose
of charge set center hose
(2) Evacuation for approximately one hour.
– Confirm that the gauge needle has moved
toward -76 cmHg (vacuum of 4 mmHg or less).
(3) Close the valve (Lo side) on the charge set,
turn off the vacuum pump, and confirm that
the gauge needle does not move (approximately 5 minutes after turning off the vacuum
pump).
(4) Disconnect the charge hose from the vacuum
pump.
– Vacuum pump oil.
If the vacuum pump oil becomes dir ty or
depleted, replenish as needed.
Copyright ©2008 LG Electronics. Inc. All right reserved.
Only for training and service purposes
- 36 -
LGE Internal Use Only
3. Gas Charging
(After Evacuation)
Liquid side
Indoor unit
2-Way
valve
Open
Outdoor unit
Gas side
Open
3-Way
valve
Check valve
Charging
cylinder
Lo
(1)
OPEN
CLOSE
• Procedure
\
(1) Connect the charge hose to the charging
cylinder.
– Connect the charge hose which you disconnected from the vacuum pump to the valve
at the bottom of the cylinder.
– If you are using a gas cylinder, also use a scale
and reverse the cylinder so that the system can
be charged with liquid.
(2) Purge the air from the charge hose.
– Open the valve at the bottom of the cylinder
and press the check valve on the charge set to
purge the air. (Be careful of the liquid
refrigerant). The procedure is the same if
using a gas cylinder.
(3) Open the valve (Lo side on the charge set and
charge the system with liquid refrigerant.
– If the system can not be charged with the
specified amount of refrigerant, it can be
charged with a little at a time (approximately
150g each time) while operating the air
conditioner in the cooling cycle; however, one
time is not sufficient, wait approximately 1
minute and then repeat the procedure
(pumping down-pin).
Copyright ©2008 LG Electronics. Inc. All right reserved.
Only for training and service purposes
This is different from previous procedures.
Because you are charging with liquid refrigerant
from the gas side, absolutely do not attempt to
charge with larger amounts of liquid refrigerant
while operating the air conditioner.
(4) Immediately disconnect the charge hose from
the 3-way valve’s service port.
– Stopping partway will allow the gas to be
discharged.
– If the system has been charged with liquid
refrigerant while operating the air conditioner
turn off the air conditioner before disconnecting
the hose.
(5) Mount the valve stem nuts and the service
port nut.
– Use torque wrench to tighten the service port
nut to a torque of 1.8 kg.m.
– Be sure to check for gas leakage.
- 37 -
LGE Internal Use Only
Cycle
1. Installation (Connecting the piping between indoor and outdoor unit)
Liquid side
Indoor unit
Outdoor unit
Gas side
Gas cylinder
Lo
R22
Purge the air
• Installation
(1) Connect the piping between the indoor and
outdoor unit firmly.
– Incorrect connection may cause the leakage and
incomplete vacuuming.
(2) Attach the charging hose (manifold gage) to the
service port.
– Charging hose is necessary to check the pressure
and to inject R22 for leakage test.
– The valve of charging hose must be closed before
being connected.
(3) Inject the 100~300g R22 through the charging hose
opening the valve.
(4) Check the joint part using a gas detector or soapy
water for leakage.
– On checking, the service valve of main service port
must be closed, this test is only for checking whether
pipe connection is ok or not.
Copyright ©2008 LG Electronics. Inc. All right reserved.
Only for training and service purposes
- 38 -
(5) If there is no leakage, discharge R22 in piping
completely into tank for retrieving.
– Complete discharge is needed for vacuuming.
– If leakage is found, please fasten the joint more
tightly.
(6) After closing the valve of charging hose,
disconnect the tank and connect the vacuum pump
to charging hose and open the valve again for
vacuuming.
(7) Turn on the vacuum pump until the pressure drops
below 0kg/cm2.
(8) After vacuuming, disconnect the vacuum pump and
open the spindle of service port (liquid-side)
slightly for 30 sec and then open the spindle of
(gas side) with hexagonal wrench.
(9) Open the liquid side completely first and then the
gas side fully in order.
LGE Internal Use Only
2. Disconnection (on moving)
Liquid side
Indoor unit
Outdoor unit
Gas side
Retrieving Tank
Lo
• Disconnection
(1) Attach the charging hose (manifold gage) to
the service port.
– Connect the manifold gage once to the service
port not stopping. Stopping in the middle of
process may cause the leakage.
(6) Disconnect the piping between indoor and
outdoor unit and then put on service cap to
the service port.
(2) Purge the air in hose into special device such
as retrieving tank opening the valve of
charging- hose (gas side) slightly and then
close it tightly.
(3) Operate the air conditioner for 10~15 min until
cycle is stabilized.
(4) Close the spindle of service port (liquid sidehigh pressure) and wait till pressure of gas
side (low pressure) drops below 0kgf/cm2.
(5) After the needle of gage indicates below
0 kgf/cm2, close the valve of gas side quickly
and turn off the power.
Copyright ©2008 LG Electronics. Inc. All right reserved.
Only for training and service purposes
- 39 -
LGE Internal Use Only
3. Gas Charging
(After Evacuation)
Liquid side
Indoor unit
2-Way
valve
Open
Outdoor unit
Gas side
Open
3-Way
valve
Check valve
Charging
cylinder
Lo
(1)
OPEN
CLOSE
• Procedure
(1) Connect the charge hose to the charging
cylinder.
– Connect the charge hose which you disconnected from the vacuum pump to the valve
at the bottom of the cylinder.
– If you are using a gas cylinder, also use a scale
and reverse the cylinder so that the system can
be charged in liquid state.
(2) Purge the air from the charge hose.
– Open the valve at the bottom of the cylinder
and press the check valve on the charge set to
purge the air. (Be careful of the liquid
refrigerant). The procedure is the same if
using a gas cylinder.
(3) Open the valve (Lo side on the charge set and
charge the system with liquid refrigerant.
– If the system can not be charged with the
specified amount of refrigerant, it can be
charged with a little at a time (approximately
150g each time) while operating the air
conditioner in the cooling cycle; however, one
time is not sufficient, wait approximately 1
minute and then repeat the procedure.
Copyright ©2008 LG Electronics. Inc. All right reserved.
Only for training and service purposes
This is different from previous procedures.
Because you are charging with liquid refrigerant
from the gas side, absolutely do not attempt to
charge with larger amounts of liquid refrigerant
while operating the air conditioner.
(4) Immediately disconnect the charge hose from
the 3-way valve’s service port.
– Stopping partway will allow the gas to be
discharged.
– If the system has been charged with liquid
refrigerant while operating the air conditioner,
turn off the air conditioner before disconnecting
the hose.
(5) Mount the valve stem nuts and the service
port nut.
– Use torque wrench to tighten the service port
nut to a torque of 1.8 kg.m.
– Be sure to check for gas leakage.
- 40 -
LGE Internal Use Only
Troubleshooting
Problem
Checklist
Remedy List
1. Nothing works
Power supply to unit
Re-set circuit breaker or change fuse
PCB fuse
Change fuse
Interconnecting wiring
Look for break in cable or loose connection
PCB varistor
Replace PCB
Transformer
Replace PCB
2. Power on but system
will not function
Re-set control switch
Handset control
Re-set
Change batteries ( or hand set )
3. Power on but indoor
will not function
Mode on hand set
Power on fan terminal (pcb)
Change function
No power check relay, if faulty replace
4. Power on but compressor
will not function
5. Power on but outdoor
fan will not function
Evaporator sensor
If short circuit, replace
Connector plug
Repair or replace
Motor overload
Wait to reset and check amps
Faulty motor
Replace
Evaporator frozen
Defrost and check filter / gas charge & de-ice sensor
Motor capacitor
Replace
Room temp set point
Relay on PCB
Adjust on hand set
Replace relay or PCB
Comp contactor
If power on contactor coil, replace contactor
Comp overload
Re set, check amps and set point
Indoor sensor(de-ice )
See control functions
Comp internal overload
Allow comp to cool down, check gas
Compressor terminals
Check for good connection
De-ice sensor (heating)
Ambient temp low
Wait for defrost to terminate
Check gas pressure
Outdoor sensor
See control functions
Indoor coil too hot
Clean filter
Fan relay on PCB
Replace relay or PCB
Faulty motor
Replace motor
6. Power on but indoor
manual key will not
function
Connector plug
Faulty switch
Replace or repair
Replace switch or PCB
7. Power on but indoor
display will not function
Connector plug
Faulty display
Replace or repair
Replace display or PCB
Reset switch position
Correct or operate once
Handset control
Faulty stepping motor
Change function
Replace
Connector plug
Replace or repair
8. Indoor up-down louver
will not function
Copyright ©2008 LG Electronics. Inc. All right reserved.
Only for training and service purposes
- 41 -
LGE Internal Use Only
Problem
Checklist
Remedy List
9. Indoor left-right swing
Handset control
Change function
Faulty swing motor
Replace
Connector plug
Replace or repair
Relay on PCB
Replace relay or PCB
Handset control
Change function
will not function
10. Power on but indoor fan
lost Hi or Med or Low
Faulty motor
Replace
speed
Connector plug
Replace or repair
3 relays on PCB
Replace relay
Outdoor sensor
See control functions
Unit location
Check for air recirculation
Indoor sensor faulty
Replace
Dirty condenser coil
Clean
11. Condenser fan short
cycles on cooling
12. High discharge pressure
cooling cycle
16. System not cooling
17. High suction / low
Gas overcharge
Reduce charge
Air recirculation
Move unit
Faulty motor
Replace
Cap tube blocked
Replace
PCB relay
Replace or change PCB
Low gas charge
Add gas and leak test
Reversing valve sticking
Replace
Ambient temp low
Wait for de - ice initiation
Dirty condenser coil
Clean
Outdoor de - ice sensor faulty
Replace
PCB faulty
Replace
Low gas charge (heating)
Add gas and leak test
Indoor set point too low
Adjust temperature
Dirty filter
Clean filter
Faulty indoor sensor
Replace
PCB faulty
Replace
Indoor fan not working
Replace
Low gas charge
Replace
discharge pressure
18. Outdoor coil icing up
19. Indoor coil icing up
Add gas and leak test
Copyright ©2008 LG Electronics. Inc. All right reserved.
Only for training and service purposes
- 42 -
LGE Internal Use Only
Exploded View
1. Indoor Unit
• Models: LV-C362FLA0, LV-C422FLA0, LV-C602HLA0, LV-C60BHLA0
146811
148000B
354212
148000A
132100A
132100B
249310
359012A
145200
W48300
147581A
147590
359012B
147582
336610
147581B
330871
235450
346810
268711
152302
135303
Copyright ©2008 LG Electronics. Inc. All right reserved.
Only for training and service purposes
- 43 -
LGE Internal Use Only
2. Indoor Unit
• Models: LV-C482GLA0, LV-C48BGLA0
354212
146811
148000B
132100A
148000A
132100B
249310
359012
145200
W48300
147581A
147590
147582
147581B
336610
235450
330871
346810
268711
152302
135303
Copyright ©2008 LG Electronics. Inc. All right reserved.
Only for training and service purposes
- 44 -
LGE Internal Use Only
3. Indoor Unit
• Models: LV-C482GLA0, LV-C48BGLA0
354212
146811
148000B
132100A
148000A
132100B
249310
359012
145200
W48300
147581A
147590
147582
147581B
336610
330871
346810
268711
152302
135303
Copyright ©2008 LG Electronics. Inc. All right reserved.
Only for training and service purposes
- 45 -
LGE Internal Use Only
435301
Copyright ©2008 LG Electronics. Inc. All right reserved.
Only for training and service purposes
349480
437210
435512
267110
- 46 430411
559010
447910
349600
546810
554160
352113
W0CZZB
W0CZZA
548490
566001
268711F
137213A
552111
552112
554031
649950
435511
435300
552203B
552203A
137213B
4. Outdoor Unit
• Models: LV-C362FLA0
LGE Internal Use Only
554160
430411
Copyright ©2008 LG Electronics. Inc. All right reserved.
Only for training and service purposes
- 47 -
435511
437210
435301
267110
435512
559010
137213
546810
349600
554031
447900
352113
W0CZZA
649950
548490
W0CZZB
552111
437212
552203B
552203A
5. Outdoor Unit
• Models: LV-C422FLA0, LV-C482GLA0, LV-C602HLA0, LV-C48BGLA0, LV-C60BHLA0
LGE Internal Use Only
554160
352113
W0CZZA
430411
Copyright ©2008 LG Electronics. Inc. All right reserved.
Only for training and service purposes
- 48 -
435511
437210
435301
267110
435512
559010
137213
546810
349600
554031
447900
566001
649950
W0CZZB
552111
437212
552203B
552203A
6. Outdoor Unit
• Models: LV-C422FLA0, LV-C482GLA0, LV-C602HLA0, LV-C48BGLA0, LV-C60BHLA0
LGE Internal Use Only
P/NO : 3828A20172X
February, 2008