1
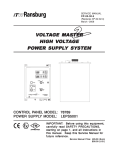
PRODUCT MANUAL
LN-9409-01.2
RansFlow
Fluid Metering System
MODEL: A12410-XXXXXXX
IMPORTANT: Before using this equipment,
carefully read SAFETY PRECAUTIONS, starting on
page 1, and all instructions in this manual. Keep
this Service Manual for future reference.
Product Manual Price: $50.00
NOTES
2
CONTENTS
Section 1: SAFETY
5-9
Safety Precautions
Hazards / Safeguards
Section 2: INTRODUCTION
10-20
RansFlow
Specifications
Features
RansFlow Selection Guide
Section 3: INSTALLATION
21-33
System Guidelines
Electrical Connections
Air Connections
Fluid Connections
Discrete Gun Inputs & Outputs
Discrete System Inputs & Outputs
Section 4: PROGRAMMING
34-75
Main Screen
Configure
System Parameters
Gun Parameters
Channel Parameters
Advanced Channel Parameters
Job Parameters
Alarms
Reports
Information
Color Change Sequence
Tools
Force I/O
View Inputs
Emulator
LN-9409-01.2 : RansFlow
3
Section 5: OPERATION
76-78
Emulator / Remote Operator Panel Screen
Start Spraying
Finished Spraying
Section 6: TROUBLESHOOTING
79-84
Power Supply
Flow Too High / Flow Too Low
Out of Tolerance
Reverse Flow
No Master Flow
Section 7: APPENDIX
85-105
Icon Definitions
Remote Operator Panel (ROP) Fault Codes
Typical Installation Prints (fractional & metric)
Control Panel Parts List
Fluid Panel Parts List
Pneumatic Interface Panel Parts List
Interconnect Board Schematic
Optical Isolator Board Schematics
Pneumatic Interface Panel Wiring Diagram
Wall Mount Enclosure Wiring Diagram
50-Conductor System I/O Cable
Recommended Spare Parts
High Voltage Interlock Valve
Warranty Policies
LN-9409-01.2: RansFlow
4
Section 1: SAFETY
Before operating, maintaining or servicing any ITW Ransburg electrostatic coating system, read and understand all of
the technical and safety literature for your ITW Ransburg products. This manual contains information that is important
for you to know and understand.
This information relates to USER SAFETY and PREVENTING EQUIPMENT PROBLEMS. To help you
recognize this information, we use the following symbols:
CAUTION - states information that tells
how to prevent damage to equipment
or how to avoid a situation that might
cause minor injury.
WARNING - states information to alert
you to a situation that might cause serious injury if instructions are not followed.
While this manual lists standard specifications and service
procedures, some minor deviations may be found between
the literature and your equipment. Differences in local codes
and plant requirements, material delivery requirements, etc.,
make such variations inevitable. Compare this manual with
your system installation drawings and appropriate ITW Ransburg equipment manuals to reconcile such differences.
Careful study and continued use of this manual will provide a
better understanding of the equipment and process, resulting
in more efficient operation, longer trouble-free service and
faster, easier troubleshooting. If you do not have the manuals and safety literature for your Ransburg system, contact
your local ITW Ransburg representative or ITW Ransburg.
WARNING
The user MUST read and be familiar with the Safety Section in this manual and the ITW Ransburg
safety literature therein identified.
This manual MUST be read and thoroughly understood by ALL personnel who operate , clean or
maintain this equipment! Special care should be taken to ensure that the WARNINGS and safety
requirements for operating and servicing the equipment are followed. The user should be aware of
and adhere to ALL local building and fire codes and ordinances as well as NFPA 33 SAFETY STANDARD, 2009 EDITION, prior to installing, operating, and/or servicing this equipment.
The hazards shown on the following pages may occur during normal use of this equipment. Please
read the hazard chart beginning on page 6.
LN-9409-01.2: RansFlow
5
AREA
Spray Area
HAZARD
SAFEGUARDS
Fire Hazard
Follow These Guidelines
Improper or inadequate operation and maintenance procedures will cause a fire hazard.
Fire extinguishing equipment must be present in the
spray area and test periodically.
Protection against inadvertent arcing that is
capable of causing fire or explosion is lost if
any safety interlocks are disabled during
operation. Frequent power supply shutdown indicates a problem in the system
requiring correction.
Spray areas must be kept clean to prevent the accumulation of combustible residues.
Smoking must never be allowed in the spray area.
The high voltage supplied to the atomizer must be
turned off prior to cleaning, flushing or maintenance.
When using solvents for cleaning:
Those used for equipment flushing should have
flash points equal to or higher than those of the
coating material.
Those used for general cleaning must have flash
points above 1000F (37.80C).
Spray booth ventilation must be kept at the rates required by NFPA 33, 2009 Edition, OSHA and local
codes. Ventilation must be maintained during cleaning
operations using flammable or combustible solvents.
Electrostatic arcing must be prevented.
Non-factory replacement parts or unauthorized equipment modifications may cause fire or injury.
If used, a key switch bypass is intended for use only
during setup operations. Production should never be
done with safety interlocks disabled.
Never use equipment for use in waterborne installations to spray solvent based materials.
LN-9409-01.2: RansFlow
6
AREA
Spray Area
HAZARD
SAFEGUARDS
Explosion
Follow These Guidelines
Improper or inadequate operation and maintenance procedures may cause an explosion.
Protection against inadvertent arcing that is
capable of causing fire or explosion is lost if
any safety interlocks are disabled during
operation. Frequent power supply shutdown indicates a problem in the system
requiring correction.
Electrostatic arcing MUST be prevented.
All electrical equipment must be located outside Class I
or II, Division 1 or 2 hazardous areas, in accordance
with NFPA 33, 2009 Edition.
Test only in areas free of flammable or combustible
materials.
The current overload sensitivity (if equipped) MUST be
set as described in corresponding section of the equipment manual. Protection against inadvertent arcing
that is capable of causing fire or explosion is lost if the
current overload sensitivity is not properly set. Frequent power shutdown indicates a problem with the
system which requires correction.
Always turn the control panel off prior to flushing, cleaning, or working on spray system equipment.
Ensure that the control panel is interlocked with the
ventilation system and conveyor in accordance with
NFPA 33, 2009 Edition.
Have fire extinguishing equipment readily available and
tested periodically.
Spray Area
Explosion - Incompatible Materials
Follow These Guidelines
Halogenated hydrocarbon solvents for example: methylene chloride and 1,1,1,Trichloroethane are not chemically compatible with the aluminum that might be used in
many system components. The chemical
reaction caused by these solvents reacting
with aluminum can become violent and lead
to an equipment explosion.
Aluminum is widely used in other spray application
equipment - such as material pumps, regulators, triggering valves, etc. Halogenated hydrocarbon solvents
must never be used with aluminum equipment during
spraying, flushing, or cleaning. Read the label or data
sheet for the material you intend to spray. If in doubt
as to whether or not a coating or cleaning material is
compatible, contact your coating supplier. Any other
type of solvent may be used with aluminum equipment.
LN-9409-01.2: RansFlow
7
AREA
Spray Area / High Voltage Equipment
HAZARD
SAFEGUARDS
Electrical Discharge
Follow These Guidelines
There is a high voltage device that can induce an electrical charge on ungrounded
objects which is capable of igniting coating
materials.
Inadequate grounding will cause a spark
hazard. A spark can ignite many coating
materials and cause a fire or explosion.
Parts being sprayed must be supported on conveyors
or hangers and be grounded. The resistance between
the part and ground must not exceed 1 mega ohm.
All electrically conductive objects in the spray area, with
the exception of those objects required by the process
to be at high voltage, must be grounded.
Any person working in the spray area must be
grounded.
Unless specifically approved for use in hazardous locations, the power supply and other electrical control
equipment must NOT be used in Class I, Division 1 or 2
locations.
Electrical Equipment
Electrical Discharge
Follow These Guidelines
High voltage equipment is utilized. Arcing
in areas of flammable or combustible materials may occur. Personnel are exposed to
high voltage during operation and maintenance.
All electrical equipment must be located outside Class I
or II, Division 1 or 2 hazardous areas. Refer to NFPA
33, 2009 Edition.
Turn the power supply OFF before working on the
equipment.
Protection against inadvertent arcing that
may cause a fire or explosion is lost if safety
circuits are disabled during operation.
Test only in areas free of flammable or combustible
material.
Frequent power supply shutdown indicates
a problem in the system which requires
correction.
Testing may require high voltage to be on, but only as
instructed.
An electrical arc can ignite coating materials
and cause a fire or explosion.
Production should never be done with the safety circuits disabled.
Before turning the high voltage on, make sure no objects are within the sparking distance.
LN-9409-01.2: RansFlow
8
AREA
Toxic Substances
HAZARD
SAFEGUARDS
Mechanical Hazard
Follow These Guidelines
Certain material may be harmful if inhaled,
or if there is contact with the skin.
Follow the requirements of the Material Safety Data
Sheet supplied by the coating manufacturer.
Adequate exhaust must be provided to keep the air free
of accumulations of toxic materials.
Use a mask or respirator whenever there is a chance of
inhaling sprayed materials. The mask must be compatible with the material being sprayed and its concentration. Equipment must be as prescribed by an industrial hygienist or safety expert, and be NIOSH approved.
Robot Work Area
Mechanical Hazard
Follow These Guidelines
Improper use or maintenance can lead to
hazardous conditions, particularly from unexpected robot manipulator movement.
Applicator adjustments or maintenance should be done
after the robot is taken out of service. Do not adjust or
repair the applicator if the robot is operating or standing
ready to start.
Refer to robot operating instructions for the procedures
to take a robot out of service.
Follow all OSHA Lockout / Tagout procedures when
performing any maintenance.
All Areas
Improper / Inadequate Training
Follow These Guidelines
Improper operation or maintenance may
create a hazard.
Personnel must be given training in accordance with
the requirements of NFPA 33, 2009 Edition.
Personnel must be properly trained in the
use of this equipment.
Instructions and safety precautions must understood
prior to using this equipment.
Comply with appropriate codes governing ventilation,
fire protection, operation maintenance, and housekeeping. OSHA references are sections 1910.94 and
1910.107. Also refer to NFPA 33, 2009 Edition and
your insurance company requirements.
LN-9409-01.2: RansFlow
9
Section 2: INTRODUCTION
the RansFlow precisely meters and mixes multi-component materials. This electronic metering system provides accuracy and repeatability for consistent finish quality.
The RansFlow System is composed of four basic elements…
Main Control Console
Fluid Panel
Remote Operator Panel (optional)
Pneumatic Interface Panel (optional)
The Main Control Console can control up to 3 channels (materials), the fluid panels are available in 1, 2, or 3 channels,
and the Remote Pneumatic Interface panels are available in single or 2-channel models.
Remote Operator Panel
Main Control Panel
Fluid Panel
LN-9409-01.2: RansFlow
10
The RansFlow is a dynamic fluid metering system using regulators and flow meters to provide true closed-loop flow control.
Operation overview:
A CHANNEL consists of:
A GUN can consist of 1, 2, or 3 CHANNELS:
LN-9409-01.2: RansFlow
11
The RansFlow can control up to 3 CHANNELS configured as 1 or 2 GUNS:
This RansFlow will maintain the fluid delivery and ratio at each individual applicator to a tolerance as close as +/-2%. A
flow meter will be located in the fluid stream prior to component mixing upstream from each applicator. This flow meter
generates pulses as material flows through it and sends them back to the flow controller. The flow controller converts
the pulses to ml/min using a calibration value defined at setup. This actual flow rate will be compared to the operator
adjustable set point and ratio. The flow controller will then make an adjustment to the MVR fluid regulators located prior
to the applicator. This process of measuring, comparing, and, adjusting is repeated 50 times per second maintaining the
required flow rate and ratio for each material. After each component leaves the flow meters, they come together in a
spiral mix tube assembly prior to delivery to the applicator.
Automatic mode utilizes inputs from a robot controller or PLC to set flow rates and ratios and activate triggers, flushes
and fills. Manual mode relies on the operator for the operation of the mixed material. A remote operator panel
(depending on the version) is mounted inside or outside the spray booth to allow control of the RansFlow by the manual
sprayer and to inform the operator of the RansFlow‟s operating conditions. This panel allows the operator to flush, fill,
run and reset faults to the RansFlow from inside the booth and it also indicates the condition of the unit: Run, Flush,
Load, or Fault..
LN-9409-01.2: RansFlow
12
MANUAL MODE examples:
AUTOMATIC MODE example:
Main Control Console
The Main Control Console is the heart of the RansFlow System. It houses the following items:
User-interface computer (incl. LCD display and touchscreen)
PC-104 Interface cards (3)
Optically isolated interface boards
20 Solenoid valves
E to P transducers (1 to 6)
DC Power supplies (2)
Air Flow Switches (2)
Power and I/O terminal strip
LN-9409-01.2: RansFlow
13
Main Control Console (continued)
Pressure Switches (for gun flush box interfacing)
Optional zener barriers for intrinsically safe flowmeters
Optional fiberoptic interface modules (for fiberoptic flowmeters)
The user-interface computer is a AMD Geode based P.C. with a non-volatile flash-disk that contains a Windows CE 5.0
operating system and the RansFlow user-interface software. The computer has a USB port for updating its software and
for backing up parameter data.
The three PC-104 I/O cards plug onto the back of the user-interface PC and control all I/O functions, including interfacing
with external control devices such as remote PLC‟s.
Ribbon cables connect the PC-104 cards to optically isolated interface boards to prevent harmful voltages, etc. from
damaging the user-interface P.C.
There are two DC power supplies housed in the main control console. One is 24 VDC for all discrete I/O signals and for
the user-interface P.C. The second supply provides +5 VDC for the optical isolator boards.
On the top of the main control console are three connectors for I/O. One is for a second gun (37-pins), the second (50pins) for all system I/O, and the third is for the Remote Operator Panel (9-pins).
The E to P pressure transducers convert a 0 to 10 VDC signal from the channel cards to a proportional 0 to 100 psi air
signal. This signal is used to pilot the MVR flow control valves.
The Zener barriers make the flowmeter sensors intrinsically safe for use inside the spray area.
The air flow switches are used to sense when a handgun is triggered (to prevent flow if a master channel flowmeter
sticks).
The pressure switches are used to interface to the optional gun flush boxes to prevent flushing and loading of handguns
when they are not in the flush box.
Fluid Panel
The Fluid Panels contain all of the „wetted‟ components for the RansFlow. These include:
MVR flow control valves
Flowmeters
Mixer Block
Spiral Mix Tube
Check Valves
Calibration Valves
Optional fluid pressure regulators
LN-9409-01.2: RansFlow
14
The flowmeters and MVR valves are available in various sizes for various materials and flow rates. Users should consult
our technical support group to determine which are required for their specific application.
The MVR Valves act as both flow control valves and on-off valves depending on the application. With manual mode
guns, the master channel MVR opens 100% during operation and the slave channel or channels are controlled to maintain the proper ratio only. With guns configured in automatic mode, all MVR valves act as flow control valves. There are
3 different needle sizes available for the MVR valves (02 for low flow, 03 for medium flow, and 04 for high flow).
The flowmeters act as the feedback mechanism to the software so that it knows what the current flow rate of the material
is. The RansFlow is capable of interfacing with any type of flowmeter that is capable of outputting a square wave whose
frequency is proportional to the flow rate. It is highly recommended (although not absolutely necessary) that these flowmeters have quadrature outputs so that reverse flow can be detected.
The calibration valves are 3-way ball valves used to direct the flow of material away from the mix block to the calibration
tubes. This is used to calibrate the flowmeters.
The check valves prevent backflow of material from one source to another. (Typically, the catalyst is run at a higher
pressure than the resin to allow it to „inject‟ itself into the resin flow stream and can, therefore, back up into the resin supply if an MVR valve is stuck open for any reason.
The Mix-Block is a four-port manifold that brings the fluid from the outlet of the resin MVR together with the outlet of the
catalyst MVR. Attached to the top of the Mix-Block is a port for an optional solvent flush valve for quick flushing of only
the mixed material from the Mix-Block out to the applicator.
Attached to the outlet of the Mix-Block is the spiral mix tube. This is simply a piece of tubing with a helical-shaped element inside the tube. This element causes the two materials (resin and catalyst) to be „folded‟ together numerous times
as the materials pass through it, thus causing it to mix.
LN-9409-01.2: RansFlow
15
Relevent Information:
The RansFlow control system achieves closed-loop control of its fluids via its configured channels and guns. A channel
consists of one MVR valve, one flowmeter, one calibration valve, and one check valve. A gun (in most cases) represents one applicator and may be configured with one channel (for flow control only) or configured with two or three channels (for ratio and flow control).
Each channel operates independently of, and simultaneously with all of the other channels in the system. The controller,
therefore, provides accurate and dynamic flow control for all channels regardless of external system variables (ie. fluid
inlet pressure, backpressure, material viscosity, flowmeter wear, etc.).
Configurable Operating Parameters:
The design of the RansFlow system allows it to be configured to meet the requirements of the application. The large
number of parameters allows the RansFlow to be used in almost any application involving flow and or ratio control of
coatings.
System Parameters are parameters that affect the overall system, which includes all channels and guns or the user
interface. They include:
Number of guns
Channels assigned to each gun
Function of the alarm horn
Gun Parameters are parameters that affect the gun. These parameters apply to all channels configured to that gun.
They include:
Mode (manual or automatic)
Which channels open during flush sequences
Default Job Number
Flow/Ratio Tolerance
Tolerance Time
Tolerance Volume
Flush Mode
Trigger-On Delay
Trigger-Off Delay
Blow-Off Time
Gun Parameters Screen
Mixed Volume
Flush Box Enable/Disable
LN-9409-01.2: RansFlow
16
Channel Parameters are parameters that affect only that specific channel. For two or three channel guns, there are
independent parameters for each of the channels. They include:
Regulator Type
MVR High
MVR Low
Pulses/Liter (Flowmeter Calibration Value)
Pressure Regulator Pressure
Advanced Channel Parameters include:
Reverse Flow Volume
C-Band
I-Band
Kp
Advanced Channel Parameters Screen
Ki
Job Parameters are parameters that are stored with the specific job number. Typically, a job number is assigned to a
specific material. In this way, totalization data and PID parameters relate directly to the material. These parameters include:
Flow Rate Setpoint
Maximum Flow (for analog control)
Minimum Flow (for analog control)
Pot-Life Time
Ratio
Pulses/Liter (flowmeter calibration values)
Valve (resin and catalyst)
MVR High
MVR Low
Pressure Regulator Setting
Kp
Ki
Job Parameters Screen
C-Band
I-Band
Text Note(s)
LN-9409-01.2: RansFlow
17
SPECIFICATIONS - Environmental / Physical
Size:
Main Control Console: 24” Wide x 24” High x 9” Deep.
Remote Operator Panel: 9.5” Wide x 6.25” High x 4” Deep.
Pneumatic Interface Panel (for second gun): 24” Wide x 12” High x 9” Deep.
Operating Temperature:
32° F to 130° F inside enclosures
100° F maximum ambient outside temperature
Operating Humidity:
0% to 95% RH
Air Input:
125 psi maximum
Power Input:
120 VAC, 50/60 Hz @ 2.25A or
240 VAC, 50/60 Hz @ 1A
(auto selecting)
LCD Display:
6.5” Diagonal, Full Color, 640 x 480 pixels (utilizing a touchscreen for data input)
Processor:
AMD Geode GX533
Flow Capacity:
10 ml‟s/min to 4000 ml‟s/min per channel (dependant upon material and flowmeter limitations)
Viscosity Range:
30 cp to 500 cp
I/O update time (incl. PID loop):
20 msec (50 times/sec)
Job Tables:
99 Jobs (P-Sets) per gun
LN-9409-01.2: RansFlow
18
FEATURES
Control of up to 3 materials from one 24” W. x 24” H. x 9” D. control console.
Possible gun configurations:
One 3-component gun
One 2-component gun and one single component gun
Two single component guns
Dual channel guns are configurable as manual (ratio control only) or automatic (flow and ratio control) modes.
Configurable operating parameters for all channels and guns. (Up to 99 „Jobs‟ per Gun can be programmed.)
Full color 6.5” LCD display with touchscreen for setup, operation, and diagnostics.
Pot-life timer monitoring and alarming.
Wide range of ratio and flow capabilities.
Discrete I/O capabilities allow interfacing to any manufacturer‟s PLC.
USB port allows backup of all operating parameters, retrieval of flow totalization data, and updating of user-interface software (stored on flash drive). USB flash drive size MUST be less than 4GB.
User interface software is Windows CE 5.0 based.
Retrofit option allows current EZ Flow, 2k220, 2k880, and DynaFlow customers upgrade their electronics and use their
existing fluid components.
Extremely easy to program color change sequencer for flushing and loading can handle up to 10 colors and 3 different
catalysts.
All discrete and analog inputs and outputs can be monitored and forced for diagnostic purposes.
Analog input capability for flow rate setpoints (0-10 VDC).
Convenient test points on I/O boards make it simple to connect data acquisition hardware for process monitoring and
fine tuning.
All discrete inputs and outputs optically isolated.
Gun flush box interface I/O option is available.
Optional inlet pressure control allows users to program inlet fluid pressure to MVR valves.
Optional Remote Operator Panel uses Hall-Effect switches and a magnet for operation. (This allows the ROP to be
mounted outside the booth on a booth window and operated from inside the booth, eliminating overspray contamination.)
All I/O (including PID loop) are updated 50 times/second.
Extremely robust PID loop is factory tuned for nearly all setups.
LN-9409-01.2: RansFlow
19
SELECTION GUIDE
Control Panel Configuration Part Number
LN-9409-01.2: RansFlow
20
Section 3: INSTALLATION
System Guidelines:
Installation Prints:
Drawings and information contained in this section of the manual is applicable to most installations. However in some
special cases, ITW Ransburg may supply custom installation drawings for your specific site. It is highly recommended
that if your installation differs significantly from the installation drawings supplied by ITW Ransburg, you notify your ITW
Ransburg representative to insure that standard installation practices are not violated and to have your prints updated to
reflect the installation accurately for future reference. Typical fractional and metric installation prints can be found in the
Appendix section of this manual.
Cable Assemblies:
Interconnections between all control panels and the fluid panels are made using manufactured cable assemblies with
heavy duty connectors. This simplifies installation and eliminates the possibility of items being wired incorrectly. The
one exception to this is the discrete interface I/O wiring. These connections will vary greatly from installation to installation. This can involve well over 50 connections per control console and, therefore, require a cable with the proper 50-pin
connector on one end (P/N: A12487-XXX).
Equipment Grounding:
All panels should be grounded in accordance with either the National Electrical Code or local electrical codes (whichever
is more stringent). Refer to the electrical installation drawings
provided in this manual to locate the grounding terminal for all control panels. If in doubt, contact your ITW Ransburg
representative for clarification.
Equipment Locations:
All of the RansFlow panels must be located outside of the hazardous area. If in doubt, contact your ITW Ransburg representative for clarification.
There are four basic panels used in the RansFlow system:
Main Control Console
Fluid Panel
Remote Operator‟s Panel (optional)
Pneumatic Interface Panel (optional)
LN-9409-01.2: RansFlow
21
The Fluid Panel should be placed within 20‟ of the control console (or Pneumatic Interface Panel in the case of Gun #2)
to minimize pneumatic delays between the E to P transducers and the MVR valves.
Fluid Regulators:
It is highly recommended that a pilot operated fluid regulator (similar to the ITW DR-1 regulator) be used on the inlet of
all of the MVR valves unless they are supplied from pressure pots.
The RansFlow can (optionally) control the pilot pressure to these fluid regulators. (It is sometimes necessary to use
higher pressures for high viscosity materials than lower viscosity materials, etc.) The RansFlow allows the user to program a different pressure for every job and every channel so that the inlet pressure to the MVR valves can be fine-tuned
to the specific material and flow rate.
Pneumatic Interface Panel for Gun #2:
If more than one fluid panel is to be controlled from one RansFlow controller, it is necessary to use a second pneumatic
interface panel. In this instance, the software will be configured for two guns, Gun #1 and Gun #2 (See gun configuration chart, below.)
Possible Gun Configurations:
One 3-channel gun
Channels 1, 2, & 3
Two single-channel guns
Gun #1 (Channel 1)
Gun #2 (Channel 2)
One single-channel gun and one 2-channel gun
Gun #1 (Channel 1)
Gun #2 (Channels 2 & 3)
Note: Channel 3 cannot be configured as a master channel!
Control / Interface Panel Overview:
LN-9409-01.2: RansFlow
22
STEP 1 - Main Power to Control Panel Connection
LN-9409-01.2: RansFlow
23
STEP 2 - Flow Meters and I/O Connections
LN-9409-01.2: RansFlow
24
STEP 3 - CCV and Gun Connections
LN-9409-01.2: RansFlow
25
STEP 4 - Gun Flush Box and Transducer / MVR Connection
LN-9409-01.2: RansFlow
26
STEP 5 - Atomization Air and Supply Air Connections
LN-9409-01.2: RansFlow
27
STEP 6 - Fluid Connections
LN-9409-01.2: RansFlow
28
Discrete (Digital and Analog) GUN Inputs and Outputs
Pin
No.
Name
Type
Description
1
Resin Air Solenoid
Output
2
Color #9 Solenoid
Output
Intended to drive the CCV air valve on the resin color change valve stack
assy. It can be programmed to turn on in steps 1 and/or 3 of the flush sequence and it pulses in step 2.
Intended to drive the #9 color valve on the CCV stack.
3
Color #7 Solenoid
Output
Intended to drive the #7 color valve on the CCV stack.
4
Color #5 Solenoid
Output
Intended to drive the #5 color valve on the CCV stack.
5
Color #3 Solenoid
Output
Intended to drive the #3 color valve on the CCV stack.
6
Color #1 Solenoid
Output
Intended to drive the #1 color valve on the CCV stack.
7
Ch. B Transducer
Output
8
Resin Solvent Sol.
Output
9
Trigger Solenoid
Output
10
Catalyst #2 Solenoid
Output
A 0-10 VDC output command to drive the E to P transducer which, in turn,
drives the MVR flow control valve (Ch. B).
Intended to drive the CCV solvent valve on the resin color change valve
stack assy. It can be programmed to turn on in steps 1 and/or 3 of the flush
sequence and it pulses in step 2.
Intended to be shuttled together with the solenoid valve that triggers the applicator during normal spray sequences. It allows the color change sequencer to trigger the applicator during flush and load sequences. (It is
turned on in the 3rd step of the load sequence and the 4th step of the load
sequence.
Intended to drive the #2 catalyst valve on the catalyst CCV stack.
11
Ch. C Transducer
Output
12
Flowmeter C Phase
Input
A 0-10 VDC output command to drive the E to P transducer which, in turn,
drives the MVR flow control valve (Ch. C).
One of the quadrature feedback signals from the channel C flowmeter.
13
Flowmeter A Phase
Input
One of the quadrature feedback signals from the channel A flowmeter.
14
Flowmeter B Phase
Input
One of the quadrature feedback signals from the channel B flowmeter.
15
Flowmeter B Source
Input
One of the quadrature feedback signals from the channel B flowmeter.
16
Trigger
Input
17
Ch. C MVR Enable
Output
Connecting this input to +24 VDC starts flow on a gun configured in automatic mode.
Intended to drive the enable valve on the inlet of the channel C MVR.
18
Ch. A Transducer
Output
19
+24 VDC
N/A
20
Color #10 Solenoid
Output
Intended to drive the #10 color valve on the CCV stack.
21
Color #8 Solenoid
Output
Intended to drive the #8 color valve on the CCV stack.
22
Color #6 Solenoid
Output
Intended to drive the #6 color valve on the CCV stack.
23
Color #4 Solenoid
Output
Intended to drive the #4 color valve on the CCV stack.
24
Color #2 Solenoid
Output
Intended to drive the #2 color valve on the CCV stack.
A 0-10 VDC output command to drive the E to P transducer which, in turn,
drives the MVR flow control valve (Ch. A).
LN-9409-01.2: RansFlow
29
Pin
No.
Name
Type
Description
25
Ch. A MVR Enable
Output
Intended to drive the enable valve on the inlet of the channel A MVR.
26
Dump Solenoid
Output
27
Catalyst #1 Solenoid
Output
Intended to drive a dump valve at the applicator. On in steps 1 & 2 of the
load sequence and steps 1, 2, & 3 of the flush sequence.
Intended to drive the #1 catalyst valve on the catalyst CCV stack.
28
Catalyst #3 Solenoid
Output
Intended to drive the #3 catalyst valve on the catalyst CCV stack.
29
Cat. Solvent Solenoid
Output
30
Flowmeter C Source
Input
Intended to drive the CCV solvent valve on the catalyst color change valve
stack assy. It can be programmed to turn on in step 2 of the flush sequence.
One of the quadrature feedback signals from the channel C flowmeter.
31
DC Common
N/A
DC Common to all I/O signals and DC power supply voltages.
32
Flowmeter A Source
Input
One of the quadrature feedback signals from the channel A flowmeter.
33
DC Common
N/A
DC Common to all I/O signals and DC power supply voltages.
34
Ch. B MVR Enable
Output
35
Flush Box “A” Ready
Input
Signal to be on with gun in flush box and flush box lid closed.
36
Flush Box “B” Ready
Input
Signal to be on with gun in flush box and flush box lid closed.
37
+24 VDC
N/A
Intended to drive the enable valve on the inlet of the channel B MVR.
LN-9409-01.2: RansFlow
30
Discrete (Digital and Analog) SYSTEM Inputs and Outputs
Pin
No.
Name
In or
Out
Type
1
Spare
Output
24 VDC
Not currently implemented in software
2
Mixed Volume
Cleared, Gun 2
Pressure Regulator,
Channel 3
Output
24 VDC
Output
0-10
VDC
4
Pressure Regulator,
Channel 2
Output
0-10
VDC
5
Actual Flow, Gun 2
Output
0-10
VDC
6
Flow Rate Command,
Gun 2
Input
0-10
VDC
7
Input
24 VDC
8
Job Select Bit 1,
Gun 2
Flush, Gun 2
Input
24 VDC
9
Halt/Reset, Gun 2
Input
24 VDC
10
Run, Gun 2
Input
24 VDC
11
Job Strobe, Gun 1
Input
24 VDC
12
Input
24 VDC
Input
24 VDC
Input
24 VDC
Input
24 VDC
16
Job Select Bit 40,
Gun 1
Job Select Bit 10,
Gun 1
Job Select Bit 4,
Gun 1
Job Select Bit 1,
Gun 1
Flush, Gun 1
Input
24 VDC
This output goes on when the mixed volume of material has
flowed through the flowmeters during the flush cycle.
This is an analog output programmed in the job parameters
intended to drive an E to P transducer to drive a fluid regulator
This is an analog output programmed in the job parameters
intended to drive an E to P transducer to drive a fluid regulator
Analog indication of actual flow rate. If Min. Flow is programmed at 0 ml‟s/min and Max. Flow is programmed at
1000 ml‟s/min and 400 ml‟s/min is flowing, this output will be
at 4.00 volts DC.
For remote analog control of flow rate. If Min. Flow is programmed at 0 ml‟s/min and Max. Flow is programmed at
1000 ml‟s/min and 4.00 volts DC is sent to this input, the
gun will flow at 400 ml‟s/min.
For remote selection of next job to be loaded. See appendix for recommended job load timing sequence.
Connecting this input to +24 VDC initiates the flush sequence
Connecting this input to +24 VDC (momentarily) resets a
faulted gun or halts a gun in run (active) mode.
Connecting this input to +24 VDC (momentarily) puts a
halted (non-faulted) gun in run (active) mode.
For remote selection of next job to be loaded. See appendix for recommended job load timing sequence.
For remote selection of next job to be loaded. See appendix for recommended job load timing sequence.
For remote selection of next job to be loaded. See appendix for recommended job load timing sequence.
For remote selection of next job to be loaded. See appendix for recommended job load timing sequence.
For remote selection of next job to be loaded. See appendix for recommended job load timing sequence.
Connecting this input to +24 VDC initiates the flush sequence
17
+24 VDC
N/A
18
H.V. Enable, Gun 2
Output
24 VDC
19
Fault, Gun 2
Output
24 VDC
20
Job Strobe, Gun 2
Input
24 VDC
21
Pressure Regulator,
Channel 1
Output
0-10
VDC
3
13
14
15
Description
This output goes on once the load sequence is completed
and the gun flush box(es) is/are closed.
This output goes on when the gun faults.
For remote selection of next job to be loaded. See appendix for recommended job load timing sequence.
This is an analog output programmed in the job parameters
intended to drive an E to P transducer to drive a fluid regulator
LN-9409-01.2: RansFlow
31
Pin
No.
Name
In or
Out
Type
Description
22
Actual Flow, Gun 1
Output
0-10
VDC
23
Flow Rate Command,
Gun 1
Input
0-10
VDC
24
Load, Gun 2
Input
24 VDC
25
Spare
Output
24 VDC
Analog indication of actual flow rate. If Min. Flow is programmed at 0 ml‟s/min and Max. Flow is programmed at
1000 ml‟s/min and 400 ml‟s/min is flowing, this output will be
at 4.00 volts DC.
For remote analog control of flow rate. If Min. Flow is programmed at 0 ml‟s/min and Max. Flow is programmed at
1000 ml‟s/min and 4.00 volts DC is sent to this input, the
gun will flow at 400 ml‟s/min.
Connecting this input to +24 VDC initiates the load sequence
Not currently implemented in software
26
DC Common
N/A
27
Input
24 VDC
Input
24 VDC
Input
24 VDC
Input
24 VDC
31
Job Select Bit 80,
Gun 1
Job Select Bit 20,
Gun 1
Job Select Bit 8,
Gun 1
Job Select Bit 2,
Gun 1
Load, Gun 1
Input
24 VDC
32
Halt/Reset, Gun 1
Input
24 VDC
33
Run, Gun 1
Input
24 VDC
34
Pot Life Expired,
Gun 2
Output
24 VDC
35
Gun Active, Gun 2
Output
24 VDC
36
Input
24 VDC
Input
24 VDC
Input
24 VDC
Input
24 VDC
Input
24 VDC
Input
24 VDC
Input
24 VDC
43
Job Select Bit 80,
Gun 2
Job Select Bit 20,
Gun 2
Job Select Bit 40,
Gun 2
Job Select Bit 8,
Gun 2
Job Select Bit 10,
Gun 2
Job Select Bit 2,
Gun 2
Job Select Bit 4,
Gun 2
DC Common
44
H.V. Enable, Gun 1
Output
24 VDC
45
Mixed Volume
Cleared, Gun 1
Output
24 VDC
28
29
30
37
38
39
40
41
42
N/A
DC Common to all I/O signals and DC power supply voltages.
For remote selection of next job to be loaded. See appendix for recommended job load timing sequence.
For remote selection of next job to be loaded. See appendix for recommended job load timing sequence.
For remote selection of next job to be loaded. See appendix for recommended job load timing sequence.
For remote selection of next job to be loaded. See appendix for recommended job load timing sequence.
Connecting this input to +24 VDC initiates the load sequence
Connecting this input to +24 VDC (momentarily) resets a
faulted gun or halts a gun in run (active) mode.
Connecting this input to +24 VDC (momentarily) puts a
halted (non-faulted) gun in run (active) mode.
This output goes on when the mixed material in the applicator has been mixed for a time greater than the time programmed in the job parameter for pot-life time.
This output goes on if the gun is in run mode or if it is loading or flushing.
For remote selection of next job to be loaded. See appendix for recommended job load timing sequence.
For remote selection of next job to be loaded. See appendix for recommended job load timing sequence.
For remote selection of next job to be loaded. See appendix for recommended job load timing sequence.
For remote selection of next job to be loaded. See appendix for recommended job load timing sequence.
For remote selection of next job to be loaded. See appendix for recommended job load timing sequence.
For remote selection of next job to be loaded. See appendix for recommended job load timing sequence.
For remote selection of next job to be loaded. See appendix for recommended job load timing sequence.
DC Common to all I/O signals and DC power supply voltages.
This output goes on once the load sequence is completed
and the gun flush box(es) is/are closed.
This output goes on when the mixed volume of material has
flowed through the flowmeters during the flush cycle.
LN-9409-01.2: RansFlow
32
Pin
No.
Name
In or
Out
Type
Description
46
Pot Life Expired,
Gun 1
Output
24 VDC
47
Gun Fault, Gun 1
Output
24 VDC
This output goes on when the mixed material in the applicator has been mixed for a time greater than the time programmed in the job parameter for pot-life time.
This output goes on when the gun faults.
48
Gun Active, Gun 1
Output
24 VDC
49
System Pulse
Output
24 VDC
50
+24 VDC
N/A
This output goes on if the gun is in run mode or if it is loading or flushing.
This output pulses on and off at approximately a 1 Hz rate
as long as the RansFlow software is running.
LN-9409-01.2: RansFlow
33
Section 4: PROGRAMMING
Main Screen
This is the screen that appears immediately after powering up the RansFlow controller. All data on this screen upon
power up is non-valid random data and should be disregarded until a job is loaded from the Emulator Screen.
The icons across the bottom, starting from the left are:
Configure
Reports
Color Change Sequencer
Tools
Emulator (Operator Panel)
If there is more than one gun configured, there will be two tabs displayed at the top of the screen. Select the gun number you wish to monitor or control.
Note: The RansFlow can control up to three channels of fluid. They can be configured in any of the following ways:
One, single channel gun.
Two, single channel guns.
One single channel gun and one two component (2-channel) gun. (The 2-channel gun MUST be configured
to be channels B & C).
One three component (3-channel) gun.
One 2-channel gun (can be configured as channels A & B OR B & C if a 3-channel unit was ordered).
Immediately below the gun tab (or tabs) there is a gun status line, indicating the status of that gun (i.e. Run, Idle,
Faulted, Loading, Flushing, etc.).
LN-9409-01.2: RansFlow
34
Main Screen (continued)
Once a valid job has been loaded, the information in the left column of the Main Screen indicates the targets or setpoints
for ratio, flow rate and the pot-life of the material. It also indicates what the next job number to be loaded is (if one was
toggled in externally while still running the current job).
Note: The ratio and flow rate setpoint can be changed “on the fly” by touching the ratio or flow rate boxes in the left column. A keypad will popup on the screen, allowing the user to change the target ratio or flow rate. This is a temporary
change only and is not saved to the job data. This temporary change will be discarded the instant a new job is loaded
(even if it is the same job number that is currently running).
In the right column real-time information is provided to allow the user to monitor the current running job number, the actual ratio, the actual flow rate, and the remaining pot-life of the material currently in the applicator. The ratio being displayed is an average over a period of time. If the user wants to get a more instantaneous idea of the ratio, simply touch
the volume box in the right column and a small box will popup asking if you would like to reset the volume. If you answer
yes, the volume box at the bottom of the column will be zeroed and the ratio being displayed will be averaged once again
from that point forward.
LN-9409-01.2: RansFlow
35
Configure Screen
When you touch the left function button on the main screen, you will be taken to the Configure Selection Screen.
The icons across the bottom of the screen, starting from the left are:
Return to the Home Screen
Go back one screen
Save parameters to Excel file
Save Configuration and Job Data (to USB Port). USB flash drive size MUST be less than 4GB.
Read Configuration and Job Data (from USB Port)
Buttons on this screen allow the user to select which parameters they wish to examine or edit.
System Parameters
Gun Parameters
Channel Parameters
Job Parameters
LN-9409-01.2: RansFlow
36
Configure Screen (continued)
The icon on the middle key:
allows users to save parameters in Excel (comma separated variables, .csv) format to a memory stick and take them
to a printer to be printed out. Two files are created, one that has all of the job data and second that has all of the
totalization data.
LN-9409-01.2: RansFlow
37
System Parameters Screen
The icons across the bottom of the screen, starting from the left are:
Return to Home Screen
Go back one screen
Not used
Not used
Save System Parameters to flash memory
There are only three things that relate to the system that need to be configured:
The number of guns
The channels assigned to each gun
Horn configuration
LN-9409-01.2: RansFlow
38
System Parameters Screen (continued)
The number of guns can only be 1 or 2. As stated previously, they can be configured one of five different ways:
One, single channel gun.
Two, single channel guns.
One single channel gun and one two component (2-channel) gun. (The 2-channel gun MUST be configured
to be channels B & C).
One three component (3-channel) gun.
One 2-channel gun (can be configured as channels A & B or B & C if a 3-channel unit was ordered).
The radio buttons inside the Horn box allows the user to set when the horn sounds and if the sound will be one continuous tone or a pulsing tone. Options for when the horn sounds are:
Never
If a gun fault occurs
If a pot-life timer expires
If either a gun fault or pot life timer expires (both radio buttons selected)
LN-9409-01.2: RansFlow
39
System Parameters Screen (continued)
Note: If a gun fault occurs (whether or not the horn is configured to sound) the controller turns off all flow control valves
configured to that gun. If a pot-life time expires, the controller does not turn off the flow control valves. (This is simply a
warning to the user that the material in the applicator is approaching the point where it may coagulate.)
Note: If the number of channels configured to a gun changes, it is necessary to reboot the computer (userinterface touch-screen) for change to take effect.
Hitting the back button returns you to the Configure Selection Screen.
LN-9409-01.2: RansFlow
40
Gun Parameters Screen
This screen allows the user to configure parameters specific to the gun.
The icons across the bottom of the screen, starting from the left are:
Return to Home Screen
Go back one screen
Not used
Not used
Save Gun Parameters to flash memory
CHANNELS
This box indicates which channels are configured to the gun. If it is necessary to change this setting, it must be done on
the Systems Parameters screen.
MODE
When this box is touched, a popup will allow the user to select either Manual or Automatic mode for the gun.
LN-9409-01.2: RansFlow
41
Gun Parameters Screen (continued)
In manual mode, there is no flow control on the master channel and the user controls the flow rate either with an external fluid regulator or by adjusting the needle on the applicator. The controller monitors the flow of the master channel
and simply controls the ratio of the slave channel or channels based on the programmed ratio. (Note that during the load
sequence, if there is a flow control valve on the master channel, the color change sequencer will attempt to control the
flow rate of the master channel to prevent flow too high faults as the fluid fills the empty supply lines.)
In automatic mode, the controller controls the flow rate and ratio of all channels configured to the gun based on the target flow rate and target ratio.
CLEAN CHANNELS
This allows the user to control which materials are flushed during the color change sequences. If set for No, the color
valves and flow control valves will not be opened during the color change sequence. (These channels have to be manually flushed either by pneumatically bypassing the flow control valves/regulators or by forcing the necessary valves/
regulators open on the Force I/O Screen.)
DEFAULT JOB
This is the job that is automatically loaded into the gun at power up. (Note that this only loads the gun parameter data
and does not automatically initiate a color load sequence.)
LN-9409-01.2: RansFlow
42
Gun Parameters Screen (continued)
FLOW TOLERANCE
This parameter allows the user to specify how far out of tolerance the flow rate and ratio are allowed to vary before the
system generates a fault and closes all valves.
For example:
If flow tolerance is set for ±5% on a 2-channel gun, with a target flow rate of 150 cc‟s/min and
a 2:1 target ratio, this indicates that the master channel should be flowing at 100 cc‟s/min and
the slave channel should be flowing at 50 cc‟s/min. So...
Flow Rate Errors:
A flow too low on channel A would occur if the flow rate of A falls below 95 cc‟s/min.
A flow too high on channel A would occur if the flow rate of A goes above 105 cc‟s/min.
A flow too low on channel B would occur if the flow rate of B falls below 47.5 cc‟s/min.
A flow too high on channel B would occur if the flow rate of B goes above 52.5 cc‟s/min.
(Keep in mind that the flow rate has to remain out of tolerance for the duration of the time programmed for tolerance
time.)
LN-9409-01.2: RansFlow
43
Gun Parameters Screen (continued)
Ratio Errors:
Since a 2:1 ratio results in 66.67% of the channel A material and 33.33% of the channel B material...
A ratio too high fault will occur if the actual ratio calculated is greater than 71.67% of the mixed material.
A ratio too low fault will occur if the actual ratio calculated is less than 61.67% of the mixed material.
(Keep in mind this is based on the value programmed in for tolerance volume.)
TOLERANCE TIME
This is the amount of time any error (except ratio) must persist before a fault is generated. It is recommended that this
never be programmed less than 3 seconds as numerous nuisance faults will probably occur. (Note: Ratio checks are
based on volume, not time. See Tolerance Volume below.)
TOLERANCE VOLUME
This parameter is only used with multiple component guns. Flow rates of all channels are checked 50 times/second
(every 20 milliseconds). Ratio, however, is checked based on volume rather than flow rate. Every time this volume of
material has exited the applicator, the controller calculates the actual ratio based on how much of that volume flowed
through each of the 2 or 3 channels. If the actual ratio (based on the volumes measured) is outside the flow tolerance
setting, a ratio fault will occur.
LN-9409-01.2: RansFlow
44
Gun Parameters Screen (continued)
FLUSH MODE
Currently there is only one flush and load sequence saved for all jobs. Therefore, this should always be left at the default value of 1.
TRIGGER-ON DELAY (ms)
This allows the operator to put a short delay between the time that the controller sees a trigger input signal and when it
turns on the flow control valves to start flow. This is to prevent flow too low faults if there is a pneumatic delay getting the
applicator opened. It is specified in milliseconds. (250 milliseconds = ¼ second)
TRIGGER-OFF DELAY (ms)
This allows the operator to put a short delay between the time that the controller sees the trigger input signal go off and
when it closes the flow control valves. This prevents the fluid pressure from dropping off while the applicator is closing.
BLOW-OFF TIME (sec)
This parameter is only functional with manual mode guns. This parameter allows a hand painter to blow off a part prior
to beginning the spray operation. Note that the timer accumulates until the controller sees flow through the master channel flow meter.
LN-9409-01.2: RansFlow
45
Gun Parameters Screen (continued)
The reason this is important is that there is the possibility that the gears in the master channel flowmeter could become
stuck. If this occurs, material can slip by the gears without the gears turning. As a result, there is no signal fed back to
the controller and it has no way of knowing that master channel component is flowing. The controller, therefore, does
not meter in any of the slave component or components. This results in only a single component material being applied
to the parts. If the controller sees a trigger input for a longer time than the blow off time when running the handgun air
through the air flow switch, it checks to make sure that the master channel flowmeter is spinning and that it is metering in
the proper slave material or materials. If not, the controller generates a no master flow fault and shuts down the gun.
The system can be operated without the trigger signal (the slave channel or channels are controlled based on the flow
rate of the master) but this is risky. If more than one applicator is connected to the output of the fluid panel, the trigger
signals from all applicators should be paralleled and fed back to the trigger input of the controller. Note that this may
require a diode array to prevent feeding back voltage to the triggering devices. If you are unsure how to implement this
scheme, contact your ITW Ransburg representative or our technical support group.
NOTE:
It is highly recommended that all handguns have air flow switches attached to the atomization airline feeding the handgun. The signal from that air flow switch should be wired back to the trigger input of the controller (System I/O connector) if the factory installed air flow switch is NOT being used.
LN-9409-01.2: RansFlow
46
Gun Parameters Screen (continued)
POT-LIFE VOLUME (ml)
This volume represents the volume of material in the system that has been mixed (a.k.a. mixed volume). It, basically, is
all of the material between the top of the spiral mix tube and the applicator or applicators. It is calculated based on the
inside diameter of the fluid lines and their lengths. Use the following formula to calculate this value:
Volume (ml) = d2 x L x 12.87
Where:
d = the inside diameter of the tubing (in inches)
L = the length of the tubing (in inches)
Also add in the appropriate volumes for the spiral mix tube and the applicator or applicators.
Flush Box A and B Radio Buttons
In the lower right hand corner of the screen are two radio buttons, one labeled Flush Box A and the other Flush Box B.
There are two pressure switches in the bottom of the control console that have been provided to interface with gun flush
boxes. If these radio buttons are enabled on this screen, the color change sequencer will not be allowed to operate
unless a signal is coming into the pressure switch or switches that are enabled on this screen. (Pressure on the switch
indicates to the software that the applicator or applicators are in the flush box, that the flush box is closed, and that the
high voltage power supply, if used, is disabled.)
Once all of these parameters meet your requirements, make sure you touch the save button in the bottom right hand
corner of the screen to save the parameters to the flash disk.
LN-9409-01.2: RansFlow
47
Channel Parameters Screen
The icons across the bottom of the screen, starting from the left are:
Return to Home Screen
Go back one screen
Not used
Advanced Channel Parameters
Write displayed parameters to operating gun (these parameters will not be saved to flash memory!)
Note: All channel parameters displayed on this screen and the advanced channel parameters (accessed by touching
the lock symbol) are for temporary changes only (except for the Reverse Flow parameter on the Advanced Screen).
When any of these parameters are changed and then saved by touching the diskette symbol, the data is changed for the
job currently running („on the fly‟) but are not saved to the job. Therefore, when a new job is loaded (even if it is the
same job currently running), the data programmed in the job file will over write these temporary parameters.
Since this is the only place to modify the Reverse Flow Parameter, when the save button is pressed, this parameter is
saved to flash memory and is permanent for all jobs until, once again, changed on this screen. Any other changes that
are intended to be permanent must be made on the Edit Job Data Screen.
Note: When making changes to the parameters on this screen, they have to be saved with the button in the lower right
corner of the screen (the disk icon) before they temporarily take effect. They do not take effect when the enter key is
pressed on the keypad!
LN-9409-01.2: RansFlow
48
Channel Parameters Screen (continued)
REGULATOR TYPE
This parameter allows the user to specify what type of flow control device is being used on that specific channel. This is
a label ONLY and has NO EFFECT on the operation of the system.
MVR HIGH
This parameter allows the user to control the maximum pressure that is sent to the flow control device from the E
(voltage) to P (pressure) transducer. This pressure is used for flush sequences and for opening the master channel on a
gun configured for manual operation.
MVR LOW
This parameter allows the user to program the cracking pressure of the flow control valve. This parameter should be
programmed just below the cracking pressure to prevent leakage of material past the flow control valve when the gun is
triggered off. This will result in the fastest possible response in the flow control loop when switching from a no-flow state
to a flow-state. A value of 20 psi is recommended for weep-style MVR valves and 10 psi is recommended for the
weepless-style MVR valves.
LN-9409-01.2: RansFlow
49
Channel Parameters Screen (continued)
PULSES PER LITER
This parameter allows the operator to change the calibration values for the flowmeters. This is normally done through
the calibration routine.
PRESSURE REGULATOR
This allows the operator to program a fixed pressure to be delivered to a pilot operated fluid regulator on the inlet of the
flow control valve for each channel. (Typically, thicker materials require a higher inlet pressure to the flow control valve.)
Note that this is an optional feature.
LN-9409-01.2: RansFlow
50
Advanced Channel Parameters Screen
(Note that this screen is accessed by touching the lock symbol on the Channel Parameters Screen.)
The icons across the bottom of the screen, starting from the left are:
Return to Home Screen
Go back one screen
Not used
Not used
Write displayed parameters to operating gun (these parameters will not be saved to flash memory!)
REVERSE FLOW
This parameter allows the user to control how much flow in the reverse direction is allowed before a fault is generated
and the system is shut down. Note that programming a value of zero (0) here is not recommended because there is
some unavoidable reverse flow that occurs because of hydrostatic kickback when some applicators turn their trigger
valves off. The default value of 50 cc‟s works well in most cases. Note: This is the only parameter on this screen that is
saved to flash memory and used on all future loaded jobs. All other parameters when changed on this screen are temporary only and will revert back to the values stored with the job when the next job is loaded.)
LN-9409-01.2: RansFlow
51
Advanced Channel Parameters Screen (continued)
C-BAND
This is the control band for the PID control loop. In general, this setting should never need to be changed unless the
flow meter has been changed to a flow meter with a significantly different calibration value. This parameter keeps the
system steady while maintaining a constant flow rate. Too large a value can keep the system from getting to the target
flow rate while too small a value may cause the flow rate to oscillate.
I-BAND
This is the integrator band for the PID control loop. In general, this setting should never need to be changed unless the
flowmeter has been changed to a flowmeter with a significantly different calibration value. This parameter controls how
responsive the system is when the desired flow rate changes. Too large a value will cause the system to overshoot the
target flow while too small a value may prevent the system from reaching the target flow rate or possibly even cause the
flow rate to oscillate.
Kp
This is the Proportional Gain parameter for the PID loop. It controls how fast the PID loop opens the flow control valve
when flow is initially requested. A value too small here will cause an unnecessary delay in flow on the initial trigger on of
the applicator or a slow ramp up of flow. Too large of a value here will cause the flow to oscillate. The default value of
2000 works well in most cases.
Ki
This is the Integral Gain parameter for the PID loop. It controls how fast the PID loop pulls the actual flow back to the
target flow after the proportional portion of the PID loop has the actual flow approaching the target.
LN-9409-01.2: RansFlow
52
Job Parameters Screen
Note: If you change any of the
parameters on this screen for
the job number that is currently
running, they will not change
the parameters currently running. To actually change parameters that are currently running, the job must be reloaded
from the Emulator Screen after
the changes to the Job Parameters Screen have been
saved.
This is the screen where all of the parameters stored with the “Job” are examined, modified, and saved.
The icons across the bottom of the screen, starting from the left are:
Return to Home Screen
Go back one screen
Not used
Not used
Save Job Parameters to flash memory
If two guns are configured, there will be two gun tabs at the top of the screen. Select the gun number that you wish to
examine or edit.
Notice the small magnifying glass immediately to the right of the Job number box. This button allows you to “Examine”
parameters for any job and edit them, if necessary. For example, if you wanted to examine and edit parameters for job
number 22, touch the small box immediately to the right of the word Job. A keypad will popup and allow you to enter a
job number. (For the RansFlow, valid job numbers range from 1 to 99.) Enter the job number 22 (or whatever job you
wish to examine/edit) and touch the enter (ENT) key and then touch the magnifying glass to retrieve the values. If a
valid job #22 was previously stored, its parameters will be displayed. If that job number is not in memory, the job number
will change to 0, indicating that this job number is not in memory.
LN-9409-01.2: RansFlow
53
Job Parameters Screen (continued)
Modify the parameters as necessary. (Don‟t forget to modify all channels with the channel tabs on the right section of
the screen.) If you want to save the parameters to the job number currently being displayed in the job number box, simply touch the save button. (The save button is in the lower right corner and has a diskette icon in it.) If you wish to save
the displayed parameters to a different job number (or if the job number displayed is 0), change the number in the job
number box to the desired value and then touch the save button.
Channels
This value is not adjustable on this screen, it appears for informational purposes only. Channels and guns are configured on the System Parameters screen. This box simply indicates how many channels are configured to the gun. The
number of channel tabs on the right side of the screen will match this number. Make sure all parameters for all channels
are programmed.
Flow Rate
This is the target flow rate for the gun. If the gun is configured as a manual mode gun, this parameter is ignored. If analog flow control is to be used, this value should be 0. (That is, this value overrides the Min Flow and Max Flow settings.)
It is expressed in ml‟s/min (cc‟s/min).
Max Flow
This parameter is the target flow rate desired from the applicator when a 10 VDC signal is received at the analog flow
rate input. It is expressed in ml‟s/min (cc‟s/min).
LN-9409-01.2: RansFlow
54
Job Parameters Screen (continued)
Min Flow
This is the target flow rate desired from the applicator when a 0 VDC signal is received at the analog flow rate input. It is
expressed in ml‟s/min (cc‟s/min).
Pot Life
This is the amount of time it takes for the plural component material to “setup”. The system keeps track of the oldest
material in the fluid line (which basically is the material in the applicator) and sounds an alarm when the mixed material
in the applicator has been mixed for this amount of time. It is expressed in seconds.
Notes
This box allows the user to enter some simple text notes that they would like displayed with the job data. (Possibly, descriptions of the material or parts that should be used with these job parameters, etc.) Editing of this text requires connection of a keyboard inside the controller. Contact your ITW Ransburg Representative for more information on adding
this text.
Ratio (Parts)
This parameter controls the mix ratio of the material for plural component materials. It must be specified in parts and on
all channels configured to the gun. For example, if it was desired that the mixed ratio of material was to be 50% resin
(channel A), 30% catalyst (channel B), and 20% solvent (channel C), the ratio for channel A should be programmed at 5,
the ratio for channel B should be programmed at 3, and the ratio for channel C should be programmed at 2. Alternately
they could also be programmed at 2.50:1.50:1.00 and achieve the same ratio. Note that the last parameter does not
need to be 1.
LN-9409-01.2: RansFlow
55
Job Parameters Screen (continued)
Pulses/Liter
Although this value can be programmed on this screen, it is recommended that it be setup from the calibration routine. It
is the number of pulses per liter that the flow meter sends out for the material being flowed. This may vary significantly
from material to material based on viscosity, shear, flow rate, etc.
Valve
This allows the user to program the color valve that will be opened when this job number is loaded. The master channel
can control up to 10 color valves and the slave channel can control up to 3 color valves. NOTE: When running in 1k
mode, ensure that NO slave channel valve is programmed to be opened.
MVR High
This is the maximum pressure that is allowed by the software to be sent to the flow control valve (which in most cases
will be an MVR valve). This value is used during flushing, loading, and for the master channel of a manually configured
gun. This also limits the maximum pressure that is allowed to be sent to the flow control device while running (PID control) so users are warned that specifying too low of a value here can limit the maximum possible flow rate and possibly
response time of the PID control loop. It is expressed in psi. (This parameter can also be temporarily changed on the
Channel Parameter Screen.)
MVR Low
This is the pressure (in psi) sent to the flow control valve when the gun is in run mode but the applicator is not triggered.
It acts as an „offset‟ to hold the flow control valve just below the cracking pressure of the valve so that when the applicator is triggered, a minimal amount of time is lost opening the valve for flow. If this parameter is programmed too high
(above the cracking pressure of the valve), undesirable pressures will develop between the flow control valve and the
applicator during trigger off times, causing a „blooming effect‟ when the applicator triggers, until the higher pressure
bleeds off. (This parameter can also be temporarily changed on the Channel Parameter Screen.)
LN-9409-01.2: RansFlow
56
Job Parameters Screen (continued)
Pressure REG
This is a simple analog output that can (optionally) be used to control a pilot operated fluid regulator on the inlet of the
flow control valves. Additional E to P transducers will be required to convert this 0 to 10 VDC signal to a 0 to 100 psi
signal to control these fluid regulators. (Thicker materials or higher flow rates often require a higher inlet pressure to the
flow control valves.) (This parameter can also be temporarily changed on the Channel Parameter Screen.)
Kp
This is the Proportional Gain parameter for the PID loop. It controls how fast the PID loop opens the flow control valve
when flow is initially requested. A value too small here will cause an unnecessary delay in flow on the initial trigger on of
the applicator or a slow ramp up of flow. Too large of a value here will cause the flow to oscillate. The default value of
2000 works well in most cases.
Ki
This is the Integral Gain parameter for the PID loop. It controls how fast the PID loop pulls the actual flow back to the
target flow after the proportional portion of the PID loop has the actual flow approaching the target. (This parameter can
also be temporarily changed on the Channel Parameter Screen.)
C-Band
This is the control band for the PID control loop. In general, this setting should never need to be changed unless the
flowmeter has been changed to a flowmeter with a significantly different calibration value. This parameter keeps the system steady while maintaining a constant flow rate. Too large a value can keep the system from getting to the target flow
rate while too small a value may cause the flow rate to oscillate. (This parameter can also be temporarily changed on
the Channel Parameter Screen.)
I-Band
This is the integrator band for the PID control loop. In general, this setting should never need to be changed unless the
flow meter has been changed to a flow meter with a significantly different calibration value. This parameter controls how
responsive the system is when the desired flow rate changes. Too large a value will cause the system to overshoot the
target flow while too small a value may prevent the system from reaching the target flow rate or possibly even cause the
flow rate to oscillate. (This parameter can also be temporarily changed on the Channel Parameter Screen.)
LN-9409-01.2: RansFlow
57
Alarms Screen
The second button on the main screen takes you to the reports page. The first screen you enter is the Alarms page.
The icons across the bottom of the screen, starting from the left are:
Return to Home Screen
Go back one screen
Return to Alarms Screen (used if you are on the Totals or Information Screens
Flow Totals
Information Screen (Software versions, etc.)
The last 100 alarms are listed with the latest one always appearing at the top of the screen. (Older alarms automatically
scroll off of the bottom of the screen. Simply touch the scroll bar on the right side of the screen to scroll down.) To clear
the screen, simply touch the eraser icon in the upper right corner of the screen. Note: Faults must be cleared on the
Emulator Screen.
LN-9409-01.2: RansFlow
58
Reports Screen
The fourth button on the Reports Screen is for examining and resetting flow totalization data.
Select the job you are interested in retrieving data for and touch the examine button (magnifying glass).
Information is stored separately for all three channels. There are two independent values stored for each channel, Daily
and Year to Date (YTD). These values are not tied to the clock in any way, they are simply two values that both increment when material is flowing but can be reset independently. They can be used as shift totals, totals for production
runs of one single part, daily totals, weekly, monthly, etc. These six values are stored independently for all 99 jobs.
The clean totals (displayed in the bottom half of the screen) are the totals that are incremented whenever the channel is
flushing. These are grand totals for all jobs; they are not stored independently for each job number.
LN-9409-01.2: RansFlow
59
Information Screen
This screen indicates the current version of software installed on the unit. The top number indicates the control software
version and the bottom number indicates the version of the user-interface software. These two numbers should be recorded and provided to ITW Ransburg personnel when requesting technical support.
LN-9409-01.2: RansFlow
60
Color Change Sequencer Screen
The middle button on the bottom of the Main Screen opens the Color Change Sequencer Screen.
The icons across the bottom of the screen, starting from the left are:
Return to Home Screen
Go back one screen
Not used
Not used
Save Flush and Load Parameters to flash memory
The top half of this screen allows the user to program the Flush Sequence. There are four possible steps in the flush
sequence. If the time is programmed to be zero (0) for any step, that step is skipped.
LN-9409-01.2: RansFlow
61
Color Change Sequencer Screen (continued)
Step 1: Allows the user to push the material currently in the fluid line with either solvent or air for a specified time period.
One or the other (solvent or air) must be selected. If solvent is selected, the following valves are opened:
Resin MVR Valve
Resin MVR Enable Valve
Resin Solvent Valve
Dump Valve
If air is selected to be used to push the paint in the initial step, the following valves are opened:
Resin MVR Valve
Resin MVR Enable Valve
Resin Air Valve
Dump Valve
LN-9409-01.2: RansFlow
62
Color Change Sequencer Screen (continued)
Step 2: Allows the user to push out the catalyst line with solvent, if necessary. If this step is set for 0 seconds, it is
skipped. If this step is used, the following valves are opened:
Catalyst MVR Valve
Catalyst MVR Enable Valve
Catalyst Solvent Valve
Dump Valve
Step 3: The resin solvent and resin air valves are cycled to cause a scrubbing action inside of the fluid line. The user
can specify how long each of the two valves is open in each cycle as well as how long they continue the cycling process
for. During this step, the following valves are opened:
Resin MVR Valve
Resin MVR Enable Valve
Resin Solvent Valve (pulsing)
Resin Air Valve (pulsing)
Dump Valve
LN-9409-01.2: RansFlow
63
Color Change Sequencer Screen (continued)
Step 4: Allows the user to push out the flushing materials left in the fluid lines with either air or solvent. (For plural component materials, it is often recommended to leave unpressurized solvent in the lines when the system is not in use to
soften any material that may have “skinned” the inside of the fluid lines. That material should be flushed out at the start
of the next paint cycle.) The valves that are opened during this step are:
Resin MVR Valve
MVR Enable Valve
Resin Solvent (or Resin Air) Valve
Trigger Valve
Note: This final step flushes the applicator itself as the dump valve is closed and the trigger valve is opened.
LN-9409-01.2: RansFlow
64
Color Change Sequencer Screen (continued)
The bottom half of the Color Change Sequencer Screen allows the user to control the Load Sequence. Once again, if
any of the times are set to zero, the step is skipped.
In the first step, the user can specify which valve or valves should be opened to allow material to flow from the color
valve stack to the flow meter and for how long. The valves that are opened during this step are:
Resin MVR and/or Catalyst MVR and/or Component C MVR Valves
Resin CCV and/or Catalyst CCV Valve (note that which of the resin and catalyst CCV valves opened is
based on information provided on the Configure Job Screen)
Resin and Catalyst MVR Enable Valves
Dump Valve
In the second step, the controller switches to run mode and starts controlling the flow of the material or materials. This
should be done at a fairly high flow rate since the dump valve is still opened. Material should be run in this step until
mixed material is approaching the dump valve and then this step should end. (It is not advisable to send mixed material
through the dump valve as the next spray cycle may exceed the pot-life time of the material and the material could set up
in the dump valve.) The valves that are on during this step are:
All MVR Valves are PIDding
Resin and Catalyst MVR Enable Valves
Resin and Catalyst CCV Valves
Dump Valve
LN-9409-01.2: RansFlow
65
Color Change Sequencer Screen (continued)
The third and final step closes the dump valve and opens the trigger valve. Flow rate is normally reduced in this step
since the applicator typically cannot handle as high a flow as the dump valve. This step is intended to prepare the applicator for the first trigger on a part. This flow rate can be programmed or if the Use Analog radio button is selected, the
unit will use the signal from the analog input to determine the target flow rate required in this step. (Refer to the section
explaining the Job Parameters to program the Min Flow and Max Flow parameters for this analog feature to work.)
LN-9409-01.2: RansFlow
66
Tools Screen
The fourth button from the left on the Main Screen selects the Tools Screen. From here, users can perform functions
such as calibrate the flow meters, do flow tests, and test all digital and analog inputs and outputs.
The icons across the bottom of the screen, starting from the left are:
Return to Home Screen
Go back one screen
Force I/O Screens
Not used
Save Calibration Parameters to flash memory
Calibration
Four items must be selected prior to calibrating: The Gun Number (tab at the top of the screen), the Job Number
(Current JOB) that you want the new calibration values saved to, the channel (Current Channel) which can be A, B, or C,
and the Valve Number (this is which color valve) that should be opened during the calibration process. To change the
values of Job, Channel, and Valve, simply touch the white box where the value appears that you wish to change and a
keypad will popup, allowing you to change its value.
Note: There are three buttons inside the calibration section of the tools screen. The top button has the image of a valve
with a red cross through it. This indicates that presently the valves are closed. When you touch this button, three things
will happen: The color valve that you selected will open, the MVR enable signal (solenoid valve) for the channel you selected will open, and the MVR valve will go to its MVR High pressure. This allows you to flow material from the color
valve down through the MVR valve, flow meter, calibration valve, etc. and get any air out of the fluid lines prior to calibrating. This button can remain on during the entire calibration process if you have a downstream valve to control the
flow of material during calibration (such as a calibration ball valve or trigger valve at the applicator, etc.)
LN-9409-01.2: RansFlow
67
Tools Screen (continued)
The second button inside of the calibration section of the screen is a large green arrow. When this button is pushed, the
software will begin counting pulses from the flow meter. (This button changes to a red stop sign when pushed.) To calibrate, simply push this green arrow button and then open your calibration valve (or trigger valve) and flow an adequate
amount of material into a graduated cylinder. Close the calibration valve (or trigger valve) and push the red stop sign
button. Next, touch the white box under the text Volume and a keypad will popup. Enter the volume (in milliliters) that
was collected in the graduated cylinder and hit enter (ENT). The software will automatically calculate a new calibration
value for the flow meter (in pulses per liter) and display it in the lower right box under New PPL. If this value seems reasonable, touch the small box at the bottom of the screen with the check mark in it. This will copy the most recently calculated value over to the box at the left labeled OLD PPL. (This is the value that the software uses to calculate the volume
of material as it is counting pulses.)
You should repeat the calibration process until you get at least three consecutive values that are within 5% of each
other. Touch the top (open valve) button to close all valves on the channel and color you are calibrating once you are
satisfied with the calibration value. Once this has been done, touch the Save to flash memory button in the lower right
hand corner of the screen to save the new PPL value to the selected Job. Note that leaving this screen without performing this save function will lose the calibration data you just determined.
This calibration process must be completed for all channels configured to the gun. Also note that these calibration values must be determined for all materials that are to be used. It is recommended that one job number be used for each
material as different materials affect the flow meters in different ways and will result in different calibration values. Make
sure to save values to flash memory after each calibration process has been completed.
LN-9409-01.2: RansFlow
68
Tools Screen (continued)
Flow Test
Once calibration has been completed, it is a good idea to do some flow tests to insure that the system is flowing at the
proper flow rates and giving the proper ratios. The Flow Test screen can be used to easily accomplish this.
Prior to doing a flow test, go back to the emulator screen and perform a load sequence for the material (Job) that you
wish to perform the flow test on. Take the gun out of run mode by touching the red stop sign button prior to leaving the
emulator screen.
Return to the Tools screen and, once again, begin by selecting the tab for the gun you wish to perform the flow test on at
the top of the screen. Next, touch the white box below the Flow Rate text and enter the target flow rate that you wish to
come out of the applicator (total of all channels) during the flow test. Next, program how long (in seconds) you wish the
flow test to run for under Flow Time. If there are values displayed under Total Volume or the A, B, or C channels, they
can be reset to zero by touching the eraser button on the right side of the screen.
At this point, the gun can be placed in “Run Mode” by touching the green arrow button on the left side of the Flow Test
screen. To start the flow test, simply touch the middle “Timer Start” button. Flow will start immediately and a signal will
be sent from the trigger solenoid valve. Make sure to open the applicator if it is not being controlled by the RansFlow‟s
trigger valve or a flow too low fault will occur. The unit will continue to flow for the amount of time programmed, at which
point the trigger valve will be closed and flow will be stopped. During the flow process, the Total Volume and the volumes under channels A, B, and C, (or whatever channels are configured to the gun) will be incremented based on
pulses received from the appropriate flow meters. If the materials are collected independently of each other from the
calibration ports, those values can be compared to the volumes that the software calculated as having been dispensed.
If any of the volumes are outside of acceptable limits, the flow meter for that channel should be recalibrated.
An additional feature of this screen allows you to have the software calculate the actual ratio of the material(s) that were
dispensed. Simply touch the white box below the heading Parts A and enter what the target ratio for the master channel
was. The software will then automatically calculate the other component or other components ratios for easy comparison to the target. Once again, if any of the component‟s ratios are outside of acceptable limits, recalibration of the flow
meter or flow meters is recommended.
LN-9409-01.2: RansFlow
69
Tools Screen (continued)
An additional feature of this screen allows you to have the software calculate the actual ratio of the material(s) that were
dispensed. Simply touch the white box below the heading Parts A and enter what the target ratio for the master channel
was. The software will then automatically calculate the other component or other components ratios for easy comparison to the target. Once again, if any of the component‟s ratios are outside of acceptable limits, recalibration of the flow
meter or flow meters is recommended.
LN-9409-01.2: RansFlow
70
Force I/O Screen
This screen allows the user to force any of the digital (discrete) or analog outputs of the RansFlow System. Also from
this screen, the user can select the View Inputs Screen.
The first column allows you to force the digital status outputs. Simply touch the square next to the signal you wish to
force on and a checkmark will appear in the box indicating that the signal is forced on. To remove the force simply touch
the box a second time or touch the Clear ALL button in the top right of the screen.
The second column allows you to force any of the color valve solenoids on. Only one can be forced on at a time (to prevent materials backing up from one supply line to another if they don‟t have matching pressures). Simply touch the radio
button next to the color valve you wish to turn on. To turn it off, touch the All OFF radio button at the bottom of the second column or the Clear ALL button.
The third column allows you to force any of the catalyst valve solenoids on. Only one can be forced at a time (to prevent
materials backing up from one supply line to another if they don‟t have matching pressures). Simply touch the radio button next to the catalyst valve you wish to turn on. To turn it off, select another valve to turn on or touch the All OFF radio
button in the third column or the Clear ALL button.
Also in the third column is a box marked Actual Flow. This drives an analog output that is proportional to the flow rate
passing through the applicator. If you touch the box below the Actual Flow text, a keypad will appear allowing you to key
in a voltage to send to this analog output. Key in the value 0 to reset.
LN-9409-01.2: RansFlow
71
Force I/O Screen (continued)
The fourth column allows you to force the analog outputs that drive the transducers that in turn drive the MVR valves
(MVR A, MVR B, MVR C). There are three additional analog outputs (Regulator A, Regulator B, and Regulator C) that
can be forced. (These outputs allow the user to optionally connect a pilot operated fluid regulator to the input of the MVR
valve and specify different inlet pressures for different materials.) Simply touch the box below the output to be forced
and key in the voltage desired out of the analog output. Key in a value of 0 to reset the output.
The fifth column allows the user to force the horn on and the MVR Enable signals (solenoids). Simply touch the box next
to the text that you wish to force and check mark will appear when the output is turned on. Touch the box a second time
to turn the output off or touch the Clear ALL button.
In the bottom right corner of this screen is a button labeled View Inputs. Select this option if you wish to monitor the
status of any of the digital or analog inputs.
LN-9409-01.2: RansFlow
72
View Inputs Screen
This screen displays the status of all input signals. A checkmark beside any label indicates a signal is present at that
input. The two Flow Rate Command boxes indicate the input voltage on that input.
LN-9409-01.2: RansFlow
73
Emulator Screen
The fifth button from the left on the Main Screen selects the Emulator Screen. From here, users can perform functions
such as select the job number to load, load material to the applicator, flush the applicator, put the gun in run mode, halt
the gun, reset faults, and view the status of the gun, the currently running job number and the current flow rate.
The icons across the bottom of the screen, starting from the left are:
Return to Home Screen
Go back one screen
Not used
Not used
Enable the Remote Operator Panel
The icons in the upper area of the screen are described below:
The upper left button is the Reset/Halt button. It changes its appearance depending upon the mode the gun is in. If the
gun is faulted, this button resets the fault. If the gun is running, it halts it. The gun must be in run mode to flow material.
LN-9409-01.2: RansFlow
74
Emulator Screen (continued)
Run – this button puts a halted gun in run mode (which enables it to flow).
Flush – this button performs a flush of the applicator(s).
Load – this button performs a load sequence on the applicator. (Which in turn loads
the job number specified on this screen.)
Previous/Next Job Number – these two buttons allow the user to select the next job
number to load.
LN-9409-01.2: RansFlow
75
Section 5: OPERATION
Emulator / Remote Operator Panel Screen
Emulator Screen on RansFlow Main Control Panel
All gun/applicator operation can be done from the Emulator screen or from the optional Remote Operator Panel.
Optional RansFlow Remote Operator Panel
LN-9409-01.2: RansFlow
76
Start Spraying
Two steps to start spraying:
1. Start-up
Turn ON AC power and let the software startup.
2. Loading a Job
Go to the EMULATOR screen:
Press the RESET / STOP button to clear any initial faults:
Press the UP/DOWN arrows to select the job you want to use:
RansFlow must be in the idle/halt state. Press HALT:
**If unit is already in idle/halt state, this button will not be visible.
Press LOAD:
On the first load after power up, or if a job with a new color is selected the RansFlow will do a flush
before it loads.
When the load sequence is complete the RansFlow will be placed in RUN mode and the gun/
applicator will be ready to spray.
LN-9409-01.2: RansFlow
77
Finished Spraying
Two steps when finished spraying:
1. Flushing
RansFlow must be in the idle/halt state. Press HALT:
**If unit is already in idle/halt state, this button will not be visible.
Press FLUSH:
The RansFlow will step through the flush sequence leaving the gun clean and idle.
2. Recovering from a Fault
If a fault occurs, first the unit must be RESET:
The unit must be placed back into RUN mode:
The fault that occurred my be viewed on the Reports Screen.
LN-9409-01.2: RansFlow
78
Section 6: TROUBLESHOOTING
POWER SUPPLY ISSUES
There are two DC power supplies in the main control console, one at 5 VDC and a 24 VDC, both capable of 5 amps,
maximum. Neither power supply is fused. If a short in the electrical system does occur (greater than 5 amps is sensed),
the power supply will shut down its output until that short is removed. It may be necessary to cycle the AC power feeding the power supplies to permit them to reset properly. The photograph below shows the terminals on the power supplies that can be used to verify output voltages with a voltmeter.
The AC power is fed into the bottom of the supplies (L=Hot and
N=Neutral). The DC power exits the top of the supplies with
the positive terminals marked with a plus (+) sign and the
ground terminals with a negative (-) sign. Note that both power
supplies have voltage adjustment screws on them that are factory preset but can be readjusted, if necessary. If the 5 volt
supply is not within 10% of 5.00 volts (4.95 to 5.05), it should
be adjusted. If the 24 volt supply is not within 10% of 24 volts
(21.6 to 26.4), it should also be adjusted. The larger 24 VDC
power supply also has a Single/Parallel switch that should be
set on the Single position.
If no voltage is detected on the output of either supply, and cycling the AC power does not restore the output, try removing
the wires on the output of the supply (with the AC power off)
and then power up the unit. If there is still no voltage, replace
the power supply. If the voltage recovers, place an ammeter in
circuit and check to see if you have exceeded the 5 amp limit of
the supply. If current draw is less than 5 amps, replace the
power supply. If the current draw is greater than 5 amps, look
for excessive current draw in the system.
Proper OSHA Lockout/Tagout procedures must be
followed prior to performing any equipment maintenance or repair.
LN-9409-01.2: RansFlow
79
FLOW TOO LOW OR FLOW TOO HIGH FAULTS
These types of faults can be caused by numerous problems. We will attempt to describe most of the more common
causes below. Keep in mind that, as the name implies, the controller thinks that either too little or too much material is
getting to the applicator. This troubleshooting manual assumes that the system was running at one time and something
has gone wrong. It is not meant as a manual for setting up a new system, however, many of the troubleshooting procedures described can be used in either case.
1. Has your material supply pressure changed? What was the material supply pressure when the system was running properly? Is it the same now? Do you really trust the pressure gauge you have been using for the past several
years? The controller can compensate for small changes in pressure (typically 10 psi) but changes greater than this
or large pressure surges (as is seen with piston pumps without surge chambers) are a definite problem.
2. Has the viscosity of the material changed? A significant change in viscosity alters the way in which it passes
through the fluid metering equipment (MVR valve, flow meter, check valves, Y-block, spiral mix tube, etc.). Typically,
an increased viscosity will require more pressure to get to the same flow rate. However, in some cases (as with
thixotropic materials), the viscosity will actually change as the pressure varies or as the material passes through the
MVR valve and the flow meter. Note that there is a large pressure drop across the MVR and flow meters. Additionally, the material 'chopped' into small chunks as it passes through the flow meter, and this can cause some materials
to change their properties as they flow.
3. Has a restriction formed somewhere in the fluid line? This could be a kinked tube, contamination in the MVR or
flow meter, spiral mix tube blockage, or sticky check valve, "Y" block blockage, to name but a few. An easy way to
verify that the system is capable of flowing at the flow rate required is to flush the applicator. Watch the flow rate
during the flush seqeunce. If the system cannot get to the required flow rate in flush mode, the system will not be
able to get there in run mode since MVR valves are wide open in flush mode. This tests all fluid lines from the material supply to the applicator. Try running the unit from the calibration ports on the fluid panel. Place containers under
them, open the calibration ports, and put the unit in run mode. (If the unit is being operated in automatic mode, the
trigger will have to be forced on.) If the unit operated correctly that way, the problem is further downstream.
4. Are you seeing any flow at all? If it is obvious that material is flowing out of the gun (or from the calibration port)
but the display shows no flow at all then this indicates that the controller is not seeing any pulses coming from the
flow meter. This could be caused by the gears in the flow meter being stuck, a bad sensor on the flow meter, a disconnected or damaged flow meter cable, a bad zener barrier, or a bad counter card. Disassemble the affected flow
meter and inspect it for stuck gears. If it is obvious they are not stuck, place the shafts and gears in the top half of
the flow meter and, with the sensor on the flow meter and cable connected, turn the gears. Watch the flow volume
value on the main screen of the controller. The volume should increment with fluid flow. If it does not, than one of
the problems mentioned above has occurred. Next, connect the flow meter to a cable of another channel that is
functional and monitor that channel for flow. If flow is not indicated, you may have a bad flow meter sensor. It is
also possible that a fuse in the zener barrier has failed. (Note, zener barriers are optional and only used on intrinsically safe units.) Find the zener barrier that is connected to the channel you are having a problem with. (Refer to
electrical diagrams in this manual.) On the side of the zener barriers there are schematics of the internal circuitry.
Fuse integrity can be verified quite easily with an ohmmeter. The flow meter cable itself can also be tested with an
ohmmeter.
LN-9409-01.2: RansFlow
80
If none of these are the problem, there are only three other possible problems. The first is the high speed counter card
mounted on the back side of the touch screen computer. (It is the top card on the stack of 3 cards.) The second option
would be the ribbon cables (or their connectors) that run from the interconnect board on the inside-top of the control console or the ribbon cables that run from the high speed counter card to the optical isolator board. The only other possible
problem would be the optical isoloator board itself. The optical isolator board has some signal conditioning circuitry
(optical isolators) on it that reduce the 24 volt flow meter pulses to 5 volt pulses (used by the counter card).
5. Another possible cause of these type of faults would be if the transducer that controls the MVR valve would
fail. Verification that the transducer for the affected channel is functioning properly is as follows... If there is not already one there, place a pressure gauge in the pilot line between the transducer and the MVR valve. Go to the
Force I/O screen on the touch-screen of the controller. Set MVR pressure for the channel you are troubleshooting at
various pressures between 0 psi and 100 psi (we suggest every 5 to 10 psi to verify linearity of the transducer).
Monitor the actual pressure with the gauge, again insuring only a 10% variance. If the transducer does not perform
as described, replace it. NOTE: Make sure there is not a leak in the tubing leading to the MVR valve or in the MVR
valve itself! The transducers are very low volume devices and are designed to only feed dead-headed devices.
6. If you notice in test #5, that the transducer is not responding as expected, it may be the signal coming from
the analog output board in the controller is at fault. First, make sure you have 24 volts (±10%) feeding the transducers (refer to electrical diagrams in this manual and the picture below). There are 3 wires connected to the terminal block in the upper left of the tranducer. The far left terminal is the ground terminal (wire #2101), the terminal second from left is the +24 VDC terminal (wire #2011), and the third from left terminal is the command input. The wire
numbers for the command signals vary from channel to channel.
7. Follow the procedure above (in test #5) to send various voltages to the transducer from the analog output
card. There is a 1:10 ratio between the voltage sent to the transducer and the pressure the transducer should produce. That is, if MVR output is set to 1.0 volt, a 1 volt signal should be output by the analog output board to the
transducer and the transducer should respond with 10 psi on its pneumatic output. Likewise, 2 volts = 20 psi, 3 volts
= 30 psi, etc. If you suspect a faulty analog output card it should be replaced.
LN-9409-01.2: RansFlow
81
OUT OF TOLERANCE FAULTS
Out of tolerance faults are generated in the following way... Every time a certain volume of resin passes through the
resin flowmeter (specified by the Tolerance Volume Parmeter), the controller determines the amount of catalyst that
flowed during that same time interval. The software then calculates the actual ratio that flowed during that interval and
checks to see if the ratio itself is within the Flow Tolerance specification on the Gun Parmeters Screen.
The reason this fault is generated even though there were no flow too high or flow too low faults is probably best explained with an example: Take for instance, we have a 2k material that is supposed to be mixed at a 3:1 ratio and spray
out of the applicator at 400 cc's/min. We have the Flow Tolerance set to 10% and the Tolerance Volume set to 200 cc's.
The software sees this to mean it should flow 300 cc's/min of resin and at the same time 100 cc's/min of catalyst, and
that is what it attempts to do. As long as the resin flow rate remains between 270 cc's/min and 330 cc's/min (±10%), and
the catalyst flow rate stays between 90 cc's/min and 110 cc's/min (±10%), you will not receive a flow too low or flow too
high fault. If, however, the resin is flowing at 280 cc's/min and the catalyst is flowing at 107 cc's/min (both within the 10%
flow tolerance), you will get an out of tolerance fault. The reason for this is the way the 2k software generates out of tolerance faults. As was mentioned earlier, after each volume of resin specified by Tolerance Volume passes through the
resin flowmeter, the 2k software looks to see how much catalyst flowed during that same time period. The software then
determines the ratio (based on volume rather than flow rate). If that ratio is above or below the preset ratio by more than
the Flow Tolerance specified in the parameters, it generates an out of tolerance fault. In our example above, the volume of resin would, of course, be 200 cc's and, since it was running low, it would have taken 42.857 seconds. In that
same 42.857 seconds, the catalyst was flowing 7% high or at 107 cc's/min. This would result in a volume of catalyst of
76.43 cc's in that same time. The ratio of 200 cc's to 76.43 cc's is 72.35:27.65, which is, on the catalyst side more than
10% high. The unit will, therefore fault with an out of tolerance fault on the catalyst channel (25% + 2.5% = 27.5%).
Keep in mind that ratio is calculated based on total volume, therefore the catalyst ratio above is calculated by:
76.43
x100
200 76.43
27.65%
Most of the time when this fault is seen, the cause is the material supply pressures. Obviously, if you are not getting flow
too low or flow too high faults, the flow rates are getting within the tolerance band of the target. Over an extended period
of time, however, the volumes used are not within that same tolerance band. Observe the actual ratio on the main
screen of the controller. (Note that the ratio displayed is an average over a period of time. In order to get instantaneous
ratio information, touch the Volume box in the lower right of the main screen and reset its value.) If the actual ratio of the
catalyst is below target, adjust the supply pressure to the catalyst MVR valve up 5 psi or so, or adjust the resin supply
pressure down by 5 psi or so and try to run again. Keep adjusting these pressures until the actual ratio locks in on the
target. Keep in mind that higher is not always better. Often times it works better to lower the pressure of the opposite
channel, rather than raise a channel that is running low in ratio.
LN-9409-01.2: RansFlow
82
REVERSE FLOW LIMITS
As the name indicates, the software believes that material has backed up through one of the flow meters. This can be
caused by any one of the following conditions:
1. If any of the check valves on the fluid panel has failed in the open condition and the opposite fluid is at a
higher pressure, fluid can actually back up into another line. If this occurs, the system must be flushed immediately and the faulty check valve replaced.
2. This is sometimes seen after a gun has been flushed and left unused for a period of time, such as at the end
of the day or end of the shift. This may be the result of pressure trapped in the line between the MVR valve and
the applicator. This pressure eventually will back up through the flow meter and out the weep port on the MVR
valve. To prevent this, make sure the applicator stays triggered for a few seconds after the controller is taken out of
clean mode to relieve this pressure.
3. When electrostatic sprayguns are used, it is not uncommon to see a very large value (in 100,000 of ml's
range) displayed for reverse flow. This is caused when electrostatic 'noise' is generated at the flow meter. That
is, if the flow meter is not properly grounded and high voltage feeds back through the paint line from the applicator,
noise is generated in the flow meter cable. This noise is read by the software controller as reverse flow. Make sure
the flow meter is adequately grounded. This must be the same ground that is used in the controller.
LN-9409-01.2: RansFlow
83
NO MASTER FLOW
This fault will only occur on guns configured as 'manual' (also known as demand mode). On guns configured in manual
mode, as soon as the gun is put in run mode, the master channel MVR valve opens to the MVR high setpoint (which is
usually 100 psi). This is, typically, wide open. In this way, the operators can demand as much fluid as they wish and all
the controller does is insure proper ratio by adjusting the MVR on the catalyst side, based on the flow rate of the resin. It
is possible, however, for the master channel flow meter gears to get stuck and still allow material to pass through the
flow meter. When this happens, the applicator continues to get resin but the controller is not aware material is flowing as
the flow meter is not sending any pulses back to the controller. Therefore, it does not open the catalyst MVR and ratio in
any catalyst. You, therefore, get uncatalyzed parts. To prevent this from happening, air flow switches are supplied that
should be tubed in the atomization air line of the applicators. When the handgun or handguns are triggered they send a
signal into the controller indicating that the handgun is in the triggered state. When the controller gets a trigger signal
from the gun, it immediately looks to see if the resin flow meter is turning. If it is not, it issues a NO MASTER FLOW
fault.
In many cases, however, operators use their handguns to blow dust and water off of their parts before spraying. They
do this by pulling the trigger on the gun back just far enough to get atomization air but no paint. When this happens, the
controller gets a trigger signal and no paint flow, which will cause it to fault. To allow for this 'blow off', a parameter
called BLOW OFF TIME has been added to the software (found on the Gun Parameters screen). As soon as the 2k
sees flow on the resin flow meter, this timer is reset, and it will start counting again, the next time it sees a trigger without
flow.
If you receive this fault, it indicates that the gun has been triggered for a period of time specified by the BLOW OFF TIME
parameter, but did not see any resin flow during that time.
In most cases, the cause of this is that the gears in the master channel flow meter have stopped (or become stuck). Try
flushing the system and watch the flow rate or flow volume on the main screen of the controller during the flush to see if
there is flow. If there still is no flow, disassemble and clean the flow meter. If this still does not correct the problem, see
the section in this manual on FLOW TOO LOW FAULTS. If this fault occurs while the operator was not even trying to
spray, then the air flow switch may be defective. This can be verified by looking at Force I/O screen (for inputs) A check
mark will show up next to the Trigger input when the controller receives a trigger signal from the air flow switch. Verify
that the signal turns ON and OFF as the applicator is triggered ON and OFF.
LN-9409-01.2: RansFlow
84
Section 7: APPENDIX
Icon Definitions
CONFIGURE
REPORTS
COLOR CHANGE SEQUENCER
TOOLS
EMULATOR
RETURN TO HOME SCREEN
GO BACK ONE SCREEN
BACKUP PARAMETERS TO USB PORT
RESTORE PARAMETERS FROM USB PORT
LN-9409-01.2: RansFlow
85
Icon Definitions (continued)
WRITE DISPLAYED PARAMETERS TO OPERATING GUN
ADVANCED PARAMETERS
RETURN TO ALARMS SCREEN
FLOW TOTALS
INFORMATION SCREEN
TIMER START
VALVE SELECT (OPEN OR CLOSED)
CLEAR VALUES (SET TO ZERO)
FORCE I/O SCREEN
LN-9409-01.2: RansFlow
86
Icon Definitions (continued)
RUN
HALT
LOAD
RESET
JOB SELECT
FLUSH
REMOTE OPERATOR PANEL (ENABLE / TURN ON)
LN-9409-01.2: RansFlow
87
Remote Operator Panel (ROP) Error Codes
ERROR CODE
DESCRIPTION
1
Ratio Out of Tolerance
2
Reverse Flow Limit
3
Flow Too Low
4
Flow Too High
5
Integrator Too Low (PID loop Ki value set too low)
6
No Job Loaded
7
Potlife Expired
8
Bad Job Format
9
Startup Reset
10
No Master Flow
11
Not in Flush Box A
12
Not in Flush Box B
LN-9409-01.2: RansFlow
88
Typical Installation Prints (fractional & metric)
LN-9409-01.2: RansFlow
89
Control Panel Parts List
LN-9409-01.2: RansFlow
90
Fluid Panel Parts List
LN-9409-01.2: RansFlow
91
Pneumatic Interface Panel Parts List
LN-9409-01.2: RansFlow
92
Interconnect Board Schematic
LN-9409-01.2: RansFlow
93
Optical Isolator Board Schematic - A
LN-9409-01.2: RansFlow
94
Optical Isolator Board Schematic - B
LN-9409-01.2: RansFlow
95
Pneumatic Interface Panel Wiring Diagram
LN-9409-01.2: RansFlow
96
Wall Mount Enclosure Wiring Diagram
LN-9409-01.2: RansFlow
97
Wall Mount Enclosure Wiring Diagram (continued)
LN-9409-01.2: RansFlow
98
Wall Mount Enclosure Wiring Diagram (continued)
LN-9409-01.2: RansFlow
99
50-Conductor System I/O Cable
LN-9409-01.2: RansFlow
100
Spare Parts
Item
Part Number
Recommended Quantity
Based on the number of installed units of:
Description
1
2
4
8
Main Control Console:
4
13742-01
Air Flow Switch
1
1
2
4
22
36
25766-106
73837-08
Pressure Switch
Zener Barrier
1
1
1
1
2
2
4
2
37
38
78643-00
SSM-5504
E/P Transducer,
Air Filter
1
1
2
2
2
2
4
4
42
A12416-00
0
1
1
1
45
A12359-00
Power Supply,
Solenoid Valve,
24V, Manifold
Mount
2
4
4
8
50
A12417-00
0
1
1
1
70
A12423-00
Power Supply,
Touch Panel,
6.4" Display,
PC104
0
1
1
1
72
A12356-01
1
1
1
2
73
A12357-01
1
1
1
2
74
A12358-01
Digital I/O ModAnalog & Digital
I/O Module,
PC104
High Speed
Counter Module,
PC104
1
1
1
2
78
A12205-00
Optical Isolator
0
0
1
1
79
A12207-00
0
0
1
1
1
1
2
2
93
Optical Isolator
Switch Operator,
Red, Mushroom
77384-00
Hd.
Clip for switch
operator, With
LSME0004-00 Lock
1
1
2
2
94
LSME0006-00 Contact Module,
1
1
2
2
92
108
77454-00
Reciever, Fiber
0
1
1
1
109
77452-00
Cable, Fiber Op-
0
1
1
1
117
A12473-00
Stylus, 24"
1
2
2
4
LN-9409-01.2: RansFlow
101
Spare Parts (continued)
Item
Part Number
Recommended Quantity
Based on the number of installed units of:
Description
1
2
4
8
Fluid Panel: (Note: Not all parts below are used on every fluid panel.)
Spiral Mix Element (Low Pres6
LSMM0056-00 sure)
5
Spiral Mix Element (High PresLSMM0056-01 sure)
5
9
12
10
20
20
1
1
1
2
77214-00
77226-00
Fiberoptic RF-1
Piston Flowmeter
1
1
1
1
1
1
2
2
76251-01
Standard RF-1
1
1
1
2
78014-01
Flushable Mix
Non-Flushable
Mix Block Assembly
0
0
1
1
0
0
1
1
High Pressure
Low Flow,
Weepless MVR
Valve
Medium Flow,
Weepless MVR
Valve
High Flow,
Weepless MVR
Valve
0
0
1
1
1
1
2
2
1
1
2
2
1
1
2
2
Low Flow, Weep
Medium Flow,
Weep Style MVR
Valve
1
1
2
2
1
1
2
2
78137-04
High Flow, Weep
LSMM0059-01 Calibration Tube
1
2
1
2
2
4
2
8
76624-02
76624-03
76624-04
78137-02
78137-03
29
20
ZHM-02 Flow-
LBAL0016-00
28
20
76805-01
78014-02
21
10
LS0067
3-Way Ball Vavle
0
0
1
2
75774-00
0
0
1
2
1
0
1
0
2
2
4
2
34
35
75773-00
76093-00
3-Way Ball Vavle
High Pressure
Check Valve
Assy.
Needle Valve
40
77227-00
Transmitter, Pis-
0
0
1
1
51
A10610-00
MVR Trigger
0
0
1
2
LN-9409-01.2: RansFlow
102
High Voltage Interlock Valve
Normal use of handheld applicators requires the product to go through color changes. During the color change sequence, there may
be solvent involved to properly clean all the fluid passages. When solvent is present in the color change process, the electrostatics to
the applicator must be off (Refer to the warnings in the applicable applicator manual). A new normally open valve package was released for use with applicators during the color change process. The A12613-00 (1/4 odt pilot) and the A12613-01 (6mm odt pilot)
were released for applications that require interlock equipment. Figure 1 shows the features of the A12613 valve assembly.
PILOT CONNECTION
A12613-00 1/4" ODT
A12613-01 6MM ODT
AIR INLET FITTING
AIR OUTLET
Figure 1- A12613 VALVE FEATURES
Ransflow Connection
When manual applicators are used with the Ransflow product, the valve assembly is installed as shown in figure 2. The “CYL “ port of
the valve is threaded onto the Inlet port of the flow switch as shown in the illustration. A connection tube is required and must be either
6mm or 1/4 “ ODT and connect from the “DUMP” port on the Ransflow to the pilot connection on the valve. This connection is also
shown in figure 2.
If more than one applicator is used from the Ransflow, then a second valve assembly must be installed and the pilot lines connected
together. See figure 3 for this connection.
LN-9409-01.2: RansFlow
103
Warranty Policies
LIMITED WARRANTY
ITW Ransburg will replace of repair without charge any part/or equipment that fails within the specified time (see below)
because of faulty workmanship or material, provided that the equipment has been used and maintained in accordance
with ITW Ransburg's written safety and operating instructions, and has been used under normal operating conditions.
Normal wear items are excluded.
THE USE OF OTHER THAN ITW RANSBURG APPROVED PARTS VOIDS ALL WARRANTIES.
SPARE PARTS: One hundred and eighty (180) days from date of purchase, except for rebuilt parts (any part number
ending in "R") for which the warranty period is ninety (90) days.
EQUIPMENT: When purchased as a complete unit, (i.e. guns, power supplies, control units, etc.), is one (1) year from
date of purchase.
WRAPPING THE APPLICATOR IN PLASTIC WILL VOID THIS WARRANTY.
ITW RANSBURG'S ONLY OBLIGATION UNDER THIS WARRANTY IS TO REPLACE PARTS THAT HAVE FAILED
BECAUSE OF FAULTY WORKMANSHIP OR MATERIALS. THERE ARE NO IMPLIED WARRANTIES NOR WARRANTIES OF EITHER MERCHANTABILITY OR FITNESS FOR A PARTICULAR PURPOSE. ITW RANSBURG ASSUMES NO LIABILITY FOR INJURY, DAMAGE TO PROPERTY OR FOR CONSEQUENTIAL DAMAGES FOR LOSS
OF GOODWILL OR PRODUCTION OR INCOME, WHICH RESULT FROM USE OR MISUSE OF THE EQUIPMENT
BY PURCHASER OR OTHERS.
EXCLUSIONS:
If, in ITW Ransburg's opinion the warranty item in question, or other items damaged by this part was improperly installed,
operated or maintained, ITW Ransburg will assume NO responsibility for repair or replacement of the item or items. The
purchaser, therefore will assume all responsibility for any cost of repair or replacement and service related costs if applicable.
LN-9409-01.2: RansFlow
104
NOTES
LN-9409-01.2: RansFlow
105
Product Manual Price: $50.00 (U.S.)
Manufacturing
1910 North Wayne Street
Angola, Indiana 46703-9100
Telephone: 260-665-8800
Fax: 260-665-8516
Technical Service - Assistance
320 Phillips Ave.
Toledo, Ohio 43612-1493
Telephone (toll free): 800-233-3366
Telephone: 419-470-2021
Fax: 419-470-2040
Technical Support Representatives can direct you to the appropriate telephone number for ordering spare parts.
Form No. AA-09-01
© 2010 Illinois Tool Works, Inc. All rights reserved.
Litho in U.S.A.
Models and specifications subject to change without notice.
09/10
LN-9409-01.2: RansFlow
106