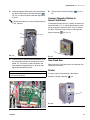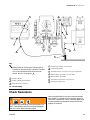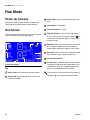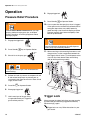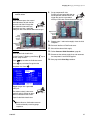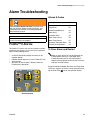
1
Operation
ProMix™ II
For proportional mixing of plural component coatings
Important Safety Instructions
Read all warnings and instructions in this manual.
Save these instructions.
See page 3 for model information, including maximum working pressure and approvals.
310633C
Contents ◆
Contents
Contents . . . . . . . . . . . . . . . . . . . . . . . . . . . . . . . . . . 2
Manual Conventions . . . . . . . . . . . . . . . . . . . . . . . . 2
ProMix™ II Models . . . . . . . . . . . . . . . . . . . . . . . . . 3
Related Manuals . . . . . . . . . . . . . . . . . . . . . . . . . . . 4
Warnings . . . . . . . . . . . . . . . . . . . . . . . . . . . . . . . . . 6
Overview . . . . . . . . . . . . . . . . . . . . . . . . . . . . . . . . . . 8
Usage . . . . . . . . . . . . . . . . . . . . . . . . . . . . . . . . . 8
Component Identification and Definition . . . . . . . 8
ProMix™ II General Operating Cycle . . . . . . . . . 10
Adaptive Overrun Correction . . . . . . . . . . . . . . . 10
Air Flow Switch Function . . . . . . . . . . . . . . . . . . 11
Installation . . . . . . . . . . . . . . . . . . . . . . . . . . . . . . . 12
Typical Installation . . . . . . . . . . . . . . . . . . . . . . . 12
Installation Requirements . . . . . . . . . . . . . . . . . 14
Location Requirements . . . . . . . . . . . . . . . . . . . 15
Fluid Supply . . . . . . . . . . . . . . . . . . . . . . . . . . . 15
Mounting . . . . . . . . . . . . . . . . . . . . . . . . . . . . . . 16
Air Supply Connections . . . . . . . . . . . . . . . . . . . 17
Fluid Supply Connections . . . . . . . . . . . . . . . . . 19
Cable Connections . . . . . . . . . . . . . . . . . . . . . . 20
Grounding . . . . . . . . . . . . . . . . . . . . . . . . . . . . . 23
Check Resistance . . . . . . . . . . . . . . . . . . . . . . . 25
Operator Controls . . . . . . . . . . . . . . . . . . . . . . . . . 26
Operator Station . . . . . . . . . . . . . . . . . . . . . . . . 26
EasyKey™ Display . . . . . . . . . . . . . . . . . . . . . . 28
Run Mode . . . . . . . . . . . . . . . . . . . . . . . . . . . . . . . . 30
Power Up Screens . . . . . . . . . . . . . . . . . . . . . . 30
Run Screen . . . . . . . . . . . . . . . . . . . . . . . . . . . . 30
Setup Mode . . . . . . . . . . . . . . . . . . . . . . . . . . . . . . . 31
Entering Setup . . . . . . . . . . . . . . . . . . . . . . . . . . 31
Setup Screen Menu . . . . . . . . . . . . . . . . . . . . . . 31
Key Commands . . . . . . . . . . . . . . . . . . . . . . . . . 31
Color Screen . . . . . . . . . . . . . . . . . . . . . . . . . . . 32
Report Screen . . . . . . . . . . . . . . . . . . . . . . . . . . 34
Calibrate Screen . . . . . . . . . . . . . . . . . . . . . . . . 34
Advanced Screens . . . . . . . . . . . . . . . . . . . . . . 35
Operation . . . . . . . . . . . . . . . . . . . . . . . . . . . . . . . . 38
Pressure Relief Procedure . . . . . . . . . . . . . . . . 38
Trigger Lock . . . . . . . . . . . . . . . . . . . . . . . . . . . . 38
Start Up . . . . . . . . . . . . . . . . . . . . . . . . . . . . . . . 39
Color Change . . . . . . . . . . . . . . . . . . . . . . . . . . 42
Printing Job Log . . . . . . . . . . . . . . . . . . . . . . . . 43
Shutdown . . . . . . . . . . . . . . . . . . . . . . . . . . . . . . 43
Purging . . . . . . . . . . . . . . . . . . . . . . . . . . . . . . . . . . 44
Purging Mixed Material . . . . . . . . . . . . . . . . . . . 44
Using Color 0 . . . . . . . . . . . . . . . . . . . . . . . . . . . 45
Purging Fluid Supply System . . . . . . . . . . . . . . 46
Purging Sampling Valves and Tubes . . . . . . . . . 48
Meter Calibration . . . . . . . . . . . . . . . . . . . . . . . . . . 49
Alarm Troubleshooting . . . . . . . . . . . . . . . . . . . . . 51
ProMix™ II Alarms . . . . . . . . . . . . . . . . . . . . . . 51
ProMix™ II Warnings . . . . . . . . . . . . . . . . . . . . 55
Technical Data . . . . . . . . . . . . . . . . . . . . . . . . . . . . 56
Graco Standard Warranty . . . . . . . . . . . . . . . . . . . 58
Graco Information . . . . . . . . . . . . . . . . . . . . . . . . . 58
Manual Conventions
WARNING
Hazard Symbol
WARNING: a potentially hazardous situation which, if
not avoided, could result in death or serious injury.
Warnings in the instructions usually include a symbol
indicating the hazard. Read the general Warnings
section for additional safety information.
2
CAUTION
CAUTION: a potentially hazardous situation which, if
not avoided, may result in property damage or
destruction of equipment.
Note
Additional helpful information.
310633C
ProMix™ II Models ◆
ProMix™ II Models
WARNING
WARNING
Do not install equipment approved only for a non-hazardous location in a hazardous area. Substitution of
components may impair intrinsic safety. See page 6.
Enter
PM
ProMix™ II
Unit
A Meter
PM
0
1
2
3
None
G3000
G3000HR
Coriolis
Changing the fluid manifold configuration may change
its pressure rating. Do not exceed the pressure rating
of the lowest rated component. See page 6.
Model
B Meter
0
1
2
3
None
G3000
G3000HR
Coriolis
number
here
Gun Flush
Box
Color Change
0
1
2
3
4
5
6
None, Single Color
2 Color, Low Pressure
4 Color, Low Pressure
6 Color, Low Pressure
2 Color, High Pressure
4 Color, High Pressure
6 Color, High Pressure
0
1
No
Yes
Hazardous Location Approval
Only models with a G3000 (1) or G3000HR (2) for both A and
B meters are approved for installation in a Hazardous Location - Class I, Div I, Group D, T3.
#
53
Conforms to FM std 3600 & 3610
for use in Class I Div 1 Group D T3
Hazardous locations
CAN/CSA 22.2 No. 157 & 1010.1-92
EEx ib IIA T3
ISSeP 04 ATEX 008
SYST
Non-hazardous Location Approval
#
53
CAN/CSA
22.2 No. 1010.1
Maximum Working Pressure
Maximum working pressure rating is dependent on the A and B meter and color change option selected. The pressure rating is based on the rating of the lowest rated fluid manifold component. Refer to the component pressure
ratings below. Example: Model PM1140 has a maximum working pressure of 3000 psi (21 MPa, 207 bar).
Check the ID plate on your EasyKey™ Display or fluid panel for its maximum working pressure. See FIG. 6,
page 15.
ProMix™ II Fluid Manifold Components Maximum Working Pressure
Color Change Option 1, 2, or 3. . . . . . . . . . . . . . . . . . . . . . . . . . . . . . . . . . . . . . . . . . . . . 300 psi (2.1 MPa, 21 bar)
Color Change Option 4, 5, or 6. . . . . . . . . . . . . . . . . . . . . . . . . . . . . . . . . . . . . . . . . . . . 3000 psi (21 MPa, 207 bar)
Coriolis A and B Meters Option 3 . . . . . . . . . . . . . . . . . . . . . . . . . . . . . . . . . . . . . . . . . . 2300 psi (16 MPa, 159 bar)
No Meters or G3000 or G3000HR A and B Meters Option 0, 1, or 2 . . . . . . . . . . . . . . . 4000 psi (28 MPa, 276 bar)
Flow Meter Fluid Flow Rate Range
G3000 Meter. . . . . . . . . . . . . . . . . . . . . . . . . . . . . . . . . . . . . . . . . . . . . . . . . . 75-3000 cc/min. (0.02-0.79 gal./min.)
G3000HR Meter . . . . . . . . . . . . . . . . . . . . . . . . . . . . . . . . . . . . . . . . . . . . . . . 38-1500 cc/min. (0.01-0.40 gal./min.)
Coriolis Meter . . . . . . . . . . . . . . . . . . . . . . . . . . . . . . . . . . . . . . . . . . . . . . . . 20-3800 cc/min. (0.005-1.00 gal./min.)
310633C
3
Related Manuals ◆
Related Manuals
Component Manuals in English
Manual
Description
Manual
Language
Manual
Language
310633
310653
310654
310655
308778
310696
310656
307731
ProMix™ II Operation
ProMix™ II Service - Parts
Fluid Mix Manifold
Dispense Valve
G3000, G3000HR Flow Meter
Coriolis Flow Meter
Color Change Kit
Color Change Valve Assembly,
Low Pressure
Color Change Valve, Low Pressure
Color Change Valve Assembly, High
Pressure
Color Change Valve, High Pressure
Gun Flush Box
Printer
ProMix™ II Data Download Kit
Gun Air Shutoff Kit
310633
310634
310635
310670
English
French
Spanish
Italian
310636
310637
310638
German
Chinese
Japanese
307941
308291
308977
310695
308818
310669
310745
4
This manual available in following languages:
310633C
Related Manuals ◆
310633C
5
Warnings ◆
Warnings
The following warnings include general safety information for this equipment. More specific warnings are included in
the text where applicable.
WARNING
FIRE AND EXPLOSION HAZARD
Flammable fumes, such as solvent and paint fumes, in work area can ignite or explode. To help prevent
fire and explosion:
• Use equipment only in well ventilated area.
• Eliminate all ignition sources; such as pilot lights, cigarettes, portable electric lamps, and plastic drop
cloths (potential static arc).
• Keep work area free of debris, including solvent, rags and gasoline.
• Do not plug or unplug power cords or turn lights on or off when flammable fumes are present.
• Ground equipment and conductive objects in work area. See Grounding instructions.
• Use only grounded hoses.
• Hold gun firmly to side of grounded pail when triggering into pail.
• If there is static sparking or you feel a shock, stop operation immediately. Do not use equipment
until you identify and correct the problem.
INTRINSIC SAFETY
Only models with a G3000 (1) or G3000HR (2) for both A and B meters are approved for installation in a
Hazardous Location - Class I, Div I, Group D, T3. To help prevent fire and explosion:
• Do not install equipment approved only for non-hazardous location in a hazardous area. See the ID
label for the intrinsic safety rating for your model.
• Do not substitute system components as this may impair intrinsic safety.
ELECTRIC SHOCK HAZARD
Improper grounding, setup, or usage of the system can cause electric shock.
• Turn off and disconnect power at main switch before disconnecting any cables and before servicing
equipment.
• Connect only to grounded power source.
• All electrical wiring must be done by a qualified electrician and comply with all local codes and regulations.
SKIN INJECTION HAZARD
High-pressure fluid from gun, hose leaks, or ruptured components will pierce skin. This may look like just
a cut, but it is a serious injury that can result in amputation. Get immediate surgical treatment.
• Do not point gun at anyone or at any part of the body.
• Do not put your hand over the spray tip.
• Do not stop or deflect leaks with your hand, body, glove, or rag.
• Do not spray without tip guard and trigger guard installed.
• Engage trigger lock when not spraying.
• Follow Pressure Relief Procedure in this manual, when you stop spraying and before cleaning,
checking, or servicing equipment.
6
310633C
Warnings ◆
WARNING
EQUIPMENT MISUSE HAZARD
Misuse can cause death or serious injury.
• Do not exceed the maximum working pressure or temperature rating of the lowest rated system
component. See Technical Data in all equipment manuals.
• Use fluids and solvents that are compatible with equipment wetted parts. See Technical Data in all
equipment manuals. Read fluid and solvent manufacturer’s warnings.
• Check equipment daily. Repair or replace worn or damaged parts immediately.
• Do not alter or modify equipment.
• For professional use only.
• Use equipment only for its intended purpose. Call your Graco distributor for information.
• Route hoses and cables away from traffic areas, sharp edges, moving parts, and hot surfaces.
• Do not use hoses to pull equipment.
• Comply with all applicable safety regulations.
MOVING PARTS HAZARD
Moving parts can pinch or amputate fingers and other body parts.
• Keep clear of moving parts.
• Do not operate equipment with protective guards or covers removed.
• Pressurized equipment can start without warning. Before checking, moving, or servicing equipment,
follow the Pressure Relief Procedure in this manual. Disconnect power or air supply.
TOXIC FLUID OR FUMES HAZARD
Toxic fluids or fumes can cause serious injury or death if splashed in the eyes or on skin, inhaled, or
swallowed.
• Read MSDS’s to know the specific hazards of the fluids you are using.
• Store hazardous fluid in approved containers, and dispose of it according to applicable guidelines.
PERSONAL PROTECTIVE EQUIPMENT
You must wear appropriate protective equipment when operating, servicing, or when in the operating
area of the equipment to help protect you from serious injury, including eye injury, inhalation of toxic
fumes, burns, and hearing loss. This equipment includes but is not limited to:
• Protective eyewear
• Clothing and respirator as recommended by the fluid and solvent manufacturer
• Gloves
• Hearing protection
310633C
7
Overview ◆ Usage
Overview
Usage
The Graco ProMix™ II is an electronic two-component paint proportioner. It can blend most two-component solvent
and waterborne epoxy, polyurethane, and acid-catalyzed paints. It is not for use with “quick-setting” paints (those with
a potlife of less than 15 minutes).
•
•
•
Can proportion at ratios from 0.1:1–30:1 in 0.1
increments.
Has user selectable ratio assurance and can maintain up to +/-1% accuracy, depending on materials
and operating conditions.
Models are available to operate air spray,
air-assisted, or airless systems with a capacity of up
to 3800 cc/min.
•
•
Color change options are available for low pressure
(300 psi [2.1 MPa, 21 bar]) air spray and high pressure (3000 psi [21 MPa, 207 bar]) systems with 2, 4,
or 6 color change valves.
Gun Flush Box option is also available.
Component Identification and Definition
See FIG. 1 for the ProMix™ II system components.
Component
8
Description
EasyKey™ Display
Used to set up, display, operate, and monitor the ProMix™ II system. The EasyKey™
Display accepts 85-250 VAC, 50/60 Hz line power and converts that power to acceptable low voltage and optical signals used by other system components.
Smart Fluid Panel
Includes air control solenoids, pressure and flow switches, fluid flow meters, and the
fluid manifold assembly to control and monitor fluid dispensing.
Fluid Manifold
Fluid component assembly mounted on the Smart Fluid Panel. It includes:
• Pneumatically Operated Dispense Valves for component A and B
• Purge Valves for solvent and air purge
• Sampling Valves for calibrating the flow meters
• Shutoff Valves for component A and B to close their fluid passages to the mix
manifold
• Mix Manifold, which includes the fluid integrator and static mixer.
➜ Fluid Integrator is the chamber where component A and B align at the
selected ratio and begin to mix.
➜ Static Mixer has 24 elements to uniformly blend the materials downstream of
the fluid integrator.
Color Change Valves
An optional component of the Fluid Manifold assembly. It is available as a color
change valve stack for either low or high pressure with 2, 4, or 6 color change valves.
Each stack includes one additional valve for solvent to clean the fluid line between
color changes.
310633C
Overview ◆ Component Identification and Definition
Component
Description
Flow Meters
Three optional flow meters are available from Graco:
• G3000 is a general purpose gear meter typically used in flow ranges of 75-3000
cc/min. (0.02–0.79 gal/min.), pressures up to 4000 psi (28 MPa, 276 bar), and
viscosities of 20–3000 centipoise. The K-factor is approximately 0.119 cc/pulse.
• G3000HR is a high resolution version of the G3000 meter. It is typically used in
flow ranges of 38–1500 cc/min. (0.01–0.4 gal/min.), pressures up to 4000 psi (28
MPa, 276 bar), and viscosities of 20–3000 centipoise. The K-factor is approximately 0.061 cc/pulse.
• Coriolis is a specialty meter capable of a wide range of flow rates and viscosities.
Dual Fiber Optic Cable
Used to communicate between the EasyKey™ Display and Smart Fluid Panel.
Fluid Panel Power
Supply Cable
Used to provide power to the Smart Fluid Panel.
Operator Station
Used by the operator for daily painting functions including: choosing color, initiating
report printing, reading/clearing alarms, and placing the system in Standby, Mix, or
Purge mode. It is typically mounted inside the booth or near the painter.
Gun Flush Box
(not shown)
Used to automatically flush manual guns into an enclosed waste container. By flushing with the exact amount of solvent required to clean your system within an enclosure, the gun flush box reduces the amount of solvent used, VOCs (volatile organic
compounds) emissions, and operator exposure to hazardous chemicals.
See Operator Controls, page 26, for detailed information on the EasyKey™ Display and Operator Station.
Smart Fluid Panel
Fluid Panel Power
Supply Cable
Operator Station
EasyKey™
Display
Color Change Valves
Fluid Manifold
Dual Fiber
Optic Cable
Flow Meters
FIG. 1
310633C
9
ProMix™ II General Operating Cycle ◆
ProMix™ II General Operating Cycle
d. Dispense Valve B opens, and fluid flows into
Refer to FIG. 2
the integrator chamber (K) and is aligned proportionately with component A.
1. The spray gun operator enters and loads the
desired color. The color change LED blinks while
color is loading, then turns solid when complete.
LED
Color
e. Flow Meter B (G) monitors the fluid volume
dispensed and sends electrical pulses to the
controller.
f.
When the target volume is dispensed, Dispense Valve B closes.
5. The components are pre-mixed in the integrator
(K), then uniformly blended in the static mixer
tube L).
An optional fluid pressure regulator can be installed
to control output from the static mixer tube to the
spray gun.
Operator Station Screen
6. Components A and B are alternately fed into the
integrator (K) as long as the gun is triggered.
2. The operator presses the Mix
key to begin
operation.
3. The controller sends signals to activate the solenoid valves. The solenoid valves activate Dispense
Valves A and B. Fluid flow begins when the gun is
triggered.
4. Components A and B are introduced into the integrator chamber (K) one at a time, through separate
fluid lines, check valves, and flow meters.
7. If the gun is not triggered for two minutes, the system switches to Idle mode, which closes off the mix
manifold dispense valves.
8. When the gun is triggered again, the ProMix™ II
continues the process where it left off.
Operation can be stopped at any time by pressing
the Standby
switch.
key or shutting off the main power
a. Dispense Valve A opens, and fluid flows into
the integrator chamber.
b. Flow Meter A (C) monitors the fluid volume
dispensed and sends electrical pulses to the
controller. The controller monitors these
pulses and signals.
c. When the target volume dispenses, Dispense
Adaptive Overrun Correction
The actual volume of fluid dispensed each cycle can
vary slightly from the calculated target. However, the
controller monitors this variance and makes adjustments
to keep the ratio of component B to A within a user specified tolerance.
Valve A closes.
The dispense volume of component A and B is
based on the mix ratio and dose size set by the
user and calculated by the controller.
10
310633C
ProMix™ II General Operating Cycle ◆ Air Flow Switch Function
Key:
A
B
C
D
E
F
G
H
J
K
L
M
L
J
Dispense Valve A
Dispense Valve B
Flow Meter A
Component A Supply Line
Air Purge Valve
Shutoff Valve A
Flow Meter B
Component B Supply Line
Solvent Purge Valve
Integrator
Static Mixer
Fluid Supply to Gun
K
F
H
E
G
D
B
C
A
M
FIG. 2 Fluid Manifold Cutaway
Air Flow Switch Function
Air or Air-assisted Airless Guns
The air flow switch detects air flow to the gun and signals the ProMix™ II controller when the gun is being
triggered. The switch functions with the flow meters to
ensure that the system components are functioning correctly.
For example, if a flow meter fails or clogs, pure resin or
catalyst could spray indefinitely if the ProMix™ II does
not detect the condition and intervene, which is why the
air flow switch is so important.
If the ProMix™ II controller detects through the air flow
switch signal that the gun is triggered, yet there is no
fluid flow through the meter, a Dose Time Alarm (page
54) occurs after 40 seconds and the system shuts down.
Operating Without Air Flow Switch
It is possible to operate the ProMix™ II without the air
flow switch, such as when a switch fails or when using
an airless gun.
Airless Gun
If using an airless gun or operating without the air flow
switch (not recommended), the dose time alarm will not
function. Instead, two minutes after a meter fails, the
system generates an Idle Time Warning and the dispense valves turn off. What this means is:
•
It is possible to spray pure resin or catalyst for up to
2 minutes before the system shuts down.
•
Since the Idle Time Warning can occur during normal operation, you may not immediately realize that
a meter failed and may continue painting.
Idle Time Warning
This warning occurs if the ProMix™ II is set to Mix
,
and 2 minutes have elapsed since the system received
a flow meter pulse.
In applications using the air flow switch, triggering the
gun clears the warning and the operator can start spraying again.
Without the air flow switch, triggering the gun does not
clear the alarm. To start spraying again, you must press
If a switch fails, replace it as soon as possible.
Mix
310633C
, then trigger the gun.
11
Installation ◆ Typical Installation
Installation
•
Reference numbers and letters in parentheses in the text refer to numbers and letters in the illustrations.
•
Icons in the text refer to icons on the equipment or keypad.
•
FIG. 4 and FIG. 5, page 14, show typical installations. Contact your Graco distributor for actual system
designs.
•
Be sure all accessories are adequately sized and pressure-rated to meet system requirements.
•
For maintenance and safety, you must have a shutoff valve between each fluid supply line and the ProMix™
II system.
•
A 100 mesh minimum fluid filter must be installed on component A and B fluid supply lines.
•
See page 16 for dimensions.
•
To protect the Operator Station and EasyKey™ Display screens from paints and solvents, clear-plastic protective shields are available in packs of 10. See the ProMix™ II Service and Parts manual to order. Clean
the screens with a dry cloth if necessary.
Typical Installation
Key - FIG. 3
A
B
C
D
E
F
G
H
J
12
Color Change Valve Lines (Component A)
Component B Line
EasyKey™ Display
Display
Keypad
Main Air Line
Air Regulator
Air Shutoff Valve
Operator Station
K
L
M
N
P
Q
R
S
T
Operator Station Cable
Power Cable
Fiber Optic Cable
Smart Fluid Panel
Spray Gun
Gun Air Line
Gun Fluid Line
Solvent Line
Fluid Shutoff Valve
310633C
Installation ◆ Typical Installation
G
F
D
H
G
H
C
E
L
M
N
S
K
T
J
H
P
A
S
Q
R
T
B
TI4658A
FIG. 3
310633C
13
Installation ◆ Installation Requirements
Installation Requirements
NON-HAZARDOUS LOCATION ONLY
Safety
Barrier
ProMix™ II
EasyKey
Interface
Power and
Communication Cable
Power Cable
ProMix™ II Smart
Fluid Panel
Fiber Optic
Communication
Cable
Operator
Station
234441
Pneumatic
Interface
Gun
Flush
Box
234443
250 VAC Maximum
Supply Voltage
Flow
Meter
Flow
Meter
HAZARDOUS (CLASSIFIED) LOCATION
FIG. 4: Non-intrinsically Safe Installation
NON-HAZARDOUS
LOCATION ONLY
ProMix™ II
EasyKey
Interface
Safety
Barrier
HAZARDOUS (CLASSIFIED) LOCATION
CLASS I, DIV I, GROUP D (FM & CSA ONLY)
CLASS I, ZONE I GROUP IIA (ATEX ONLY)
I/S Power and
Communication Cable
I/S Power Cable
Fiber Optic
Communication
Cable
ProMix™ II Smart
Fluid Panel
Operator
Station
234441
Pneumatic
Interface
Gun
Flush
Box
234443
250 VAC Maximum
Supply Voltage
Flow
Meter
Flow
Meter
IS Control Drawing 234557
1.
Nonintrinsically safe terminals (power rail) must not be connected to any device which uses or generates more than
250 VRMS or DC unless it has been determined that the
voltage has been adequately isolated.
3.
Multiple earthing of components is allowed only if high
integrity equipotential system is realized between the
points of bonding
4.
Do not operate system with safety barrier cover removed.
2.
The installation must meet the requirements of the National
Electric Code, Canadian Electrical Code Part I, NFPA 70,
Article 504 Resp., Article 505 and ANSI/ISA 12.06.01.
WARNING: Substitution of components may impair intrinsic
safety. For installation, maintenance or operation instructions,
read instruction manuals.
ADVERTISSEMENT: La substitution de composants peut
compromettre la securite intrinseque.
FIG. 5 Intrinsically Safe Installation
14
310633C
Installation ◆ Location Requirements
Location Requirements
WARNING
Smart Fluid Panel: Install according to requirements for
: Non-intrinsically Safe Installation (FIG. 4) or Intrinsically
Safe Installation (FIG. 5) and at a convenient location to
connect to paint and solvent supplies.
For an Intrinsically Safe Installation, the Smart Fluid
Panel may be located inside or outside the hazardous location. Install according to appropriate electrical codes.
Do not install equipment approved only for non-hazardous location in a hazardous area. See the identification (ID) label (FIG. 6) on the EasyKey™ Display for
the intrinsic safety rating for your model. Refer to ProMix™ II Models, page 3. Read warnings, page 6.
•
Refer to FIG. 4 or FIG. 5, page 14, for non-hazardous or hazardous location equipment
requirements.
•
Mount EasyKey™ Display and Smart Fluid
Panel within 50 ft. (15.2 m) of each other.
IMPORTANT: Do not substitute or modify system
components as this may impair intrinsic safety.
Operator Station: Install according to requirements for :
Non-intrinsically Safe Installation (FIG. 4) or Intrinsically
Safe Installation (FIG. 5) and at a convenient location for
the operator to use.
Gun Flush Box: Install in the spray booth as far away
as possible from the application point to avoid getting
over-spray on it.
Flow Meters: If you have Coriolis Flow Meters, refer to
the Coriolis manual for installation instructions. The correct orientation of the flow meter is critical to its operation.
Fluid Supply
ProMix™ II models are available to operate air spray,
air-assisted, or airless systems with a capacity of up to
3800 cc/min.
ID
•
Fluid supply pressure tanks, feed pumps, or circulating systems can be used.
•
Materials can be transferred from their original containers or from a central paint recirculating line.
FIG. 6: EasyKey™ Display and Smart Fluid Panel
EasyKey™ Display: Install in the non-hazardous area
at a convenient location for the operator to view and
operate.
The fluid supply must be free of pressure spikes,
which are commonly caused by pump stroke
changeover. If necessary, install pressure regulators or a surge tank on the ProMix™ II fluid inlets to
reduce pulsation.
Contact your Graco distributor for additional information.
310633C
15
Installation ◆ Mounting
Mounting
Dimensions
1. Follow Location Requirements, page 15.
2. Ensure that the wall and mounting hardware are
EasyKey™ Display
strong enough to support the weight of the equipment (see Technical Data, page 56), fluid, hoses,
and stress caused during operation.
.3 in.
(7.6 mm)
12 in.
(304.8 mm)
3. Using the equipment as a template, mark the
mounting holes on the wall at a convenient height
for the operator and so equipment is easily accessible for maintenance. FIG. 7.
4. Drill mounting holes in the wall. Install anchors as
13.47 in.
(342.1 mm)
12.75 in.
(323.9 mm)
Depth: 6.38 in.
(161.9 mm)
needed.
14 in.
(355.6 mm)
5. Bolt equipment securely.
Smart Fluid Panel
16.5 in.
(419.1 mm)
.5 in.
(12.7 mm)
12 in.
(304.8 mm)
26.5 in.
(673.1 mm)
Depth: 11.5 in.
(292.1 mm)
with G3000/
G3000H meters
23.25 in.
(590.6 mm)
Operator Station
5 in.
(127 mm)
.343 in.
(8.7 mm)
6.75 in
(171.5 mm)
7.5 in
(190.5 mm)
7 in.
(177.8 mm)
FIG. 7
16
310633C
Installation ◆ Air Supply Connections
Air Supply Connections
Required
•
Compressed air supply pressure: 75-100 psi
(517-700 kPa, 5.2-7 bar).
•
Air hoses: use grounded hoses that are correctly
sized for your system.
Use separate air supply lines for the following two
connections (X and L) to avoid contaminating the
purge air line (X) with fluid if the air purge valve and
a check valve failed.
3. Connect a clean air supply line to the shutoff valve
WARNING
(L). This air line supplies air to operate the gun,
solenoids, and dispense valves.
See Technical Data, page 56, for additional air
supply/consumption information.
Trapped air can cause a pump or dispense valve to
cycle unexpectedly, which could result in serious injury
from splashing or moving parts. Use bleed-type shutoff valves.
•
X
Air regulator and bleed-type shutoff valve:
include in each air line to fluid supply equipment.
Install an additional shutoff valve upstream of all air
line accessories to isolate them for servicing.
Recommended
•
Air line filter: 10 micron or better air filter to filter oil
and water out of the air supply and help avoid paint
contamination and clogged solenoids.
L
FIG. 8
Connect Air Supply Lines
1. Tighten all ProMix™ II system air and fluid line connections as they may have loosened during shipment.
2. Install a bleed-type shutoff valve (L) into the air filter
inlet
310633C
on the Smart Fluid Panel. FIG. 8.
4. lnstall a bleed-type shutoff valve (X) into the air
purge valve inlet
FIG. 8.
on the Smart Fluid Panel.
5. Connect an air supply line to the shutoff valve (X) to
supply air for the solvent and air purge sequence.
Use a clean, dry air supply (install filters/dryers as
needed),
17
Installation ◆ Air Supply Connections
CAUTION
The ProMix™ II potlife timer will not function properly
when used with multiple guns operating simultaneously. To avoid having mixed material set in the equipment, carefully monitor potlife by some other means.
6. For air spray, HVLP, and air-assist airless gun applications:
•
•
N
Systems without a Gun Flush Box, connect
the gun air supply line between the Smart Fluid
Panel gun air outlet
(N - FIG. 9) and the
spray gun air inlet (AA - FIG. 10).
Systems with a Gun Flush Box, connect the
gun air supply line between the Smart Fluid
FIG. 9
Panel gun air outlet
(N - FIG. 9) and the
atomizing air safety shutoff valve. See Gun
Flush Box Manual 310695.
Install a bleed-type air shutoff valve (Z) in the gun
air supply line or at the gun air inlet (AA). FIG. 10,
FIG. 11.
Z
AA
WARNING
FIG. 10
If using a Graco electrostatic PRO™ Gun, a shutoff
valve must be installed in the gun air line. Contact your
Graco distributor for information on air shutoff valves
for electrostatic applications.
AA
U
CC
BB
FIG. 11
18
310633C
Installation ◆ Fluid Supply Connections
Fluid Supply Connections
3. Connect the component B line to the component B
flow meter inlet (DD). FIG. 12.
WARNING
Do not exceed the pressure rating of the lowest rated
component. Refer to the product ID Label. Read ProMix™ II Models information, page 3.
The component A and B fluid meter inlets (R, DD)
have fluid check valves to prevent backflow from
fluid supply pressure fluctuations. Backflow can
cause ratio inaccuracies.
4. Connect the gun fluid supply line (CC) between the
fluid manifold static mixer (U) outlet and the gun
fluid inlet (BB). FIG. 11.
WARNING
To reduce the risk of injury, including fluid injection,
you must install a shutoff valve (T) between each fluid
supply line and the fluid manifold assembly. FIG. 12.
Use the valves to shut off fluid during maintenance
and service.
1. Connect the solvent supply lines.
P
T
a. Connect the solvent supply line (P) to the 1/4
npt(f) solvent purge valve inlet. FIG. 12.
b. Multiple color system: also connect a sol-
R
vent supply line to the color change valve (Q),
marked “CC SOLVENT”. FIG. 13.
DD
2. Connect the component A supply line(s).
➜ Single color system: connect component supply line to the component A flow meter inlet (R).
FIG. 13.
➜ Multiple color system: connect component A
supply lines to the color change valve stack (S)
inlets. FIG. 13. The color number is marked on
the valve air supply line.
Paint Recirculating System
The color change valves have two fluid ports for
each individual valve. If you are recirculating paint:
T
FIG. 12
Q
6
5
S
3
4
2
1
1. Remove the color change valve stack from the
fluid panel and mount it separately.
2. Plumb the valves in one port and out the other.
Another option is to use a tee fitting to recirculate.
CAUTION
Verify that all unused fluid ports on the color change
valve stack are plugged before operation. An open
port will leak fluid.
310633C
R
FIG. 13
19
Installation ◆ Cable Connections
Cable Connections
•
All electrical wiring must be done by a qualified
electrician and comply with all local codes and
regulations.
•
Enclose all cables routed in the spray booth
and high traffic areas in conduit to prevent
damage from paint, solvent, and traffic.
•
All options ordered on the ProMix™ II system
are electrically tested at the factory.
A
C
V
Power Requirements
FIG. 14
The ProMix™ II operates with 85-250 VAC, 50/60 Hz
input power, with a maximum of 2 amp current draw.
The power supply circuit must be protected with a 15
amp maximum circuit breaker.
3. See FIG. 21 for the L1, L2, and ground wiring connections inside the EasyKey™ Display.
4. Ground the Display to a true earth ground. See
Grounding, page 23.
Not included with system:
•
Power supply cord compatible to your local power
configuration. Wire gauge size must be 8-14 AWG.
Connect EasyKey™ Display to
Smart Fluid Panel
•
Bulkhead strain relief sized for 22.4 mm (0.88 in.)
hole that will hold the power supply cord in the
EasyKey™ Display port
(V). FIG. 14.
There are two 50 ft.(15.2 m) cables to route between the
EasyKey™ Display and Smart Fluid Panel: the Fluid
Panel Power Cable (A) and the Fiber Optic Cable (C).
1. Provide power to the EasyKey™ Display. Use conduit to protect wiring.
2. Install the strain relief and power cord or conduit
bulkhead through the EasyKey™ Display port
(V). FIG. 14.
1. Connect the appropriate Fluid Panel Power Cable
(A) end to the EasyKey™ Display connector
FIG. 14.
VDC
.
2. Connect the other cable end to the Smart Fluid
Panel connector
VDC
(B). FIG. 15.
3. The Fiber Optic Cable (C) is shipped from the factory attached to the EasyKey™ Display connector
. FIG. 14.
If you need to detach the Fiber Optic Cable (C)
from the EasyKey Display, note how the cable is
routed inside the enclosure. Ensure that the door
can swing open and close without catching or pulling wires.
20
310633C
Installation ◆ Cable Connections
4. Route the opposite Fiber Optic Cable end through
the Smart Fluid Panel strain relief connector
(D). FIG. 15. Do not route the cable with tight bends
or kinks.
The fiber optic cable has a minimum bend radius of
1.6 in. (40 mm).
6. Tighten the strain relief connector
Connect Operator Station to
Smart Fluid Panel
The Operator Station cable (F) is factory wired into the
Operator Station. FIG. 17. Do not disconnect the cable
except to replace it. Route the 50 ft. (15.2 m) cable to
the Smart Fluid Panel and connect it to the Operator
Station connector
B
(D). FIG.
16.
(G). FIG. 15.
G
D
F
FIG. 15
FIG. 17
5. Connect the blue and black cable connectors (E) to
Gun Flush Box
the matching connectors on the electrical circuit
board. FIG. 16. Insert the cable connectors until
they bottom out (approximately ¼” [6 mm]), then
tighten the threaded connector.
CAUTION
Do not over-tighten or cause excessive stress on the
circuit board connector.
Refer to the Gun Flush Box manual for installation and
connection instructions.
Printer
If using a printer, plug the printer cable into the
EasyKey™ Display connector
(H).
H
E D
FIG. 18
FIG. 16
310633C
21
Installation ◆ Cable Connections
Adding Flow Meters
If using flow meters other than those supplied with the
system:
•
You must provide a separate power source to the
flow meter (unless it is a Graco G3000, G3000HR,
or Graco HG6000 helical meter).
•
Route the signal cables through the Smart Fluid
Panel holes (J - FIG. 19) and into the enclosure
through the strain reliefs (GG - FIG. 20). Leave
enough slack in the cable so the enclosure (K) can
be raised for service.
•
See FIG. 20 for electrical connections.
J
Flow Meter Signal Wire Schematic
J3
1
2
3
4
5
6
7
8
COMMON
SIGNAL
SHIELD
COMMON
SIGNAL
SHIELD
CABLE
FLOW METER A
FLOW METER B
CABLE
K
GG
FIG. 20
FIG. 19
22
310633C
Installation ◆ Grounding
Grounding
WARNING
W
Your system must be grounded. Read warnings,
page 6.
For Intrinsic Safety:
Ground wires for the EasyKey™ Display, Smart Fluid
Panel, Operator Station, and Gun Flush Box must all be
connected to the same true earth ground. See FIG. 26,
page 25.
Different ground points may cause current to flow
through component cables, causing incorrect signals.
FIG. 22
Smart Fluid Panel
Connect a ground wire from the Smart Fluid Panel
ground lug (EE) to a true earth ground. FIG. 23.
Ground the ProMix™ II system as instructed here and in
the individual component manuals. A ground wire and
clamp, part no. 222011, is available from Graco.
EE
EasyKey™ Display
For Intrinsic Safety
Remove knock-out (FF) from bottom of EasyKey™ Display enclosure. FIG. 21. Install a bulkhead strain relief.
Connect a ground wire to the ground block terminal (W).
FIG. 22. Route the wire through the strain relief and connect it to a true earth ground.
FIG. 23
Operator Station
Connect a ground wire from the Operator Station ground
lug (Y) to a true earth ground. FIG. 24.
FF
L1 L2
Y
FIG. 21
FIG. 24
310633C
23
Installation ◆ Grounding
Gun Flush Box
Air and Fluid Hoses:
Connect a ground wire from the Gun Flush Box ground
lug (BB) to a true earth ground. FIG. 25.
Use grounded hoses only.
Spray Gun
BB
Follow the grounding instructions in your gun manual.
Fluid Supply Container
Follow local code.
Object Being Sprayed
Follow local code.
FIG. 25
Flow Meters
Connect the meter cables as instructed on page 22.
Failure to properly connect the shield may cause incorrect signals.
Feed Pumps or Pressure Pots
Connect a ground wire and clamp from a true earth
ground to the pumps or pots. See pump or pressure pot
manual.
24
All Solvent Pails Used When Purging
Follow local code. Use only conductive metal pails
placed on a grounded surface. Do not place the pail on
a nonconductive surface, such as paper or cardboard,
which interrupts the grounding continuity.
Maintain Grounding Continuity When
Purging or Relieving Pressure
Hold a metal part of the gun firmly
to a grounded metal pail while
purging or relieving pressure.
Whenever you see the picture at
right, remember to follow these
instructions.
310633C
Installation ◆ Check Resistance
4
2
5
7
8
1
10
9
3
6
Key:
Ground wires for the EasyKey™ Display, Smart
Fluid Panel, Operator Station, and Gun Flush Box
must all be connected to the same true earth
ground. See FIG. 26, page 25.
1
EasyKey™ Display
2
EasyKey™ Display ground terminal
3
Display Enclosure ground wire
6
4
Fluid Panel ground wire connection point
5
Fluid Panel ground wire
6
True Earth Ground - check your local code for requirements
7
Operator Station ground wire connection point
8
Operator Station ground wire
9
Gun Flush Box ground wire connection point
10
Gun Flush Box ground wire
FIG. 26: Grounding
Check Resistance
WARNING
To ensure proper grounding, resistance between ProMix™ II components and true earth ground must be
less than 1 ohm. Read warnings, page 6.
310633C
Have a qualified electrician check resistance between
each ProMix™ II component and true earth ground. If
resistance is greater than 1 ohm, a different ground site
may be required. Do not operate the system until the
problem is corrected.
25
Operator Controls ◆ Operator Station
Operator Controls
Two devices provide operator interface; they are the Operator Station and the Keypad on the EasyKey™ Display.
Operator Station
Used by the operator for daily painting functions including: choosing color, initiating report printing, reading/clearing
alarms, and placing the system in Standby, Mix, or Purge mode. It is typically mounted inside the booth or near the
painter. The Operator Station consists of an LED display, LED mode indicator, and input keys. FIG. 27.
Operation Modes
Mix
System mixes and dispenses material.
Purge
Purges the system, using air and solvent.
Standby
Stops the system.
26
310633C
Operator Controls ◆ Operator Station
Color change and alarm indicator
• Normally displays color number.
• If an alarm occurs, displays an alarm code,
E1 to E9.
• Color number displays after alarm is cleared.
Color change sequence indicator (green LED)
• Stays lit while a color is in use.
• Shuts off when
or
keys are pressed.
• If a new color is entered, the LED blinks while the color is loaded
and turns solid after loading is complete.
• A new color is selected by pressing
Error Clear
• Red LED stays lit
when error occurs
or blinks for a potlife
alarm
• LED shuts off after
alarm is cleared &
key is pushed.*
then pressing
.
Up
Scrolls color numbers
up.
Down
Scrolls color numbers
down.
Report
• Sends report to
printer and resets A
and B totalizers.
• Green LED blinks
once after key is
pressed.
Mix
• Starts Mix mode.
• Green LED remains
lit while in Mix
mode.
• LED blinks when 2
minute idle time is
exceeded.
or
Enter
Enters selected color
and starts color
change sequence.
Standby
• Starts Standby mode.
• Green LED remains lit
while in Standby mode.
Purge
• Starts Purge mode.
• Green LED blinks during purge
sequence and turns solid once purge is
complete. LED turns off when another
mode is started.
FIG. 27
*
If a potlife alarm (code E3) occurs, you must purge the system with solvent or spray new mixed material before
the alarm can be fully cleared.
•
For additional information about alarms, see Alarm Troubleshooting, page 51.
•
The number of colors available when scrolling with the
or
keys is determined during software setup.
See page 32.
Color 0 can be selected to purge the system (as an alternative to Purge
key) on multiple color units.
Refer to page 32.
•
310633C
27
Operator Controls ◆ EasyKey™ Display
EasyKey™ Display
LCD Display
Keypad
AC
Power
Switch
Serial
Printer
Port
(RS-232)
Graco
PC
Cable
Port
Audible Alarm
FIG. 28
AC Power Switch
Backlit LCD Display
Turns system AC power on or off.
Shows graphical and text information related to setup
and spray operations. There is a screen saver option
available in the Advanced Setup Screen 3. Pressing any
key brings the display out of screen saver mode.
Keypad
Used to input numerical data, enter setup screens, scroll
through screens, and select setup values. See page 31
for additional keypad/screen navigation information.
Audible Alarm
Provided to alert the user when an alarm condition
occurs. It will sound intermittently for a Potlife Exceeded
alarm and continuously for all other errors. The alarm is
cleared by pressing the Operator Station Error Clear
key.
28
310633C
Operator Controls ◆ EasyKey™ Display
Printer Port
Ethernet Connection
The serial printer port (RS-232) is used with optional
Printer Kit 234670, which enables you to print individual
job tickets after each dispense transaction is complete.
See page 43. Refer to printer manual 308818 for additional information.
You can access data from the ProMix™ II on an office or
industrial network or through the internet with the proper
network configuration. You will need an external module,
commonly called an Ethernet to Serial Converter, that
converts serial data (RS-232) to ethernet.
Graco PC Cable Port
Converters are available from electronics suppliers such
as B&B Electronics and Omega.
The Graco PC Cable Port is for use with the ProMix™ II
Data Download Kit 234668, which enables you to communicate with the ProMix™ II from a PC to:
➜ Upgrade software
➜ View software version
➜ Download
• job and alarm logs
• material usage report
• setup values (can also upload)
➜ Clear job, alarm, and material usage reports
➜ Upload a custom language to view on screen
➜ Restore factory defaults
➜ Restore setup password
See Data Download manual 310669 or ProMix™ II Service manual 310653 for more information.
310633C
Some converters are powered by 24 VDC power
and are DIN rail mounted. Do not power any external device using the ProMix™ II power supply; an
external power supply must be used.
!
IMPORTANT: Once modifications are made to the
ProMix™ II electronics, the electrical approvals
may no longer apply. Contact your Graco distributor
for details
Wire the serial to ethernet converter on the EasyKey™
control board as follows.
Connection
Function
J6-1
RS-232 Transmit
J6-2
RS-232 Receive
J6-3
RS-232 Ground
29
Run Mode ◆ Power Up Screens
Run Mode
Power Up Screens
3 Potlife Timer: shows remaining potlife time in min-
When the EasyKey™ power switch is turned on, the
Graco logo and current software revision displays.
4 Actual Ratio: in hundredths.
utes.
Run Screen
5 Current Flow Rate: in cc/min.
This screen displays the operating status of the system
and is the default screen after powering up.
6 Total Job Volume: in cc or oz. Total Job Volume
2
1
(A + B) is reset to zero each time the Report
key
is pressed on the Operator Station, or after a color
change or purge.
7 Animation: When there is flow, the gun appears to
10
spray, and the component A or B hose light up,
showing which component dispense valve is open.
7
3
9
4
5
6
8 Status Bar: shows current alarm or operation mode
(Mix, Standby, Purge, or Color change to #).
9 Current Date and Time
8
10 Security Level: a padlock appears on the screen if
FIG. 29: Run Screen
Key
1 Active Color: color selected at Operator Station.
2 Target Ratio: for the selected color. The ratio can
a password is required to enter Setup mode. If the
password was set to “0”, no padlock appears and
setup can be entered without a password.
The only key that functions with the Run Screen is
the Setup
key (used to enter Setup mode).
be from 0.0:1–30.0:1.
30
310633C
Setup Mode ◆ Entering Setup
Setup Mode
Entering Setup
Setup Screen Menu
Press the Setup
The Setup Screen Menu appears at the bottom of all
Setup screens, with the current screen highlighted. FIG.
32.
key to enter or exit Setup.
Password Screen
If a password was activated, you must enter the password before entering Setup mode. Refer to Advanced
Screen 3, page 37. Entering the wrong password
returns you to the Run Screen.
Advanced setup has 3 screens. All other setup selections have only 1 screen.
If you forget the password, you can reset the
password (to 0), using the ProMix™ II Data
Download Kit 234668
Setup Screen
Menu
FIG. 32: Setup Mode - Color Setup Screen
Key Commands
FIG. 30: Setup Mode - Password Screen
If a password is activated, “Setup Locked” displays
momentarily after exiting Setup mode and returning
to the Run Screen.
In addition to the numbered keys on the EasyKey™ keypad, which are used to enter values in setup, there are
the following keys to navigate within a screen and
between screens, and to save entered values.
Key
Function
Setup: press to enter or exit Setup mode.
Enter: if cursor is in drop-down list box,
press Enter key to view drop-down list. See
FIG. 33. Press Enter to save a value either
keyed in from the numerical keypad or
selected from a drop-down list.
Up Arrow: move to previous field or
drop-down list item.
FIG. 31
Down Arrow: move to next field, or
drop-down list item.
Left Arrow: move to previous screen.
Right Arrow: move to next screen.
310633C
31
Setup Mode ◆ Color Screen
Color Screen
Potlife Time
Set the potlife time from 1–999 minutes in increments of
1 minute. Select a time that is within your material’s
sprayable potlife time so if the potlife is exceeded and an
alarm occurs, you have sufficient time to spray or purge
the mix material from the system.
Dropdown
list
Setup
Screen
Menu
CAUTION
The ProMix™ II potlife timer will not function properly
when used with multiple guns operating simultaneously. To avoid having mixed material set in the equipment, carefully monitor potlife by some other means.
FIG. 33: Setup Mode - Color Setup Screen
Purge Time
Use the Color screen to enter information about each of
the colors available on the system. The Color screen is
also used to setup system purge time, using Color 0
(page 32).
This setting is used during Purge mode and color
change. It can be set from 0–999 seconds in increments
of 1 second. See ProMix™ II Purge Sequence and
ProMix™ II Color Change Sequence, page 33.
Color
Fill Time
Select the number for the color you want to setup or edit.
This setting is used during color change to set the
amount of time the system spends loading the new
color. It can be set from 0–999 seconds in increments of
1 second. Set Fill Time for at least 5 seconds longer
than the time it takes to see a new color at the gun. See
ProMix™ II Color Change Sequence, page 33.
•
Only the number of colors selected in Advanced
Screen 2 (page 36) are shown on the Color
drop-down list.
•
Selecting a different color in the Setup mode does
not affect the color currently selected on the Operator Station.
Colors 1-6 Setup
There are five values to set. Use information from the
material data sheet or from your material supplier.
Ratio
Color 0 Setup
Color 0 is used in multiple color systems to purge out
material lines without loading a new color. It is typically
selected at the end of a shift to prevent hardening of catalyzed material.
When you select 0 from the setup Color list, the Color 0
Setup screen appears. Set purge time from 0–999 seconds in increments of 1 second.
Set the volumetric ratio of component A to B from 0.0:1
to 30:1, in increments of 0.1.
0.0:1 is a special setting, indicating only component
A is dispensed, for use with 1 component materials.
Tolerance
Set the ratio tolerance of the color from 1–99% in increments of 1%. To minimize nuisance alarms, select the
largest tolerance value that meets the paint manufacturer’s recommendations and your production requirements.
32
FIG. 34: Setup Mode - Color 0 Setup Screen
310633C
Setup Mode ◆ Color Screen
ProMix™ II Purge Sequence
Legend:
Pa: Air purge valve
Ps: Solvent purge valve
Ps-final: Solvent purge valve (final solvent fill is 25% of purge time)
25% of Purge Time
Pa Ps Pa Ps Pa Ps Pa PS-final
Pa = Air chop time set in Advance Screen 1, page 35.
Ps = Solvent chop time set in Advance Screen 1, page 35.
Gun Trigger
Purge Sequence
Purge Time
ProMix™ II Color Change Sequence
Legend:
S1: cc stack solvent valve
C2: cc stack color 2 valve
A: Component A dispense valve
B: Component B dispense valve
Pa: Air purge valve
Ps: Solvent purge valve
Ps-final: Solvent purge valve (final solvent fill is 25% of purge
time or 50% of purge time when color changing to 0)
S1
A
Pa Ps Pa Ps Pa Ps Pa PS-final
C2
Pa = Air chop time set in Advance Screen 1, page 35.
Ps = Solvent chop time set in Advance Screen 1, page 35.
A
A
B
A
B
A
B
A
B
Gun Trigger
5 second
flush cc
stack
Purge Sequence
Purge Time
5 second
load cc
stack
Mix
Fill Time
FIG. 35
310633C
33
Setup Mode ◆ Report Screen
Report Screen
Calibrate Screen
FIG. 37: Setup Mode - Calibrate Screen
FIG. 36: Setup Mode - Report Screen
The Report Screen shows the most recent 10 alarms,
with the date and time. Use the
or
keys to see
all the alarms. The grand total of components A and B is
displayed in liters or gallons, based on the units set in
Advanced Screen 1. Grand total cannot be reset.
There are no selectable settings on the Report Screen.
Use this screen to calibrate a meter.
•
Start - start calibration
•
Abort - stop calibration
•
Purge - purge sampling valves after calibration
See Meter Calibration, page 49, for when and how to
calibrate meter.
The optional ProMix™ II Data Download Kit
234668 enables you to download and view the
most recent 100 alarms or events.
34
310633C
Setup Mode ◆ Advanced Screens
Advanced Screens
Example: Material Usage Report
Material Usage
Start Time: 09-Dec-2003 12:24:08
End Time: 09-Dec-2003 12:26:19
Color
A (cc)
B (cc)
1
51
17
2
0
0
3
100
25
4
20
10
5
0
0
6
0
0
Advanced setup has 3 screens. The screen number
appears on the right side of the screen. FIG. 38.
Press
key to show drop-down lists and to enter your
selection.
Advanced Screen 1
Display Units
Screen
Number
Select cc/Liter (default) or oz/Gallon. Effects units used
for Run screen job totalizers, Report screen grand total
volume, and the potlife volume set on Advanced Screen
2. All other volumetric values remain as cc, cc/min., and
cc/pulse.
Dose Size
FIG. 38: Setup Mode - Advanced Screen 1
A dose is the volume of fluid that flows through the system in one complete cycle of dispense valves A and B.
The optimal dose size depends on the mix ratio, flow
rate, and ratio tolerance of the fluid you are using.
Language
Defines the language of the screen text. Select English
(default), French, German Spanish, Japanese (Kanji),
and Chinese (simplified).
Custom screen languages can be loaded, using the
ProMix™ II Data Download Kit 234668.
Usage Report
In general, mix quality is better with smaller dose sizes.
However, due to the uncertainty of the valve timing,
smaller dose sizes can generate more off-ratio conditions, especially at high flow rates. Repeated trial and
adjustment may be necessary to find the optimal dose
size and ratio tolerance.
Select from these 3 settings:
•
25 cc - (default) works well for most applications. It is small enough for good integration,
while still avoiding nuisance alarms.
•
50 cc - is best used when an application has
high fluctuations in mix ratio, such as when
using a high flow rate (> 2000 cc/min.) or flow
meters with lower resolution (K-factor > 0.2
cc/pulse).
•
Automatic - is a setting that eliminates the
need to repeatedly adjust the dose size and tol-
Options are to take No Action or:
•
Print - sends Material Usage Report to printer.
(Totals are not cleared.) Printout is in cc or oz,
depending on Display Units setting. ProMix™ II
must be in Standby
•
mode.
Clear - Resets all color totals to zero.
erance. Each time the Mix
key is pressed,
the ProMix™ II chooses between 15 cc, 25 cc,
or 50 cc dose sizes, based on how well the ratio
was maintained during the last application of the
color selected. This is especially beneficial
when using a very low flow rate (< 100 cc/min.).
310633C
35
Setup Mode ◆ Advanced Screens
Air Chop
Defines time (in seconds) that air is dosed during
air-solvent chop, which is used during the purge and
color change sequences. Set from 0-999 seconds.
Default is 1 second.
Solvent Chop
The potlife volume is set in either ounces or cc based on
units selected in Advanced Screen 1. Set from 0-999 cc
or 0-33 ounces. If you change the units, this value
updates to the new units. Default is 350 cc (12 oz.).
The volume of the ProMix™ II mix manifold, integrator,
and static mixer is 100 cc. To determine the volume of
your fluid hose to the gun, use the following information.
Defines time (in seconds) that solvent is dosed during
the air-solvent chop. Set from 0-999 seconds. Default is
2 seconds. See ProMix™ II Purge Sequence and ProMix™ II Color Change Sequence, page 33.
Hose Volume
Advanced Screen 2
Metric Units
Hose volume = 0.785 x (ID)2 (mm) x Length (m)
English Units
Hose volume = 154.4 x (ID)2 (in.) x Length (ft.)
Potlife Volume
Potlife volume = 100 cc + Hose Volume
Example:
If you are using a 25 ft., 1/4 in. ID fluid hose:
Hose volume = 154.4 x (0.25 in.)2 x 25 ft. = 241 cc
Potlife volume = 100 cc + 241 cc = 341 cc
Potlife Volume (cc) Tables
Table 1: English Measures
FIG. 39: Setup Mode - Advanced Screen 2
Number of Colors
Defines the number of colors available for component A
and determines the number of colors available on Color
Setup screen and choice of colors on Operator Station.
Select 1, 2, 3, 4, 5, or 6.
If you have a one color ProMix™ II system, you can
only select “1” for number of colors. To add color
change you must purchase a Graco ProMix™ II
Color Change Kit. See ProMix™ II Service manual
310653.
Potlife Volume
Set to the total volume of mixed fluid in the system. This
includes the mix manifold, integrator, static mixer, fluid
hose, and applicator. The ProMix™ II controller uses
this volume and the Potlife Time to determine if the
mixed material has been in the system longer than the
potlife time.
36
Hose ID (in.)
Hose Length (ft.)
25
36
50
75
100
3/16
236
295
371
507
643
1/4
341
447
582
824
1065
5/16
477
643
854
1231
1608
3/8
643
882
1186
1728
2271
Table 2: Metric Measures
Hose Length (m)
Hose ID
(mm)
10
15
20
25
30
4
226
288
351
414
477
6
383
524
665
806
948
8
602
854
1104
1356
1607
10
885
1278
1670
2062
2455
310633C
Setup Mode ◆ Advanced Screens
Gun Flush Box
Advanced Screen 3
Select Off (default) or On, depending on whether you
have a gun flush box.
Autodump
Select Off (default) or On. You can only use Autodump if
you have a gun flush box. If On, ProMix™ II will automatically purge the mixed material 2 minutes after potlife
time has expired, and the gun is in the gun flush box.
This prevents mixed material from setting up in the
material lines.
K-Factor A and K-Factor B
Defines the K-factors in cc/pulse for the two flow meters.
Enter a value from 0.001-0.999. Default is 0.119. Refer
to your flow meter manual for the recommended K-factor. Calibrate meters to verify meter operation.
FIG. 40: Setup Mode - Advanced Screen 3
Month
Enter current month.
Day
The maximum meter pulse frequency input to the
ProMix™ II is 425 Hz (pulse/second). Use a flow
meter with a K-factor that does not exceed 425 Hz
output while operating at your maximum flow rate
For a given maximum flow rate in cc/min., the
smallest allowable K-factor in cc/pulse is:
Enter current day.
Year
Enter current year (four digits).
Time
Maximum Flow Rate (cc/min.)
Minimum K-factor =
25,500
Enter current time in hours (24 hour clock) and minutes.
Seconds are not adjustable.
Password
Is only used to enter Setup mode. The default is 0,
which means no password is required to enter setup.
Enter a number from 1–9999 if a password is desired.
Screen Saver Time
Defines the number of minutes a screen can be inactive
before the screen saver turns on (screen dims). Press
any key to restore the screen. A setting of 0 (default)
turns the screen saver off. Time can be set from 1-99
minutes.
310633C
37
Operation ◆ Pressure Relief Procedure
Operation
8. Engage trigger lock.
Pressure Relief Procedure
9. Press Standby
WARNING
on Operator Station.
10. If you suspect that the spray tip or hose is clogged
Follow Pressure Relief Procedure when you stop
spraying, before changing spray tips, and before
cleaning, checking, or servicing equipment. Read
warnings, page 6.
or that pressure has not been fully relieved after following the steps above, very slowly loosen tip
guard retaining nut or hose end coupling to relieve
pressure gradually, then loosen completely. Clear
hose or tip obstruction.
WARNING
1. Engage the trigger lock.
Pressure upstream of component A and B dispense
valves (A, B) may not be fully relieved.
2. Press Standby
key on Operator Station.
11. Before servicing or disconnecting flow meters, color
Shut
off
change valves, or other components between the
fluid supply shut off valves (T) and dispense valves
A and B, very slowly loosen meter swivel fitting
(HH) to relieve pressure gradually.
3. Shut off air at the spray gun.
WARNING
If using an electrostatic gun, shut off electrostatics
before flushing.
4. Relieve fluid and air pressure at component A and
T
B and solvent feed pumps or pressure pots as
instructed in their separate manuals. Close all fluid
supply shutoff valves.
5. Press Mix
on Operator Station.
HH
6. Disengage trigger lock.
T
A
B
HH
Trigger Lock
7. Hold a metal part of the gun firmly
to a grounded metal pail. Trigger the
gun to relieve pressure.
page 24
Always engage the trigger lock when you stop spraying
to prevent the gun from being triggered accidentally.
Read warnings, page 6.
Trigger locks can vary. Follow instructions in your
gun manual.
38
310633C
Operation ◆ Start Up
Start Up
1. Go through Checklist,
✓
Checklist
1B
1A
System grounded
Verify all grounding connections were made. See
Grounding, page 23.
All connections tight and correct
Verify all electrical, fluid, air, and system connections are tight and installed according to Installation instructions, page 12.
4B
4A
Fluid supply containers filled
Check component A and B and solvent supply
containers.
2B
2A
3A
Mix manifold valves set
Check that mix manifold valves are set correctly.
Start with the settings recommended in Mix Manifold Valve Settings, below, then adjust as
needed.
3B
Mix Manifold Valves
Packing nuts on dispense and purge
valves correctly torqued
Use a 3/8” or 10 mm wrench to torque the dispense and purge valves packing nuts (D) to 25
in-lbs (2.8 N•m). FIG. 41. Repeat this torque
weekly to extend valve life and avoid leakage.
D
E
Torque to 25 in-lbs
(2.8 N•m)
Fluid supply valves open and pressure set
Component A and B fluid supply pressures should
be equal unless one component is more viscous
and requires a higher pressure setting.
TI4608A
FIG. 41
Solenoid pressure set
75-100 psi inlet air supply (0.5-0.7 MPa, 5.2-7 bar)
Mix Manifold Valve Settings
To open dispense or purge valves, turn their hex nut (E) counterclockwise. To close, turn clockwise. FIG. 41.
Valve
Hex Nut (E) Setting
Function
Dispense (3A, 3B)
1 turn out from fully closed
Limits maximum fluid flow rate into integrator and
minimizes valve response time.
Fluid Shutoff (1A, 1B)
Fully open during Run/Mix operation
Closes component A and B ports to integrator during
ratio check or meter calibration. Open ports during
Run/Mix operation.
Sampling (2A, 2B)
Fully closed during Run/Mix
operation
Opens valves to dispense component A and B while
calibrating meters. Do not open sampling valves
unless fluid shutoff valves are closed.
Purge (4A, 4B)
310633C
39
Operation ◆ Start Up
2. Turn the EasyKey™ Display AC Power Switch on
(I = on, 0 = off).
➜ Graco logo and software revisions display, followed by Run screen.
➜ In bottom left corner, the system status displays,
which can be Standby, Mix, Purge, or an alarm
notification.
Eas y K ey
3. If this is the first time starting up the system, purge
it as instructed in Purging Fluid Supply System,
page 46. The equipment was tested with lightweight oil, which should be flushed out to avoid
contaminating your material.
4. Setup your system as instructed in Key Commands, page 31.
5. Make sure that the Operator Station is in Standby
TM
mode.
6. Adjust component A and B fluid supplies as needed for your application.
Use lowest pressure possible.
7. Do not exceed the maximum rated
working pressure shown on the system ID panel
(refer to page 3) or the lowest rated component in
the system.
8. Open the fluid supply valves to the
system.
Run Screen
9. Adjust the air pressure to the Pro-
➜ Verify that the Operator Station is working. The
active color number and Standby
should be lit.
Color
LED
Mix™ II system. Most applications
require about 80 psi (552 kPa, 5.5 bar) air pressure
to operate properly. Do not use less than 75 psi
(517 kPa, 5.2 bar).
10. Purge air from the fluid lines.
a. Shut off air to the gun by closing the air regulator or shutoff
valve for the gun atomizing
air.
b. Trigger the gun into a grounded
metal pail.
LED
c. Press Mix
on Operator
page 24
Station.
d. If the flow meters over-run because of air in
Operator Station Screen
the system, an alarm will occur and operation
stops. Press
e. Press Mix
40
key to clear alarm.
.
310633C
Operation ◆ Start Up
11. Adjust the flow rate.
The fluid flow rate shown on the EasyKey™ Run
screen is for either component A or B, depending
on which dispense valve is open. The fluid supply
lines on the screen highlight to show which dispense valve is open.
1
If the fluid output is too high: reduce the air pressure, close the fluid manifold dispense valves further, or adjust the fluid pressure regulator.
Pressure adjustments of each component will vary
with fluid viscosity. Start with the same fluid pressure for component A and B, then adjust as
needed.
CAUTION
Do not use the first 4-5 oz. (120-150 cc) of material as
it may not be thoroughly mixed due to alarms while
priming the system.
12. Turn on atomizing air to the gun. Check the spray
pattern as instructed in your spray gun manual.
Component A Dispensing
Watch the fluid flow rate displayed on the Run
screen while the gun is fully open. Verify that the
flow rate of components A and B are within 10% of
each other.
If the fluid output is too low: increase air pressure to component A and B fluid supplies or
increase the regulated fluid pressure.
310633C
CAUTION
Do not allow the fluid supply tank to run empty. It is
possible for airflow in the supply line to turn gear
meters in the same manner as fluid. This can lead to
the proportioning of fluid and air that meets the ratio
and tolerance settings of the machine. This can further result in spraying uncatalyzed material.
41
Operation ◆ Color Change
Color Change
6. When the color change indicator light stops flashing on the Operator Station, the color change
sequence is complete.
Integrated Color Change - for
multiple color systems
The color change timer does not start until the gun
is triggered and fluid flow is detected. If no flow is
detected within 2 minutes, the color change operation aborts. The Operator Station switches to
1. Shut off air to the gun.
WARNING
Standby
If using an electrostatic gun, shut off the electrostatics
before placing the gun in the gun flush box.
2. Place the gun in the gun flush box if used, and
close the door.
3. The system can remain in Mix
switched to Standby
4. Use the scroll keys,
mode or
7. When you are ready to spray, remove the gun from
the gun flush box if used, and close its door.
The gun flush box door must be closed for the
atomizing air valve to open.
8. Press Mix
to start spraying.
at the Operator Station.
or
, to select the new
color. Press Enter
to begin the color change
sequence (see page 33).
the gun into a grounded metal pail
until the color change sequence is
complete.
Color Change - for single color
systems
1. Follow procedure for Purging Fluid Supply System, page 46.
5. If a gun flush box is not used, trigger
2. Load the new color as instructed in Start Up, page
39.
page 24
3. Press Mix
42
mode at the previous color.
to start spraying.
310633C
Operation ◆ Printing Job Log
Printing Job Log
Shutdown
1. To stop production at any time, press Standby
on the Operator Station.
2.
WARNING
6
If using an electrostatic gun with a gun flush box, shut
off the electrostatics before placing the gun in the box.
3. If you have a gun flush box, place the gun inside
If a printer is connected to the EasyKey™ Display, you
can press the Report
key to generate a Job Log
report. The EasyKey™ Display resets the Total Job Volume 6 and sends the report to the printer.
Job Log Report Example
Job:
Color:
Start Time:
End Time:
Target Ratio:
Ave Ratio:
Volume A
Volume B
Alarm:
•
•
1
3
03-Feb-2004 12:07:48
03-Feb-2004 13:38:04
2.5:1
2.51: 1
282 cc
112 cc
NO ALARMS
the box when the gun is not in use.
4. If your shutdown time WILL exceed the potlife,
follow the procedure Purging Mixed Material,
page 44.
If your shutdown time WILL NOT exceed the
potlife, you do not need to purge the system, but
you must relieve system pressure.
WARNING
Follow Pressure Relief Procedure on page 38 when
you stop spraying, before changing spray tips, and
before cleaning, checking, or servicing equipment.
Read warnings, page 6.
To print a Material Usage Report, see page 35.
The Job Log and other reports can be viewed
or printed using the Graco Data Download Kit
234668.
310633C
43
Purging ◆ Purging Mixed Material
Purging
3.
WARNING
WARNING
Read warnings, page 6. Follow Grounding instructions, page 23.
WARNING
If using an electrostatic gun with a gun flush box, shut
off the electrostatics before placing the gun in the box.
4. Set the solvent supply pressure regulator at a pressure high enough to thoroughly purge the system in
a reasonable amount of time but low enough to
avoid splashing or an injection injury. Generally, a
setting of 100 psi (0.7 MPa, 7 bar) is sufficient.
To avoid splashing fluid in the eyes, wear eye protection.
There are 4 purging procedures in this manual:
•
•
•
•
5. If using a gun flush box, place the gun into the box.
Purging Mixed Material (below)
Using Color 0 (page 45)
Purging Fluid Supply System (page 46)
Purging Sampling Valves and Tubes (page 48)
Press Purge
key on the Operator Station. The
purge sequence automatically starts.
If the gun flush box is not used, trigger the gun into a grounded metal
pail until the purge sequence is
complete.
Use the criteria listed in each procedure to determine
which procedure to use.
When done purging, the Operator Station automatically switches to Standby mode.
Purging Mixed Material
There are times when you only want to purge the fluid
manifold, such as:
• end of potlife
• breaks in spraying that exceed the potlife
• overnight shutdown
• before servicing the fluid manifold assembly, hose or
gun.
Solvent purges the component B (catalyst, right) side of
the mix manifold and the inner tube of the integrator. Air
purges the component A (resin, left) side and the outer
tube of the integrator.
1. Press Standby
page 24
6. If the system is not completely clean, repeat step 5.
If necessary, adjust purge sequence so only one
cycle is required.
7.
WARNING
Follow Pressure Relief Procedure, page 38. Engage
trigger lock.
on the Operator Station.
8. If spray tip was removed, re-install it.
2.
WARNING
9. Adjust the solvent supply regulator back to its normal operating pressure.
Follow Pressure Relief Procedure, page 38. Engage
trigger lock. If you are using a high pressure gun,
remove spray tip and clean tip separately.
44
310633C
Purging ◆ Using Color 0
Using Color 0
Color 0 is typically used:
• in multiple color systems to purge out material lines
without loading a new color
• at the end of a shift to prevent hardening of catalyzed material.
To setup Color 0, see page 32.
LED
1. Press Standby
on the Operator Station.
2.
WARNING
If using an electrostatic gun with a gun flush box, shut
off the electrostatics before placing the gun in the box.
3. If using a gun flush box, place the gun into the box.
4. Select Color 0 and press Enter
.
5. If a gun flush box is not used, trigger
the gun into a grounded metal pail
until the purge sequence is complete.
page 24
6. The color change LED blinks while Color 0 runs
and turns solid after purge sequence is complete.
Operator Station Screen
If the system is not completely clean, you can
repeat Color 0 by pressing
310633C
.
45
Purging ◆ Purging Fluid Supply System
Purging Fluid Supply System
Follow this procedure before:
• the first time material is loaded into equipment*
• servicing
• shutting down equipment for an extended period of
time
• putting equipment into storage
* Some steps are not necessary for initial flushing, as
no material has been loaded into the system yet.
1. Press Standby
on the Operator Station.
2.
A
WARNING
B
5. Adjust the solvent fluid supply pressure. Use the
Follow Pressure Relief Procedure, page 38. Engage
trigger lock. If you are using a high pressure gun,
remove spray tip and clean separately.
lowest possible pressure to avoid splashing.
6. Remove the Smart Fluid Panel cover to access the
solenoid valves.
7. Purge component A side.
3.
WARNING
If using an electrostatic gun with a gun flush box, shut
off the electrostatics before placing the gun in the box.
➜ Single color systems: press
the manual override button on
the Dispense A solenoid valve
and trigger the gun into a
grounded metal pail.
page 24
4. Attach solvent supply lines.
➜ Single color systems: disconnect the component A and B fluid supplies at the flow meter
inlet, and connect regulated solvent supply
lines.
Dispense A
solenoid
button
➜ Multiple color systems, disconnect only the
component B fluid supply at the flow meter
inlet and connect a regulated solvent supply
line.
46
310633C
Purging ◆ Purging Fluid Supply System
➜ Multiple color systems: choose one of two
methods below.
Method 1
Have someone press the manual
override buttons for both the Dispense A and Color Change Solvent solenoid valves while you
page 24
trigger the gun into a grounded
metal pail until clean solvent flows from the gun.
8. Purge component B side.
Press the manual override button on
the Dispense B solenoid valve and
page 24
trigger the gun into a grounded
metal pail until clean solvent flows from the gun.
Dispense B
solenoid
button
Color
Change
Solvent
button
9. Repeat steps 7 and 8 to thoroughly clean the fluid
integrator.
Dispense A
solenoid
button
10. Re-install the Smart Fluid Panel cover.
11. Shut off the solvent fluid supply.
Method 2
12. Follow Pressure Relief Procedure, page 38.
Close B side fluid shutoff valve.
On the EasyKey™ Display, press Setup
access setup screens.
Press
Press
key to
key to select the Calibrate screen.
13. Disconnect the solvent supply lines and reconnect
the component A and B fluid supplies.
14. See page 39 for Start Up procedure.
key and select Purge from the
drop-down list. Press
.
Purge
Trigger the gun into a grounded
metal pail.
The solvent valve(s) close automatically after 2 minutes or when
Abort is selected on the screen.
page 24
Open B side fluid shutoff valve.
Select Abort on Calibration screen to
avoid accidentally restarting purge
sequence.
310633C
47
Purging ◆ Purging Sampling Valves and Tubes
Purging Sampling Valves and Tubes
Follow this procedure after meter calibration.
1. Press Standby
7. Press
on the Operator Station.
key to select the Calibrate screen. Press
key and select Purge from the drop-down list.
2.
Press
WARNING
.
Dispense A, solvent purge valve (B side), and color
change solvent valves (if used) will open.
Follow Pressure Relief Procedure, page 38.
Purge
3. Close both fluid shutoff valves (1A, 1B) and sam-
Purge
Start
Purge
pling valves (2A, 2B).
1B
1A
8. To avoid splashing, slowly open the sampling
valves (2A, 2B) and dispense solvent until the
valves and tubes are clean.
The solvent valve(s) close automatically after 2
minutes or when Abort is selected on the screen.
5A
2A
9. Close sampling valves.
2B
Select Abort on Calibration screen to avoid accidentally restarting purge sequence.
C
4. Route the sampling tubes into a grounded waste
container.
5. On a single color system, attach a solvent supply
10. Fully open both fluid shutoff valves (1A, 1B).
11. Follow Pressure Relief Procedure, page 38.
12. On a single color system, reconnect component
line to Flow Meter A inlet (5A).
A fluid supply line to flow meter A.
6. On the EasyKey™ Display, press Setup
key to
access setup screens.
48
310633C
Meter Calibration ◆
Meter Calibration
3. Close both fluid shutoff valves (1A, 1B) and sam-
WARNING
pling valves (2A, 2B).
To avoid splashing fluid in the eyes, wear eye protection.
1B
1A
CAUTION
The fluid shutoff valves and ratio check valves are
retained by mechanical stops that prevent accidental
removal of the valve stem while the manifold is pressurized. If you cannot turn the valve stems manually,
relieve the system pressure, then disassemble and
clean the valve to remove the resistance.
2A
2B
Calibrate the meter:
•
The first time the system is operated.
•
Whenever new materials are used in the system,
especially if the materials have viscosities that differ
significantly.
C
•
•
At least once per month as part of regular maintenance.
Whenever a flow meter is serviced or replaced.
•
K-Factors on the Calibrate Screen are updated
automatically after the calibration procedure is
completed.
•
K-Factor values on the screen are viewable
only. If needed, you can manually edit the
K-Factors in Advanced Screen 2 (see page 37).
•
4. Place the beakers (minimum size - 250 cc) in
holders (C). Put the sampling tubes into the beakers.
If tubes need replacing, use 5/32 in. or 4 mm OD
tubing.
5. On the EasyKey™ Display, press Setup
key to
access setup screens.
6. Press
key to select the Calibrate screen. Press
key and select Start from the drop-down list.
Press
to activate Dispense Valves A and B.
All values on this screen are in cc, independent
of the units set in Advanced Screen 1.
1. Press Standby
on the Operator Station.
2. Shut off all spray or dispense devices connected to
the ProMix™ II.
310633C
49
Meter Calibration ◆
7. One at a time, dispense component A and B into
11. After the volumes for A and B are entered, the con-
separate beakers.
troller calculates the new flow meter K-Factor and
shows them on the Calibration screen.
a. To avoid splashing, slowly open sampling
valves (2A, 2B).
.
K-Factor values on the screen are viewable only. If
needed, you can manually edit the K-Factors in
Advanced Screen 2 (see page 37).
b. For more accurate calibration, adjust the valve
to dispense at a flow rate similar to your production spray flow rate.
c. Dispense a minimum of 250 cc of each com-
12. Always purge sampling valves after calibrating
ponent; make sure enough material is dispensed to accurately read the volume with
your beaker. The A and B volumes do not
have to be equal or at any particular ratio.
meters. Use one of the following methods.
d. Close each sampling valve tightly.
8. The volume that the ProMix™ II measured displays
•
Follow the Purging Sampling Valves and
Tubes procedure, page 48.
•
Place the sampling valve fluid tubes into a compatible cleaning fluid (TSL or solvent) or cap
them.
on the EasyKey™ Display.
If fluid hardens in sampling tubes, replace them
with 5/32 in. or 4 mm OD tubing.
Volume
Measured
13. Make sure both sampling valves (2A, 2B) are
closed and both fluid shutoff valves (1A, 1B) are
fully open.
1B
1A
9. Compare the amounts on the EasyKey™ Display to
the amount in the beakers.
For maximum accuracy, use a gravimetric (mass)
method to determine the actual volumes dispensed.
2A
10. If the screen and actual volumes are different, enter
2B
the actual dispensed volume in cc for A and B Volume fields, and press
.
C
If the values were substantially different, repeat the
calibration process.
14. Before you begin production, clear the system of
solvent and prime it with material.
If the screen and actual volumes are the same or if
for any reason you want to cancel the calibration
procedure, scroll to Abort on the Calibration
drop-down list and press
.
a. Select Mix
on the Operator Station.
b. Trigger the gun into a grounded
metal pail until mixed material
flows from the gun nozzle.
c. To begin operation, see Start
page 24
Up, page 39.
50
310633C
Alarm Troubleshooting ◆ ProMix™ II Alarms
Alarm Troubleshooting
Alarms E-Codes
WARNING
Follow Pressure Relief Procedure, page 38, when
you stop spraying, before changing spray tips, and
before cleaning, checking, or servicing equipment.
Read warnings, page 6.
CAUTION
Do not use the fluid in the line that was dispensed off
ratio as it may not cure properly.
ProMix™ II Alarms
The ProMix™ II alarms alert you of a problem and help
prevent off-ratio spraying. If an alarm occurs, operation
stops and the following occurs:
•
•
•
•
A red LED illuminates steadily or flashes on the
Operator Station.
Operator Station displays an alarm E-Code (E1-E9).
Alarm sounds.
Status bar on the EasyKey™ Display shows the
E-Code with a description.
Description
E-Code
Communication Error
E1
Purge Error
E2
Potlife Exceeded Alarm
E3
Ratio Alarm
E4
Overdose Alarm
E5
Dose Time A Alarm
E6
Dose Time B Alarm
E7
Autodump Complete Alarm
E8
EasyKey in Setup Mode
E9
To Clear Alarm and Restart
When an alarm occurs be sure to determine the
E-Code before clearing it. If you forget which
E-Code occurred, you can use the EasyKey™
Report screen (page 34) to view the last 10 alarms,
with date and time stamps.
Except for Potlife Exceeded (E3) Alarm and Purge Error
(E2) Alarm, page 52, all alarms can be cleared by press-
Red LED
E-Code
ing the Error Clear
key on the Operator Station.
Operator Station
310633C
51
Alarm Troubleshooting ◆ ProMix™ II Alarms
Communication Error Alarm (E1)
Cause
Solution
•
The communication signal between the EasyKey™
Display, Smart Fluid Panel, or Operator Station was
interrupted.
•
Verify that all cables are correctly connected. See
Cable Connections, page 20.
•
The fiber optic cable is cut or bent.
•
Verify cables have not been cut or bent at a radius
smaller than 1.6 in. (40 mm).
•
Dirty fiber optic cable ends
•
Disconnect fiber optic cable ends and clean with a
lint-free cloth.
•
A communication cable or connector failed.
•
Replace cable.
Purge Error (E2) Alarm
Cause
Solution
•
ProMix™ II detects atomizing air flow to the gun dur- •
ing Purge or Color Change sequence.
Verify that the gun air is shut off and atomizing air
safety valve is connected and functioning.
•
In systems with a gun flush box, operator selects to
Purge or Color Change when the gun is not in the
gun flush box.
•
Verify that the gun is in the gun flush box and the
door is fully closed. For additional Gun Flush Box
information, see manual 310695.
In systems set up for Autodump (page 36),
Autodump is initiated when gun is not in the gun
flush box.
CAUTION
The material may have cured in the system. Always
place the gun in the gun flush box when the gun is not
in use.
To abort a Color Change or Purge:
Press Standby
52
, then Error Clear
keys to clear alarm.
310633C
Alarm Troubleshooting ◆ ProMix™ II Alarms
Potlife Exceeded (E3) Alarm
CAUTION
The ProMix™ II potlife timer will not function when the ProMix™ II is used with multiple guns. To avoid having
mixed material set in the equipment, carefully monitor the potlife by some other means.
Potlife Timer Function
The potlife timer, thus the alarm, becomes inactive after the system has been purged. The ProMix™ II needs a dose
of component B (or a complete cycle) to restart the potlife timer. Once restarted, the potlife time resets whenever
the potlife volume (see page 36) has moved through the system.
Cause
The time the mixed material has been in the lines has
exceeded the potlife time (see Potlife Time, page 32).
Solution
Press the Error Clear
key to stop the audible alarm.
You must then purge the system of mixed material before
the E3 code clears. Purge the system with solvent or new
mix material.
•
Solvent - Press the Purge
key on the Operator
Station. The system purges until the preset purge
time is complete. Refer to Purging Mixed Material,
page 44.
•
New Mix Material - Press the Mix
the old material with new material.
key and purge
Ratio Alarm (E4)
Cause
Solution
Comparison of component A and B volume dispensed in
the previous cycle does not meet set tolerances. See
Tolerance, page 32. This can be caused by:
•
If the alarm occurs during start up, after purging, the •
flow rate was probably too high.
Restrict gun needle travel to slow down the initial
fluid delivery rate until fluid hoses are loaded with
material.
•
If the alarm occurred after you were spraying for
some time, the pressures from the fluid supplies
could be unbalanced.
Adjust component A and B fluid supply regulator
pressures until they are about equal. If the pressures
are already about equal, verify that component A
and B dispense valves are operating properly.
•
Slow actuation of the component A or B valves. This
can be caused by:
•
Manually operate the Dispense A and B solenoid
valves as instructed in ProMix™ II Service manual
310653 to check operation.
➜ Air pressure to the valve actuators is too low.
➜ Increase air pressure.
➜ Something is restricting the solenoid or tubing
and interrupting valve actuation air.
➜ There may be dirt or moisture in the air supply.
Filter appropriately.
➜ Packings on the mix manifold dispense valves
are too tight.
➜ Packing torque should be 25 in-lbs (2.8 N•m).
See page 39.
➜ A dispense valve is turned in too far.
➜ Refer to Start Up Checklist, page 39, for proper
adjustment. Tip: Put a piece of tape on the
knobs after they are properly set to discourage
anyone from changing settings.
➜ Fluid pressure is high and air pressure is low.
➜ Adjust air and fluid pressure.
310633C
53
Alarm Troubleshooting ◆ ProMix™ II Alarms
Overdose (E5) Alarm
Cause
Solution
ProMix™ II detected that the sum of A and B doses was
too large for the integrator (greater than 65 cc). This can
be caused by:
•
Valve(s) packings or needle/seat are leaking.
•
Torque packings to 25 in-lbs (2.8 N•m) [see page
39], or service the valve [see Dispense Valve manual
310655]
•
Sampling valve is leaking.
•
Tighten or replace valve.
•
Flow meter fluctuations caused by pressure pulsations.
•
Check for pressure pulsations:
a. Close all the manifold valves.
b. Turn on the circulating pumps and all the booth
equipment (such as fans and conveyors).
c. Check if the ProMix™ II is reading any fluid flow.
d. If the ProMix™ II shows there is fluid flow and
there are no leaks from the gun or any other
packings or fittings, the flow meters are probably
being affected by pressure pulsations.
e. Close the fluid shutoff valve between the fluid
supply system and the flow meter. The flow indication should stop.
f. If necessary, install pressure regulators or a
surge tank on the fluid inlets to the ProMix™ II to
reduce the fluid supply pressure. Contact your
Graco distributor for information.
•
Slow actuation of component A or B valves.
•
See Ratio Alarm (E4), page 53, third cause.
•
Running a high mix ratio and a high flow rate.
•
It may be necessary to restrict the flow rate through
the component B dispense valve by adjusting its hex
nut (E). FIG. 41, page 39.
Dose Time A (E6) or B (E7) Alarm
Cause
Solution
See Air Flow Switch Function, page 11, for additional
If the air flow switch is on, but there is no fluid flow
through the meter for the component being dispensed for information.
40 seconds, a dose time alarm occurs and the dispense
valves turn off. This can be caused by:
•
Do not partially trigger gun.
Fluid flow rate is too low.
•
Increase flow rate
Flow meter or cable failed or flow meter clogged.
•
Follow Meter Calibration procedure, page 49. If
there is a meter or cable failure, you will see a large
difference between the amount of fluid dispensed
and the flow meter volume displayed by the
EasyKey™ Display.
•
System being in Mix
mode and gun is only partially triggered, allowing air, but no fluid, to pass
through the gun.
•
•
54
310633C
Alarm Troubleshooting ◆ ProMix™ II Warnings
Autodump Complete Alarm (E8)
Cause
Solution
Occurs after an autodump sequence completes to signal
Press Error Clear
the operator that mixed material was purged and solvent
is in the lines. Refer to page 36.
key to clear alarm.
EasyKey in Setup Mode (E9)
Cause
Solution
Mix
mode was selected at Operator Station while the Completed all setup changes before entering Mix
EasyKey™ was in Setup mode.
mode.
ProMix™ II Warnings
The following conditions are considered system Warnings. They do not stop operation or sound an alarm. They are
saved in the date/time stamped log, which can be viewed on a PC, using the Data Download Kit 234668.
Idle Time Warning
The Operator Station Mix
LED flashes to indicate an Idle Time Warning and the dispense valves turn off.
Cause
•
ProMix™ II is set to Mix
, and 2 minutes have
elapsed since the system received a flow meter
pulse. For additional information, see Air Flow
Switch Function, page 11.
Solution
•
In applications using the air flow switch, trigger the
gun to clear the warning and start spraying again. If
the alarm does not clear, the air flow switch has
failed and should be replaced.
Without the air flow switch, triggering the gun does
not clear the alarm. To start spraying again, press
Mix
•
If the gun is dispensing when the alarm occurs, the
air flow switch and a flow meter have failed.
If spraying airless or air is supplied to gun by other
means than the ProMix™ II unit and the alarm
occurs, the flow meter has failed.
•
, then trigger the gun.
Follow Meter Calibration procedure, page 49. If
there is a meter or cable failure, you will see a large
difference between the amount of fluid dispensed
and the flow meter volume displayed by the
EasyKey™ Display.
Setup Change Warning
Anytime system parameters are changed in Setup on the EasyKey™ Display, this warning is logged.
Power On Warning
Every time the system is powered up the date/time stamp is logged.
Defaults Loaded Warning
If you load all of the default factory settings, using the Data Download Kit 234668, the process is date/time stamp
logged.
310633C
55
Technical Data ◆
Technical Data
Maximum fluid working pressure . . . . . . . . . . . . . . . . . . . see page 3
Maximum working air pressure. . . . . . . . . . . . . . . . . . . . . 100 psi (0.7 MPa, 7 bar)
Air supply . . . . . . . . . . . . . . . . . . . . . . . . . . . . . . . . . . . . . 75–100 psi (0.5–0.7 MPa, 5.2–7 bar)
Air filtration . . . . . . . . . . . . . . . . . . . . . . . . . . . . . . . . . . . . 10 micron (minimum) filtration required
Mixing ratio range . . . . . . . . . . . . . . . . . . . . . . . . . . . . . . . 0.1:1–30:1*
On-ratio accuracy . . . . . . . . . . . . . . . . . . . . . . . . . . . . . . . up to + 1%, user selectable
Fluids handled . . . . . . . . . . . . . . . . . . . . . . . . . . . . . . . . . one or two component:
• solvent and waterborne paints
• polyurethanes
• epoxies
• acid catalyzed varnishes
• moisture sensitive isocyanates
Viscosity range of fluid . . . . . . . . . . . . . . . . . . . . . . . . . . . 20–5000 cps*
Fluid filtration . . . . . . . . . . . . . . . . . . . . . . . . . . . . . . . . . . 100 mesh minimum
Fluid flow rate range*
G3000 Meter . . . . . . . . . . . . . . . . . . . . . . . . . . . . . . . 75–3000 cc/min. (0.02–0.79 gal./min.)
G3000HR Meter . . . . . . . . . . . . . . . . . . . . . . . . . . . . . 38–1500 cc/min. (0.01–0.40 gal./min.)
Coriolis Meter. . . . . . . . . . . . . . . . . . . . . . . . . . . . . . . 20–3800 cc/min. (0.005–1.00 gal./min.)
External Power Supply Requirements . . . . . . . . . . . . . . . 85–250 Vac, 50/60 Hz, 2 amps maximum draw
15 amp maximum circuit breaker required
8 to 14 AWG power supply wire gauge
Operating temperature range . . . . . . . . . . . . . . . . . . . . . . 41–122° F (5–50° C)
Environmental Conditions Rating . . . . . . . . . . . . . . . . . . . indoor use, pollution degree (2), installation category II
Noise Level
Sound pressure level . . . . . . . . . . . . . . . . . . . . . . . . . below 70 dBA
Sound power level . . . . . . . . . . . . . . . . . . . . . . . . . . . below 85 dBA
Wetted parts . . . . . . . . . . . . . . . . . . . . . . . . . . . . . . . . . . . 303, 304 SST, 17–4 SST, Tungsten carbide (with nickel
binder), perfluoroelastomer; PTFE; CV75
*
56
Dependent on programmed K-factor and application. The ProMix™ II maximum allowable flow meter pulse frequency is 425 Hz (pulses/sec.). For more detailed information on viscosities, flow rates, or mixing ratios, consult
your Graco distributor.
310633C
Technical Data ◆
Weight
Base System Total (no meters color change valves or
gun flush box) . . . . . . . . . . . . . . . . . . . . . . . . . . . . . . . 66.6 lbs (30.2 kg)
EasyKey™ Display. . . . . . . . . . . . . . . . . . . . . . . . 22.2 lbs (10.1 kg)
Smart Fluid Panel (no meters) . . . . . . . . . . . . . . . 41.3 lbs (18.7 kg)
Operator Station. . . . . . . . . . . . . . . . . . . . . . . . . . 3.3 lbs (1.5 kg)
Optional Components
G3000/G3000HR Flow Meter . . . . . . . . . . . . . . . 6 lbs. (2.7 kg) each
Coriolis Flow Meter . . . . . . . . . . . . . . . . . . . . . . . 33 lbs. (15 kg) each
Low Pressure Color Change Stack (6 color) . . . . 3.0 lbs (1.4 kg)
High Pressure Color Change Stack (6 color). . . . 11.0 lbs (5.0 kg)
Gun Flush Box . . . . . . . . . . . . . . . . . . . . . . . . . . . 22 lbs. (9.6 kg)
See individual component manuals for additional technical data.
310633C
57
Graco Standard Warranty
Graco warrants all equipment referenced in this document which is manufactured by Graco and bearing its name to be free from defects in
material and workmanship on the date of sale to the original purchaser for use. With the exception of any special, extended, or limited warranty
published by Graco, Graco will, for a period of twelve months from the date of sale, repair or replace any part of the equipment determined by
Graco to be defective. This warranty applies only when the equipment is installed, operated and maintained in accordance with Graco’s written
recommendations.
This warranty does not cover, and Graco shall not be liable for general wear and tear, or any malfunction, damage or wear caused by faulty
installation, misapplication, abrasion, corrosion, inadequate or improper maintenance, negligence, accident, tampering, or substitution of
non-Graco component parts. Nor shall Graco be liable for malfunction, damage or wear caused by the incompatibility of Graco equipment with
structures, accessories, equipment or materials not supplied by Graco, or the improper design, manufacture, installation, operation or
maintenance of structures, accessories, equipment or materials not supplied by Graco.
This warranty is conditioned upon the prepaid return of the equipment claimed to be defective to an authorized Graco distributor for verification of
the claimed defect. If the claimed defect is verified, Graco will repair or replace free of charge any defective parts. The equipment will be returned
to the original purchaser transportation prepaid. If inspection of the equipment does not disclose any defect in material or workmanship, repairs will
be made at a reasonable charge, which charges may include the costs of parts, labor, and transportation.
THIS WARRANTY IS EXCLUSIVE, AND IS IN LIEU OF ANY OTHER WARRANTIES, EXPRESS OR IMPLIED, INCLUDING BUT NOT LIMITED
TO WARRANTY OF MERCHANTABILITY OR WARRANTY OF FITNESS FOR A PARTICULAR PURPOSE.
Graco’s sole obligation and buyer’s sole remedy for any breach of warranty shall be as set forth above. The buyer agrees that no other remedy
(including, but not limited to, incidental or consequential damages for lost profits, lost sales, injury to person or property, or any other incidental or
consequential loss) shall be available. Any action for breach of warranty must be brought within two (2) years of the date of sale.
GRACO MAKES NO WARRANTY, AND DISCLAIMS ALL IMPLIED WARRANTIES OF MERCHANTABILITY AND FITNESS FOR A
PARTICULAR PURPOSE, IN CONNECTION WITH ACCESSORIES, EQUIPMENT, MATERIALS OR COMPONENTS SOLD BUT NOT
MANUFACTURED BY GRACO. These items sold, but not manufactured by Graco (such as electric motors, switches, hose, etc.), are subject to
the warranty, if any, of their manufacturer. Graco will provide purchaser with reasonable assistance in making any claim for breach of these
warranties.
In no event will Graco be liable for indirect, incidental, special or consequential damages resulting from Graco supplying equipment hereunder, or
the furnishing, performance, or use of any products or other goods sold hereto, whether due to a breach of contract, breach of warranty, the
negligence of Graco, or otherwise.
FOR GRACO CANADA CUSTOMERS
The Parties acknowledge that they have required that the present document, as well as all documents, notices and legal proceedings entered into,
given or instituted pursuant hereto or relating directly or indirectly hereto, be drawn up in English. Les parties reconnaissent avoir convenu que la
rédaction du présente document sera en Anglais, ainsi que tous documents, avis et procédures judiciaires exécutés, donnés ou intentés, à la suite
de ou en rapport, directement ou indirectement, avec les procédures concernées.
Graco Information
For the latest information about Graco products, visit www.graco.com.
TO PLACE AN ORDER, contact your Graco distributor or call to identify the nearest distributor.
Phone: 612-623-6921 or Toll Free: 1-800-328-0211, Fax: 612-378-3505
All written and visual data contained in this document reflects the latest product information available at the time of publication.
Graco reserves the right to make changes at any time without notice.
This manual contains English. MM 310633
Graco Headquarters: Minneapolis
International Offices: Belgium, China, Japan, Korea
GRACO INC. P.O. BOX 1441 MINNEAPOLIS, MN 55440-1441
Copyright 2004, Graco Inc. is registered to ISO 9001
www.graco.com
Revised 3/2009