1
Battistinis
Custom
Cycles
Chrome billet grips
&
black anodized
billet grips
1109 Langton drive
San Ramon, CA 94582
925.270.4211 Tech line
www.battistinisusa.com
Quantity
1
1
1
1
1
1
1
1
3
BILL OF MATERIALS
Part
Billet grip, left, chrome
Billet grip, right, chrome
Bolt, bearing mount
Bearing
Polymer 1 (small)
Ploymer 2, (large)
Hex nut, zinc plated 5/16”-18
Washer, stainless steel
Set screw, stainless steel, 10-32 x 3/16”
BASIC TOOLS
MEDIUM:
30 minutes
to install
(approx.)
MAINTENANCE: To keep your new grips
looking their best, apply a high-quality
chrome polish to them (for chrome grips) or
clean them thoroughly (for black grips) every
time you detail your motorcycle.
WARNING: Your safety depends onthe correct installation of this kit. Use
appropriate service manual procedures. If the procedures are not within your
capability or you do not have the correct tools, have a trained mechanic/
technician install this part for you. Improper installation of this part could result
in injury or death.
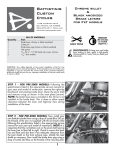
STEP 1: Follow the procedure listed in the appropriate
service manual for your year and model of motorcycle to
remove the existing grip. Clean both the inside and outside
of the handlebar end, ensuring that the inside of the bar
is dry and free of oil or grease. Two hex-shaped polymer
inserts are included with this kit. Choose the one that best
fits your handlebars and install the insert that fits snugly
into the end of your handlebars as shown. We recommend
cutting 1/2” off of the bar end to ensure that the new grip
is correctly positioned inside the hand control. Optionally,
you can move your hand controls down the bar end 1/2”
should you not wish to cut your handlebars.
STEP 1A - NOTE: Not all handlebars are constructed from
tubing that has the same inside diameter. For example, OEM
Harley-Davidson handlebars use thin-wall stainless steel
tubing. If your motorcycle does NOT have OEM HarleyDavidson handlebars made of thin-wall stainless steel tubing,
proceed to Step 2.
1
Battistinis
Custom
Cycles
Chrome billet grips
&
Black anodized billet grips
STEP 1B - NOTE: With this type of handlebar, it may be
necessary to pre-tighten the bearing mount bolt in order to
distort the polymer insert enough to provide a snug fit, as
shown.
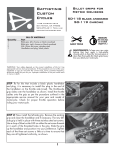
STEP 2: The large stainless steel washer will stop against the
bar end when the insert is fully installed. As shown, tighten
the bearing mount bolt. Avoid over-tightening this bolt so as
not to damage the polymer insert.
STEP 3: There is a small ball bearing pressed into the end
of the throttle grip. Slide the throttle grip over the handlebar
end until the bearing registers onto the bearing mount bolt
as shown. Install the throttle cables onto the Battistinis grips
as per the procedure outlined in the appropriate service
manual for your year and model of motorcycle. Check for
proper throttle operation before riding your motorcycle.
STEP 4: Remove the existing left-side grip and clean the
handlebar end if necessary. The new grip is held in place
with three stainless steel set screws. Use a drop of blue
Loctite 242 on either the set screw threads or in each of the
threaded holes in the grip. Slide the grip up the handlebar
and position it to your preference. Tighten each of the three
set screws a little at a time to ensure that they are all tightened
uniformly, as shown. We recommend re-checking the set
screws periodically to ensure they stay tight. Now you are
ready to enjoy your new Battistinis billet grips.
2