1
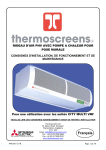
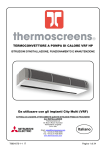
PHV RECESSED HEAT PUMP AIR CURTAINS
INSTALLATION, OPERATION & MAINTENANCE INSTRUCTIONS
For use with CITY MULTI VRF units
PLEASE READ THESE INSTRUCTIONS CAREFULLY BEFORE ATTEMPTING INSTALLATION
Thermoscreens Ltd
St. Mary’s Road Nuneaton
Warwickshire England
CV11 5AU
Email: [email protected]
Tel: +44 (0) 24 7638 4646
Fax: +44 (0) 24 7638 8578
www.thermoscreens.com
9901037-2
English
Page 1 of 33
Thermoscreens / Mitsubishi Electric
Thermoscreens City Multi Heat Pump Air Curtains can be used with Mitsubishi Electric City
Multi Y/WY-Series (Heat Pump) or City Multi R2/WR2-Series (Heat Recovery) systems.
City Multi Y/WY-Series Heat Pump Air Curtain System
City Multi Y/WY-Series Heat Pump Air Curtain Schematic :Permanent electrical supply
(from local switched spur)
Permanent mains electrical supply
(from local switched spur) for:
PAC-AH AHU
Controller
1 per air
curtain
LEV(s)
Power
Fan
Sensors
Defrost signal
Cond. alarm
Mitsubishi Electric
Compressor Unit
BMS Control
x Fans
x PAC-AH…AHU Controller
x Defrost electric heaters (if used)
PAR-21MAA
remote
controller
Heat Pump
Air Curtain
Remote
3-Speed
Fan Switch
Mitsubishi Electric
Indoor Units
Refrigeration pipework
Electrical/Controls cables
City Multi Y-Series System:Indoor Units and Air Curtains(s) all operate on heating at the same time, or all operate on
cooling at the same time.
The City Multi Y Series Heat Pump Air Curtain system consists of :• One or more Thermoscreens VRF PHVR Heat Pump (heating & cooling) Air Curtains *
• A Mitsubishi Electric PAC-AH…M-G AHU Controller or PAC-AH…M-H AHU Controller
(one for each air curtain) *
• A Mitsubishi Electric PAR-21MAA Remote Controller (one for each AHU Controller) +
• One or more Mitsubishi Electric City Multi Y/WY-Series Compressor Unit +
• Mitsubishi Electric Indoor Unit(s) + [NB. Can be used on a full air curtain basis if required
up to 100% diversity]
• Mitsubishi Electric BMS System or Centralised Controller, if required +
* - supplied by Thermoscreens Ltd.; + - supplied by others
9901037-2
Page 2 of 33
City Multi R2/WR2-Series Heat Pump Air Curtain System
City Multi R2/WR2-Series Heat Recovery Heat Pump Air Curtain Schematic :Permanent electrical supply
(from local switched spur)
BC Controller
Permanent mains electrical supply
(from local switched spur) for:
PAC-AH AHU
Controller LEV(s)
1 per air
curtain
Power
Fan
Sensors
Defrost signal
Cond. alarm
Mitsubishi Electric
Compressor Unit
BMS Control
x Fans
x PAC-AH…AHU Controller
x Defrost electric heaters (if used)
PAR-21MAA
remote
controller
Heat Pump
Air Curtain
Remote
3-Speed
Fan Switch
Mitsubishi Electric
Indoor Units
Refrigeration pipework
Electrical/Controls cables
City Multi R2/WR2-Series System:Indoor Units and Air Curtains(s) can operate on heating or cooling simultaneously, e.g.
some indoor units are cooling whilst other indoor units and air curtain are heating at the
same time.
The City Multi R2/WR2-Series heat recovery system with Heat Pump Air Curtain(s) consists
of :• One or more Thermoscreens VRF PHVR Heat Pump (heating & cooling) Air Curtains *
• A Mitsubishi Electric PAC-AH…M-G AHU Controller or PAC-AH…M-H AHU Controller
(one for each air curtain) *
• A Mitsubishi Electric PAR-21MAA Remote Controller (one for each AHU Controller) +
• One or more Mitsubishi Electric City Multi R2/WR2-Series Compressor Unit +
• Mitsubishi Electric BC Controller +
• Mitsubishi Electric Indoor Unit(s) + [NB. Can be used on a full air curtain basis if required
up to 100% diversity]
• Mitsubishi Electric BMS System or Centralised Controller, if required +
* - supplied by Thermoscreens Ltd.; + - supplied by others
9901037-2
Page 3 of 33
DESIGN INFORMATION
Each Thermoscreens Heat Pump Air Curtain needs to operate with a Mitsubishi Electric
PAC-AH…AHU Controller. There are two versions that can be used; PAC-AH…M-G and
PAC-AH…M-H the supply of which is dependent on the EU state/country where the
installation is being carried out.
The rated size of the PAC-AH…AHU Controller needs to be matched to the size of the
heat pump air curtain. Each size of AHU Controller comes with different size LEV(s) and
number of LEVs so they need to be matched to the air curtain. The table shows the AHU
Controller to be selected and performance data for the air curtain.
Air Curtain
VRF PHV1000R
DXE HO
VRF PHV1500R
DXE LO
VRF PHV1500R
DXE HO
VRF PHV2000R
DXE LO
VRF PHV2000R
DXE HO
PAC-AH…AHU
Controller
LEV(s)
No.Off
Index Size
Maximum Heat Max. Air
Pump Output (kW) Volume
Heating Cooling Flow
Max.
Noise
Level
(m3/h)
dB(A)@3m
PAC-AH125M-G Type P632411X01
or
PAC-AH125M-H
PAC-AH125M-G
or
PAC-AH125M-H
PAC-AH140M-G
or
PAC-AH140M-H
PAC-AH140M-G
or
PAC-AH140M-H
PAC-AH250M-G
or
PAC-AH250M-H
1 off
P100
9.0
8.1
1400
56
10.6
9.0
2500
58
15.1
13.6
2600
58
16.4
14.8
3300
59
21.4
19.3
3130
59
Type P632411X01
1 off
P125
Type P632414X01
1 off
P140
Type P632414X01
1 off
P140
Type P632411X01
2 off
P200
Maximum heat pump output refers to the heating or cooling output from the air curtain air stream. Figures are
derived from laboratory testing with reference to test standard EN14511. They are with the air curtain
operating at high fan speed, outdoor air temperature 7/6°C db/wb, indoor air temperature 20°C db for heating;
outdoor air temperature 35/27°C db/wb, indoor air temperature 27°C db for cooling. Contact Mitsubishi Electric
for performance at other outdoor and indoor conditions.
The air curtain normally operates under automatic temperature control set on the PAR-21MAA remote
controller and can also run at part load.
The following City Multi compressor units can be connected:
For Y/WY-Series systems:
PUHY-(E)P200 …. 1250Y(S)HM-A
PQHY-P200 …. 600Y(S)HM-A
PUMY-P100 …. 140V(Y)HMB
PUHY-HP200 …. 500Y(S)HM-A
For R2/WR2-Series systems:
PURY-(E)P200 …. 800Y(S)HM-A
PQRY-P200 …. 600Y(S)HM-A
9901037-2
Page 4 of 33
The Thermoscreens Air Curtain requires a permanent mains electrical supply from a local
switched isolator. Electrical power to the PAC-AH…AHU controller is then fed from the air
curtain. Electrical power to the Mitsubishi Electric compressor unit(s) and BC Controller is
fed separately in the normal way (see separate Mitsubishi Electric instructions). If the
defrost cycle electric heaters inside the air curtain are to be used during the heating mode
defrost cycle the electrical supply to the air curtain needs to be 3-phase (3L+N+E). If the
defrost cycle electric heaters are not required they can be permanently disconnected at
installation and a single phase electrical supply (1L+N+E) fed to the air curtain instead,
see 'Installation - Electrical Supply'.
Warning: Air curtain fans continue to operate during heating mode system defrost to
maintain an air stream across the doorway. With the defrost cycle electric heaters
operating the discharge air temperature from the air curtain is kept to a few degrees below
that of the indoor ambient air temperature during the duration of system defrost. If the
electric heaters are disconnected, discharge air temperatures could be very cold,
approximately 6ºC during the defrost and defrost times will also be extended, particularly
with the R2-Series System. Defrost does not occur with WY and WR2 systems so the
defrost cycle electric heaters should be disconnected on these systems.
There are various control cables that are wired on site to the PAC-AH…AHU Controller
and the Thermoscreens Air Curtain that provide control for the operation of the unit. These
are:• Start/Stop of air curtain fans
• Operation of LEV(s) for control of heating or cooling output
• Thermistor sensors
• PAR-21MAA Remote Controller for end user manual control, if used
• On/Off of electric heaters inside the air curtain during system defrost (if used)
• Condensate alarm derived from condensate pump alarm sensor (if used)
• M-Net communications link to the Mitsubishi Electric Compressor Unit.
(see also wiring diagrams)
The Thermoscreens Air Curtain is supplied with an integral condensate drain tray to
enable the air curtain to be used in cooling mode during warm weather, if so desired. If it is
intended to use the air curtain in cooling mode a condensate drain system is required. It is
possible to gravity drain condensate from these recessed air curtains via the lower
condensate outlet hole, which is c.40mm above the top surface of the ceiling within the
ceiling void. Means of condensate disposal must then be provided within the ceiling void.
Alternatively, a suitable condensate pump (not supplied by Thermoscreens) can be
supplied and fitted by the installer to remove condensate directly from the unit. The
condensate pump must be of sufficient capacity (see Page 20) and if located above the
drain tray; it should be self priming and capable of providing the appropriate suction head
so the pump will lift condensate out from the top of the air curtain. Suitable condensate
pumps with a suction head are Peristaltic or Rotary Diaphragm type. We recommend the
Blue Diamond rotary diaphragm type with cooling signal sensor (drainStik) manufactured
by Charles Austen Pumps Ltd. (www.miniblue.co.uk). It is recommended that the
condensate pump has the facility so it only operates when the air curtain is in cooling
mode by detection of water in the drain tray or by detecting a cooling differential in the
airflow. It should also have a pump overrun to empty the drain tray as much as possible
when the air curtain is switched off.
The condensate disposal system should have an alarm system with appropriate sensor
fitted in the drain tray that will give a volt-free signal (open circuit = alarm). This will stop
9901037-2
Page 5 of 33
the air curtain cooling if the condensate drain tray is in danger of flooding, air curtain fans
will continue to operate. Other indoor units on the same City Multi system are unaffected if
the air curtain condensate alarm occurs. There is a plastic fixing bracket with 8mm
diameter hole attached to the drain tray inside the air curtain so a condensate sensor can
be fixed in the tray by the installer. The hole can be enlarged, if necessary, to suit the type
of sensor used so it is located in the tray at the appropriate position, see the
manufacturer’s instructions that come with the condensate pump for further information.
The 230v AC, single phase electrical supply to operate the condensate pump will come
from the air curtain.
Warning: The air curtain condensate collection system is designed to remove condensate
with the air curtain operating in cooling mode during normal summer weather conditions in
countries with a temperate climate. In case of extreme weather conditions or failure of the
condensate disposal system, which can occur, it is vital that the design of the floor beneath
the air curtain and its surface is such that it will not become slippery or damaged if it
became wet. This is similar to the conditions that might be experienced with heavy rainfall
in at an open doorway or wet pedestrian foot traffic, so careful consideration must be paid
to the design of the floor and its surface finish.
If it is intended that the air curtain should not be operated in cooling mode and a
condensate disposal system/pump is not fitted, the BMS System, Centralised Controller or
PAR-21MAA manual Remote Controller must be configured at commissioning so that
COOL or AUTO mode can never be selected (see Section – Commissioning). It is still
recommended, however, that the floor design and surface be as described above in case
cooling mode is used in the future and to cope with heavy rainfall or wet pedestrian foot
traffic.
Note: It could still be possible for an end user to unlock a PAR-21MAA Remote Controller
if they found out how to and switch it into cooling, not realising that condensate would then
flood out of the drain tray. It may therefore be considered prudent to install a condensate
disposal system even if it is intended that the unit should only be used in HEAT or FAN
mode.
If a Building Management System (BMS) or Centralised Controller is to be used for control
of the air curtain please contact Mitsubishi Electric for more details.
The air curtain is designed only for use with a Mitsubishi Electric City Multi VRF system for
use on R410A. The complete Thermoscreens/Mitsubishi Electric heat pump system,
including fridge pipework, wiring, controls, etc. must be installed only by an approved
Mitsubishi Electric refrigeration contractor.
The air curtain is not intended for use by persons (including children) with reduced
physical, sensory or mental capabilities, or lack of experience and knowledge, unless they
have been given supervision or instruction concerning the use of the appliance by a
person responsible for their safety.
High Output (HO) and Low Output (LO) in this document refers to the heat pump heating
or cooling capacity of the Air Curtain, not to any electrical rating. HO air curtains have a 3row coil, LO air curtains have a 2-row coil.
These instructions must be read in conjunction with the Mitsubishi Electric instructions that
come with other components of the heat pump system, e.g. Compressor Unit, BC
Controller, PAR-21MAA Remote Controller, BMS System, Centralised Controller, etc.
They should be kept by the building facilities manager for future reference.
9901037-2
Page 6 of 33
UNPACKING THE HEAT PUMP AIR CURTAIN
The following items are supplied and packaged within the Thermoscreens air curtain box:VRF Recessed Heat Pump Air Curtain
Remote 3-Speed Fan Switch
Void
Filter
Air Discharge
The Recessed Grille is packed in a separate box but comes with the air curtain:Recessed Grille with Filter
If anything is missing or
damaged please
contact your place of
purchase immediately
Air Discharge
Air Inlet
The Mitsubishi Electric PAC-AH…M-G AHU Controller or PAC-AH…M-H AHU Controller
comes in its original Mitsubishi Electric box. It is delivered with the Thermoscreens air curtain
and Recessed grille. It is factory pre-wired as much as possible to reduce installation time on
site:PAC-AH..M-G or M-H..AHU Controller
Check with the cross-reference labels
on the Thermoscreens air curtain box
and the Mitsubishi Electric AHU
Controller box that the correct AHU
Controller is matched with the correct
air curtain.
Other components for the heat pump system are as described above on the System
Schematics on pages 2 and 3.
9901037-2
Page 7 of 33
The Installer will also need to supply and install the following:PAR-21 MAA Remote Controller
If Air Curtain is to be manually controlled,
also needed for commissioning
Condensate Disposal System and
Condensate Pump (if non-gravity drain)
If Air Curtain is to be operated in COOL or
AUTO mode – see text for more information
The following optional equipment is also available for the air curtain:Fan Speed Controller for low speeds
For your records:
Date of Purchase……………………………..
Place of Purchase…………………………….
Serial Number…………………………………
For warranty purposes proof of purchase is necessary so please keep a copy of your invoice.
9901037-2
Page 8 of 33
INSTALLATION OF THE HEAT PUMP AIR CURTAIN
The air curtain is designed to be recessed within ceiling voids or bulkheads within a
building and located horizontally over a doorway. It must not be installed outside of
the building.
Location
The air curtain must be mounted so the recessed
grille is between 1.8m minimum and 3.5m maximum
Air Inlet
above floor level and situated as close to the doorway
as possible. The Air Discharge section of the
recessed grille must be nearest to the doorway and
the Air Inlet section furthest from the doorway.
Beware of doorway top edges, structural beams, door
Air Discharge
opening/closure devices, etc. which may interfere with
the air stream and affect the location of the unit. The
DOORWAY
air curtain must be installed level or condensate may
leak out, particularly if it tilts down at the left hand side
(looking out of the doorway from inside). It is better to tilt down slightly at the right hand
side as the drain tray spout is this side.
Ensure there will be adequate clear space above the top of the unit within the ceiling void
to safely allow for pipework brazing operations.
The PHVR Recessed Heat Pump air curtain has a rectangular air ventilation hole with
Void Filter on one side of the unit, see photo of unit on Page 7. This air ventilation hole will
be inside the ceiling void once the air curtain is installed and air from the void needs to
enter it for the correct operation of the unit. There must be a clearance gap of 80mm
minimum between this ventilation hole and any obstruction/bulkhead within the ceiling void
to allow ventilation air from the void to easily enter the air curtain. Furthermore, the ceiling
void must be sufficiently large and freely ventilated so there will be an adequate supply of
ventilation air (m3/hr) to the unit (see table below). If the ceiling void is enclosed around
the air curtain it will need an air ventilation grille of effective free area (cm2) as given in the
table below and an adequate air path within the void for air to enter the rectangular air
ventilation hole.
Required air flow within Effective free area of ventilation grille
ceiling void (m3/hr)
for an enclosed ceiling void (cm2)
VRF PHV1000R DXE HO
353
500
Air Curtain
VRF PHV1500R DXE LO
421
700
VRF PHV1500R DXE HO
421
700
VRF PHV2000R DXE LO
707
1200
VRF PHV2000R DXE HO
707
1200
9901037-2
Page 9 of 33
Ceiling Suspension
Make the cut-out in the ceiling to the dimensions given
in Figure 1 being as accurate as possible. The air
curtain can be manoeuvred straight up through the
ceiling cut-out. Alternatively the ceiling can be fitted
after the air curtain is installed. Bear in mind it will be
necessary to carry out pipework brazing operations
above the air curtain once it is located in position.
Ensure there is sufficient height clearance within the
ceiling void to do this.
M10
threaded
hanging
rods
Holes are provided in the top face of the casing (see Figure 1 for positions) to allow the
unit to be suspended on M10 threaded rods (not provided). All suspension points must be
used.
Weight (kg)
Number of
hanging points
VRF PHV1000R DXE HO
45
4
VRF PHV1500R DXE LO
66
6
VRF PHV1500R DXE HO
67
6
VRF PHV2000R DXE LO
85
6
VRF PHV2000R DXE HO
88
6
Air Curtain
Four of the threaded rods (the two at each end of the unit) enter the casing from above
and are attached to fixing brackets near the bottom of the unit (see photo above - looking
up into the air curtain). The two centre threaded rods (on PHV1500 and PHV2000 units)
are attached to the top face of the casing.
Ensure each of the threaded rods is secured onto a suitable structure that can support the
weight of the unit (see table above)*. When fitting the threaded rod ensure that it does not
interfere with internal components. Threaded rod should engage into fixing holes by a
minimum of 20mm and locking nuts fitted to prevent the rod rotating and coming away
from its fixing point.
Note: When installing the air curtain ensure that the underside of the casing is between
40mm and 65mm above the exposed bottom face of the ceiling tile/plasterboard
(see Figure 1). The recessed grille and other air curtain components have
adjustment within this range, although aim to achieve the minimum 40mm if
possible.
* It is the sole responsibility of the installer to ensure that the building fixing points and
suspension system used are suitable for the air curtain being installed.
9901037-2
Page 10 of 33
9901037-2
40-65mm
CEILING LEVEL
Alternative position for
Electrical Supply and
Control Wiring Inlets
Clearance from side of unit for
air to enter from ceiling void
1095
2290
800
1690
1655
445
N/A
1190
1155
445
B(mm)
C(mm)
Cut-Out Length(mm)
in Ceiling Width(mm)
55
314
140
A
B
Hot Gas
Refrigerant Connection
Hole for condensate hose (pumped)
Holes for M10 drop rods
4 for 1m unit, 6 for 1.5m/2m units
Use all drop rod holes !
B
C
Hole for condensate hose (gravity)
FIGURE 1 – DIMENSIONS OF PHVR HEAT PUMP AIR CURTAIN
445
2245
2240
1650
1150
PHV1000R DXE PHV1500R DXE PHV2000R DXE
476
80
296
A(mm)
Separator Plate
on top of grille
436
Liquid line
Refrigerant Connection
Electrical Supply and
Control Wiring Inlets
100
Page 11 of 33
Fitting the Recessed Grille
The recessed grille consists of a frame and grille core
with filter attached to it.
Fix the four fixing brackets to the grille frame using an
M4 screw to fit each fixing bracket. Note which fixing
brackets go where (see photo), there are two shapes.
Less angled bracket
More angled
bracket
Remove the grille core from the grille frame by
unfastening the two conical bolts fitted at each end of
the grille core using an 8mm spanner.
Then push the grille core sideways against the spring
loaded pins on one side and the grille core with filter
now comes clear of its frame.
Note: The grille core with filter attached will still be
tethered to the frame via safety cords and will
hang down on these cords.
Locate the four M6 bolts that will hold the grille fixing brackets to the air curtain (two inside
each end of the unit) and remove these M6 bolts. Lift the frame into position so the air
discharge section of the grille will align with the air discharge vanes from the air curtain
(see Figure 1 and photos on Page 7). Screw an M6 bolt through the slot in each grille
fixing bracket until all four are located in place. Adjust the height of the grille frame (via the
slots in the fixing brackets) so the frame fits neatly against the cut-out in the ceiling.
Tighten each M6 bolt in place locking the grille frame in the correct position up against the
underside of the finished ceiling.
The grille core will now be hanging down on its safety
cords exposing all the components up inside the air
curtain. Within the air curtain there are sliding air
separator plates, two on the PHV2000 and one on the
PHV1500 and PHV1000. These need to be adjusted up
or down to stop the discharge air re-circulating back into
the air curtain. Release the M6 bolts at each end of the
plate, extend the sliding plate down so it will just touch
the topside of the grille along its whole length when the
grille core is fitted and tighten the bolts (see photo and Figure 1). It is necessary to
temporarily fit the grille core to gauge the required height of the air separator plate(s).
Re-fit the grille core by locating each spring loaded pin in its locating hole, push against
the spring loaded pins so the fixed pins at the other side of the grille core locate in their
fixing holes in the frame. Tighten and secure the conical bolts fitted at each end of the
grille core to lock it in position.
Note: Access for electrical connections and all servicing is by removing the grille core.
Once work on the ceiling is finished remove the protective plastic film from the recessed
grille frame.
9901037-2
Page 12 of 33
Refrigerant Pipework
This must be carried out before connection of any electrical and controls cables
and in accordance with the Instructions that come with the Mitsubishi Electric
City Multi equipment. This work must only be undertaken by a Mitsubishi Electric
approved Contractor.
Refrigerant installation pipework sizes need to be as follows :Air Curtain
Discharge Line
(Gas)
VRF PHV1000R DXE HO
5
VRF PHV1500R DXE LO
5
VRF PHV1500R DXE HO
5
VRF PHV2000R DXE LO
5
8
8
8
8
Liquid Line
in.
3
in.
3
in.
3
in.
3
8
8
8
8
Index Size
in.
P100
in.
P125
in.
P140
in.
P140
3 in.
in.
P200
4
8
NOTE: Contact Mitsubishi Electric for recommended pipework lengths, numbers of fittings etc.
The installation must be done in accordance with the Mitsubishi Electric Service Manual.
VRF PHV2000R DXE HO
3
It is intended that refrigerant pipe connections to the air curtain are made using brazed
joints and these must be carried out in a professional and safe manner. If installation
pipe sizes for the discharge (gas) line and liquid line are different from the pipe
connection sizes on the air curtain, suitable pipe reducers must be used for the
connection. R410A refrigerant systems can operate at pressures up to 610 psi (c. 42
Bar). These brazed joints may well be located in a public area and a weakness leading
to an explosion could be extremely dangerous. The air curtain with its coil is
manufactured in accordance with the Pressure Equipment Directive and the installation
must be carried out to a good standard of workmanship. Use a heat sink on the copper
pipes when brazing to reduce the transfer of heat to the inside of the air curtain where
sensitive components are located. Make sure the thermistor (gas) sensor has not been
inserted into its pocket on the gas pipe at the top of the air curtain before brazing.
Remove it if it has or it will burn when the pipe connection is brazed.
For the City Multi system the LEV needs to be brazed into
the liquid line as close as possible to the air curtain (2m
maximum). The picture shows an example of this. On the
VRF PHV2000R DXE HO there are two LEVs to be fitted
in parallel (see Mitsubishi Electric AHU Controller
instructions). The LEV(s) should be located in the ceiling
void in an accessible position.
For the City Multi VRF R2 and WR2 Series system, pipework from each air curtain must
connect to one pair of ports on the Mitsubishi Electric BC Controller. The exception to
this is the VRF PHV2000R DXE HO air curtain that requires 2 pairs of ports on the BC
Controller to achieve the correct output. Do not combine pipework from two or more air
curtains together into one set of pipework and then connect this to one pair of ports.
NB: A maximum P140 Index is possible from 1 pair of ports, contact Mitsubishi Electric.
9901037-2
Page 13 of 33
To gain access inside the Air Curtain
To gain access for connection of the electrical supply, controls wiring and to work on the
unit during commissioning it is necessary to remove the grille core of the recessed grille.
Remove the grille core from the grille frame by
unfastening the two conical bolts fitted at each end of
the grille core using an 8mm spanner.
Then push the grille core sideways against the spring
loaded pins on one side and the grille core with filter
now comes clear of its frame.
Note: The grille core with filter attached will still be
tethered to the frame via safety cords and will
hang down on these cords.
Electrical Supply to the Air Curtain
This must be carried out AFTER the connection of the refrigerant pipework. All
electrical wiring and connections MUST be carried out by a competent qualified
electrician in accordance with the latest edition of the IEE wiring regulations
and/or local statutory regulations. (see also Wiring Diagrams on Pages 16 and 17)
• A local isolator having a contact separation of at least 3mm on all poles must be
fitted in the electrical supply to the air curtain and located in an accessible position
adjacent to the unit. 3 phase if defrost electric heaters are required. 1 phase if
defrost electric heaters are not required.
• The appliance must be connected using cables having an appropriate temperature
rating (heat resistant).
• Ensure that the supply cables, circuit breakers and other electrical installation
equipment are correctly sized for the air curtain being installed. See Table
overleaf.
• A 20mm size cable gland or conduit connector should be used for the Electrical
Supply into the air curtain.
• This appliance must be Earthed.
9901037-2
Page 14 of 33
Air Curtain
VRF PHV1000R DXE HO
VRF PHV1500R DXE LO
VRF PHV1500R DXE HO
VRF PHV2000R DXE LO
VRF PHV2000R DXE HO
400V/3ph/50Hz
if defrost electric heaters are required
Rated Electrical
Rated Current per
Power Input (kW)
phase (A)
4.8
7.8
7.8
9.5
9.5
7.8
12.7
12.7
15.7
15.7
230V/1ph/50Hz
if defrost electric heaters are not used
Rated Electrical
Rated Current (A)
Power Input (kW)
0.3
0.35
0.35
0.5
0.5
1.3
1.8
1.8
2.7
2.7
If the defrost electric heaters are not to be used they can be disabled by disconnecting
the neutral to the contactor coil inside the air curtain (see below and wiring diagrams on
Pages 16 & 17).
Note: If the defrost electric heaters are disconnected, discharge air temperatures could
be very cold, approximately 6ºC. Defrost times could also be extended, particularly with
the R2-Series System. *
The photo above shows the completed
wiring to terminals L1,L2, L3, N and
(Earth) for a 3 phase electrical supply
(400v/3ph/50Hz) if defrost electric
heaters are used
The photo above shows the completed
wiring to terminals L1, N and
(Earth)
for a single phase electrical supply
(230v/1ph/50Hz) if defrost electric
heaters are not used. NB. Electric
heaters must be disabled for 1 phase !!
Do not use cable size of more than 2.5mm2 or connecting the cable is difficult.
See also wiring diagram on page 16 or page 17.
If the defrost electric heaters are to be disabled this can be
done by disconnecting the purple (neutral) wire from terminal
A2 on the contactor inside the air curtain. The disconnected
purple wire should be terminated safely into unused auxiliary
terminal 14NO as shown in the adjacent picture, or into a
suitable terminal block.
*NB. Defrost does not occur with WY and WR2 systems so the
defrost cycle electric heaters should always be disconnected
on these systems.
9901037-2
Page 15 of 33
9901037-2
K1
SITE WIRING
Local Electrical Supply for Defrost
Electric Heaters and Fans
VRF PHV1000 = 7.8A per phase
VRF PHV1500 = 12.7A per phase
VRF PHV2000 = 15.7A per phase
400V/3ph/50Hz
E
Electrical Supply for
Outdoor Unit
400V/3ph/50Hz
or 230V/1ph/50Hz
L1 L2 L3 N
WIRING DIAGRAM – VRF PHVR Heat Pump Air Curtain with PAC-AH…M-G AHU Controller
(Medium Fan
Speed shown)
LINK-OUT if not
using 3-Speed Fan
Switch
1.3A for VRF PHV1000DX
1.8A for VRF PHV1500DX
2.7A for VRF PHV2000DX
L2 and L3 are not then needed
L1 is then 230V/1ph/50Hz
If Defrost Electric Heating Elements
are not required disconnect purple wire
from A2 and terminate wire safely in
auxiliary terminal 14NO.
1m unit
3 x 1.5kW = 4.5kW
1.5m unit 3 x 2.5kW = 7.5kW
2m unit
3 x 3.0kW = 9kW
K1
Electrical supply for Condensate Pump, use:Terminal 1 (Switched LIVE - Live only when air curtain is operating)
or, Terminal 7 (Permanent LIVE - Live at all times)
Terminal 8 (NEUTRAL)
Terminal 9 (EARTH)
OPTIONAL LOW SPEED CONTROLLER
Page 16 of 33
9901037-2
K1
SITE WIRING
Local Electrical Supply for Defrost
Electric Heaters and Fans
VRF PHV1000 = 7.8A per phase
VRF PHV1500 = 12.7A per phase
VRF PHV2000 = 15.7A per phase
400V/3ph/50Hz
E
Electrical Supply for
Outdoor Unit
400V/3ph/50Hz
or 230V/1ph/50Hz
L1 L2 L3 N
WIRING DIAGRAM – VRF PHVR Heat Pump Air Curtain with PAC-AH…M-H AHU Controller
(Medium Fan
Speed shown)
LINK-OUT if not
using 3-Speed Fan
Switch
1.3A for VRF PHV1000DX
1.8A for VRF PHV1500DX
2.7A for VRF PHV2000DX
L2 and L3 are not then needed
L1 is then 230V/1ph/50Hz
If Defrost Electric Heating Elements
are not required disconnect purple wire
from A2 and terminate wire safely in
auxiliary terminal 14NO.
1m unit
3 x 1.5kW = 4.5kW
1.5m unit 3 x 2.5kW = 7.5kW
2m unit
3 x 3.0kW = 9kW
K1
Electrical supply for Condensate Pump, use:Terminal 1 (Switched LIVE - Live only when air curtain is operating)
or, Terminal 7 (Permanent LIVE - Live at all times)
Terminal 8 (NEUTRAL)
Terminal 9 (EARTH)
OPTIONAL LOW SPEED CONTROLLER
Page 17 of 33
Wiring to PAC-AH…AHU Controller and Controls Wiring
The Mitsubishi Electric PAC-AH…AHU Controller needs to be located
within 7m from the air curtain (cables are 8m long). It would normally
be placed lying flat within the ceiling void but it could be fixed to a wall
using the four mounting feet. It must be accessible for future service
work if necessary. It comes pre-wired with various 8m long cables for
power supplies, thermistor sensors, LEV(s), alarms, etc. which have
to be connected to the air curtain. Each of the pre-wired cables has a
label attached to it at the end of the cable showing where it has to be
connected at the air curtain. The following table lists the connections
to be made between the PAC-AH…AHU Controller and the Air
Curtain. Please note, there are two types of AHU Controller, PAC-AH…M-G and PACAH…M-H, and wiring of some cables and components is different for each type. This is
indicated in the table below. See also wiring diagram on Page 16 for PAC-AH…M-G, and
Page 17 for PAC-AH…M-H.
Controller
Type
Termination at
PAC-AH…
Cable / Component
M-G and M-H
8m 3-core cable prewired to terminals E N L
POWER SUPPLY
8m 2-core cable prewired to terminals D1 D2
OPERATION SIGNAL
8m 2-core cable preplugged into CN52 on
PAC-AH… pcb
8m 2-core cable prewired to terminals
T21 T22 THERMISTOR
(GAS)
Electrical power supply from air
curtain to PAC-AH… – 230v ac
wire to terminals 7 8 9
Operation signal from PAC-AH… to
start Air Curtain – 230v ac
wire to terminals 1 & 2
Defrost signal from PAC-AH… to
operate contactor in air curtain for
defrost electric heaters if used
Thermistor
(Gas)
temperature
sensor – identified Black
wire to terminals 5 & 6
wire to terminals
T11 T12 THERMISTOR
(LIQUID)
wire to terminals
T1 & T2 THERMISTOR
(INLET AIR)
wire to terminals
T1 & T2 THERMISTOR
(OUTLET AIR)
Terminals T31 T32
8m 6-core cable prewired to 6-way colour
coded LEV terminals
Thermistor (Liquid) temperature
sensor – identified White
8m 2-core cable preplugged into CN31 on
PAC-AH… pcb
Condensate alarm from condensate
pump alarm system,
open circuit = alarm and stops unit
M-G and M-H
M-G and M-H
M-G and M-H
M-G and M-H
M-G only
M-H only
M-H only
M-G and M-H
M-G and M-H
9901037-2
Thermistor (Return Air)
temperature sensor – identified
Red
Thermistor (Return Air)
temperature sensor – identified
Red
Nothing connected to T31 or T32
Linear Expansion Valve(s) - LEV(s)
Termination at Air
Curtain
Fit sensor bulb into Hot Gas
pocket on refrigerant gas
pipe at top of air curtain after
brazing pipe connections
8m 2-core cable with sensor
bulb factory fitted within air
curtain
8m 2-core cable with sensor
bulb factory fitted within air
curtain
8m 2-core cable with sensor
bulb factory fitted within air
curtain
Not Applicable
Install in liquid line near to air
curtain
Connect to condensate pump
alarm terminals which must
be volt free, open cct = alarm
Page 18 of 33
Remote 3-Speed Fan Switch
A remote 3-speed fan switch is supplied with the air curtain so the end user can remotely
select High, Medium or Low fan speeds to suit the local
conditions. The 3-Speed Fan Switch should be mounted on a
wall with the Mitsubishi Electric PAR-21MAA Remote Controller,
if used, so the end user will then have On/Off, temperature
control and fan speed control all from one location. The 3-speed
fan switch is wired to terminals FAN, HIGH, MED and LOW in
the Air Curtain using 230v mains rated, 4 core double insulated
cable of size 0.75mm2.
If the remote 3-Speed fan switch is not to be used, a permanent
wire link must be fitted across the fan terminals in the air curtain or
the fans will not operate when the system is started. This will
result in an error message from the compressor unit after a time.
The picture opposite shows a wire link fitted across terminals FAN
and MED and the air curtain would operate at Medium Fan Speed
whenever the heat pump system is switched on.
Note: Fan speed selection using the PAR-21MAA Remote Controller is not available. The
fan speed control logic within the PAC-AH…AHU Controller is not suitable for the
operation of an air curtain and so is not used.
230v rated cables
The finished wiring to the air curtain will be as shown in the
photo adjacent (wiring is shown with a 3-phase electrical
supply for enabled defrost heaters).
Note the use of 20mm conduit with thermistor sensors and low
voltage cables routed in a separate conduit to that used for
mains rated cables.
Sensors and low
voltage cables
PAR-21MAA Remote Controller
If the air curtain is to be manually controlled by the end user a
Mitsubishi Electric PAR-21MAA remote controller (not supplied by
Thermoscreens) must be supplied and fitted by the installer. This is
wired to the PAC-AH…AHU Controller using 2-core cable. Refer to
the Mitsubishi Electric instructions that come with the PAR-21MAA
remote controller for installation and wiring of the controller.
A PAR-21MAA Remote Controller is also required for commissioning
purposes and if using AUTO mode with a BMS System or Centralised
Controller.
M-NET Communications Cable
The M-NET communications cable is wired to the PAC-AH…AHU Controller in accordance
with Mitsubishi Electric instructions. Avoid isolators in the communications cables as this
can lead to transmission problems.
9901037-2
Page 19 of 33
Condensate Disposal System
If it is intended to use the air curtain in cooling mode a condensate disposal system is
required.
The air curtain is supplied with a 1m length of 12mm bore plastic
hose ready fitted to the outlet spout of the drain tray. The plastic hose
can be found curled up inside the air curtain at the right hand side of
the unit. There are two condensate outlet holes in the casing, one at
the top of the unit and a lower one at the rear, both fitted with rubber
plugs (see Figure 1, Page 11). The photo shows the plastic hose
going through the lower rear condensate outlet hole.
It is possible to gravity drain condensate from these recessed air curtains via the lower
condensate outlet hole at the rear of the unit, which is c.40mm minimum above the top
surface of the ceiling within the ceiling void (see Figure 1). Means of condensate disposal
must then be provided within the ceiling void. The plastic hose should be pushed through
this lower hole at the rear after removing the plug and connected to the condensate
disposal system within the ceiling void.
Alternatively, a suitable condensate pump (not supplied by Thermoscreens) can be
supplied and fitted by the installer to remove condensate directly from the unit. The
condensate pump must be of sufficient capacity (see Table below) and if located above
the drain tray; self priming and capable of providing the appropriate suction head so the
pump will lift condensate out from the top of the air curtain. Suitable condensate pumps
with a suction head are Peristaltic or Rotary Diaphragm type. We recommend the Blue
Diamond rotary diaphragm type with cooling signal sensor (drainStik) manufactured by
Charles Austen Pumps Ltd. (www.miniblue.co.uk).
Air Curtain
VRF PHV1000R DXE HO
VRF PHV1500R DXE LO
VRF PHV1500R DXE HO
VRF PHV2000R DXE LO
VRF PHV2000R DXE HO
Maximum likely
Condensate flow rate
(litres/hour)
6.0
7.0
10.0
11.0
14.0
It is recommended that the condensate pump has the facility so it only operates when the
air curtain is in cooling mode by detection of water in the drain tray or by detecting a
cooling differential in the airflow. It should also have a pump overrun to empty the drain
tray as much as possible when the air curtain is switched off. The plastic hose should be
pushed through either of the two condensate outlet holes after removing the plug and
connected to the condensate pump using the adapter supplied with the pump. It may be
necessary to extend the hose if the pump is remotely located.
Whether a gravity drain system is used to remove the condensate, or a condensate pump,
there should be an alarm system with appropriate sensor fitted in the drain tray that will
give a volt-free signal (open circuit = alarm). This will stop the air curtain cooling if the
9901037-2
Page 20 of 33
condensate drain is in danger of flooding, bringing up
error code 2502 or 2503, and the air curtain fans will
continue to operate. Other indoor units on the same City
Multi system are unaffected if the air curtain condensate
alarm occurs. There is a plastic fixing bracket with 8mm
diameter hole attached to the drain tray inside the air
curtain so a condensate sensor can be fixed in the tray by
the installer. Remove the drain tray at one end to gain
better access to the plastic fixing bracket. Enlarge the
hole if necessary to suit the type of sensor used so it is
located in the tray at the appropriate position. If a
condensate pump is being used, see the manufacturers instructions that come with the
pump for further information.
The 230v AC, single phase electrical supply to operate a condensate pump should come
from the air curtain (see wiring diagram). For a condensate pump with cooling mode start
and pump overrun, as recommended above, use Terminals:- 7 (Permanent Live), 8
(Neutral), 9 (Earth) which provides a permanent 5A fused supply. Terminal 1 (Switched
Live) can be used if a Switched Live is required. This will energise when the air curtain is
operating (Heat, Fan or Cool) and de-energise when it is switched off. This is also a 5A
fused supply.
Optional Fan Speed Controller
An optional fan speed controller is available to provide a greater
range to the three fan speeds in the air curtain. Three fan speeds
are still used but the speeds can be reduced to lower levels than
the standard fan motor offers. The controller is useful if noise
levels are an issue on site as the fan speeds can be reduced
accordingly. The controller can be fitted to the air curtain
retrospectively. It does not fit inside the air curtain but comes with
2m cables so it can be hidden remotely from the unit or even
inside one of the optional sheet metal covers. Separate instructions come with the fan
speed controller showing how it is connected to the air curtain and commissioned.
9901037-2
Page 21 of 33
COMMISSIONING THE HEAT PUMP AIR CURTAIN
Ensure that the electrical supply to the Air Curtain is switched off before starting
any commissioning work.
Air Curtain Checks
Check that the components inside the air curtain are as shown in the picture below.
Check that the thermal overheat cut-out switch has not ‘tripped’. Push down on the red
button on the top of the thermal overheat switch - if it has tripped it will click back on.
Connections on
electric elements
12v DC
relay
Thermal
overheat
cut-out
switch
Air Inlet
Sensor
RED
230v AC
relay
Set the inner aluminium air vanes within the air curtain air discharge so they point
straight downwards over the doorway.
A PAR-21MAA Remote Controller should be connected and
used to carry out commissioning even if the air curtain is to
operate under the control of a BMS System or Centralised
Controller. Disconnect the remote control plug from inside the
PAC-AH…AHU Controller to use the remote controller. Plug it
back in again if a BMS/Centralised Controller is to be used and
the PAR-21MAA is disconnected after commissioning.
NB. If the air curtain is used in AUTO mode under the control of
a BMS System or Centralised Controller it is necessary to also
have a PAR-21MAA Remote Controller connected.
Mitsubishi Electric Compressor Unit
For Y-Series systems ensure that the appropriate dip switch has been set in the
compressor unit so that the PAR-21MAA Remote Controller will operate in AUTO mode
and to enable Auto Re-Start after power failure if required.
PUMY-P model:- SW2-5 ON for AUTO mode
PUHY-P YHM and PQHY-P YHM model:- SW4-5 ON for AUTO mode
SW1-9 and SW1-10 on for Auto Re-Start after power failure.
9901037-2
Page 22 of 33
Mitsubishi Electric PAC AH…AHU Controller
Remove the access covers of the PAC-AH…AHU Controller and check that the dip
switch settings are correct for the controller. These need to be set as follows:
SW8
ON
OFF
1
2
3
VRF PHV1000DXE HO
ON
ON
ON
ON
OFF
OFF
OFF
OFF
1
2
3 4
SW4
5
1
2 3
SW7
4
1
ON
ON
OFF
OFF
2 3 4 5
SW2 (P125)
6
6
OFF
1
VRF PHV1500DXE HO
VRF PHV2000DXE LO
VRF PHV1500DXE LO
1
2 3 4 5
SW2 (P100)
ON
2
3
4
5 6
SW3
7
VRF PHV2000DXE HO
8
9 10
1
2
3
4
5 6
SW1
7
8
9 10
Black rectangle indicates
moveable head of dip switch
ON
OFF
1
2 3 4 5
SW2 (P140)
6
1
2 3 4 5
SW2 (P200)
6
These settings are the same for PAC-AH…M-G and PAC-AH…M-H AHU Controllers.
Starting the System
Carry out a final inspection to ensure that all wiring is in accordance with the wiring
diagram on Page 16 for a PAC-AH…M-G or Page 17 for a for PAC-AH…M-H and that
all connections have been properly made. Ensure that the refrigerant system is
complete, there are no leaks and there is sufficient charge of refrigerant R410A. Switch
on the electrical supply to the compressor unit and other City Multi system components.
Wait 30 seconds and switch on the electrical supply to the air curtain at the local
isolator. The system will boot-up and when the screen on the PAR-21MAA Remote
Controller becomes active it will repeat the message “PLEASE WAIT”. After several
minutes when the PLEASE WAIT message has stopped the system is ready to start.
DANGER: Beware of Fans Starting! Turn the air curtain on using the ON/OFF Button on
the PAR-21MAA Remote Controller and the air curtain fans will start straight away.
Switch the Mode Button on the PAR-21MAA to heating mode and adjust the target
temperature to 28°C maximum setting using the ▲TEMP Button. If the 3-Speed fan
switch is installed check that the fans run at Low speed, Medium speed and High speed
by operating the slider switch. Check there is no mechanical noise coming from the fans
at each of the three fan speeds and that all fans are working. If the 3-Speed fan switch
is not to be installed a wire link will have been fitted to the fan speed terminals on the air
curtain. Set the wire link to one of the three fan speeds (LOW, MED or HIGH)
appropriate to the site conditions (see also Page 19).
Check Heating and Cooling Performance
In heating mode check that the air stream from the discharge grille warms up across the
whole length of the air curtain after approximately 20 minutes of operation and that the
air stream reaches right down across the doorway with the door open or closed. If
necessary the inner aluminium vanes in the air curtain air discharge can be angled
either inwards or outwards if this gives better penetration/warming of any incoming
draughts. The fan speed can also be adjusted (High, Medium or Low) to suit the
9901037-2
Page 23 of 33
conditions. If an optional fan speed controller has been installed it may be necessary to
re-set the voltage tappings on the transformers inside the fan speed controller to
achieve a compromise between airstream performance and noise levels. This is
explained in the instructions that come with the optional fan speed controller.
If it is intended that the air curtain is to ever operate in cooling mode switch the Mode
Button on the PAR-21MAA remote controller to ‘COOL’ and adjust the target
temperature to 14°C minimum setting using the ▼TEMP Button. Wait for the air curtain
air stream to go cold. Check the inside of the drain tray is clean, there is no debris in the
outlet spout, there are no kinks in condensate hoses, the condensate pump (if fitted) will
operate or the gravity condensate drain (if used) is functional. It is unlikely that
condensate will fill the drain tray straight away so it will be necessary to fill the tray
manually with water to see if the condensate removal system is working satisfactorily. If
an alarm sensor is fitted in the drain tray, check it operates to stop the air curtain cooling
if the drain tray becomes too full. Test the air curtain for a time in cooling mode with the
recessed grille core fitted and if environmental conditions permit check that condensate
is being collected and disposed of, or pumped away by the condensate pump. No
condensate should leak out of the air curtain. At the end of the cooling test remove the
recessed grille core and check that the inside of the air curtain has remained dry and
that all condensate was collected by the removal system.
To conserve energy and carbon resources it is recommended to set up the BMS
System, Centralised Controller or PAR-21MAA Remote Controller so it can operate in
AUTO Mode at a target temperature of 24°C. This is the normal mode of operation for
the heat pump air curtain and it should run in this set-up with no further adjustments,
automatically heating or cooling as required. If the end user is to operate the air curtain
with a PAR-21MAA Remote Controller set up the No.1 locking function on the controller
so they can only switch the air curtain ON or OFF, with no control of mode or target
temperatures. See user instructions for the Mitsubishi Electric PAR-21MAA Remote
Controller.
BEWARE: It is possible for the air curtain to go into cooling mode on a warm day if the
BMS System, Centralised Controller or PAR-21MAA Remote Controller is set in AUTO
mode as described above. A condensate disposal system must therefore be fitted if the
air curtain is set in AUTO mode.
If it is intended that the air curtain should only operate in heating mode, never in cooling
mode, the PAR-21MAA Remote Controller must be set to HEAT mode with an
appropriate heating target temperature (say 24°C) and locked so only the ON/OFF
function on the Remote Controller works. If it is to be operated from a BMS System or
Centralised Controller this should be configured such that the air curtain can only
operate in HEAT or FAN mode, never in AUTO or COOL mode. It is important this is
done at commissioning if the air curtain is not to operate in cooling mode and is not
fitted with a condensate disposal system.
9901037-2
Page 24 of 33
Filter Dirty Indicator
The air curtain is fitted with a Filter Dirty Indicator. It is located at
the left-hand end of the air discharge grille and signals when the
air curtain inlet grille filters should be vacuum cleaned or the air
curtain requires servicing.
NB. The filter dirty indicator on the PAR-21MAA Remote Controller
does not function wired to a PAC-AH…AHU Controller.
The indicator states are outlined below:
Indicator State
Indicator Light
Action Required
Reset Button
GREEN FLASH
RED ON
RED FLASH
On 0.5s; Off 3s
On permanently
On 0.5s; Off 0.5s
None
Vacuum inlet
Service filters
N/A
Quick reset
Press for 5s
START
120 hrs
RED ON: Quick reset
120 hrs
480 hrs
Fan operating hours
The filter indicator schedule is based on fan operating hours. For the default schedule,
shown schematically below, the inlet grille filter should be vacuum cleaned every 120hrs
of fan operation (every 1 to 2 weeks) and a full service should take place every 480hrs
of fan operation.
RED ON: Quick reset
120 hrs
RED ON: Quick reset
120 hrs
RED FLASH: Hold 5s to reset
The factory set default schedule is suitable for most applications. However, the actual
frequency of cleaning required will depend on the environment. Two alternative filter
indicator schedules are available, and can be selected by changing the ‘jumper’ position
(marked 1, 2 or 3) on the Filter Indicator pcb.
Filter Indicator Schedule
Jumper position
9901037-2
Doublefrequency
Default
Halffrequency
• • • •
• • • •
• • • •
1 23
1 23
1 23
Inlet grille vacuum interval
60 hrs
120 hrs
240 hrs
Filter service interval
240 hrs
480 hrs
960 hrs
Page 25 of 33
To access the Filter Indicator pcb to change jumper position:Switch off the electrical power to the Heat Pump Air Curtain.
Remove the recessed grille core from the air curtain (see To gain
access inside the Air Curtain, Page 14). Unfasten the two screws
as indicated.
The Filter Indicator pcb is now accessible to change the
jumper position.
Fixing
screws
Jumper
Once the filter indicator pcb ‘jumper’ has been re-positioned,
re-fit the filter indicator and replace the recessed grille core.
Hand-over to End-User
Before leaving site it is important that there is a 'Hand-Over Meeting' to hand-over the
heat pump system and air curtain installation to the end user or their representative.
This should include a full and clear explanation of how the system operates and a
demonstration showing the air curtain running. Be sure to explain the Filter Indicator
Schedule, that the air inlet grille must be regularly vacuum cleaned and the unit serviced
at regular intervals.
If the air curtain is to be operated under manual control, it is important that the end user
understands how the Mitsubishi Electric PAR-21MAA Remote Controller and 3-Speed
Fan Switch operate. That the PAR-21MAA Remote Controller has been locked so only
the ON/Off button functions and the air curtain operates in AUTO mode with a fixed
target temperature of 24°C. If a condensate disposal system has not been fitted it is vital
they understand that the air curtain must not be run in COOL or AUTO mode and that
the PAR-21MAA Remote Controller has been locked so only the ON/Off button
functions and the air curtain operates only in HEAT mode with a fixed target
temperature of 24°C.
If the air curtain is to be operated under the control of a BMS System or Centralised
Controller, explain all the settings and demonstrate the operation of the system. If a
condensate disposal system has not been fitted it is vital they understand that the air
curtain must not be run in COOL or AUTO mode, that it must only be operated in HEAT
or FAN mode.
If a condensate disposal system has been fitted and they are going to run the air curtain
in COOL mode (not just AUTO mode) explain that the target temperature should be
adjusted to a comfortable level of cooling, not necessarily to the lowest target
temperature possible as this uses a lot more energy and carbon resources.
Ensure that all instructions and manuals are handed to the end user or their
representative.
9901037-2
Page 26 of 33
USER INSTRUCTIONS FOR THE AIR CURTAIN
For manual control using a PAR-21MAA Remote Controller
To Switch On and Off:
Turn the air curtain on by pressing the ON/OFF Button on the PAR-21MAA Remote
Controller and the air curtain fans will start within a few seconds. If a 3-Speed Fan
Switch is fitted adjust the fan speed to suit using the slider switch. As set up by the
Commissioning Engineer the air curtain will operate in AUTO mode, automatically
heating or cooling as required, with a target temperature of 24°C - all other buttons on
the Remote Controller are locked out.
NB. The air curtain may produce condensate during hot weather so a condensate
disposal system must be fitted!
PAR-21MAA
Remote Controller
3-Speed
Fan Switch
Turn the air curtain off by pressing the ON/OFF Button on the PAR-21MAA Remote
Controller and the air curtain fans will stop.
If the PAR-21MAA Remote Controller is not locked the following functions operate:-
HEAT Mode:
Press the Mode Button on the Remote Controller until HEAT appears on the display.
Adjust the target temperature using the ▲ or ▼ TEMP Button between 22°C and 28°C
maximum. Allow time for the air stream to heat up.
AUTO Mode (only if a condensate disposal system is fitted!!):
Press the Mode Button on the Remote Controller until AUTO appears on the display.
Adjust the target temperature using the ▲ or ▼ TEMP Button to 24°C. This is the
normal mode of operation for the heat pump air curtain and it should run in this set-up
with no further adjustments, automatically heating or cooling as required.
FAN Mode (Fan only - no heating or cooling):
Press the Mode Button on the Remote Controller until FAN appears on the display.
COOL Mode (only if a condensate disposal system is fitted!!):
Press the Mode Button on the Remote Controller until COOL appears on the display.
Adjust the target temperature using the ▲ or ▼ TEMP Button between 20°C and 14°C
minimum. Allow time for the air stream to chill. Do not necessarily use the lowest target
temperature possible as this uses a lot more energy and carbon resources.
The temperature of the air returning to the air curtain is constantly displayed on screen.
9901037-2
Page 27 of 33
SERVICING THE HEAT PUMP AIR CURTAIN
Vacuum Clean the Air Inlet Grilles / Filters
(Weekly, or when the Filter Dirty Indicator shows PERMANENT RED)
With the air curtain switched OFF, a vacuum cleaner with
an extension tube and brush attachment at its end should
be used to clean the face of the air inlet grille and the filter
at the back of the grille. This is important to minimise the
build-up of dust and lint on the air filter which will affect the
performance of the air curtain. This is a simple service task
that can be carried out by the Cleaner or Janitor on a
weekly basis from floor level without having to access the
air curtain at high level. This should be done weekly as a
regular service task and/or when the Filter Dirty Indicator
shows permanent red.
Reset the Filter Dirty Indicator after cleaning by a quick press of
the Reset Button (even if the indicator has not gone red).
Servicing the Air Curtain
(suggest every 3 Months, or if the Filter Dirty Indicator shows FLASHING RED)
Always disconnect and isolate the mains electricity supply both at the local
electrical supply to the Air Curtain and to other Mitsubishi Electric equipment in
the City Multi system before servicing, maintaining or repairing the Air Curtain.
Note: All servicing, maintenance and repairs to the air curtain must be carried out by an
approved Service Agent.
Towards the rear of the recessed grille (nearest the
doorway), and at each end of the grille, there are two
conical bolts that prevent the grille being removed
without the use of tools.
Loosen these two conical bolts using an 8mm
spanner.
Then push the grille core towards the doorway against
spring loaded pins on one side and the grille core with
filter now comes clear of its frame.
Note: The grille core with filter attached will still be
tethered to the frame via safety cords and will
hang down on these cords.
9901037-2
Page 28 of 33
The grille filter can now be unclipped from the grille
and brushed and vacuum cleaned.
Looking up inside at the front edge of the unit (the
edge furthest from the doorway) there are 2 or 3
screws inset into the frame (see photo). Loosen each
of these screws by 2 turns.
Reach up and pull the metal retaining strip over to
one side and remove the retaining strip.
Pull the void filter outwards at the bottom and then
remove from the air curtain. It can then be brushed
and vacuum cleaned.
Refit the filters opposite to removal. The filters are very durable but may need to be
replaced after a number of service intervals.
Vacuum clean and remove any build-up of dust, dirt and debris within the air-curtain,
especially on the face of the coil and the electric heating elements.
Note: Fan motors are permanently lubricated and require no additional lubrication.
If the Air Curtain has been used in Cooling:-
Loosen by 4 turns, the rear row of
drain tray fixing screws along the
whole length of the tray. Do not
remove these screws completely.
9901037-2
Remove the front row of drain tray
fixing screws along the whole
length of the drain tray. Keep the
screws.
Page 29 of 33
The drain tray now angles down along its front edge and
the inside surface of the tray can be easily cleaned.
Remove all debris from the drain tray, outlet spout and
condensate hose.
Check there are no kinks in condensate hoses. If a peristaltic condensate pump is fitted
change the rubber pump head tube. Refit drain tray opposite to removal.
Once the air curtain has been cleaned, visually inspect the air curtain components.
Ensure pipe temperature sensors are located in their pockets and any foam insulation
covering these pockets is un-damaged. Check the location of the thermal overheat cutout and air sensor and that the thermal overheat cut-out switch has not tripped (see
Section – Commissioning, Page 22). Check all electrical connections and terminals
within the unit are tight and that crimp connections have not become loose.
After all the components have been re-fitted switch on the electrical supplies and fully
function test the air curtain to ensure correct operation (see Section - Commissioning).
Check the condensate pump operates, if fitted.
Reset the Filter Dirty Indicator after the service by pressing the
Reset Button for at least 5 seconds (even if the indicator has not
gone flashing red).and hand back the unit to the end user.
9901037-2
Page 30 of 33
Fault Conditions
If the Thermoscreens Heat Pump Air Curtain System does not operate as expected refer
to the fault finding table below:
Symptom
Air curtain
fans do not
operate
Air curtain
discharge air
stream is not
heating or
cooling when
required
Mitsubishi
Electric
system is
indicating an
error code
Possible Cause
Action Required
Electrical power is not switched on to
Switch on power to all
the Mitsubishi Electric City Multi system
components in the heat pump
and at the local electrical isolator next to
system and wait 30 seconds
the Thermoscreens Air Curtain
Switch on air curtain using the
PAR-21MAA Remote
Air curtain is not switched On
Controller, BMS System or
Centralised Controller
Air Curtain fans are not wired to operate
Wire in 3-Speed Fan Switch or
with either a 3-Speed Fan Switch or a
wire link – see wiring diagram
wire link on fan terminals in air curtain
Use wiring diagram to
Problem with air curtain fan motor(s), or
investigate possible cause of
internal wiring, or controls
fault
Air curtain has been running for less
Give system sufficient time to
than 20 minutes and is still warming up
reach operating condition
or cooling down
Air curtain is set to Fan-Only on PARCheck schedule on Controller
21MAA Remote Controller, BMS
and amend if necessary
System or Centralised Controller
Adjust the target temperature
Target temperature is set incorrectly,
on the BMS System,
i.e. too low for heating or too high for
Centralised Controller or PARcooling
21MAA Remote Controller
Select the correct mode for the
The operating mode is set incorrectly,
conditions on the BMS
i.e. set on COOL when heating is
System, Centralised Controller
required
or the PAR-21MAA Remote
Controller
Rectify alarm circuit which
Condensate Alarm circuit is open circuit
must be closed circuit for air
and air curtain will not COOL
curtain to operate in cooling
Service air curtain as
Air Curtain filters and/or coil is dirty.
described in Section –
Servicing, Pages 28 to 30
Error Code 2502 or 2503 indicating
Inspect air curtain condensate
condensate alarm from condensate
tray and condensate pump,
pump alarm system
service or repair if necessary
Refer to Mitsubishi Electric
A variety of error codes can occur
Service Manual to understand
because of a fault within the air curtain fault, then inspect and repair
air curtain if there is a fault
If the Heat Pump Air Curtain system is still not operating correctly call for a Mitsubishi
Electric Service Agent.
9901037-2
Page 31 of 33
Warranty
If any problems are encountered with the heat pump air curtain please contact your
Mitsubishi Electric Service Agent.
Care has been taken in compiling these instructions to ensure they are correct, although
Thermoscreens Ltd. disclaims all liability for damage resulting from any inaccuracies
and/or deficiencies in this documentation. Thermoscreens Ltd. retain the right to change
the specifications stated in these instructions.
Thermoscreens Ltd
St. Mary’s Road Nuneaton
Warwickshire England
CV11 5AU
Email: [email protected]
Tel: + 44 (0) 24 7638 4646
Fax: + 44 (0) 24 7638 8578
www.thermoscreens.com
9901037-2
Page 32 of 33
Thermoscreens Ltd
St. Mary’s Road
Nuneaton
Warwickshire
CV11 5AU
United Kingdom
Telephone: +44 (0)24 7638 4646
Fax: +44 (0)24 7638 8578
EC DECLARATION OF CONFORMITY
as defined by the EC Council Directive on Machinery 2006/42/EC, the Low Voltage Directive 73/23/EEC,
the Electromagnetic Compatibility Directive 89/336/EEC and the Pressure Equipment Directive 97/23/EC
Herewith we declare that the air movement equipment designated below, on the basis of its design and
construction in the form brought onto the market by us in accordance with the relevant safety, health and
performance requirements of the Machinery.
If alterations are made to the machinery without prior written permission from us this declaration becomes invalid.
Designation of Equipment :
THERMOSCREENS AIR CURTAINS with CITY MULTI SYSTEM
Series Type :
VRF PHV1000DXE HO, VRF PHV1000RDXE HO, VRF PHV1500DXE LO,
VRF PHV1500RDXE LO, VRF PHV1500DXE HO, VRF PHV1500RDXE HO,
VRF PHV2000DXE LO, VRF PHV2000RDXE LO, VRF PHV2000DXE HO
VRF PHV2000RDXE HO
Relevant EC Council
the Machinery Directive (2006/42/EC)
the Low Voltage Directive (73/23/EEC as amended by 93/68/EEC)
the Electromagnetic Compatibility Directive (89/336/EEC as amended by
91/31/EEC and 93/68/EEC)
the Pressure Equipment Directive (97/23/EC)
Applied Harmonised
Standards :
Machinery - EN 292-1, EN 292-2, EN 294, EN 394, EN 414
LVD - EN 60335-1, EN 60335-2-30, EN 60335-2-40
EMC - EN55011, EN 61000-3-2, EN 61000-3-3, EN 61000-4-2,
EN 61000-4-4, EN61000-4-5, EN61000-4-11, EN61000-6-4
PED - EN 13134, EN 13133
Basis of Self Attestation :
Quality Assurance to BS EN ISO 9001 : 2000
B.S.I. Registered Firm Certificate Number FM 85224
Responsible Person :
Mr. M. Francis, Managing Director, Thermoscreens Limited
Date :
17th June 2009
Signed :
9901037-2
Page 33 of 33