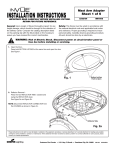
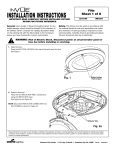
1
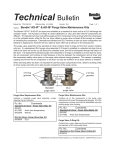
ServiceNews June 2002 OBD II Courses Offered at Online University Camshaft Pulse Plate Torque Spec Missing Interested in increasing your knowledge and improving your skills in the area of OBD II? The Online University has 17 new web-based training modules covering this subject. These self-study modules are in Adobe PDF format, so it’s a snap to make copies of them if you like. NOTE: This article applies to the 2000–02 S2000 Service Manual, 2002 Civic Si Service Manual, and the 2002 CR-V Service Manual. The Online University is just a click away on the Honda Interactive Network (iN). Here’s what you need to do: 1. Sign into iN. 2. From the main screen, click on “Online University.” The S/M doesn’t list the mounting bolt torque spec for the camshaft plate attached to the end of the camshaft. When tightening the camshaft plate mounting bolts, lubricate the threads with clean engine oil, then torque the bolts to 39 N·m (4.0 kgf·m, 29 lbf-ft). MOUNTING BOLTS 3. Click on “Service Training.” CAMSHAFT PLATES 4. Click on “Web Based Training.” 5. Click on “EMC” (Emissions Module Cognitive). 6. Click on the knowledge module you’d like to study. A PDF version of the module comes up on your display screen. You can study the resource material in the module worksheet right from the screen, or print yourself a copy and take it with you. 7. When you’re done studying the module, and you think you’ve got the material nailed down, it’s time to visit the Testing Center. Click on “Testing Center,” sign in, and complete the questions for the Self-Evaluation for that module. If you score 90 percent or higher, congratulate yourself. You’ve successfully completed the module and you’ve earned yourself valuable course credit. Data Transfer Module Needs an Analog Phone Line Think of them as a matched set: the data transfer module (DTM) and an analog phone line. You need to plug the DTM into a phone line like the one used for sending and receiving faxes or it doesn’t work. This has become an issue lately because some computer techs have been strapping the DTM to the Tech Cart mistakenly thinking they can just plug it into the dedicated line for ISIS. If your DTM is strapped to the Tech Cart, you have only two choices: move the cart close to an analog phone line or install an analog line close to the cart. If there’s no way to install a line close to the cart, take the DTM off the cart and find a place where you can plug it into an analog phone line. DOWEL PIN EXHAUST CAMSHAFT Cam Chain Sprocket-to-Idler Gear Torque Spec Missing The 2000–02 S2000 S/M doesn’t list a torque spec for the cam chain sprocket-to-idler gear mounting bolts. Torque the cam chain sprocket bolts to 14 N·m (1.4 kgf-m, 10 lbf-ft). IDLER GEAR CAM CHAIN SPROCKET BOLT 14 N.m (1.4 kfg.m, 10 lbf-ft) Stiff Shifting? Check the Shift Lever Pivot Ball S/M Fix: SRS DTCs, ’01–02 Accord If you have a ’01–02 Civic M/T customer who complains of stiff shifting, it’s most likely either clutch drag or a worn shift lever. First, check for clutch drag by moving the shift lever with the engine turned off. If the shift lever moves freely, you’re most likely looking at clutch drag. But if the shift lever is hard to move, the lever itself may be worn or damaged. Remove the shift lever, and look at the pivot ball on the end of the lever. If the pivot ball is cracked, dry, or damaged, replace the shift lever (P/N 54100-S5A-003, H/C 6469910). Remember to lubricate the pivot ball on the new lever with Super High Temp Urea Grease (P/N 08798-9002, H/C 3720984). For ’01-02 Accords, the troubleshooting procedures for SRS DTCs 13-1, 13-2 and SRS DTCs 14-1, 14-2 on page 23-203 of the 1998–02 Accord Service Manual need some revising. Make these changes to your copies of the S/M: A/T Leaks, Makes Noise, Shifts Erratically On ’98–02 Accords and ’99–02 Odysseys, damaged differential carrier bearings can cause all sorts of A/T-related problems such as ATF leaks, transmission noise, or erratic shifting. The only fix is a reman A/T. When the carrier bearings are shot, here’s what can happen and why: YES - Faulty front passenger's side impact sensor or SRS unit; replace the front passenger's side impact sensor. If the problem is still present, replace the SRS unit. ATF leakage. If the differential carrier moves around, the driveshafts can exceed the range of the inner axle seals. This can cause ATF to leak from the seals. Transmission noise. Worn carrier bearings let the differential carrier move around and cause irregular countershaft gear to final driven gear contact. This can generate a nasty noise that’s often described as a loud moan or roar. Erratic shifting. Pieces from the damaged differential carrier bearings can contaminate the ATF, fouling the shift and lock-up valves. A common A/T DTC that goes with damaged differential carrier bearings is DTC P1750 (mechanical problem in hydraulic system). Broken Wing Spoiler Studs: ’00–02 Accord, ’01–02 Civic When installing wing spoilers on ’00–02 Accords and ’01–02 Civics, don’t use pneumatic or electric wrenches to tighten the mounting nuts. If you overtighten the nuts, you can break the studs or pull them out of the spoiler. And if you do, it’s not covered by warranty. Use a torque wrench, and torque the nuts to 7 to 10 N·m (5 to 7 lb-ft). Check for Dealership Address Errors on Navi When doing a PDI or test-driving a vehicle with the Navigation System, punch in your dealership address on the display unit to make sure the system database lists your dealership and shows it correctly on the display. If your address isn’t listed or its location is wrong on the display, report the error to your District Parts and Service Manager so it can be fixed during the next database update. A/C Compressor Seizure: ’99–01 Odyssey Choose the Right Differential Fluid for the Job If the A/C compressor seizes on a ’99–01 Odyssey, replace all damaged and contaminated parts, and increase the system oil level to 210 cc. American Honda recommends four different differential fluids for its 4WD vehicles. The kicker is none of these fluids are interchangeable. So, when you’re adding or replacing differential fluid, use this handy chart to make sure you’re picking the right fluid for the job: When installing a new compressor, check the color of the serial number tag on the original compressor. It tells you how much oil is in the system. • If the tag is black, the A/C system contains 180 cc of oil. • If the tag is blue, the A/C system contains 210 cc of oil. Then follow the appropriate procedure: Original Compressor Is Dry 1. Drain all of the oil from the new compressor into a clean, suitable container. 2. If the original compressor has a blue serial number tag, the system already has 210 cc of oil. Pour 50 cc (1 2/3 oz) of oil back into the new compressor. This replaces the oil that would have been in the original compressor. 3. If the original compressor has a black serial number tag, the system only has 180 cc of oil. Pour 80 cc (2 2/3 oz) of oil back into the new compressor to increase the system oil level to 210 cc. Original Compressor Has Some Oil 1. Drain all of the oil from the original compressor into a clean, suitable container. Measure how much oil is collected. 2. Drain all of the oil from the new compressor into a clean, suitable container. Measure how much oil is collected. 3. If the new compressor has a blue serial number tag, refill the new compressor with the same amount of oil you drained from the original compressor. Make sure you’re using the oil you drained from the new compressor. 4. If the new compressor has a black serial number tag, refill the new compressor with the same amount of oil you drained from the original compressor plus an extra 30 cc (1 oz). That extra 30 cc shot of oil increases the oil level from 180 cc to 210 cc. Make sure you’re using the oil you drained from the new compressor. 5. Properly dispose of any excess oil drained from the new compressor and the oil drained from the original compressor. Year/Model Recommended Fluid Ordering Info 1985–91 Civic 4WD GL5 SAE 90 1997–02 CR-V Dual Pump Fluid P/N 08200-9002 H/C 6512644 1994–02 Passport Synthetic GL-5 SAE 75W-90 (front diff) 51130-3 (Mobil P/N) GL-5 SAE 80W-90 (rear diff) 51015-6 (Mobil P/N) VTM-4 Fluid P/N 08200-9003 H/C 6512651 2003 Pilot Use Correct S/M Section to Assemble M/T: ’96–00 Civic The 1996–00 Civic S/M splits section 13 into two parts: one part for the S4C M/T used in the ’99–00 Civic Si, and another part for the S40 M/T used in everything else. When assembling an M/T, make sure you’re looking at the correct page for the type you’re working on, especially when it comes time to install the 3rd/4th synchro hub. If you’re looking at the wrong page, you’ll install the synchro hub upside down. And if that happens, the M/T won’t shift properly or it could pop out of gear. Here’s a handy reference to help you remember which page you need to follow to install the 3rd/4th synchro hub: • S40 M/T (All Civics except Si) - See Mainshaft Assembly Index on page 13-15. • S4C M/T (Civic Si ) - See Mainshaft Assembly Index on page 13-67. Diagnosing Vehicles With Airbag ON/OFF Switches Replacement ATF Filters Now Available If a vehicle has an airbag ON/OFF switch kit installed, follow this procedure if the SRS indicator comes on. Replacement ATF filters (the type you get with reman A/Ts) are now in Honda stock and available separately for all models except Passport. To order a replacement ATF filter, call the Reman ATR Order Desk at 888-997-7278. Use this handy chart when ordering. 1. Make sure you have the anti-theft code for the radio, then write down your customer’s radio station presets. 2. Disconnect the negative battery cable, and wait 3 minutes. Part Number Honda Code 1986–89 Accord 25420-PF4-315 3828449 1990–93 Accord 3828498 4. Plug the passenger airbag and cable reel into the SRS main harness. Leave the ON/OFF switch harness unplugged. 25420-PX4-A00 (Large Type) 1990–02 Accord 25420-P24-A01 (Small Type) 3959574 5. Use the PGM Tester to clear any stored DTCs. 1988–91 Civic 25420-PL4-305 3828456 6. Turn the ignition switch to LOCK (0) for 10 seconds, then turn it to ON (II). 1992–02 Civic 25420-P24-A01 3959574 • If the DTC resets, go to section 23 of the appropriate S/M and do the SRS troubleshooting procedure. 1988–91 Prelude 25420-PF4-315 3828449 1992–02 Prelude 25420-P24-A01 3959574 • If the DTC doesn’t reset, the airbag ON/OFF switch is faulty. Call Automobile Customer Relations at 800-999-1009 Ex 118045 or 118037, and order a replacement airbag ON/OFF switch kit. Don’t reuse any parts from a faulty airbag ON/OFF switch kit. 1995–02 Odyssey 25420-P24-A01 3959574 1997–02 CR-V 25420-P24-A01 3959574 3. Unplug the airbag ON/OFF switch harness from the front passenger SRS harness and the cable reel harness. A/C Doesn’t Work After Fog Light Installation: ’02 CR-V If you’re installing an accessory fog light kit on a ’02 CR-V, it’s really easy to knock loose the white 8P connector C502, or forget to plug it back in. If C502 isn’t properly plugged in, it breaks the connection between the heater unit control panel and the A/C pressure switch. With this connection broken, the A/C doesn’t work. So make sure C502 is properly connected when you’re buttoning things up and, as an extra check, run the A/C when you’re done to make sure it works. RES DVD Demo Disc Available at Helm If you need to order a DVD demo disc for the rear entertainment system, call Helm at 800-782-4256 and ask for Y0610. The dealer net price for this item is $20.00. This disc is for the RES in ’02 Odysseys only. The RES for the ’03 Pilot doesn’t come with a demo disc. Model/Year Clean Surfaces for Good Accessory Adhesion For lasting installation, accessories that attach with double-sided tape or adhesives need a clean, dry mounting surface. When you’re installing selfadhesive accessories, remember to first clean the surfaces you’re going to stick the accessory to with isopropyl alcohol and a clean towel, then dry the area with a hair dryer set to low temperature. Don’t use compressed air for this; compressed air and the air hoses can contain oil and moisture, and that defeats the purpose. ServiceNews 2002 American Honda Motor Co., Inc. - All Rights Reserved. Published by AHM Service Communications, 1919 Torrance Blvd., Torrance, CA 90501-2746. All suggestions become the property of American Honda Motor Co., Inc.; sending a suggestion gives Honda permission to publish it without further consideration. ASN 23852 (0206)