Download MARCONI 6970 Ops
Transcript
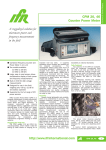
Operating Manual RF POWER METER 6970 IFR Ltd. 2000 No part of this book may be reproduced or transmitted in any form or by any means, electronic or mechanical, including photocopying, or recorded by any information storage or retrieval system, without permission in writing by IFR Ltd. Printed in the UK Manual part no. 46882-182 Issue 12 23 February 2000 i Appendix A POWER MEASUREMENT ERROR ANALYSIS CONTENTS Page INTRODUCTION .....................................................................................................A-1 ERROR SOURCES ...................................................................................................A-1 Instrumentation Error.....................................................................................A-1 Mismatch Error..............................................................................................A-1 Power reference uncertainty ..........................................................................A-2 Calculating measurement uncertainty............................................................A-2 Typical uncertainty calculations ....................................................................A-3 INTRODUCTION The 6970 uses the customary technique of power measurement of a sensor element at the power source with a remote signal processing unit. By using a microcontroller and digital signal processing techniques, sensor correction, calibration and zeroing factors can be used to give the best enhancement of measurement accuracy. RF power measurements are never free from uncertainties. These can be due to instrumentation error, mismatch uncertainty and sensor calibration uncertainty. Significant measurement errors are possible unless these uncertainties are reduced to a minimum. ERROR SOURCES Instrumentation Error The instrumentation error comes from component tolerances and calibration uncertainty of the power meter. The total instrumentation accuracy of 6970 is typically ±0.5 %. Mismatch Error Large uncertainties can arise from either sensor or source mismatches. The first effect of these mismatches is to cause a transmission loss, i.e. the sensor does not receive the maximum available power from the source. The second effect is multiple reflections occurring between the source and the sensor causing unpredictable transmission losses. 46882-182 App-A-1 POWER MEASUREMENT ERROR ANALYSIS Power reference uncertainty When the power reference is used to calibrate the power meter and the power sensor together, the accuracy of the reference oscillator becomes part of the overall measurement uncertainty. Calculating measurement uncertainty For a source and load having complex reflection coefficients of ΓS and ΓL respectively, the ratio of transmitted power to maximum available power is as follows:P P L 1 − = ΓL 1 − ΓS Γ L O 1 − This has a maximum of: 2 1 − ΓS 2 1 − ΓS 2 ΓL (1 − Γ S Γ L ) 1 − and a minimum of: ΓS 2 1 − 2 2 ΓL (1 + Γ S Γ L ) 2 2 2 Uncertainty is usually quoted as a percentage uncertainty. From the previous formula:Positive uncertainty Negative uncertainty ( = 100 × 1 + ( ΓS Γ L ) = 100 × 1 − 2 ΓS Γ L ) − 1 % 2 − 1 % The positive and negative uncertainties are essentially the same for low reflection coefficients, but as the reflection coefficients increase the positive uncertainty increases more rapidly than the negative uncertainty. If the source and load matches are quoted as VSWRs then they may be converted to reflection coefficients by the following simple formula:Γ = S −1 S +1 where S is the VSWR If the reflection coefficients are small, typically less than 0.15, the positive and negative uncertainties can be taken to be equal and the uncertainty can be approximated by:Percentage uncertainty = 200 × Γ S Γ L App-A-2 46882-182 POWER MEASUREMENT ERROR ANALYSIS Typical uncertainty calculations (1) Calculate the mismatch uncertainty for a source reflection coefficient of 0.33 and a sensor reflection coefficient of 0.05. Positive uncertainty = 100 × ((1 + 0.33 × 0.05) 2 − 1) = 100 × ((1 + 0.0165) 2 − 1) = 100 × (1.0333 − 1) = 3.33% Negative uncertainty = 100 × ((1 - 0.33 × 0.05) 2 − 1) = 100 × ((1 - 0.0165) 2 − 1) = 100 × (0.9673 − 1) = –3.27% (2) Calculate the uncertainties for the source VSWR of 1.3:1 and a sensor VSWR of 1.05:1. The VSWRs must first be turned in to reflection coefficients. ΓS = 1. 3 − 1 0. 3 = = 0.130 1. 3 + 1 2. 3 ΓL = 1. 05 − 1 0. 05 = = 0. 024 1. 05 + 1 2. 05 As both the source and sensor reflection coefficients are low we can apply the approximation formula described previously. Percentage uncertainty 46882-182 = 200 × 0.13 × 0.024 = ±0.624% App-A-3 CONTENTS PRECAUTIONS Chapter 1 GENERAL INFORMATION Chapter 2 INSTALLATION Chapter 3 OPERATION Chapter 4 TECHNICAL DESCRIPTION Chapter 5 ACCEPTANCE TESTING Appendix A POWER MEASUREMENT ERROR ANALYSIS INDEX ii 46882-182 PRECAUTIONS WARNINGS, CAUTIONS and NOTES These terms have specific meanings in this manual: WARNINGS contain information to prevent personal injury. CAUTIONS contain information to prevent damage to the equipment. Notes contain important general information. HAZARD SYMBOLS The meaning of hazard symbols appearing on the equipment is as follows: Symbol Nature of hazard Toxic hazard Class II supply Static sensitive component GENERAL CONDITIONS OF USE This product is designed and tested to comply with the requirements of IEC/EN61010-1 ‘Safety requirements for electronic measuring apparatus’, for Class III hand-held equipment and is for use in a pollution degree 2 environment. The equipment is designed to operate from an installation Category I supply. Equipment should be protected from the ingress of liquids and precipitation such as rain, snow, etc. When moving the instrument from a cold to a hot environment, it is important to allow the temperature of the instrument to stabilise before it is connected to the supply to avoid condensation forming. The instrument must only be operated within the environmental conditions specified in Chapter 1, ‘Performance Data’. This product is not approved for use in hazardous atmospheres or medical applications. If the equipment is to be used in a safety-related application, e.g. avionics or military applications, the suitability of the product must be assessed and approved for use by a competent person. WARNING - TOXIC HAZARDS Some of the components used in this equipment may include resins and other materials which give off toxic fumes if incinerated. Take appropriate precautions, therefore, in the disposal of these items. 46882-182 iii WARNING - NICKEL CADMIUM A Nickel-cadmium battery is used in this equipment. Do not crush or otherwise mutilate, as corrosive electrolyte can be released. Do not incinerate as they may explode or release toxic fumes. WARNING - POWER ADAPTER The supplied power adapter has been designed and tested in accordance with BS EN 60950 (IEC 950) ‘Safety of information technology equipment, including electrical business equipment’, and meets the ‘SELV’ requirements of products with low voltage DC supply inputs. The adapter conforms with IEC safety Class II incorporating double insulation in its construction, and does not require a protective ground connection. No user serviceable parts are contained within the adapter and no attempt should be made to open the case. Where a supply lead is fitted to adapters incorporating an integrally fused plug ensure that the fuse rating is commensurate with the current requirements of the adapter. See under ‘Performance data’ in Chapter 1 for power requirements. CAUTION - LCD HANDLING When using this equipment take care not to depress the front of the display module, as this may damage the liquid crystal elements. CAUTION - STATIC SENSITIVE COMPONENTS This equipment contains static sensitive components which may be damaged by handling - refer to the Maintenance part of the Service Manual for handling precautions. CAUTION - PRECISION CONNECTOR The precision Type N connector fitted to this instrument (Option 001 only) may be damaged by mating with a non-precision type. Damage to the connector may also occur if the connector interface parameters are not within specification. The connector should be checked with the appropriate gauging tool. CAUTION - SUITABILITY FOR USE This equipment has been designed and manufactured by IFR Ltd. to for making power measurements in the range 0.1 nW to 25 W over a wide range of frequencies using the IFR 6900 series of power sensors.. IFR Ltd. has no control over the use of this equipment and cannot be held responsible for events arising from its use other than for its intended purpose. iv 46882-182 PRECAUTIONS WARNINGS, CAUTIONS et NOTES Les termes suivants ont, dans ce manuel, des significations particulières: WARNINGS contient des informations pour éviter toute blessure au personnel. CAUTIONS contient des informations pour éviter les dommages aux équipements. Notes contient d’importantes informations d’ordre général. SYMBOLES SIGNALANT UN RISQUE La signification des symboles liés à cet équipement est la suivante: Symbole Nature du risque Danger produits toxiques Class II supply CONDITIONS GENERALES D’UTILISATION Ce produit e été conçu et testé pour être conforme aux exigences des normes CEI/EN61010-1 « Spécifications des conditions de sécurité pour instruments de mesure électronique », pour des quipements Classe III qui tiennent dans la main et pour une utilisation dans un environnement de pollution de niveau 2. Cet équipement est conçu pour fonctionner à partir d'une alimentation de catégorie I. Cet équipement doit être protégé de l'introduction de liquides ainsi que des précipitations d'eau, de neige, etc... Lorsqu'on transporte cet instrument d'un environnement chaud vers un environnement froid, il est important de laisser l'instrument se stabiliser en température avant de le connecter à une alimentation afin d'éviter toute formation de condensation. L'instrument doit être utilisé uniquement dans les conditions d'environnement spécifiées dans le chapitre 1 « Performances » du manuel d'utilisation. Ce produit n’est pas garanti pour fonctionner dans des atmosphères dangereuses ou pour un usage médical. Si l'équipement doit être utilisé pour des applications en relation avec la sécurité, par exemple des applications militaires ou aéronautiques, la compatibilité du produit doit être établie et approuvée par une personne compétente. WARNING - DANGER PRODUITS TOXIQUES Certains composants utilisés dans cet appareil peuvent contenir des résines et d'autres matières qui dégagent des fumées toxiques lors de leur incinération. Les précautions d'usages doivent donc être prises lorsqu'on se débarrasse de ce type de composant. 46882-182 v WARNING - NICKEL CADMIUM Une batterie au cadmium nickel est utilisée dans cet équipement. Ne pas l'écraser ou la broyer, l'électrolyte contenu est corrosif. Ne pas l'incinérer cela risque de provoquer l'explosion et le dégagement de fumées toxiques. WARNING - ADAPTATEUR SECTEUR L’adaptateur secteur fourni avec l’appareil a été conçu et testé en conformité avec la norme BSEN 60950 (CE 950) “Sécurité de équipements de technologie de l’information et équipements électriques industriels” et suit les recommandations “SELV” des produits comportant des entrée continues à faible voltage. L’adaptateur possédant d’origine une double isolation conformément à la norme CEI “Sécurité Classe II”, ne requière pas de retour à la masse. L’adaptateur ne contient pas de composants réparables et il faut absolument éviter d’ouvrir la prise. Lorsque le câble d’alimentation connecté à l’adaptateur contient un fusible, il faut vérifier qu’il soit bien dimensionné. Voir chapitre 1 “Performance data” pour la consommation. vi 46882-182 VORSICHTSMASSNAHMEN WARNINGS, CAUTIONS und NOTES Diese Hinweise haben eine bestimmte Bedeutung in diesem Handbuch: WARNINGS dienen zur Vermeidung von Verletzungsrisiken. CAUTIONS dienen dem Schutz der Geräte. Notes enthalten wichtige Informationen. GEFAHRENSYMBOLE Die Gefahrensymbole auf den Geräten sind wie folgt: Symbol Gefahrenart Warnung vor giftigen Substanzen Class II supply ALLGEMEINE HINWEISE ZUR VERWENDUNG Dieses Produkt wurde entsprechend den Anforderungen von IEC/EN61010-1 "Sicherheitsanforderungen für elektronische Meßgeräte ", Klasse III, für Betrieb in der Hand zur Verwendung in einer Grad 2 verunreinigten Umgebung, entwickelt und getestet. Dieses Gerät ist für Netzversorgung Klasse I zugelassen. Das Meßgerät sollte vor dem Eindringen von Flüssigkeiten sowie vor Regen, Schnee etc. geschützt werden. Bei Standortänderung von kalter in wärmere Umgebung sollte das Meßgerät wegen der Kondensation erst nach Anpassung an die wärmere Umgebung mit dem Netz verbunden werden. Das Meßgerät darf nur in Umgebungsbedingungen wie in Kapitel 1 "Leistungsdaten (Performance data)" der Bedienungsanleitung beschrieben, betrieben werden. Dieses Produkt ist nicht für den Einsatz in gefährlicher Umgebung (z.B. Ex-Bereich) und für medizinische Anwendungen geprüft. Sollte das Gerät für den Einsatz in sicherheitsrelevanten Anwendungen wie z.B. im Flugverkehr oder bei militaerischen Anwendungen vorgesehen sein, so ist dieser von einer für diesen Bereich zuständigen Person zu beurteilen und genehmigen. WARNING - WARNUNG VOR GIFTIGEN SUBSTANZEN In einigen Bauelementen dieses Geräts können Epoxyharze oder andere Materialien enthalten sein, die im Brandfall giftige Gase erzeugen. Bei der Entsorgung müssen deshalb entsprechende Vorsichtsmaßnahmen getroffen werden. 46882-182 vii WARNING - NICKEL CADMIUM Eine Nickel-Cadmium-Batterie ist in diesem Gerät eingebaut. Das Gerät nicht beschädigen oder verbrennen, da ätzende Elektrolyte freigesetzt wird. Die Batterie kann dabei explodieren oder giftige Gase freisetzen. WARNING - NETZADAPTER Der mitgelieferte Netzadapter ist entsprechend der Norm BS EN 60950 (IEC 950) für die Sicherheit datentechnischer Anlagen, inklusive elektrischer Büromaschinen, ausgelegt und getestet worden. Er entspricht den “SELV” Richtlinien für Geräte mit niedrigen Gleichspannungsversorgungen. Der Adapter entspricht mit doppelter Isolation der IEC Sicherheitsklasse II und benötigt keinen Masse-Schutzleiter. Der Adapter enthält keine reparier- oder austauschbaren Teile und darf nicht geöffnet werden. Falls ein Netzkabel und ein Stecker mit eingebauter Sicherung verwendet werden, beachten Sie bitte, daß die Sicherung den elektrischen Werten des Adapters entspricht. Weiter Information zur Leistungsaufnahme finden Sie unter “Leistungsdaten” in Kapitel 1. viii 46882-182 PRECAUZIONI WARNINGS, CAUTIONS e NOTES Questi termini vengono utilizzati in questo manuale con significati specifici: WARNINGS riportano informazioni atte ad evitare possibili pericoli alla persona. CAUTIONS riportano informazioni per evitare possibili pericoli all’apparecchiatura. Notes riportano importanti informazioni di carattere generale. SIMBOLI DI PERICOLO Significato dei simboli di pericolo utilizzati nell’apparato: Simbolo Tipo di pericolo Pericolo sostanze tossiche Class II supply CONDIZIONI GENERALI D’USO Questo prodotto è stato progettato e collaudato per rispondere ai requisiti della direttiva IEC/EN61010-1 'Safety requirements for electronic measuring apparatus' per apparati di classe III palmari e per l'uso in un ambiente inquinato di grado 2. L'apparato è stato progettato per essere alimentato da un alimentatore di categoria I. Lo strumento deve essere protetto dal possibile ingresso di liquidi quali, ad es., acqua, pioggia, neve, ecc. Qualora lo strumento venga portato da un ambiente freddo ad uno caldo, è importante lasciare che la temperatura all'interno dello strumento si stabilizzi prima di alimentarlo per evitare formazione di condense. Lo strumento deve essere utilizzato esclusivamente nelle condizioni ambientali descritte nel capitolo 1 'Performance Data' del manuale operativo. Questo prodotto non è stato approvato per essere usato in ambienti pericolosi o applicazioni medicali. Se lo strumento deve essere usato per applicazioni particolari collegate alla sicurezza (per esempio applicazioni militari o avioniche), occorre che una persona o un istituto competente ne certifichi l'uso. WARNING - PERICOLO SOSTANZE TOSSICHE Alcuni dei componenti usati in questo strumento possono contenere resine o altri materiali che, se bruciati, possono emettere fumi tossici. Prendere quindi le opportune precauzioni nell'uso di tali parti. 46882-182 ix WARNING - NICHEL CADMIO Quest ’apparato incorpora una batteria al nichel cadmio. Non tentare di rompere o comunque di manomettere la batteria in quanto essa contiene un elettroliti corrosivo. Non incenerire in quanto la batteria può esplodere o emettere dei fumi tossici. WARNING - CARICA-BATTERIE Il carica-batterie fornito è stato progettato e collaudato secondo le raccomandazioni IEC 950 (BS EN 60950) “Safety of information technology equipment, including electrical business equipment” e rispetta I requisiti “SELV” per prodotti alimentati in corrente continua e a bassa tensione. Il carica-batterie è conforme con le apparecchiature di classe II di sicurezza IEC con doppio isolamento e non richiede collegamento di terra di protezione. Il carica-batterie non contiene parti sostituibili e qualsiasi tentativo di apertura è da evitare. Qualora il carica-batterie contenga un fusibile, verificare che sia del giusto amperaggio (vedi capitolo 1, “Performance data”). x 46882-182 PRECAUCIONES WARNINGS, CAUTIONS y NOTES Estos términos tienen significados específicos en este manual: WARNINGS contienen información referente a prevención de daños personales. CAUTIONS contienen información referente a prevención de daños en equipos. Notes contienen información general importante. SÍMBOLOS DE PELIGRO Los significados de los símbolos de peligro que aparecen en los equipos son los siguientes: Símbolo Naturaleza del peligro Aviso de toxicidad Class II supply CONDICIONES GENERALES DE USO Este producto ha sido diseñado y probado para cumplir los requerimientos de la normativa IEC/EN61010-1 "Especificaciones de los requisitos de seguridad para instrumentos electrónicos de medida", para equipos clase III de mano y para uso en un ambiente con un grado de contaminación 2. El equipo ha sido diseñado para funcionar sobre una instalación de alimentación de categorías I. Debe protegerse el equipo de la entrada de líquidos y precipitaciones como nieve, lluvia, etc. Cuando se traslada el equipo de entorno frío a un entorno caliente, es importante aguardar la estabilización el equipo para evitar la condensación. Sólo debe utilizarse el aparato en las condiciones ambientales especificadas en el capítulo 1 "Especificaciones" o "Performance Data" del Manual de Instrucciones/Manual de Operación/Funcionamiento. Este producto no ha sido aprobado para su utilización en entornos peligrosos o en aplicaciones médicas. Si se va a utilizar el equipo en una aplicación con implicaciones en cuanto a seguridad, como por ejemplo aplicaciones de aviónica o militares, es preciso que un experto competente en materia de seguridad apruebe su uso. WARNING - AVISO DE TOXICIDAD Alguno de los componentes utilizados en este equipo pudieran incluir resinas u otro tipo de materiales que al arder produjeran sustancias tóxicas, Por tanto, tome las debidas precauciones en la manipulación de esas piezas. 46882-182 xi WARNING - NIQUEL CADMIO En este equipo se utiliza una batería de NiquelCadmio. No las aplaste o rompa ya que podría liberar electrólito corrosivo. No las queme ya que podría dar lugar a que la batería explote o libere humos tóxicos. WARNING - ADAPTADOR DE ALIMENTACIÓN A RED AC El adaptador de alimentación suministrado ha sido diseñado y probado según la normativa BS EN 60950 (IEC 950) “Seguridad en aparatos de tecnologías de la información, incluyendo equipamiento eléctrico de oficinas “ y cumple los requerimientos “SELV” de productos con baja tensión de entrada DC. El adaptador cumple la normativa de seguridad IEC clase II, está construido con doble aislamiento y no precisa conexión a toma de tierra de seguridad. En el interior del adaptador no existen partes reemplazables por el usuario y no debe hacerse ningún intento de abrir la carcasa. Si el adaptador tiene instalada una clavija de red con fusible incorporado, asegúrese de que el valor del fusible está en consonancia con el consumo de corriente del adaptador. Vea el capítulo 1 “Especificaciones” para obtener detalles del consumo de equipo. xii 46882-182 Chapter 1 GENERAL INFORMATION CONTENTS Page CONVENTIONS .......................................................................................................1-1 PURPOSE AND FEATURES OF EQUIPMENT.....................................................1-1 ACCURACY .............................................................................................................1-2 OPERATIONAL FACILITIES .................................................................................1-2 PERFORMANCE DATA..........................................................................................1-3 OPTIONS AND ACCESSORIES .............................................................................1-6 SUPPORTED POWER SENSORS...........................................................................1-6 LIST OF TABLES Table 1-1 General characteristics of 6910, 6920 and 6930 series power sensors when used with 6970 ...............................................................................1-7 LIST OF FIGURES Fig. 1-1 6970 RF Power Meter..............................................................................1-2 CONVENTIONS The following conventions apply throughout this manual: CAPS Capitals refer to titles marked on the panel. [CAPS] Capitals in square brackets indicate key titles. PURPOSE AND FEATURES OF EQUIPMENT The 6970 RF Power Meter is a microcontroller controlled RF power meter which combines the high accuracy and fast, intuitive operation of a quality bench power meter with battery powered portability. The unit can be used to measure RF and microwave power from -70 dBm (0.1 nW) to +44 dBm (25 W) over a wide range of frequencies using the IFR 6910, 6920 and 6930 series of power sensors. 46882-182 1-1 GENERAL INFORMATION Fig. 1-1 6970 RF Power Meter ACCURACY High accuracy is achieved by applying calibration and linearity factor correction. All power sensors are supplied with individual calibration data. IFR 6900 series sensors all have an excellent return loss specification to minimise mismatch errors in power measurement. The integral calibrator provides a precision 0 dBm (1 mW) power reference at 50 MHz to give the same precision calibration standard as bench instruments. OPERATIONAL FACILITIES The instrument front panel consists of a 13 key keypad and a liquid crystal display (LCD) comprising a 4 digit readout with annunciators. Power levels are displayed on the digital readout with a peaking meter ’bar graph’ underneath for convenient monitoring of power fluctuations with time. The keyboard is used both to enable measurement functions and enter data When switched off, the instrument is permanently in a low power standby mode. Pressing the [ON/ENTER] key will power-up the unit, which will remain active until either the [OFF] key is pressed, or the microcontroller detects that there has been no keypress for a continuous period of 6 minutes. The unit will then switch to low power standby mode to prolong battery life. The auto power off feature can be disabled if required and will be disabled if the instrument is powered from the AC adapter. 1-2 46882-182 GENERAL INFORMATION The instrument settings are automatically stored in non-volatile memory when the unit powers down, and these settings will be restored when the instrument is switched on again. The optional AC adapter should be used to re-charge the internal batteries, but can also be used for powering the unit for bench applications. An optional vehicle DC supply lead enables the unit to be charged or operated from a standard vehicle cigar lighter socket. New batteries will provide a minimum of 8 hours continuous use before recharging is required, reducing with extensive use, high temperature and high humidity. Limit checking with both upper and lower power limits may be performed, with convenient audio and visual alarms to alert the user of a measurement that is out of limits. Sensor calibration and linearity factors can be entered with the dual function keypad. The 6970 and power sensor can also be calibrated using the integral 0 dBm 50 MHz power reference with traceability to National Standards. The 6970 is fully auto-ranging, but also has a manual range control facility provided for fixed range measurements or modulated signals. The display indicates either AUTO or MAN as appropriate, with indication of under and over-range conditions. PERFORMANCE DATA Frequency range 30 kHz to 46 GHz (dependent on sensor). Power range -70 dBm (0.1 nW) to + 44 dBm (25 W) (dependent on sensor) Power sensors supported 6910 series (-30 to +20 dBm) 6920 (-70 to -20 dBm), 6923/24 (-65 to -20 dBm) 6930 series (-15 to +35 dBm) 6930 Series option 002 (−5 to +44 dBm) Number of inputs 1 Instrumentation accuracy (including carry over) ±1% range 0, 1, 2 ±5% range 3 Power accuracy ±0.2 dB assuming that calibration using a traceable 0 dBm power reference has taken place. ±2 dB typical when an uncalibrated sensor is used (all sensors). Specification applies when measuring a signal in the centre of the power sensor dynamic range, from a source with return loss better than 14 dB. Display Type 46882-182 LCD Resolution 4 digits for positive readings 3 digits for negative readings Units dB, dBm, nW, µW, mW, W, mV, V, dBV 1-3 GENERAL INFORMATION Annunciators Analogue bargraph Battery low indicator. Indication of auto-ranging or manual range. Upper and lower limits. Correction Linearity Factor Ability to enter in range 0.01 to 15 with 0.01 resolution. Defaults to standard setting. Calibration Factor Ability to enter in range 0.01% to 200%. Resolution: 0.01 to 99.99%. 0.1, 100% and above. Auto-Calibration Ability to calibrate against a 0 dBm 50 MHz reference. This may be internal or a suitable external source. Auto-Zero Removes DC offset from amplifier gain stages and sensor. Set accuracy <400 nW (6910 series) <100 pW (6920), <200 pW (6923/24) <12 µW (6930 series) Drift When measured over one hour at constant temperature. ±10 nW (6910 series) ±100 pW (6920 series) ±300 nW (6930 series) Noise As averaged over 5 seconds. ±100 nW (6910 series) ±100 pW (6920 series) ±3 µW (6930 series) Facilities 1-4 Averaging Selected automatically dB relative Ability to select the current measurement value, or a user defined value as an offset for relative power measurements. Duty cycle Enables entry of duty cycle of pulsed signal in the range 0.01% to 100%. The 6970 calculates the peak value of the pulsed signal from the average power measured by the sensor. Audio limit Produces audible tones when the measured power is above or below programmed limits. 46882-182 GENERAL INFORMATION Batteries 3, rechargeable Nickel-Cadmium AA size. Operating time >7 hours from full charge when new. Time to recharge <14 hours Power consumption 250 mW Battery charger requirements 9 V to 21 V DC, 120 mA via a 2.1 mm power connector. Power reference Frequency 50 MHz ±0.05 MHz Level 0 dBm (1 mW) Uncertainty ±0.7% traceable to National Standards. Accuracy ±1.2% worst case for one year. Output connector N (female) 50 Ω. Adapters are supplied with 75 Ω, 3.5 mm and 2.92 mm power sensors. General Safety This instrument is designed to comply with the requirements of IEC/EN61010-1 for Class III hand-held equipment and is for use in a pollution degree 2 environment. The equipment is designed to operate from installation supply categories I Electromagnetic compatibility Conforms with the protection requirements of the EEC Council Directive 89/336/EEC. Complies with the limits specified in the following standards: EN55011 Class B CISPR 11 EN50082-1 IEC 801-2,3,4 Operating temperature range 0°C to +55°C Storage temperature range -40°C to +55°C Storage humidity range Up to 85% RH at +40°C Storage altitude range Up to 4600 m (15000ft) Dimensions and weight 46882-182 Height 50 mm (1.9 in) Width 88 mm (3.5 in) Depth 190 mm (7.5 in) Weight 486 g (1.1 lb) 550 g (1.2 lb) with Option 001 1-5 GENERAL INFORMATION OPTIONS AND ACCESSORIES Supplied with 43138-663 23421-641 46882-182 46882-183 1.5 m power sensor cable DC Power connector, 2.1 mm Operating Manual Operating Summary Card Recommended accessory 54441-016 54441-017 54441-018 AC Adapter - UK Style AC Adapter - European Style AC Adapter - USA Style Optional accessories 54112-159 54311-171 46882-207 54417-002 54431/030 54431/031 Carrying pouch DC supply lead Maintenance Manual Waveguide 22 to PC 2.92 mm transformer N Type 10 dB attenuator, DC −4.2 GHz N Type 10 dB attenuator, DC −18 GHz 6900 Series Power Sensors SUPPORTED POWER SENSORS The 6970 supports the full range of IFR power sensors. 17 sensors are available, covering the frequency range from 30 kHz to 46 GHz (dependent upon sensor used). The power range depends on sensor type, and covers from -70 dBm (0.1 nW) to +44 dBm (25W). To cater for the different frequency ranges, connector types include N type, 3.5 mm and 2.92 mm. Table 1-1 summarizes the characteristics of the power sensors currently available for use with the 6970. 1-6 46882-182 GENERAL INFORMATION TABLE 1-1 GENERAL CHARACTERISTICS OF 6910, 6920 AND 6930 SERIES POWER SENSORS WHEN USED WITH 6970 Sensor Frequency range Power range Connector 6910 6911 6912 10 MHz to 20 GHz 10 MHz to 20 GHz 30 kHz to 4.2 GHz -30 to +20 dBm -30 to +20 dBm -30 to +20 dBm N type (m) APC 7 N type (m) 6913 6914 6914S 6919 10 MHz to 26.5 GHz 10 MHz to 40 GHz 10 MHz to 46 GHz 30 kHz to 3 GHz -30 to +20 dBm -30 to +20 dBm -30 to +20 dBm -30 to +20 dBm 3.5 mm (m) PC 2.92 mm (m) PC 2.92 mm (m) N type 75 ohm 6920 6923 6924 6924S 10 MHz to 20 GHz 10 MHz to 26.5 GHz 10 MHz to 40 GHz 10 MHz to 46 GHz -70 to -20 dBm -65 to -20 dBm -65 to -20 dBm -65 to -20 dBm N type (m) 3.5 mm (m) PC 2.92 mm (m) PC 2.92 mm (m) 6930 6930-002 6932 6932-002 6934 6934S 10 MHz to 18 GHz 10 MHz to 18 GHz 30 kHz to 4.2 GHz 30 kHz to 4.2 GHz 10 MHz to 40 GHz 10 MHz to 46 GHz -15 to +35 dBm -5 to +44 dBm -15 to +35 dBm -5 to +44 dBm -15 to +30 dBm -15 to +30 dBm N type (m) N type (m) N type (m) N type (m) PC 2.92 mm (m) PC 2.92 mm (m) The maximum safe input power for the power sensors is as follows:6910 series: +25 dBm (300 mW) continuous, +42 dBm (15 W) for 2 µs. 6920 series: +26 dBm (400 mW) continuous, +30 dBm (1 W) for 2 µs. 6930, 6932 +37 dBm (5W) continuous, +50 dBm (100 W) for 2 µs. 6930-002, 6932-002 45 dBm (30 W) continuous, 60 dBm (1 kW) for 2 µs. 6934 +33 dBm (2W) continuous, +45 dBm (32 W) for 2 µs. Full details on the characteristics, operation and maintenance of the sensors are contained in the instruction manual which accompanies each sensor. 46882-182 1-7 GENERAL INFORMATION 46882-182 1-9 Chapter 2 INSTALLATION CONTENTS Page POWER REQUIREMENTS .....................................................................................2-1 INITIAL INSPECTION ............................................................................................2-2 LIST OF FIGURES Fig. 2-1 DC input connections.................................................................................2-1 POWER REQUIREMENTS The 6970 is fitted with rechargeable batteries which are sufficient for up to 8 hours continuous use between charges when new. A 2.1 mm input connector is provided (centre pin positive, outer sleeve negative) for a DC supply input of 9 V to 21 V. AC Adapters are offered as a recommended accessory, which can be used to both charge the internal batteries and power the unit for bench applications. Different versions are available to suit different types of power socket. If there is a requirement to power or recharge the 6970 from a DC bench supply using the supplied DC power connector, the connector should be wired as shown in Fig. 2-1. CAUTION Ensure that the connections are made correctly, as incorrect wiring may damage the unit. 9 to 21 V DC C0980 SUPPLY GROUND Fig. 2-1 DC input connections An optional DC supply lead enables the unit to be charged from a standard vehicle cigar lighter socket. A recharge time of 14 hours is recommended for a full charge, but the charge rate is low enough such that the batteries will not be damaged if left on charge for extended periods of time. An LED (CHARGE) indicates battery charging. Note... If the optional DC supply lead needs to be replaced, it must be fitted with a 500 mA quick-blow fuse. The battery symbol is displayed on the LCD when the batteries require charging. If the unit has previously been fully charged, the remaining battery charge should be sufficient for a further 15 minutes of operation. (This figure will be less if the batteries were not previously charged to full capacity.) 46882-182 2-1 INSTALLATION For maximum battery life the following is recommended: (a) The unit should not be left on continuous charge for more than 72 hours without discharge. (b) Maintain batteries in the unit in a charged condition. (c) Recharge batteries at regular intervals (approximately every 8 weeks) if the unit is stored without use. Note... Any alternative AC Adapter should conform to the SELV requirements detailed in IEC950, EN60950, UL1950 (sec. 2.3) If the 6970 internal batteries have become almost completely discharged and a battery charger is connected, the instrument’s beeper will sound during the initial charging period (approximately one minute). During this time the instrument will be held in the reset state; the keypad will be inoperative and the display will be blank. When the battery voltage has increased sufficiently, the beeper will stop. The instrument can then be turned on and operated while charging proceeds. Note... Before using the instrument for the first time it is recommended that it is placed on charge for a minimum of 14 hours. Note that since the shelf life of the batteries when installed in the unit is approximately 1 month, they can become discharged through a long period of non-use (this situation can therefore occur with a new unit). INITIAL INSPECTION With the internal batteries charged or with an external DC supply connected, carry out the following tests. Ensure that the instrument is switched off at the start of each test. (1) Keypad test. Press and hold down the [SHIFT] key, press the [ON/ENTER] key, and then release the [ON/ENTER] key. Press each keypad key in turn; the key number should be displayed on the LCD. Press the [ON/ENTER] key to end the test. (2) Display test. Press and hold down the [CAL FACTOR] key, press the [ON/ENTER] key, then release the [ON/ENTER] key. All segments of the display should be illuminated and flash at 1 second intervals. Press the [ON/ENTER] key to end the test. (3) Software Issue. Press and hold down the [RESET PK.MTR.] key, press the [ON/ENTER] key, then release the [ON/ENTER] key. The software issue number will be displayed on the LCD. Press the [ON/ENTER] key to end the test. For more detailed acceptance testing refer to Chapter 6. 2-2 46882-182 Chapter 3 OPERATION CONTENTS Page PANEL LAYOUT .....................................................................................................3-2 KEYPAD ...................................................................................................................3-2 DISPLAY...................................................................................................................3-5 NOTE ON KEYPAD OPERATION AND LCD DISPLAYS...................................3-6 PREPARATION FOR USE.......................................................................................3-6 KEY FUNCTIONS....................................................................................................3-8 Zero................................................................................................................3-8 Cal..................................................................................................................3-8 Units...............................................................................................................3-9 Range .............................................................................................................3-9 Lower limit ....................................................................................................3-9 Upper limit.....................................................................................................3-9 Peak indication...............................................................................................3-10 Duty cycle correction .....................................................................................3-10 dB relative function .......................................................................................3-10 OTHER FUNCTIONS...............................................................................................3-11 Averaging.......................................................................................................3-11 Power-down stores.........................................................................................3-11 Auto power off...............................................................................................3-12 SUMMARY OF MEASUREMENT PROCEDURE ................................................3-12 Preparation.....................................................................................................3-12 Making measurements ...................................................................................3-13 SELF-TEST MODES ................................................................................................3-13 MICROCONTROLLER RESET OPERATION .......................................................3-13 SENSOR OVERLOAD WARNING.........................................................................3-14 LOW LEVEL POWER MEASUREMENTS ............................................................3-14 LIST OF TABLES Table 3-1 Measurement response times...................................................................3-11 Table 3-2 Settings held in non-volatile memory......................................................3-11 Table 3-3 Default values..........................................................................................3-12 LIST OF FIGURES Fig. 3-1 6790 Power meter ......................................................................................3-3 Fig. 3-2 Liquid crystal display .................................................................................3-5 46882-182 3-1 LOCAL OPERATION PANEL LAYOUT (Refer to Fig. 3-1.) 1 Keypad. Dual function keys- see description below. 2 Liquid crystal display. See Fig. 3-2. 3 Power reference connector. 4 SENSOR INPUT connector. Accepts multipin connector from supplied sensor input cable. 5 DC input connector. 2.1 mm connector for 9 to 21 V DC supply for charging internal batteries. 6 Battery charging indicator. 7 Power reference "ON" indicator. KEYPAD The keypad consists of 13 keys, all except one with dual functions. The primary key functions are indicated by labels on each key, the secondary functions (the numeric keypad) by labels under the keys. After selection of a primary function the numeric keys are normally enabled to allow numerical entry of data for that function. The primary functions of all 13 keys are summarised below. The secondary functions are shown in brackets. Functions labelled in blue are accessed by the [SHIFT] key. ON/ENTER Used to activate the instrument out of standby mode; also to confirm the entering of a value from the numeric keys. When the unit is measuring power, pressing this key will restart the automatic averaging. Used in conjunction with the [SHIFT] key, it switches the integral power reference on and off. SHIFT (8) This key allows access to the ZERO and CAL operations, and thus prevents accidental initiation of these functions. In combination with other keys it also enables the integral power reference to be switched on and off for calibration and verification purposes; initiates duty cycle correction and the dB relative function; toggles the auto power off feature on and off. ZERO (7) Actions the measurement zero function, only after the [SHIFT] key has been pressed. CAL (9) Actions the sensor calibration function, only after the [SHIFT] key has been pressed. 3-2 46882-182 LOCAL OPERATION Fig. 3-1 6790 Power meter 46882-182 3-3 LOCAL OPERATION SENSOR (4) Allows the display and selection of the RF sensor type connected. The first press of the key will clear the display and display the current sensor type. Subsequent presses will step through the sequence of sensor type numbers. LIN FACTOR (5) For setting and examining sensor linearity factor. CAL FACTOR (6) For setting and examining sensor calibration factor. LOWER LIMIT (1) Enables and disables lower limit checking, and setting of the lower limit value. RESET PK.MTR. (2) Sets the peaking indicator to half full scale value corresponding to the current sensor input power. UPPER LIMIT (3) Enables and disables upper limit checking, and setting of the upper limit value. RANGE (0) Allows examination and alteration of the amplifier gain ranges. Four manual gain ranges can be selected, together with auto ranging for normal operation. Used in conjunction with the [SHIFT] key to allow the setting and examination of the RF duty cycle. UNITS (.) Allows selection of the output measurement format (dBV, dBm, watts, volts, ). Used in conjunction with the [SHIFT] key to allow the auto power off feature to be toggled on and off. OFF (-) Used to set the instrument into micropower standby mode. Used in conjunction with the [SHIFT] key to allow an offset, or the current display value to be entered for relative measurements (dB rel mode). 3-4 46882-182 LOCAL OPERATION 2 4 3 1 5 LIN FACTOR CAL FACTOR µ W dBV mW dBm nW mV 14 6 7 - + 13 SENSOR AUTO MAN ZERO C0806 . 12 11 10 9 8 Fig. 3-2 Liquid crystal display DISPLAY The LCD comprises the following: 1 NUMERICAL VALUE A three digit display of power reading (four if positive) in log format (dBm, dBV) and 4 digits in linear format (watts, volts), or the keypad entry value and the input amplifier range (r0, r1, r2, r3) when manually selecting ranges. 2 BEEPER Displayed when lower or upper limit checking is enabled, to show that the beeper will sound when the limit is exceeded. 3 LIN FACTOR Displayed when [LIN FACTOR] key is pressed to access sensor linearity factor examination/entry. 4 CAL Displayed when instrument/sensor calibration function is in progress. 5 FACTOR Used in conjunction with CAL annunciator when [CAL FACTOR] key is pressed to access sensor calibration factor examination/entry. 6 µW, mW, nW, dBV, dBm, mV Indicates the measurement units selected. The dB annunciator is used when the dB relative function is active 7 >> 8 ZERO Indicates that instrument zero function has been actioned. 9 MAN Indicates that manual selection of input amplifier range has been selected. 46882-182 Indicates that upper limit checking has been enabled. 3-5 LOCAL OPERATION 10 AUTO Indicates that autoranging of input amplifier has been selected. 11 SENSOR Indicates that sensor selection and calibration has been actioned. 12 BATTERY Indicates that the internal batteries require recharging. If the unit has previously been fully charged, the remaining battery charge should be sufficient for a further 15 minutes of operation. (This figure will be less if the batteries were not previously charged to full capacity.) 13 << 14 Peaking Meter Bar Presents the measurement value in analogue form, having a dynamic range of ±5 dB about the half scale value. Also indicates progress of the CAL and ZERO operations. Indicates that lower limit checking has been enabled. NOTE ON KEYPAD OPERATION AND LCD DISPLAYS Some of the primary functions have numeric values associated with them. When such a function is selected, its current value is displayed on the LCD and the numeric keys are enabled to allow the value to be changed. Numeric entry is terminated by pressing the [ON/ENTER] key. The digits appear on the LCD as they are typed in. If a wrong value is entered, the entry should be completed using the [ON/ENTER] key and the function re-selected. If it is simply required to view the current value a function without change, press the appropriate function key. The current value is displayed until the [ON/ENTER] key is pressed. The following functions do not require numeric input: [ZERO] [CAL] [SENSOR] [RESET PK MTR] [RANGE] [UNITS] Selection of one of these functions initiates the appropriate operation. PREPARATION FOR USE (1) Press [ON/ENTER] to activate the instrument . If the batteries require charging the battery symbol on the LCD will be displayed or the display will remain blank if the batteries are completely discharged. Connect the AC adapter via the 2.1 mm connector at the bottom end of the instrument. An LED indicates charging in progress, and the 6970 will audibly "beep" whilst the batteries acquire sufficient charge to power-up the unit. For fully discharged cells, the beeper may sound for several minutes. Once the beep has stopped, the instrument can be used while the batteries are being charged. 3-6 46882-182 LOCAL OPERATION (2) Select a sensor appropriate for the power and frequency range to be used, and connect it via the sensor cable to the SENSOR INPUT connector at the top of the instrument. (3) Select the correct sensor type by pressing [SENSOR]. The currently selected sensor type number will then be displayed on the LCD. Further presses of [SENSOR] will step through the sequence of possible sensors, as detailed in Chapter 1. For variants of sensor type, use the basic type number. Press [ON/ENTER] to confirm the selection. The default sensor is the IFR 6910. (4) Enter the sensor’s LINEARITY FACTOR. This is shown on the sensor’s label or, more precisely (to two decimal places), on the Calibration Data Chart which accompanies the sensor. The allowed range of LINEARITY FACTOR is 0.01 to 15.00. The LINEARITY FACTOR is a correction figure to allow for the non-linearity of the sensor’s response to high power levels. Select [LIN FACTOR]. The LIN and FACTOR flags will be displayed and the currently selected LINEARITY FACTOR will be displayed. Enter the required LINEARITY FACTOR using the numeric keys. Press [ON/ENTER] to set the LINEARITY FACTOR to the new value and return the instrument to normal operation. (5) Enter the sensor’s CAL FACTOR. The CAL FACTOR is a correction figure which takes into account the variation in efficiency of RF to DC conversion in the sensor over its specified frequency range. If the frequency of the signal to be measured is known, the accuracy of the reading can be improved by entering the CAL FACTOR corresponding to the frequency. A graph of CAL FACTOR against frequency is given on the side of each sensor, and the calibration data chart gives CAL FACTOR at appropriate frequency intervals to two decimal places. Select [CAL FACTOR]. The CAL and FACTOR flags will be displayed and the currently selected CAL FACTOR. Enter the required CAL FACTOR using the numeric keys. Press [ON/ENTER] to set the CAL FACTOR to the new value and return the instrument to normal operation. The default CAL FACTOR value is 100%. 46882-182 3-7 LOCAL OPERATION The 6970 is now ready to make uncorrected power measurements. Connect the sensor (via attenuator or matching unit as required) to the source to be measured. A power reading (in dBm) will be obtained. Note that a sensor zero and calibration will be required for accurate power measurements, as described in SUMMARY OF MEASUREMENT PROCEDURE page-3-12. CAUTION IFR 6910, 6920 and 6930 series power sensors are fitted with precision microwave connectors in type N, MPC 3.5 mm, APC7 and PC 2.92 mm. To avoid damage to these connectors, they should not be mated with non-precision connector types. KEY FUNCTIONS The remaining keys allow for a variety of refinements to be made to the basic reading. Each of the keys not already discussed in ’Preparation for Use’ is described below. Zero This will offset any residual voltage in the power meter/sensor combination before connection to the equipment under test. Ensure that no RF power is applied to the sensor, then press [SHIFT] [ZERO]. The display will be cleared and the ZERO annunciator will be displayed together with the power sensor type number. The peaking meter bar will progress across the display from left to right during the zeroing sequence. On completion the instrument will be restored to normal operation. NOTE: If the ZERO operation is performed with RF present or a power sensor is not connected to the unit, the warning message FAIL will be displayed on the LCD. Press any key to remove the message. Cal For best possible measurement accuracy, the sensor should be calibrated against the integral power reference, immediately following a sensor zero. The power reference provides a very stable power source, with excellent source match (for effects of source match see Appendix A: Power Measurement Error Analysis) traceable to international standards. Enter the 50 MHz calibration factor, supplied with the sensor. Connect the sensor to the integral 50 MHz, 0 dBm power reference, if fitted, then press [SHIFT] [CAL] to calibrate the sensor: the peaking indicator shows time to completion. An external power reference may be used to perform the sensor calibration if the power reference option is not fitted. When using 6920 series sensors the supplied 30 dB attenuator must be used between the calibrator output and power sensor during calibration. When using 6930 Series option 002 sensors the supplied 10 dB attenuator must be removed before connection to the calibrator output and then reconnected to the sensor before any subsequent measurements. 3-8 46882-182 LOCAL OPERATION Units The currently selected measurement units will be shown on the LCD. To change the units, press [UNITS]. If the current units are Watts, the instrument will select the appropriate scaling from W, mW, µW or nW; similarly with V or mV when Volts are selected. Available units are dB, dBm, W, V and dBV. Range The input amplifier ranges can be manually selected or set to auto ranging. The MAN or AUTO flag on the LCD will show the current selection. Press [RANGE] to display the current selection and to step through the sequence r0, r1, r2, r3, AUTO. Press [ON/ENTER] to select the displayed range. When set to AUTO, the instrument automatically selects the range most suitable for the input signal level. If the measured power is higher than maximum for the range selected, the display will change to or (over-range). Similarly for under-ranging ur will be displayed. The range selection should be amended to suit. The amplifier gain configuration is such that Range 0 (r0) has the least gain and Range 3 (r3) the greatest. Note that the automatic restart averaging function is disabled in manual range selection mode. Lower limit When making repetitive power measurements, such as in production testing, the limit facility can be used to give a quick audible warning of a minimum power level not being attained: << (i) Press [LOWER LIMIT]; the checking is enabled. annunciator is displayed to indicate that limit (ii) Enter the lower limit value using the numeric entry keys. (iii) Press [ON/ENTER] to confirm the entry. The beeper will sound and the annunciator will flash when the input power falls below the chosen limit. (iv) To disable lower limit checking, press [LOWER LIMIT] again. << Upper limit The UPPER LIMIT facility provides a similar quick audible warning of when a maximum power level is exceeded. >> (i) Press [UPPER LIMIT]; the checking is enabled. (ii) Enter the upper limit value using the numeric entry keys. 46882-182 annunciator is displayed to indicate that limit 3-9 LOCAL OPERATION (iii) Press [ON/ENTER] to confirm the entry. The beeper will sound and the >> annunciator will flash when the input power exceeds the chosen limit. The beeper rate for the upper limit is higher than for the lower limit. (iv) To disable upper limit checking, press [UPPER LIMIT] again. Peak indication The peaking indicator bar graph provides an analogue representation of power level. The range of the indicator is ±5 dB about half full scale, and the responsiveness of the indication depends upon the chosen amplifier range. When the 6970 is used to set up the output power level of a device under test, press [RESET PK. MTR.] to set the peaking indicator to half full scale. The range of the indicator is now ±5 dB about the input power level. Duty cycle correction Duty cycle correction may be applied to display peak pulse power when the incident RF is a pulsed signal. Duty cycle is defined as the percentage ratio of RF on time to RF off. Duty cycle correction may be applied as follows: (i) Press [SHIFT][RANGE] to display the current duty cycle (default 100%) (ii) Enter the required value for the RF input duty cycle using the numeric keys. (iii) Press [ON/ENTER] to confirm the entry. The display will now indicate the calculated RF level. (iv) Set the duty cycle back to 100 when making normal (non-pulsed) measurements. Note that with duty cycles other than 100%, the auto-restart averaging function is disabled. Use the [ON/ENTER] key to restart averaging. dB relative function This function allows an offset to be added to the LCD readout value. A typical example application would be for the correction of an attenuator pad placed in front of the power sensor. To enter the offset press [SHIFT][OFF], then enter the offset value in dB. [ON/ENTER] to confirm the entry. Press An attenuator placed in front of the power sensor is defined as having a negative offset value, whilst an amplifier requires a positive offset value to be entered. To use the current measurement value as a 0 dB reference (to measure a drift in power level, for example) press [SHIFT][OFF][ON/ENTER]. When an offset has been applied, the dB annunciator is displayed on the LCD. Press [UNITS] to disable the dB relative function. 3-10 46882-182 LOCAL OPERATION OTHER FUNCTIONS Averaging Averaging is used to reduce the effect of noise on measurements. A number of reading samples are taken and the average value calculated and displayed. The number of samples taken for each measurement varies with input range sensitivity, the maximum being taken on the most sensitive range. 6970 employs an automatic restart averaging function which resets the averaging whenever an RF input level change is detected. If measurements are being made with modulated signals, manual range selection should be used to over-ride the automatic restart function. The time taken to produce the averaged measurement value, therefore, varies with selected range, as shown in Table 3-1. To restart measurement averaging at any time, press [ON/ENTER]. TABLE 3-1 MEASUREMENT RESPONSE TIMES RANGE 0 1 2 3 RESPONSE TIME 0.5 s 2.0 s 5.0 s 18.0 s Power-down stores When the unit is switched OFF (i.e. in micropower standby mode), the current instrument settings are stored in non-volatile memory, as shown in Table 3-2. TABLE 3-2 SETTINGS HELD IN NON-VOLATILE MEMORY FUNCTION LINEARITY FACTOR CAL FACTOR LOWER / UPPER LIMIT RANGE UNITS Peaking indicator centre level Sensor type number Sensor CAL data Sensor ZERO data RANGE/STATES 0.01 to 15.00 0.01 to 200% 0.000 to 999.9 mW, 0.000 to 999.9 mV -100 to 100 dBm, -100 to 100 dBV 0, 1, 2, 3, AUTO Log or linear (dBm, dBV, W, mV, dB) 6910, 6920, 6930 - When the instrument is switched ON, from standby mode, a checksum test is made of the memory contents, and if successful, the stored parameters are re-established. If the test fails the stored values are reset to the default values, as shown in Table 3-3. Note... If the unit has previously been fully charged, it can be left in standby mode for approximately three months before recharging is required. 46882-182 3-11 LOCAL OPERATION TABLE 3-3 DEFAULT VALUES FUNCTION LINEARITY FACTOR CAL FACTOR LOWER LIMIT UPPER LIMIT RANGE UNITS SENSOR SETTING 8.000 100.0% 0.000 mW 999.9 mW AUTO dBm 6910 Auto power off When the unit is powered from its internal batteries the auto power off feature can be enabled, whereby the unit will switch off automatically if there have been no keypresses over a period of 6 minutes. If the [SHIFT] key is held pressed, successive presses of the [UNITS] key toggles auto power off between enabled (PO 6 displayed) and disabled (PO - displayed). Pressing [ON/ENTER] confirms the selection. SUMMARY OF MEASUREMENT PROCEDURE Preparation 3-12 (1) Select a sensor suitable for the measurement. Connect the sensor to 6970 using the supplied sensor cable. (2) Turn on the unit by pressing [ON/ENTER]. (3) Select the correct sensor type: step [SENSOR] [ENTER]. (4) Enter the sensor LINEARITY FACTOR (0.01 to 15): [LIN FACTOR] 〈value〉 [ON/ENTER]. (5) Enter the 50 MHz sensor CALIBRATION FACTOR (0.01 to 200): [CAL FACTOR] 〈value〉 [ON/ENTER]. (6) Connect the sensor (via the precision attenuator, if necessary) to the internal 50 MHz, 0 dBm power reference, if fitted. Alternatively, an external power reference may be used to perform the calibration. (7) Ensure that no RF power is applied to the sensor, then press [SHIFT] [ZERO] to zero the sensor. (8) To calibrate the sensor press [SHIFT] [CAL]. (9) Enter the sensor CALIBRATION FACTOR corresponding to the frequency of the input signal to be measured (0.01 to 200): [CAL FACTOR] 〈value〉 [ON/ENTER]. (10) 6910 series and 6930 series power sensors are now ready for making corrected power measurements. When using 6920 series sensors, continue the preparation to include steps (11) and (12). (11) Repeat the zero function [SHIFT][ZERO] again with no RF applied to the sensor. 46882-182 LOCAL OPERATION (12) Connect the sensor to the signal source to be measured and where feasible, with no RF power applied to the sensor, repeat the zero function: [SHIFT][ZERO]. Making measurements (1) Select the appropriate measurement units by stepping the [UNITS] key. (2) If required, select the appropriate range for the measurement by stepping the [RANGE] key to choose between MANual ranges r0, r1, r2, r3 or AUTOranging. An or displayed on the LCD corresponds to an over range condition; whereas ur corresponds to an under range condition. (3) If required, set a lower limit by pressing [LOWER LIMIT] 〈value〉 [ON/ENTER]. The LCD displays the << and ’beeper’ annunciators. (4) If required, set an upper limit by pressing [UPPER LIMIT] 〈value〉 [ON/ENTER]. The LCD displays the >> and ’beeper’ annunciators. (5) Reset the peaking meter bar graph by pressing [RESET PK. MTR.]. A ±5 dB measurement range about half full scale is obtained. SELF-TEST MODES When switched ON from standby mode, the instrument performs a check on the internal non-volatile memory, as described previously. A number of test functions are also enabled by switching ON the unit whilst simultaneously pressing another key. (1) Display Test. With the instrument in standby mode (press [OFF]), press and hold [CAL FACTOR] and press [ON/ENTER]. All segments of the LCD will be displayed at a 1 second flash rate. To end the test press [ON/ENTER]. (2) Keypad Test. With the instrument in standby mode (press [OFF]), press and hold [SHIFT] and press [ON/ENTER]. Test the keys by pressing each key in turn. As a key is pressed its number should be displayed and the beeper sounded. To end the test, press [ON/ENTER] to resume normal operation. (3) Software Issue. With the instrument in standby mode (press [OFF]), press and hold [RESET PK. MTR] and press [ON/ENTER]. The current software issue is displayed on the LCD. Press [ON/ENTER] to resume normal operation. MICROCONTROLLER RESET OPERATION Should the unit fail to power-up correctly during normal operation or whilst being recharged, the microcontroller may be reset by pressing the button located between the two front feet on the underside of the unit. Once reset, the microcontroller will power-up with default measurement data as detailed in Table 3-3. 46882-182 3-13 LOCAL OPERATION SENSOR OVERLOAD WARNING Should the RF incident on the power sensor be at a level in excess of the stated maximum input level for the power sensor, the warning message -OL- will appear on the LCD together with a continuous tone from the beeper. The RF source should be removed promptly to avoid damaging the sensor. LOW LEVEL POWER MEASUREMENTS The 6920 Power Sensor used with a 6970 Power Meter is an extremely sensitive measuring system capable of reading power levels as low as -70 dBm (-65 dBm for 6923/24 power sensors). It is therefore necessary to follow a few simple precautions to ensure an accurate reading at these low levels. (a) Allow the sensor to stabilize to ambient temperature before attempting to start the calibration and measurement. (b) Ensure the sensor is not subjected to changes of temperature during the calibration and measurement. For example, handle the sensor as little as possible and do not carry out the measurement in a stream of hot air from an instrument. (c) When measuring power levels at the bottom end of the sensor’s dynamic range, set the 6970 to manual ranging, range 3. Manual range selection is used because it over-rides the automatic restart averaging function, giving a more stable power reading display. However, the response time will be longer than in auto-ranging mode. Refer to Table 5-1 for the approximate upper range limits for each sensor type (these are likely to vary by ±2 dB to allow for the spread in sensor sensitivities). (d) When zeroing the sensor ensure that it is not receiving radiated power at its input connector. (e) Ensure that the internal power reference is switched off to prevent RF radiation being picked up by the power sensor. (f) The procedure entails the following functions to be performed immediately prior to the measurement and in the given order: [SHIFT][ZERO] with no RF power applied to the sensor [SHIFT][CAL] with the sensor connected to a power reference again [SHIFT][ZERO] with no RF power applied to the sensor and where feasible a final zero with the sensor connected to the signal source to be measured, again ensuring no RF power is being applied to the sensor. 3-14 46882-182 Chapter 4 TECHNICAL DESCRIPTION CONTENTS Page CONSTRUCTION ....................................................................................................4-1 SYSTEM DESCRIPTION.........................................................................................4-1 LIST OF FIGURES Fig. 4-1 6970 block diagram....................................................................................4-3 CONSTRUCTION The 6970 Power Meter is enclosed in a plastic case moulded in two halves. electronic circuits are located on two multi-layer PCBs using surface mounted components. The The upper case half has the LCD PCB secured inside with the LCD visible through an aperture. The keypad assembly uses metal dome spring keys in a layered construction which is adhesively fixed to the case upper surface. Three NiCd rechargeable batteries are held in clips on the PCB. The lower case half has the Main PCB secured inside. The SENSOR INPUT multi-pin connector, fitted to the aluminium/polycarbonate front panel, is located in a groove at the top end of the case assembly. The DC input connector is similarly located at the bottom end of the case, with a voltage regulator heat sink plate attached to it. The Power Reference PCB is secured inside the upper half of the case, and is fixed to the LCD PCB. The power reference output N-type connector is located on the front panel of the case, next to the previously mentioned SENSOR INPUT connector. SYSTEM DESCRIPTION The heart of the 6970 Power Meter is an 8-bit microcontroller which provides control and timing for the unit and processes measurement data acquired through an analogue/digital converter (ADC), it also drives the liquid crystal display (LCD) and interfaces which the keypad. Program code is contained in internal ROM. The 6970 uses a signal chopper to provide a pulsed DC voltage which is proportional to the incident RF power and thus allows AC coupled differential amplification. The tuned input amplifier is distributed between the selected sensor and the 6970 input amplifier, as shown in Fig. 4-1. 46882-182 4-1 TECHNICAL DESCRIPTION The second stage amplifier scales the signal as appropriate over four ranges before feeding the ADC, which converts the analogue signal to a digital form suitable for the microcontroller to process and apply corrections. A digital/analogue converter (DAC) is used as part of the sensor zero operation to minimize and account for system offsets when no RF signal is applied. The internal power source comprises three rechargeable NiCd cells; two DC-DC converters are used to boost the NiCd power source to regulated +5 V and -5 V power rails required by the analogue and digital circuitry. The power reference provides a 0 dBm (1mW) 50 MHz signal from a level controlled oscillator based on a dual gate FET. Thermal compensation techniques are used in the design of the oscillator such that the long term drift of output power due to temperature variations is minimised. 4-2 46882-182 46882-182 DC INPUT +3.6V to +5V DAC_CS(L) ZERO DAC CHOPPER DRIVE SIGNAL CHOPPER +5V(µ) VREF TUNED AMPLIFIER ➤ BATTERY POWER SUPPLY RF DETECTOR POWER SENSOR 12 +3.6V to -5V 4 RANGE AMPLIFIER RANGE_1 RANGE_0 -5V +5V P.S. ENABLE KEY PAD 8 MHz OSC ADC VCC 8 ÷4 32.768 kHz OSC MICROCONTROLLER ADC_CONVST(L) ADC_BUSY(L) CLK 27 C3431 LCD POWER REFERENCE BEEPER TECHNICAL DESCRIPTION ➤ Fig. 4-1 6970 block diagram 4-3 Chapter 5 ACCEPTANCE TESTING CONTENTS Page ACCEPTANCE TESTING OF POWER METER....................................................5-1 ACCEPTANCE TESTING OF POWER REFERENCE ..........................................5-4 LIST OF TABLES Table 5-1 Signal generator power levels for instrumentation accuracy test ............5-3 ACCEPTANCE TESTING OF POWER METER SPECIFICATION Instrumentation accuracy: ±1% range 0, 1, 2 ±5% range 3 TEST EQUIPMENT Description Minimum specification Example Signal generator Power range -60 to +13 dBm IFR* 2030 series Power sensor IFR* 6900 series IFR* 6910 *IFR Ltd was previously known as Marconi Instruments Ltd With the internal batteries fully charged or with the external AC adapter connected, the following acceptance tests should be performed: (1) Keypad test. Press and hold down the [SHIFT] key, press the [ON/ENTER] key, and then release the [ON/ENTER] key. Press each keypad key in turn; the key number should be displayed on the LCD. Press the [ON/ENTER] key to end the test. (2) Display test. Press and hold down the [CAL FACTOR] key, press the [ON/ENTER] key, then release the [ON/ENTER] key. All segments of the display should be illuminated and flash at 1 second intervals. Press the [ON/ENTER] key to end the test. (3) Software Issue. Press and hold down the [RESET PK.MTR.] key, press the [ON/ENTER] key, then release the [ON/ENTER] key. The software issue number will be displayed on the LCD. Press the [ON/ENTER] key to end the test. (4) Sensor Zero Connect a 6910, 6920 or 6930 Series sensor to the unit with the supplied sensor cable, then enter the correct sensor type by pressing the [SENSOR] key until the sensor type is shown on the LCD. Ensure that no RF 46882-182 5-1 ACCEPTANCE TESTING power is incident on the sensor, then press [SHIFT][ZERO] to initiate a sensor zero: the peaking indicator shows time to completion. The warning message FAIL will be displayed on the LCD if the sensor fails to zero correctly. (5) Sensor Calibration Connect a 6910, 6920 or 6930 series sensor to the internal 50 MHz power reference (if fitted) or an external 50 MHz 0 dBm standard. A 30 dB attenuation pad should be connected between 6920 series sensors and the power reference. Press [SHIFT][CAL] to initiate a sensor calibration: the peaking indicator shows time to completion. Check that the display reads 0 dBm following the calibration, or -30 dBm for 6920 series sensors. (6) Instrumentation Accuracy Connect a 6910, 6920 or 6930 series power sensor to the signal generator, then perform the following operations: (i) Ensure that the RF is turned off, then perform a sensor zero. (ii) Press [RANGE] repeatedly until r3 and MAN are displayed on the LCD, then press [ON/ENTER] to select this range: the MAN annunciator should remain visible on the LCD, indicating that auto-ranging has been disabled. Set the signal generator to 50 MHz and to the appropriate power level for r3 (as shown in Table 5-1). Increase the source power level in 0.1 dB steps until or is displayed on the LCD. Reduce the power level by 0.2 dB. Press [ON/ENTER] to restart averaging and wait 20 seconds. Press [SHIFT][OFF] to invoke dB Rel, then press [ON/ENTER]. Check that 0.000 dB is displayed. Press [RANGE] repeatedly until r2 is shown on the LCD, then press [ON/ENTER] to select. Press [ON/ENTER] to restart averaging and wait 10 seconds. The displayed reading should be in the range -0.22 to +0.21 dB (±5%). (iii) With the unit still set to r2, increase the source power from the appropriate power for r2 (as shown in Table 5-1) in 0.1 dB steps until or is displayed on the LCD. Reduce the power level by 0.2 dB. Press [ON/ENTER] to restart averaging and wait 10 seconds. Press [SHIFT][OFF] to reset dB Rel, then press [ON/ENTER]. Check that 0.000 dB is displayed. Press [RANGE] repeatedly until r1 MAN is shown on the LCD, then press [ON/ENTER] to select. Press [ON/ENTER] to restart averaging and wait 10 seconds. The displayed reading should be in the range -0.04 to+0.04 dB (±1%). (iv) 5-2 With the unit still set to r1, increase the source power from the appropriate power for r1 (as shown in Table 5-1) in 0.1 dB steps until or is displayed on the LCD. Reduce the power level by 0.2 dB. 46882-182 ACCEPTANCE TESTING Note... If the or indication does not apper on range 1 even when the maximum output level of the signal generator has been reached then this level (+13 dBm) should be used for the measurement. Press [ON/ENTER] to restart averaging and wait 5 seconds. Press [SHIFT][OFF] to reset dB Rel, then press [ON/ENTER]. Check that 0.000 dB is displayed. Press [RANGE] repeatedly until r0 is shown on the LCD, then press [ON/ENTER] to select. Press [ON/ENTER] to restart averaging and wait 5 seconds. The displayed reading should be in the range -0.04 to+0.04 dB (±1%). TABLE 5-1 SIGNAL GENERATOR POWER LEVELS FOR INSTRUMENTATION ACCURACY TEST SENSOR TYPE r3 (Range 3) r2 (Range 2) r1 (Range 1) 6920 -49 dBm -38 dBm -28 dBm 6923/4 -46 dBm -35 dBm -25 dBm 6910 series -8 dBm +3 dBm +13 dBm 6930 series +6 dBm +18 dBm +27 dBm 46882-182 5-3 ACCEPTANCE TESTING ACCEPTANCE TESTING OF POWER REFERENCE SPECIFICATION ±1.2% worst case for 1 year. Accuracy: TEST EQUIPMENT Description Milliwatt power meter Minimum specification Meter error ±0.015 dB at 50 MHz, 23°C ±3°C 50 Ω N-Type probe connector Input VSWR <1.01:1 Calibrated to National Standards Example W & G EPM-1 Note... For maximum accuracy it is important to allow sufficient warm-up time for the equipment used in this test. For the EPM-1 one hour should be allowed. 5-4 (i) Calibrate the milliwatt power meter then connect the probe to the 6970 POWER REFERENCE output. (ii) Press [SHIFT][ON/ENTER] on the UUT to enable the power reference. (iii) Verify that the readout on the milliwatt power meter is within ±1.2% (±0.05 dB). 46882-182 Index A AC adapter ........................................ 1-3, 2-1 Acceptance testing ....................................5-1 Accuracy ...................................................1-2 Auto power off........................................3-12 Averaging ...............................................3-11 restart ........................................ 3-2, 3-11 B Battery charging......................... 1-3, 2-1, 3-6 Beeper .............................................. 3-5, 3-9 C Cal factor ..................................................3-7 Construction..............................................4-1 D dB relative function ................................3-10 Default state of instrument......................3-12 Display......................................................3-5 Duty cycle correction..............................3-10 E Error sources ................................... App. A 1 K Key functions............................................3-8 Keypad ......................................................3-2 L LCD Display.............................................3-5 Limit checking ..........................................3-9 Linearity factor .........................................3-7 Low level power measurements .............3-14 O Options and accessories............................1-7 P Peak indication .......................................3-10 Performance data ......................................1-3 Power measurement error analysis . App. A-1 Power reference .................................1-2, 3-8 Power requirements ..................................2-1 Power-down stores .................................3-11 Preparation for use....................................3-6 R Range selection.........................................3-9 Response time of measurement ..............3-11 S Self-test modes ................................2-2, 3-13 Sensor calibration ..............................3-2, 3-8 Sensor zero ........................................3-2, 3-8 Static Sensitive components ....................... iv Stored instrument settings ......................3-11 Supported power sensors ..........................1-7 System description....................................4-1 T Tests, keyboard and display ............2-2, 3-13 U Units .........................................................3-9 Z Zeroing..............................................3-2, 3-8 M Microcontroller reset..................... 3-13, 3-14 46882-182 Index-1


