1
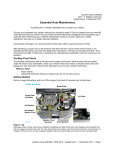
C4 Corvette L98 Engine Fuel Injector Replacement Removal of Injectors on 89 Corvette TPI without removal of Runners Watch this important How To video: http://www.youtube.com/watch?v=TMCrylOxsOU I replaced the Multec injectors in my 89 - 350 TPI a few months ago and used the GM Helms manual as a guide. The manual recommends you remove both runners to replace the fuel injectors. I followed the Helm manual procedure on my first injector removal and found it difficult to remove the lower Torx runner bolts. These bolts are not easily removed because the valve covers do not allow "straight access" to the pesky Torx bolts. Therefore, you must remove the valve covers.....and this is not easy! During my second injector removal project, I wanted to see if I could remove the injectors the “an easier way” (without runner removal) and the steps below were a result of what I found to work for me. Just for the "fun of it" make sure your new injectors (if you are replacing them) all fit the electrical connectors on your engine...sounds like an assumption...one of my injectors did not fit. Had to do a little filing on the injector plug and a lot of cussing! BTW, removal of the injector leads from the injectors is the first step in this procedure. The injector leads are not specific to a certain injector as are the spark plug wires. The L98 engine has a “bank fire” process where all injectors on the same side of the engine fire at the same point in time. There are some tools you will need for this. You will need a Torx #40 male driver to remove the upper plenum bolts. There will be some metric wrenches, a soft face hammer and screwdrivers. However, there are some “special” items: 1. A set of ¼ inch hex Torx bits as these are about one inch in length 2. ¼ inch combination wrench. You will need to place the ¼ inch Torx bit into the closed end of the ¼ inch combination wrench to “break loose” the fuel rail line crossover Torx bolts. These small Torx bolts are in very close quarters. Try this simple process before you start the injector removal. Here is a photo to illustrate this practice: Page 1 of 10 C4 Corvette L98 Engine Fuel Injector Replacement After you “break free” the small Torx bolts, use a ¼ inch ratchet with a ¼ inch socket and insert the Torx bit into the ¼ inch socket. This will “speed up” the removal of the small Torx bolts that hold the the crossover lines to the fuel injector rails. 3. A set of flare wrenches. These are readily available from Sears and are needed to remove the main fuel lines to the injector fuel rails and some vacuum lines. 4. Torx “male” sockets (mine are 3/8 drive) that will fit into your ratchet. These are used to remove runner bolts. NOTE: The Corvette engine is very low to the ground and is somewhat “hard on the back” to work on for long periods of time. I find it to be much easier to work on the engine by jacking up the front end of the car. Place jack stands under the frame and then remove both front wheels. With the wheels off, the engine is much easier to work on…..my opinion! Here is what I did to install new injectors: 1. Remove one connection to the car battery. 2. Relieve the pressure in the fuel system by pressing the Schrader valve on the passenger side fuel rail. Note you are releasing gasoline that can cause odor and fire!!! Be careful doing this and do it in a well-ventilated area. 3. Remove the wire cables (connected to the accelerator) on the butterfly valve on the throttle body, remove the cables from the bracket on the side of the plenum and lay aside the cables. One cable has a easily removed clip and the other has an end that must be oriented for removal. 4. While on that side of the engine, remove the vacuum line on the rear and bottom of the plenum. Use a flare wrench so that you do not "booger up" the 5/8 nut. 5. Remove the upper runner Torx bolts (driver side) and note what length bolt goes where. I have found it best to get a piece of cardboard and punch holes in the cardboard that correspond to the location of the runner bolts. As you remove the bolts, place them in the proper holes. This makes reassembly easier. Page 2 of 10 C4 Corvette L98 Engine Fuel Injector Replacement 6. Go to the other side of the engine and disconnect the IAC, TPS and MAF connections. 7. Remove the flexible hose from the air filter to the throttle body. 8. Disconnect the two water lines to the TB and consider a TB doing a bypass! This project will “clean up a very busy” area of the motor and will cost you less than $8 for a professional looking job! Here is a photo of the throttle body bypass. Note to throttle body water port (passenger side) is open and does not have a hose connected. The 5/8 inch heater hose leading to the throttle body was cut and spliced (NAPA has splice connection) to a new length of 5/8 hose. This connection can be seen at the rear of the AC compressor. The new length of heater hose goes in front of the AC compressor and then routes to the front of the intake manifold. This removes both water hoses from the throttle body. 9. Disconnect the various vacuum lines on that side of the plenum, as there are 4 to 5 as I recall. Note there is one vacuum line under the plenum (front, left hand side) and this one is easy to miss! 10. Remove the throttle body and place on a secure surface11. Remove the upper runner Torx bolts (passenger side) and note any difference in length of screws. I have found it best to get a piece of cardboard and punch holes in the cardboard that correspond to the location of the runner bolts. As you remove the bolts, place them in the proper holes. This makes reassembly easier. 12. At this point make sure all UPPER runner bolts (both sides) are removed and all connections to plenum are disconnected. Using a rubber or soft face hammer, slightly Page 3 of 10 C4 Corvette L98 Engine Fuel Injector Replacement tap "upwards" under the plenum and the plenum will “just” come loose from the runners. (Do not loosen or remove the lower runner bolts.) Lift up and remove the plenum. Place this on a secure surface. If you drop it, you will cry real tears!!! . I like to clean out the “crud” inside the plenum and the cleaning should not be done with the throttle body attached. Gumout really cuts and cleans the crap inside the plenum. 13. Remove the two fuel lines (right front side of engine) that go to and from the fuel rail assembly. Use a flare wrench for this removal. 14. Remove the two steel fuel lines (crossways to engine top) in front and rear of the fuel rail assembly. Note that a small Torx screw secures a bracket (that holds that end of the line) on each fuel rail. The rear line (and brackets) is a little difficult due to close space, but is easy to remove. Here you will have to use the ¼ Torx bit placed in the closed end of the ¼ inch combination wrench to remove the Torx screws. Please NOTE that these small Torx screws on my 89 were very tight and I thought they would strip out…..but they finally came loose. See the note on “special” tools at the beginning of this note! 15. Remove the EGR valve and the two bolts are in close quarters. I used a 7/16 inch combination wrench (use open end of wrench and place wrench in a vertical position) on the EGR hex bolts with a screwdriver in the closed end as a lever, useful for this “tight area”. Please NOTE that these screws on my 89 were very tight and I thought they would strip out…..but they finally came loose . 16. The passenger side injector rail assembly is easiest to remove. While standing on one side of the car (this is made easier by removing the two front wheels), grab the front of the rail with one hand and the back of the rail with the other hand. Rock the rail assembly side to side while gently pulling upwards. Be careful as the rail assembly will suddenly turn loose and you can damage the runner and some of your tender skin!! After the four injectors break loose, rotate the top of the fuel rail assembly toward the center of the engine and raise it upwards. That injector rail assembly will come out as one piece. 17. The other rail is removed the same way but required a special twist to get it out. Just work with it, have a cold beer and you can get it out. 18. Assembly is just the opposite sequence and do not forget to connect the injector leads to the new injectors . Also, you must add (replace) some coolant to the cooling system to replace the lost coolant from disconnecting the TB coolant lines. Helpful Hints a. The injectors are secured to the fuel rail by a little “rotating clip”. The clip must be rotated clockwise with a pointed tool in order to remove that injector from the fuel rail. After installation of each injector, do not forget to “re-lock” the little rotating clip. b. Use anti-seize paste (get this from NAPA) on any screws or bolts that thread into aluminum threads. This makes (future) removal easier and prevents seizing due to contact of different metals. c. The Runner Torx bolts should be torqued to 25 ft lbs of torque. This is per GM Service Bulletin 89-22-6E dated 11/88. Be very careful not to strip out these bolts, as the plenum material is soft aluminum. Page 4 of 10 C4 Corvette L98 Engine Fuel Injector Replacement c. Do not use any gasket sealer on the upper runner gaskets to plenum contact points. I found it helpful to use some gasket adhesive to hold the gaskets to the runners as the plenum is installed. e. While you have easy access to the thermostat housing (when the plenum is removed), you may want to solve a future problem. Some day you will have to drain the coolant from your engine to flush it and add new coolant. The cooling system on the L98 engine tends to trap air and refilling the system is very difficult. Some people recommend “stacking the coolant” which is a pain in the arse. You can prevent the trapped air problem by simply drilling two little holes in the thermostat. The diameter of the holes can either be 1/16 or 1/8 inch. Here is a photo showing this practice: Please note that these small holes did not change the warm up time on my 89 Corvette. f. Do yourself a favor and use NEW "O" rings on the fuel rail lines and injectors, as they are cheap compared to another teardown! Lubricate all the "O" rings with engine oil for ease of re-assembly. Bob Lamb (Sam Lam on Forum) St, Charles, MO Written January 04 Revised last on February 07 Page 5 of 10 C4 Corvette L98 Engine Fuel Injector Replacement Got mine from Jon @ FIC for my '90 L98. Will be assembling next week. 1985-1993 Corvette, Camaro Pontiac T/A Bosch Design III upgrade Fuel Injector http://fuelinjectorconnection.com/sh...&productId=134 Bob Lam’s article on injector removal http://webpages.charter.net/buddiel/...al)%201-04.doc TPI Injector Replacement http://www.thirdgen.org/injectorswap How to change your fuel injectors http://www.corvettefever.com/howto/c...uel/index.html Intake Plenum Gasket http://www.autozone.com/R,APP1104544...ductDetail.htm Fuel rail seal kit http://www.autozone.com/R,APP1136249...ductDetail.htm I took a three-day weekend the last week of April 2006, ostensibly to clean out the basement, but also to repair an oil leak which had developed in the rear seal of my intake manifold. I took pictures, so here's how I fixed it. Not meant to replace the GM Service Manual, but maybe this will help if you decide to do this the first time. Throughout the article, you click on any pictures for a larger view. The Corvette intake manifold is sealed by a composite gasket on the cylinder heads, but uses a bead of RTV sealing compound at the front and rear of the valley. Over time, this seal is prone to leaking and must be replaced, which necessitates removal of the intake manifold. I begin by cleaning the engine -- no one likes working on a dirty engine. This is really a pretty straight-forward job of unbolting and re-bolting parts -- there's just a lot of parts. Start as you would any project by disconnecting the battery, then you're all Page 6 of 10 C4 Corvette L98 Engine Fuel Injector Replacement set to begin unbolting. Here's a general progression, but remember that you'll need a GM Service Manual if you try this yourself. Start by unbolting the plenum from the intake runners and the throttle body, then the plenum comes straight up to remove. The intake runners are held in place with T-40 Torx bolts, and the throttle body uses 10mm bolts. Throughout this repair you'll find that you'll use these two sockets a lot. There are two connector under the plenum which give some people trouble: don't forget to unplug the Intake Air Temperature sensor, and to disconnect the vacuum feed at the rear of the plenum (5/8" and 3/4" fittings). The first time you do this repair, you'll wonder how in the world you are supposed to get at the plenum bolts which are hidden inside at the front and the rear. Just use a long extension. Note added 5 April 2007: A reader on the Corvette Forum successfully used these instructions to complete this repair on his '88 and recommended the 6" T40 extension shown here. It is available from Snap-On. Thanks Jim! Here's how it looks with the plenum off. I can never remember the position of the two connectors on the distributor, so picture helps. Once the distributor cover was off, I took a picture of the distributor position prior to removal. You'll see later that by using this picture, I was able to get the distributor back in correctly the first time. Page 7 of 10 C4 Corvette L98 Engine Fuel Injector Replacement Pull the injectors and the fuel rail as a unit. I use plastic plugs for the fuel lines to keep fuel from leaking out during this repair. The intake is off. After thoroughly cleaning the mating surfaces, install new gaskets (I used FelPro) and run a bead of RTV along the front and the rear of the intake valley. I used black RTV in the front, but opted for the stronger copper RTV on the rear. Here the intake is back in place. And the runners are back on. Page 8 of 10 C4 Corvette L98 Engine Fuel Injector Replacement Done. Believe it or not, it started as soon as the fuel pressure built (10 seconds). I put a timing light on it to check timing, and it was dead-on. Credit the photo I had taken earlier showing the distributor position. I was done! Injector replacement: My notes and experiences I finally finished replacing the injectors on my '88 coupe. I was having problems with an extended crank time on a warm restart. I contacted FIC and ordered the Delphi replacements which arrived promptly and look nearly identical to the originals. Since the car has very low miles and is nearly all original it is important to me to keep it that way. Some of the things I have experienced while doing this project may be of interest to others who are contemplating doing an injector replacement themselves. They are not listed in any particular order. 1. Plan on replacing the throttle body to intake bypass hose, thermostat and its gasket, and fuel rail o-rings. Reasoning: Alot of labor is involved with just getting to these parts, and while you are in there anyway, now is the time. 2. Plan on purchasing a o-ring kit for the fuel rail so you can replace all the o-rings on the rail. Reasoning: ditto above. 3. The Fel-pro intake gasket kit contains most but not all of the o-rings and gaskets you'll need. Buy the fuel rail o-ring kit mentioned above. You will also find that the Fel-pro kit includes two o-rings, one smaller and one larger o-ring, for where the fuel lines connect to the fuel rail. In my case both lines were the same size and took the larger o-ring. This required me to go to the local GM dealer to purchase the correct o-rings. Even the dealer said that they should be two different sizes. However that was not the case in my experience. Perhaps there was a changeover to two same size steel lines somewhere in production. 4. You'll need an EGR valve gasket. 5. Be real carefull with the injector retaining clips. They bend real easy and are easy to lose. 6. Do not drop debris, sockets, gasket scrapings, etc. into the holes of the manifold. DUH! 7. The fuel rail is easier to remove and reinstall in two pieces. Disconnect the left side from the right side by disassembling the crossover tubes. 8. In order to get the plenum off, at least one of the runners should be taken off too. In my Page 9 of 10 C4 Corvette L98 Engine Fuel Injector Replacement case the passenger side. The front cross bolt can be easily accessed from the drivers side if you remove the electric vacuum switch that controls the EGR which is attached to the rear thermostat housing bolt. Remove the bolt. 9. Check the functioning of your FPR (Fuel Pressure Regulator) BEFORE reinstalling it. 10. Check for leaks by pressuring the systems (running the fuel pump)after you have reinstalled the fuel rail but before you install the plenum and runners. 11. You will become intimately acquainted with a T-40 torx bit, and hopefully a torque wrench when reassembling things. Remember, ITS ALUMINUM! Take your time, don't rush and Good Luck to anyone who tries it. Many thanks to the helpful crew over at FIC. It is a rewarding experience, and the results speak for themselves. Page 10 of 10