1
GENERAL SERVICE -- WINDOWS
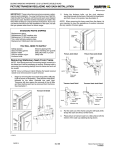
REGLAZING, IN-- SASH WOOD WINDOWS
5.
Carefully turn the sash over. Cut the interior glazing seal
by sliding a flexible putty knife between interior glass
rabbet and glass similar to step 2. See illustration 3. More
than one pass may be needed to completely free glass
from sash frame. If necessary, carefully push the glass
out from interior and remove. Note positions of glass
setting blocks, remove and set aside for reuse later.
10.
Dry fit replacement exterior wood bead to ensure a
proper fit. Some trimming may be necessary. Begin with
the shortest pieces first then install the longer pieces.
On Round Top units install the radius wood bead first
then the bottom rail bead. When all wood bead
components fit correctly remove and set aside for use
later.
11.
Apply a continuous 3/16″ bead of sealant along the
perimeter of the glass. Center the sealant bead directly
over the glass spacer as shown in illustration 6.
Sealant
bead
3
6.
Clean all remaining glazing sealant from glass rabbet
and wood bead (if it is to be reused). It is very important
that glazing surfaces are free from debris to ensure a
proper seal on new glass.
Installing New Glass
6
12.
Beginning with the shortest pieces (or radius on a round
top) press wood bead into place. Some sealant
squeeze out should appear.
13.
When all wood bead is in place press down firmly and
nail to sash 1″ (25) from each corner and every 4″--6″
(102--152) with 7/8″ 18 gauge brad nails. See illustration
7. Be careful not to angle nail toward glass. If using a
hammer to fasten wood bead, it may be necessary to
place a piece of cardboard over glass to avoid damage
to glass surface.
CAUTION: Always wear proper hand protection when
handling replacement glass.
7.
With a caulking gun run a 3/16″ (5) bead of sealant in the
glazing bevel of glass rabbet as shown in illustration 4.
Nail location
Sealant
bead
Countersink
nails with nail
set
4
Brad
nails
NOTE: If reglazing with sash installed in frame be sure to
replace setting blocks on bottom rail prior to installing glass.
See illustration below for correct placement of setting blocks.
8.
9.
Carefully set replacement
glass into sash. If reglazing
with sash installed set bottom
of glass on sill then tip into
place.
Glass must be blocked on
bottom rail and at least one
side at quarter points before
the sealant sets. If possible
reuse the glass setting blocks
removed previously. See
illustration 5 for correct
location of setting blocks.
Press glass into sealant at
edges to ensure a proper
seal.
Quarter
points
Quarter
points
5
7
Quarter
points
14.
When wood bead is completely fastened, counter sink
nails with a nail set.
15.
Fill in nail holes with wood filler and finish as desired
following manufacturer’s instructions.
NOTE: Do not clean excess sealant from glass until fully cured
(at least 24 hours).
11/2004
3.2.10
Marvin Service Manual
11708609