Download Installation Guide ( PDF)
Transcript
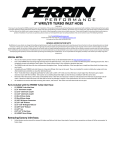
1.75” and 2.00” Subaru Uppipe 062211 Thank you for purchasing the PERRIN up-‐pipe. Please read through all instructions first. We recommend a professional mechanic perform this installation WARNING: This part is designed, manufactured, and sold solely for use on off-‐road and racing vehicles not controlled by federal and or local emissions laws. It is not intended for use on vehicles that operate on public streets and highways. Use of this part on emissions controlled vehicles may be in violation of federal or local law! ASMC, LTD. is not responsible for any damages as a result of misuse of this part. Check your local laws prior to use or installation. SPECIAL NOTES: • • • • • The use of a factory service manual is highly recommended. These can be downloaded online at http://techinfo.subaru.com. The use of penetrating oil will greatly reduce the chances of galling threads on bolts as they are removed. We highly recommend the use of anti-‐seize on treads of all bolts, when reassembling. It is vitally important to loosen turbo support brackets before uppipe is tighten down to header. Its vitally important that these brackets get tightened back down only after uppipe is tightened to header. This ensures no stress is being put on uppipe that can cause premature failure. Its also vitally important that your downpipe has not been damaged, and or fits properly before installation. An improper fitting downpipe can be “forced” to install onto car, but will cause premature failure of uppipe. Special Fittment Notes about your 2002-‐2005 WRX, AND 2005 LEGACY GT: • • These above models contain OEM catalytic converters in their uppipe, and it is NOT legal for use or installation within the United States on those applications. However, Canadian, Japanese, European and other markets may allow for replacement. Contact your local government prior to ordering for these areas. For those installing this part on race cars, there is an EGT sensor that is installed into OEM uppipe. This part has been proven to fail and destroy turbos in racing applications. We purposely eliminate the EGT bung to prevent turbo failure. A CEL will occur after installation of Uppipe in this situation, unless a 2.2Kohm resistor is installed across OEM female plug. These can be found at most any RadioShack. Parts Included with the PERRIN Uppipe: • • (1) PERRIN uppipe (5) 10x1.25x41mm double ended studs Installation for Uppipe 1. 2. 3. Raise front wheels off the ground. The vehicles weight must be supported by jack stands. Death or serious injury could result from an improperly supported vehicle. Remove lower plastic splashguard to gain access to the exhaust system from under the car. This step varies from older to newer cars, but normally there are (3) 10MM bolts and 4 plastic connectors to remove. Newer cars have fewer fittings. Remove intake system to gain access to 02 sensor wire bracket. 02-‐07 cars have (2) 12mm bolts down low on chassis secure air box. 08-‐11 cars have (2) 10mm bolts holding box to chassis. 4. Remove intercooler from engine by removing blow off valve (2) 12mm bolts then remove (2) 12mm bolts on either side of intercooler and the hose 5. 6. 7. clamps that attach intercooler to the turbo and intercooler. Carefully remove by pulling back of intercooler up and out. Remove gold colored passenger side intercooler bracket (2) 12mm bolts located on engine. Remove upper turbo heat shield by removing (7) small 10MM bolts around turbo. Using a small ¼” drive ratchet or ¼” drive air wrench can aid in removing a couple of the hard to reach bolts. Remove rear 02 sensor from downpipe using o2 sensor wrench. 8. Remove down pipe from chassis by removing (5) 14mm nuts at turbo, (1) 14mm bolt on transmission case, (1) 14mm bolt on rear hanger and (2) spring bolts at downpipe to catback connection. If removing OEM downpipe, leave downpipe in one piece. 9. Remove lower turbo heat shield mounted to factory up-‐pipe with (2) 10mm bolts. These bolt holes are slotted, simply loosed a couple turns and shield will slide right off. 10. Remove small plastic access panel in passenger side, wheel well to access front 02 sensor. Remove 12mm bolt mounted on #3 cylinder coil to loosen 02 Sensor wire bracket. This is important to allow wire to rotate while removing 02 sensor. Make sure and use a proper 02 sensor wrench. 11. Remove lower passenger side exhaust manifold heat shields. (4) 12mm bolts. 12. Remove (3) 14mm nuts that bolt turbo to up-‐pipe and remove (2) 14mm nuts holding support brackets to uppipe. 13. Remove bolts/nuts on passenger side lower exhaust manifold (3) 14mm nuts, (4) 14mm nuts and bolts combos. Take notes as to where gaskets are located, and don’t reuse! Remove manifold from engine and chassis. NOTE: manifold can get caught on uppipe when removing, take time when lowering down. 14. If car is equipped with EGT sensor in uppipe, locate plug on shock tower, and unplug. The chassis side of harness is where resistor will get plugged into. Trimming of resistor leads will be necessary for installation. Follow special notes above for more detail. 15. Remove passenger side motor mount nut & washer. NOTE: If you have aftermarket mounts, you may find you need to loosen both sides. 16. Use floor jack and block of wood to jack engine up enough for up-‐pipe to be removed out the bottom. Lift engine approximately 2 inches. If done correctly, uppipe will fall out of car. 17. The motor does not need to be raised for installation of new up-‐pipe. Lower engine and retighten motor mount immediately after you have removed factory up-‐pipe. Tighten motor mount nut to 62ft-‐lbs. 18. Important!!! Loosen turbo support brackets (small and large) where they connect to engine. These will be re-‐tightened after uppipe is installed. 19. Install supplied studs into PERRIN up pipe. Place new turbo inlet gasket onto uppipe. Install PERRIN uppipe into the car from the top. Place PERRIN up-‐pipe into the turbo bracket, using one of the nuts to hold it in place. 20. When reinstalling lower exhaust manifold don’t tighten all nuts and bolts. Leave them finger tight until all bolts and nuts have been installed. Make sure to install new gaskets as bolts are being re-‐installed. Make sure to align uppipe with exhaust manifold before tightening bolts. 21. Important!!! Torque the nuts and bolts in this order: Manifold to up-‐pipe (2) 14mm bolts (38ft-‐lbs) -‐ Manifold to cross over pipe (2) 14mm bolts (38ft-‐lbs) -‐ Manifold to block (3) 14mm nuts (38ft-‐lbs) -‐ turbo to up-‐pipe (3) 14mm nuts (38ft-‐lbs) -‐ Small/Large turbo bracket (2) 14mm nuts (38ft-‐ lbs) -‐ Small/Large turbo bracket where they connect to engine (20ft-‐lbs). 22. Reinstall lower manifold heat shield, and proceed to reinstall remove parts in reverse order starting with step #11. 23. After installation is complete, start car and listen for exhaust leaks. Under full throttle an exhaust leak before the turbo can make a screeching sound. If leaks are present re-‐check install and replace gaskets if needed. For questions & comments please contact [email protected] 503-‐693-‐1702 See Website for Live Chat Options


