1
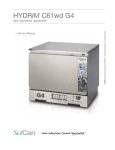
HYDRIM M2
WASHER-DISINFECTOR
• Service Manual
HYDRIM M2 Service Manual 96-111286 Rev 1.0
Copyright 2009 SciCan Ltd. All rights reserved.
Table of Contents
1. Cycle Description
2. Safety Information
3. Tools & Hardware Required for Maintenance, Shipping Instructions
4. Pre-Installation, Tools & Hardware Required to Install, Installation Instructions
5. Electrical, Water & Drain Connections
6. Disconnecting the Unit, Setting the Water Softener, Water Hardness Setup Table
7. Adding Water Softening Salts, Installation Test, Program Description Chart
8. Routine Maintenance
9. Operating Instructions
10. Overview of Menus
11. User Menu
12. Setup Menu
13. Technical Service Menu Overview
14. Technical Service Menu
15. Component Testing
16. Cycle Faults
17. Opening Door in Case of Power Failure, Cover Removal
18. Component Replacement
19. Appendix A - Flow Meter factor Setup
20. Appendix B - Dosing Pump Setup
21. Appendix C - Software upgrade instructions
Manufactured by:
SciCan Ltd
1440 Don Mills Road
Toronto ON M3B 3P9
Canada
Local: 416.445.1600
Toll Free: 1.800.667.7733
Fax: 416.445.2727
0123
SciCan Ltd.
1440 Don Mills Road
Toronto ON M3B 3P9
CANADA
Phone: (416) 445-1600
Fax: (416) 445-2727
Toll free: 1-800-667-7733
Page
3
4-5
5
6
7
8
9
9-10
11-12
13
14-15
16-20
21-24
25-38
39-43
44-47
48
49-53
54
57
59
For all Service and repair inquiries:
Germany:
+49 821 567456 0
Canada:
1-800-870-7777
USA:
1-800-572-1211
International: 1-416-445-1600
Email:
[email protected]
[email protected]
EU Representative
SciCan GmbH
Kurzes Geländ 10
86156 Augsburg
Germany
Tel.: +49 821 567456 0
Fax: +49 821 567456 15
E-Mail: [email protected]
www.scican.com
Hydrim is registered trademark of SciCan Ltd. HIP is trademark of SciCan Ltd. All other trademarks referred to in this manual
are the property of their respective owners.
2
HYDRIM M2 Service Manual 96-111286 Rev. 1.0
1. Cycle Description
P1 - Regular
Wash cycle
P2 - Wash
Disinfect 80ºC
P3 - Wash
Disinfect 90ºC
Description
Use for instruments and
cassettes when disinfection
is not required
Use for instruments and cassettes
when disinfection (minimum A0 of
600) is required
Use for instruments
and cassettes when
disinfection (minimum
A0 of 3000) is required
Cold Prewash
<30ºC
<30ºC
<30ºC
Wash
Rinse/Disinfect
50ºC
9 minutes
60ºC
50ºC
9 minutes
80ºC for 10 minutes
50ºC
9 minutes
90ºC for 5 minutes
Dry*
20 min. standard
30 min. intensive
15 min. standard
20 min. intensive
15 min. standard
20 min. intensive
31 minutes
50 minutes
51 minutes
40 L with or without drying
40 L without drying
70-80L with drying
40 L without drying
70-80L with drying
Total Time**
without Drying
Water
Consumption
* Cassettes may be of a complex design that does not permit full dryness of the cassette inner surfaces
** Cycle times depend on the temperature of incoming water, mass of the load and mains voltage.
Specifications:
Height, freestanding:
Height, built-in:
Width:
Depth:
Depth with door open:
Weight:
Running Noise:
Hot and cold water connections:
Inlet water pressure:
Incoming hot water temperature:
Drain:
Water softener:
Drying System:
Electrical Connection:
Equipment pollution degree:
Equipment installation category:
Maximum relative humidity:
Operating temperature range:
Max. Altitude:
850 mm
830 mm
600 mm
600 mm
1200 mm
80 kg
60 dB(A)
G ”
2-5 bar
max. 60-84°C
G ”
1 kg salt capacity
Blower
230-240 V 50 Hz 13 A
Pollution Degree 2
Installation category II
80% for temp up to 31°C
50% for temp up to 40°C
+5°C to 40°C
2000m
HYDRIM M2 Service Manual 96-111286 Rev. 1.0
3
2. Safety Information
Pay close attention to the following symbols that appear in this book
Caution, a potential
Hazard to the operator
Safe operation
The following applies to both operators and service technicians:
Exercise caution and seek assistance when lifting or carrying the unit.
Cleaning solutions may irritate. Avoid contact with eyes and mouth.
Never lean on the open door. The unit may tip forward causing injury.
Always turn the unit OFF before adding softener salt or solutions. Before performing
routine maintenance or servicing the unit, turn the unit OFF and unplug the power cord
from the power source.
The operator should never remove the cover of the unit or insert objects through holes or
openings in the cabinetry. Doing so may damage the unit and/or pose a hazard to the
operator.
If the unit is used in a manner other than that specified, the protection provided by the
equipment may be impaired.
Safe servicing
The Hydrim M2 Instrument Washer – Disinfector should only be installed and serviced by a
qualified contractor, as it is an Installation Category 2 device. SciCan shall not be liable for
incidental, special or consequential damages caused by any maintenance or service
performed on the Hydrim M2 by a third party or for the use of equipment or parts
manufactured by a third party, including lost profits, any commercial loss, economic loss, or
loss arising from personal injury.
All local, regional, state and national regulations regarding the servicing of this class of
device and safety requirements must be observed.
When the cover is removed:
Hazardous voltages are accessible. Disconnect the power cord before removing the covers.
Sharp metal edges are exposed. Be careful, and wear long sleeves and gloves.
Power main
A dielectric strength test (hi-pot) must be performed on the unit if parts associated with the
power main are serviced or replaced.
4
HYDRIM M2 Service Manual 96-111286 Rev. 1.0
Ground
A protective bonding impedance test (grounding continuity) must be performed on the unit
if components of the protective earthing system are changed or if connections are broken
and remade.
If the cover is removed, a dielectric strength test (Hi-Pot) must be performed once the cover
has been returned to the unit.
If the cover is removed, a protective bonding impedance test (ground continuity) must be
performed once the cover has been returned to the unit.
Reporting
It is vital for SciCan to learn of any problems in the field. This information will help SciCan
solve the problem quickly and improve product reliability in new units.
Biological Waste
Wastewater in the unit may contain biological contaminants; use a mechanical means to
siphon the contents. Wear disposable gloves. Dispose of absorbent material according to
biological waste disposal regulations.
2. Tools & Hardware for Installation & Servicing
DESCRIPTION
Needle Nose pliers
Screwdriver PH 1
Screwdriver PH 2
Screwdriver Slot
Wire cutters
Small Slot screwdriver
Nut driver 8 mm
DESCRIPTION
Allen key 3.0 mm
Adjustable wrench
Shipping Instructions
The unit should be serviced on site. If it is necessary to send the unit back to the dealer, follow these
instructions. Before shipping the unit, run the drain pump to remove most of the water from the system. If
there is standing water in the chamber, siphon or ladle as much as possible and use an absorbent cloth to
remove the rest.
Disconnect and remove the cleaning solution container. Completely screw in the levelling legs. Strap the
unit to a pallet in a proper box and specify heated and insured shipping.
HYDRIM M2 Service Manual 96-111286 Rev. 1.0
5
4. Pre-Installation
The machine must be installed and levelled correctly for the unit to function as described. All electrical
work must be carried out by a qualified electrician and in compliance with all local and national electrical
codes.
Voltage:
Frequency:
Rated load:
Circuit breaker:
230-240V ± 10%
50 Hz
2.7 kW
13A
The outlet needs to be accessible after the unit is installed.
The appliance must be correctly grounded! The manufacturer cannot be held responsible for damage or
injury caused by incorrect or missing grounding.
The Hydrim unit is heavy (80 Kg). Exercise caution and obtain assistance when lifting unit.
The Hydrim is equipped with an air gap/anti-suction device to prevent backflow of dirty water into
the water supply. No other air gap device is necessary.
If you need to extend the water inlet and drain hoses, ensure that you use commercial grade
plumbing hose. The maximum length of the drain hose is 3.3 m.
Installation Instructions
The Hydrim M2 should only be installed and service by a qualified SciCan
contractor, as it is an installation Category 2 device. The contractor should be
experienced in installing equipment that requires electrical hook-up as well as
plumbing.
The machine must be installed and levelled (see below) correctly for the unit to
function as described. All electrical work must be carried out by a qualified
electrician and in compliance with all local and national electrical codes.
1.
2.
3.
4.
6
Levelling the Hydrim:
The unit is standing on three supports: rollers (wheels) at the back and two legs at
the front.
Remove the front kickplate. Push the Hydrim into place while lifting the strap at
the front to allow the unit to roll on the rollers.
Adjust the front legs as required until the Hydrim is level.
The rear two legs are used only if the floor is uneven or cannot provide support
to the rollers.
Tuck the strap under the machine before replacing the kickplate, so as not to
interfere with the exhaust air vents.
HYDRIM M2 Service Manual 96-111286 Rev. 1.0
5. Electrical Connection
This appliance must be correctly grounded! The manufacturer cannot be held responsible for damage or
injury caused by incorrect or missing grounding. Before making any connections check that the voltage
shown on the serial number label corresponds to your power supply. The machine is supplied as standard
for connection to 230-240V 50 Hz single-phase power supply and is fitted with a power supply cord 2.5m
long. It should be connected to the main power supply according to the information below.
Voltage:
Frequency:
Rated load:
Circuit breaker:
230-240V
50 Hz
2.7 kW
13 A
If you need to extend the mains connecting lead, do not cut off the plug. Replace the whole cable, which
can be disconnected inside the unit.
Connection to the Water Intake
The unit must be connected to the water supply in accordance with all local and national plumbing codes.
SciCan recommends a hard plumbing installation within 1.5m/5ft. of the unit. If additional distance is
necessary, commercial grade plumbing hose must be used to minimize leaks.
Connect inlet hoses to hot and cold water taps using the hoses connected to the unit and in accordance with
the installation instructions.
Water Pressure:
Water Temperature:
Water inlet hoses
(provided):
Water Connection
2-5 bar
Cold water less than 30ºC
Hot water up to 60-84ºC
”; 2m
Optional installation is with cold water and de-ionized water. In this case, connect the cold water to the
cold water inlet and the DI water to the hot water inlet. Cycle times will be longer.
Drainage
The unit is supplied with a 1.5m flexible drain hose with a 2cm barb inlet. The hose should not be
shortened or attached to any fittings that would cause a reduction in water flow. The drain system is
equipped with a non-return valve that prevents dirty water from flowing back into the unit.
The drain hose should not be more than 1.5m from a hard plumbing drain. If this is not possible, then
commercial grade plumbing hose must be used to minimize leaks.
The hose can be attached to an existing drain through the use of a 3.5cm or larger stand pipe/ P-trap
combination. Alternatively, the hose can be connected directly to the existing drain lines, provided the
fittings or adapters used do not reduce the water flow. The drain hose should not exceed 3.3m/13ft. in
length, or be attached to the main drain at a point higher the 35cm above the floor.
HYDRIM M2 Service Manual 96-111286 Rev. 1.0
7
6. Disconnecting the Unit
To disconnect the unit, follow these steps:
Unplug the unit from the mains supply.
Turn off the water supply.
Disconnect the drain and water intake hoses.
Pull out unit using the moving strap. Carefully
withdraw hoses at the same time.
Setting the Water Softener
Water quality and water hardness are very important to proper Hydrim operation. Please check your water
quality before proceeding with the machine installation.
Your Hydrim is equipped with a built-in water softening system. The Water Test Kit (available from
SciCan) will help you properly adjust the water softening system, and determine if you need additional
water treatment.
The Hydrim Water Test Kit includes three water hardness test strips. Use them as described on the
individual strip packages. Take the water sample from the location where the machine will be installed.
Once you have determined the water hardness level, find the recommended setting for your Hydrim M2 in
the water hardness setup table. If your water hardness falls between two settings, select the higher setting
(see page 17 & 18 for changing the setting). Water softening salt (available in most supermarkets and
hardware stores) should be added regularly. If your water hardness is outside the unit adjustment range, you
will need to get an additional water treatment system. Otherwise you could experience reduced washing
quality, spotting, or discolouration.
Water Hardness Setup Table
Hardness – ºdH
0-6
6.7 – 7.8
8.4 – 10
10.6 – 11.8
12.3 – 16.2
16.8 – 20.7
21.3 - 30.3
30.8 . 49.9**
> 49.9
Hardness – ppm*
0-110
120-140
150-180
190-210
220-290
300-370
380-540
550-890**
>890
Hydrim M2 setting
0
1
2
3
4
5
6
7
Additional water
treatment required
*Not all steps are available on the test strip. Round up to higher value if necessary.
**Consider using additional treatment system even at this level.
8
HYDRIM M2 Service Manual 96-111286 Rev. 1.0
7. Adding Water Softening Salts
If you have to set the water softener to any setting above 0, the message “Salt Level Low” will appear on
the display.
Salt container lid
To add water softening salts follow these steps:
1. Unscrew the salt container lid.
2. Upon first use of the Hydrim M2, pour approximately 1 litre of
water into the salt container, or until it is full with water. It is
not necessary to add water during subsequent refills of the salt
container.
3. Replace the salt container lid.
After salt has been added to the unit, the softening salt indicator will
initially indicate salt needed. The indicator will turn off when the salt
solution has become sufficiently concentrated.
Installation Test
Turn on the shut-off valves. Run a test cycle, checking for leaks. (See Operating Instructions)
8. Routine Maintenance
Daily
Filter
Inspect the filter inside the chamber.
To remove filter, lift filter and turn 90 degrees.
Wash arms
Filter
HYDRIM M2 Service Manual 96-111286 Rev. 1.0
9
Weekly
Wash Arms
Inspect wash arms in chamber
To remove the wash arms, unscrew the collar (Upper/middle arm are counterclockwise & lower is
clockwise) and remove the arm.
Inspect the nozzles for debris. Rinse under a tap and reassemble.
Yearly
Water Inlet Hoses
Disconnect the hot and cold water inlet hoses.
Make sure the hoses are clean and free of debris.
Make sure the inlet valves are free of debris.
Valves
Air filter
Change the air filter (P/N 01-111780S) and reset the drying counter
Dosing Pump Tubing
Replace the internal tubing on the Dosing Pump and then calibrate the pump by completing the
instructions in found Appendix A (for softare R318 and lower) or appendix B (for software R320 and
higher)
Remove cover and replace tubing
(P/N 01-111831S)
10
HYDRIM M2 Service Manual 96-111286 Rev. 1.0
9. Operating Instructions
Power up screen
SciCan
HYDRIM
SHM2MR316
When the Power Switch is turned ON this screen appears.
Pressing the “i” will allow you to enter the User, Technician or Setup
menus.
The “i” symbol disappears after 10 seconds.
Touch the screen anywhere to change to the Main menu screen.
Main menu screen
P1 Regular
P2 80C 10min
Press the lock symbol to unlock the door or select the desired cycle and
then press start.
P3 90C 5min
Cycle screen
The cycle name appears at the top of the screen.
P2 80C 10min
The progress bar shows the progress of the cycle as a percentage of
remaining time vs. remaining time at the beginning of the cycle.
Filling
The stage within the cycle is shown beneath the bar (eg. Draining, Filling,
Rinsing).
142
The cycle count or cycle time remaining is displayed depending on the
countdown setting. See section 13, Cycle Settings, Countdown.
Press “Stop” to abort the cycle.
HYDRIM M2 Service Manual 96-111286 Rev. 1.0
11
P2 80C 10min
Filling
Draining, PleaseWait
00:30
CF 2
Chamber Filling
Cycle aborted screen
The touch screen is not active.
The machine drains for 30 seconds.
An error code appears on the display.
The stop button will be shaded at this time.
24 min
After the draining timeout is complete, the screen switches to the cycle
aborted acknowledge screen.
_____________________________________________________________________________
Cycle aborted acknowledge screen
P2 80C 10min
Instruments
Not Processed
If the cycle aborted due to cycle fault or door opening, the display will
indicate the problem.
Press the OK button to return to the main menu screen.
CF 2
Chamber Filling
OK
_____________________________________________________________________________
Cycle complete screen
P2 80C 10min
Cycle Complete
When the cycle is complete, the program name and “Cycle Complete” is
displayed.
Press the OK button to return to the main menu screen.
OK
12
HYDRIM M2 Service Manual 96-111286 Rev. 1.0
10. Overview of Menus
SciCan
HYDRIM
SHM2MR316
User – Page 14
Technician - Page 24
Set Drying Time
Error History
Cycle Count
Setup – Page 16
Unit No.
Language Selection
Date Setup
Date / Time
Time Setup
Reset Drying Counter
Date Format
Screen Saver
12/24 Hour
Temperature C/F
Set Button Beep
Printer Selection
Baud Rate
Set Regeneration
LCD Contrast
HYDRIM M2 Service Manual 96-111286 Rev. 1.0
13
11.User Menu
To access the user menu, follow these steps:
SciCan
HYDRIM
Turn the Hydrim OFF and then ON. An “i” (information) will appear for about
10 seconds at the bottom right hand corner.
Touch the “i” to move to the Menu screen.
SHM2MR316
Menu
User Menu
User
Set Drying Time
Technician
Error History
Setup
Cycle Count
Select User.
The User Menu consists of three choices
_____________________________________________________________________________
Set Drying Time
Set Drying Time
P1 Regular
Standard
The drying time can be set to standard, for small loads, or
intensive, for larger loads. Standard drying time is 20 minutes
for P1, and 15 minutes for P2 and P3. Intensive drying time is
30 minutes for P1, and 20 minutes for P2 and P3. Touch the up
arrow to select standard or intensive. The default is "intensive".
Touch default if you wish to return to the factory default. Use
the back arrow to return to the previous screen.
Default: Intensive
14
HYDRIM M2 Service Manual 96-111286 Rev. 1.0
User Menu
Set Drying Time
Error History
Error History
Printout 1 Page 1/2
Hydrim M2
Software Rev. 3.14
Unit no. : 00
Cycle Number: 00022
Error History
Printout 1 Page 2/2
. . .
Start
Draining
Filling
End
24C 00:00:01
24C 00:00:01
24C 00:00:31
25C 00:06:31
CF 2 FILLING CHAMBER
Cycle Count
Wash
. . .
50
5min
X
X
The error history screen allows the user to see the last three errors and the last cycle.
Press the down arrow to move to the next page/error.
Press the X in the lower left hand corner to clear the error history. The last cycle will remain.
Press the back arrow to return to the previous menu.
User Menu
Set Drying Time
Cycle Count
Cycle Count
Error History
22
Cycle Count
This allows the user to see how many
cycles have been run on the Hydrim.
Touch cycle count and the number of
cycles (completed and aborted) will be
displayed. This cannot be reset. Touch the
back arrow to return to the previous
menu.
HYDRIM M2 Service Manual 96-111286 Rev. 1.0
15
12. Setup Menu
To access the Setup Menu, proceed to the menu screen by turning the Hydrim OFF and then ON. An “i”
(information) will appear for about 10 seconds at the bottom right hand corner.
Menu
SciCan
HYDRIM
User
Technician
SHM2MR314
Setup
Touch the i to move to the Menu screen
and select Setup.
Setup
Setup
Setup
Setup
Unit No.
Reset Drying
Counter
Set Button Beep
Set Regeneration
Language
Selection
Screen Saver
Printer Selection
LCD Contrast
Date/Time
Temperature C/F
Baud Rate
The Setup Menu consists of eleven choices as shown above. Use the up and down arrows to move through the
choices. Touch the desired option to select it. For more detail on each Setup Menu option, refer to the
following sections.
Unit Number
Unit No.
0
Default
16
0
If you have more than one Hydrim in your office, you can designate them
Unit #1, Unit #2, etc. Use the up and down arrows to select the unit
number. The default is 0. It is important to set this Unit Number if the M2
has a Data Logger attached to it because the file name of the printout is
based on this number. Touch the back arrow to return to the previous
menu.
HYDRIM M2 Service Manual 96-111286 Rev. 1.0
Language Selection
Language Selection
This allows the user to select among available languages for the Hydrim.
Use the up and down arrows to select the desired language. The default
language is English. Touch the back arrow to return to the previous menu.
English
Default
English
Date/Time
Date Time
Date Setup
12h/24h
Setup Menu – Date / Time
The Date/Time menu consists of four
options as shown. Use the up and down
arrows to move from screen. The user can
set the current date and time, set the date
format and the time format. Touch the
desired option and follow the directions
below.
Time Setup
Date Format
Date Setup
DD/MM/YY --/--/-1
2
HH:MM:SS
--/--/--
Date Setup
3
4
5
6
7
8
9
CL
0
EN
Enter the day,
month and year
and touch EN to
save. Touch CL
to clear the last
number entered.
1
2
Time Setup
3
4
5
6
7
8
9
CL
0
EN
HYDRIM M2 Service Manual 96-111286 Rev. 1.0
Enter the time in
hours, minutes and
seconds and press
EN to save. Touch
CL to clear the last
number entered.
17
Date Format
DD/MM/YY
Default DD/MM/YY
Reset Dryer Counter
750
Date Format
12h/24h Setup
Use the up and
down arrows to
change the date
format from
DD/MM/YY to
MM/DD/YY.
The default is
DD/MM/YY
12h/24h
12h/24h
24
Default
24
Use the up and
down
down arrows
arrows to
to
switch from 12-hour
to
to 24-hour
24-hour clock.
clock.
The
The default
default is
is
24-hour
clock.
24-hour clock.
Reset Drying Counter
When the “change air filter” message appears, the air filter must be
changed and the drying cycle counter reset. This should be done by an
authorised service technician.
To reset the drying counter, touch Reset.
Use the back arrow to return to the previous screen.
Reset
Screen Saver
Screen Saver
4min
Default
18
The user can adjust the time that elapses before the screen goes into
screen saver mode. Touch the up and down arrows to select the desired
screen saver setting. The default is 4 minutes. Touch the back arrow to
return to the previous menu.
4min
HYDRIM M2 Service Manual 96-111286 Rev. 1.0
Temperature C/F
C
Temperature C/F
The user can choose to have information displayed in degrees Celsius or
degrees Fahrenheit. Touch the up and down arrows to select the desired
choice. The default is degrees Celsius. Touch the back arrow to return to
the previous menu.
Default C
Set Button Beep
On
0
Set Button Beep
The user can select between having the unit beep or not beep whenever a
screen button is touched. Turn the beep ON or OFF by using the up and
down arrows. The default setting is ON. Touch the back arrow to return
to the previous menu.
Default: On
Printer Selection
Serial Printer
Default
Setup Menu – Printer / Data Logger Selection
Printer selection allows the user to select either a default serial printer
or the SciCan Data Logger as the recording medium for cycle
information. See section 5.11 (operator manual) for more
information.
Serial
HYDRIM M2 Service Manual 96-111286 Rev. 1.0
19
Baud Rate
Setup Menu – Baud Rate
The Baud Rate is a setting used in conjunction with the printer
selection. Baud Rate is a measure of how fast data is moving through
the serial connection. See section 5.11 (Operator’s manual) for more
information.
9600
Default
9600
_____________________________________________________________________________________
Set Regeneration
Set the salt regeneration according to the local water hardness. Use the up
and down arrows to change the value. The default setting is 0. See
installation instructions for further information. Touch the back arrow to
return to the previous menu.
0
Default
Set Regeneration
0
_____________________________________________________________________________________
LCD Contrast
50%
Default
20
LCD Contrast
The user can change the contrast on the display. Touch the up and down
arrows to select more or less contrast on the display. The default is 50%.
Touch the back arrow to return to the previous menu.
50%
HYDRIM M2 Service Manual 96-111286 Rev. 1.0
13. Technical Service Menu Overview
Set Serial
Number
Diagnostic
Tools
Error History
View IO Status
Component Test
Set Debug Screen
Set Calibration
Dosing Pump Setup
Cycle
Settings
Printer
Selection
Baud
Rate
Factory
Default
Repeater
Mode
Set Drying Time
Set Regeneration
Chemical Setup
Set Wash Time
Set Rinse Time
# Extra Rinses
Set Wash Temperature
Last Rinse Temperature
Cycle Selection
Pre Wash
Countdown
RO Selection
Production
Tools
Software
Upgrade
Chamber Cleaning
Flow Meter Factor
Water Adjustment
To access this menu, turn the unit OFF and ON. There is an “i” in the lower right hand corner of the screen
for about 10 seconds. Touch the “i” to get to the menu screen. Touch Technician.
Enter the password 7919 and press EN.
Within the main Technician menu there are nine options.
Set Serial No: Allows the technician to input the Serial Number of the Hydrim M2.
Diagnostic Tools: Offers a submenu of six tools.
Error History: Allows access to the last three errors and the last cycle.
View IO Status: Shows the status of each component in the unit.
Chamber Full Switch – ON/OFF
Salt Switch – OK/No Salt
Rinse aid – ON/OFF (not used with HIP Solution)
Chemical Sensor – ON/OFF
Chamber Overflow – ON/OFF
Chamber Pressure – ON/OFF
Door SW – ON/OFF
Chamber Temperature Celsius
Validation Temperature Celsius
CTS (Clear to Send) – ON/OFF
Detergent Level Switch – ON/OFF
HYDRIM M2 Service Manual 96-111286 Rev. 1.0
21
Component Test: Allows individual testing of the following components.
Circulation Pump M1 - ON/OFF
All Devices - ON/OFF
RO Valve Y5 – ON/OFF
Dryer Motor High – ON/OFF
Condenser Valve – ON/OFF
Chamber Heater R1 – ON/OFF
Latch L1 (Door) – ON/OFF
Salt Valve Y2 – ON/OFF
Dosing Pump M4 – ON/OFF
Dryer Motor Low – ON/OFF
Hot Water Valve Y7 – ON/OFF
Cold Water Valve Y1 – ON/OFF
Rinse Aid Valve – ON/OFF (not used with HIP Solution)
Waste Pump M2 – ON/OFF
Set debug screen: Shows IO status when cycle is running.
Set Calibration: Allows technician to calibrate the temperature sensors.
Dosing Pump Setup: Allows technician to calibrate the Dosing Pump.
Cycle Settings: Offers a submenu of eight settings.
Set Drying Time:
The dryer can operate at standard or intensive drying, and can be set independently for P1, P2, and
P3.
Set Regeneration: Sets water softener setting.
0 (choose from 0 to 7)
Chemical Setup:
Revision 318 and Lower Software
Prewash
4 sec. (choose from 0 to 7 sec.)
Wash
14 sec. (choose from 0 to 50 sec.)
High Temp. Wash
14 sec. (choose from 0 to 50 sec.)
Rinse
9 sec (choose from 0 to 12 sec.)
22
Revision 320 and Higher Software
Prewash
0 sec. (choose from 0 to 7 sec.)
Wash
0 sec. (choose from 0 to 20 sec.)
High Temp. Wash
32 sec. (choose from 0 to 50 sec.)
Rinse
9 sec (choose from 0 to 12 sec.)
HYDRIM M2 Service Manual 96-111286 Rev. 1.0
Set Wash Time:
P1 Regular
9 min (choose from 5 to 15 min)
P2 80°C 10min
9 min (choose from 5 to 15 min)
P3 90°C 5min
9 min (choose from 5 to 15 min)
Set Rinse Time:
P1 Regular
1 min (choose from 1 to 5 min)
P2 80°C 10min
10 min (not adjustable)
P3 90°C 5min
5 min (not adjustable)
# Extra Rinses:
P1 Regular
0 (choose from 0 to 4)
P2 80°C 10min
0 (choose from 0 to 4)
P3 90°C 5min
0 (choose from 0 to 4)
Set Wash Temperature:
P1 Regular
50ºC (choose from 45 to 60ºC)
P2 80°C 10min
50ºC (choose from 45 to 60ºC)
P3 90°C 5min
50ºC (choose from 45 to 60ºC)
Last Rinse Temperature:
P1 Regular
60ºC (choose from 30 to 90ºC)
P2 80°C 10min
80ºC (not adjustable)
P3 90°C 5min
90ºC (not adjustable)
Cycle Selection: Allows technician to deactivate cycles that are not required by the user.
P1 Regular - ON (choose OFF or ON)
P2 80°C 10min - ON (choose OFF or ON)
P3 90°C 5min - ON (choose OFF or ON)
Note: At any time only two cycles can be turned OFF. At least one cycle must be available to the
user.
HYDRIM M2 Service Manual 96-111286 Rev. 1.0
23
Pre Wash: Allows the technician to set Prewash times for each individual cycle and temperature for
all three cycles.
Time:
P1 Regular – 3min (choose 3 – 10 min)
P2 80°C 10min - 3min (choose 3 – 10 min)
P3 90°C 5min - 3min (choose 3 – 10 min)
Temperature:
P1, P2 & P3 – 28°C (choose 5-40 °C) One common setting for all programs
Countdown: This allows the technician to select between display of the estimated time remaining in
the cycle (countdown ON) and the cycle count (countdown OFF).
RO Selection: For customers with an RO water supply, this allows the technician to select between
two set-ups.
Case 1: Feed RO water into the hot water valve and potable water into the cold water valve.
Case 2: Feeds RO water into a third valve (future development).
Printer Selection
Serial Printer (default)
USB Flash/MSD
Baud Rate: The Baud rate is a setting used in conjunction with the Printer Selection. Baud Rate is a
measure of how fast data is moving through the serial connection.
Repeater Mode: In the ON position, the unit will continuously run the selected cycle.
Factory Default: Resets all values to factory default except Water Adjustment value.
Software Upgrade: To upgrade software via the SciCan Data Logger.
24
HYDRIM M2 Service Manual 96-111286 Rev. 1.0
14. Technical Service Menu
To access the Technician Menu, proceed to the menu screen by turning the Hydrim OFF and then ON. An
“i” (information) will appear for about 10 seconds at the bottom right hand corner.
Menu
01:30 PM
09/05/08
SciCan
User
Touch the “i” to move to the Menu screen
and select Technician.
Press the back arrow to return to the
previous screen.
Technician
HYDRIM
SHM2MR316
Setup
Enter Access Code
To enter the Technician Menu touch 7919 and press EN.
1
2
3
Password is shown as “*” characters.
4
5
6
Touch CL to clear the last number entered.
7
8
9
Press the back arrow to return to the previous menu.
CL
0
EN
****
Technician Menu
Technician Menu
Technician Menu
Set Serial No
Printer Selection
Repeater Mode
Diagnostic Tools
Baud Rate
Production Tools
Cycle Settings
Factory Default
SW Upgrade
The Technician Menu consists of nine choices as shown above. Use the up and down arrows to move
through the choices. Touch the desired option to select it.
HYDRIM M2 Service Manual 96-111286 Rev. 1.0
25
Technician Menu
Set Serial No
Set Serial No
The Set Serial No screen allows the
technician to enter the Hydrim serial
number into the software.
00000000
Diagnostic Tools
Cycle Settings
Default
0
Touch the up arrow to increase the
highlighted number. Touch the right
arrow to select next number.
Press the back arrow to return to the
previous menu.
____________________________________________________________________________________________________________________________
Technician Menu
Diagnostic Tools
Diagnostic Tools
Set Serial No
Error History
Set Debug Screen
Diagnostic Tools
View IO Status
Set Calibration
Cycle Settings
Component Test
Dosing Pump Setup
The Diagnostic Tools menu consists of six choices. Use the up arrow to change to the previous Diagnostic
Tools screen. Use the down arrow to change to next Diagnostic Tools screen. Press the back arrow to return
to the previous menu.
Diagnostic Tools
Error History
Error History
Printout 1 Page 1/2
HYDRIM L110w
Software Rev. 3.15
View IO Status
Component Test
Error History
Printout 1 Page 2/2
. . .
CYCLE NUMBER: 00022
Start
Draining
Filling
End
Wash
CF 2 FILLING CHAMBER
Unit sn. : 0000000
50C
5min
24C 00:00:01
24C 00:00:01
24C 00:00:31
25C 00:06:31
. . .
X
X
The Error History screen allows the user to see the last three errors and the last cycle.
Press the down arrow to move to the next page / error. Press the X in the lower left hand corner to clear the
error history. The last cycle will remain.
Press the back arrow to return to the previous menu.
View IO Status shows the status of each component in the unit:
26
HYDRIM M2 Service Manual 96-111286 Rev. 1.0
Chamber Full SW – ON/OFF
Salt (Regeneration) SW – OK/No Salt
Diagnostic Tools
View IO Status
Rinse Aid SW – ON/OFF (No Rinse Aid
Chamber Full SW OFF
Error History
Salt SW No Salt
on software 318 and up)
Rinse aid OFF
Chemical Sensor - ON/OFF
Chemical Sensor OFF
Chamber Overflow SW – ON/OFF
Chamber Overflow OFF
View IO Status
Chamber Pressure SW – ON/OFF
Chamber Pressure OFF
Door SW – ON/OFF
Door SW ON (closed)
Chamber
T
27ºC
Chamber Temperature - XXºC
Component Test
Validation T 27ºC
Validation Temperature - XX°C
CTS ON
CTS (clear to send) – ON/OFF
Det Level OFF
(To Printer or Data logger)
Det Level SW – ON/OFF
Press the back arrow to return to the
previous menu.
__________________________________________________________________________________
Diagnostic Tools
Component Test
Error History
Circ. Pump M1 OFF
Chm Pres=Off
Test Cycle
Component Test
Off
On
Press the up arrow to move to the next device.
Press the down arrow to move to the previous device.
Press the On button to turn the device ON.
Press the Off button to turn the device OFF.
Press the back arrow to return to the previous menu.
Component Test allows individual
testing of the following
components:
Circ. Pump M1 – ON/OFF
All Devices – ON/OFF
RO Valve Y5 – ON/OFF
Dryer Motor High – ON/OFF
Cond. Valve – ON/OFF
Ch. Heater R1 – ON/OFF
Latch L1 – ON/OFF
Salt Valve Y2 – ON/OFF
Dosing Pump 1 M4 – ON/OFF
Dryer Motor Low – ON/OFF
Hot W. Valve Y7 – ON/OFF
Cold W. Valve Y1 – ON/OFF
Rinse Aid Valve – ON/OFF
Waste Pump M2 – ON/OFF
HYDRIM M2 Service Manual 96-111286 Rev. 1.0
27
Diagnostic Tools
Set Debug Screen
Set debug screen
Press the up arrow to turn on the debug
screen.
Press the down arrow to turn off the
debug screen.
Off
Press the default button to set the value
to default.
Default: Off
Press the back arrow to return to the
previous menu.
Time remaining in cycle
Chamber Temperature is 27°C
Chamber Full Switch is OFF
Chamber Overflow Switch is OFF
Door latch is CLOSED
Detergent Level Switch is ON
Cold water valve is OFF (closed)
Circulation pump is OFF
Chamber heater is OFF
Dryer motor high is OFF
Condenser valve is OFF
Drain pump is ON
Det SW (Flow meter) is OFF
(inactive)
Salt valve is OFF
A0 = shows A0 value for cycle
P2 80° 10min
Chm T 27ºC
Chm Full=OFF
Chm Over=OFF
Door=CLSD
Det Lvl = ON
Cold V=OFF
Circ Pump=OFF
Chm Heater=OFF
Dryer High=OFF
Cond V = OFF
Drain Pump=ON
Det SW = OFF
Salt V=OFF
A0 = 0
24 min
Cycle
no 257
Val T 27°C
Det Puls=0
Chm Pres=OFF
Salt SW=OK
Hot V=OFF
Dryer Low = OFF
Dosing=OFF
total det = 0
Chamber Validation Temp is 27°C
Det Puls shows the # of pulses
during each detergent delivery
Chamber Pressure Switch is OFF
Salt Switch is OK
Hot water valve is OFF (closed)
Dryer motor low is OFF
Dosing is OFF
Total det = total detergent delivered
in mL x 10
(e.g. 100.2 mL = 1002)
The Debug cycle should be used when troubleshooting to view the IO status of components.
28
HYDRIM M2 Service Manual 96-111286 Rev. 1.0
Set Calibration
Off
P3 90C 5min 67 min
PRE WASH
Chm T28 °C ValT30 °C
Offset
Offset
O
O
Default: Off
This allows the technician to calibrate the temperature sensors. Place a calibration sensor into the wash
chamber and close the door. In the “Set Calibration” screen, select “ON”. Exit from this menu using the
back arrow and run a P3 cycle as usual. You will see the screen shown above. When the chamber
temperature sensor (ChmT) and the validation temperature sensor (ValT) reach 90ºC, use the arrows to
adjust the offset value of each sensor to match the reading on the calibration sensor in the chamber. Press
stop. Adjustment of +/- 5ºC can be made. Turn the unit OFF and back ON to exit the calibration mode.
Dosing Pump Setup
This allows the technician to calibrate the dosing pump. Refer
to Appendix B for details.
Current 200ml/min
New
START
(WAIT)
Default
210ml/min
For units with software revision 318 and lower software, this
must be done in conjunction with the set up of the Flow Meter
Factor as described in Appendix A.
SETUP
210ml/min
Flow = 174
HYDRIM M2 Service Manual 96-111286 Rev. 1.0
29
Technician Menu
Cycle Settings
Cycle Settings
Cycle Count
Set Drying Time
Set Wash Time
Diagnostic Tools
Set Regeneration
Set Rinse Time
Cycle Settings
Chemical Setup
# Extra Rinses
__________________________________________________________________________________
Cycle Settings
Set Wash Temperature
Cycle Settings
The Cycle Settings menu consists of twelve
choices.
Pre Wash
Last Rinse Temp.
Countdown
Use the up and down arrows to change to
different Cycle Settings screens.
Cycle Selection
RO Selection
Press the back arrow to return to the
Technician menu.
__________________________________________________________________________________
Set Drying Time
Set Drying Time
P1 Regular
Standard
The drying time can be set to standard, for small loads, or intensive, for larger
loads. Standard drying time is 20 minutes for P1, and 15 minutes for P2 and P3.
Intensive drying time is 30 minutes for P1, and 20 minutes for P2 and P3.
Touch the up arrow to select standard or intensive. The default is "intensive".
Touch default if you wish to return to the factory default. Use
the back arrow to return to the previous screen.
Default: Intensive
30
HYDRIM M2 Service Manual 96-111286 Rev. 1.0
Set Regeneration
0
Use a Water Test Kit part #01-108305S to determine if salt is required.
Use the up and down arrows to select the desired salt regeneration setting.
Press default to return to the factory default.
Default
0
Press the back arrow to return to the Technician Menu.
Chemical Setup
Chemical Setup
Prewash
Rinse
Select the cycle for which you wish to
change the dosing setting.
Wash
High Temp. Wash
Set HIP Dosing
Prewash
Use the up and down arrows to select the desired dosing setting for the cycle
selected. (Do not change default setting unless directed by SciCan)
Press default to return to factory default.
4s
Press the back arrow to return to the Technician Menu.
Default
4s
Settings for software below revision 318
Prewash dosing Min Value 0 – Max Valve 7s, Default Value 4s
Wash dosing Min Value 0 – Max Value 50s, Default Value 14s
HD Wash dosing Min Value 0 – Max Valve 50s Default 14s
Final rinse dosing Min Value 0 – Max Value 12s, Default Value 9s
Settings for software revision 320 and higher
Prewash dosing Min Value 0 – Max Value 7s Default Value 0s
Wash dosing Min Value 0 – Max Value 20s Default Value 0s
HD Wash dosing Min Value 0 – Max Value 50s Default Value 32s
Final rinse dosing Min Value 0 – Max Value 12s Default Value 9s
HYDRIM M2 Service Manual 96-111286 Rev. 1.0
31
Set Wash Time
P1 Regular
Set Wash Time
P2 80C 10min
12 min
Use the up and down arrows to select the
desired wash time for the cycle selected.
(Do not change default setting unless
directed by SciCan)
P2 80C 10min
P3 90C 5min
Select the cycle for which you wish to
change the wash time.
Default 9 min
Press default to return to factory default.
Press the back arrow to return to the
Technician Menu.
P1, P2 & P3 Default value 9 minutes, minimum value 5 minutes, maximum value 15 minutes
____________________________________________________________________________________________________________________________
Set Rinse Time
P1 Regular
Set Rinse Time
P1 Regular
1 min
P2 80C 10min
Select cycle for rinse time you wish to
change.
Use the up and down arrows to select the
desired rinse time for the cycle selected.
(Do not change default setting unless
directed by SciCan)
P3 90C 5min
Default 1 min
Press default to return to factory default.
Press the back arrow to return to the
Technician Menu.
P1 Default value 1 minute, minimum value 1 minute, maximum value 5 minutes
P2 Default value 10 minutes, minimum value 10 minutes, maximum value 10 minutes
P3 Default value 5 minutes, minimum value 5 minutes, maximum value 5 minutes
# Extra Rinses
P1 Regular
# Extra Rinses
P1 Regular
0
P2 80C 10min
P3 90C 5min
Default 0
Select the cycle for which you wish to set
the # of extra rinses.
Use the up and down arrows to select the
desired # of extra rinses for the cycle
selected. (Do not change default setting
unless directed by SciCan)
Press default to return to factory default.
Press the back arrow to return to the
Technician Menu.
P1, P2 & P3 Default value 0, minimum value 0, maximum value 4
32
HYDRIM M2 Service Manual 96-111286 Rev. 1.0
Set Wash Temperature
P1 Regular
Set Wash Temperature
P1 Regular
50C
P2 80C 10min
Select the cycle for which you wish to
change the wash temperature.
Use the up and down arrows to select the
desired wash temperature for the cycle
selected. (Do not change default setting
unless directed by SciCan)
P3 90C 5min
Default 50C
Press default to return to factory default.
Press the back arrow to return to the
Technician Menu.
P1, 2 & 3 Default value 50°C, minimum value 45ºC, maximum value 60ºC
__________________________________________________________________________________
Select the cycle for which you wish to
change the last rinse temperature.
Last Rinse Temp.
Last Rinse Temp.
P1 Regular
P1 Regular
Use the up and down arrows to select the
60C
desired last rinse temperature for the cycle
selected. (Do not change default setting
P2 80C 10min
unless directed by SciCan)
P3 90C 5min
Default 60C
Press default to return to factory default.
Press the back arrow to return to the
Technician Menu.
P1 Default value 60°C, minimum value 30°C, maximum value 90°C
P2 Default value 80°C, not adjustable
P3 Default value 90°C, not adjustable
_______________________________________________________________________________
Cycle selection
P1 = ON
Cycle selection allows the technician to deactivate cycles that are not
required by the user. If a cycle is deactivated it will not appear on the cycle
selection menu. At least one cycle must be selected.
P2 = ON
P3 = ON
HYDRIM M2 Service Manual 96-111286 Rev. 1.0
33
Prewash
Set Prewash Time
Time Setup
P 1 Regular
Set Prewash Time
P2 80C 10min
3min
Temperature
P 2 80C 10min
P 3 90C 5min
Default
3min
This allows the technician to set the Prewash time and temperature.
Temperature
28 C
Default
28C
Time:
P1 Regular – 3 min (choose 3-10 min)
P2 80ºC 10min - 3 min (choose 3-10 min)
P3 90ºC 5min - 3 min (choose 3-10 min)
Temperature:
P1, P2 & P3 – 28 ºC (choose 5-40 ºC) One common setting for all programs
__________________________________________________________________________________
Countdown
This allows the technician to select between display of the estimated time
remaining in the cycle (countdown ON) and the cycle count (countdown
OFF).
Off
Default: Off
34
HYDRIM M2 Service Manual 96-111286 Rev. 1.0
RO Selection
Set RO Case 1
Set RO Case 1
Set RO Case 2
Off
Off
Default: Off
Default: Off
Set RO Case 2
RO Selection: Allows the technician to select an RO water set-up, if connected to an RO water supply.
Case 1: Feed RO water into the hot water valve and potable water into the cold water valve.
Case 2: Feed RO water into a third valve (future development)
When either RO case is selected the detergent delivery for the Rinse stage is automatically set to 0.
__________________________________________________________________________________
Technician Menu
Printer Selection
Printer Selection
Serial Printer
Baud Rate
Factory Default
Default Serial
Printer Selection allows the technician to
select either a default serial printer or the
SciCan Data Logger as the recording
medium for cycle information.
Press the up or down arrow to change
between “Serial Printer” and “USB
Flash/MSD”.
Press the back arrow to return to the
previous menu.
__________________________________________________________________________________
Technician Menu
Printer Selection
Baud Rate
9600
The Baud rate is a setting used in
conjunction with the Printer Selection.
Baud Rate is a measure of how fast data is
moving through the serial connection.
Baud Rate
Factory Default
Default 9600
HYDRIM M2 Service Manual 96-111286 Rev. 1.0
35
Printer Selection
Press the Reset button to return to factory
default values, except the Water
Adjustment value.
Baud Rate
Press the back arrow to return to the
previous menu.
Technician Menu
Factory Default
Reset
Factory Default
__________________________________________________________________________________
Press the Up arrow to turn on repeater mode.
Repeater Mode
Off
Press the Down arrow to turn off repeater mode.
Press the Default button to return to default values.
Press the back arrow to return to the previous menu.
Default: Off
Production Tools
Repeater mode will reset to OFF when Power Switch is turned OFF or it
can be set to OFF from this screen. When the wash cycle is aborted by
pressing the stop button, the repeater mode will stay ON.
Cleaning
Chamber Cleaning
Filling
Chamber Cleaning is used to clean hard
water residue from the chamber walls.
Place 500 ml of vinegar in the bottom of the
chamber prior to beginning the cycle.
Flow Meter Factor
5
Water Adjustment
36
HYDRIM M2 Service Manual 96-111286 Rev. 1.0
Production Tools
Flow Meter Factor
Chamber Cleaning
4.2
Flow Meter Factor
Water Adjustment
The Flow Meter Factor is used to adjust the
flow meter factor in production or
following the installation of a new flow
meter. Machines with a flow switch do not
require this adjustment.
Default: 4.2
__________________________________________________________________________________
Production Tools
Water Adjustment (used in production only) does not reset when the Factory
Default button is pressed.
Chamber Cleaning
Flow Meter Factor
Water Adjustment
__________________________________________________________________________________
Software Upgrade
Technician Menu
SW Upgrade
Repeater Mode
1
2
3
A Data Logger is required to upgrade
software.
Factory Default
4
5
6
To enter the Software Upgrade screen,
select 5849 and press EN.
SW Upgrade
7
8
9
Touch CL to clear the last number entered.
CL
0
EN
Press the back arrow to return to the
previous menu.
****
HYDRIM M2 Service Manual 96-111286 Rev. 1.0
37
SW Upgrade
SW Upgrade USB
See Appendix C for Software Upgrade Instructions
Press SW Upgrade USB to start the SW upgrade procedure. This option
allows the technician to upgrade software by using a USB Data Logger
and files stored on a USB Memory Stick.
Press the back arrow to return to the previous menu.
When the SW upgrade is complete, the display will return to the “Power
Up” screen.
38
HYDRIM M2 Service Manual 96-111286 Rev. 1.0
15. Component Test Menu Revision 316 & Higher Software
Component Test
Circ. Pump M1 OFF
Chm Pres=Off
Off
On
The Circulation Pump M1 screen is the first component test
screen to appear. The Chamber Pressure Switch status appears
below Circulation Pump information. Touch the ON button to
start the Circulation Pump. If the chamber is full of water the
Chamber Pressure Switch should turn ON when the Circulation
Pump is running.
If the pump is left on for 2 minutes it will automatically turn OFF
for 2 minutes and then back ON and so forth. While in this mode,
the status line on the LCD will show “Circ. Pump M1 ON” (this
feature is used for demonstration, when there is no water and
drain connection).
Touch the down arrow to select the next component test screen,
All Devices.
When you exit a screen the component will automatically turn
OFF.
____________________________________________________________________________________________________________________________
Component Test
All Devices Off
Off
The All Devices test is used to turn all the components OFF. The
devices can only be turned OFF from this screen.
To select the next component, RO Valve Y5, touch the down
arrow.
When you exit a screen the component will automatically turn
OFF.
On
_____________________________________________________________________________
Component Test
RO Valve Y5 OFF
Chm Full=OFF Chm
Pres=OFF
Touch the ON button to activate the RO Valve Y5. (This valve is
only available in units using RO water).
Touch the down arrow to select next component test screen, Dryer
Motor High.
When you exit a screen, the component will automatically turn
OFF.
Off
On
HYDRIM M2 Service Manual 96-111286 Rev. 1.0
39
Component Test
Dryer Motor High OFF
Touch the ON button to activate the Dryer Motor High.
This will test the Air Turbine running at high speed.
Touch the down arrow to select the next component test screen,
Cond. Valve.
When you exit a screen, the component will automatically turn
OFF.
Off
On
__________________________________________________________________________________
Component Test
Cond. Valve OFF
Touch the ON button to activate the Condenser Valve.
Touch the down arrow to select the next component test screen,
Ch. Heater R1.
When you exit a screen, the component will automatically turn
OFF.
Off
On
__________________________________________________________________________________
Component Test
Ch. Heater R1 OFF
Off
40
Touch the ON button to activate the Chamber Heater R1. After
pressing the ON button the LCD will change to a regular cycle
screen and the unit will fill with water and run the pump and
heater until the temperature protection mechanism is activated and
shows CF 13.
On
HYDRIM M2 Service Manual 96-111286 Rev. 1.0
Component Test
Touch the ON button to activate Latch L1. The door will open
when the latch is ON.
Latch L1 OFF
Touch the down arrow to select the next component test screen,
Salt Valve Y2.
Off
On
When you exit a screen, the component will automatically turn
OFF.
__________________________________________________________________________________
Component Test
Salt Valve Y2 OFF
Be sure that the door is closed before activating the Salt Valve Y2.
Touch the ON button to activate the Salt Valve. Water will enter
the chamber from the back right.
Touch the down arrow to select the next component test screen,
Dosing Pump 1 M4.
When you exit a screen, the component will automatically turn
OFF.
Off
On
______________________________________________________________________________
Component Test
Dosing Pump 1 M4 OFF
DetPuls=0
Off
On
Touch the ON button to activate Dosing Pump 1 M4. For software
revision 318 and lower the Flow Meter detergent pulses will be
displayed. For software revision 320 and higher the Detergent
Switch (Flow Switch) status appears below the Dosing Pump
information. If there is cleaning solution in the unit, the Detergent
Switch (Flow Switch) should turn ON when the Dosing Pump is
ON.
Touch the down arrow to select the next component test screen,
Dryer Motor Low.
When you exit a screen, the component will automatically turn
OFF.
HYDRIM M2 Service Manual 96-111286 Rev. 1.0
41
Component Test
Dryer Motor Low OFF
Touch the ON button to activate the Dryer Motor Low. This will
test the motor running at low speed.
Touch the down arrow to select the next component test screen,
Hot W. Valve Y7.
When you exit a screen, the component will automatically turn
OFF.
Off
On
_______________________________________________________________________
Component Test
Hot W. Valve Y7 OFF
Chm Full=OFF Chm
Over=OFF
Off
On
Be sure that the door is closed before activating the Hot Water
Valve Y7. Touch the ON button to activate the Hot Water Valve.
Water will enter the chamber from the back right. The Chamber
Full Switch and Chamber Overflow Switch status appears below
the Hot Water Valve info. As the chamber fills with water, the
Chamber Full Switch should turn ON. Then the Chamber
Overflow Switch will turn ON. When the Chamber Overflow
Switch turns ON, the valve will automatically turn OFF.
Touch the down arrow to select the next component test screen,
Cold Water Valve Y1.
When you exit a screen, the component will automatically turn
OFF.
_________________________________________________________________________
Component Test
Cold W. Valve Y1 OFF
Chm Full=OFF Chm
Over=OFF
Off
42
On
Be sure that the door is closed before activating the Cold Water
Valve Y1. Touch the ON button to activate the Cold Water Valve.
Water will enter the chamber from the back right. The Chamber
Full Switch and Chamber Overflow Switch status appears below
Cold Water Valve information. As the chamber fills with water,
the Chamber Full Switch should turn ON. Then the Chamber
Overflow Switch will turn ON. When the Chamber Overflow
Switch turns ON the valve will automatically turn OFF.
Touch the down arrow to select the next component test screen,
Rinse Aid Valve. When you exit a screen the component will
automatically turn OFF.
HYDRIM M2 Service Manual 96-111286 Rev. 1.0
Component Test
Rinse Aid Valve OFF
The Rinse Aid Valve is not used at this time as Rinse Aid is not
required with HIP Solution. Touching the ON button would
activate the Rinse Aid Valve if required.
Touch the down arrow to select the next component test screen,
Waste Pump M2.
Off
On
When you exit a screen, the component will automatically turn
OFF.
__________________________________________________________________________
Component Test
Waste Pump M2 OFF
Chm Full=OFF Chm
Over=OFF
Touch the ON button to activate the Waste Pump M2. The
Chamber Full Switch and Chamber Overflow Switch status
appears below the Waste Pump information. If the chamber is full
of water the Chamber Full Switch and/or the Chamber Overflow
Switch may be turned ON. As the Waste Pump removes the water
from the chamber, the Chamber Full and Overflow Switches
should turn OFF.
Touch the down arrow to select the next component test screen,
Circulation Pump M1.
Off
On
When you exit a screen the component will automatically turn
OFF.
HYDRIM M2 Service Manual 96-111286 Rev. 1.0
43
16. Cycle Faults
Always run the unit in Debug Mode when troubleshooting.
If the software detects an error, an error message will appear on the screen showing one of the following
codes.
P2 80C 10min
Instruments
Not Processed
CF3
Temp. sensor 1 bad
OK
CF 1 Heating Failure
Detection
1.
Water temperature does not increase by 1ºC over a 2 minute period after the first 4 minutes
of heating or, it doesn’t reach the target temperature in 40 minutes.
2.
Cause
Pressure switch not activating due to low water level or defective pressure switch.
Defective heating element.
CF 2 Chamber Filling Failure
1.
Detection
Chamber full switch not activated in the first 6 minutes of filling – circulation pump not
running yet (if hot water missing or at low pressure, the unit will switch to cold water after 4
minutes if the Chamber Full switch is not activated).
Pressure switch not activated in 4 minutes of filling after the circulation pump was turned
ON (after full switch was activated).
2.
Cause
No water supplied at the unit (hot or cold).
Defective water valve (hot and/or cold).
Defective chamber full switch
Defective pressure switch
Defective circulation pump
CF 3 Chamber Temperature Sensor Failure (Control)
1.
2.
44
Detection
Temperature sensor readings are out of limits (either too low or too high).
Cause
Broken temperature sensor wire
Bad temperature sensor connection to PCB
HYDRIM M2 Service Manual 96-111286 Rev. 1.0
CF 4 Water Evacuation Failure
1.
Detection
Chamber full switch did not open in 1 minute after drain pump turned ON.
2.
Cause
Defective chamber full switch
Clogged drain
Defective drain pump
Defective check valve
CF 5 Disinfection Failure
1.
2.
Detection
Temperature is below target temperature during disinfection
Cause
Pressure switch failure
Water leak
Defective control or validation temperature sensor
Bad connection between the temperature sensor and the logic board
CF 6 Serial Communication Failure
1.
2.
Detection
Failure to read second temperature sensor within 10 seconds
Cause
Logic board failure
CF 8 Secondary Chamber Temperature Sensor Failure
1.
Detection
Temperature sensor readings are out of limits (either too low or too high).
2.
Cause
Broken temperature sensor wire,
Bad temperature sensor connection to PCB
CF 9 Software or PCB Failure
1.
2.
Detection
The unit is running a cycle for more than 3 hours
Cause
Defective PCB and/or software failure
HYDRIM M2 Service Manual 96-111286 Rev. 1.0
45
CF 10 Pressure Switch Failure
1.
Detection
The Pressure Switch is closed (show pressure) when the circulation pump is not running.
Detected when the unit is idle or during the first stage of the water filling phase when the
pump is not ON.
2.
Cause
Defective Pressure Switch
CF 11 No Detergent Flow (for Units with Software Revision 318 and Lower)
1.
Detection
The flow meter did not detect detergent flowing during the cycle.
2.
Cause
No detergent or defective detergent level sensor
Defective dosing pump
Clogged detergent tubing
Defective Flow Meter
CF 11 No Detergent Flow (for Units with Software Revision 320 and Higher)
1.
Detection
The Flow Switch did not detect detergent flowing. CF11 will not be displayed if the Flow
Switch doesn’t detect detergent during the rinse phase of the cycle.
2.
Cause
No detergent
Kinked detergent tubing
Defective dosing pump
Clogged detergent tubing
Defective Flow Switch
CF 13 Temperature Validation Error
1. Detection
During the washing phase of the cycle if either the control or validation temperature are more
than +/-5°C away from the target temperature.
Chamber Temperature Sensor or Validation Temperature Sensor > 96ºC
During the disinfection phase of cycle, control and validation temperature are more than
+/-2ºC apart
2. Cause
Temperature sensors need calibrating
Defective temperature sensor(s)
Bad contact between the temperature sensor(s) and the logic board
46
HYDRIM M2 Service Manual 96-111286 Rev. 1.0
CF 14 Flow Meter Error (for Units with Software Revision 318 and Lower)
1.
Detection
Delivery of chemical over the complete cycle is greater than +/- 20% of intended value.
2.
Cause
Dosing Pump tubing needs replaced (then calibrate Dosing Pump)
Flow Meter factor needs to be adjusted (See Appendix A)
Flow Meter defective
CF 14 Bad Flow Switch (for Units with Software Revision 320 and Higher)
1.
Detection
Flow Switch did not turn OFF after a 15 second timeout
2.
Cause
Flow Switch stuck ON
CF 15 Chamber Overflow
1.
Detection
The overflow switch did not turn OFF after 30 seconds of the drain pump running.
2.
Cause
Defective overflow switch
Clogged drain
CF 16 No Pressure
1.
Detection
Water pressure drops during wash or disinfection.
2.
Cause
Defective Pressure Switch
Defective Circulation Pump
No water due to leak
HYDRIM M2 Service Manual 96-111286 Rev. 1.0
47
17. Opening the Door in Case of Power Failure
If there is a power failure, remove the kickplate below the door. Locate the ring to the left and pull it to
open the door. Exercise caution! There may be fluid remaining in the unit and the instruments may be
hot. Instruments that have not completed the cycle should not be used and should be reprocessed.
Manual open pull ring
Kickplate
Cover Removal
Top Cover
Open the front door and remove the two screws under front of the top cover. The top cover needs to
be pulled forward first to disengage tabs at the rear prior to lifting it off. Lift up the top cover to
remove it.
Kickplate (Lower Front Cover)
To remove the kickplate below the door, remove the screw in top centre of the cover.
Side and Rear Covers
To remove the side and rear covers, remove the top cover first. Then lift the side or rear covers and
remove them.
Note: When replacing/re-attaching the covers, ensure that the ground wires are re-attached
48
HYDRIM M2 Service Manual 96-111286 Rev. 1.0
18. Component Replacement
Flow Meter
The flow meter is located behind the chemical solution box. Remove the
top cover and the right side panel to access it. Replace with flow switch
repair kit (part number 01-111688S).
Flow Switch Kit # 01-111688S
Dosing Pump
The Dosing Pump is located behind the cover below the front
door. Remove the screw from top center of the kickplate and
locate the Dosing Pump on the right side. Remove the two
mount screws to access the Dosing Pump.
Dosing Pump Part # 01-111777S
Dosing Pump Tubing Part # 01-111831S
Dosing Pump
Water Heater
U Plate
Safety Switch Probe
Mounting Plate & Gasket
The Water Heater connections are located behind the kickplate below the front door. The heater is located
in the chamber and locked in place with the double U plate from outside. After removing the mounting nuts
and the U plate, the Water Heater is removed from inside the chamber underneath the filter screen. Remove
the safety switch probe before removing the heating element.
Water Heater Part kit (01-111475S)
HYDRIM M2 Service Manual 96-111286 Rev. 1.0
49
Safety Switch & Probe
Safety Switch
Probe Mounting Nut
Safety Switch
Remove the filter screen from
inside the chamber and unclip
the Safety Switch Probe from
the Heating Element.
Behind the kickplate below the
front door, remove the nut that
holds the probe to the chamber.
The Safety Switch is located
behind the plate.
Safety Switch Part #
01-111482S
Chamber Temperature Sensor
Chamber Temperature Sensor
Chamber Temperature Sensor
Remove the mounting nut from
the sensor located underneath
the filter inside the chamber.
Behind the kickplate below the
front door, remove the sensor
from the chamber and unplug
the red wiring. Chamber Temp.
Sensor Part # 01-111778S
Door Latch
Remove top cover. Disconnect the Door Latch in front of the
unit and replace. Door Latch Assembly Part # 01-111783S
Door Latch
Touch Screen
Remove the screw above the touch screen and open the door. Disconnect the I/O Board
and Logic board from Touch screen. Replace the touch screen and re-connect the
boards in reverse order. Close the door and re-insert the screw above the touch screen.
Touch Screen Part # 01-109785S
50
HYDRIM M2 Service Manual 96-111286 Rev. 1.0
Controller Assembly
IO Board
Remove the screw above the touch screen and pull out the door
to access the IO Board and Logic Board. Replace as needed.
IO Board Part # 01-109783S
Logic Board Part # 01-110378S
Logic Board
Power Supply Board
Remove the top cover and right side panel to access the Power
Supply Board.
Power Supply Board Part # 01-109782S
Power Supply
Board
Dryer Motor and Filter
Remove the top cover and right side panel to access the Dryer
Motor and Filter Assembly.
Dryer Motor # 01-111779S
Dryer Filter # 01-111780S
Dryer Motor and
Filter Assembly
HYDRIM M2 Service Manual 96-111286 Rev. 1.0
51
Chamber Level and Overflow Switch
Remove the top cover and right side panel to
access the Chamber Level and Overflow Switch.
Chamber Level & Overflow Switch part # 01111408S
Chamber Level & Overflow
Switch
Chamber Pressure Switch & Drain Bleed Valve
Remove the top and rear covers to access the Chamber Pressure
Switch and Breather.
Chamber Pressure Switch Part # 01-111409S
Breather Part # 01-111585S
Drain Breather Valve
Chamber Pressure Switch
Cold & Hot Water Inlet Valves
Hot Water Inlet Valve
Remove the top and rear covers to access the Cold & Hot Water
Inlet Valves. The 2-fold valve is for cold water and the single
valve is for hot water.
Cold Water Inlet Valve Part # 01-111782S
Hot Water Inlet Valve Part # 01-111494S
Cold Water Inlet Valve
52
HYDRIM M2 Service Manual 96-111286 Rev. 1.0
Drain Pump
Drain Pump
Remove the top cover and right side panel to access the Drain
Pump.
Drain Pump Part # 01-111412S
Circulation Pump
Remove the top cover, rear and left side panels to
access the Circulation Pump.
Circulation Pump Part # 01-111782S
Circulation Pump
HYDRIM M2 Service Manual 96-111286 Rev. 1.0
53
19. Appendix A – Flow Meter Factor Setup
(for units with software revision R318 and lower)
Background
For units with software revision R318 and lower, the M2 detergent dosing system consists of a
Dosing Pump and a Flow Meter. The Flow Meter validates that the proper amount of chemical was
delivered by the Dosing Pump during a washing/disinfecting cycle.
For proper operation the Dosing Pump Flow and Flow Meter Factor have to be adjusted at initial
factory setup and at regular maintenance intervals.
Procedure
For this operation a small cup (around 40ml) and a measuring tube (minimum 40ml) are needed.
To start go to the Dosing Pump Setup screen located in Technician/ Diagnostic Tools (2), see below:
Dosing Pump Setup
Current 200 ml/min
New
START
(WAIT)
210 ml/min
SETUP
Default 210ml/min
Flow = 174
Before pressing the Start button please read the following instructions. By pressing the Start
button a dosing sequence starts and the message WAIT is displayed above the button until
all the calculations are done. First the dosing pump is turned on for 8 seconds for priming
the internal dosing system (flow meter, internal tubing). After that the dosing pump is
paused for 4 seconds and turned on again for 10 seconds. During the 4s pause get ready to
collect the detergent delivered to the washing chamber in the next 10 seconds, see picture
below:
54
HYDRIM M2 Service Manual 96-111286 Rev. 1.0
19. Appendix A – Flow Meter Factor Setup
(for units with software revision R318 and lower)
Dosing Pump Setup
Current 200 ml/min
New
When the detergent delivery ends transfer the liquid collected from
the small cup into the measuring tube and read the volume = D [ml].
Now check the LCD screen and write down the number of pulses
(Flow = N) that the flow meter counted during the 10
seconds dosing. Please note that this count has to be a number
between 100 and 200. If this is a small number please exit the
Dosing Pump Setup and restart this process.
START
(WAIT)
210 ml/min
SETUP
Default 210ml/min
Flow = 174
Then calculate the Flow Meter Factor = N/D.
For example for D = 35ml and N = 172 pulses => Flow Meter Factor = 172/35 = 4.9
You can now adjust The Flow Meter Factor in the Technician/Production Tools/Flow Meter Factor
menu (default is 4.2 - see below).
Flow Meter Factor
4.9
Default 4.2
After setting up the Flow Meter Factor go back to the Dosing Pump Setup screen and press the Start
button again. We need this step for calculating the proper dosing pump flow value. The unit is using
the Flow Meter Factor for the calculation of the Dosing Pump Flow so it is important to redo this
calibration with the new Flow Meter Factor value.
HYDRIM M2 Service Manual 96-111286 Rev. 1.0
55
19. Appendix A – Flow Meter Factor Setup
(for units with software revision R318 and lower)
After pressing START the message WAIT is displayed above the button until all the calculations are
done. When the message START comes back, please make sure that the number of pulses (Flow)
has a value that is very close to the one measured before (N).
Now the unit has calculated the Dosing Pump Flow value which is
displayed in the “New” text box.
Dosing Pump Setup
This value is restricted to be between a minimum
of 130ml/min and a maximum of 260ml/min, the default
value is 210ml/min.
When the number in the “New” box is the minimum or maximum
value there is either a wrong calculation (Flow value too low, wrong
Flow Meter Factor) or the dosing pump tubing has to be changed.
If the number in the “New” box is between the minimum and
maximum values press the SETUP button and the “New”
number will be saved as “Current” value.
Exit the Dosing Pump Setup screen.
This ends the Flow Meter Factor and Dosing Pump Flow setup process.
56
HYDRIM M2 Service Manual 96-111286 Rev. 1.0
Current 200 ml/min
New
START
(WAIT)
210 ml/min
SETUP
Default 210ml/min
Flow = 174
20. Appendix B – Dosing Pump Setup
(for units with software revision R320 and higher)
Background
For units with software revision R320 and higher, the M2 detergent dosing system consists
of a Dosing Pump and a Flow Switch. The Flow Switch validates that the proper amount of
chemical was delivered by the Dosing Pump during the washing phase of the cycle.
For proper operation the Dosing Pump Flow has to be adjusted at initial factory setup and at
regular maintenance intervals.
Procedure
For this operation a small cup (around 40ml) and a measuring tube (minimum 40ml) are
needed.
To start go to the Dosing Pump Setup screen located in Technician/ Diagnostic Tools (2),
see below:
Dosing Pump Setup
DPF/min = 200 ml/min
START
(WAIT)
(DONE)
Default 210 ml/min
Flow Sw =
Before pressing the Start button please read the following instructions:
HYDRIM M2 Service Manual 96-111286 Rev. 1.0
57
20. Appendix B – Dosing Pump Setup
(for units with software revision R320 and higher)
By pressing the Start button the dosing pump is turned on and the message WAIT is
displayed. When the Flow Switch turns ON (Flow Sw = 1) the dosing pump will run for 10
more seconds and the message DONE is displayed shortly. Run this sequence once for
priming the internal dosing system (flow switch, internal tubing). After that get ready to
collect the detergent delivered to the washing chamber, see picture below, and press the
START button. The dosing pump will turn on again for 10 seconds (assuming that the Flow
Switch is primed with detergent).
When the detergent delivery ends transfer the liquid collected from the small cup into the
measuring tube and read the volume = D [ml].
Now multiply volume D by 6 to find the Dosing Pump Flow (DPF) in ml/min.
For example for D = 35ml => Dosing Pump Flow = 35 * 6 = 210 ml/min
Please note that this DPF has to be a number between 190 and 242. If this is a number
outside these values please exit the Dosing Pump Setup, check if the dosing pump is running
properly and restart this process.
You can now adjust The Dosing Pump
Flow by pressing the
Up or Down buttons
(default is 210ml/min - see
below).
Exit the Dosing Pump Setup screen by
pressing the left arrow.
Dosing Pump Setup
DPF/min = 200 ml/min
START
(WAIT)
(DONE)
Default 210 ml/min
Flow Sw =
This ends the Dosing Pump Flow setup
process.
58
HYDRIM M2 Service Manual 96-111286 Rev. 1.0
21. Appendix C – Hydrim M2 Software Upgrade Instructions
!
!
The Software Upgrade process is a lengthy process (takes about 10 minutes). Do
not power down the unit after the upgrade process has started!
If the upgrade process gets interrupted due to a power loss or for any other
reason, restart the upgrade by following the instructions below:
1. If LCD screen remains blank after Power ON, power off and back on the
Data Logger and the upgrade process will restart automatically.
2. If the screen shows the normal boot up icons follow the normal upgrade
instructions, see below.
Hydrim M2 software upgrade instructions:
• Copy firmware files to USB flash drive
o Attach the USB flash drive to a PC
o Format USB flash drive, to make sure that the file system is not corrupted
• Double click on the My computer icon to open it
• Right click on the USB Flash drive letter
• Select Format
• In the “Format Removable Disk” Window make sure that the
selected File System is Fat32
• Do not select Quick format
• Press Start to Start the Format process
• Wait until finished
• Close the “Format Removable Disk” window
o Extract the following 3 files from the software upgrade ZIP achieve onto
the root directory of the USB flash drive:
firmware.311 (311 is not the software revision it means that this
file is used for upgrading a unit with software R311 and up)
firmware.sci (used when upgrading a unit with software between
R300 to R310)
flashldr.sci (used when upgrading a unit with software between
R300 to R310)
o Make sure that the files are located in the root directory of the Flash
drive; otherwise the upgrade process will not work.
o When disconnecting the USB Flash drive, make sure to use the Safely
remove option (icon from the Windows tray)
•
•
Attach Data logger to unit
o Power down both Hydrim unit and Data Logger.
o Attach Data Logger to the Hydrim unit by using the provided serial cable
o Insert USB Flash drive into the Data logger
o Power up Data logger
o Power up Hydrim unit
Check serial communication Baud Rate
o Select i icon to enter Menu screen
o Select Setup
o Press down arrow until “Baud Rate” is displayed
o Select “Baud Rate”
HYDRIM M2 Service Manual 96-111286 Rev. 1.0
59
21. Appendix C – Hydrim M2 Software Upgrade Instructions
•
o Make sure that 9600 is currently selected. If not, adjust baud rate to read
9600 (default value)
o Press Back arrow until the Cycle selection screen has been reached
o Power off unit.
Start software upgrade process
o Power up unit
o Select i icon to enter Menu screen
o Select “Technician”
o Enter Technician password 7919 followed by EN to access the Technician
options
o Press Down arrow until “SW Upgrade” is displayed
o Select “SW Upgrade”
o Enter SW upgrade password 5849 followed by EN
o Select “SW Upgrade USB”
o During a valid upgrade process, the light on the USB stick will flash.
o Wait until software upgrade finishes
The Software Upgrade process takes about 10 minutes. During a valid upgrade
process, the light on the USB stick will flash. The unit will automatically restart
after finishing the upgrade process.
Verify software revision on the main screen, it should be SHM2MR3xx*
*For xx value check the name of the zip file containing the software upgrade.
! Important: after upgrade, follow the next steps to reset the unit settings to factory
defaults
• Reset to defaults
o Power off unit.
o Power up unit
o Select i icon to enter Menu screen
o Select “Technician”
o Enter Technician password 7919 followed by EN to access the Technician
options
o Press Down arrow until “Factory Default” is displayed
o Select “Factory Default“
o Select “Reset” and wait 2 to 3 seconds for a beep
o Press return arrow until the Cycle selection screen is displayed.
o Power off unit
o Congratulations, you successfully upgraded the software on your Hydrim
unit
60
HYDRIM M2 Service Manual 96-111286 Rev. 1.0