1
INSTALLATION
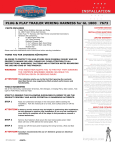
PLUG & PLAY TRAILER WIRING HARNESS for H-D
PARTS INCLUDED
1
1
1
1
Trailer Wiring Isolation Relay
H-D Trailer Sub Harness
Inline Fuse and “Y” Wire Assembly with Heat Shrink Covered Butt Connectors
Hardware Kit Containing:
6
Black Nylon 8” Wire Ties
1
1/4” Ring Terminal
1
Dielectric Grease Pack
2
1” X 2” Adhesive Backed Hook Strap
2
1” X 2” Adhesive Backed Loop Strap
1
Alcohol Pad
1
Installation Instructions
Please read and understand entire instructions before starting installation.
THANK YOU FOR CHOOSING KϋRYAKYN!
IN ORDER TO PROTECT YOU AND OTHERS FROM POSSIBLE INJURY AND/OR
PROPERTY DAMAGE OR LOSS, PLEASE PAY CLOSE ATTENTION TO ALL
INSTRUCTIONS, WARNINGS, CAUTIONS AND ATTENTION NOTES REGARDING
THE USE AND CARE OF THIS PRODUCT.
WARNING!
THIS INDICATION ALERTS YOU TO THE FACT THAT IGNORING
THE CONTENTS DESCRIBED HEREIN CAN RESULT IN
POTENTIAL DEATH OR SERIOUS INJURY.
ATTENTION! This indication alerts you to the fact that ignoring the contents
described herein may negatively affect product performance and
functionality.
CAUTION!
This indication alerts you to the fact that ignoring the contents
described herein can result in potential injury or material
damage.
TOOLS SUGGESTED
Set of Hex Wrenches, Combination Wrenches, Side Cutter, Electrical Tape, a Set of Screw
Drivers, and a Test Light or Multi Meter
STRICTLY OBSERVE THE FOLLOWING GUIDELINES IN ORDER TO USE THE
PRODUCT PROPERLY AND AVOID POTENTIALLY DANGEROUS ACCIDENTS.
STEP 1
Read and understand all steps in the instructions before starting the
installation. Park the motorcycle on a hard, level surface and turn off the
ignition.
NOTE: Installation shown on Touring model, other models may vary for relay
placement.
ATTENTION! A factory service manual may be helpful in performing this installation.
Do not attempt to perform this installation if you are not confident in
your ability to complete all of the steps in the procedure; consult a
trained technician.
7672-22HD-0212
-cont.-
7672
CUSTOMER SERVICE
877.370.3604 (toll free)
INSTALLATION QUESTIONS
[email protected]
or call 715.247.2983
LIMITED WARRANTY
Küryakyn warrants that any Küryakyn products
sold hereunder, shall be free of defects in
materials and workmanship for a period of one
(1) year from the date of purchase by the
consumer excepting the following provisions:
● Küryakyn shall have no obligation in the event
the customer is unable to provide a receipt
showing the date the customer purchased the
product(s).
●The product must be properly installed,
maintained and operated under
normal conditions.
●Küryakyn makes no warranty, expressed or
implied, with respect to any gold plated
products.
●Küryakyn shall not be liable for any
consequential and incidental damages, including
labor and paint, resulting from failure of a
Küryakyn product, failure to deliver, delay in
delivery, delivery in nonconforming condition, or
for any breech of contract or duty between
Küryakyn and a customer.
●Küryakyn products are often intended for use in
specific applications. Küryakyn makes no
warranty if a Küryakyn product is used in
applications other than intended.
●Küryakyn electrical products are warranted for
one (1) year from the date of purchase by the
consumer. L.E.D.’S contained in components of
Küryakyn products will be warranted for defects
in materials and workmanship for 3 years from
the date of purchase where as all other
components shall be warranted for one(1) year.
This includes, but is not limited to; control
modules, wiring, chrome & other components.
●Küryakyn makes no warranty of any kind in
regard to other manufacturer¹s products
distributed by Küryakyn. Küryakyn will pass on
all warranties made by the manufacturer and
where possible, will expedite the claim on behalf
of the customer, but ultimately, responsibility for
disposition of the warranty claim lies
with the manufacturer.
ABOUT OUR CATALOG
For purchasing Küryakyn® products, you
can receive a complete catalog free of charge.
Send the Proof-of-Purchase below with
your address to: Küryakyn, P.O. Box 339,
Somerset, WI 54025.
Please indicate either Accessories Catalog for
Harley-Davidson® or GL & Metric Cruisers.
Be sure to ask your local dealer about other
Küryakyn® products, the motorcycle parts and
accessories designed for riders by riders.
©2005 Küryakyn USA® All Rights
reserved.
STEP 2
CAUTION!
Remove the seat and locate the H-D main wiring harness. PIC 1 (On
Trike models, locate the 8-pin connector from the main harness to the
PIC 1
run-turn–brake controller. This is the input side of the controller,
PIC 1, and the 8-pin connector will have a RED wire with a YELLOW
stripe. It should be located on the left side under the passenger
handrail.) Disconnect the wiring harness and plug the sub-harness into
the ends of the main taillight harness. PIC 2
WIRING HARNESS
Always install the Isolation Relay Sub Harness upstream
(before) of any existing multifunction control modules.
Do not install the Isolation Relay Sub Harness between
a module and the turn signals, as this will overload the
module. Overloading will damage the module and may create a fire hazard!
ATTENTION! Kuryakyn recommends the use of dielectric grease on electrical
WIRING HARNESS
COMES UP THROUGH
FRAME
CONNECTOR ON TRIKES HAS RED
WITH YELLOW STRIPE WIRE
PIC 2
connections
STEP 3
STEP 4
Take the 4-pin connector and route it under the frame rail and bring it
out under the side cover of the bike. This connection will be used to
supply the power to the trailer. PIC 2
PLUGS TO WIRE
HARNESS
Under the side cover, plug the Trailer Isolation Relay to the
sub-harness. PIC 3
TRAILER ISOLATION WIRING HARNESS
TO ISOLATION
RELAY UNDER
SIDE COVER
PIC 3
STEP 5
Take the long red positive, red with a black stripe and the long black
ground wire in the black sheathing and route them to the battery. Be
cautious of where you route the wires, avoid moving parts or extreme
heat. PIC 3
STEP 6
Take the red power wire and connect it to one end of the “Y “ wire
attached to the fuse holder with the butt connectors. PIC 4 Slide the
wire into the end of the butt connector and crimp.
STEP 7
The red wire with a black stripe is a power wire that can be used for
THE SUBHARNESS TO BEHIND THE
SIDE COVER SO YOU WILL BE ABLE
keyless entry power or interior lighting on the trailer. If your trailer
TO CONNECT THE SUBHARNESS TO
DOES NOT need an extra power wire for accessory lighting, then DO
THE TRAILER ISOLATION RELAY
NOT connect this to the other “Y” wire from the fuse holder. Wrap the
butt connector on the unused red “Y” wire with electrical tape or heat shrink to prevent an
unwanted short, as it will have power to it all the time, and secure it out of harms way. Proceed to
Step 9.
WARNING:
WHEN THE SINGLE RED WIRE WITH THE RING TERMINAL IS CONNECTED TO
THE BATTERY IN STEP 9, THE RED WIRE WITH THE BUTT CONNECTOR WILL
HAVE POWER AT THE BUTT CONNECTOR. MAKE SURE IT IS CAPPED OFF
AS IN STEP 7 BEFORE ATTACHING THIS WIRE TO THE BATTERY!
ROUTE THIS GROUP
OF 3 WIRES TO
BATTERY
ROUTE THE 4-PIN CONNECTOR FROM
PAGE
2
-cont.-
PLUG & PLAY TRAILER WIRING
INSTALLATION
STEP 8
NOTE:
WARNING:
STEP 9
STEP 10
If your trailer DOES need an extra power wire for accessory lighting, Take the red with black
stripe power wire and connect it to the end of the second “Y” wire with the attached
PIC 4
butt connector. PIC 4 Slide the wire into the end of the butt connector and crimp.
If you would like to have “keyed” power to the red with black stripe wire,
instead of constant power, use a test light to find a “keyed” wire on the bike
and attach this wire to it. Be sure to cap off the unused butt connector on
the “Y” wire from the fuse holder as in Step 7. Make sure that the added
amperage from the trailer accessory will not overload the chosen circuit.
BATTERY
GROUND
INSERT
AND
CRIMP
WHEN THIS SINGLE RED WIRE WITH THE RING TERMINAL IS
CONNECTED TO THE BATTERY IN STEP 9, THE RED WIRE WITH THE
BLACK STRIPE WILL HAVE POWER AT THE OTHER END OF IT.
MAKE SURE IT IS CAPPED OFF AS THE RED WIRE IN STEP 7,
OR ATTACHED TO THE TRAILER PLUG, BEFORE ATTACHING THIS WIRE
TO THE BATTERY!
Attach the single red wire from the other end of the fuse holder with the ring terminal to the
positive side of the battery. PIC 4 Connect the long black ground wire to the negative on the
battery using the supplied 1/4” ring terminal (you will need to crimp this to
the black wire). PIC 5
PIC 5
TO BATTERY POSITIVE
REFER TO WARNING
STEP 7 AND STEP 8
BEFORE CONNECTING
INSERT AND
CRIMP
With the two (four pin) plugs connected in PIC 3, use a test light to check for
proper function. Turn the key on and test both signals. (Yellow is left turn and
Green is right turn) Brake lights (Blue) and Run light (Brown). The red wire
with a black stripe is a power wire that can be used for keyless entry power or
interior lighting on the trailer (Step 7 or Step 8). The white wire is ground.
PIC 6
TO BATTERY NEGATIVE
ATTENTION! Secure all wiring away from any
moving parts, pinch points or extreme
heat. Küryakyn WILL NOT issue a
warranty on any electrical component
that fails due to pinched, crimped,
broken, abraded, melted or frayed
wires.
STEP 11
Tie up any excess wire length with the
provided cable ties. Locate an area on
the bike that you will be able to mount the
trailer isolation relay box. Take the
provided 1” x 2” Hook Strap and the
1” x 2” Loop Strap and place one on the
back of the trailer isolation relay and the
other on the bike in a good and safe area
that is out of harms way.
STEP 12
Wire up any style connector needed for
your trailer application.
STEP 13
When you are satisfied with the wiring,
re-install the saddlebag if needed, replace
the seat, and secure it in the same order
that it was removed in Step 2 of the sub
harness installation instructions.
WARNING!
PIC 6
GROUND
BRAKE
RIGHT TURN
RUN LIGHTS
LEFT TURN
ENSURE PROPER TRAILER AND
MOTORCYCLE LIGHT OPERATION
BEFORE RIDING THE MOTORCYCLE. VISIBILITY IS A MAJOR CONCERN FOR
MOTORCYCLISTS. TRAILER OR MOTORCYCLE LIGHT MALFUNCTION COULD
RESULT IN DEATH OR SERIOUS INJURY.
SEE WARNING STEP 8
PAGE
3
Ride On!
PLUG & PLAY TRAILER WIRING
INSTALLATION