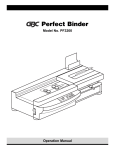
1
2013
SERVICE MANUAL
856 CONTROL PANEL
ADHESIVE
APPLICATOR SYSTEM
856_0412_0_ 12.01.10
Apquip LLC Ver X.x
Service (831) 642-6565
5 Harris Court Bldg Q
Monterey, CA 93940
The following Assembly Drawings are to be used in conjunction with this Manual.
Included
!
!
!
!
!
!
!
!
!
!
!
!
!
!
!
!
!
!
!
!
Drawing Number
Description
121
BRACKET ASSEMBLY
_____
APPLICATOR HEAD, EDGE GLUE
221
BRACKET ASSEMBLY
268
ADHESIVE VALVE ASSEMBLY
268-Rebuild
ADHESIVE VALVE REBUILD INSTRUCTIONS
375
BRACKET ASSEMBLY
552
SOLENOID VALVE ASSEMBLY, LARGE
582
PRESSURE TANK ASSEMBLY
582-07
FLUSH TANK ASSEMBLY
587
ADHESIVE ACCUMULATOR
600 / 600B
ADHESIVE FILTER ASSEMBLY / LARGE
621 / 627
ADHESIVE REGULATOR ASSEMBLY / HIGH FLOW
816
FINGERJOINT SYSTEM DIAGRAM / NOTES
817
EDGE GLUE SYSTEM DIAGRAM / NOTES
820
SOLENOID VALVE ASSEMBLY
856FM
CONTROL PANEL ASSEMBLY
856FM-IO
INPUT/OUTPUT WIRING DIAGRAM
856FM-32
CONTROL PANEL WIRING DIAGRAM
____
APPLICATOR HEAD, FINGERJOINT
!
!
!
!
___
________________________________
___
________________________________
___
________________________________
___
________________________________
856_0412_0_ 12.01.10
Additional Drawings
2013
SERVICE MANUAL
856 CONTROL PANEL
ADHESIVE
APPLICATOR SYSTEM
856_0412_0_ 12.01.10
Apquip LLC Ver X.x
Service (831) 642-6565
5 Harris Court Bldg Q
Monterey, CA 93940
CONTENTS
856_0412_0_ 12.01.10
OVERVIEW ................................................................................................................ 1
ELECTRICAL INSTALLATION ..................................................................................... 2
PNEUMATIC INSTALLATION ...................................................................................... 3
SENSOR INSTALLATION............................................................................................. 4
CONTROL ENCLOSURE FEATURES ........................................................................... 5
OPERATOR INTERFACE FEATURES............................................................................ 7
Main Menu ............................................................................................................ 7
BASIC FUNCTIONS AND ADJUSTMENTS .................................................................... 8
Glue Start Delay ................................................................................................... 8
Glue Length Delay .............................................................................................. 10
Block Counter Reset ........................................................................................... 12
Flush Switch ........................................................................................................ 13
Service Information ............................................................................................ 15
PROGRAMMING ASSISTANCE ................................................................................. 16
ADDITIONAL PROGRAM FEATURES ........................................................................ 17
REMOTE FLUSH or PURGE.................................................................................. 17
LIQUID LEVEL MONITOR .................................................................................... 18
CHAIN BREAK DELAY ......................................................................................... 19
RESUME RAMP-UP DELAY .................................................................................. 20
TIMED VALVE PURGE ......................................................................................... 21
OPTIONAL PROGRAM FUNCTIONS ......................................................................... 22
SERIES (BOARD SKIP) OPERATION ..................................................................... 22
Setup and Installation .................................................................................... 23
Series Status .................................................................................................. 24
Program Series Data ...................................................................................... 26
Enter Sides to Glue ........................................................................................ 27
Series Pattern Example ................................................................................. 29
GLUE DETECTION .............................................................................................. 43
Setup and Installation .................................................................................... 44
Glue Detection Status .................................................................................... 45
Set Reject Threshold ...................................................................................... 46
Glue Detection Board Marker ........................................................................ 48
GLUE METERING ................................................................................................ 50
Setup and Installation .................................................................................... 51
Glue Metering Status ..................................................................................... 52
Glue Metering Input Data .............................................................................. 53
Reset Confirmation ........................................................................................ 54
Meter Calibration .......................................................................................... 55
Glue Metering Board Marker ........................................................................ 57
C1
CONTENTS
856_0412_0_ 12.01.10
SYSTEM COMPONENT IDENTIFICATION ................................................................ 59
SIX CONTROL STAGES DURING APPLICATION ....................................................... 60
ADHESIVE APPLICATOR HEAD ............................................................................... 62
APPLICATOR HEAD ALIGNMENT ............................................................................ 62
APPLICATOR HEAD CLEAN UP ................................................................................ 64
WOOD SENSOR MOUNTING ................................................................................... 65
SENSING COMPONENTS CHECK ............................................................................ 66
DYNAMIC ADJUSTMENT .......................................................................................... 67
SQUEEZE OUT ......................................................................................................... 69
ADJUSTMENT TROUBLESHOOTING ......................................................................... 70
Applicator valve correct application. ................................................................. 70
Applicator valve opens late. ............................................................................... 70
Applicator valve closes early. ............................................................................. 71
Applicator valve opens early and/or closes late ................................................. 71
Adhesive on upper surface and none on lower surfaces. .................................... 72
Adhesive on lower surface and none on upper surfaces. .................................... 72
Glue Buildup On Applicator Head ...................................................................... 72
AIR CONTROLS ........................................................................................................ 73
TROUBLESHOOTING ............................................................................................... 74
Troubleshooting Fluid Supply ............................................................................. 74
Troubleshooting Applicator Valve Assembly ...................................................... 75
Internal Electrical Component Identification ...................................................... 76
Troubleshooting Electrical Controls ................................................................... 77
Troubleshooting Sensing Electronics .................................................................. 78
Troubleshooting WOOD Sensor Function............................................................ 80
Troubleshooting WOOD Sensor Output Signal .................................................... 81
Troubleshooting LIQUID LEVEL Sensor Output Signal ........................................ 82
Troubleshooting LIQUID LEVEL Sensor Output ................................................... 83
Troubleshooting PLC Output Signals .................................................................. 84
Troubleshooting Chain Relay.............................................................................. 86
Troubleshooting (Board Skip) Series Function .................................................... 87
Troubleshooting Glue Detect Function ............................................................... 88
Troubleshooting Glue Detect Marker Function ................................................... 91
APPLICATOR VALVE ASSEMBLY .............................................................................. 93
OPTIONAL VALVE PARTS ......................................................................................... 94
ADHESIVE FILTER.................................................................................................... 95
PRESSURE TANKS .................................................................................................... 96
SPECIAL ADHESIVES ............................................................................................... 97
C2
OVERVIEW
The 856 Control Enclosure is an extremely fast PLC controlled unit capable of many
functions to provide accuracy, flexibility, and monitoring of your glue applicators for
use with finger jointers, edge and face lamination applications. We utilize an operator
interface panel that allows the operator to quickly interact with the PLC to change
values and settings. Because the operator interface panel has four lines of text, the
operator can quickly learn to operate the 856, even with limited computer knowledge.
The interface unit also has eight function keys enabling the operator to quickly access
and change critical values using the 10 digit keypad and scrolling arrows. As is the case
with any piece of machinery, it is still important that the operator take the time to
thoroughly read the manual for a clear understanding of principles.
856 Ver x.xA:
The basic 856 control unit is designed to start and stop the adhesive pattern. The basic
856 Version A will also provide you with a board count feature and a flush switch. In
addition, with optional PLC programming and DIN rail mountable hardware, you can
easily upgrade features for your glue application needs.
856 Ver x.xB - Programable Board Skip: The 856 board skip unit was designed for
edge and face lamination lines that need to control one or two gluing operations
simultaneously. The 856 Version B can be easily programmed through the operator
interface panel so that each individual board in a series can have either both sides
glued, the left (top) side (face) only glued, the right (bottom) side (face) only glued or
neither side (face) glued. It should be clear that this program is designed for use with
only one sensor controlling the start and stop of the adhesive pattern so the pattern
cannot be staggered from one side (face) to another.
856 Ver x.xC - Glue Detection:
The 856 glue detection unit is a revolutionary system that will detect the amount of glue
on each finger joint end, even at extremely high speeds. Not only can the 856 determine
if there is no glue or glue, it can also determine what amount of glue is being applied to
each individual piece. The Glue Detect screen allows the operator to monitor a
numerical value that corresponds to the amount of glue applied. The same screen
allows the operator to set a threshhold value that will determine which boards have an
inadequate application and correspondingly reject them.
856 Ver x.xD - Glue Detection and Board Skip:
The 856 glue detection unit with board skip unit combines the two features of glue
detection and board skip capability. All the functions of the 856 Version B and Version
C will work together in one unit. Please refer to the two descriptions listed above.
856_0412_0_ 12.01.10
Many of these functions can be combined to provide the optimal in glue application for
your mills needs. Please consult an Apquip representative to learn the possibilities that
are available. For Example;
856FM Ver x.xAF - Basic Gluing Operation with Flow Meter
856F2 Ver x.xCF - GLue Detection Operation with Flow Meter
1
ELECTRICAL INSTALLATION
Two electrical connections are needed for the APQUIP Control Enclosure:
NOTE: The Apquip 856 Control Enclosure may be supplied power at 24VDC, 115VAC or
230VAC. The Control Enclosure is configured for the correct supply voltage when manufactured.
The required connections are 1) a constant AC or DC Supply to power the system
and, 2) an AC or DC Supply signal when the Lug Chain Drive or Conveyor Drive is
powered.
The AC Supply is wired to the AC Input Terminal Strip terminals 2 & 3 with the hot
wire on Terminal 2.
The Lug Chain Drive “ON” is wired to the Chain Relay Base A1 & A2. The Relay is not
polarity sensitive for DC Chain voltage.
Ground is connected to Terminal 1.
For wiring of periferal components such as Sensors, Air Electric Valves and
Indicators, refer to the Program Version Specific Wiring Drawing provided with your
856 Control System. The below drawing shows all possible periferal connections and
does not represent any Program Version of the 856 Control System wiring.
DIN RAIL
I/O TERMINALS
856_0412_0_ 12.01.10
AC INPUT
TERMINALS
CHAIN INPUT
CONNECTION
2
PNEUMATIC INSTALLATION
A supply of dry, clean air must be connected to the barbed fitting marked “Supply”
on the 820 Air Electric Solenoid from the Coalescer Regulator. Set the air pressure on
the Coalescer Regulator to 60 psi.
It is critical that the air supply to the 820 valve is dry and oil free as possible. It
is highly recommended that a water trap is installed just prior to the air supply
connection to the Coalescer Regulator.
1/4" air lines will need to be run from the 820 Air Electric Solenoid (bottom right
corner of the 856 Enclosure) to the 268 Adhesive Valve. These lines will control the
opening and closing of the Adhesive Valve.
An air line will need to be run from the barbed brass fitting marked “A” on the 820
solenoid to the air fitting on the cap of the Air Cylinder on the 268 Valve. An air line
will also need to be run from the barbed brass fitting marked “B” on the 820 Air
Electric Solenoid to the air fitting on the main body of the Air Cylinder on the 268
Valve.
B
856_0412_0_ 12.01.10
A
Air Supply
from
Coalescer
3
SENSOR INSTALLATION
The Wood Sensor should be located approximately 1" upstream of the applicator
head. The Sensor lens should be 1.5" from the top surface of the wood. The Sensor
should be mounted in a location that will allow it to clearly see the edge of the wood
but not the top of the lug. This is critical, otherwise the Adhesive Dispensing System
will extrude glue even if the lug is empty. If you are running thin blocks (4/4 and
below) it may be necessary to slightly angle the sensor upstream so that the sensors
do not detect the bottom of an empty lug due to beam reflection off the shiny
aluminum. It may be necessary to mount the sensor so that it is aimed at only the
finger section of the block. This will eliminate any false readings from the lugs or lug
chain.
Example, if the lugs are on 6" centers and maximum board width is 2" the Sensor
centerlines should be no more than 3.99" apart. To be on the safe side, the sensors
should be located 3" center to center.
Please contact your Apquip representative for more about positionig of the Wood
Sensor.
856FM
Control
Enclosure
A
B
Frame
Sensors
856_0412_0_ 12.01.10
Wood
Sensor
Glue Sensor
4
CONTROL ENCLOSURE FEATURES
The Apquip 856 Control Enclosure operates a precise adhesive applicator system.
For proper installation and to maintain this system at optimum performance, the
operator must have a basic understanding of how this applicator system works.
Let’s start by examining the controls:
OPERATOR
INTERFACE
DOOR
LATCH
COALESCER
FILTER/REGULATOR
ASSEMBLY
Apquip LLC Ver x.x
Service (831) 642-6565
5 Harris Court Bldg Q
Monterey, CA 93940
F1
F2
F3
F4
K1
K2
K3
K4
1
2
3
4
5
6
7
8
9
.
0
+/-
ESC
ACK
INS
DEL
HELP
OFF ON
ENTER
FLUSH
ERROR
LAMP
FLUSH
SWITCH
SYSTEM
NAMEPLATE
& SERIAL
856_0412_0_ 12.01.10
POWER
SWITCH
SHIFT
5
CONTROL ENCLOSURE FEATURES
• Power Switch (On / Off Switch)
Supplies power to the Control Enclosure electronics when in the ON position.
De-energizes the Control Enclosure when in the OFF position.
NOTE: Line voltage (115 VAC or 220VAC depending on your configuration) is
still present inside the enclosure even with the Power Switch in the OFF position.
• Power “ON” Indication
The Operator Interface display is lighted when the Power Switch is in the ON
position and the Door Safety Switch is closed.
• Manual Valve Operator (Flush Operation)
Press the FLUSH Switch on the Control Enclosure to operate the Air Electric
Solenoid. The Air Electric Solenoid Valve shifts the air in the control lines to
open the Adhesive Valve. This will either dispense adhesive or, when the
Adhesive Valve is connected for flushing, will flush water through the adhesive
lines.
The Flush operation can also be performed by pressing F4 on the Operator
Interface to access the Flush Menu. Press F4 when at the Flush Screen to start
the Flush operation. Release F4 to end the Flush operation.
• Digital Counter
Increments with each Gluing cycle, providing a count of Adhesive Valve operations and joints glued.
• GLUE START Adjustment
The Glue Start adjustment is provided in the Menu of the Operator Interface.
Screen F1 displays the current setting which can be changed by keying in the
numeric value and pressing the Enter Key.
The Glue Length adjustment is provided in the Menu of the Operator Interface.
Screen F2 displays the current setting which can be changed by keying in the
numeric value and pressing the Enter Key.
6
856_0412_0_ 12.01.10
• GLUE LENGTH Adjustment
OPERATOR INTERFACE FEATURES
MAIN MENU
The Main Menu F Function screen displays
when the power comes up on the Operator
Panel. Function Keys F3 and F4 share a line
of text and the fourth text line contains the
current Block Count. When on the F1-F4
screens a line of text displays the F1-F4
Function Key assignments which can be
accessed without going to the Main Menu.
To access any K1-K4 Menus, you must first
go to the Main Menu.
M
E
N
U
F1 Glue Start
(⇓)
F2 Glue Length
F3 Reset F4 Service
Blocks
232
M
E
N
U
K1
K2
K3
K4
The Block Count can also be seen on the
F1 Glue Start time screen, the F2 Glue
Length time screen, and the F3 Block
Counter Reset screen.
SCROLL DN Key
F4 is the Service Screen which shows the
Apquip shipping address and 856 Program
Version. When on the Main Menu, press F4
to get to the Service Screen. If you are the
F1-F4 screens, press F4 to activate the Flush
Screen and allow the flush operation as with
previous program versions. A Remote Flush
Switch is installed on the Enclosure to reduce wear on the HMI keypad.
When on the Main Menu F Function screen,
press the DN arrow to move to the Main
Menu K Function screen. On the Main Menu
K Function Screen, K4 Glue Rate Info has
replaced the K4 Service Menu selection.
Series
Glue Detection
Glue Marker
Glue Rate Info
(⇑)
SCROLL UP Key
856_0412_0_ 12.01.10
Returing to the Main Menu can be accomplished by pressing ESC twice from
any screen. If on any F1-F4 Screen, press
K1 to return to the Main Menu. If on any K1K4 Screen, press F1 to return to the Main
Menu unless the key is assigned to another
function.
7
OPERATOR INTERFACE FEATURES
BASIC FUNCTIONS AND ADJUSTMENTS
Glue Start Delay
Press the F1 function key at the top left corner of the keypad to access the Glue Start
Delay Screen. On some screens, the F1 key may be assigned to another purpose.
Return to the Main Menu using any method described on Main Menu in this Manual
and view the F1-F4 function key assignments, then press F1. The Start Delay
adjustment ranges from 1 to 1000, the greater the number, the longer it will take for
the glue valve to open. Use the Down Arrow key to move the cursor to the value
field. The delay value (second line on the display) is preset to 1 if no value has been
previously entered. Key in the desired numerical value using the ten digit keys and
press ENTER. This will immediately change the timing of the desired glue start. If
your glue pattern starts too early, with excess glue at the start of the board, key in a
greater number and press ENTER. Conversely, if the glue pattern starts too late, with
no glue on the leading edge, key in a smaller number and press ENTER.
Example: If your setting is at 345 and the glue is starting late - too far in from the
leading edge - press F1, key in 300 and press ENTER. Now you find the glue pattern is
starting a little early - glue is starting to extrude before the leading edge of the board key in 325 and press ENTER. This can be continued until pattern is set exactly where
you want the glue to start.
Menu
Title
Numerical Value
for Glue Start
Start
- GLUE START DELAY _100
Block Counter
_150
Length
Reset
F1 Key
Function Keys
Flush
Board Count Title
Numerical Value for
Board Count
ESC Key
SCROLL DN Key
856_0412_0_ 12.01.10
Numeral Keys
ENTER Key
8
OPERATOR INTERFACE FEATURES
BASIC FUNCTIONS AND ADJUSTMENTS
Glue Start Delay continues
This adhesive pattern setting will remain constant as long as your chain/conveyor
speed remains constant. If the stock material size is changed and the feed speed
increases or decreases, you will have to adjust the settings accordingly. It is a good
idea to write down the appropriate settings, once they have been established, so
that every material size will have a predetermined setting for quick changeovers.
*Please note that the glue spread should be adjusted so that the glue pattern is
1/16" to 3/16" away from both the leading and trailing edge to eliminate excessive
“squeeze-out”. You will have to adjust this distance according to your glue type,
viscosity, press pressure and joint type. Typically, you should start with the
adjustment setting so that pattern is 1/16" from the edges and adjust the pattern if
necessary after viewing the finished boards from the press. You should see only a
small few small “dots” of glue squeeze out on either end.
**The running board/block count is located on the 4th line of this screen. This is to let
you know the exact number of boards/blocks that have passed the glue applicator.
For directions on how to reset this counter to zero, please refer to Block Counter
Reset in this Manual.
Menu
Title
Numerical Value
for Glue Start
Start
- GLUE START DELAY _325
Block Counter
_155
Length
Reset
Flush
Board Count Title
Numerical Value for
Board Count
Function Keys
ESC Key
SCROLL DN Key
856_0412_0_ 12.01.10
Numeral Keys
ENTER Key
9
OPERATOR INTERFACE FEATURES
BASIC FUNCTIONS AND ADJUSTMENTS
Glue Length Delay
Press the F2 function key, top row second from the left to access the Glue Length
Delay Menu. If in a sub-menu, the F2 key may be assigned to another purpose.
Return to the main menu as described on Main Menu in this Manual and view the F1F4 function key assignments, then press F2. The Glue Length adjustment also ranges
from 1 to 1000, the greater the number, the longer the glue pattern. Use the Down
Arrow to move the cursor to the value field. The delay value (second line on the
display) is preset to 1 if no value has been previously entered. Key in the desired
numerical value using the ten digit keys and press ENTER. This will immediately
change the timing of the desired glue length. If your glue pattern ends too early, that
is the glue pattern does not extend to the end of the board, key in a larger number
and press ENTER. Conversely, if the glue pattern extends beyond the trailing edge
of the board, too much glue at the end of the board, key in a smaller number and
press ENTER.
Example: If your setting is at 433 and the glue is ending early - too far in from the
trailing edge - press F2, key in 470 and press ENTER. Now if you find the glue pattern is
ending a little late - glue is extruding beyond the edge of the board - key in 450 and
press ENTER. This can be continued until pattern is set exactly where you want the glue
to stop.
Menu
Title
Numerical Value for
Glue Start
- GLUE LENGTH DELAY _100
Block Counter
_175
Start
Length
Reset
Function Keys
Flush
Board Count Title
Numerical Value for
Board Count
F2 Key
ESC Key
SCROLL DN
Key
856_0412_0_ 12.01.10
Numeral Keys
ENTER Key
10
OPERATOR INTERFACE FEATURES
BASIC FUNCTIONS AND ADJUSTMENTS
Glue Length Delay continues
This adhesive pattern setting will remain constant as long as your chain/conveyor
speed remains constant. If the stock material size is changed and the feed speed
increases or decreases, you will have to adjust the settings accordingly. It is a good
idea to write down the appropriate settings, once they have been established, so
that every material size will have a predetermined setting for quick changeovers.
* Please note that the glue spread should be adjusted so that the glue pattern is 1/16"
to 3/16" away from both the leading and trailing edge to eliminate excessive
“squeeze-out”. You will have to adjust this distance according to your glue type,
viscosity, press pressure and joint type. Typically, you should start with the
adjustment setting so that pattern is 1/16" from the edges and adjust the pattern if
necessary after viewing the finished boards from the press. You should see only a
small few small “dots” of glue squeeze out on either end.
**The running board/block count is located on the 4th line of this screen. This is to let
you know the exact number of boards/blocks that have been run past the glue
applicator. For directions on how to reset this counter to zero, please refer to Block
Counter Reset in this Manual.
Menu
Title
Numerical Value for
Glue Length
- GLUE LENGTH DELAY _305
Block Counter
_203
Start
Length
Reset
Flush
Board Count Title
Numerical Value for
Board Count
Function Keys
ESC Key
SCROLL DN
Key
ENTER Key
856_0412_0_ 12.01.10
Numeral Keys
11
OPERATOR INTERFACE FEATURES
BASIC FUNCTIONS AND ADJUSTMENTS
Block Counter Reset
To access the Block Counter Reset Screen, press the F3 function key, top row third
from the left. On some screens, the F3 key may be assigned to another purpose.
Return to the main menu as described on Main Menu in this Manual and view the F1F4 function key assignments, then press F3.
To reset the block count, press “1" on the numerical keypad and press ENTER. If you
press “3" on the numerical keypad and press ENTER, the counter will remain at the
present count. The Block Count on the 4th line will indicate that you have reset the
Block Counter.
Menu
Title
Selection Options
Start
- BLOCK COUNTER RESET?
1 = Y 3 = N _0
_203
Length
Reset
Function Keys
Flush
Selection Variable
Numerical Value for
Board Count
F3 Key
ESC Key
SCROLL DN Key
Numeral Keys
856_0412_0_ 12.01.10
ENTER Key
12
OPERATOR INTERFACE FEATURES
BASIC FUNCTIONS AND ADJUSTMENTS
Flush Switch
Apquip 856 Control Enclosures have a remote Flush Switch mounted on the
enclosure door. Pressing the Flush Switch will activate the Flush Input of the PLC and
the PLC will activate the Air Valve to open the Adhesive Valve and Flush or Purge the
adhesive through the system.
Use the Flush Switch to prime the adhesive delivery system or purge air from the
Applicator when starting gluing operations. Use the Flush Switch when performing a
cleaning operation using warm water to remove adhesive or adhesive residue from
the supply lines and Adhesive Valve as an end-of-day, or end-of-week maintenance
or prior to performing a rebuild maintenance on the Adhesive Valve.
Press the F4 function key, (top right corner of the keypad), to acess the Flush Screen
if in any F1-F4 Screen. On some screens, the F4 key may be assigned to another
purpose. Return to the main menu as described on Main Menu in this Manual and
view the F1-F4 function key assignments, then press F4 to access the Service Screen.
While on the Service Screen, press F4 to move to the Flush Screen. (Shown on the
next page.)
Once the flush screen (shown on next page) is displayed, press the F4 key to hold
the Adhesive Valve in the open position and flush the valve. Release the F4 key to
close the valve and end the flush operation.
Menu
Title
M
E
N
U
F1 Glue Start
(⇓)
F2 Glue Length
F3 Reset F4 Service
Blocks
232
F4 Key
Function Keys
ESC Key
SCROLL DN Key
Numeral Keys
856_0412_0_ 12.01.10
ENTER Key
13
OPERATOR INTERFACE FEATURES
BASIC FUNCTIONS AND ADJUSTMENTS
Flush Switch continues
The flush switch should be used to flush adhesive from the system with water or
cleaning fluid. When using this switch for this purpose, please remove the applicator
head, insert the flush hose, and have a bucket to catch wash fluid coming out of the
flush hose. Remember that cleaning fluid is generally much less viscous than the
adhesive and will consequently shoot out of the flush hose under considerable
pressure. Please wear appropriate eye protection while completing this task.
The flush switch may also be used to “prime” the adhesive in the system. This is
often useful when starting the system up for the shift or after a break. By depressing
and quickly releasing the Flush Switch you can assure there is glue in the applicator
head. If this is not done, it may result in an inadequate glue spread on the first few
boards.
The Manual Valve Operator installed on the Door is the preferred method to perform
a flush operation. This will reduce excess wear on the soft membrane switch of the
HMI and save costly repairs. The Manual Valve Operator can be pressed at any time
to perform Flush operations. The HMI will not display the Flush Screen when
performing Flush operations using the Manual Valve Operator.
Menu
Title
------ FLUSH -----Press and hold F4
to FLUSH the system
Start
Length
Reset
Flush
F4 Key
Function Keys
ESC Key
SCROLL DN Key
Numeral Keys
856_0412_0_ 12.01.10
ENTER Key
14
OPERATOR INTERFACE FEATURES
BASIC FUNCTIONS AND ADJUSTMENTS
Service Information
Press the F4 function key (second row, right side of the keypad) to access the
Service Information Screen. On some screens, the F4 key may be assigned to
another purpose. Return to the main menu as described on Main Menu in this
Manual and view the F1-F4 function key assignments, then press F4.
This screen lists our company name, address, phone number and PLC software
version number. Please have the PLC software version readily available when
calling for service help or information so that we will know the configuration of your
PLC control system.
If for some reason your operator interface panel is inoperative, you can obtain the
software version number from the identification labels place on each PLC and HMI
panel or on the System nameplate. You can reach a service technician by phone at
(831) 642-6565 or by fax at (831) 642-6563. In addition, you may e-mail us at
[email protected].
Apquip LLC Ver x.x
Service (831) 642-6565
5 Harris Court Bldg Q
Monterey, CA 93940
856_0412_0_ 12.01.10
F4 Key
15
OPERATOR INTERFACE FEATURES
PROGRAMMING ASSISTANCE
If you have difficulties or problems with programming the settings, parameters, or
operation of any feature of the Apquip 856, please contact Apquip Tech Help by
email - [email protected], fax - (831) 642-6563, or phone - (831) 642-6565.
856_0412_0_ 12.01.10
If possible, take a phone out to the 856 Control panel location and call us at (831)
642-6565 with your questions. We will then walk you through the programming of
your 856 Control System.
16
OPERATOR INTERFACE FEATURES
ADDITIONAL FEATURES
REMOTE FLUSH OR PURGE:
The Remote Flush Switch Input can be used for flushing operations without going through
the HMI menus. When connected per the Wiring Diagram, the Remote Flush Switch can
be mounted to the 856, or wired to another more convenient switch box. This will reduce repeated use of the HMI membrane switches and extend the life of the HMI.
The Remote Flush Switch Input can also be connected to external controls and to allow
an external control system to initiate a Flush operation using the 856. This method may
be used by third party meter-mixer devices to purge the adhesive lines before the
mixed adhesive begins to set up.
856_0412_0_ 12.01.10
Please contact your Apquip representative with questions regarding Remote Flush / Purge.
17
OPERATOR INTERFACE FEATURES
ADDITIONAL FEATURES
LIQUID LEVEL MONITOR:
The Liquid Level Sensor is used when it is important to know that the adhesive level is
approaching a low level condition. The Sensor detects the presence of the adhesive in
a tank and as long as the adhesive is above the location of the Sensor, there is no error.
When the level falls below the position of the Sensor, the Red Lamp on the side of the
856 will light to indicate a low level condition.
Careful adjustment of the Sensor gain is required to allow detection of the adhesive as
far as possible inside the tank. Improper adjustment and adhesive residue along the
inner surfaces of the tank may cause inaccurate level readings.
856_0412_0_ 12.01.10
Please contact your Apquip representative with questions regarding Liquid Level Monitor.
18
OPERATOR INTERFACE FEATURES
ADDITIONAL FEATURES
CHAIN BREAK DELAY:
The Chain Break Delay Function allows gluing for a fixed amount of time after the chain
signal is cut off. This is useful in the event a board enters the gluing station just as the
power is cut off to the chain. Without the Chain Break Delay, the board may be partially
glued and unusable. The Chain Break Delay allows the board to be completely glued, if
it has started. This all depends on how far the chain moves when power is removed.
To access the Chain Break Delay parameters from the Main Menu, press F4 to display
the Service Screen, then press the DN arrow to move down to the Chain Break Delay
parameter screen.
Use the DN arrow to position the cursor on the parameter you wish to change, then key
in the new value and press enter to store the change.
Parameters for the Chain Break Delay Function:
Name
Units
Chain Break Delay
10 (x 10 msec)
Resume Length
1 (x 1 msec)
Initial Value
100 msec
1 msec
The Chain Break Delay is the amount of time that gluing will be allowed to continue
after the Chain power is removed. Set this time to the amount of time it takes for the
conveyor to coast down to a stop when the power is removed. This will ensure that there
is glue on the board up to the time the chain
has stopped.
1) Should the Chain break after a board has
activated the sensor but before the glue has
started: Gluing will begin at the completion
of the Start Time, and gluing will end at the
completition of the Chain Break Delay Time
as the conveyor is stopped.
Chain Break Delay
00000 x 10ms
Resume Length
00000 ms
Menu
Up
Down
3) Should the Chain break while the run
Length is in progress: Gluing will continue
until the end of the Length Time or Chain
Break Delay Time, whichever occurs first.
19
856_0412_0_ 12.01.10
2) Should the Chain break while gluing is in
progress: Gluing will continue until the end
of the Chain Break Delay Time as the conveyor is stopped.
OPERATOR INTERFACE FEATURES
ADDITIONAL FEATURES
RESUME RAMP-UP DELAY:
The Resume Ramp-Up Delay is used to continue applying glue as the chain signal is
activated and the conveyor begins to move. Without the Resume Ramp-Up Delay, the
board may be partially glued and unusable. The Resume Ramp-Up Delay allows the
board to be completely glued when the Chain is started. This all depends on how far
the chain moves when power is removed.
Parameters for the Resume Ramp-Up Delay Function:
Name
Units
Initial Value
Chain Break Delay
10 (x 10 msec)
100 msec
Resume Length
1 (x 1 msec)
1 msec
Resume Length is the maximum length of time the glue valve will be when the Chain is
restored after the board has passed the view of the sensor. This is longer than Run
Length (F2) setting as the conveyor is ramping up to speed after the Chain has been
restored.
Set the Chain Break Delay equal to the time it takes the conveyor to stop when the chain
is removed. Set the Resume Length to 20% greater than the Run Length.
1) If the Chain is restored while a board is in view of the sensor: Gluing will begin
immediately and end at the completion of the Run Length Timer.
2) If the Chain is restored from a Chain break while gluing is in the Run Length: Gluing
will start immediately and continue until the end of the adjusted Resume Length calculated as follows.
Adj Resume Length = Resume Length - (Run Length used) - (Chain Break Delay)
Ex: Run Length = 200msec / Resume Length = 240msec / Chain Break Delay = 100msec
Gluing occurred 50msec into the Run Length therefore 50msec used
Adj Resume Length
=
240msec - 50msec - 100msec
=
90msec
When the Chain is restored, Gluing will begin immediately and gluing will stop after
the end of the Adjusted Resume Length or 90msec.
856_0412_0_ 12.01.10
3) If the Chain is restored and gluing has restarted but a new board enters the view of
the Sensor: Gluing is stopped and Start Time begins for the new board entering the
gluing station.
Please contact your Apquip representative with questions regarding Chain-Break / Resume RampUp Delay.
20
OPERATOR INTERFACE FEATURES
ADDITIONAL FEATURES
TIMED VALVE PURGE:
To access the Valve Purge parameters from the Main Menu, press F4 to display the
Service Screen. Press the DN arrow to move down to the Chain Break Delay parameter
screen, the press the DN arrow to move down to the Valve Purge parameter screen.
Use the DN arrow to position the cursor on the parameter you wish to change, then key
in the new value and press enter to store the change.
Parameters for the Valve Purge Function.
Name
Units
Purge Delay
1 (x 1 min)
Purge Length
1 (x 100 msec)
# Cycles
0-99
Initial Value
1 min
100 msec
0 operations
Purge Delay is the amount of time that will pass after the last gluing operation before
the Purge Function will open the Glue Valve to purge the adhesive. It is also the time
betwen purge cycles. Set the Purge Delay time short enough to prevent the adhesive
from curing in the Adhesive Valve and Applicator.
Purge Length is the amount of time the Adhesive Valve will open to purge adhesive
from the valve. Set the Purge Length time long enough to move the adhesive through
the application system.
# Cycles is the number of purge operations
you wish to perform before the purge function should stop. A setting of 0 will place the
Purge Function in standby.
Please contact your Apquip representative with
questions regarding Timed Purge.
Timed Purge Function
Delay
00000 min
Length
00000 x100ms
# Cycles
00
Up
856_0412_0_ 12.01.10
Menu
21
OPERATOR INTERFACE FEATURES
OPTIONAL FUNCTIONS
SERIES (BOARD SKIP) OPERATION
Series Operation allows the operator to quickly program the sequence for gluing a
panel or particular lay-up. This feature is used when edge gluing or face laminating
surfaces that need an occasional “dry” board.
To access the Series Status Screen, press the K1 Function Key, second row on
the left. On some screens, the K1 key may be assigned to another purpose. Press the
ESC key to return to the main menu and view the F1- F4 function key assignments,
then press K1.
The Series function can be used when gluing a single face or edge or dual faces or
edges. The dual face or edge systems will need two valves, two applicator heads
and two mounting/ positioning brackets. However, both gluing operations must
directly oppose each other as the timimg of both gluing operations will not be
differentiated from one side to the other.
NOTE: On a single edge or face gluing system, you will only utilize part of the
program. You will only program for the right side board and disregard the left side.
You will utilize the glue on right side only or no glue on either side.
Menu
Title
M
E
N
U
K1
K2
K3
K4
Series
(UP)
Glue Detection
Glue Marker
Glue Rate Info
Function Keys
ESC Key
K1 Key
SCROLL DN Key
Numeral Keys
856_0412_0_ 12.01.10
ENTER Key
22
OPERATOR INTERFACE FEATURES
OPTIONAL FUNCTIONS
SERIES OPERATION: Setup and Installation
Setup for Series Operation is the same as Setup for Edge Gluing or Face Gluing
Operations.
The Series function can be used when gluing a single face or edge or dual faces or
edges. The dual face or edge systems will need two valves, two applicator heads
and two mounting/ positioning brackets. However, both gluing operations must
directly oppose each other as the timimg of both gluing operations will not be
differentiated from one side to the other.
856_0412_0_ 12.01.10
Please contact your Apquip representative with questions regarding Series (Board
Skip) setup.
23
OPERATOR INTERFACE FEATURES
OPTIONAL FUNCTIONS
SERIES OPERATION: Series Status
The Series program can be set up for patterns involving up to 99 boards. The pattern
can be set-up so that each individual board can have glue on both sides, glue on
either the left or right side or no glue on either side. If you are gluing the faces, it is
the same setup but you will have to regard the left side as the bottom face and the
right side as the top face or visa versa.
The Series Status Screen displays the count of the next Board to be glued, the total
number of boards in the Series, and the side to glue value for that board. The screen
will display the board number and the side to glue value for each board in the series
as it passes through the system.
Next Board #
Menu
Title
Side to Glue
--- SERIES STATUS --NEXT PC = 1/ 4
Glue (RIGHT) Side(s)
(RST) (DOWN)
Total Boards
F4 Key
Function Keys
ESC Key
SCROLL DN Key
Numeral Keys
856_0412_0_ 12.01.10
ENTER Key
24
OPERATOR INTERFACE FEATURES
OPTIONAL FUNCTIONS
SERIES OPERATION: Series Status continues
The below screen shows board #1 as the next board (to go through the system) of a
series of 4 boards, and the glue will be applied on the right side of the board.
Press F2 to reset <RST> the Series to the first board in that series. This is useful if you
want to start the series over at the beginning after processing a gew boards.
Press F4 to move down <DOWN> one menu level to the Program Series Data screen.
Next Board #
Menu
Title
Side to Glue
--- SERIES STATUS --NEXT PC = 1/ 4
Glue (RIGHT) Side(s)
(RST) (DOWN)
Function Keys
Total Boards
F4 Key
F2 Key
ESC Key
SCROLL DN Key
Numeral Keys
856_0412_0_ 12.01.10
ENTER Key
25
OPERATOR INTERFACE FEATURES
OPTIONAL FUNCTIONS
SERIES OPERATION: Program Series Data
The Program Series Data Screen is used to enter or change the value for Total Pieces
in the Series.
The Screen will prompt you to input the total number of pieces in your series. Key in
the number of pieces in your series using the numeral keys then press “enter”.
Press F4 to move down <DOWN> one menu level to the Enter Sides to Glue screen.
Press F1 to move up <UP> one menu level to the Series Status screen.
NOTE: It is very important that you press enter after every pattern value change in
order for the PLC to accept the new value. If you do not press enter, your change will not
be stored and the pattren will remain at the previously programmed value.
Menu
Title
F1 Key
Total Pieces in Series
PROGRAM SERIES DATA
Input total pieces
in series:
4 (1-99)
(UP)
(DOWN)
F4 Key
Function Keys
ESC Key
SCROLL DN Key
Numeral Keys
856_0412_0_ 12.01.10
ENTER Key
26
OPERATOR INTERFACE FEATURES
OPTIONAL FUNCTIONS
SERIES OPERATION: Enter Sides to Glue
The Enter Sides to Glue screen is used to enter or change the Side to Glue value for
each board in th eseries.
The screen will prompt you to enter the desired board program. The cursor will be
flashing a zero (if the unit has never been programmed before) for the first board of
your series. The number zero signifies that you don’t want glue on either edge. This
number can be replaced with either 1, 2, or 3 by keying in the appropriate number
using the numeral keys and pressing “enter”.
The four choices available are 0, 1, 2 and 3. The numbers signify the following:
0 = no glue on either side
1 = glue on the left side only
2 = glue on the right side only
3 = glue on both sides
Menu
Title
Enter Sides to Glue
(0=N, 1=L, 2=R, 3=BOTH)
Pc No =
1/ 4: 2
(UP)
(PREV)(NEXT)
Side to Glue Value for
Board # 1 of 4
Function Keys
ESC Key
SCROLL DN Key
Numeral Keys
856_0412_0_ 12.01.10
ENTER Key
27
OPERATOR INTERFACE FEATURES
OPTIONAL FUNCTIONS
SERIES OPERATION: Enter Sides to Glue continues
Press F3 to move to the previous <PREV> board in the series.
Press F4 to move to the next <NEXT> board in the series.
Verify your board series program using the F3 and F4 buttons before exiting this screen.
Press F1 to move up <UP> one menu level to the Program Series Data Screen.
NOTE: It is very important that you press enter after every pattern value change in
order for the PLC to accept the new value. If you do not press enter, your change will not
be stored and the pattern will remain at the previously programmed value.
Menu
Title
F1 Key
Enter Sides to Glue
(0=N, 1=L, 2=R, 3=BOTH)
Pc No =
1/ 4: 2
(UP)
(PREV)(NEXT)
F3 Key
F4 Key
Function Keys
ESC Key
SCROLL DN Key
Numeral Keys
856_0412_0_ 12.01.10
ENTER Key
28
OPERATOR INTERFACE FEATURES
OPTIONAL FUNCTIONS
SERIES PROGRAM EXAMPLE: Program Series Data
Let’s program a series of 6 boards gluing the right side with board 1 dry.
1.
Proceed to the Series Status Screen.
Press K4 to move to the Series Status screen. The screen will display the series
program that was last used.
Press F4 to move down <DOWN> to the Program Series Data screen. The cursor will
blink on the current Total Pierces value. Press numeral 6 and then press “enter” to
store the new value for Total Pieces.
2.
Enter 6 as the Total Pieces value on the Program Series Data Screen.
Press F4 to move down <DOWN> to the Enter Sides to Glue Screen.
NOTE: It is very important that you press enter after every pattern value change in
order for the PLC to accept the new value. If you do not press enter, your change will not
be stored and the pattern will remain at the previously programmed value.
Menu
Title
F1 Key
PROGRAM SERIES DATA
Input total pieces
in series:
6 (1-99)
(UP)
(DOWN)
Total Pieces in Series
F4 Key
Function Keys
ESC Key
SCROLL DN Key
Numeral Keys
856_0412_0_ 12.01.10
ENTER Key
29
OPERATOR INTERFACE FEATURES
OPTIONAL FUNCTIONS
SERIES PROGRAM EXAMPLE: Enter Sides to Glue
3.
Enter 0 for the board Program for board #1 on the Enter Sides to Glue Screen.
This will be the dry board.
Board 1 of 6 is displayed on the Enter Sides to Glue Screen. The cursor will blink at
the Side to Glue value. The screen may display 0, or ##, or any previously
programmed value.
Press numeral 0 and then press “enter” to store the new value for Sides to Glue for
board 1.
Press F4 <NEXT> to move to the next board in the series.
NOTE: It is very important that you press enter after every pattern value change in
order for the PLC to accept the new value. If you do not press enter, your change will not
be stored and the pattern will remain at the previously programmed value. If you make
a mistake, press the correct numeral key and press “enter” again. Press F3 <PREV> to
move to the previous board in the series. Key in the correct option 0, 1, 2, or 3, press
“enter” to store the correction. Press F3 or F4 to move in the series to make corrections.
Menu
Title
F1 Key
Enter Sides to Glue
(0=N, 1=L, 2=R, 3=BOTH)
Pc No =
1/ 6: 0
(UP)
(PREV)(NEXT)
No Glue on Board #1
F4 Key
F3 Key
Function Keys
ESC Key
SCROLL DN Key
Numeral Keys
856_0412_0_ 12.01.10
ENTER Key
30
OPERATOR INTERFACE FEATURES
OPTIONAL FUNCTIONS
SERIES PROGRAM EXAMPLE: Enter Sides to Glue continues
4.
Enter 2 for the board Program for board #2 on the Enter Sides to glue Screen.
Glue will be on the Right side.
Board 2 of 6 is displayed on the Enter Sides to Glue screen. The cursor will blink at
the Side to Glue value. The screen may display 0, or ##, or any previously
programmed value.
Press numeral 2 and then press “enter” to store the new value for Sides to Glue for
board 2.
Press F4 <NEXT> to move to the next board in the series.
NOTE: It is very important that you press enter after every pattern value change in
order for the PLC to accept the new value. If you do not press enter, your change will not
be stored and the pattern will remain at the previously programmed value. If you make
a mistake, press the correct numeral key and press “enter” again. Press F3 <PREV> to
move to the previous board in the series. Key in the correct option 0, 1, 2, or 3, press
“enter” to store the correction. Press F3 or F4 to move in the series to make corrections.
Menu
Title
F1 Key
Enter Sides to Glue
(0=N, 1=L, 2=R, 3=BOTH)
Pc No =
2/ 6: 2
(UP)
(PREV)(NEXT)
Glue Right side of
Board #2
F4 Key
F3 Key
Function Keys
ESC Key
SCROLL DN Key
Numeral Keys
856_0412_0_ 12.01.10
ENTER Key
31
OPERATOR INTERFACE FEATURES
OPTIONAL FUNCTIONS
SERIES PROGRAM EXAMPLE: Enter Sides to Glue continues
5.
Enter 2 for the board Program for board #3 on the Enter Sides to Glue Screen.
Glue will be on the right side.
Board 3 of 6 is displayed on the Enter Sides to Glue screen. The cursor will blink at
the Side to Glue value. The screen may display 0, or ##, or any previously
programmed value.
Press numeral 2 and then press “enter” to store the new value for Sides to Glue for
board 3.
Press F4 <NEXT> to move to the next board in the series.
NOTE: It is very important that you press enter after every pattern value change in
order for the PLC to accept the new value. If you do not press enter, your change will not
be stored and the pattern will remain at the previously programmed value. If you make
a mistake, press the correct numeral key and press “enter” again. Press F3 <PREV> to
move to the previous board in the series. Key in the correct option 0, 1, 2, or 3, press
“enter” to store the correction. Press F3 or F4 to move in the series to make corrections.
Menu
Title
F1 Key
Glue Right Side of
Board #3
Enter Sides to Glue
(0=N, 1=L, 2=R, 3=BOTH)
Pc No =
3/ 6: 2
(UP)
(PREV)(NEXT)
F4 Key
F3 Key
Function Keys
ESC Key
SCROLL DN Key
Numeral Keys
856_0412_0_ 12.01.10
ENTER Key
32
OPERATOR INTERFACE FEATURES
OPTIONAL FUNCTIONS
SERIES PROGRAM EXAMPLE: Enter Sides to Glue continues
6.
Enter 2 for the board Program for board #4 on the Enter Sides to Glue Screen.
Glue will be on the Right Side.
Board 4 of 6 is displayed on the Enter Sides to Glue screen. The cursor will blink at
the Side to Glue value. The screen may display 0, or ##, or any previously
programmed value.
Press numeral 2 and then press “enter” to store the new value for Sides to Glue for
board 4.
Press F4 <NEXT> to move to the next board in the series.
NOTE: It is very important that you press enter after every pattern value change in
order for the PLC to accept the new value. If you do not press enter, your change will not
be stored and the pattern will remain at the previously programmed value. If you make
a mistake, press the correct numeral key and press “enter” again. Press F3 <PREV> to
move to the previous board in the series. Key in the correct option 0, 1, 2, or 3, press
“enter” to store the correction. Press F3 or F4 to move in the series to make corrections.
Menu
Title
F1 Key
Enter Sides to Glue
(0=N, 1=L, 2=R, 3=BOTH)
Pc No =
4/ 6: 2
(UP)
(PREV)(NEXT)
Glue Right Side of
Board #4
F4 Key
F 3 Key
Function Keys
ESC Key
SCROLL DN Key
Numeral Keys
856_0412_0_ 12.01.10
ENTER Key
33
OPERATOR INTERFACE FEATURES
OPTIONAL FUNCTIONS
SERIES PROGRAM EXAMPLE: Enter Sides to Glue continues
7.
Enter 2 for the board Program for board #5 on the Enter Sides to Glue Screen.
Glue will be on the Right Side.
Board 5 of 6 is displayed on the Enter Sides to Glue screen. The cursor will blink at
the Side to Glue value. The screen may display 0, or ##, or any previously
programmed value.
Press numeral 2 and then press “enter” to store the new value for Sides to Glue for
board 5.
Press F4 <NEXT> to move to the next board in the series.
NOTE: It is very important that you press enter after every pattern value change in
order for the PLC to accept the new value. If you do not press enter, your change will not
be stored and the pattern will remain at the previously programmed value. If you make
a mistake, press the correct numeral key and press “enter” again. Press F3 <PREV> to
move to the previous board in the series. Key in the correct option 0, 1, 2, or 3, press
“enter” to store the correction. Press F3 or F4 to move in the series to make corrections.
Menu
Title
F1 Key
Enter Sides to Glue
(0=N, 1=L, 2=R, 3=BOTH)
Pc No =
5/ 6: 2
(UP)
(PREV)(NEXT)
Function Keys
Glue Right Side of
Board #5
F4 Key
F 3 Key
ESC Key
SCROLL DN Key
Numeral Keys
856_0412_0_ 12.01.10
ENTER Key
34
OPERATOR INTERFACE FEATURES
OPTIONAL FUNCTIONS
SERIES PROGRAM EXAMPLE: Enter Sides to Glue continues
8.
Enter 2 for the board Program for board #6 on the Enter Sides to Glue Screen.
Glue will be on the Right Side.
Board 6 of 6 is displayed on the Enter Sides to Glue screen. The cursor will blink at
the Side to Glue value. The screen may display 0, or ##, or any previously
programmed value.
Press numeral 2 and then press “enter” to store the new value for Sides to Glue for
board 6.
Press F4 <NEXT> to move to the next board in the series.
NOTE: It is very important that you press enter after every pattern value change in
order for the PLC to accept the new value. If you do not press enter, your change will not
be stored and the pattern will remain at the previously programmed value. If you make
a mistake, press the correct numeral key and press “enter” again. Press F3 <PREV> to
move to the previous board in the series. Key in the correct option 0, 1, 2, or 3, press
“enter” to store the correction. Press F3 or F4 to move in the series to make corrections.
Menu
Title
F1 Key
Enter Sides to Glue
(0=N, 1=L, 2=R, 3=BOTH)
Pc No =
6/ 6: 2
(UP)
(PREV)(NEXT)
Glue Right Side of
Board #6
F4 Key
F3 Key
Function Keys
ESC Key
SCROLL DN Key
Numeral Keys
856_0412_0_ 12.01.10
ENTER Key
35
OPERATOR INTERFACE FEATURES
OPTIONAL FUNCTIONS
SERIES PROGRAM EXAMPLE: Enter Sides to Glue continues
9.
Verify the board program for each board back to board #1.
Press F3 <PREV> to move to the previous board in the series. Board 5 should have 2
as the Sides to Glue value.
Press F3 <PREV> to move to the previous board in the series. Board 4 should have 2
as the Sides to Glue value.
Press F3 <PREV> to move to the previous board in the series. Board 3 should have 2
as the Sides to Glue value.
Press F3 <PREV> to move to the previous board in the series. Board 2 should have 2
as the Sides to Glue value.
Press F3 <PREV> to move to the previous board in the series. Board 1 should have 0
as the Sides to Glue value.
Press F1 <UP> to move up to the Program Series Data screen.
Press F1 <UP> again to move up to the Series Status screen.
No Glue on Board #1
Menu
Title
F1
Enter Sides to Glue
(0=N, 1=L, 2=R, 3=BOTH)
Pc No =
1/ 6: 0
(UP)
(PREV)(NEXT)
F4 Key
F3 Key
Function Keys
ESC Key
SCROLL DN Key
Numeral Keys
856_0412_0_ 12.01.10
ENTER Key
36
OPERATOR INTERFACE FEATURES
OPTIONAL FUNCTIONS
SERIES PROGRAM EXAMPLE: Enter Sides to Glue continues
10.
or
Observe the program as boards are sent through the system. Setup the
System to run boards for this test. Place the System in either Constant Width
Variable Width Mode.
Press K4 to view the Series Status screen.
Press F2 <RST> on the Series Status screen to reset the program to the first board in
the series. The screen below shows that the next board to pass through is board 1 in
a series of 6 boards and glue will be applied to no sides of the board.
As the first piece passes, the board sensor is activated and no glue is applied to the
board.
The board count will increment.
Menu
Title
F2 Key
No Glue on
Board #1 of 6
--- SERIES STATUS --NEXT PC = 1/ 6
Glue (
NO) Side(s)
(RST)
(DOWN)
F4 Key
Function Keys
ESC Key
SCROLL DN Key
Numeral Keys
856_0412_0_ 12.01.10
ENTER Key
37
OPERATOR INTERFACE FEATURES
OPTIONAL FUNCTIONS
SERIES PROGRAM EXAMPLE: Enter Sides to Glue continues
11.
Observe the program as boards are sent through the system.
The screen below shows that the next board to pass through is board 2 in a series of 6
boards and glue will be applied to the right side of the board.
As the second piece passes, the board sensor is activated and glue is applied to the
right side of the board.
The board count will increment.
Menu
Title
F2 Key
--- SERIES STATUS --NEXT PC = 2/ 6
Glue (RIGHT) Side(s)
(RST)
(DOWN)
Glue Right Side
of Board #2 of 6
F4 Key
Function Keys
ESC Key
SCROLL DN Key
Numeral Keys
856_0412_0_ 12.01.10
ENTER Key
38
OPERATOR INTERFACE FEATURES
OPTIONAL FUNCTIONS
SERIES PROGRAM EXAMPLE: Enter Sides to Glue continues
12.
Observe the program as boards are sent through the system.
The screen below shows that the next board to pass through is board 3 in a series of
6 boards and glue will be applied to the right side of the board.
As the third piece passes, the board sensor is activated and glue is applied to the
right side of the board.
The board count will increment.
Menu
Title
F2 Key
Glue Right Side of
Board #3 of 6
--- SERIES STATUS --NEXT PC = 3/ 6
Glue (RIGHT) Side(s)
(RST)
(DOWN)
F4 Key
Function Keys
ESC Key
SCROLL DN Key
Numeral Keys
856_0412_0_ 12.01.10
ENTER Key
39
OPERATOR INTERFACE FEATURES
OPTIONAL FUNCTIONS
SERIES PROGRAM EXAMPLE: Enter Sides to Glue continues
13.
Observe the program as boards are sent through the system.
The screen below shows that the next board to pass through is board 5 in a series of
6 boards and glue will be applied to the right side of the board.
As the fourth piece passes, the board sensor is activated and glue is applied to the
right side of the board.
The board count will increment.
Menu
Title
F2 Key
Glue Right Side of
Board #4 of 6
--- SERIES STATUS --NEXT PC = 4/ 6
Glue (RIGHT) Side(s)
(RST)
(DOWN)
F4 Key
Function Keys
ESC Key
SCROLL DN Key
Numeral Keys
856_0412_0_ 12.01.10
ENTER Key
40
OPERATOR INTERFACE FEATURES
OPTIONAL FUNCTIONS
SERIES PROGRAM EXAMPLE: Enter Sides to Glue continues
14.
Observe the program as boards are sent through the system.
The screen below shows that the next board to pass through is board 5 in a series of
6 boards and glue will be applied to the right side of the board.
As the fifth piece passes, the board sensor is activated and glue is applied to the
right side of the board.
The board count will increment.
Menu
Title
F2 Key
--- SERIES STATUS --NEXT PC = 5/ 6
Glue (RIGHT) Side(s)
(RST)
(DOWN)
Glue Right Side of
Board #5 of 6
F4 Key
Function Keys
ESC Key
SCROLL DN Key
Numeral Keys
856_0412_0_ 12.01.10
ENTER Key
41
OPERATOR INTERFACE FEATURES
OPTIONAL FUNCTIONS
SERIES PROGRAM EXAMPLE: Enter Sides to Glue continues
15.
Observe the program as boards are sent through the system.
The screen below shows that the next board to pass through is board 6 in a series of
6 boards and glue will be applied to the right side of the board.
The board count will increment to the beginning of the series.
as there are no more boards left in the series.
Menu
Title
F2 Key
--- SERIES STATUS --NEXT PC = 6/ 6
Glue (RIGHT) Side(s)
(RST)
(DOWN)
Glue Right Side of
Board #6 of 6
F4 Key
Function Keys
ESC Key
SCROLL DN Key
Numeral Keys
856_0412_0_ 12.01.10
ENTER Key
42
OPERATOR INTERFACE FEATURES
OPTIONAL FUNCTIONS
GLUE DETECTION FUNCTION
The Glue detection functions of this unit will allow the operator to determine if the
proper amount of glue has been applied to a given work piece, either a finger
jointed block or an edged glued strip. Once a proper threshold level has been
determined for a given species of wood and glue type, the operator can set a
numeric value through the operator interface panel. If the adhesive reading on the
given work piece drops below the set level, the board will be rejected. Conversely,
if the reading on the given work piece stays above the given threshold, the board
will continue through the manufacturing process.
If the work piece is rejected, the board will either be marked or physically removed
from the manufacturing process. The marking or removal output from the PLC can be
delayed so that the dye nozzle or removal equipment can be located downstream
from the glue detection lens. The actual marking or removal equipment will vary
according to different customer requirements.
The glue detection unit will only be “looking” for a defective adhesive application
when a board or block is directly in front of the lens so the blank areas between lugs
or boards will not be seen as defects.
856FM
Control
Enclosure
A
B
Frame
Sensors
856_0412_0_ 12.01.10
Wood
Sensor
Glue Sensor
43
OPERATOR INTERFACE FEATURES
OPTIONAL FUNCTIONS
GLUE DETECTION: Setup and Installation
Glue Detection and Framing Sensors are typically installed within 12” downstream of
the Adhesive Applicator, and should be located where the block is still on the Lug,
riding on the Bed Rail, and optimally under the Air Bag. The Frame Sensors are to be
mounted above the lumber similar to the drawing below.
The Glue Detection Sensor is to be mounted approximately 2” away from the face of
the glued fingers at the centerline of the Frame Sensors. When the lumber is below
the Frame Sensors and they are both active, the Glue Sensor reading is monitored to
determine if the glue level is above the minimum setting, and the apropriate is
action taken when the reading is low.
Marker components should be installed above the lumber and downstream of the
Glue Sensor. The maximum distance from the Glue sensor should be no more than
the conveyor lug spacing.
856_0412_0_ 12.01.10
Please contact your Apquip representative with questions regarding Glue Detection
setup.
44
OPERATOR INTERFACE FEATURES
OPTIONAL FUNCTIONS
GLUE DETECTION FUNCTION: Glue Detect Status
From the Main Menu, press the K2 function key, second row, second from the left to
to to the Glue Detection Status Screen,
The first column, ACTUAL value is a display-only field to show the current
Luminescence Sensor reading for each Sensor and cannot be changed. As the return
signal from the Glue Detect Sensors change due to variations in luminescence in the
amount of glue on the joint, this display value will change. The display range is from
0 to 1000.
The second column, THRESHOLD value is an editable field to set the minimum
reading which is allowed to pass during the inspection. If the Glue amount is lower
than the Reject Threshold for either Sensor, then an error condition is set and the
Error Lamp is momentarily lighted and the error is added to the Glue Detect Marker
queue. Both Readings must be above the Reject Threshold for a good board.
Menu
Title
Sensor #1
Sensor #2
K2 Key
Actual Glue reading
from Luminescence
Sensors
---- GLUE DETECT ---#1
#2
ACTUAL
40
40
THRESHOLD
450
450
MENU
Previously set
Reject Threshold
F4 Key
Function Keys
ESC Key
SCROLL DN Key
Numeral Keys
856_0412_0_ 12.01.10
ENTER Key
45
OPERATOR INTERFACE FEATURES
OPTIONAL FUNCTIONS
GLUE DETECTION FUNCTION: Set Reject Threshold
When moving to the Glue Detect Status Screen, the flashing cursor will be located at
the numerical value field for the Reject Threshold on Sensor #1. Change this setting
by keying in a numerical value from zero to 1000 then press “enter” to store the new
value. Use the DN Key to move the cursor to the Reject Threshold on Sensor #2 and
change the setting to the same value as Sensor #1. The program will not accept any
value higher than 1000. This will set the threshold at your determined value.
Menu
Title
Sensor #1
Sensor #2
K2 Key
Actual Glue reading
from Luminescence
Sensors
---- GLUE DETECT ---#1
#2
ACTUAL
950
950
THRESHOLD
450
450
MENU
Previously set
Reject Threshold
F4 Key
Function Keys
ESC Key
SCROLL DN Key
Numeral Keys
856_0412_0_ 12.01.10
ENTER Key
46
OPERATOR INTERFACE FEATURES
OPTIONAL FUNCTIONS
GLUE DETECTION FUNCTION: Set Reject Threshold continues
This value will need to be fine tuned once in production but to get a rough setting
you will need to take the following steps.
1) Place a typical block or board that you will
be running without any glue two inches in front
of the detection lens. The surface that is
supposed to haver glue applied to it should be
parallel to the detection lens. This value should
be approximately zero to 200. The number can
vary with wood species but a typical reading
would be somewhere close to “45”.
2) Place a typical block or board that you will
be running with a normal amount of glue for your application two inches in front of
the detection lens. The glued face should be parallel to the detection lens. This value
should be approximately 300 to 1000. The number will vary greatly with glue type
and manufacture. Most wood species and glue will be tested prior to system shipment
to assure the system will work for your application.
Once you have completed this step, take the average of the two numerical values
determined in the steps above and set your reject threshold to this averaged value.
The system will now reject any board or block whose glue value drops below this
determined value.
856_0412_0_ 12.01.10
Your may want to get a more precise value prior to actually running the machine.
This may be done by taking a typical board or block and applying a full coating of
glue to the 1st quarter of the board, proceed to apply a 3/4 coating of glue to the 2nd
quarter, 1/2 coating of glue to the 3rd quarter and 1/4 coating to the 4th quarter.
Slowly move the piece across the face of the lens, two inches in front, form the 1st
quarter all the way through the 4th quarter of the board. by observing the numerical
values you can determine the values given for the different amounts of glue that are
directly in front or the lens. When you have determined what you feel is an
insufficient amount of adhesive, use a numerical value that is 2-5 numbers above that
value as your reject threshold setting.
47
OPERATOR INTERFACE FEATURES
OPTIONAL FUNCTIONS
GLUE DETECTION: Board Marker
The Board Marker output is used to mark faulty boards or blocks seen by the
detection unit. Glue coverage that is below your Reject Threshold level will trigger
the Marker output. The output, although referred to as a marker, can be used for
various output devices. The output may be linked to either a dye valve, hence the
term marker, a signal light, an audio signal, a pneumatic cylinder to kick the
defective work piece clear of the production process or an “ air Kicker” to remove
the defective work piece clear of the production process. The output has a variable
delay so that the “marker” or removal system can be located slightly downstream of
the detection unit. The output duration may be changed to fit your needs.
Press K3 from the Main Menu to access the Board Marker Screen. This will bring up
the Glue Detection Board Marker Screen. If you have the Glue Metering Option,
press the F4 or the DN arrow Key to move to the Glue Metering Board Marker
Screen. Press the F1 Key to return to the Main Menu.
The flashing cursor will be located on the numerical value for the Start Delay. This
value will set the time delay between the fault detection and the Marker output
activation. Set the value from 0 (instantaneous), to 999. The value has an increment of
10 milliseconds. Therefore, a value of one represents 10 milliseconds, and a value of
999 represents 9,990 milliseconds which is almost ten seconds. 1 ms equals 1/1000
of a second.
Menu
Title
K3 Key
--- BOARD MARKER --Glue Detection
Start Delay
_x10ms
On Time
x10ms
Menu
Up
Down
Marker Start
Delay
Marker On Time
F4 Key
Function Keys
ESC Key
SCROLL DN Key
Numeral Keys
856_0412_0_ 12.01.10
ENTER Key
48
OPERATOR INTERFACE FEATURES
OPTIONAL FUNCTIONS
GLUE DETECTION: Board Marker continues
The Start Time and Duration that the Board Marker is energized can be programmed
by moving the flashing cursor to the On Time field. Press the DN arrow key to scroll
to the second line item “On Time” in the Bad Glue Marker Screen.
Set the value from 0 (instantaneous), to 999. The value has an increment of 10
milliseconds. Therefore, a value of one represents 10 milliseconds, and a value of
999 represents 9,990 milliseconds which is almost ten seconds. 1 ms equals 1/1000
of a second.
The minute increments allow the outputs on time to be precisely controlled. It may
seem logical that as short an on time as possible would be most desirable but often
times an output device will require different “on time” depending on how fast it
responds to a signal. In addition, there are cases such as the dye valve where you
may want to leave the valve on slightly longer to make either a larger mark or even
“stripe” the entire length of the board.
An initial numerical setting of “10” will usually be a good starting point. You can
change this setting while in operation when adjustment is needed. Typically, this
setting should always be less than the Marker Start Delay Time as the duration of this
output should not be longer than the time it takes for the two boards to move by the
Detection point. If longer, the Marker would affect the next board on the lug chain.
Menu
Title
K3 Key
--- BOARD MARKER --Glue Detection
Start Delay
_x10ms
On Time
x10ms
Menu
Up
Down
Marker Start
Delay
Marker On Time
F4 Key
Function Keys
ESC Key
SCROLL DN Key
Numeral Keys
856_0412_0_ 12.01.10
ENTER Key
49
OPERATOR INTERFACE FEATURES
OPTIONAL FUNCTIONS
GLUE METERING:
The Glue Metering functions of this unit will allow the operator to determine if the
proper amount of glue has been applied to a given work piece, either a finger
jointed block or an edged glued strip. Once a proper GM/Pc volume has been
determined for a given species of wood and glue type, the operator can set a
minimum numeric value for an acceptable applicaton. If the adhesive measurement
for a given work piece drops below the set level, the board will be rejected.
If the work piece is rejected, the board will either be marked or physically removed
from the manufacturing process. The marking or removal output from the PLC can be
delayed so that the dye nozzle or removal equipment can be located downstream
from the glueing position. The actual marking or removal equipment will vary
according to different customer requirements.
The Glue Meter allows a measurable amout of adhesive to flow through the rotating
meter gears. The Glue Meter Sensor detects the number of gear rotations, providing a
signal pulse for each gear tooth. The number of sensor pulses corresponds to a spefic
volume of glue through a set of mathematical equations performed by the PLC.
The user must provide specific data such as GWT (Gallon Weight) in pounds for the
adhesive being used, and KFT (K Factor) for the Meter which determines the number of
pulses which results in a cubic centimeter for the adhesive being measured. Factors
which cause changes in viscosity can affect
the GWT or KFT directly and therefore cause
incorrect volume measurements.
Gm/Pc
Gm/20 Pcs
Total Liters
Total Gallons
Menu
Reset
0.0
0.0
0.0
0.0
Down
856_0412_0_ 12.01.10
A Calibration procedure is used to confirm
or correct the flow measurement accuracy.
During the procedure, the operator will dispensing a specific volume of adhesive into a
beaker. If the volume does not match the volume displayed on the screen, then the operator will key in the actual volume into the
PLC. The PLC uses the measurement data and
resulting volume to determine the proper
KFT value.
50
OPERATOR INTERFACE FEATURES
OPTIONAL FUNCTIONS
GLUE METERING: Setup and Installation
Attach the Meter in the glue supply line between the Adhesive Tank and the Adhesive
Valve, preferably near the Adhesive Valve. Verify fluid flow direction per the indication
on the meter. Install the Glue Meter Sensor into the Meter per the Sensor installation
instructions. Connect the Sensor Cable to the Terminal in the 858 per the 858FM Wiring
Diagram. Attach the Sensor Connector to the Sensor.
Glue Supply pressure may need to be increased due to the added restriction of the
GlueMeter.
Enter values for GWT and KFT on the Glue Metering Input Screen.
Perform the Calibration procedure to confirm measurement accuracy of the meter.
The System is now ready to operate with Glue Metering.
856_0412_0_ 12.01.10
Please contact your Apquip representative with questions regarding Glue Metering
setup.
51
OPERATOR INTERFACE FEATURES
OPTIONAL FUNCTIONS
GLUE METERING: Status
Press K4 to access the Glue Metering Per Piece screen from the Main Menu. This screen
displays the current adhesive usage since the last reset.
Gm/Pc
Gm/20 Pcs
-
Total Liters Total GallonsF1
F2
F4
-
shows the amount of adhesive in grams used on the last board.
shows the average of the amount adhesive used on the last 20
boards.
shows total adhesive usage since the last reset.
shows the total Gallon usage since the last reset.
Press F1 to go to the Main Menu
Press F2 to zero the Glue usage on the Reset Confirmation Screen
Press F4 to move down to the Glue Metering Input screen
The Gm/Pc value will change with each board that gets glued. It will display the amount
of glue dispensed for the previous board. There is a slight delay as the display does not
update immediately. Purge and Flush operations are not monitored or included in glue
usage data.
Gm/Pc
Gm/20 Pcs
Total Liters
Total Gallons
Reset
Down
856_0412_0_ 12.01.10
Menu
0.0
0.0
0.0
0.0
52
OPERATOR INTERFACE FEATURES
OPTIONAL FUNCTIONS
GLUE METERING: Input Screen
KFT - K Factor
This is the multiplication factor that is determined by the last
calibration of the meter. It is found on the meter calibration
document.
GWT - Gallon Weight
This is the weight of one gallon of Adhesive per the Adhesive Manufacturer. It can be found on the specification sheet
of the adhesive.
LGW - Low Glue Weight
This setting is the lowest allowable glue weight for the joint
or board. Any time the glue dispensed is less than this setting, the Error Lamp will light momemtarily. This also sets up
the use of the Marker Output to either mark or kick off the
board with below adequate glue.
Use the DN arrow to position the cursor on the parameter you wish to change, then key
in the new value and press enter to store the change.
-
Press F3 to move up to the Glue Metering Per Piece screen.
Press F4 to move down to the Glue Metering Calibration screen.
KFT Pulse/CC
GWT lbs./Gal
LGW grams
4.243
7.500
5.000
Up
Dn
856_0412_0_ 12.01.10
F3
F4
53
OPERATOR INTERFACE FEATURES
OPTIONAL FUNCTIONS
GLUE METERING: Reset Confirmation Screen
This screen gives you a chance to change your mind after you have pressed Reset on
the Glue Metering Per Piece Screen.
-
Press F2 to reset the accumulated glue metering Data and usage history.
Press F4 to return to the Glue Metering Per Piece Screen without resetting
the usage history.
CONFIRM USAGE RESET
F4 - No, return to
Rate Screen
F2 - Yes, RESET DATA
Reset
Return
856_0412_0_ 12.01.10
F2
F4
54
OPERATOR INTERFACE FEATURES
OPTIONAL FUNCTIONS
GLUE METERING: Calibration Screen
This screen is divided into two sections “old” on the left, and “new” on the right.The
current KFT and meter Glue Volume in ml are shown to the left half of the screen. The
proposed KFT based on the new Glue Volume (entered by the operator) is shown to the
right.
KFT - K Factor
-
This is the multiplication factor that is determined by the last
calibration of the meter. It is found on the meter calibration
document.
ml - Glue Volume
-
This is the volume of Adhesive as measured by the Glue
Meter.
F1
F2
F3
-
F4
-
Press F1 to move to the MainMenu and end the Calibration process.
Press F2 to enter the Calibration mode. “Test” blinks in calibrate mode.
Press F3 to move up to the Glue Metering Input screen and end the Calibration process.
Press F4 to accept the proposed change to the KFT and end the Calibration process.
Calibration Procedure:
1.
Press F2 to start the Calibration process. (Press F2 to stop the Calibration.)
2.
Place a graduated beaker to catch the
discharge of adhesive from the output
of the Adhesive Valve. Beaker graduations can be from 0-250ml.
.3.
Press the Flush Switch to fill the beaker to a predetermined amount. 150ml
for example. You will see the “old”
Glue Volume reading change as the
glue is dispensed into the beaker.
55
old
2.432
140.0
Menu
Calibration
KFT
ml
Test
Up
new
0.0
0.0
Accept
856_0412_0_ 12.01.10
Material Required:
A Graduated Beaker of sufficient volume to accurately measure a dispensed glue sample.
OPERATOR INTERFACE FEATURES
OPTIONAL FUNCTIONS
GLUE METERING: Calibration Screen continues
4.
Observe the value of the “old” Glue Volume reading at the lower left of the Calibration Screen. This is the amount of Glue according to the Meter. Key in the
actual measured amount of Glue in the beaker at the lower right on the Calibration screen.
5.
As you key in the beaker Glue Volume on the screen, the “new” KFT value will
change from 0.0 to a new value based on the “new” Glue Volume and the number of Meter Sensor “tics” in the PLC memory for the amount of glue dispensed
into the beaker.
6.
Press F4 to accept the “new” KFT and use it in place of the “old” KFT. The “old”
KFT will change to the new value, and all the other variables will be reset to 0.0.
7.
After returning the the Main Menu, cycle the Power Switch of the 856 Enclosure
to allow the new KFT to take effect.
Note: Moving away from the Calibration screen during a Calibration process will terminate the Calibration process. If you do not wish to change the KFT, then just
exit the screen or press F2 to end the process.
Calibration in
Calibration
old
Calibration
KFT
2.432
ml
140.0
Test
Up
old
Calibration
KFT
2.412
ml
0.0
Accept
Menu
Test
Up
new
0.0
0.0
Accept
856_0412_0_ 12.01.10
Menu
new
2.412
150.0
process.
56
complete.
OPERATOR INTERFACE FEATURES
OPTIONAL FUNCTIONS
GLUE METERING: Board Marker
The Board Marker output is used to mark boards or blocks that have low glue as
measured by the Flow Meter. Glue flow that is below your Reject Threshold level will
trigger the Marker output. The output, although referred to as a marker, can be used
for various output devices. The output may be linked to either a dye valve, hence the
term marker, a signal light, an audio signal, a pneumatic cylinder to kick the
defective work piece clear of the production process or an “ air Kicker” to remove
the defective work piece clear of the production process. The output has a variable
delay so that the “marker” or removal system can be located slightly downstream of
the detection unit. The output duration may be changed to fit your needs.
Press K3 from the Main Menu to access the Board Marker Screen. This will bring up
the Glue Metering Board Marker Screen if you do not have the Glue Detection
option. If you have the Glue Detection option, then you will be on the Glue Detection
Board Marker Screen. Press the F4 or the DN arrow Key to move to the Glue
Metering Board Marker Screen. Press the F1 Key to return to the Main Menu.
The flashing cursor will be located on the numerical value for the Marker Start Delay.
This value will set the time delay between the fault detection and the Marker output
activation. Set the value from 0 (instantaneous), to 999. The value has an increment of
10 milliseconds. Therefore, a value of one represents 10 milliseconds, and a value of
999 represents 9,990 milliseconds which is almost ten seconds. 1 ms equals 1/1000
of a second.
Menu
Title
K3 Key
--- BOARD MARKER --Glue Metering
Start Delay
_x10ms
On Time
x10ms
Menu
Up
Down
Marker Start
Delay
Marker On Time
F4 Key
Function Keys
ESC Key
SCROLL DN Key
Numeral Keys
856_0412_0_ 12.01.10
ENTER Key
57
OPTIONAL FUNCTIONS
GLUE METERING: Board Marker continues
The duration that the Board Marker is energized can be programmed by moving the
flashing cursor to the On Time field. Press the DN arrow key to scroll to the second
line item “On Time” in the Board Marker Screen.
Set the value from 0 (instantaneous), to 999. The value has an increment of 10
milliseconds. Therefore, a value of one represents 10 milliseconds, and a value of
999 represents 9,990 milliseconds which is almost ten seconds. 1 ms equals 1/1000
of a second.
The minute increments allow the outputs on time to be precisely controlled. It may
seem logical that as short an on time as possible would be most desirable but often
times an output device will require different “on time” depending on how fast it
responds to a signal. In addition, there are cases such as the dye valve where you
may want to leave the valve on slightly longer to make either a larger mark or even
“stripe” the entire length of the board.
An initial numerical setting of “10” will usually be a good starting point. You can
change this setting while in operation when adjustment is needed. Typically, this
setting should always be less than the Marker Start Delay Time as the duration of this
output should not be longer than the time it takes for the two boards to move by the
Detection point. If longer, the Marker would affect the next board on the lug chain.
Menu
Title
K3 Key
--- BOARD MARKER --Glue Metering
Start Delay
_x10ms
On Time
x10ms
Menu
Up
Down
Marker Start
Delay
Marker On Time
F4 Key
Function Keys
ESC Key
SCROLL DN Key
Numeral Keys
856_0412_0_ 12.01.10
ENTER Key
58
SYSTEM COMPONENT IDENTIFICATION
1)
Control Enclosure
4)
“On” Air Control Line
2)
Coalescer Filter/Regulator
Assembly
5)
Framing Sensors
6)
Adhesive Sensor
7)
Applicator Head
8)
Wood Sensor
9)
Adhesive Valve Assembly
10)
Bracket, X - Y Adjustment, Adhesive
Valve Mount
3)
“Off” Air Control Line
1
2
A
B
3
4
8
5
9
10
7
16
15
14
11
13
12
59
11)
Pressurized Adhesive Hose
12)
Adhesive Filter
13)
Manual Shut off Valve
14)
Regulator / Gauge, Tank
Pressure
15)
Relief, Tank Pressure
16)
Pressure Tank Assembly
856_0412_0_ 12.01.10
6
SIX CONTROL STAGES DURING APPLICATION
STAGE THREE
STAGE TWO
The moving piece of wood
now passes the sensor and
the red beam. The applicaA piece of wood moving on
tor valve is still closed. The
the lug chain away from the
time delay circuit begins
cutter head approaches the
timing out the interval set
sensor.
with the START adjustment.
822 Sensor:
Unobstructed
STAGE ONE
268 Valve:
LED lighted
Closed
822 Sensor:
Blocked
LED off
268 Valve:
Closed
START Timer: Running
The START time delay
circuit completes its timing
cycle and the Air Electric
Solenoid is activated.* The
Applicator Valve opens and
the adhesive passes to the
finger ports of the Applicator Head. The wood finger
joint has just moved into
the Applicator Head and
the pressurized adhesive is
forced through the finger
ports to the wood surfaces.
The START adjustment
synchronizes this entire
operation, so that the Applicator Valve opens at the
desired START position on
the wood, not earlier and
not later.
Blocked
LED off
268 Valve:
Open
START Timer: Complete
* The Air Electric Solenoid Valve shifts causing the air in the “ON” control line to
pressurize and open the Applicator Valve. When the Air Electric Solenoid is deenergized, the Air Electric Solenoid Valve shifts causing the air in the “OFF” control line to
pressurize and close the Applicator Valve. When either the “ON” or “OFF” air control
line is pressurized, the other air control line is exhausted.
60
856_0412_0_ 12.01.10
822 Sensor:
SIX CONTROL STAGES DURING APPLICATION
STAGE SIX
The LENGTH time delay
circuit completes its timing
cycle and the Air Electric
The entire width/length of
Solenoid is deenergized.*
STAGE FOUR
wood has now passed the
The Applicator Valve closes
optical sensor. The optical
and the adhesive flow
The Applicator Valve is
beam and the time delay
through the Applicator
open and the Applicator
circuit begins timing out
Head is shut off. The
Head spreads adhesive
the second interval. ** The
LENGTH adjustment synevenly onto the wood surLENGTH adjustment deterchronizes the closure of the
faces. Any width joint or
mines this delay period.
Applicator Valve to shut off
length of wood can be run 822 Sensor:
Unblocked
the adhesive flow as the
through the Applicator
LED lighted
trailing edge of the wood
Open
Head without readjustment 268 Valve:
passes the Applicator
of the START and LENGTH START Timer: Complete
LENGTH
Timer:
Running
Head.
controls.
822 Sensor:
Blocked
The result, an even film of
LED off
adhesive is applied to a
268 Valve:
Open
wood finger joint with no
START Timer: Complete
dry spots and no drips.***
STAGE FIVE
822 Sensor:
Unblocked
LED lighted
268 Valve:
Closed
START Timer: Complete
LENGTH Timer: Complete
856_0412_0_ 12.01.10
** The LENGTH setting or time interval is not necessarily of the same length as that of
the START. The two adjustments, START and LENGTH, operate independently of one
another.
*** Refer to the Manual Section on ADHESIVE PATTERN ADJUSTMENT for a more
detailed explanation of system operation and “fine tuning.”
61
ADHESIVE APPLICATOR HEAD
The only component in the Apquip System which requires particular alignment
attention is the Applicator Head. The Applicator Head must be clean and correctly
aligned in order for the adhesive to be properly applied.
APPLICATOR HEAD ALIGNMENT
Visual alignment of the Applicator Head has proved the most reliable alignment
method. Alignment should be performed with a wood joint stopped directly in front
of the head. A white card or a flashlight placed behind the joint may make it easier to
check the head clearance in poorly lit environments.
At no point should the Applicator Head touch the wood during an adhesive application. The Applicator Head should not move, not even slightly, as the wood passes
through the Applicator Head Fingers. Mechanical wear caused by misalignment will
reduce the usable life of the head.
The Applicator Head need not be realigned each time the cutter heads are changed,
provided the dimensions of the wood joint remain the same. However, a check of the
Applicator Head alignment with each cutter head change will also provide a quick
verification of correct cutter head alignment.
856_0412_0_ 12.01.10
For edge glue or face glue applications, the applicator head should be 1/16” from
the wood surface at an approximate 90° or 45° angle depending on the particular
Applicator. The Applicator must be parallel with the face of the lumber to provide an
even layer or equally sized lines of glue on the lumber.
62
APPLICATOR HEAD ALIGNMENT
d
a
b
Correct alignment of Applicator
Head to wood joint is shown at
the left. Carefully note that all of
the clearances between wood
and metal are equal. In particular check to see that on each
finger the clearance at point (a)
is equal to the clearance at point
(b). Similarly, the clearance at
point (c) should equal the clearance at point (d). These are the
critical check points. (Fig. A.)
c
Figure A.
If you have difficulties getting
equal clearances (a), (b), (c),
and (d) above, verify that the
Applicator Head is at 90° with
respect to the wood joint. (Fig
B.)
856_0412_0_ 12.01.10
If you still have difficulties check
to see that the dimensions of the
wood joint are correct.
Figure B.
63
APPLICATOR HEAD CLEAN UP
At the end of each day the Applicator Head must be thoroughly flushed out with
water. The Apquip Flush Adaptor, (Part #010,) is designed for just this purpose. The
Flush Adaptor connects to a common hose bib for easy flushing of the Applicator
Head.
The Applicator Head can be taken apart should foreign matter get through the fluid
filter and clog the Applicator Head. For those plants which use two component adhesives with a limited pot life, the head can be taken apart and cleaned should the
adhesive be allowed to set up inside the head.
Apquip Applicator Heads are machined from stainless steel and although resistant to
wear, they can be damaged by sharp tools. Use only a soft brush to clean the head if
taken apart. A toothbrush or fine brass brush works well. Never use a screwdriver or
pick to clean the finger ports in the Applicator Head.
Use of silicone grease during reassembly on all screw threads and head mating
surfaces will make maintenance much easier.
856_0412_0_ 12.01.10
Whenever the applicator head is removed from the valve, use the Apquip Valve Plug
(Part #011-01) to seal the valve. This will prevent glue drying inside the valve.
64
WOOD SENSOR MOUNTING
The sensor, for finger jointer applications, should be installed on the hold down
section on the side opposite the cutter head. The aluminum body which houses the
sensor should be installed as follows:
It is preferable to place the sensor on the side of the hold-down section that is
away from the cutter head. This offers more protection from contact by the
cutter head whenever it is removed.
2)
The beam centerline should
be 1” or less UPSTREAM of
the centerline of the applicator head. The bottom edge of
the sensor housing should be
1-1/2” above the wood surface. This distance should be
measured when the holddown section is adjusted for a
given thickness of wood.
3)
The 1-1/2” edge of the block
should be parallel to wood
travel. The beam diameter is
small enough so that it can be
mounted with the beam
located between the edge of
the hold-down flex strip and
the edge of the lug.
4)
If you are having difficulties
with reflection from the lugs,
try angling the sensor beam
upstream slightly.
5)
If you run blocks with significant wane, you may want to angle the sensor
upstream so you are actually targeting the block halfway down the side of the
block. This will eliminate the sensor not picking up the front section of the
board that has the top corner of the leading edge missing.
6)
Edge Gluing: Because the edge glue lines often run at much higher speeds, it
may be necessary to mount the sensor anywhere from 1” to 15” upstream of
the Applicator Head.
856_0412_0_ 12.01.10
1)
65
SENSING COMPONENTS CHECK
Before proceeding to adjustment, a quick check of the sensing electronics will verify
that the system is set up correctly. The following check is made without the Lug Chain
or Conveyor moving. The Air Lines from the Air Electric Solenoid may be connected
to the Adhesive Valve but you should not pressurize the Adhesive Tank until this test
is complete.
1)
POWER SWITCH
The Main Switch is on the face of the Control Enclosure Door. Locate the switch
labelled “OFF / ON” and rotate the Switch to the ON position. The Operator
Interface will light and display text to indicate the Control Enclosure has been
powered up.
Locate the Sensor in its mounting and check the back end of the aluminum
Sensor block. The Sensor LED will be lighted when power is applied to the
enclosure.
Place an object (or your hand) in front of the Sensor between 0 and 1.5” away
from the “eye” opening. The LED will extinguish when the object blocks the
Sensor, and relight when the object is moved away.
2)
MANUAL VALVE OPERATE
The Manual Valve Operator is on the Control Enclosure Door, locate the switch
labelled “FLUSH” and press. The FLUSH switch bypasses the sensing circuit
and will activate the Air Electric Solenoid Valve while the FLUSH button is
pressed.
You will hear the Air Electric Solenoid activate when the FLUSH Switch is
pressed, and deactivate when the FLUSH Switch is released. The Adhesive
Valve will open when the Air Electric Valve is energized, and close when the
Air Electric Valve is deenergized.
3)
GLUE CYCLE TEST
With the Chain Voltage ON, place an object (or your hand) in front of the Sensor between 0 and 1.5” away from the “eye” opening. The LED will extinguish,
the Air Electric Solenoid will activate, and the Adhesive Valve will shift to
OPEN, and glue will be dispensed while the object blocks the Sensor. When
the object is moved away from the Sensor, the LED will relight, the Air Electric
Solenoid will deactivate, and the Adhesive Valve will shift to CLOSE, and the
glue flow will be shut off.
66
856_0412_0_ 12.01.10
The Chain Voltage supply to the Control Enclosure is not required when performing the Flush operation.
DYNAMIC ADJUSTMENT
The Apquip system employs a high speed optical Sensor and PLC with programmable timers to insure a reliable and consistent adhesive pattern. Once the Applicator Head has been aligned and the sensing components checked, adhesive pattern
dynamic adjustments (with the jointer running) can be made:
1)
Bleed any trapped air out of the adhesive supply line using the FLUSH Switch
on the Enclosure Door. This switch bypasses the sensing circuit and directly
opens the applicator valve.
2)
Set the GLUE START DELAY numerical value to 200; this value is dependent on
the horizontal distance between the Applicator Head and the Sensor, and the
speed of the Chain or Conveyor. The greater the distance, the greater the
setting. This setting is temporary.
Set the GLUE LENGTH DELAY numerical value to 200. As above, this setting is
dependent on the distance between the Applicator Head and the Sensor, and
the speed of the Chain or Conveyor. This setting is also temporary.
This illustration shows a right hand application. A left hand application would
show the direction of travel reversed as well as directions “A” and “B.” The “A”
direction points downstream with the travel (toward the leading edge and assembly section) and the “B” direction points upstream against the travel (toward
the trailing edge and feeder station). All subsequent application adjustment
illustrations will show right hand application examples only.
67
856_0412_0_ 12.01.10
Start the Lug Chain Drive. The above control adjustment settings will produce something like the starting pattern shown below:
DYNAMIC ADJUSTMENT
These adjustments must be made with the jointer running.
GLUE START:
If the leading edge (A), or start, of the glue pattern is too far away from the edge of
the block as shown below, then decrease the numerical value of the GLUE START
DELAY setting. This will reduce the size of the gap from the edge of the block to the
start of the glue pattern. Continue adjusting the setting until the glue pattern is 1/8”
from the block’s leading edge.
GLUE LENGTH:
Examine the length of the Adhesive Pattern. If the trailing edge of the glue pattern is
too far from the back edge (B) of the block (length is not long enough), then increase
the numerical value of the GLUE LENGTH DELAY setting. This will cause the glue
pattern length to extend farther toward the trailing edge of the block. Continue
adjusting the setting until the glue pattern is 1/8” from the block’s trailing edge.
856_0412_0_ 12.01.10
NOTE: A small gap, or “spared” area, 1/16” - 1/8” should be left on both ends of the
adhesive pattern to allow for a little squeeze forward/rearward of the adhesive during assembly. Refer to the Manual Section on SQUEEZE OUT for more adjustment
modifications for Squeeze Out.
68
SQUEEZE OUT
Fine Droplets
Fine
Droplets
To double check your adhesive pattern settings, examine an assembled wood joint
farther down the line. A very thin bead of adhesive or fine droplets squeezed out on
tip of the joint indicate a sufficient quantity of adhesive applied to the joint (i.e. correct adhesive pressure).
Squeeze-out on the edge surface of the joint should be minimal.
To remove the leading edge squeeze-out, increase the numerical value of the GLUE
START DELAY setting.
To remove the trailing edge squeeze-out, decrease the numerical value of the GLUE
LENGTH DELAY setting.
When these Delay values are correctly set, the adhesive pattern will be slightly less
than the width of the joint, thereby allowing for a little squeeze forward/rearward of
adhesive and preventing excessive side squeeze-out.
856_0412_0_ 12.01.10
SMALL GAP FOR
SQUEEZEFORWARD
SMALL GAP FOR
SQUEEZE-REARWARD
69
ADJUSTMENT TROUBLESHOOTING
1)
CORRECT APPLICATION
An even film of adhesive on
upper and lower face of wood
fingers. No drips. No dry areas.
Figure 1. Correct Adhesive Application
2)
APPLICATOR VALVE
OPENS LATE.
Decrease the numerical value of
the GLUE START DELAY setting
to open Applicator Valve earlier
and bring the adhesive closer to
the leading edge of the block.
Figure 2.
APPLICATOR VALVE
CLOSES EARLY.
Increase the numerical value of
the GLUE LENGTH DELAY setting to close Applicator Valve
later and extend the adhesive
pattern toward the trailing edge
of the block.
856_0412_0_ 12.01.10
3)
Figure 3.
70
ADJUSTMENT TROUBLESHOOTING
4a)
Applicator Valve either:
1) Opens too early; or
2) Closes too late; or
3) Opens early AND closes
late.
In all three cases there is adhesive on the Applicator Fingers
before the wood reaches the
Head.
Figure 4a.
IF 4a IS THE CASE, THEN:
4b) Increase the numerical
value of GLUE START DELAY
setting and decrease the numerical value of GLUE LENGTH
DELAY setting to re-center the
adhesive pattern so there are
“spared” areas as shown in
Figure 4b.
Then decrease the numerical
value of GLUE START DELAY
setting to advance the adhesive
up to the leading edge of the
block.
Figure 4b.
856_0412_0_ 12.01.10
Now increase the numerical
value of GLUE LENGTH DELAY
setting to extend the adhesive
pattern to the trailing edge of
the block.
71
ADJUSTMENT TROUBLESHOOTING
5)
ADHESIVE ON UPPER SURFACE AND NONE ON LOWER SURFACES.
ADHESIVE
Applicator head is incorrectly
aligned vertically to the wood finger
joint. The Applicator Assembly must
be repositioned slightly lower to
give equal clearance above and
below steel Applicator Fingers.
JOINT
Figure 5.
The 375 Bracket Assembly has a vertical adjustor to position the Applicator Head. In
this example, turn the vertical adjustor knob to move the Applicator Head downward.
See Applicator Head Alignment Figure A in this manual for the desired alignment
of the Applicator and joint.
6)
ADHESIVE ON LOWER SURFACE AND NONE ON UPPER SURFACES.
JOINT
Figure 6.
The Applicator Head is incorrectly
aligned vertically to the wood finger
joint. The Applicator Assembly must
be repositioned slightly higher to
give equal clearance above and
below steel Applicator Fingers. Turn
the Vertical Adjustor Knob to move
the Applicator Head upward.
ADHESIVE
7) GLUE BUILDUP ON APPLICATOR
HEAD
856_0412_0_ 12.01.10
If glue appears on the side surfaces
of the Applicator Head check to see
that the Applicator Head is at 90°
with respect to the wood joint.
Figure 7.
72
AIR CONTROLS
Pressurized air lines are normally used at just two points in the Apquip System:
1) Air supply to pressurize the tank.
2) Air supply to the Control Enclosure to operate the applicator valve.
This system requires a maximum of 60 PSIG of clean, dry air. Moisture and compressor blowby will affect the performance of the system’s spool/sleeve assembly. The
Apquip system includes Coalescer / Filter to remove normal levels of impurities.
Do not lubricate the air supply.
Replace the Coalescer Filter Element whenever it is no longer white in color. Continued use of a contaminated Element will permit impurities to cause inconsistent operation of the Air Electric Valve. A combination of cold air in the mill and oil in the air
supply can also cause intermittent or sluggish Air Electric Valve operation.
73
856_0412_0_ 12.01.10
All control lines are 1/4” plastic tubing. The air fittings are the quick release type. To
attach an air line, push the plastic tubing firmly into the fitting (See A). To remove the
air line, depressurize the line, push the tubing firmly into the fitting, then using your
fingers, push the locking ring in on the fitting. While holding the lock ring in, pull the
tubing out. (See B)
TROUBLESHOOTING
If your Adhesive Applicator System does not function, then proceed with troubleshooting to isolate the problem to one of three subsystems; fluid supply, applicator,
valve assembly, or electrical controls.
TROUBLESHOOTING FLUID SUPPLY
Shut off the air supply to the pressure tank. Disconnect the pressurized adhesive
supply hose at the applicator valve assembly. This hose may be under pressure, so
loosen the fitting slowly. Place the end of the hose over a small container.
Turn the air pressure regulator at the top of the tank slowly CLOCKWISE until:
A) The gage indicates 20 PSI and there is no flow from the hose, or
B) adhesive flows from the hose.
If the gauge indicates 20 PSI and there is no flow, then turn the tank air supply off and
depressurize the tank. Turn the valve at the bottom of the tank off and then check the
condition of the filter inside the brass T-body. A plugged filter screen will prevent
adhesive flow. Remove the filter screen and clean with water and a small brush. If the
filter screen cannot be cleaned, replace it with a new one. Refer to drawing 600 which
lists the three sizes of available filter screens.
If there is adhesive flow, then refer to Manual Section TROUBLESHOOTING APPLICATOR VALVE ASSEMBLY.
Adhesive flow
Pressure
Regulator and
Gauge
856_0412_0_ 12.01.10
Adhesive Filter
Assembly
74
TROUBLESHOOTING
TROUBLESHOOTING APPLICATOR VALVE ASSEMBLY
Shut off the air supply to the Control Enclosure and Pressure Tank. Disconnect the two
1/4” air control lines to the Adhesive Valve (see Manual Section on Air Controls for
instructions on disconnecting air lines from quick-release fittings). Hold the ends of
the control lines in your hand.
Reapply air to the Control Enclosure at 20 psi. Air should exhaust from the “OFF” B
line. Press the FLUSH Switch to perform the FLUSH operation. Air should now exhaust
from the “ON” A line to the valve.
If air still exhausts from the “OFF” line when the Flush Switch is pressed, then proceed with Manual Section TROUBLESHOOTING ELECTRICAL CONTROLS.
Reconnect the air lines to the Adhesive Valve. Reapply air to the Control Enclosure
and Pressure Tank at 60 psig.
Now press the FLUSH Switch to perform the FLUSH operation. The Applicator Valve
should now open and adhesive should flow from the finger ports of the Applicator
Head.
If no adhesive appears at the Applicator Head then
the APPLICATOR VALVE must be taken apart and
serviced.
Start the lug chain drive and run a few wood joints.
The Applicator Valve should open each time a wood
joint passes through the sensor’s beam.
A
B
B
“OFF”
If the Applicator Valve doesn’t open as the wood
joints pass, then proceed with Manual Section
TROUBLESHOOTING ELECTRICAL CONTROLS.
A
“ON”
Wood
Sensor
Frame
Sensors
856_0412_0_ 12.01.10
BA
Glue Sensor
75
TROUBLESHOOTING
INTERNAL ELECTRICAL COMPONENT IDENTIFICATION
THE SMALL RED INDICATOR VISIBLE IN THE SENSOR HOUSING (NEAR THE CABLE)
GLOWS WHEN THE CONTROL ENCLOSURE IS ENERGIZED; IT GOES OUT WHEN THE
SENSOR DETECTS AN OBJECT UP TO 1-1/2” FROM THE EDGE OF THE ALUMINUM
SENSOR HOUSING.
Examine the Electrical Diagram Drawing 856-32 and 856-IO. See Drawing 856-x.xY
Control Panel Assembly of your System Version to locate the electrical components
inside the Control Enclosure:
l)
Cord Grip
a)
Electrical Wiring Harness
m)
Base, Chain Relay
b)
PLC
c)
Analog Input Module
n)
Chain Relay
o)
AC Input Terminals
d)
Power Supply 24VDC
e)
Door Safety Switch
p)
Fuseholder Terminal
q)
Terminal Ground
f)
Jumper, Terminal
r)
On / Off Switch
g)
I/O Terminals
s)
Connectors HMI, DC & PLC
h)
End Block, Terminal
t)
Door Latch
i)
Lamp, 24VDC
u)
E200 Interface
j)
Solenoid Cable
v)
Enclosure Door
k)
Solenoid Valve, 24VDC
PROCEED WITH CAUTION, SOME TESTS ARE PERFORMED
WITH THE CONTROL ENCLOSURE ENERGIZED.
SOME COMPONENTS WILL BE AT LINE VOLTAGE.
u
v
a
b
c
d
e
f
g
t
j
k
r
q
p
o
76
n m
l
856_0412_0_ 12.01.10
h
i
s
TROUBLESHOOTING
TROUBLESHOOTING ELECTRICAL CONTROLS
PLACE POWER TO OFF / OPEN ENCLOSURE DOOR
CHECK SUPPLY VOLTAGE:
Using a voltmeter, check the AC voltage between terminals (2) and (3) on the AC
Input Terminal Strip. Line Voltage should be present as determined by your electical
installation. A reading of 0 VAC indicates your plant supply is not providing power to
the Control Enclosure.
PLACE DOOR SAFETY SWITCH TO OVERRIDE / POWER SWITCH TO ON:
With Line Voltage at terminals (1) and (2), pull the Door Safety Switch plunger to
override. (Pull the plunger button with insulated pliers or pull the #6 screw attached
to the plunger outward about 1/4”.) The override position closes the Door Safety
Switch and allows the Enclosure to operate with the Door open. Rotate the Power
Switch to ON.
OBSERVE INTERFACE SCREEN LIGHTED / DARK, CHECK INPUT AGAIN THEN
DOORSWITCH & FUSES:
The Interface Panel (front of Enclosure Door) screen will light when powered up. If
not, recheck the AC voltage between the lower terminals of the Fuseholders. Line
Voltage should be present. If the voltage is 0 VAC then disconnect power and check
continuity through the Door Switch while operating the switch. Replace the Switch if
there is no continuity when the Switch is pulled to override. If Line Voltage is present,
check the upper terminals of the Fuseholders. If the voltage is 0 VAC then replace
one or both 3A Fuses in the Fuseholders.
PERFORM FLUSH OPERATION:
Press the FLUSH Switch to perform a FLUSH Operation. Systems with multiple Valves
will flush all valves in a Flush Operation. All Air Electric Solenoids will activate with a
click sound. If no sound, check the solenoids by pressing the button at the end of the
each black solenoid housing to feel the solenoid activate when Flush is pressed. If the
core doesn’t move, then check voltage between I/O Terminals (16)&(28), (25)&(28),
(26)&(28) as determined by your system configuration. Voltage will be 24 VDC when
the FLUSH Switch is at FLUSH. If 24 VDC is present for a terminal set, then replace that
solenoid coil.
If the voltage checks out, then proceed with TROUBLESHOOTING SENSING ELECTRONICS.
77
856_0412_0_ 12.01.10
CHECK AIR ELECTRIC SOLENOID VALVE:
If the Air Electric Solenoid activates but the air output does not shift, the valve (located in the valve body) is sticking and must be serviced or replaced.
TROUBLESHOOTING
TROUBLESHOOTING SENSING ELECTRONICS
Before proceeding to troubleshooting, check to see that the sensing electronic components are set up correctly.
1)
SENSOR POSITION
The visible red beam, (or the center of the eye of the Sensor), should be 1” or less
from the centerline of the Applicator Head.
The lower edge of the Sensor’s Aluminum Housing should be positioned 1-1/2”
above the upper surface of the wood being detected.
856_0412_0_ 12.01.10
NOTE: If the wood blocks have much wane, it will be necessary to angle the Sensor
Assembly so that the detection point is the LOWER leading edge of the block. Refer
to the installation notes for more detail.
78
TROUBLESHOOTING
TROUBLESHOOTING SENSING ELECTRONICS CONTINUES
2)
MANUAL VALVE OPERATOR.
On the Enclosure Door, locate the FLUSH Switch. This Switch is used to place the
System into Flush Operation.
The System is placed into Flush Operation when the FLUSH Switch is pressed and will
remain in Flush Operation until the FLUSH Switch is released. During the Flush Operation, the Air Electric Solenoid is activated causing the Adhesive Valve to open
allowing adheisve flow through the Applicator Head.
Release the FLUSH Switch to terminate the Flush Operation. When the Flush Operation is terminated, the Air Electric Valve is deenergized causing the Adhesive Valve
to close and shut off the adhesive flow through the Applicator Head.
Apquip LLC Ver x.x
Service (831) 642-6565
5 Harris Court Bldg Q
Monterey, CA 93940
F1
F2
F3
F4
K1
K2
K3
K4
1
2
3
4
5
6
7
8
9
.
0
+/-
ESC
ACK
INS
DEL
HELP
ENTER
OFF ON
FLUSH
FLUSH
SWITCH
79
856_0412_0_ 12.01.10
SHIFT
TROUBLESHOOTING
TROUBLESHOOTING WOOD SENSOR FUNCTION
PLACE DOOR SAFETY SWITCH TO OVERRIDE / POWER SWITCH TO ON:
With Line Voltage at AC Input Terminals (2) and (3), pull the Door Safety Switch
plunger to the override. (Pull the plunger button with insulated pliers or pull the #6
screw attached to the plunger outward about 1/4”.) The override position closes the
Door Safety Switch and allows the Enclosure to operate with the Door open. Rotate
the ON / OFF Switch to ON. The Operator Interface display will light.
REFER TO DRAWING 856 AND 856-32
FOR COMPONENT AND TERMINAL IDENTIFICATION.
Before checking the operation of the #822 sensor, verify that the Sensor is wired as
follows:
I/O Terminal 5
White
I/O Terminal 6
Black
I/O Terminal 8
Red
Examine the mounting of the Sensor Housing and confirm that the red LED at the
back end of the Sensor Housing is lighted. It will light when there is no wood within
range of the Sensor beam. This is the normal “unblocked” condition for the Sensor.
Bring a wood target within 1-1/2 inches of the Sensor Housing. When the wood is
detected the red LED at the back end of Sensor Housing will extinguish. This is the
normal “blocked” condition for the Sensor.
The LED will be lit only when wood is NOT being detected. If this is not the case,
replace the Sensor assembly.
856_0412_0_ 12.01.10
NOTE: Under certain low voltage conditions, the Sensor LED will go into a blinking state.
This is a circuit protection function for the Sensor. To restore normal operation, remove
power to the Control Enclosure, wait 5 seconds, then restore power. If this does not restore
normal function to the Sensor, check the DC Power Supply output voltage.
80
TROUBLESHOOTING
TROUBLESHOOTING WOOD SENSOR OUTPUT SIGNALS
PLACE DOOR SAFETY SWITCH TO OVERRIDE / POWER SWITCH TO ON:
With Line Voltage at terminals (1) and (2), pull the Door Safety Switch plunger to the
override. (Pull the plunger button with insulated pliers or pull the #6 screw attached
to the plunger outward about 1/4”.) The override position closes the Door Safety
Switch and allows the Enclosure to operate with the Door open. Rotate the ON / OFF
Switch to ON. The Operator Interface display will light.
REFER TO DRAWINGS 856 AND 856-32
FOR COMPONENT AND TERMINAL IDENTIFICATION.
CHECK DC SUPPLY VOLTAGE TO SENSOR:
Connect a positive meter lead to lower I/O Terminal (8) and the negative lead to
lower I/O Terminal (6) where the Sensor wires are connected. About +24VDC should
appear across the terminals. If the proper power supply voltage does not appear,
then check the upper I/O Terminals for +24 VDC and the DC Power Supply output
terminals as well. Check wiring of the following points.
DC Power Supply -V
Wht/Blu wire
DC DC Power Supply +V
Red/Blu wire
DC +24
Upper I/O Terminal 6
Wht/Grn wire
DC Upper I/O Terminal 8
Red/Blu wire
DC +24
Lower I/O Terminal 6
Blk wire
DC Lower I/O Terminal 8
Red wire
DC +24
CHECK OUTPUT SIGNAL FROM SENSOR:
Connect the negative meter lead to Upper I/O Terminal (6) and the positive meter
lead to Lower I/O Terminal (5). Have an assistant block the sensor. When the Sensor is
blocked, the voltage will be about 0VDC. When the Sensor is unblocked the voltage
will be +VDC (or +20VDC to +24VDC.) If not, check wiring of the following points.
When the Sensor is blocked, if Input I0.0 indicator on the PLC does not go OFF, check
wiring of the following points.
Lower I/O Terminal 5
Wht
Upper I/O Terminal 5
Wht
PLC Terminal I0.0
Wht
856_0412_0_ 12.01.10
NOTE: The Wood Sensor is adjusted for “Dark” detection, the signals work as follows. The
White Output wire will be at 0VDC when the Sensor is blocked, and +VDC when the Sensor
is unblocked. Reference is DC Common on the Sensor’s Black wire.
81
TROUBLESHOOTING
TROUBLESHOOTING LIQUID LEVEL SENSOR FUNCTION
PLACE DOOR SAFETY SWITCH TO OVERRIDE / POWER SWITCH TO ON:
With Line Voltage at terminals (1) and (2), pull the Door Safety Switch plunger to the
override. (Pull the plunger button with insulated pliers or pull the #6 screw attached
to the plunger outward about 1/4”.) The override position closes the Door Safety
Switch and allows the Enclosure to operate with the Door open. Rotate the ON / OFF
Switch to ON. The Operator Interface display will light.
REFER TO DRAWINGS 856 AND 856-32
FOR COMPONENT AND TERMINAL IDENTIFICATION.
Before checking the operation of the Liquid level sensor, verify that the Sensor is
wired as follows:
I/O Terminal 3
Blue
I/O Terminal 2
Black
I/O Terminal 10
Red
Examine the mounting of the Sensor and confirm that the LED at the back end of the
Sensor Housing is lighted. It will light when there is Glue within range of the Sensor.
This is the normal “blocked” condition for the Sensor. The Output will be “ON” when
there is Glue detected by the Sensor.
Move the Sensor so that it does not detect the Glue in the Tank or tilt the Tank so that
the Glue is not directly in front of the Sensor. When the Glue is not detected the LED
at the back end of Sensor will extinguish. This is the normal “unblocked” condition
for the Sensor. The Output will be “OFF” when there is no Glue detected by the Sensor. The 856FM will respond when there is no Glue detected by the Sensor by lighting the Error Lamp until Glue is detected again.
856_0412_0_ 12.01.10
The LED will be lit only when Glue is detected. If this is not the case, replace the
Sensor assembly.
82
TROUBLESHOOTING
TROUBLESHOOTING LIQUID LEVEL SENSOR OUTPUT
PLACE DOOR SAFETY SWITCH TO OVERRIDE / POWER SWITCH TO ON:
With Line Voltage at terminals (1) and (2), pull the Door Safety Switch plunger to the
override. (Pull the plunger button with insulated pliers or pull the #6 screw attached
to the plunger outward about 1/4”.) The override position closes the Door Safety
Switch and allows the Enclosure to operate with the Door open. Rotate the ON / OFF
Switch to ON. The Operator Interface display will light.
REFER TO DRAWINGS 856 AND 856-32
FOR COMPONENT AND TERMINAL IDENTIFICATION.
CHECK DC SUPPLY VOLTAGE TO SENSOR:
Connect a positive meter lead to lower I/O Terminal (10) and the negative lead to
lower I/O Terminal (2) where the Sensor wires are connected. About +24VDC should
appear across the terminals. If the proper power supply voltage does not appear,
then check the upper I/O Terminals for +24 VDC and the DC Power Supply output
terminals as well. Check wiring of the following points.
DC Power Supply -V
Wht/Blu wire
DC DC Power Supply +V
Red/Blu wire
DC +24
Upper I/O Terminal 3
No wire
DC (Jumpered to Terminal 4) Wht/Grn wire
Upper I/O Terminal 10
Red/Blu wire
DC +24
Lower I/O Terminal 2
Blu wire
DC Lower I/O Terminal 10
Brn wire
DC +24
CHECK OUTPUT SIGNAL FROM SENSOR:
Connect the negative meter lead to Upper I/O Terminal (3) and the positive meter
lead to Lower I/O Terminal (2). Have an assistant activate the sensor by placing Glue
in front of the Sensor. When the Sensor is blocked, the voltage will be about 0VDC.
When the Sensor is unblocked the voltage will be +VDC (or +20VDC to +24VDC.) If
not, check wiring of the following points. When the Sensor is blocked, if Input I0.5
indicator on the PLC does not go ON, check wiring of the following points.
Lower I/O Terminal 2
Blk
Upper I/O Terminal 2
Blk/Yel
PLC Terminal I0.5
Blk/Yel
856_0412_0_ 12.01.10
NOTE: The detection depth of the Level Sensor is adjusted to detect the Glue beyond the
inner surface of the Intermediate Tank. The signals work as follows. The Black Output wire
will be at 0VDC when the Sensor detects Glue, and +VDC when the Sensor detects NO Glue.
Reference is DC Common on the Sensor’s Blue wire.
83
TROUBLESHOOTING
TROUBLESHOOTING PLC OUTPUTS
PLACE DOOR SAFETY SWITCH TO OVERRIDE / POWER SWITCH TO ON:
With Line Voltage at terminals (1) and (2), pull the Door Safety Switch plunger to the
override. (Pull the plunger button with insulated pliers or pull the #6 screw attached
to the plunger outward about 1/4”.) The override position closes the Door Safety
Switch and allows the Enclosure to operate with the Door open. Move the ON / OFF
Switch to ON. The Power Indicator Lamp will light.
REFER TO DRAWING 856 AND 856-32
FOR COMPONENT AND TERMINAL IDENTIFICATION.
CHECK PLC OUTPUT SIGNAL(S):
Have an assistant block the sensor. Observe the Output Indicators on the PLC. Depending on your 856 System setup, indicators for PLC Outputs Q0.0, or Q0.1 or both
will light light when the Sensor is blocked, and extinguish when the Sensor is unblocked.
PLC Output Q0.1 is for single Adhesive Valve Systems and will activate when the
Sensor is Blocked. PLC Outputs Q0.0 and Q0.1 are the Left and Right Adhesive Valves
respectively which will activate according to your Series Program for 856 System
Revision B or Revision D.
Connect the negative meter lead to I/O Terminal (13)(DC-), and the positive meter
lead to PLC Output Terminal (Q0.1). When the Sensor is unblocked, the voltage will
be about 0VDC. When the Sensor is blocked, the voltage will be +VDC. If this is not
so, check wiring at the following points.
Repeat this test with PLC Output Terminals Q0.0 if applicable to your 856 System.
856_0412_0_ 12.01.10
0VDC wiring
Upper I/O Terminal 6
Wht/Grn wire (x2)
Upper I/O Terminal 4
Wht Grn wire (x2)
Upper I/O Terminal 13
Wht/Grn wire, Wht/Blu wire
Upper I/O Terminal 18
Wht Grn wire (x2)
Upper I/O Terminal 22
Wht Grn wire
Upper I/O Terminal 12
Wht/Blu wire (x2)
Upper I/O Terminal 20
Wht/Blu wire (x2)
Upper I/O Terminal 28
Wht/Blu wire (Air Electric Solenoid lead)
(May be more than one depending on your 856 System.)
84
TROUBLESHOOTING
TROUBLESHOOTING PLC OUTPUTS CONTINUES
PLACE DOOR SAFETY SWITCH TO OVERRIDE / POWER SWITCH TO ON:
With Line Voltage at terminals (1) and (2), pull the Door Safety Switch plunger to the
override. (Pull the plunger button with insulated pliers or pull the #6 screw attached
to the plunger outward about 1/4”.) The override position closes the Door Safety
Switch and allows the Enclosure to operate with the Door open. Move the ON / OFF
Switch to ON. The Power Indicator Lamp will light.
REFER TO DRAWING 856 AND 856-32
FOR COMPONENT AND TERMINAL IDENTIFICATION.
CHECK PLC +VDC OUTPUT SIGNAL(S): continues
Outputs used are determined by your system configuration.
Valve Left Output:
PLC Terminal Q0.0
Upper I/O Terminal 25
Lower I/O Terminal 25
Vio wire
Vio wire
Blk wire (Air Electric Solenoid lead)
Valve Right Output:
PLC Terminal Q0.1
Upper I/O Terminal 26
Lower I/O Terminal 26
Brn wire
Brn wire
Blk wire (Air Electric Solenoid lead)
Metering Marker Valve Output:
PLC Terminal Q0.3
Grn wire
Upper I/O Terminal 16
Grn wire
Lower I/O Terminal 16
Blk wire (Air Electric Solenoid lead)
Error Lamp Output:
PLC Terminal Q0.4
Upper I/O Terminal 21
Lower I/O Terminal 21
Gry wire
Gry wire
Vio wire (Error Lamp lead)
856_0412_0_ 12.01.10
Glue Detect Marker Valve Output:
PLC Terminal Q0.5
Yel wire
Upper I/O Terminal 27
Yel wire
Lower I/O Terminal 27
Blk wire (Air Electric Solenoid lead)
85
TROUBLESHOOTING
TROUBLESHOOTING CHAIN RELAY
PLACE DOOR SAFETY SWITCH TO OVERRIDE / POWER SWITCH TO ON:
With AC Line Voltage at terminals (1) and (2), pull the Door Safety Switch plunger to
the override. (Pull the plunger button with insulated pliers or pull the #6 screw attached to the plunger outward about 1/4”.) The override position closes the Door
Safety Switch and allows the Enclosure to operate with the Door open. Move the ON /
OFF Switch to ON. The Power Indicator Lamp will light.
REFER TO DRAWING 856 AND 856-32
FOR COMPONENT AND TERMINAL IDENTIFICATION.
CHECK CHAIN RELAY:
The Chain Relay is used as an additional condition for allowing gluing operations by
the 856 Control Enclosure. The Chain Input is connected to the Fingerjointer conveyor power, so the Chain Input should be active whenever the conveyor is operating.
The main purpose for the Chain Input is to prevent gluing operations when boards
are not moving on the fingerjointer. PLC Outputs Q0.0 and Q0.1 will not activate when
the Chain Input is inactive.
Some test operations should be performed with the Chain Input inactive. Verify the
proper operation of PLC Inputs while preventing activation of the PLC Glue Valve
outputs while the Chain Relay is inactive. Error and Marker Outputs will continue to
function when the Chain Input is inactive.
CHECK CHAIN RELAY SIGNAL TO PLC:
Input I0.1 on the PLC will indicate ON when the Chain Relay signal is properly connected to the PLC. If this is not so, check wiring at the following points.
PLC Terminal L+
Red/Blu wire (4 places)
Upper I/O Terminal 9
Red wire, Red/Blu wire
Chain Relay Base Terminal 21
Red wire
Chain Relay Terminal 21 connects to Terminal 24 when the Chain Relay
is activated.
Chain Relay Base Terminal 24 Gry/Wht wire
PLC Terminal I0.1
Gry/Wht wire
86
856_0412_0_ 12.01.10
The Chain Relay can be checked by measuring line voltage between Chain Relay
Base Terminals (A1) and (A2). Line voltage will be 24VDC or 1
110-120VAC or 220-240VAC depending on the supply power from your plant.Set the
meter to read AC Voltage and connect the meter leads across the Chain Relay Base
Terminals (A1) and (A2). Have an assistant supply and disconnect the chain signal.
Look for audible and visual indicators of the Chain Relay shifting. If it does not shift
when the proper voltage is present, replace the Chain Relay.
TROUBLESHOOTING
TROUBLESHOOTING BOARD SKIP (SERIES) FUNCTION
PLACE DOOR SAFETY SWITCH TO OVERRIDE / POWER SWITCH TO ON:
With Line Voltage at terminals (1) and (2), pull the Door Safety Switch plunger to the
override. (Pull the plunger button with insulated pliers or pull the #6 screw attached
to the plunger outward about 1/4”.) The override position closes the Door Safety
Switch and allows the Enclosure to operate with the Door open. Move the ON / OFF
Switch to ON. The Power Indicator Lamp will light.
REFER TO DRAWING 856 AND 856-32
FOR COMPONENT AND TERMINAL IDENTIFICATION.
CHECK SERIES STATUS:
Review the Optional Program Functions Section of this Manual with regards to Series
Operation.
Using the Series Status Screen, note the side of the board which is to have the adhesive application. Run the boards through the System slow enough to check that the
adhesive is properly applied with regards to the Series Status Screen.
If the adhesive is applied properly, then reprogram the Series if necessary to achieve
the desired lay-up pattern.
856_0412_0_ 12.01.10
If the adhesive is not applied with regards to the Series Status Screen, then check the
PLC Outputs per Troubleshooting PLC Outputs in this Manual to verify Air Valve
connections and voltage paths.
87
TROUBLESHOOTING
TROUBLESHOOTING GLUE DETECT FUNCTION
PLACE DOOR SAFETY SWITCH TO OVERRIDE / POWER SWITCH TO ON:
With Line Voltage at terminals (1) and (2), pull the Door Safety Switch plunger to the
override. (Pull the plunger button with insulated pliers or pull the #6 screw attached
to the plunger outward about 1/4”.) The override position closes the Door Safety
Switch and allows the Enclosure to operate with the Door open. Move the ON / OFF
Switch to ON. The Power Indicator Lamp will light.
REFER TO DRAWING 856 AND 856-32
FOR COMPONENT AND TERMINAL IDENTIFICATION.
CHECK LUMINESCENCE SENSORS:
The two Luminescence Sensors are analog sensors requiring a 24VDC supply voltage
and and havning an output range from .5-10ma. When power is applied, an orange
LED on the top of the Sensor is lighted and the Sensor emits a three low level purple
LED beams from the lens. When the adhesive with luminescence is detected, a red
LED at the to of the Sensor will flash or be lighted depending on the amount of the
luminescence detected by the Sensor. The signal from the Sensor is scaled in the PLC
from 0 to 1000 and displayed on the Glue Detect Screen.
CONNECT AMMETER TO OUTPUT SIGNAL FROM THE SENSORS:
Press K2 from the Main Menu to view the Glue Detect Screen and monitor the Glue
Amount value.
Connect an Ammeter leads in series with the Top Sensor output using 0-200 ma scale.
Remove the Yellow wire from Upper I/O Terminal 15. Connect the Black Probe to
Upper I/O Terminal 15 and the Red Probe to the Yellow wire. Perform the tests below
to evaluate the Sensor output.
Connect an Ammeter leads in series with the Bottom Sensor output using 0-200 ma
scale. Remove the Yellow wire from Upper I/O Terminal 16. Connect the Black Probe
to Upper I/O Terminal 16 and the Red Probe to the Yellow wire. Perform the tests
below to evaluate the Sensor output.
856_0412_0_ 12.01.10
CHECK OUTPUT SIGNAL FROM THE SENSORS:
Place a block of wood with no luminescent glue within 2” of the Luminescence Sensors, the Glue Amount displayed on the Glue Detect Screen should be at or near zero.
The Ammeter will display at or near zero ma. The Sensitivity adjustment on the sensor may be adjusted to obtain the proper zero reading for Glue Amount when there is
no glue on the board. Some varieties of lumber have natural luminescence which will
be detected by the Sensor.
88
TROUBLESHOOTING
TROUBLESHOOTING GLUE DETECT FUNCTION CONTINUES
PLACE DOOR SAFETY SWITCH TO OVERRIDE / POWER SWITCH TO ON:
With Line Voltage at terminals (1) and (2), pull the Door Safety Switch plunger to the
override. (Pull the plunger button with insulated pliers or pull the #6 screw attached
to the plunger outward about 1/4”.) The override position closes the Door Safety
Switch and allows the Enclosure to operate with the Door open. Move the ON / OFF
Switch to ON. The Power Indicator Lamp will light.
REFER TO DRAWING 856 AND 856-32
FOR COMPONENT AND TERMINAL IDENTIFICATION.
CHECK OUTPUT SIGNAL FROM THE SENSORS CONTINUES:
Place a block of wood with the proper glue application within 2” of the Luminescence
Sensor, the Glue Amount on the Glue Detect Screen should be at or near 1000. The
Ammeter will display at or near 9-10 ma.
Place a 50% luminescent sample within 2” of the Luminescence Sensor, the Glue
Amount on the Glue Detect Screen should be at or near 500. The Ammeter will display at or near 4-6 ma.
If the Ammeter reading is correct but the Glue Amount display is incorrect, verify all
wiring connections to the Analog I/O Module.
CHECK THE SENSOR POTENTIOMETERS:
The Luminescence Sensors have two Potentiometers located at the bottom end of the
Sensor, near the cable connection. They are used for Sensitivity and Response Time.
The Response Time Potentiometer is always adjusted to minimum or the lowest setting. This is to provide the fastest data to the PLC regarding the actual glue amount on
the joint. Setting the potentiometer to any other positions would cause the Sensor to
miss small sections of the joint with no glue.
The Sensitivity Potentiometer is normally set to display 1000 when the Sensor is
monitoring a joint with 100% glue coverage. Therefore, when the joint has less than
100% glue coverage, lower readings will be displayed.
856_0412_0_ 12.01.10
The Sensitivity Potentiometer may be checked for linearity by placing a joint with
100% glue coverage in front of the Sensor and adjusting the potentiometer slowly
from minimum to maximum. The display should start at zero and move slowly to 1000.
This will typically take 100° rotaion of the potentiometer.
89
TROUBLESHOOTING
TROUBLESHOOTING GLUE DETECT FUNCTION CONTINUES
CHECK THE FRAME SENSORS:
The Frame Sensors define the window of operation for the Luminescence Sensor. If
the Frame Sensors are adjusted improperly, the joints may not be checked at all by
the Luminescence Sensor.
The initial setup of the Frame Sensors is vertical, along the centerline of the Luminescence Sensor, looking perpendicular down onto the lumber on the fingerjointer. The
Red beams of the Frame Sensors should be about .75”-1” apart on the lumber.
Set the Frame Sensors, then check the sensitivity of the Glue Detect Reject Threshold.
The Frame Sensors may be angled toward or away from each other, changing the
operation window of the luminescence detection. A gap of .50” between the Red
Beams of the Frame Sensors would give the Detection System a wider window of
operation where you may receive more errors at the leading and trailing edges of the
joint. A gap of 2.0” would give the Detection System a smaller window where you may
miss glue voids on the joint.
Once the Frame Sensors are set, begin with a lower Glue Detect Reject Threshold
where there are no detection errors. Slowly increase the Reject Threshold by increments of 10 to the point where the system detects non-existent errors. Lower the
Reject Threshold setting by 15-20 to eliminate the detection of non-existent errors.
856_0412_0_ 12.01.10
Example: Start with a Reject Threshold of 75. Increase the Reject Threshold setting by
increments of 10 until the setting is 160 where errors begin to occur with adequately
glued boards. Lower the Reject Threshold to 145 and continue operations.
90
TROUBLESHOOTING
TROUBLESHOOTING GLUE DETECT MARKER FUNCTION
PLACE DOOR SAFETY SWITCH TO OVERRIDE / POWER SWITCH TO ON:
With Line Voltage at terminals (1) and (2), pull the Door Safety Switch plunger to the
override. (Pull the plunger button with insulated pliers or pull the #6 screw attached
to the plunger outward about 1/4”.) The override position closes the Door Safety
Switch and allows the Enclosure to operate with the Door open. Move the ON / OFF
Switch to ON. The Power Indicator Lamp will light.
REFER TO DRAWING 856 AND 856-32
FOR COMPONENT AND TERMINAL IDENTIFICATION.
CHECK FRAME SENSORS:
CHECK OUTPUT SIGNAL FROM THE LEFT SENSOR:
Connect the negative meter lead to Upper I/O Terminal (18) and the positive meter
lead to Lower I/O Terminal (19). When the Sensor is unblocked, the voltage will be
about 0VDC. Have an assistant block the sensor. When the Sensor is blocked the
voltage will be +VDC (or +20VDC to +24VDC.) If not, check wiring of the following
points. When the Sensor is blocked, if Input I0.2 indicator on the PLC does not go ON,
check wiring of the following points.
Lower I/O Terminal 19
Wht
Upper I/O Terminal 19
Blu
PLC Terminal I0.2
Blu
CHECK OUTPUT SIGNAL FROM THE RIGHT SENSOR:
Connect the negative meter lead to Upper I/O Terminal (23) and the positive meter
lead to Lower I/O Terminal (22). When the Sensor is unblocked, the voltage will be
about 0VDC. Have an assistant block the sensor. When the Sensor is blocked the
voltage will be +VDC (or +20VDC to +24VDC.) If not, check wiring of the following
points. When the Sensor is blocked, if Input I0.3 indicator on the PLC does not go ON,
check wiring of the following points.
Lower I/O Terminal 23
Wht
Upper I/O Terminal 23
Grn
PLC Terminal I0.3
Grn
91
856_0412_0_ 12.01.10
NOTE: The Frame Sensor is adjusted for “Light” detection, the signals work as follows. The
White Output wire will be at 0VDC when the Sensor is unblocked, and +VDC when the
Sensor is blocked. Reference is DC Common on the Sensor’s Black wire.
TROUBLESHOOTING
TROUBLESHOOTING GLUE DETECT MARKER FUNCTION CONTINUES
PLACE DOOR SAFETY SWITCH TO OVERRIDE / POWER SWITCH TO ON:
With Line Voltage at terminals (1) and (2), pull the Door Safety Switch plunger to the
override. (Pull the plunger button with insulated pliers or pull the #6 screw attached
to the plunger outward about 1/4”.) The override position closes the Door Safety
Switch and allows the Enclosure to operate with the Door open. Move the ON / OFF
Switch to ON. The Power Indicator Lamp will light.
REFER TO DRAWING 856 AND 856-32
FOR COMPONENT AND TERMINAL IDENTIFICATION.
CHECK ERROR LAMP AND MARKER OUTPUT:
CHECK ERROR LAMP OUTPUT:
The Error Lamp will light immediately when both Frame Sensors are active and the
either Luminescence Sensor reading for Glue Amount is lower than the it’s respective
Reject Threshold set on the Glue Detect Screen. The lamp will extinguish when one of
the Frame Sensors becomes inactive. The comparrison between Reject Threshold
and Glue Amount is only made while both Frame Sensors are active. Press K2 to view
the Glue Detect Screen and monitor the Glue Amount and Reject Threshold setting.
If the Error Lamp does not activate, refer to Troubleshooting PLC Outputs in this
Manual to check wiring and trace the Error Lamp voltage path.
CHECK PLC MARKER VALVE OUTPUT:
The Marker Valve is active after the Marker Delay setting has expired and for the
duration of the Marker On Time setting. Set a Marker Delay Time of 50 for 500 ms and
a Marker On Time of 100 for 1000ms. To force an error in Glue Detection, set the one
of the Glue Detect Reject Thresholds to 1000 or unplug one of the Luminescence
Sensors.
Block both Frame Sensors momentarily and observe that the Error Lamp is lighted.
Unblock both Frame Sensors and observe the Marker Valve for activation after a 1/2
second delay. Observe the Marker Valve On Time of 1 second.
856_0412_0_ 12.01.10
If the Marker Valve does not activate, refer to Troubleshooting PLC Outputs in this
Manual to check wiring and trace the Marker Valve voltage path.
92
APPLICATOR VALVE ASSEMBLY
See Assembly Drawing 268.
The Applicator Valve assembly is composed of two subassemblies, the Air
Cylinder and the Adhesive Valve Body. The moving parts are the Air Piston and
Valve Spool. The Air Piston drives the Valve Spool towards the Applicator Head
to open the Adhesive Valve and away from the Applicator Head to close the
Adhesive Valve. The Valve Spool is designed to create a sniffing action when the
Adhesive Valve is closed to draw the adhesive back into the Adhesive Head to
reduce waste and prevent drips. The parts subject to wear in normal operation
are the Valve Spool (Part #206-07 or #206-26) and any of the Adhesive Valve’s
Seals and O-Rings.
If the Adhesive Valve leaks adhesive in its OFF position, it indicates that Spool
Seals are worn. If adhesive backs up into the Air Cylinder, this condition indicates worn Spool Seals and a worn U-Cup Seal (Part #258-24 or #268-37).
Adhesive in the Air Cylinder will cause valve operation to be sluggish, giving
an indication of an electronic timing problem.
Take the Adhesive Valve apart and thoroughly clean all the pieces. Inspect the
Spool and Seals, and replace parts which show wear. Use only APQUIP replacement Seals and O-Rings. Other Seals, though they look the same, will not offer
the same resistance to chemical attack or mechanical wear due to compound
characteristics.
**** IMPORTANT NOTE *****
Observe the correct orientation of the Spool Seal (Part #206-14) and
other two-part seals that consist of a modified U-cup and O-ring
expander. The “open” side of the seal that contains the O-ring MUST
face toward the incoming adhesive pressure. The correct orientation
of seals is well illustrated in Drawing 268. Lubricate all parts with
Silicone Grease which is available from Apquip. DO NOT USE PETROLEUM-BASED GREASE.
Note that the U-Cup Seal (Part #258-24 or #268-37) for the Air Cylinder must have its
“open side” face the incoming air pressure to seal properly.
93
856_0412_0_ 12.01.10
Therefore, when installing the Spool Seal (Part #206-14) in the “Valve Body Inlet”
(Part #206-05), the lips of the Seal must enter the cavity first. However, in the “Valve
Body Mounting Segment” (Part #258-04), the inner Seal (the face which contacts the
Valve Body Inlet) is installed with the “heel” entering first while the outer Seal, the
lips are inserted first.
OPTIONAL VALVE PARTS
Optional Parts:
If the Valve Spool (Part #206-07) is experiencing unusual wear because if its use with
a filled or abrasive adhesive, then use of the ceramic coated version of the Valve
Spool (Part #206-26) is recommended. This special Valve Spool is normally kept in
stock.
Part #206-14 is the standard Spool Seal (Black in color) that are normally installed
into new Part #268 Adhesive Valves. Optional Seals are available that may last longer
with your adhesive. There are two optional Spool Seals: Part #268-31 (Orange in
color) and Part #268-33 (White in color), that may extend the working life of your
valve between rebuilds. Please consult with an Apquip representative if you feel you
have to rebuild your valve too frequently.
856_0412_0_ 12.01.10
The standard U-Cup Seal (Part #258-24) is a soft Black rubber with no O-Ring and the
optional U-Cup Seal (Part #268-37) is Orange in color with an O-Ring. The Orange UCup Seal has less reactivity with petroleum products such as oil. This seal is preferred when applying urethane adhesives where an oil reservoir is in use.
94
ADHESIVE FILTER
See Assembly Drawing 600.
The Adhesive Filter accepts replaceable screen elements in three different wire
mesh sizes. Screen sizes are 16, 30, and 50 mesh. Refer to drawing 600 for part numbers.
For single component adhesives, use the 30 or 50 mesh element. For two component
adhesives, with powder catalyst, the 16 mesh element provides less restriction. For
low viscosity, unfilled adhesives, use the 50 mesh element.
Some powdered catalysts contain large particles that are not removed during the
manufacturing process. Use of these catalysts will require pre-filtering after mixing in
your mill. This pre-filtering can be done by pouring the mixed adhesive through an
ordinary window screen into a plastic bucket.
856_0412_0_ 12.01.10
Apquip also provides a large capacity Adhesive Filter (Part #600B) that can be used
when there is a large volume of adhesive being applied. 600B Filters also accept
screen elements in three different wire mesh sizes. Screen sizes are 16, 30 , and 50
mesh. Refer to Drawing 600B for part numbers.
95
PRESSURE TANKS
See Assembly Drawing 582
All Adhesive Pressure Tanks have a maximum working pressure of 125 PSIG which is
set by Federal safety standards. Do not remove or alter the safety Relief Valve which
is a required part of the Adhesive Pressure Tank Assembly. A typical operating pressure is 20 PSIG for a low viscosity adhesive in a warm mill. Higher viscosity glues and
lower operating temperatures will require higher tank pressures. Under no circumstances should 125 PSIG tank pressure be exceeded.
856_0412_0_ 12.01.10
If an application requires a greater pressure than 125 PSIG, then the positive displacement Adhesive Pump (Part #522) will be required.
96
SPECIAL ADHESIVES
The Apquip System is quite versatile in that it may be used with many different types
of adhesives. Systems may be capable or running a completely different adhesive
with only a few modifications.
With over twenty-five years of experience in woodworking applications, a quick
phone call, fax or e-mail may make your adhesive switch a much nicer experience.
We have worked with isocyanate, melamine, polyurethane, PVA, resorcinol and soy
based adhesives.
856_0412_0_ 12.01.10
Please consult with an Apquip representative if you are planning on switching adhesives.
97