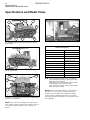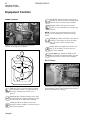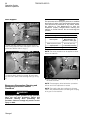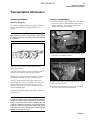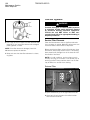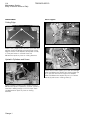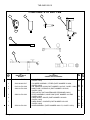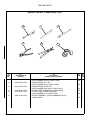
1
TM 5-2430-200-10
Operator’s Manual
Deployable Universal Combat
Earthmover (DEUCE)
30/30 (Model DV100)
NSN: 2430-01-423-2819
PIN: 7RR00003-Up
DISTRIBUTION STATEMENT A: Approved for public release; distribution is unlimited.
Headquarters, Department of the Army
MARCH 2001
TM 5-2430-200-10
CHANGE
NO. 1
HEADQUARTERS, DEPARTMENT OF THE ARMY
WASHINGTON, DC, 18 MAY 2008
TECHNICAL MANUAL
OPERATOR’S MANUAL
FOR
DEPLOYABLE UNIVERSAL
COMBAT EARTHMOVER (DEUCE)
30/30 (MODEL DV100)
NSN 2430-01-423-2819
PIN: 7RR00003-UP
DISTRIBUTION STATEMENT A - Approved for public release; distribution is unlimited.
TM 5-2430-200-10 dated 01 MARCH 2001 is updated as follows:
1.
2.
3.
4.
File this sheet in front of the manual for reference.
This change is a result of various configuration changes and updates to include: recoil alert system, sight
gauge covers to rollers and rear idlers, changed and re-routed hydraulic hoses, updated PMCS, BII tools
and NSNs.
A vertical bar in the outer margin of the page or between columns in a double column format indicates new
or updated text or illustrations.
Remove old pages and insert new pages as indicated below.
REMOVE PAGE
1 through 4
7 through 10
13 and 14
17 through 22
27 and 28
31 and 32
35 through 42
45 and 46
49 and 50
53 through 62
65 through 88
97 and 98
103 through 106
109 through 118
121 through 132
A-3 through A-6
A-15 and A-16
INSERT PAGE
REMOVE PAGE
INSERT PAGE
A (B Blank)
1 through 4
7 through 10
13 and 14
17 through 22
27 and 28
31 and 32
35 through 42
45 and 46
49 and 50
53 through 62
65 through 88
97 and 98
103 through 106
109 through 118
121 through 132
A-3 and A-4
A-4.01 and A-4.02
(blank)
A-5 and A-6
A-15 and A-16
A-21 through A-24
A-21 and A-21.00
A-21.01 and A- 22
A-23 and 24
B-1 and B-2
C-1 through C-4
D-1 and D-2
E-1 and E-1.00
E-1.01 Blank) and E-2
E-3 through E-6
B-1 and B-2
C-1 through C-4
D-1 and D-2
E-1 through E-6
DA 2028 Sample
None
None
Metric Chart
PIN
DA 2028 Sample Front
DA 2028 Sample Back
DA 2028 Front and Back
Metric Chart
PIN
By Order of the Secretary of the Army:
GEORGE W. CASEY, JR.
General, United States Army
Chief of Staff
Official:
JOYCE E. MORROW
Administrative Assistant to the
Secretary of the Army
0811910
DISTRIBUTION: To be distributed in accordance with the Initial Distribution Number (IDN)
256552, requirements for TM 5-2430-200-10.
TM5-2430-200-10
INSERT LATEST CHANGED PAGES. DESTROY SUPERSEDED DATA.
LIST OF EFFECTIVE PAGES
NOTE: A vertical line in the outer margin of the page or between columns indicates the portion of the text or
illustration affected by a change.
Dates of issue for original and changed pages are:
Original 0 . . . . . . . . . 01 March 2001
Change 1 . . . . . . . . .
18 May 2008
TOTAL NUMBER OF CHANGE PAGES IS 89 WHICH CONSISTS OF THE FOLLOWING:
* A zero in the Change Number columns below indicates an original page.
Page Number
*Change Number
Page Number
Cover...................................................................0
A and B ...............................................................1
Page 1 ................................................................1
Page 2 and 3 ......................................................0
Page 4.................................................................1
Page 5 and 6 ......................................................0
Page 7.................................................................1
Page 8 ................................................................0
Page 9 ................................................................1
Page 10 through 12 ............................................0
Page 13 ..............................................................1
Page 14 through 17 ............................................0
Page 18 through 22 ............................................1
Page 23 through 26 ............................................0
Page 27 and 28 ..................................................1
Page 29 through 31 ............................................0
Page 32...............................................................1
Page 33 and 34 ..................................................0
Page 35...............................................................1
Page 36 and 37 ..................................................0
Page 38...............................................................1
Page 39...............................................................0
Page 40 through 42 ............................................1
Page 43 through 45 ............................................0
Page 46 ..............................................................1
Page 47 through 49 ............................................0
Page 50...............................................................1
Page 51 through 53 ............................................0
Page 54 through 58 ............................................1
Page 59...............................................................0
Page 60 and 61 ..................................................1
Page 62 through 64 ............................................0
Page 65 through 67 ............................................1
Page 68 ..............................................................0
Page 69 through 71 ............................................1
Page 72...............................................................0
Page 73...............................................................1
Page 74 and 75 .................................................0
Page 76...............................................................1
Page
Page
Page
Page
Page
Page
Page
Page
Page
Page
Page
Page
Page
Page
Page
Page
Page
Page
Page
Page
Page
Page
Page
Page
Page
Page
Page
Page
Page
Page
Page
Page
Page
Page
Page
Page
Page
A
*Change Number
77...............................................................0
78 and 79 ..................................................1
80...............................................................0
81 through 84 ............................................1
85...............................................................0
86 ..............................................................1
87...............................................................0
88...............................................................1
89 through 97 ............................................0
98...............................................................1
99 through 102 ..........................................0
103 through 105 ........................................1
106 through 109 ........................................0
110 through 115 ........................................1
116.............................................................0
117 ............................................................1
118 through 121 ........................................0
122 through 125 ........................................1
126.............................................................0
127 through 132 ........................................1
A-1 through A-3 .........................................0
A-4 .............................................................1
A-4.01 (A-4.02 blank) ................................1
A-5 .............................................................0
A-6 ............................................................1
A-7 through A-14 .......................................0
A-15 and A-16 ..........................................1
A-17 through A-20 ....................................0
A-21 ...........................................................1
A-21.00 and A-21.01 .................................1
A-22 ...........................................................0
A-23 and A-24 ...........................................1
B-1 .............................................................0
B-2 .............................................................1
C-1.............................................................0
C-2 through C-4.........................................1
D-1.............................................................0
Change 1
TM5-2430-200-10
LIST OF EFFECTIVE PAGES
Page Number
*Change Number
Page D-2.............................................................1
Page E-1 .............................................................1
Page E-1.00 (E-1.01 blank) ................................1
Page E-2 .............................................................1
Page E-3 .............................................................0
Page E-4 .............................................................1
Page E-5 .............................................................0
Page E-6 .............................................................1
Page E-7 through F-2 .........................................0
Authorization Page..............................................0
DA 2028 Sample Front & Back ...................................1
DA 2028 Front & Back.................................................1
Metric Chart.................................................................1
PIN.............................................................................. 1w
Change 1
B
TM 5-2430-200-10
1
Information Section
Table of Contents
REPORTING ERRORS AND RECOMMENDING IMPROVEMENTS
You can help improve this publication. If you find any mistakes or if you know of a way to improve the procedures,
please let us know. Submit your DA Form 2028 (Recommended Changes to Equipment Technical Publications),
through the Internet, on the Army Electronic Product Support (AEPS) website. The Internet address is
http://aeps.ria.army.mil . The DA Form 2028 is located under the Public Applications section in the AEPS Public
Home Page. Fill out the form and click on SUBMIT. Using this form on the AEPS will enable us to respond quicker
to your comments and better manage the DA Form 2028 program. You may also mail, fax or email your letter, DA
Form 2028 direct to: U. S. Army TACOM Life Cycle Management Command, ATTN: AMSTA-LC-LMPP/TECH
PUBS, 1 Rock Island Arsenal, Rock Island, IL 61299-7630. The email address is ROCK-TACOM-TECH-PUBS@
conus.ria.army.mil. The fax number is DSN 793-0726 or Commercial (309) 782-0726.
Table of Contents
Information Section
After Starting Engine................................................60
Machine Operation ..................................................61
Operating Techniques..............................................73
Foreword ...................................................................3
Machine Parking ......................................................76
Safety Section
Transportation Information .......................................79
Towing Information ..................................................85
Important Safety Information......................................4
Safety ........................................................................5
Warning Labels .....................................................5
General Hazard Information...................................9
Crushing or Cutting Prevention............................10
Burn Prevention ..................................................10
Fire or Explosion Prevention ................................11
Threat of Nuclear, Biological, and Chemical (NBC)
Contamination .....................................................12
ElectroMagnetic Pulse (EMP) Exposure ...............12
Mounting and Dismounting..................................12
Before Starting the Engine...................................12
Engine Starting....................................................12
Before Operating the Machine.............................13
Machine Operation ..............................................13
Machine Parking .................................................13
Troubleshooting.......................................................86
Maintenance Section
Cooling System Specifications.................................99
Fuel Specifications.................................................101
Lubricant Specifications.........................................102
Lubricant Viscosities and Refill Capacities..............103
Lubrication Chart ...................................................104
Maintenance Intervals ............................................105
When Required......................................................106
Every 10 Service Hours or Daily.............................112
General Section
Every 50 Service Hours or Weekly .........................125
Specifications and Model Views...............................14
Every 250 Service Hours or 3 Months ...................127
Product Identification and Serial Number
Locations ............................................................15
Index Section
Operation Section
Index .....................................................................129
Monitoring Systems and Cab Features ....................17
Machine Features ....................................................38
Equipment Controls .................................................50
Before Starting the Engine .......................................52
Engine Starting ........................................................54
Change 1
2
Information Section
Table of Contents
TM 5-2430-200-10
Appendices
A. Operator’s Preventive Maintenance
Checks and Services (OPMCS) –
DEUCE
B. Components of End Item (COEI) –
DEUCE
C. Basic Issue Items (BII) List—DEUCE
D. Additional Authorization List
(AAL) – DEUCE
E. Unit Maintenance Level Transportation
Information
F. PLGR Instructions
TM5-2430-200-10
3
Information Section
Foreword
Foreword
Literature Information
Maintenance Interval Schedule
This manual should be stored in the operator's
compartment. Store the manual in the pamphlet bag,
which is provided as a Basic Issue Item (BII), or in the
literature storage area on the back side of the
operator’s seat.
Use the service hour meter to determine the servicing
intervals. Calendar intervals shown (daily, weekly,
monthly, etc.) can be used instead of the service hour
meter intervals, if they provide more convenient
servicing schedules and approximate the indicated
service hour meter reading. Recommended service
should always be performed at the interval that occurs
first.
This manual contains safety, operation, transportation,
lubrication, and maintenance information suitable for
the Army operator.
Guards and covers may have been removed for
illustrative purposes. Read, study and keep this
manual with the machine.
Whenever a question arises regarding your machine,
or this publication, please consult U.S. Army TankAutomotive and Armaments Command (TACOM), your
Caterpillar dealer, or Caterpillar Defense and Federal
Products for the latest available information.
Under extremely severe, dusty or wet operating
conditions, more frequent lubrication than is specified
in the Maintenance Intervals chart might be necessary.
Perform service on items at multiples of the original
requirement. For example, at Every 50 Service Hours
or Weekly, also service those items listed under Every
10 Service Hours or Daily.
Machine Description
Safety
The Safety section lists basic safety precautions. In
addition, this section identifies the text and locations
of the warning signs and labels used on the machine.
Read and understand the basic precautions listed in
the Safety section before operating or performing any
lubrication, maintenance or repair on this machine.
Operation
The Operation information is a reference for the new
operator and a refresher for the experienced one. This
section includes a discussion of gauges, switches,
machine controls, attachment controls, transportation,
and towing information.
Photographs and illustrations guide the operator
through the correct procedures for checking, starting,
operating and stopping the machine.
Maintenance
The maintenance information is a guide to equipment
care for Army operators. The illustrated, step-by-step
instructions are grouped by servicing intervals. Items
without specific intervals are listed under the When
Required topics. Items in the Maintenance Intervals
chart (refer to “Maintenance Section, Maintenance
Intervals” in this manual) are referenced to detailed
instructions that follow.
The Deployable Universal Combat Earthmover
(DEUCE) is an earthmoving machine capable of
travelling between sites at high speed. The DEUCE is
equipped with a 3126 HEUI (Hydraulic Electronic Unit
Injector) engine that operates at two power levels, 197
kW (265 hp) and 138 kW (185 hp). The machine is
equipped with a power/angle/tilt (PAT) blade and a
winch. The suspension on the machine can be
activated for smooth operation at high speed, or
locked, for a stable base when dozing.
California
Proposition 65 Warning
Diesel engine exhaust, and some of its constituents,
are known to the state of California to cause cancer,
birth defects, and other reproductive harm.
4
Safety Section
Safety
TM5-2430-200-10
Important Safety Information
Most accidents involving product operation, maintenance and repair are caused by failure to observe
basic safety rules or precautions. An accident can often be avoided by recognizing potentially
hazardous situations before an accident occurs. A person must be alert to potential hazards. This
person should also have the necessary training, skills and tools to perform these functions properly.
Improper operation, lubrication, maintenance or repair of this product can be dangerous
and could result in injury or death.
Do not operate or perform any lubrication, maintenance or repair on this product, until you
have read and understood the operation, lubrication, maintenance and repair information.
Safety precautions and warnings are provided in this manual and on the product. If these hazard
warnings are not heeded, bodily injury or death could occur to you or other persons.
The hazards are identified by the “Safety Alert Symbol” and followed by a “Signal Word” such as
“WARNING” as shown below.
! WARNING
The meaning of this safety alert symbol is as follows:
Attention! Become Alert! Your Safety is Involved.
The message that appears under the warning, explaining the hazard, can be either written or
pictorially presented.
NOTICE
Operations that may cause product damage are identified by NOTICE labels on the product and in
this publication.
Caterpillar cannot anticipate every possible circumstance that might involve a potential hazard. The
warnings in this publication and on the product are therefore not all inclusive. If a tool, procedure,
work method or operating technique not specifically recommended by Caterpillar is used, you must
satisfy yourself that it is safe for you and others. You should also ensure that the product will not be
damaged or made unsafe by the operation, lubrication, maintenance or repair procedures you
choose.
The information, specifications, and illustrations in this publication are on the basis of information
available at the time it was written. The specifications, torques, pressures, measurements,
adjustments, illustrations, and other items can change at any time. These changes can affect the
service given to the product. Obtain the complete and most current information before starting any
job. TACOM and Caterpillar dealers will have the most current information available. For a list of the
most current publication form numbers available, see the Caterpillar Service Manual Contents
Microfiche, REG1139F.
Change 1
5
Safety Section
Safety
TM5-2430-200-10
Safety
Warning Labels
There are several specific warning labels on this
machine. The exact location of each label and a
description of the hazard are reviewed in this section.
Please review the location and content of each
warning label.
1
NOTE: The warning labels on the radiator and engine
valve covers are not accessible to the operator
Make sure all warning labels can be read. Clean or
have the warning labels replaced if the words cannot
be read, or the illustrations are not clear. When
cleaning the warning labels, use a cloth, water, and
soap. Do not use solvent, gasoline, etc., to clean the
warning labels. Solvents or gasoline, etc., could
loosen the label adhesive and allow the sign to fall off.
If a warning label is attached to a part that is replaced,
make sure a new label is installed on the replaced
part. Contact TACOM or any Caterpillar dealer for new
warning labels. Refer to the following group numbers
in Parts Manual, Deployable Universal Combat
Earthmover (DEUCE) for the part numbers of the
warning labels and data plates:
•
•
•
•
•
•
1004943
1228811
1243842
1243847
1450425
1520463
Cover GP-Valve Mechanism
Paint GP-Transfer
Cylinder GP & Mounting (Front)
Cylinder GP & Mounting (Bogie)
Cab GP-Basic
Wiring GP & Battery (Optional Arctic)
Warning label (1) is located inside the battery
compartment, at the rear of the machine.
1
A second copy of warning label (1) is located on the
left side of the machine, towards the rear, near the
auxiliary start receptacle (NATO slave).
! WARNING
Improper jumper cable connections can cause
explosion, resulting in personal injury.
Batteries may be located in separate
compartments. When using jumper cables,
always connect positive (+) cable to positive (+)
terminal of battery connected to starter solenoid
and negative (-) cable from external source to
starter negative (-) terminal. (If machine not
equipped with starter negative terminal, connect
to engine block.) Follow procedure in the
operation manual.
1
A third copy of warning label (1) is located on the
arctic battery box, if the machine is equipped with the
arctic battery option.
6
Safety Section
Safety
TM5-2430-200-10
! WARNING
! WARNING
Pressurized system: hot coolant can cause serious
burn. To open cap, stop engine, wait until radiator is
cool, then loosen cap slowly to relieve the pressure.
• If a load slips or falls—you can be injured or
killed.
• Always be alert when around moving or
overhead loads.
2
• Always keep hands and body away from block
sheaves and swivels—and away from “pinch
points” where rope touches block parts.
• Always inspect tackle block system and parts
before each use.
Warning label (2) is located on the radiator, near the
cap.
• See OSHA Rule 1926 550(G) for personnel
hoisting for cranes and derricks. Only a Crosby
or McKissick Hook with a PL latch attached and
secured with the bolt, nut and cotter pin
provided, may be used. For any personnel
hoisting, a hook with or without a Crosby Ss4055 Latch attached shall not be used for
personnel hoisting.
• Never use tackle block
instruction and training.
without
proper
• Only use proper component parts.
3
Warning label (3) is located on the winch doubling
block.
7
Safety Section
Safety
TM5-2430-200-10
! WARNING
4
5
7
6
8
Do not operate or work on this machine unless
you have read and understand the instructions
and warnings in the operation and maintenance
manuals. Failure to follow the instructions or
heed the warnings could result in injury or death.
Contact any Caterpillar dealer for replacement
manuals. Proper care is your responsibility.
10
Warning label (4) is located on the engine valve cover.
This warning label is a four-quadrant graphic label.
Quadrant (5) warns against injecting ether into the air
intake system. Quadrant (6) warns of an electrical
shock hazard. Quadrant (7) warns that damaged highpressure oil lines can cause injury. Quadrant (8) directs
personnel to read the service manual before
performing service on the engine.
! WARNING
The protection offered by this ROPS will be
impaired if it has been subjected to any
modification, structural damage, or has been
involved in an overturn incident. This ROPS must
be replaced after a roll-over. Seat belts must be
worn while operating vehicle.
Warning label (10) is located on the console to the
right of the operator’s seat.
9
Warning label (9) is located on the top right corner of
the cab, inside the operator’s compartment.
NOTE: ROPS is the acronym for Rollover Protective
Structure.
Change 1
8
Safety Section
Safety
TM5-2430-200-10
! WARNING
! WARNING
If NBC exposure is suspected all air filter media
will be handled by personnel wearing full NBC
protective equipment. See operator maintenance
manuals. Failure to comply could result in
serious illness or death.
High intensity noise. Hearing protection required
within 33 feet when operating.
12
11
Warning label (12) is located on the left side of the
machine, to the rear of the cab door.
11
11
Warning label (11) is located at all air filter locations.
NOTE: NBC is an acronym for nuclear, biological, or
chemical.
TM5-2430-200-10
9
Safety Section
Safety
Wear a hard hat, protective glasses, and other
protective equipment as required by job conditions.
! WARNING
Accumulator and connecting lines may be
pressurized.
Wear eye and face protection when working with
hydraulic or air lines.
Read and follow the maintenance manual and the
instructions below before working on the
accumulator and connecting lines.
Do not wear loose clothing or jewelry that can catch
on the controls, or other parts of the machine.
Failure to follow the maintenance manual or the
instructions can cause rapid discharging of gas
or hydraulic fluids which can result in injury or
death.
1. Slowly bleed all hydraulic pressure off the
hydraulic side of the accumulators by using the
hydraulic disconnects.
2. Slowly discharge all gas pressure by opening
gas valve at one end of the accumulator until gas
begins to escape. Wait until all gas pressure is
relieved
before
proceeding
with
next
maintenance procedure.
13
14
15
Make certain that all protective guards and covers are
secured in place on the machine.
Keep the machine, especially the deck, walkways and
steps, free of foreign material; such as debris, oil, tools
and other items which are not part of the machine.
Secure all loose items such as tools and other items
which are not part of the machine.
Know the appropriate work site hand signals and who
gives them. Accept signals from one person only.
Do not smoke when servicing air conditioners or
wherever refrigerant gasses may be present. Inhaling
air-conditioner refrigerant gas through a lit cigarette or
other smoking method or inhaling fumes released from
a flame contacting air-conditioner refrigerant gas can
cause bodily harm or death.
Never put maintenance fluids into glass containers.
Drain all liquids into a suitable container. Dispose of all
liquids according to local regulations.
Use all cleaning solutions with care.
16
17
18
Report all needed repairs.
Do not allow unauthorized personnel on the machine.
(13) Brake accumulator, beneath cab. (14) Front cylinder
accumulator, each side of machine. (15) Middle cylinder
accumulator, each side of machine. (16) Bogie cylinder
accumulator, each side of machine. (17) Recoil accumulator,
each side of machine. (18) Kneeling accumulator, each side of
machine.
Accumulator warning labels are attached to each
accumulator on the machine.
General Hazard Information
Attach a Do Not Operate warning tag to the start
switch or controls before servicing or repairing the
machine. This tag is available from TACOM.
Do not operate the engine coolant heater while
refueling the machine. Do not place any combustible
or heat sensitive material within 50.8 mm (2 in) of the
heater’s exhaust system. Routinely inspect the fuel
delivery system for leaks. Repair all leaks before
operating the heater. Operation of the heater
produces harmful vapors which represent an
asphyxiation hazard. To guard against asphyxiation:
do not operate the heater in an enclosed space;
ensure that no exhaust fumes enter the operator’s
compartment. Exhaust components can be extremely
hot. Do not touch the exhaust components until the
parts are cool.
Know the width of your attachments so that proper
clearance can be maintained when operating near
fences, boundary obstacles, etc.
Change 1
10
Safety Section
Safety
TM5-2430-200-10
Performance of Maintenance
Unless otherwise specified, maintenance should be
performed with the machine parked on level ground,
the blade resting on the ground, the transmission
control lever in NEUTRAL, the parking brake engaged,
the engine stopped, and the electrical disconnect
switch in the OFF position.
Pressure Air
Pressure air can cause personal injury. When using
pressure air for cleaning, wear a protective face shield,
protective clothing, and protective shoes.
The maximum air pressure must be below 205 kPa
(30 psi) for cleaning purposes.
Fluid Penetration
Always use a board or cardboard when checking for a
leak. Escaping fluid under pressure, even a pin-hole
size leak, can penetrate body tissue, causing serious
injury, and possible death. If fluid is injected into your
skin, it must be treated immediately by a doctor
familiar with this type of injury.
Crushing or Cutting Prevention
Support equipment and attachments properly when
working beneath them. Do not depend on hydraulic
cylinders to hold them up. Any attachment can fall if a
control is moved, or if a hydraulic line breaks.
Never attempt adjustments while the machine is
moving, or the engine is running, unless otherwise
specified.
Where there are attachment linkages, the clearance in
the linkage area will increase or decrease with
movement of the attachment.
Stay clear of all rotating and moving parts.
Chips, or other debris, can fly off objects when struck.
Make sure no one can be injured by flying debris
before striking any object.
Rollover Protective Structure (ROPS) or
Falling Objects Protective Structure (FOPS)
ROPS or FOPS are guards located above the
operator's compartment and secured to the machine.
To avoid any possible weakening of the ROPS or
FOPS, consult TACOM or any Caterpillar dealer before
altering, adding weight to, welding on, or cutting or
drilling holes into the structure.
Any alteration not specifically authorized by Caterpillar
invalidates Caterpillar's ROPS and FOPS certification.
The protection offered by the ROPS/FOPS will be
impaired if it has been subjected to structural damage.
Structural damage can be caused by an overturn
accident, by falling objects, etc.
Burn Prevention
Coolant
At operating temperature, the engine coolant is hot
and under pressure. The radiator and all lines to
heaters, or the engine, contain hot coolant or steam.
Any contact can cause severe burns.
Steam can cause personal injury.
Check the coolant level only after the engine has been
stopped and the fill cap is cool enough to remove with
your bare hand.
Remove the cooling system fill cap slowly to relieve
pressure.
Cooling system additive contains alkalis that can
cause personal injury. Avoid contact with the skin,
eyes, and mouth.
Keep objects away from moving fan blades. They will
throw or cut any object or tool that falls, or is pushed,
into them.
Allow cooling system components to cool before
draining.
Do not use a kinked or frayed wire rope cable. Wear
gloves when handling the wire rope cable.
Oils
Retainer pins, when struck with force, can fly out and
injure nearby persons. Make sure the area is clear of
people when driving retainer pins.
Wear protective glasses when striking a retainer pin,
to avoid injury to your eyes.
Hot oil and components can cause personal injury. Do
not allow hot oil or components to contact the skin.
At operating temperature, the hydraulic tank is hot and
can be under pressure.
TM5-2430-200-10
Remove the hydraulic tank fill cap only after the engine
has been stopped, and the fill cap is cool enough to
remove with your bare hand.
Remove the hydraulic tank fill cap slowly, to relieve
pressure.
Relieve all pressure in air, oil, fuel, or cooling systems
before any lines, fittings or related items are
disconnected or removed.
Batteries
Batteries give off flammable fumes which can explode.
Do not smoke when observing the battery electrolyte
levels.
Electrolyte is an acid and can cause personal injury if it
contacts the skin or eyes.
Always wear protective glasses when working with
batteries.
11
Safety Section
Safety
Remove all flammable materials such as fuel, oil and
other debris before they accumulate on the machine.
Do not expose the machine to flames, burning brush,
etc., if at all possible.
Shields, which protect hot exhaust components from
oil or fuel spray in the event of a line, tube or seal
failure, must be installed correctly.
Fire Extinguisher
Have a fire extinguisher available and know how to
use it. Inspect and have it serviced as recommended
on its instruction plate.
Make sure the fire extinguisher is mounted on the right
side fender at the rear of the machine, in the location
provided.
Ether
Ether is poisonous and flammable.
Fire or Explosion Prevention
Inhaling ether vapors, or the repeated contact of ether
with skin, can cause personal injury.
All fuels, most lubricants, and some coolant mixtures
are flammable.
Use ether only in well-ventilated areas.
Fuel leaked, or spilled, onto hot surfaces or electrical
components can cause a fire.
Do not smoke while refueling or while in a refueling
area.
Do not smoke in areas where batteries are charged,
or where flammable materials are stored.
Refer to “Operation Section, Engine Starting” in this
manual for specific starting instructions.
Clean and tighten all electrical connections. Check
daily for loose or frayed electrical wires. Have all loose
or frayed electrical wires tightened, repaired, or
replaced before operating the machine.
Keep all fuels and lubricants stored in properly marked
containers and away from all unauthorized persons.
Store all oily rags, or other flammable material, in
protective containers.
Do not weld or flame cut on pipes or tubes that
contain flammable fluids. Clean them thoroughly with a
nonflammable solvent before welding or flame cutting
on them.
Do not smoke while changing ether cylinders.
Use ether with care to avoid fires.
Do not store replacement ether cylinders in living
areas or in the operator's compartment.
Do not store ether cylinders in direct sunlight or at
temperatures above 40°C (102°F).
Discard the cylinders in a protective place. Do not
puncture or burn the cylinders.
Keep ether cylinders out of the reach of unauthorized
personnel.
Lines, Tubes and Hoses
Do not bend or strike high pressure lines. Do not
install bent or damaged lines, tubes or hoses.
Repair any loose or damaged fuel and oil lines, tubes
and hoses. Leaks can cause fires.
12
Safety Section
Safety
TM5-2430-200-10
Check all lines, tubes and hoses carefully. Do not use
your bare hand to check for leaks. Use a board or
cardboard to check for leaks. Refer to “Safety, Fluid
Penetration” in this section for more details. Tighten all
connections to the recommended torque. Replace if
any of the following conditions are found:
• End fittings are damaged or leaking.
• Outer covering is chafed or cut, and the wire
reinforcing is exposed.
• Inspect, and when necessary, clean and have
repairs made to the steps and hand holds before
mounting and dismounting.
• Face the machine when mounting and dismounting.
• Maintain a three-point contact (two feet and one
hand or one foot and two hands) with the steps and
hand holds.
• Never get on or off a moving machine.
• Outer covering is ballooning locally.
• Never jump off the machine.
• There is evidence of kinking, or crushing, of the
flexible part of the hose.
• Do not try to climb on or off the machine when
carrying any tools or supplies. Use a hand line to
pull any equipment up onto the platform.
• Hose armor is embedded in the outer cover.
• End fittings are displaced.
Make sure that all clamps, guards and heat shields are
installed correctly, to prevent vibration, rubbing against
other parts, and excessive heat during operation.
Threat of Nuclear, Biological, and
Chemical (NBC) Contamination
The DEUCE incorporates a CARC painted exterior.
The materials used in the DEUCE are metal, rubber,
plastic, fabric and glass. In the event of NBC
contamination, the decontaminates for these surfaces
and materials are listed in Army FM 3-5. For
decontamination procedures, refer to Army FM 3-7.
The DEUCE Parts Manual, TM5-2430-200-24P,
contains a list of parts that are susceptible to damage
from NBC exposure.
ElectroMagnetic Pulse (EMP) Exposure
The components listed and designated as EMP
susceptible may be damaged by EMP exposure. If the
machine is exposed to an EMP incident, verify proper
operation and repair as necessary. The DEUCE Parts
Manual, TM5-2430-200-24P, contains a list of parts
that are susceptible to damage from EMP exposure.
Mounting and Dismounting
This machine can be mounted or dismounted at the
left front of the machine.
• Mount and dismount the machine only on the left
side, where steps and hand holds are provided.
• Do not use any controls as hand holds when
entering or leaving the operator's station.
• Always raise and then use the handrail when on the
walkways.
• Keep the walkways free of debris and oil. Clean
away any ice or snow that has accumulated.
Alternate Exit
This machine is equipped with an alternate exit. For
additional alternate exit information, refer to “Operation
Section, Monitoring Systems and Cab Features” in this
manual.
Before Starting the Engine
Start the engine only from the operator's station.
Never short across the starter terminals or across the
batteries, as this could bypass the engine neutral-start
system, as well as damage the electrical system.
Before starting the engine, refer to “Operation Section,
Before Starting the Engine” in this manual.
Engine Starting
Do not start the engine or move any of the controls if
there is a Do Not Operate or similar warning tag
attached to the start switch or controls.
Diesel engine exhaust contains products of
combustion which can be harmful to your health.
Always start and operate the engine in a wellventilated area. If the machine is in an enclosed area,
vent the exhaust to the outside.
TM5-2430-200-10
13
Safety Section
Safety
This machine will spot turn with the engine running,
even though the transmission control is in NEUTRAL.
Always apply the parking brake while starting the
engine.
Report any needed repairs noted during operation.
To start the engine, refer to the procedures given in
“Operation Section, Engine Starting” in this manual.
If the machine begins to side slip on a grade,
immediately turn the machine downhill.
Before Operating the Machine
Clear all personnel from the machine and the area.
Clear all obstacles from the path of the machine.
Beware of hazards such as wires, ditches, etc.
If radio antennas are installed, ensure that none of the
antennas will contact electrical wires when the
machine is operated. If clearance is not sufficient, tie
the antennas down to avoid contact with electrical
wires.
Be sure all windows are clean. Secure the doors and
windows in either the open or shut position.
Adjust the rear view mirrors for best vision, especially
close to the machine.
Make sure the machine horn, the back-up alarm and
all other warning devices are working properly.
Adjust the tilt and length of the steering column so
that it is best suited for operating the machine.
Fasten the seat belt securely.
Before operating this machine, read and understand
the information given in the “Operation Section” of this
manual.
Machine Operation
Operate the machine only while seated and with the
seat belt fastened.
Stay a safe distance from the edge of cliffs, overhangs
and slide areas.
Be careful to avoid any condition which could lead to
tipping when working on hills, banks or slopes, and
when crossing ditches, ridges or other obstructions.
Whenever possible, work up and down slopes, rather
than sideways.
Keep the machine under control and do not work it
over its capacity.
Be sure any hitch points and the towing device are
adequate.
Never straddle a wire rope cable or similar device, nor
allow others to do so.
Know the maximum height and reach of your
machine.
Always keep the ROPS (the top half of the cab shell)
installed when operating the machine.
Always remove the ROPS (the top half of the cab
shell) when preparing the machine for air drop.
Always kneel the machine and install the kneeling lock
pins when driving and parking the machine in a
transport airplane.
When operating this machine, follow the procedures
and heed the warnings given in the “Operation
Section” of this manual.
Machine Parking
To minimize whole body vibration, based on 24 hour
operations, limit daily machine usage to a maximum of
11.5 hours, no more than 4 hours continuous; the
operator must rest between operations at least 4.16
hours.
Park the machine on level ground, with the blade
resting on the ground, the transmission control lever in
NEUTRAL, and the parking brake engaged. Block the
drive belts (on downhill side) if the machine must be
parked on uneven terrain. Move the electrical
disconnect switch into the OFF position after parking
the machine and stopping the engine.
Operate the controls only with the engine running,
unless instructed otherwise.
For detailed parking instructions, refer to “Operation
Section, Machine Parking” in this manual.
The operator must be satisfied that no one will be
endangered before moving the machine.
Do not allow riders on the machine.
Change 1
14
General Section
Specifications and Model VIews
TM5-2430-200-10
Specifications and Model Views
3
2
1
4
9
5
6
7
20
8
(1) Cab. (2) Cooling system. (3) Air filter compartment. (4) Fuel
tank. (5) Blade. (6) Back ripper. (7) Front idler. (8) Rear idler.
(9) Drive wheel.
(20) Lifting specifications plate.
DEUCE Operational Specifications
Standard Configuration
10
Overall Length:
Overall Height
5867 mm (231 in)
1:
2776 mm (109.3 in)
Overall Width:
2946 mm (116 in)
Special Shipping Width:
2591 mm (102 in)
Gross Vehicle Weight:
16 140 kg (35,500 lb)
Winch Capacity
2:
97 856 N (22,000 lb)
Maximum Cable Strength 3:
11
12
Winch Drum Capacity
13
(10) Hydraulic oil tank. (11) Oil filter compartment. (12) Recoil
cylinder. (13) Midroller.
14
15
16
18
17
19
(14) Electrical panel and BII compartment. (15) Tool/battery
compartment. (16) Optional arctic battery box. (17) Backup alarm.
(18) Winch. (19) Pintle hook.
NOTE: If the machine is equipped with the optional
arctic starting system, optional arctic battery box (16)
is mounted on the left fender of the machine, as
shown.
4:
195 725 N (44,000 lb)
55 169 mm (181 ft)
Towing Capacity (1st Gear):
15 910 kg (35,000 lb)
Maximum Fording Depth:
914 mm (36 in)
Top Speed:
48 kph (30 mph)
Engine Horsepower:
138/197 kW (185/265 hp)
Electrical System:
24 Volts
NOTE: 1 Actual machine height may vary due to suspension
system characteristics. Always confirm machine height
before the machine is shipped.
2 Specification given is for five wraps of 5/8 inch cable.
3 Cable strength is given for 5/8 inch cable.
4 Drum capacity is five layers of 5/8 inch cable. Usable
length is 48 768 mm (160 ft).
NOTE: Refer to “Operation Section, Transportation
Information” in this manual for machine tie-down
locations and the military load classification (MLC)
number. Refer to “Maintenance Section, Lubricant
Viscosities and Refill Capacities” for information about
refill capacities.
15
General Section
Product Information and Serial Number Locations
TM5-2430-200-10
Product Identification and Serial Number Locations
The Product Identification Number (PIN) is used to
identify a powered machine that is designed for an
operator to ride.
3
Caterpillar products, such as earthmoving equipment
not designed for an operator to ride (engines,
transmissions, etc.), are identified by serial numbers.
Also, most major Caterpillar attachments are identified
by serial numbers.
For quick reference, record the identification numbers
in the spaces provided below the illustration
photographs.
Plate (3) is located on the right control console inside
the operator’s compartment.
Cab Information Plate (Lower) ____________________
1
Plate (1) is mounted on the left side of the machine,
under the walkway, near the suspension cylinder
mounting points.
4
Machine PIN __________________________________
Plate (4) is located on the side of the transmission and
is visible through a hole in the frame, on the right side
of the machine.
Transmission Serial Number ______________________
2
Plate (2) is located on the top right corner of the cab,
inside the operator’s compartment.
5
Cab Information Plate (Upper) ____________________
Plate (5) is mounted to the rear of the torque
converter.
Torque Converter Serial Number __________________
16
TM5-2430-200-10
General Section
Product Information and Serial Number Locations
6
Plate (6) is mounted on the valve cover on the front
end of the engine. This plate can be seen after the
radiator is raised.
Engine Serial Number____________________________
7
Plate (7) is located on the right, rear side of the blade.
Bulldozer Serial Number ________________________
8
Plate (8) is located on the bottom, left side of the
winch.
Winch Serial Number ____________________________
TM5-2430-200-10
17
Operation Section
Monitoring Systems and Cab Features
Monitoring Systems and Cab Features
When the switch is in the OFF position, power is
blocked to all electrical components except for the
engine heater, NATO slave receptacle, SINCGARS,
and PLGR.
Switches
Engine Start Switch
ON (4)—Move the switch into the center
position to turn on the electrical power to the
machine.
START/INDICATOR CHECK (3)—Move and
hold the switch all the way up to engage the
starter and crank the engine. If the engine is
already running, move the switch into the START
position to turn on the indicator lights and check
indicator operation.
2
1
NOTE: The starter will not engage if the transmission
control lever is not in NEUTRAL, or the engine is
already running.
NOTE: Refer to “Indicator Check Function,” in this
section, for a description of the lamp check system.
3
2
4
5
NOTICE
Do not crank the engine for more than 30 seconds.
Allow the starter to cool for two minutes before
cranking again.
Turbocharger damage can result if the engine rpm is
not kept low until the engine oil gauge verifies that the
engine oil pressure is sufficient.
1
Remove locking pin (1) and lift switch cover (2) to
access the switch. Store the locking pin as shown.
OFF (5)—Move switch cover (2) all the way
down to turn off electrical power to the
machine and to shut off the engine.
18
Operation Section
Monitoring Systems and Cab Features
TM5-2430-200-10
Engine Coolant Heater Switch
NOTE: The engine coolant heater switch is always
installed on the machine. If the machine is equipped with
the optional arctic starting system, the engine coolant
heater switch is functional. If the machine is not equipped
with the optional arctic starting system, the engine coolant
heater switch is not functional.
NOTICE
Do not operate the engine coolant heater if the coolant
is frozen.
Start-Aid Switch
NOTE: The engine coolant heater switch is always
installed on the machine. If the machine is equipped with
the optional artic starting system, the engine coolant heater
switch is functional. If the machine is not equipped with the
optional artic starting system, the engine coolant heater
switch is not functional.
7
! WARNING
Do not operate the engine coolant heater in an
enclosed area. The heater produces combustion gases
which may be harmful to your health. Always start and
operate the heater in a well-ventilated area and, if in an
enclosed area, vent the exhaust to the outside.
Improper use of the engine coolant heater can create a
fire or cause an explosion. Do not operate the engine
coolant heater while the machine is being refueled. Do
not place combustible materials within 50.8 mm (2 in)
of the exhaust system.
6
8
Lift switch cover (7) to access the switch.
Start-Aid Switch (8)—Move the switch up and
hold it for three or more seconds, and then
release it. Depending on the temperature of
the intake air and engine coolant, a
premeasured amount of ether is injected into the
engine air intake manifold. When the start-aid system
is functioning and the blackout light switch is in STOP
LIGHT or SERVICE DRIVE, the start-aid indicator will
turn on.
NOTICE
Use the ether sparingly. Excessive ether can cause
piston and ring damage.
Do not inject ether unless the engine is rotating.
Press switch (6) down to turn the engine heater ON. Press
the switch again to raise the switch and turn the engine
heater OFF. An internal light in the switch will illuminate to
indicate that the heater is functioning. After the switch has
been turned off, the light will continue to illuminate until the
coolant heater has completed a three-minute shut-down
procedure.
NOTICE
Do not start the engine while the light in the engine coolant
heater switch is on. The engine coolant heater requires
three minutes to purge itself of diesel fumes. Damage to
the engine coolant heater may result if the engine is started
too soon after use.
Change 1
NOTE: The electronic control module (ECM) will allow
the manual injection of ether if the intake air
temperature is below 0°C (32°F), the engine coolant
temperature is below 40°C (104°F), and the engine
speed is below 1000 rpm.
NOTE: The ECM automatically turns on the engine
intake air heater to assist in starting the engine,
depending on the air temperature and the engine
coolant temperature. It is permissible to manually
inject ether using the start-aid switch when the intake
air heater is turned on.
TM5-2430-200-10
Engine Diagnostic Switch
19
Operation Section
Monitoring Systems and Cab Features
Transmission Diagnostic Check Switch
9
11
Move switch (9) up and hold it there for more than two
seconds to activate the engine diagnostic system. For
more information, refer to “Troubleshooting, Engine
Diagnostic Codes” in this section.
Transmission diagnostic check switch (11) is used by
maintenance personnel to clear error codes in the
electronic programmable transmission control unit
(EPTC II) in the diagnostic mode.
Engine Controller Diagnostic Port
Transmission Diagnostic Scroll Switch
10
Port (10) is used by maintenance trained personnel to
diagnose and calibrate the ECM.
12
Transmission diagnostic scroll switch (12) is used by
maintenance personnel to scroll through the faults
stored in the diagnostic mode of the EPTC II.
Change 1
20
Operation Section
Monitoring Systems and Cab Features
TM5-2430-200-10
Transmission Controller Diagnostic Port
Work Light Switch
16
17
13
Port (13) is used by maintenance trained personnel to
diagnose and calibrate the EPTC II.
Horn Enable Switch
18
18
14
15
ON (14)—Move the switch into the ON
position (up) to enable the horn and backup
alarm.
OFF (15)—Move the switch into the OFF
position (down) to disable the horn and backup
alarm.
NOTE: The blackout light switch must be in the
SERVICE DRIVE or STOP LIGHT position for the horn
and backup alarm to operate.
19
ON (16)—Move the switch up to turn on the
front (18) and rear (19) working lights.
OFF (17)—Move the switch down to turn off
the working lights
NOTE: The blackout light switch must be in the
SERVICE DRIVE or STOP LIGHT position for the work
lights to operate.
Change 1
TM5-2430-200-10
21
Operation Section
Monitoring Systems and Cab Features
Blackout Light Switch
37
38
39
41
40
20
42
43
44
45
46
47
23
22
21
24
OFF
B.O.
MARKER
B.O.
DRIVE
STOP
LIGHT
SERVICE
DRIVE
48
25
49
A
26
UNLOCK
PANEL
BRT
DIM
27
C
B
50
51
42
52
30
OFF
PARK
31
28
52
29
32
32
33
33
34
34
53
54
35
36
Change 1
22
Operation Section
Monitoring Systems and Cab Features
TM5-2430-200-10
52
55
56
1
BLACKOUT DRIVE (21)—Move lever (A) into the
BLACKOUT DRIVE position to enable the following
lamps to function:
• Blackout Head Lamp (36)
• Right and Left Blackout Tail Lamps (41)
• Right and Left Blackout Marker Lamps (34)
• Right and Left Blackout Brake Lamps (38)
• Tension Fail Indicator (49)
• Low Brake Pressure Indicator (43)
• Blade Down Indicator (50)
• Engine Oil Pressure Indicator (44)
• Hydraulic Oil Temperature Indicator (54)
BLACKOUT MARKER (22)—Move lever (A) into the
BLACKOUT MARKER position to enable the following
lamps to function:
• Right and Left Blackout Tail Lamps (41)
• Right and Left Blackout Marker Lamps (34)
• Right and Left Blackout Brake Lamps (38)
• Tension Fail Indicator (49)
•
•
•
•
NOTE: Blackout switch (20) provides overall control of
all lamps on the machine. The position of the three
control levers on the blackout switch determines
which machine lamps are illuminated and the
illumination level of all instrument panel lamps.
UNLOCK (30)—Hold lever (B) in the UNLOCK position
to allow lever (A) to move into BLACKOUT DRIVE (21),
STOP LIGHT (24), or SERVICE DRIVE (25).
LOCK (31)—When lever (B) is in the LOCK position,
movement of lever (A) is restricted.
NOTE: When lever (B) is in the LOCK position (31)
and lever (A) is in the OFF position (23), lever (A) can
only be moved into BLACKOUT MARKER (22).
However, lever (A) can be moved into OFF (23) from
BLACKOUT DRIVE (21), BLACKOUT MARKER (22),
STOP LIGHT (24), or SERVICE DRIVE (25) with lever
(B) in the LOCK position.
Change 1
Low Brake Pressure Indicator (43)
Blade Down Indicator (50)
Engine Oil Pressure Indicator (44)
Hydraulic Oil Temperature Indicator (54)
OFF (23)—Move lever (A) into the OFF position to
disable all lights except:
• Tension Fail Indicator (49)
• Low Brake Pressure Indicator (43)
• Blade Down Indicator (50)
• Engine Oil Pressure Indicator (44)
• Hydraulic Oil Temperature Indicator (54)
TM5-2430-200-10
STOP LIGHT (24)—Move lever (A) into the STOP
LIGHT position to enable the following lamps to
function:
• Right and Left Brake Lamps (40)
• Interior Light (56)
• Right and Left Rear Working Lamps (19)
• Right and Left Center Work Lamps (18)
• Right and Left Front Work Lamps (18)
• Right and Left Turn Lamps (42, on panel)
• Rear Right and Left Turn Signal Lamps (37)
• Front Right and Left Turn Signal Lamps (33)
• Tension Fail Indicator (49)
• Low Brake Pressure Indicator (43)
• Blade Down Indicator (50)
• Engine Oil Pressure Indicator (44)
• Hydraulic Oil Temperature Indicator (54)
• Start-Aid Indicator (55)
• Check Engine Indicator (51)
• Crank-Without-Inject Indicator (45)
• Kneeling Mode Indicator (46)
• Winch Indicator (47)
• Self-Deploy Indicator (48)
• Remote Throttle Indicator (53)
NOTE: Lever (A) must be in SERVICE DRIVE position
(25) for lever (C) to work.
SERVICE DRIVE (25), OFF (28)—Move lever (A) into
the SERVICE DRIVE position and lever (C) into the
OFF position to enable the following lamps to function:
• Right and Left Brake Lamps (40)
• Interior Light (56)
• Right and Left Rear Working Lamps (19)
• Right and Left Center Work Lamps (18)
• Right and Left Front Work Lamps (18)
• Right and Left Turn Lamps (42, on panel)
• Rear Right and Left Turn Signal Lamps (37)
• Front Right and Left Turn Signal Lamps (33)
• Right and Left Tail Lamps (39)
• Right and Left Front Marker Lamps (32)
• Right and Left Head Lamps (35)
• Tension Fail Indicator (49)
• Low Brake Pressure Indicator (43)
• Blade Down Indicator (50)
• Engine Oil Pressure Indicator (44)
• Hydraulic Oil Temperature Indicator (54)
• Start-Aid Indicator (55)
• Check Engine Indicator (51)
• Crank-Without-Inject Indicator (45)
• Kneeling Mode Indicator (46)
• Winch Indicator (47)
• Self-Deploy Indicator (48)
• Remote Throttle Indicator (53)
23
Operation Section
Monitoring Systems and Cab Features
SERVICE DRIVE (25), PANEL BRIGHT (26)—Move
lever (A) into the SERVICE DRIVE position and lever
(C) into the PANEL BRIGHT position to enable the
following lamps to function:
• Right and Left Brake Lamps (40)
• Interior Light (56)
• Right and Left Rear Work Lamps (19)
• Right and Left Center Work Lamps (18)
• Right and Left Front Work Lamps (18)
• Right and Left Turn Lamps (42, on panel)
• Rear Right and Left Turn Signal Lamps (37)
• Front Right and Left Turn Signal Lamps (33)
• Right and Left Tail Lamps (39)
• Right and Left Front Marker Lamps (32)
• Right and Left Head Lamps (35)
• All Panel and Gauge Lamps (52, bright level)
• Tension Fail Indicator (49)
• Low Brake Pressure Indicator (43)
• Blade Down Indicator (50)
• Engine Oil Pressure Indicator (44)
• Hydraulic Oil Temperature Indicator (54)
• Start-Aid Indicator (55)
• Check Engine Indicator (51)
• Crank-Without-Inject Indicator (45)
• Kneeling Mode Indicator (46)
• Winch Indicator (47)
• Self-Deploy Indicator (48)
• Remote Throttle Indicator (53)
SERVICE DRIVE (25), DIM (27)—Move lever (A) into
the SERVICE DRIVE position and lever (C) into the DIM
position to enable the following lamps to function:
• Right and Left Brake Lamps (40)
• Interior Light (56)
• Right and Left Rear Work Lamps (19)
• Right and Left Center Work Lamps (18)
• Right and Left Front Work Lamps (18)
• Right and Left Turn Lamps (42, on panel)
• Rear Right and Left Turn Signal Lamps (37)
• Front Right and Left Turn Signal Lamps (33)
• Right and Left Tail Lamps (39)
• Right and Left Front Marker Lamps (32)
• Right and Left Head Lamps (35)
• All Panel and Gauge Lamps (52, dim level)
• Tension Fail Indicator (49)
24
Operation Section
Monitoring Systems and Cab Features
•
•
•
•
•
•
•
•
•
•
•
TM5-2430-200-10
Low Brake Pressure Indicator (43)
Blade Down Indicator (50)
Engine Oil Pressure Indicator (44)
Hydraulic Oil Temperature Indicator (54)
Start-Aid Indicator (55)
Check Engine Indicator (51)
Crank-Without-Inject Indicator (45)
Kneeling Mode Indicator (46)
Winch Indicator (47)
Self-Deploy Indicator (48, dim level)
Remote Throttle Indicator (53)
SERVICE DRIVE (25), PARK (29)—Move lever (A)
into the SERVICE DRIVE position and lever (C) into the
PARK position to enable the following lamps to
function:
• Right and Left Brake Lamps (40)
• Interior Light (56)
• Right and Left Rear Working Lamps (19)
• Right and Left Center Work Lamps (18)
• Right and Left Front Work Lamps (18)
• Right and Left Turn Lamps (42, on panel)
• Rear Right and Left Turn Signal Lamps (37)
• Front Right and Left Turn Signal Lamps (33)
• Right and Left Tail Lamps (39)
• Right and Left Front Marker Lamps (32)
• All Panel and Gauge Lamps (52, dim level)
• Tension Fail Indicator (49)
• Low Brake Pressure Indicator (43)
• Blade Down Indicator (50)
• Engine Oil Pressure Indicator (44)
• Hydraulic Oil Temperature Indicator (54)
• Start-Aid Indicator (55)
• Check Engine Indicator (51)
• Crank-Without-Inject Indicator (45)
• Kneeling Mode Indicator (46)
• Winch Indicator (47)
• Self-Deploy Indicator (48, dim level)
Gauges
1
2
3
4
5
6
7
Engine Oil Pressure (1)—Indicates the engine
oil pressure in kPa (psi).
NOTE: The normal engine oil pressure range
should be between 250 and 450 kPa (30 and 70 psi)
when the engine is running at full speed with SAE
15W40 oil at operating temperature.
Engine Coolant Temperature (2)—Indicates
the temperature of the engine coolant in
degrees celsius and degrees fahrenheit. If the
engine coolant temperature increases above
110°C (230°F), stop operation of the machine and allow
the engine to idle for a few minutes. If the coolant
temperature will not return to 110°C (230°F) or less
during normal working conditions, stop the machine
and investigate the cause of engine overheating.
Transmission Oil Temperature (3)—Indicates
the temperature of the transmission system oil
in °C (°F). If the transmission system oil
temperature increases above 110°C (230°F),
stop operation of the machine and allow it to idle for a
few minutes. If the transmission oil temperature will not
return to 110°C (230°F) or less during normal working
conditions, stop the machine and investigate the cause
of the transmission system overheating.
Engine RPM (4)—Indicates the engine speed in
revolutions (X100) per minute.
The service hour meter is located on the engine rpm
gauge.
Speedometer (5)—Indicates machine ground speed in
miles-per-hour and kilometers-per-hour.
Voltmeter (6)—Indicates the electrical system
voltage at different operating conditions.
25
Operation Section
Monitoring Systems and Cab Features
TM5-2430-200-10
With the start switch in the ON position and the
engine NOT RUNNING, a reading in the first red zone
indicates dead batteries.
With the start switch in the ON position and the engine
NOT RUNNING, a reading in the black-and-white
striped zone indicates that the batteries are not fully
charged.
With the start switch in the ON position and the
engine NOT RUNNING, a reading in the first green
zone indicates the batteries are fully charged.
With the ENGINE RUNNING, a reading anywhere
below the second green zone (normal operating range)
indicates that the alternator is not producing enough
voltage to charge the batteries and supply current to
the electrical accessories.
Indicators
The indicators are color coded to indicate the
importance.
• Green—A green indicator means that the indicated
system is in operation.
• Orange—An orange indicator means to notice that
an automatically controlled system is operating.
• Red—A red indicator means to pay immediate
attention and correct the indicated problem
immediately.
1
7
With the ENGINE RUNNING, a reading in the second
red zone indicates that the alternator is overcharging.
With the ENGINE RUNNING, if the pointer registers in
the first green band, or either red bands, have the
problem corrected.
Fuel Level (7)—Indicates the approximate
quantity of fuel in the fuel tank.
NOTICE
To prevent the fuel from overheating when the
machine is operated in ambient temperatures above
38°C (100°F), the fuel level should be maintained
above one-half of a tank. Overheated fuel can cause
reduced power and possibly damage the fuel system.
NOTE: The fuel tank capacity is 341 L (90 U.S. gal).
6
5
2
3
4
Tension Fail (1)—Indicates low oil pressure in the
drive belt tension system.
! WARNING
Do not operate the machine when the tension fail
warning indicator is lit. Braking efficiency is
reduced if there is not enough drive belt tension.
Personal injury or damage to the machine can
occur if there is not enough braking capacity to
stop the machine.
Low Brake Pressure (2)—Indicates low oil
pressure in the brake system.
! WARNING
Do not operate the machine when the low brake
pressure warning indicator is lit. Braking
efficiency is reduced if there is not enough brake
system pressure. Personal injury or damage to the
machine can occur if there is not enough braking
capacity to stop the machine.
26
Operation Section
Monitoring Systems and Cab Features
TM5-2430-200-10
Blade Down (3)—Indicates that the blade is
not in the full up position when the machine is
in SELF-DEPLOY mode.
NOTE: If the blackout switch is in the STOP LIGHT or
SERVICE DRIVE position, the blade down alarm will
sound when blade down indicator (3) is illuminated.
Start-Aid (4)—Indicates the operation of the
start-aid system (intake air heater or ether
injection).
NOTE: The blackout switch must be in the STOP
LIGHT or SERVICE DRIVE position for start-aid
indicator (4) to function.
Engine Oil Pressure (5)—Indicates that there
is not enough engine oil pressure. The oil
pressure indicator illuminates when the oil
pressure is 35 ± 21 kPa (5 ± 3 psi)
NOTICE
Do not continue to operate the machine if the engine
oil pressure indicator is on, or if the engine oil pressure
gauge indicates an engine oil pressure of less than 50
kPa (10 psi), 15 seconds after starting the engine.
Stop the machine immediately and inform Unit
Maintenance of the problem. Do not operate the
machine until the cause of the low engine oil pressure
has been corrected.
Check Engine (6)—Indicates the presence of
a fault code in the engine electronic control
module. Refer to “Troubleshooting, Engine
Diagnostic Codes” in this manual for information on
diagnostic codes.
NOTE: The blackout switch must be in the STOP
LIGHT or SERVICE DRIVE position for check engine
indicator (6) to function.
Crank-Without-Inject (7)—Indicates the fuel delivery
system has been disabled, to allow the engine to be
turned over without starting. This operational mode is
used only by service personnel to repair the engine.
NOTE: The blackout switch must be in the STOP
LIGHT or SERVICE DRIVE position for crank-withoutinject indicator (7) to function.
8
9
10
11
Turn Signal (8)—Indicates the direction of the turn
signal.
NOTE: The blackout switch must be in the STOP
LIGHT or SERVICE DRIVE position for turn signal
indicators (8) to function.
Kneeling (9)—Indicates that the machine is fully
lowered into the kneeling mode.
NOTE: The blackout switch must be in the STOP
LIGHT or SERVICE DRIVE position for kneeling mode
indicator (9) to function.
Winch (10)—Indicates that the winch control
system is activated.
NOTE: The blackout switch must be in the STOP
LIGHT or SERVICE DRIVE position for winch indicator
(10) to function.
Self-Deploy Mode (11)—Indicates that the suspension
is active and the machine is in SELF-DEPLOY mode.
NOTE: The blackout switch must be in the STOP
LIGHT or SERVICE DRIVE position for self-deploy mode
indicator (11) to function.
TM5-2430-200-10
27
Operation Section
Monitoring Systems and Cab Features
NOTICE
During earthmoving operations it is possible to
collapse the recoil cylinder completely. To reduce the
possibility of breaking track belts in this condition a
recoil alarm has been added to the machine to alert
the operator that a hazardous condition exists.
12
12
NOTE: The position of the blackout switch does not
effect the recoil alert warning lights.
13
13
Indicator Check Function
Remote Throttle (12)—Indicates that the engine
speed is being controlled by the remote throttle
switch.
NOTE: The blackout switch must be in the STOP
LIGHT or SERVICE DRIVE position for remote throttle
indicator (12) to function.
Hydraulic Oil Temperature (13)—Indicates that the
hydraulic oil temperature is too high. If this light comes
on during operation, slow the machine until the light
goes off. If the light continues to illuminate during
normal operating conditions, have the cause of the
hydraulic system overheating investigated and
corrected.
NOTE: The blackout switch must be in the STOP
LIGHT or SERVICE DRIVE position for hydraulic oil
temperature indicator (13) to function.
1
When the engine is running, the start position of the
engine start switch (1) will perform an indicator check
function.
NOTE: The ECM will disengage the starter at 600
rpm. Holding the starter engaged after the engine has
started will not damage the starter.
When engine start switch (1) is held in the START
position, the following indicators will turn on to test for
failed indicator bulbs. Have Unit Maintenance
personnel replace any indicator bulbs that do not turn
on during the check.
2
2
1
33
NOTE: The blackout light switch must be in the STOP
LIGHT or SERVICE DRIVE position for the indicators to
turn on in the indicator check function.
Recoil Alert
Recoil Indicator LH (1) and/or Recoil Indicator RH (2)
will illuminate, and a warning buzzer (3) will sound
when the machine encounters an obstruction in the
undercarriage and the recoil cylinder is compressed. If
the recoil alert sounds, stop the machine and reverse
direction to clear debris from the undercarriage.
Change 1
28
Operation Section
Monitoring Systems and Cab Features
TM5-2430-200-10
Steering Column
8
3
1
7
2
3
4
5
6
2
4
5
9
10
10
(2) Tension Fail.
(3) Low Brake Pressure.
Horn (1)—Press the center button in the steering
wheel to sound the horn.
(4) Blade Down.
NOTE: The horn switch must be ON, and the blackout
switch must be in the STOP LIGHT or SERVICE DRIVE
position for horn (1) to function.
(5) Engine Oil Pressure.
Turn Signal (2)—Move lever (2) forward to activate the
right turn signal. Move lever (2) rearward to activate
the left turn signal.
(6) Kneeling.
(7) Winch
(8) Self-Deploy Mode.
(9) Remote Throttle.
(10) Hydraulic Oil Temperature.
Change 1
NOTE: The blackout switch must be in the STOP
LIGHT or SERVICE DRIVE position for turn signal (2) to
function.
Wiper/Washer (2)—Turn the knob on the end of lever
(2) to turn on the wiper. There are two positions
corresponding to two wiper speeds. Press the knob in
to activate the washer.
Tilt (3)—Lift and hold lever (3) to tilt the steering
column. Release the lever when the steering column is
in the desired position.
TM5-2430-200-10
Extend and Retract (4)—Slide the lever to the right to
extend or retract the steering column. Slide the lever
to the left to lock the steering column in the desired
location.
29
Operation Section
Monitoring Systems and Cab Features
Cooling Fan
1
Hazard Warning Lights (5)—Push center
button (5) in to turn on the flashers. Pull the
outer collar out to turn off the flashers.
NOTE: The blackout switch must be in the STOP
LIGHT or SERVICE DRIVE position for hazard warning
lights switch (5) to function.
There are two cooling fans mounted in the cab. One
fan is mounted in the left rear corner of the cab. The
other fan is mounted in the right front corner of the
cab.
Off—Move switch (1) to the center position to turn the
fan off.
High—Move switch (1) to the left to operate the fan at
high speed.
Low—Move switch (1) to the right to operate the fan
at low speed.
30
Operation Section
Monitoring Systems and Cab Features
TM5-2430-200-10
Arm Rest
Interior Light
1
1
2
Loosen bolts (2). Move arm rest (1) up or down to the
desired position, and tighten the bolts.
ON—Push the bottom of switch (1) in to turn ON the
interior light.
OFF—Push the top of switch (1) in to turn OFF the
interior light.
NOTE: The blackout switch must be in the STOP
LIGHT or SERVICE DRIVE position for the interior lamp
to function.
TM5-2430-200-10
Cab Door
31
Operation Section
Monitoring Systems and Cab Features
Release From Hold-Open Position
Open From Outside
3
1
Move lever (3) towards the front of the machine to
release the door from the hold-open position.
Pull handle (1) up to release the latch and open the
door.
Open From Inside
Secure In Hold-Open Position
4
2
Push lever (4) towards the front of the machine to
release the door from the inside.
Press door (2) firmly against the side wall of the cab to
engage the latch and secure the door in the open
position.
32
Operation Section
Monitoring Systems and Cab Features
TM5-2430-200-10
Side Window
Air Conditioning/Heating Controls
1
1
2
Squeeze levers (1 and 2) on both sides of the window
to raise or lower the window. Release the levers when
the window is in the desired position.
Alternate Exit
2
Air Conditioning
Turn switch (2) counterclockwise (left) to activate the
air conditioner. There are three positions which
correspond to three speeds for the blower fan.
Turn knob (1) clockwise (right) for cooler air.
1
Heating
Turn switch (2) clockwise (right) to activate the heater.
There are three positions which correspond to three
speeds for the blower fan.
Turn knob (1) counterclockwise (left) for warmer air.
Push lever (1) up and toward the window to release
the latch. Swing the window towards the front of the
machine to open, and exit through the window frame.
Change 1
TM5-2430-200-10
Ventilation Louvers
33
Operation Section
Monitoring Systems and Cab Features
Circuit Breakers
3
1
2
3
3
4
3
5
(1) Engine Control—20 Amps. This circuit breaker
also protects the intake air heater relay.
(2) Dome/Horns—15 Amps. This circuit breaker also
protects the remote throttle indicator lamp.
(3) Transmission Control—20 Amps. This circuit
breaker also protects the self-deploy/earthmoving
solenoids, parking brake and blade lock valve.
(4) A/C Blower—15 Amps.
Rotate and tilt louvers (3) to direct the air flow in the
desired direction.
(5) Auxiliary—15 Amps. This circuit breaker also
protects the suspension charging system,
instrument panel gauges and the steering control
system.
NOTE: This machine is equipped with two circuit
breaker panels. For location of the second circuit
breaker panel, refer to “Machine Features, Main Circuit
Breakers” in this section.
34
Operation Section
Monitoring Systems and Cab Features
TM5-2430-200-10
Seat Belt
Seat Belt Adjustment
Always check the condition of the seat belt and its
mounting hardware before operating the machine.
The seat belt is equipped with an automatic locking
retractor. This retractor will lock if the belt is pulled or
jerked after the belt is pulled out of the retractor.
The buckle end of the seat belt is equipped with a
comfort ride sleeve. This sleeve will allow the operator
limited movement with the seat belt fastened.
1
1
Replace the seat belt at least once every three years,
regardless of its appearance. Date label (1) indicates
the belt fabrication date. Replace the belt if the date
on the label is older than three years.
Inspect for worn or frayed webbing.
Check for a worn or damaged buckle. Replace the
belt, buckle or slide if they are worn or damaged.
3
2
Pull seat belt (1) out of the retractor in a continuous
motion.
Fasten seat belt catch (2) into buckle (3). Check to
make sure the seat belt is placed low across the lap.
The retractor will adjust the belt length and lock in
place. The operator has limited movement while
wearing the seat belt.
To Release the Seat Belt
2
Inspect the belt mounting hardware at locations (2).
Have Unit Maintenance replace any damaged or worn
hardware. Keep the mounting bolts tight.
Push the release button on the buckle to release the
seat belt. The seat belt will automatically retract into
the retractor.
TM5-2430-200-10
Seat Adjustment
35
Operation Section
Monitoring Systems and Cab Features
Rear View Mirror
1
1
2
2
3
Raise/Lower (1)—Lift and hold the lever up, raise or
lower the seat, and then release the lever to lock the
seat at the desired height.
Suspension (2)—Turn the knob clockwise to increase
the stiffness of the suspension. Turn the knob
counterclockwise to decrease the stiffness of the
suspension. When the desired stiffness is achieved, a
yellow indicator will be flush with the end of a small
tube at the lower left front of the seat frame.
Loosen knob (2) and rotate mirror (1) up or down.
Tighten the knob when the mirror is in the desired
location.
PLGR Bracket
1
Fore/Aft (3)—Move and hold the lever out (away from
the seat cushion), and slide the seat fore or aft. Release
the lever when the seat is in the desired position.
Mirrors
1
Mounting bracket (1) for the Precision Lightweight
GPS Receiver (PLGR) is located on the control
console to the right of the operator.
NOTE: Refer to Appendix F for PLGR installation
instructions.
Move mirror (1) by hand to set the correct angle for
maximum visibility. The machine is equipped with a
mirror on both sides of the cab. Fold the mirrors
against the side of the cab when operating in areas
where the mirrors can be damaged by branches or
other objects.
Change 1
36
Operation Section
Monitoring Systems and Cab Features
TM5-2430-200-10
SINCGARS Bracket Installation
Rifle Bracket
1
1
Single Channel Ground and Airborne Radio System
(SINCGARS) mounting bracket installation location (1)
is to the left of the operator’s seat, on the cab floor.
Rifle bracket (1) is located in front of the right console,
on the right side of the cab.
NOTE: For instructions to install the SINCGARS, unit
maintenance should refer to TB11-5820-890-20-113,
Installation Instructions for Installation Kit, Electronic
Equipment, MK-2901/VRC (NSN 5895-01-458-1547)
(EIC: N/A) to Permit Installation of Radio Sets
AN/VRC-87/88/89 Series in a DEUCE Vehicle. This
publication should be read and understood before the
SINCGARS is installed.
Windshield Washer Fluid Bottle
1
PLGR/SINCGARS Power Strip
1
Power strip (1) for the PLGR and SINCGARS is
located behind and to the left of the operator’s seat.
NOTE: The capacity of the power strip is 10 amps at
24 volts. The power strip is protected by the start
circuit breaker. Refer to “Operation Section, Machine
Features, Main Circuit Breakers” in this manual for the
location of this circuit breaker.
Windshield washer fluid bottle (1) is located on the
right side wall of the cab.
37
Operation Section
Monitoring Systems and Cab Features
TM5-2430-200-10
Coat Hook
Rear Windshield Guard
1
1
Coat hook (1) is located in the right rear corner of the
cab.
To raise rear windshield guard (1), pull out sharply on
the lower corners to release the guard from the rubber
fasteners. Raise the guard and allow it to rest on the
top of the cab.
1
2
To lower rear windshield guard (1), raise the guard off
the top of the cab and rotate it down in position over
the rear window. Press sharply on the lower corners of
the guard to secure it in rubber fasteners (2).
NOTE: Rear windshield guard (1) provides protection
for the operator when the winch is operated. The rear
windshield guard should only be raised to clean or
replace the rear windshield. At all other times, the rear
windshield guard should be lowered and secured in
rubber fasteners (2).
! WARNING
Operation of the winch while rear windshield guard
(1) is in the raised position could result in injury or
death.
38
Operation Section
Machine Features
TM5-2430-200-10
Machine Features
Parking Brake
Service Brakes
NOTICE
Do not apply the parking brake while the machine is
moving, unless an emergency exists.
! WARNING
With the engine running, this machine will spot
turn when the steering wheel is turned, even if the
transmission is in NEUTRAL.
To avoid personal injury due to unexpected
movement, engage the parking brake and make
sure the area is free of personnel before starting
the engine.
1
Depressing pedal (1) applies equal braking torque to
both front idlers. Increasing pedal stroke increases
brake torque.
1
! WARNING
Parking brake switch (1) is located on the
control console, to the right of the operator’s
seat.
Pull up on the switch to apply the parking brake.
NOTE: A lamp inside parking brake switch (1) will
indicate that the brake is applied.
Push down on the switch to release the parking brake.
NOTE: The parking brake must be applied for the
engine starter to function.
Change 1
This machine is equipped with an accumulator in
the brake system. The accumulator stores energy to
apply the brakes if the engine stops running. The
brake accumulator stores enough energy to apply
the brakes five times after the engine stops. When
the accumulator pressure is gone, the springapplied parking brake will engage, and the machine
will stop suddenly.
NOTICE
Use caution when towing loads at transport speeds
(up to 15 mph). Reduce speed if towed load is not
equipped with brakes. Avoid hard braking applications.
NOTE: Never rest a foot on the pedal. Resting a foot
on the brake pedal causes unnecessary wear of the
brake disks.
39
Operation Section
Machine Features
TM5-2430-200-10
Accelerator Pedal
Transmission Control Lever
2
1
1
3
Push pedal (1) down to increase the engine speed.
Release the pedal to decrease the engine speed.
NEUTRAL (1)—Move the lever into the detent
position marked “N” to put the transmission
into NEUTRAL.
Steering Wheel
1
Forward (2)—Move the lever forward to select one of
six forward transmission speeds, marked “1” through
“6.”
When the machine is in EARTHMOVING mode, the
transmission is limited to three forward speeds. Each
speed is manually selected. If the transmission control
lever is placed in any position above “3,” the
transmission will remain in third gear.
When the machine is in SELF-DEPLOY mode, there
are six forward speeds. The transmission will
automatically shift between first gear and the
maximum gear selected.
Turn wheel (1) to the right to steer the machine to the
right. Turn the wheel to the left to steer the machine
left.
Reverse (3)—Move the lever to the rear to
place the transmission into one of two reverse
speeds, marked “R1” and “R2.”
40
Operation Section
Machine Features
TM5-2430-200-10
ON (2)—Turn the switch ON to connect the
electrical system to ground.
Main Disconnect Switch
OFF (3)—Turn the switch OFF to disconnect
the electrical system from ground.
NOTICE
Never turn the main disconnect switches to OFF with
the engine running. Electrical system damage could
result.
1
2
2
3
3
Second Main Disconnect Switch for Optional Arctic Starting
System.
The main disconnect switch is located in electrical
panel and BII compartment (1) at the rear of the
machine. A second disconnect switch is located on
the arctic battery box on the left fender, if the machine
is equipped with the optional arctic starting system.
NOTE: If the machine is equipped with the optional
arctic starting system, both disconnect switches must
be in the OFF position to disable the electrical system.
Change 1
41
Operation Section
Machine Features
TM5-2430-200-10
Main Circuit Breakers
Auxiliary Start Receptacle (NATO Slave)
1
2
3
1
4
5
6
Press the red button to reset the circuit breaker.
(1) Main—105 Amps
Auxiliary start receptacle (NATO slave) (1) is located at
the left rear of the machine.
(2) ALT (Alternator)—105 Amps
(3) AIH (Intake Air Heater)—80 Amps
(4)
1
(Engine Coolant Heater)—30 Amps
(5) Ether—15 Amps
(6) Start—10 Amps
NOTE: The main circuit breaker panel is one of two
circuit breaker panels on this machine. For the
location of the other circuit breaker panel, refer to
“Monitoring Systems and Cab Features, Circuit
Breakers” in this section.
If the machine is equipped with the optional arctic
starting system, auxiliary start receptacle (NATO slave)
(1) is located on the arctic battery box on the left
fender.
Change 1
42
Operation Section
Machine Features
TM5-2430-200-10
Remote Throttle Switch
! WARNING
Do not activate the remote throttle switch when the
vehicle is moving. When the remote throttle switch
is placed in the ON position, the parking brake is
automatically applied, the transmission is placed
into NEUTRAL, and the accelerator pedal is
disabled.
Kneeling Switch
The kneeling switch lowers the front of the machine
for air transport. Refer to “Transportation Information,
Preparation for Air Transport (C–130, C–141, C–5)” in
this section.
1
3
2
The remote throttle system holds the engine at a
constant high speed for use when operating remote
hydraulic tools.
1
2
3
Lift switch cover (1) to access switch.
ON (2)—Move the switch into the ON position (up) to
set the engine speed at 2400 rpm.
OFF (3)—Move switch cover (1) down to move the
switch into the OFF position.
NOTE: If the remote throttle switch is moved into the
OFF position while the transmission control is NOT in
NEUTRAL, the transmission will remain in NEUTRAL
until the shift lever is cycled back to the NEUTRAL
position. If the parking brake switch is in the OFF
position when the remote throttle switch is moved to
the OFF position, the parking brake will remain ON
until the parking brake switch is cycled to the ON and
OFF positions.
Raise (1)—Hold the switch up in the RAISE
position to fully extend the front suspension
cylinders and raise the machine.
NOTE: The blackout switch must be in the STOP
LIGHT or SERVICE DRIVE position for indicator (3) to
function.
NOTICE
The front cylinder locks must be installed to secure the
machine in the kneeled position.
Do not operate the machine at speeds greater than 3
kph (2 mph) while it is lowered.
Only operate the machine in the RAISE position,
unless in the air transport mode.
Lower (2)—Hold the switch down in the
LOWER position to fully retract the front
suspension cylinders and lower the machine.
Indicator (3) turns on when the machine is fully
lowered.
NOTE: The kneeling switch is a three-position toggle
switch. The center position of the switch is the OFF
position. The switch is spring-centered to the OFF
position.
NOTE: The machine will not kneel if it is in the
EARTHMOVING mode, or if the manual suspension
lock valves are in the LOCK position.
Change 1
43
Operation Section
Machine Features
TM5-2430-200-10
Self-Deploy/Earthmoving Mode Switch
Winch Control Switches
Winch Enable Switch
1
1
3
2
7
4
2
5
3
SELF-DEPLOY (1)—Move the switch into the SELFDEPLOY position (up) to put the machine into SELFDEPLOY mode.
Indicator (3) turns on when the machine has
successfully been put into SELF-DEPLOY mode, if the
blackout switch is in the SERVICE DRIVE or STOP
LIGHT position.
When the machine is in SELF-DEPLOY mode, the
suspension is active to protect the machine from
shock loads while travelling at high speed; the blade
will operate in all directions except LOWER; and the
engine operates at the high horsepower setting.
NOTE: Refer to “Machine Operation, Self-Deploy
Mode” in this section for the procedure to put the
machine into SELF-DEPLOY mode.
NOTICE
Do not operate on slopes greater than 30 percent (17°)
with the machine in SELF-DEPLOY mode. Use only
EARTHMOVING mode for slopes greater than 30
percent (17°).
EARTHMOVING (2) – Move the switch into the
EARTHMOVING position (down) to put the machine
into EARTHMOVING mode.
When the machine is in EARTHMOVING mode, the
suspension is deactivated to stabilize the machine for
precision blade control, and the engine operates at
the low horsepower setting.
NOTE: Refer to “Machine Operation, Earthmoving
Mode” in this section for the procedure to put the
machine into EARTHMOVING mode.
6
Lift switch cover (1) to access the switch.
ON (2)—Move the switch into the ON position
(up) to enable the winch control system.
OFF (3)—Move the switch into the OFF
position (down) by closing cover (1), to disable
the winch control system.
Indicator (7) turns on when the winch is enabled if the
blackout switch is in the SERVICE DRIVE or STOP
LIGHT position.
Winch Control Switch
This switch is active when the winch enable switch is
in the ON position. The winch clutch must be in the
ENGAGED position for the winch to operate (refer to
“Operation Section, Equipment Controls, Winch
Controls” in this manual).
IN (4)—Hold the switch in the IN position (up)
to operate the winch to reel in the cable.
HOLD (5)—Leave the switch in the center position to
stop the winch.
OUT (6)—Hold the switch in the OUT position
(down) to operate the winch to reel out the
cable.
Refer to “Winch Operation,” in this manual, for more
information on winch functions.
44
Operation Section
Machine Features
TM5-2430-200-10
Kneeling Lock Pin
Remote Hydraulic Tool Ports
4
1
1
5
2
2
3
The kneeling lock pin locks the kneeling cylinder in
place to ensure that the machine does not drift up
after it has been put into the kneeled position. There is
a pin on the kneeling cylinder, on each side of the
machine.
Valve (1) controls the pressure setting in the hydraulic
system when the remote hydraulic tools are in use.
This valve should be closed (turned clockwise against
the stop) during normal machine operation.
To lock the kneeling cylinders, remove the pin from
bracket (1) on both sides of the machine. When the
machine is fully kneeled, insert the pin through bracket
(1) and locking bar (2), on both sides of the machine.
NOTICE
The engine may not start if valve (1) is open. Machine
performance is adversely effected when the valve is
open during normal machine operation.
NOTE: Use the pump lever to install and remove the
pins. The pump lever and kneeling lock pins are
normally stored in the BII compartment at the rear of
the machine.
Ports (2) and (3) supply hydraulic oil to remote
hydraulic tools. The ports are located in the air filter
compartment, on the left side of the machine.
NOTICE
The kneeling lock pins should be installed only during
air transport. Operating the machine with the kneeling
lock pins installed may damage the machine.
NOTE: Refer to the operation manual of the hydraulic
tool being used for any cautions, notices, or warnings
regarding the operation and use of remote tools.
NOTE: Refer to “Machine Operation, Remote
Hydraulic Power Manifold” in this section for the
procedure to operate the remote hydraulic tool
function.
NOTE: Ports (4) and (5) are used for raising the blade
and releasing the park brake.
45
Operation Section
Machine Features
TM5-2430-200-10
Cab/Radiator Tilt Controls
The cab/radiator tilt controls are used by Unit
Maintenance personnel for repairing the machine.
Emergency Drive Belt Tension
Adjustment Controls
4
5
1
2
1
2
3
3
Selector Knobs (1)—When the selector knobs are
pointing upwards (turned fully clockwise) the radiator
tilt circuit is active. When the selector knobs are
pointing downward (turned fully counterclockwise) the
cab tilt circuit is active.
2
Pump Bracket (2)—The pump bracket is used with a
lever to raise and lower the cab or radiator.
Direction Selector (3)—The slotted end of the pump
lever is used to turn the direction selector. When the
direction selector is turned fully counterclockwise,
pumping the lever will lower the cab/radiator. When
the direction selector is turned fully clockwise,
pumping the lever will raise the cab/radiator.
Radiator Shown in Raised Position for Photographic Clarity.
Auxiliary Charge Switch (1) – Move and hold the
auxiliary charge switch up to pressurize the drive belt
tension adjustment circuit.
Port (2) – The port provides pressurized hydraulic oil
to increase the tension of the drive belt.
NOTE: Port (2) can be accessed by raising the
radiator (as shown), or through the air filter
compartment. For the belt tension procedures, refer to
“Machine Operation, Emergency Belt Tension
Procedure” in this section.
46
Operation Section
Machine Features
TM5-2430-200-10
Suspension Manual Lockout Valves
Decontamination Container Bracket
1
1
Suspension manual lockout valves (1) are located on
both sides of the main frame, in front of the drive
wheels. Turn both valves counterclockwise to
manually lock the suspension. Turn both valves
clockwise to control the suspension using the selfdeploy/earthmoving mode switch in the cab.
Decontamination container bracket (1) is located on
the right side of the machine.
Pintle Hook
NOTICE
Do not operate the machine in SELF-DEPLOY mode
when the suspension is locked by the manual
suspension lockout valves. Damage to the machine
may result.
Do not air drop the machine with the manual
suspension lockout valves in the LOCK position.
Damage to the machine may occur.
Fire Extinguisher Bracket
1
Fire extinguisher bracket (1) is located on the right
fender at the rear of the machine.
Change 1
1
Pintle hook (1) is located at the rear of the machine.
47
Operation Section
Machine Features
TM5-2430-200-10
Grab Rails
Engine Coolant Fill Cap
! WARNING
1
At operating temperature, the engine coolant is
hot and under pressure. Any contact with the
skin can cause severe burns. Also, cooling
system additive contains alkalis. Avoid contact
with the skin, eyes, and the mouth. Do not open
engine coolant fill cap (3) until the temperature of
the engine coolant is below 36°C (98°F).
3
2
1
2
3
4
5
Six grab rails (1) are located around the rear of the
machine. The grab rails should be in the up position
whenever personnel are standing on the walkways.
The grab rails should be in the down position when
operating the machine in areas where tree branches
and/or brush may damage the rails.
To raise a grab rail, remove locking pins (2 and 3) from
the bottom holes, and rotate the rail up. Replace the
locking pins in top holes (4 and 5) to lock the grab rail
in the up position.
NOTE: The grab rails are pinned so they can be
lowered for air transport. In the up position, some
movement of the rails may occur.
3
Raise radiator guard (1) to access engine coolant fill
cap (3). Place support rod (2) in the prop hole in the
radiator guard to secure the guard in the open
position.
Turn engine coolant fill cap (3) counterclockwise to
remove it. Press in and rotate the cap clockwise to
install it.
NOTE: The normal location for checking the coolant
level and adding coolant is the coolant overflow bottle.
Only add coolant at this location if the coolant
overflow bottle is empty or the cooling system has
been completely drained.
48
Operation Section
Machine Features
TM5-2430-200-10
Fuel Tank Fill Cap
Power Train Oil Fill Cap
1
2
1
To remove fuel cap (1), raise lever (2) and turn the
lever counterclockwise. To install fuel cap (1), install
the cap, turn lever (2) clockwise and lower the lever.
2
3
Hydraulic Oil Tank Fill Cap
4
1
2
5
The power train oil fill cap is located under rear
walkway (2). Raise the rear walkway and secure the
walkway in the up position by inserting the plungers
on the walkway into cups (1).
Remove—To remove the hydraulic oil tank fill cap, lift
and hold lever (1) while rotating cap (2)
counterclockwise.
Install—To install the hydraulic oil tank fill cap, lift and
hold lever (1) while rotating cap (2) clockwise.
Remove—To remove the power train oil fill cap, rotate
cap (3) counterclockwise.
Install—To install the power train oil fill cap, rotate cap
(3) clockwise.
Secure rear walkway (1) in the down position by
lowering the walkway until plunger (4) inserts in cup
(5).
NOTE. Rear walkway (1) is equipped with one plunger
(4) and cup (5) on each side.
49
Operation Section
Machine Features
TM5-2430-200-10
Electrical Panel and BII Compartment
and Tool and Battery Compartment
2
1
Emergency Brake Release Valve
NOTE: The emergency brake release valve is used by
Unit Maintenance personnel when they tow the
machine.
3
1
4
5
Electrical panel and BII compartment (1) is the left
compartment at the rear of the machine. To gain
access to the electrical panel and BII compartment, lift
the bottom of rubber latches (4), and then rotate the
top of the rubber latches away from the compartment.
Use grab rail (3) to pull the lid towards the rear of the
machine, and then raise the lid.
Close electrical panel and BII compartment (1) by
lowering the lid, rotating the top of rubber latches (4)
towards the compartment, and then pushing the
bottom of the rubber latches towards the
compartment. The lid is secure when the top of the
rubber latch clamps the lip which is attached to the
lid.
Tool and battery compartment (2) is the right
compartment, at the rear of the machine. Two rubber
latches (5) secure the lid of the compartment. Access
to the tool battery compartment can be gained by
following the same procedure as described for access
to electrical panel and BII compartment (1).
Radiator Shown in Raised Position for Photographic Clarity.
Valve (1) is located on the multifunction valve in the air
intake compartment, on the left side of the machine.
Open—Turn valve (1) fully counterclockwise for normal
operation.
Closed—Turn valve (1) fully clockwise to prepare the
machine for manual parking brake release. When valve
(1) is closed, the drain passage from the parking brake
is plugged, which allows the manual brake release
pump to operate.
50
Operation Section
Equipment Controls
TM5-2430-200-10
Equipment Controls
Tilt Left (5)—Move the blade control lever to
the left to tilt the left corner of the blade down.
The lever returns to HOLD when released.
Blade Controls
1
Hold (6)—Return the lever to the center
position to stop the blade from moving in any
direction.
NOTE: The lever is spring-centered to the HOLD
position, when released from all positions except
FLOAT.
Blade control lever (1) is located on the control
console, to the right of the operator.
2
Tilt Right (7)—Move the blade control lever to
the right to tilt the right corner of the blade
down. The lever returns to HOLD when
released.
Lift (8)—Move the blade control lever to the
rear, to lift the blade. The lever returns to
HOLD when released.
Angle Right (9)—Rotate the blade control
lever clockwise to angle the blade to the right.
The lever returns to HOLD when released.
3
4
Back Rippers
5
6
7
10
8
9
Float (2)—Push the lever all the way forward
into the detent position. The blade moves up
and down, following the contour of the
ground.
Angle Left (3)—Rotate the blade control lever
counterclockwise to angle the blade to the left.
The lever returns to HOLD when released.
Lower (4)—Move the blade control lever
forward to lower the blade. The lever returns to
HOLD when released.
Change 1
There are four back rippers (10) mounted on the blade
and the blade C-frame. Use the blade control lever to
position the rippers while ripping.
TM5-2430-200-10
Winch Controls
Winch Clutch
1
3
2
! WARNING
Do not move the winch clutch lever to the
DISENGAGED position with a load on the line. The
load is released uncontrolled and can result in
personal injury or death.
Disengaged (1)—To disengage the winch, pull knob
(3) on the clutch lever out, and rotate the lever to the
DISENGAGED position. Release the knob so the peg
inserts in the hole in the winch frame.
Engaged (2)—To engage the winch, pull knob (3) on
the clutch lever out, and rotate the lever to the
ENGAGED position. Release the knob so the peg
inserts in the hole in the winch frame.
NOTE: It may be necessary to momentarily operate
the winch in or out to allow the winch clutch to
engage smoothly.
NOTICE
Do not force the winch clutch lever into position.
Damage to the winch may result if the lever is forced.
51
Operation Section
Equipment Controls
52
Operation Section
Before Starting the Engine
TM5-2430-200-10
Before Starting the Engine
! WARNING
Diesel engine exhaust contains products of
combustion which may be harmful to your health.
Always start and operate the engine in a well
ventilated area and, if in an enclosed area, vent the
exhaust to the outside.
Seat and Seat Belt Checks
NOTE: Adjust the seat at the beginning of each shift,
or when changing operators.
Adjust the seat to allow for full travel of the pedals
when the operator is seated against the seat back.
Machine Prestart Checks
1
2
2
Inspect seat belt mounting hardware (2). Replace any
damaged or worn hardware. Keep the mounting bolts
tight.
For maximum service life of the machine, make a
thorough walk-around inspection before mounting the
machine to start the engine. Refer to “Every 10
Service Hours or Daily, Walk-around Inspection” in this
manual for the procedure.
Turn the main disconnect switch ON. Refer to
“Machine Features, Main Disconnect Switch” in this
section for the procedure.
Army operators should perform the Operator’s
Preventative Maintenance Checks and Services
(OPMCS) in Appendix A.
Fasten seat belt (1) before starting the engine.
TM5-2430-200-10
Gauges
1
Inspect all gauges on instrument panel (1). Have Unit
Maintenance repair any unreadable gauges.
53
Operation Section
Before Starting the Engine
54
Operation Section
Engine Starting
TM5-2430-200-10
Engine Starting
! WARNING
Never idle the engine in a closed area. Exhaust
gases, particularly carbon monoxide, may build
up. These gases are harmful and potentially lethal.
NOTE: The parking brake must be applied for the
engine starter to function.
3
! WARNING
With the engine running, this machine will spot
turn when the steering wheel is turned, even if the
transmission is in NEUTRAL.
To avoid personal injury due to unexpected
movement, engage the parking brake and make
sure the area is free of personnel before starting
the engine.
3. Move blade control lever (3) to the HOLD position.
NOTICE
Never push or tow the machine to start the engine.
Doing so can damage the drive train.
Engine Starting Above 0°C (32°F)
4
5
4. Close cover (4) on the winch enable switch to move
the switch into the OFF position.
1
1. Move transmission control lever (1) into NEUTRAL.
2
2. Pull up on knob (2) to engage the parking brake.
Change 1
5. Move blackout light switch (5) into the desired
operating position.
NOTE: The indicator check is only fully functional
while the blackout switch is in the SERVICE DRIVE or
STOP LIGHT position.
TM5-2430-200-10
55
Operation Section
Engine Starting
9. If the engine does not start after 15 to 30 seconds
of cranking, release the engine start switch and
move it to ON position (10) to allow the air inlet
heater to operate. Wait approximately 30 seconds
to allow the starting motor to cool before operating
the starter again. Repeat Steps 7 and 8.
8
7
6
6. Remove locking pin (6) and lift cover (7) on the start
switch.
9
10
11
7. Move the start switch from OFF position (11) to ON
position (10). If start-aid indicator (8) comes on, wait
until the indicator turns off (up to 30 seconds)
before attempting to start the engine.
NOTICE
Do not keep the starting motor engaged for more than
30 seconds at a time. Wait 30 seconds to allow the
starting motor to cool before trying again. If the engine
does not start after three attempts, determine the
cause of the malfunction. Pumping the accelerator
pedal will not assist in starting the engine.
Do not increase engine speed until the oil pressure
gauge indicates between 250 and 450 kPa (30 and 70
psi). Oil pressure should raise within 15 seconds after
the engine starts. If oil pressure is not indicated on the
gauge within 15 seconds, do not drive the machine.
STOP the engine, and report the problem to Unit
Maintenance. Do not operate the machine until the
problem has been corrected.
NOTE: Applying a light load will help the engine reach
normal operating temperature sooner. When idling in
cool weather, the ECM may increase the engine
speed to approximately 1000 to 1200 rpm. Do not
race the engine to make the machine warm up more
quickly.
NOTE: The ECM will disengage the starter at 600
rpm. Holding the starter engaged after the engine has
started will not damage the starter.
8. Move the start switch to START position (9). Hold
the switch in START, and engage the blade control
lever at the same time to crank the engine. The
indicators will turn on to indicate the presence of
any burned out bulbs. (Refer to “Operation Section,
Monitoring Systems and Cab Features, Blackout
Light Switch,” in this manual for a list of indicators
which operate in the different blackout switch
positions.) Release the engine start switch when the
engine starts.
NOTE: Do not push or hold the accelerator pedal
down while cranking the engine. The ECM will
automatically provide the correct amount of fuel to
start the engine.
NOTE: The combined action of holding the START
switch and engaging the blade control lever
simultaneously provides for easier starting and less
strain on the implement pump.
Change 1
56
Operation Section
Engine Starting
TM5-2430-200-10
Engine Starting Between 0°C and –32°C
(32°F and -25°F)
! WARNING
4. If the engine does not start after 15 to 30 seconds
of cranking, release the engine start switch and
move it to the ON position to allow the intake air
heater to operate. Wait approximately 30 seconds
to allow the starting motor to cool and intake air to
heat before cranking the engine again. Repeat
Steps 2 through 4 until the engine starts.
DO NOT SPRAY ETHER (starting fluids) into the
air intake. This diesel engine is equipped with an
electric air intake heater system to aid cold
weather starting and reduce white smoke. Do not
spray ether into the air inlet. It will contact the
heater elements. Use ONLY the start-aid system or
immediate engine damage and personal injury
may result.
NOTE: Do not use ether to help start the engine at
temperatures above –32°C (–25°F). At warmer
temperatures, ether reduces the amount of oxygen
available for combustion, which makes the engine
more difficult to start.
NOTICE
Inject starting aid (ether) only after initial start-up, until
the engine is running smoothly.
NOTICE
Do not keep the starting motor engaged for more than
60 seconds at a time. Wait 30 seconds to allow the
starting motor to cool and inlet air to heat before trying
again. Pumping the accelerator pedal will not assist in
starting the engine.
Wait approximately three seconds before each ether
injection.
Use ether for cold starting purposes only, as directed.
Use ether sparingly. Excessive ether without cranking
can cause piston and ring damage.
1. Follow Steps 1 through 7 of “Engine Starting Above
0°C (32°F),” in this section.
5. Release the engine start switch into the ON position
after the engine reaches 1000 rpm. If the engine
runs roughly, operate start-aid switch (3) manually
to inject ether sparingly until the engine is running
smoothly.
NOTE: The ECM will disengage the starter at 600
rpm. Holding the starter engaged after the engine has
started will not damage the starter.
1
2
3
2. If start-aid indicator (1) comes on, wait until the
indicator turns off (approximately 30 seconds)
before attempting to start the engine.
3. When start-aid indicator (1) has turned off, hold the
engine START switch and engage the blade control
lever at the same time to crank the engine.
NOTE: The combined action of holding the START
switch and engaging the blade control lever
simultaneously provides for easier starting and less
strain on the implement pump.
Change 1
NOTICE
Do not increase engine speed until the oil pressure
gauge indicates normal. The engine oil pressure
indicator should go off, and the oil pressure should
raise within 15 seconds after the engine starts. If oil
pressure is not indicated on the gauge within 15
seconds, do not drive the machine. stop the engine,
and report the problem to Unit Maintenance. Do not
operate the machine until the problem has been
corrected.
NOTE: Applying a light load will help the engine reach
normal operating temperature sooner. When idling in
cold weather, the ECM will increase the engine speed
to approximately 1000 to 1200 rpm. Do not race the
engine to speed warm-up.
TM5-2430-200-10
Engine Starting Below –32°C (–25°F)
! WARNING
Do not spray ether (starting fluids) into the air
intake. This diesel engine is equipped with an
electric air intake heater system to aid cold
weather starting and reduce white smoke. Do not
spray ether into the air inlet. It will contact the
heater elements. Use only the start-aid system or
immediate engine damage and personal injury
may result.
! WARNING
Do not operate the engine coolant heater in an
enclosed area. The heater produces combustion
gases which may be harmful to your health.
Always start and operate the heater in a wellventilated area and, if in an enclosed area, vent the
exhaust to the outside.
1
57
Operation Section
Engine Starting
NOTICE
Do not start the engine for three minutes after using
the engine coolant heater. The engine coolant heater
requires three minutes to complete the shutdown
cycle. Damage to the engine coolant heater may result
if the engine is started without a three-minute wait to
purge the system.
3. Follow Steps 1 and 2 of “Engine Starting Between
0°C and -32°C (32°F and -25°F)” in this section.
4. Hold the engine start switch and engage the blade
control lever at the same time to crank the engine.
5. After five to ten seconds of cranking, inject ether by
pressing and holding the start-aid switch for three
seconds, and then releasing it. Repeat the injection
of ether every 10 to 15 seconds while cranking the
engine.
NOTICE
Do not keep the starting motor engaged for more than
90 seconds at a time. Wait one minute to allow the
starting motor to cool before trying to start the engine
again. Pumping the accelerator pedal will not assist in
starting the engine.
6. Release the engine start switch into the ON position
after the engine reaches 1000 rpm. If the engine
runs roughly, operate the start-aid switch manually
to inject ether sparingly until the engine is running
smoothly.
NOTE: The ECM will disengage the starter at 600
rpm. Holding the starter engaged after the engine has
started will not damage the starter.
1. Press switch (1) to start the engine coolant heater.
An indicator in the switch illuminates when the
engine coolant heater is ON. Allow the engine
coolant heater to operate for 40 minutes.
2. Press switch (1) to shut the engine coolant heater
off. Wait for three minutes before attempting to start
the engine.
NOTICE
Do not increase engine speed until the oil pressure
gauge indicates normal. The engine oil pressure
indicator should go off, and the oil pressure should
raise within 15 seconds after the engine starts. If oil
pressure is not indicated on the gauge within 15
seconds, do not drive the machine. Stop the engine,
and report the problem to Unit Maintenance. Do not
operate the machine until the problem has been
corrected.
Change 1
58
Operation Section
Engine Starting
TM5-2430-200-10
NOTE: Applying a light load will help the engine reach
normal operating temperature sooner. When idling in
cold weather, the ECM may increase the engine
speed to approximately 1000 to 1200 rpm. Do not
race the engine to speed warm-up.
2
3
1
Engine Starting with Auxiliary Start
(NATO Slave) Receptacle
! WARNING
Jump only with a 24-volt battery source.
Turn off all lights and accessories on the stalled
machine. Otherwise, the lights and accessories
operate when the jump source is connected.
When starting from another machine, make sure
the machines do not touch to prevent damage to
engine bearings and electrical circuits.
Severely discharged maintenance-free batteries
do not fully recharge from the alternator alone
after jump starting. The batteries must be
charged to the proper voltage with a battery
charger. Many batteries thought to be unusable
are still rechargeable.
2. Place transmission control lever (1) into NEUTRAL
on the stalled machine.
3. Pull knob (3) up to engage the parking brake on the
stalled machine.
4. Move blade control lever (2) into the LOWER
position on the stalled machine. Move the blade
control lever to the HOLD position when the blade
is resting on the ground.
NOTICE
This machine has a 24-volt starting system. Use only
equal voltage for jump starting. Use of a higher voltage
will damage the electrical system.
1. Refer to “Troubleshooting, Operational
Troubleshooting, 1. Starter Fails to Crank When
Start Switch Is Held in START Position” in this
section to find the reason that the stalled machine
failed to crank. Correct any detectable problems. If
the cause cannot be determined, continue with this
procedure to jump-start the machine. Report the
problem to Unit Maintenance for repair.
4
5. Move the start switch into OFF position (4) on the
stalled machine. Turn off all electrical accessories
(lights, winch, fans, radios, wipers).
5
Change 1
TM5-2430-200-10
59
Operation Section
Engine Starting
11. Start the engine on the boost machine, or activate
the charging system on the auxiliary power
source.
12. Wait a minimum of two minutes for the batteries of
the stalled machine to partially charge.
13. Attempt to start the stalled engine. Refer to the
beginning of “Engine Starting,” in this section.
6
14. Immediately after starting the stalled engine,
disconnect the NATO slave cable from the BOOST
SOURCE.
15. Disconnect the other end of the cable from the
stalled machine.
7
8
Optional Arctic Batteries.
6. Make sure that main disconnect switches (5) and
(8, if equipped) are in the ON position on the stalled
machine.
7. Move the boost-start machine near enough to the
stalled machine for the cables to reach, but DO
NOT ALLOW THE MACHINES TO TOUCH.
NOTICE
Do not allow the machines to touch while jump starting
the machine. Damage to the boost-start machine or
stalled machine may result.
8. Stop the engine on the boost machine, or, if using
an auxiliary power source, turn off the charging
system.
9. On the stalled machine, connect the NATO slave
cable to the auxiliary start receptacle (NATO slave)
(6) or (7, if equipped).
10. Connect the other end of this cable to the auxiliary
start receptacle (NATO slave) of the boost source.
60
Operation Section
After Starting Engine
TM5-2430-200-10
After Starting Engine
NOTICE
Keep the engine speed low until the engine oil
pressure indicator turns off and the gauge indicates
normal. If the light does not go out within 15 seconds,
stop the engine and inform Unit Maintenance of the
problem. Do not operate the machine until the cause of
the problem has been corrected. Operating the
machine when the engine oil pressure indicator is
illuminated can result in engine damage. The engine
oil pressure indicator illuminates when the engine oil
pressure is 35 ± 21 kPa (5 ± 3 psi).
1
3
4. Allow the engine to warm up at LOW IDLE for five
minutes. During the warm-up period, use blade
control lever (3) to RAISE and LOWER the blade, in
order to help speed the warm up of the hydraulic
components.
5. Observe the gauges and indicators frequently
during operation.
2
1. Gradually depress the accelerator pedal until
tachometer (1) indicates that the engine speed is
1200 rpm.
2. When engine oil pressure gauge (2) indicates that
the engine oil pressure is above approximately
240 kPa (35 psi), release the accelerator pedal.
3. Put the machine into EARTHMOVING mode. Refer
to “Machine Operation, Earthmoving Mode” in this
section.
Change 1
TM5-2430-200-10
61
Operation Section
Machine Operation
Machine Operation
! WARNING
To minimize whole body vibration, based on 24
hour operations, limit daily machine usage to a
maximum of 11.5 hours, no more than 4 hours
continuous; the operator must rest between
operations at least 4.16 hours. Failure to comply
may result in injury.
2
Earthmoving Mode
Put the machine in EARTHMOVING mode when using
the machine for dozing, or ripping. EARTHMOVING
mode may also be used for winching. When the
machine is in EARTHMOVING mode:
• the suspension is locked in forward, and active in
reverse.
• the transmission is limited to three speeds forward,
with manual shifting.
2. Move the self-deploy/earthmoving switch to
EARTHMOVING position (2).
Manual Suspension Locking
3
• the engine is limited to the low horsepower setting.
To Place the Machine in EARTHMOVING
Mode
Valves are installed on the machine to manually lock
the suspension into EARTHMOVING mode. These
valves provide a way to lock the suspension if the
electrically operated solenoids do not function.
1
1. Stop the machine and place transmission control
lever (1) into NEUTRAL.
LOCK—Turn manual suspension lockout valves (3) (on
both sides of the machine) counterclockwise to
manually lock the suspension into EARTHMOVING
mode.
NOTICE
Do not operate the machine in SELF-DEPLOY mode
when the suspension is locked by the manual
suspension locking valves. Damage to the machine
may result.
UNLOCK—Turn manual suspension lockout valves
(3), on both sides of the machine, clockwise to return
control of the suspension locking function to the selfdeploy/earthmoving switch.
Change 1
62
Operation Section
Machine Operation
TM5-2430-200-10
Self-Deploy Mode
Put the machine into SELF-DEPLOY mode to travel at
high speeds. When the machine is in SELF-DEPLOY
mode:
2
• the suspension is active.
• the transmission will automatically shift between six
speeds in forward.
• the blade can be raised, angled or tilted, but not
lowered.
! WARNING
The blade can be lowered when the machine is in
SELF-DEPLOY mode if the electrical power to the
machine is off. Always keep clear of the blade
when the blade is off the ground. Personal injury
can occur.
2. Move blade control lever (2) to LIFT, and raise the
blade all the way up.
3
4
• the engine operates at the high horsepower setting
in transmission speeds three through six.
• the SELF-DEPLOY indicator is lit.
To Place the Machine in SELF-DEPLOY
Mode
5
6
3. Move self-deploy/earthmoving switch (5) into SELFDEPLOY position. Self-deploy indicator (4) will turn
on. If the self-deploy indicator does not come on,
raise the blade further until blade down indicator (3)
and blade down alarm (6) turn off.
NOTE: Self-deploy indicator (4) will only function if the
blackout light switch is in the SERVICE DRIVE or
STOP LIGHT position.
1
1. Stop the machine and place transmission control
lever (1) into NEUTRAL.
NOTE: Blade down indicator (3) and blade down
alarm (6) will only function if the blackout light switch is
in the SERVICE DRIVE or STOP LIGHT position.
63
Operation Section
Machine Operation
TM5-2430-200-10
Winch Operation
! WARNING
Make sure personnel are clear of wire rope cable
when there is a load on it. The cable can break and
cause personal injury or death.
! WARNING
NOTICE
The of the doubling block must be used when
performing self-rescue of the machine. The winch
should not be used to tow another DEUCE.
Doubling Block Installation
NOTE: The weight of the doubling block is 23 kg
(51 lb).
Thick gloves should be worn when working with
cable. Failure to do so may cause severe injury to
hands and fingers.
2
1
!
WARNING
Keep away from the winch fairlead when the cable
is retracting. Personal injury due to pinching at the
fairlead is possible when the winch cable is
retracting.
NOTICE
Always operate the winch with the cable in as straight
a line as possible. For winching operation other than
self-recovery, always operate the winch with the
tractor in a stationary position. Moving the tractor while
operating the winch may damage the winch.
3
1. Remove cotter pin (3).
2. Turn pin (1) counterclockwise until the end of the
pin clears side plate (2).
4
Refer to “Machine Features, Winch Control Switches”
in this section for an explanation of the winch control
switches, and “Equipment Controls, Winch Controls”
in this section for explanation of the winch clutch.
5
1
2
The winch can be operated with the machine in either
EARTHMOVING or SELF-DEPLOY modes. Use the
engine accelerator pedal to control the winch speed.
The rear window screen must be down when the
winch is operated.
The last five wraps of cable must be left on the drum
to assist the cable clamp in holding the load.
The winch has a maximum pulling capacity of
97 856 N (22,000 lb). For loads greater than 97 856 N
(22,000 lb), use the doubling block which is stored in
the BII compartment (left compartment at the rear of
the machine). When the doubling block is used, the
maximum pulling force from the doubling block hook
is 195 712 N (44,000 lb).
3
3. Rotate side plate (2) to allow access to sheave (4).
4. Run winch cable (5) around the sheave. Refer to
“Equipment Controls, Winch Controls” in this
section for explanation of the winch clutch.
5. Return side plate (2) to its original position, and
reinstall pin (1) and cotter pin (3).
64
Operation Section
Machine Operation
TM5-2430-200-10
Remote Hydraulic Power Manifold
Preparation for Use of Remote Hydraulic
Tools
! WARNING
6
Refer to operation and maintenance information
for any tool to be used with the remote hydraulic
power manifold. Army personnel should refer to
TM 5-2420-224-10.
6. Attach the hook on the end of the winch cable to
the lifting eye (6) on either side of the winch.
1
! WARNING
When attaching hook for winching operations,
position the throat (open part) of hook upward in
case overloading straightens the hook. Failure to
do this may result in injury or death of personnel.
7. Attach the hook on the doubling block to the load,
and operate the winch to haul the load in. Refer to
“Machine Features, Winch Control Switches,” in this
section.
1. Start the engine. Refer to “Engine Starting” in this
section. Leave transmission control lever (1) in
NEUTRAL.
NOTE: The machine must be in the EARTHMOVING
mode to lower the blade. Refer to “Machine
Operation, Earthmoving Mode” in this section for the
procedure to place the machine in the
EARTHMOVING mode.
4
2
3
2. Install the remote tool supply line to fitting (2),
located in the engine air intake compartment.
3. Install the remote tool return line to fitting (3).
TM5-2430-200-10
4. Open the needle valve by turning knob (4)
counterclockwise.
5
6
65
Operation Section
Machine Operation
Returning Machine to Normal Operation
1. Move the remote throttle switch into the OFF
position, and close switch cover (7).
2. Close the needle valve by turning knob (6)
clockwise, until tight.
NOTICE
Failure to close the needle valve will cause the
machine hydraulic system to not operate within
specifications.
3. Disconnect the remote tool supply line and remote
tool return line from fittings (4) and (5).
5. Lift switch cover (5) and move the remote throttle
switch to ON (up).
NOTE: Remote throttle indicator (6) will illuminate if
the blackout switch is in STOP LIGHT or SERVICE
DRIVE; engine speed will increase to 2400 rpm; the
parking brake will remain engaged, regardless of the
position of knob (3); the accelerator pedal will not
function; and the transmission will remain in
NEUTRAL, regardless of the position of transmission
control lever (1).
6. Use the remote tools in accordance with the
manufacturer’s recommendations.
NOTE: Refer to the operating instructions of the
remote hydraulic tool in use for safety precautions and
correct operating instructions.
Change 1
66
Operation Section
Machine Operation
TM5-2430-200-10
Back Rippers
NOTICE
This procedure is for emergency field use, to mobilize
the machine if either of the drive belts become loose.
If this procedure is performed for any reason, deliver
the machine to Unit Maintenance to have the
suspension properly charged before returning the
machine to normal service. Do not overcharge the
cylinders.
2
1
3
Suspension Hydraulic Charge Specifications
Description
To lower the back rippers for use, remove chain (3)
while holding ripper (2). Allow the ripper to rest on the
ground and secure chain to ring (1).
Minimum Charge
With Machine On
Ground in kPa (psi)
Middle Suspension Cylinders
8276 ± 690 (1200 ± 100)
Bogie Cylinders
11 790 ± 690 (1710 ± 100)
Recoil Cylinders
15 170 ± 690 (2200 ± 100)
NOTE: The same procedure can be applied to either
side of the machine.
1
1
2
3
To raise the back rippers for storage, lift back ripper
(2), and hold in place, while securing chain (3), to ring
(1).
Emergency Suspension Charging and
Emergency Drive Belt Tension
Procedure
! WARNING
The hydraulic system operates at high pressure.
Wear eye and face protection, gloves and
protective clothing when performing this
procedure. Failure to comply may result in severe
injury or death.
Change 1
1. Open suspension manual lock valve (1) by rotating
the valve clockwise.
NOTE: The emergency drive belt tension procedure
will not work if the suspension is locked.
NOTE: Thoroughly clean the couplings of all hoses
used in this procedure before connecting the coupling
to any port on the machine.
67
Operation Section
Machine Operation
TM5-2430-200-10
6
2
12
2. Remove the charge hose and the gauge group from
the BII compartment. Disconnect coupling (3) from
coupling (4) on the charge hose. Connect coupling
(8) of the gauge group to coupling (4) of the charge
hose. Connect coupling (10) of the gauge group to
coupling (3) of the charge hose.
4. Install coupling (6) to “Recoil Cylinder” fitting (12) at
the rear of the machine.
NOTE: To install coupling (6) to fitting (12), snap the
coupling onto the fitting. Turn nut (2) clockwise until it
is hand tight. The hose will turn with the nut.
13
11
Radiator Shown in Raised Position for Photographic Clarity.
5. Start the engine. Refer to “Engine Starting” in this
section. Leave transmission control lever (13) in
NEUTRAL.
14
5
3. Attach coupling (7) to pressure tap (11). Open ball
valve (5) on the charge hose (valve knob is in-line
with valve body).
6. Move blade control lever (14) towards the rear of
the machine to fully raise the blade.
Change 1
68
Operation Section
Machine Operation
TM5-2430-200-10
! WARNING
Keep personnel clear of the blade while the blade
is raised. The blade could fall, resulting in injury
or death.
NOTICE
Overtightening the drive belt will cause accelerated
wear of undercarriage components and decreased
machine performance.
11. Turn nut (2) three-quarters of a turn
counterclockwise (this locks the valve). Open ball
valve (5) (turn the valve knob in line with the valve
body).
12. Remove coupling (6) from fitting (12).
15
13. Repeat Steps 4 and 8 through 11 for the other
drive belt, if necessary.
14. Remove coupling (7) from pressure tap (11) on the
multifunction valve.
7. Move the self-deploy/earthmoving switch to SELFDEPLOY position (15).
NOTE: The machine must be in the SELF-DEPLOY
mode to unlock the suspension. Refer to “Machine
Operation, Self-Deploy Mode” in this section for the
procedure to place the machine in the SELF-DEPLOY
mode.
15. Turn nut (2) counterclockwise, until the nut stops
rotating (an additional three-quarters of a turn may
be required). Remove coupling (6) from fitting (12).
16. Disconnect coupling (8) of the gauge group from
coupling (3) of the charge hose. Disconnect
coupling (10) of the gauge group from coupling (4)
of the charge hose. Connect coupling (3) to
coupling (4). Return the charge hose and gauge
group to the BII compartment for storage.
17. Deliver the machine to Unit Maintenance as soon
as possible to recharge the suspension.
9
5
16
8. With the engine operating at low idle, hold auxiliary
charge switch (16) up to direct hydraulic oil into the
recoil cylinder.
9. Watch the pressure reading on the pressure gauge
on gauge assembly (9).
10. Release auxiliary charge switch (16) and close ball
valve (5) (turn the valve knob perpendicular to the
valve body) when the pressure reading on the
pressure gauge reaches 15 170 kPa (2200 psi).
69
Operation Section
Machine Operation
TM5-2430-200-10
Emergency Machine Leveling
! WARNING
The hydraulic system operates at high pressure.
Wear eye and face protection, gloves and
protective clothing when performing this
procedure. Failure to comply may result in severe
injury or death.
NOTICE
This procedure is for emergency field use to mobilize
the machine. If this procedure is performed for any
reason, deliver the machine to Unit Maintenance to
have the suspension properly charged before
returning the machine to normal service.
NOTE: Before performing the emergency machine
leveling procedure, fully kneel and raise the machine
twice on level ground. Refer to “Machine Features,
Kneeling Switch” in this section.
2. Remove the charge hose and the gauge group from
the BII compartment. Disconnect coupling (3) from
coupling (4) on the charge hose. Connect coupling
(8) of the gauge group to coupling (4) of the charge
hose. Connect coupling (10) of the gauge group to
coupling (3) of the charge hose.
11
NOTE: The same procedure can be applied to either
side of the machine.
1
Radiator Shown in Raised Position for Photographic Clarity.
1. Open suspension manual lock valve (1) by rotating
the valve clockwise.
5
NOTE: The emergency machine levelling procedure
will not work if the suspension is locked.
NOTE: Thoroughly clean the couplings of all hoses
used in this procedure before connecting the coupling
to any port on the machine.
3. Attach coupling (7) to pressure tap (11). Open ball
valve (5) on the charge hose (valve knob is in-line
with valve body).
Change 1
70
Operation Section
Machine Operation
TM5-2430-200-10
12
15
6. Use blade control lever (15) to raise the blade off
the ground.
! WARNING
13
Keep personnel clear of the blade while the blade
is raised. The blade could fall, resulting in injury
or death.
4. If the left rear of the machine is low, install coupling
(6) to middle cylinder charge fitting (12). If the left
front of the machine is low, install coupling (6) to
front bogie cylinder charge fitting (13).
16
NOTE: To install coupling (6) to fitting (12) or (13),
snap the coupling onto the fitting. Turn nut (2)
clockwise until it is hand tight. The hose will turn with
the nut.
7. Move the self-deploy/earthmoving switch (16) into
the SELF-DEPLOY position.
14
5. Start the engine. Refer to “Engine Starting,” in this
section. Leave transmission control lever (14) in
NEUTRAL. Operate the engine at low idle.
Change 1
NOTE: The machine must be in the SELF-DEPLOY
mode to unlock the suspension. Refer to “Machine
Operation, Self-Deploy Mode” in this section for the
procedure to place the machine in the SELF-DEPLOY
mode.
71
Operation Section
Machine Operation
TM5-2430-200-10
Moving the Machine
1. Start the engine. Refer to “Before Starting the
Engine” and “Engine Starting” in this section for the
starting procedure.
3
4
17
1
2
8. To raise the machine, hold auxiliary charge switch
(17) up to direct hydraulic oil into the cylinder.
9. Watch the reading on the gauge and the level of the
machine.
NOTE: Do not exceed a maximum pressure of 8276 ±
690 kPa (1200 ± 100 psi) when middle cylinder
charge fitting (12) is used, and do not exceed a
maximum pressure of 11 790 ± 690 kPa (1710 ± 100
psi) when the bogie cylinder charge fitting (13) is used.
2. Use blade control lever (1) to raise the blade off the
ground.
10. Release auxiliary charge switch (17) and close the
valve (turn the knob perpendicular to the valve
body) on ball valve (5) when the machine is level or
when the maximum pressure for the cylinder is
reached.
Keep personnel clear of the blade while the blade
is raised. The blade could fall, resulting in injury
or death.
11. Turn nut (2) counterclockwise, until the nut stops
rotating (an additional three-quarters of a turn may
be required).
! WARNING
NOTE: If the machine is to be operated in the SELFDEPLOY mode, the blade must be fully raised.
12. Remove coupling (6) from the fitting of the cylinder
which was charged.
13. Repeat Steps 4 and 8 through 12 for the other
cylinders until the machine is level.
3
14. Remove coupling (7) from pressure tap (11).
15. Disconnect coupling (8) of the gauge group from
coupling (3) of the charge hose. Disconnect
coupling (10) of the gauge group from coupling (4)
of the charge hose. Connect coupling (3) to
coupling (4). Return the charge hose and gauge
group to the BII compartment for storage.
3. Place self-deploy/earthmoving switch (3) in the
desired position.
16. Deliver the machine to Unit Maintenance as soon
as possible to recharge the suspension.
Change 1
72
Operation Section
Machine Operation
TM5-2430-200-10
Pintle Hook
4
! WARNING
5
Use caution when operating the pintle hook. It is
possible to pinch your fingers in the clasp,
causing injury.
6
4. Depress service brake pedal (5) to engage the
service brake.
5. Push knob (2) in to release the parking brake.
7
NOTICE
Use caution when towing loads at transport speeds
(up to 24 kph [15 mph]). Reduce speed if the towed
load is not equipped with brakes. Avoid hard braking
applications.
NOTICE
Do not operate at speeds greater than 24 kph (15
mph) when towing a load. exceeding 24 kph (15 mph)
while towing a load may damage the machine.
1
2
3
6. Place transmission control lever (7) in the desired
gear.
NOTE: In EARTHMOVING mode, the transmission is
limited to the REVERSE gears and manual operation
of FIRST, SECOND, and THIRD FORWARD. If
operating in SELF-DEPLOY mode, the transmission
will automatically shift to the highest forward gear
selected.
7. Release service brake pedal (5) and accelerate the
machine using accelerator pedal (6).
8. Steer the machine using steering wheel (4).
9. Slow and stop the machine by depressing service
brake pedal (5).
NOTE: Refer to “Machine Parking” in this section for
parking instructions.
1. Remove pin (3).
2. Pull lever (1) and lift clasp (2) until the clasp locks
into the up position.
3. Back the machine up to the load.
4. Lift lever (1) and lower clasp (2).
5. Reinstall pin (3).
TM5-2430-200-10
73
Operation Section
Operating Techniques
Operating Techniques
! WARNING
Alert ground support personnel to stay a minimum of 50
ft from the deuce during dozing operations. Failure to
comply may result in injury or death from flying rocks
and debris.
NOTE: The illustrations in this section are not specific to the
DEUCE. However, the techniques described are valid
operating techniques for the DEUCE.
Bulldozing
Straight Dozing
For the best performance during straight dozing, a level cut
should be maintained. After the bulldozer blade is filled, the
load should be carried to the landfill.
• Do not lug or stall the machine.
• Do not allow the drive belt to spin excessively.
• If the machine must be turned under load, the bulldozer tilt
cylinders, not the steering wheel, should be used to steer
the machine.
During leveling work, a full bulldozer blade can be managed
more effectively than a partially loaded blade.
Slot Dozing
NOTICE
During slot dozing, side wall cave in may occur, potentially
causing damage to the drive belt and suspension..
When material is trapped in a slot, larger loads can be
carried in front of the bulldozer blade.
Once the depth of the slot exceeds the blade height,
production using this method will decreases. Decrease is
due to excess spoil falling back over the blade.
! WARNING
Moderate breaking and reverse gear one (R-1) must be
used when backing down any slope. Failure to do so
could result in injury or death.
Start at the dump end, and operate rearward. This is shown
in Figure (A). This technique permits loading downhill, and
the carrying of a load on a level surface. When working from
the rear of the slot to the dump end, the previous technique
is more efficient. This is shown in Figure (B). Uphill loading
does not utilize the slot. This is shown in Figure (B). Level
dozing through the entire slot is inefficient, due to the longer
distance of the push.
When parallel slots are dug, the center should be removed
from the rear. This procedure permits the operator to
maintain a slot until the center is removed. The center should
be maintained at a minimum width. The maximum width
should be approximately one-third of the bulldozer blade.
NOTICE
During earthmoving operations it is possible to collapse the
recoil cylinder completely. To reduce the possibility of
breaking track belts in this condition, a recoil alarm has been
added to the machine to alert the operator to this condition.
If the alert sounds, the operator should reverse direction and
clear material from the undercarriage.
Change 1
74
Operation Section
Operating Techniques
TM5-2430-200-10
Machine on a Slope
! WARNING
Moderate breaking and reverse gear one (R-1)
must be used when backing down any slope.
Failure to do so could result in injury or death.
Backfilling
Backfill material should be pushed into a trench at a
90° angle to the trench. Do not twist the machine on a
new backfill. When material is cut on a side slope,
material may fall on the machine.
Roading Information
When possible, a slope should be worked vertically.
Banks or slopes must be worked cautiously to avoid
machine tipping.
If the machine starts to sideslip on a slope, lighten the
load and turn the machine downhill.
When a slope is worked horizontally, start at the top of
the slope and work downhill. Maintain a windrow of
material on the low side of the machine to provide
stability.
Do not undercut the slope. Undercutting will increase
the slope.
V-Ditching
NOTE: Required permits must be obtained before the
machine is operated on a public road. Check with
local officials to determine if permits are required.
Before the machine is driven, Army operators should
perform the “Operator’s Preventative Maintenance
Checks and Services (OPMCS)” as described in
“Appendix A.”
If a drive belt is loose, perform the procedure
described in “Operation Section, Machine Operation,
Emergency Suspension Charging, and Emergency
Drive Belt Tension Procedure” in this manual.
Use the SELF-DEPLOY mode when driving the
machine on a public road. Refer to “Operation
Section, Machine Operation, Self-Deploy Mode” in this
manual.
Place the blackout switch in the position which meets
the requirements of the current situation. Refer to
“Operation Section, Monitoring Systems and Cab
Features, Blackout Light Switch” in this manual.
To V-ditch, tilt the bulldozer blade to the desired
slope. Position the corner of the bulldozer blade in the
center of the ditch, and cut the ditch to the desired
depth.
TM5-2430-200-10
! WARNING
The work lights may impair the vision of drivers of
approaching vehicles, which may cause injury or
fatal accidents. Therefore, when traveling on
public roads or accesses, ensure that the work
light switch is in the OFF position. Refer to
“Operation Section, Monitoring Systems and Cab
Features, Work Light Switch” in this manual.
Travel at moderate speeds. Do not exceed the speed
limit on public roads.
NOTE: The maximum travel speed of the machine is
48 kph (30 mph). Maximum attainable speed is
dependent on ambient temperature, oil level, and oil
weight. The fluids must be at normal operating
temperature, and the machine must be operated on
level terrain to reach 48 kph (30 mph).
! WARNING
Reduce travel speed if directional stability is
noticeably diminished. Always use the seat belt
when operating the machine. Loss of machine
control can result in injury or death.
Back Ripping
General Ripping Technique
When the back rippers are used, the machine should
be operated in the EARTHMOVING mode with the
transmission in FIRST SPEED REVERSE. If additional
production is required, use additional shanks instead
of increasing the ripping speed.
NOTICE
When ripping is performed, the machine must be
driven in a straight line. Also, all four rippers must be
used at the same time or the rippers must be used in
symmetrical pairs.
NOTICE
Do not turn the machine while the ripper shanks are in
the ground. The shanks may fail if they are twisted.
Use the accelerator pedal to match the drawbar pull
to the underfoot conditions. Do not allow the drive belt
to slip.
75
Operation Section
Operating Techniques
Rip the ground as deep as the underfoot conditions
will allow. Partial depth ripping may be required.
Remove the material in natural layers.
The depth and width of the pass control the sizing of
the ripped material.
The back rippers are not intended for use in rock or in
deep ripping applications. Only use the ripper shanks
which are specified in Parts Manual, Deployable
Universal Combat Earthmover (DEUCE).
Ripping Technique for Packed Soil,
Hardpan, or Clay
Follow the recommendations given in “General Ripping
Technique,” above.
Use the greatest possible number of shanks to break
the material to the desired size. The number of shanks
used should not cause the machine to stall or hang
up.
NOTE: Four shanks usually work well in these
materials.
Operation in High Ambient
Temperatures (Above 38°C [100°F])
In high ambient temperatures, the gauges must be
checked more often. If a system is overheating,
reduce the load, and allow the system to cool to
normal operating temperature.
NOTICE
To prevent the fuel from overheating, the fuel level
should be maintained above one-half of a tank.
Overheated fuel can cause reduced power and possibly
damage the fuel system.
The operator's preventative maintenance checks and
services should be performed more often than normal.
Refer to “Appendix A, Operator’s Preventive
Maintenance Checks and Services (OPMCS)—
DEUCE.” Contact Unit Maintenance for assistance in
determining new maintenance intervals.
76
Operation Section
Machine Parking
TM5-2430-200-10
Machine Parking
Machine Stopping
NOTE: If possible, park the machine on level ground.
If the machine must be parked on a grade, block both
drive belts on the downhill side of the machine.
4
5
1
3
2
5. Pull knob (5) up to engage the parking brake.
NOTE: Service brake pedal (2) can be released after
the parking brake is engaged.
1. In preparation to park the machine, release
accelerator pedal (3) to decrease engine speed.
2. Depress service brake pedal (2), and move
transmission control lever (1) to a lower gear, to
slow the machine travel speed.
3. Fully depress service brake pedal (2) to stop the
machine.
6
! WARNING
With the engine running, this machine will spot
turn when the steering wheel is turned, even if
the transmission is in NEUTRAL.
To avoid personal injury due to unexpected
movement, engage the parking brake and make
sure the area is free of personnel before starting
the engine.
4. Move transmission control lever (1) into NEUTRAL.
6. Move the self-deploy/earthmoving switch (6) into
EARTHMOVING position.
7. Move blade control lever (4) forward to LOWER the
blade to the ground. Apply a slight downward
pressure with the blade after the blade contacts the
ground.
NOTE: When the engine is operating, the machine
must be in the EARTHMOVING mode before the blade
will lower. When the engine is not operating,
movement of the blade control lever will allow the
blade to lower.
NOTE: If the engine is to be stopped, refer to
“Machine Parking, Engine Stopping” in this section for
engine shutdown instructions.
Change 1
77
Operation Section
Machine Parking
TM5-2430-200-10
Engine Stopping
Leaving the Machine
NOTICE
Stopping the engine immediately after it has been
working under load can result in overheating and
accelerated wear of the engine components.
1
Follow the engine stopping procedure, outlined below,
to allow the engine to cool and to prevent excessive
temperatures in the turbocharger center housing which
causes oil blocking problems.
1. Stop the machine. Refer to “Machine Parking,
Machine Stopping” in this section for the procedure
to stop the machine.
2. Operate the machine at low idle for five minutes.
This allows hot areas in the engine to cool
gradually, extending engine life.
1. Stop the engine following the procedure given in
“Machine Parking, Engine Stopping” in this section,
and install start switch cover locking pin (1).
2
1
3. Close cover (1) to move the engine start switch to
the OFF position and to stop the engine.
2. Move disconnect switch (2) to the OFF position, if
the machine is equipped with the optional arctic
batteries. Refer to “Machine Features, Main
Disconnect Switch” in this section.
78
Operation Section
Machine Parking
TM5-2430-200-10
7
3
3. Open the electrical panel and BII compartment at
the rear of the machine, and turn main disconnect
switch (3) to the OFF position. Refer to “Machine
Features, Main Disconnect Switch” in this section.
10
9
4
8
4. If necessary, install padlocks on start switch locking
pin (1), fuel tank cap (4), electrical panel and BII
compartment (5), tool/battery box (6), hydraulic tank
cap (7), and cab door (8).
5. Dismount the machine, maintaining three-point
contact with hand holds (10) and step (9).
12
5
6
11
6. Inspect back side (11) of the blade and inside (12)
of the drive belt components on both sides of the
machine for any accumulation of debris. Clean out
any debris before the debris hardens.
Change 1
79
Operation Section
Transportation Information
TM5-2430-200-10
Transportation Information
General Information
Machine Shipping
For machine shipping specifications, refer to “General
Section, Specifications and Model Views” in this
manual.
NOTICE
Remove any ice, snow or other slippery material from
the shipping machine and loading dock before loading
the machine.
Ground Transportation
1. Drive the machine to the loading area. For operating
instructions, refer to “Before Starting the Engine,”
“Engine Starting,” “After Starting Engine,” and
“Machine Parking” in this section.
1
2
2. Move blade control lever (1) towards the rear of the
machine to fully raise the blade.
Always block the trailer or rail car wheels before
loading the machine.
3
Load the machine with the rear end forward to avoid
damage if the cab door opens during transport.
Block the front and rear of the drive belts, and tie the
machine down before moving the hauling vehicle.
Cover the engine exhaust opening to prevent the
turbocharger from spinning in transit. If the machine is
loaded with the rear end towards the front of the
transport vehicle, the rain cap on the exhaust stack
must be fastened down.
3. Place the self-deploy/earthmoving switch (3) into
SELF-DEPLOY position.
4. Drive the machine onto the hauling unit so that the
rear end of the machine faces forward.
Comply with regulations governing weight, width and
length of load.
NOTICE
Protect the cooling system with an antifreeze mixture
rated to the lowest expected temperature on the travel
route, or, drain the cooling system completely after the
machine is loaded for transport. If the cooling system
is drained, refill the system before starting the engine
to unload the machine. Operating the machine without
coolant will damage the engine.
Change 1
80
Operation Section
Transportation Information
TM5-2430-200-10
4
6
5
5. With service brake pedal (5) depressed, move
transmission control lever (4) to NEUTRAL.
12. Secure engine exhaust cover (6) down to prevent
wind and water entry into the engine.
6. Pull knob (2) up to engage the parking brake before
releasing service brake pedal (5).
13. Secure all windows, doors, and compartments
before shipping the machine.
7. Place the self-deploy/earthmoving switch (3) into
EARTHMOVING position.
NOTE: If necessary, the blade can be collapsed to
reduce the total shipping width. For the procedure to
collapse the blade, refer to “Special Shipping
Preparation” in this section.
8. Move blade control lever (1) towards the front of the
machine, and lower the blade until the blade
contacts the bed of the hauling unit.
9. Stop the engine. Refer to “Machine Parking, Engine
Stopping,” and “Machine Parking, Leaving the
Machine” in this section for procedures for stopping
the engine and leaving the machine.
10. Block the front and rear of each drive belt.
11. Secure the machine to the hauling unit using the
tie down locations on each side of the machine.
Refer to “Transportation Information, Tie Downs” in
this section for the tie-down locations.
TM5-2430-200-10
Machine Roading
Check the travel route for overpass clearances. Make
sure there is adequate clearance.
The military load classification for this vehicle is 20.
This number is stenciled on the right side of the cab.
Check and obey all local and traffic regulations.
Machine Lifting and Tie Downs
Lifting
81
Operation Section
Transportation Information
! WARNING
Improper lifting can allow the load to shift and
cause injury or damage.
One lifting eye (1) is located on either side of the
blade. Use these lifting eyes to lift the blade. The blade
should be fully raised when the machine is lifted.
One lifting eye (2) is located on either side of the Cframe. One lifting eye (3) is located on either side of
the winch. Use lifting eyes (1) and (3) to lift the
machine. The blade should be fully raised when the
machine is lifted.
1
NOTICE
Do not use lifting eyes (2) for single-point lifting when
the ROPS (top half of cab shell) is installed. The
rigging will interfere with the top of the cab. Use lifting
eyes (1) for single-point lifting with the ROPS installed.
2
Refer to lifting information plate (4) for lifting and
slinging information and the center of gravity location.
The gross vehicle weight of the machine is 16 140 kg
(35, 500 lb). The weight given here apply to machines
as manufactured by Caterpillar Inc.
Use properly rated cables and slings for lifting.
Position the crane for level lifting.
3
4
Change 1
82
Operation Section
Transportation Information
TM5-2430-200-10
Tie Downs
Preparation for Air Transport (C-130,
C-141, C-5)
1
This machine is capable of drive-on and drive-off
loading on the C-130, C-141 and C-5 aircraft. To
prepare the machine for drive-on/drive-off, follow the
procedure below. The Aircraft Loadmaster may require
shoring to distribute floor loading. Before the machine
is driven on an aircraft, remove antennas and other
items from the machine which may interfere with the
loading process.
NOTICE
Protect the cooling system with an antifreeze mixture
rated to the lowest expected temperature on the travel
route, or, drain the cooling system completely after the
machine is loaded for transport. If the cooling system
is drained, refill the system before starting the engine
to unload the machine. Operating the machine without
coolant will damage the engine.
Drive On
1. Drive the machine to the loading area.
2
NOTE: For operating instructions, refer to “Before
Starting the Engine,” “Engine Starting,” “After Starting
Engine,” and “Machine Parking” in this section.
3
1
2
2
The machine is equipped with 12 tie-down locations:
one (1) on each side of C-frame, four (2) on each side
of machine frame, and two (3) under the winch.
! WARNING
Use an appropriate tie-down method for a
machine with a gross vehicle weight of
approximately 16 140 kg (35,500 lb). Failure to
properly secure the machine during transport
can result in injury or death.
Change 1
2. Install castor wheels on blade. Refer to “Castor
Wheel Installation”, in this manual.
a. Move blade control lever (1) towards the
rear of the machine to fully raise the blade.
83
Operation Section
Transportation Information
TM5-2430-200-10
NOTE: The kneeling lock pins and pump handle are
stored in the electrical panel and BII compartment at
the left rear of the machine.
3
4
7
NOTICE
The kneeling lock pins must be installed to secure the
machine in the kneeled position.
8
Do not operate the machine at speeds greater than 3
kph (2 mph) in the kneeled position.
5
6
3. Place blackout light switch (6) in the STOP LIGHT
or SERVICE DRIVE position. Refer to “Monitoring
Systems and Cab Features, Switches” in this
section for details about positions of blackout light
switch (6).
7. Lower all grab rails. Refer to “Machine Features,
Grab Rails” in this section.
8. Place the self-deploy/earthmoving switch into
EARTHMOVING position (8).
9. Place the blade in the float position.
4. Place the self-deploy/earthmoving switch into
SELF-DEPLOY position (7).
11
5. Move the kneeling switch down to LOWER (4), and
hold the switch in the LOWER position until
kneeling indicator (3) illuminates.
12
! WARNING
With the kneeling switch in the LOWER position,
the front of the machine lowers, reducing
clearance between the walkways and the drive
belts and also causing the blade position to
lower. Keep personnel clear of the machine when
lowering the machine.
9
10
10. Move transmission control lever (11) to first gear,
and slowly drive the machine onto the aircraft.
11. When the machine is in place on the aircraft,
depress service brake pedal (12), and move
transmission control lever (11) into NEUTRAL.
! WARNING
With the engine running, this machine will spot
turn when the steering wheel is turned, even if
the transmission is in NEUTRAL.
6. Use the pump handle to install the kneeling lock pin
on both sides of the machine when locking bar (10)
aligns with the hole in bracket (9).
To avoid personal injury due to unexpected
movement, engage the parking brake and make
sure the area is free of personnel before starting
the engine.
12. Pull knob (2) up to engage the parking brake
before releasing service brake pedal (12).
Change 1
84
Operation Section
Transportation Information
TM5-2430-200-10
NOTE: If necessary, the blade can be collapsed to
reduce the total shipping width. Refer to
“Transportation Information, Preparation for Special
Shipping Width” in this manual.
1
13. Move blade control lever (1) to HOLD.
14. Stop the engine. Refer to “Machine Parking,
Engine Stopping,” and “Machine Parking, Leaving
the Machine” in this section for procedures for
stopping the engine and leaving the machine.
2
15. Block the front and rear of each drive belt.
16. Secure the machine to the floor of the aircraft by
using the six tie-down locations on each side of
the machine. Refer to “Transportation Information,
Tie Down” in this section for the tie-down
locations.
3. Move blade control lever (1) toward the front of the
machine to fully lower the blade into the float
position.
Drive Off
4. Drive the machine off the aircraft.
NOTICE
If the cooling system was drained for transport, refill
the system before starting the engine. Operating the
machine without coolant will damage the engine.
NOTICE
Do not operate the machine at speeds greater than 3
kph (2 mph) in the kneeled position.
1. Start the engine.
NOTE: For operating instructions, refer to “Before
Starting the Engine,” “Engine Starting,” “After Starting
Engine,” and “Machine Parking” in this section.
5. When the machine is in an open location, depress
service brake pedal (12), and move transmission
control lever (11) to NEUTRAL.
6. Pull knob (2) up to engage the parking brake before
releasing service brake pedal (12).
7. Move the self-deploy/earthmoving switch into
SELF-DEPLOY position (7).
3
4
7
5
8
6
2. Ensure that blackout light switch (6) is in the STOP
LIGHT or SERVICE DRIVE position.
8. Move the kneeling switch to LOWER (4). Hold the
kneeling switch in the LOWER position for several
seconds to release any force on the kneeling lock
pins caused by natural leakage inside the kneeling
cylinders.
9. Remove the kneeling lock pins on both sides of the
machine and return the pins to the electrical panel
and BII compartment for storage.
10. Move the kneeling switch to RAISE (5). Hold the
kneeling switch in the RAISE position until the
machine is fully raised.
11. Remove castor wheel assembly. Refer to “Castor
Wheel Installation and Removal”, in this manual
Preparation for Special Shipping Width
The shipping width of the machine can be reduced to
2591 mm (102 in). Notify Unit Maintenance personnel
to prepare the machine for the special shipping width.
Refer to Appendix E for Unit Level transportation
procedure. U.S. Army Operators are not authorized to
perform the procedures in Appendix E.
Change 1
85
Operation Section
Towing Information
TM5-2430-200-10
Towing Information
! WARNING
Personal injury or death could result when towing
a disabled machine incorrectly.
Be sure all necessary repairs and adjustments
have been made before a machine that has been
towed to a service area is put back into operation.
Follow the recommendations below to properly
perform the towing procedure.
with a strength of at least 1.5 times the gross weight
of the towing machine for a disabled machine stuck in
the mud, or when towing on a grade.
Do not use a chain for pulling. A chain link may break,
causing possible injury. Use a wire rope cable with
loop or ring ends. An observer (in a safe position)
should stop the pulling procedure if the cable starts to
break or unravel. Stop pulling whenever the pulling
machine moves but the towed machine does not.
Keep the tow angle to a minimum. Do not exceed a
30-degree angle from the straight-ahead position.
NOTICE
The winch cable is rated at 195 712 N (44,000 lb). This
cable can be used for self-recovery but cannot be used
to tow another DEUCE.
NOTICE
This machine is equipped with internally, springapplied parking brakes. The parking brakes must be
hydraulically released before the machine can be
towed. Also, the final drives must be disabled before
the machine is towed. Failure to release the parking
brake and/or disable the final drives before the
machine is towed can damage the machine. Notify
Unit Maintenance to perform these procedures if the
machine must be towed.
NOTE: This information is not authorization for the
operator to maintain additional tools or to perform
maintenance tasks.
These towing instructions are for moving a disabled
machine a short distance, at low speed (no faster than
2 kph [1.2 mph]) to a convenient location for repair.
These instructions are for emergencies only. Always
haul a disabled machine if long distance moving is
required.
Quick machine movement could overload the tow line,
or bar, and cause it to break. Gradual and smooth
machine movement works better.
Normally, the towing machine should be as large as
the disabled machine. Satisfy yourself that the towing
machine has enough brake capacity, weight and
power, to control both machines for the grade and
distance involved.
To provide sufficient control and braking when towing
a disabled machine down a hill, a larger towing
machine or additional machines connected to the front
may be required. This prevents it from rolling
uncontrollably.
All different situational requirements cannot be given,
as minimal towing machine capacity is required on
smooth level surfaces, and increased capacity is
required on inclines or poor surface conditions.
Any towed machine, when loaded onto a trailer, must
be equipped with its own brake system which is
operable from the operator’s compartment.
Shielding must be provided on the towing machine to
protect the operator if the tow line, or bar, should
break. The rear window screen on the DEUCE must
be down when the machine is towing or being towed.
Do not allow an operator on the machine being towed
since it is not possible to control the steering and
braking.
Before towing, make sure the tow line, or bar, is in
good condition and has enough strength for the
towing situation involved. Use a towing line, or bar,
1
When towing the machine, use towing brackets (1) at
the rear of the machine, on both sides of the winch.
86
Operation Section
Troubleshooting
TM5-2430-200-10
Troubleshooting
Engine Diagnostic Codes
Entering Engine Diagnostic Mode
1
3
2. Hold engine diagnostic switch (3) up to initiate the
engine diagnostic mode.
NOTE: Enter the engine diagnostic mode if check
engine indicator (1) is illuminated. Use the engine
diagnostic to retrieve any stored engine diagnostic
codes.
Interpreting Error Codes
NOTE: The blackout light switch must be in STOP
LIGHT or SERVICE DRIVE for the check engine
indicator to function.
For example, to indicate an error code of “42,” the
light will blink four times, followed by a short pause,
and then the light will blink two times. There is a
longer pause between each set of error codes.
NOTE: The engine may be running or not running
during this procedure.
If there are any active errors in the ECM, check engine
indicator (1) on the instrument panel will flash a set of
two numbers for each error.
When the ECM has flashed the code for every active
error, it will repeat from the beginning with the first
error code.
NOTE: An error code of “55” indicates that there are
no active errors detected.
2
1. Lift cover (2) on the engine start switch, and move
the engine start switch into the ON position.
Change 1
Refer to the chart on the next page for a list of error
codes, the effect the error will have on engine
performance, and the suggested action to take if the
error code is present.
DIAGNOSTIC FLASH CODE/ENGINE PERFORMANCE RELATIONSHIP–3100 HEUI VEHICLE ENGINE (DEUCE)
EFFECT ON ENGINE PERFORMANCE
Diagnostic Flash Codes
Engine
Misfire
Low
Power
✔
✔
17—Injection actuation pressure fault
✔
✔
18—Injection actuation pressure driver fault
✔
Engine Speed
Reduced
SUGGESTED ACTION
Engine
Shutdown
Shutdown
Machine
Service
ASAP
Schedule
Service
12—Crank-Without-Inject Fault
15—Injection actuation pressure sensor fault
21—Sensor supply voltage
fault1
✔
✔
✔
✔
✔
25—Boost pressure sensor fault1
✔
26—Rating select input fault
✔
✔
✔
✔
✔
✔
✔
27—Coolant temperature sensor fault1
28—Throttle sensor calibration fault
✔
✔
32—Throttle position sensor fault
✔
✔
✔
✔
37—Engine oil temp sensor fault
38—Inlet manifold temp sensor fault1
✔
39—Injection actuation pressure system fault
✔
✔
✔
✔
✔
42—Timing sensor calibration fault
✔
49—Inlet air heater fault1
51—Low/intermittent power to ECM
✔
✔
✔
✔
✔
55—No detected faults
✔
56—Check customer/system parameters
59—Incorrect engine software
✔
TM5-2430-200-10
✔
34—Engine rpm signal fault
✔
72—Cylinder 1 or 2 fault
✔
✔
✔
73—Cylinder 3 or 4 fault
✔
✔
✔
74—Cylinder 5 or 6 fault
✔
✔
✔
88—Ether start relay fault
✔
✔
✔
91—Crank-without-inject indicator fault
✔
1—These
diagnostic flash codes may affect the system only under specific environmental conditions, such as engine start-up at cold temperature, cold weather operation at
high altitude, etc.
Shutdown Machine: Drive the machine to a safe stopping area and get immediate service. Severe engine damage may result.
Service ASAP (As Soon As Possible): The operator should go to the nearest qualified service location.
Schedule Service: The operator should have the problem investigated when convenient.
87
Operation Section
Troubleshooting
89—Start-aid indicator fault
88
Operation Section
Troubleshooting
TM5-2430-200-10
Operational Troubleshooting
22. Lights Do Not Work...........................................98
This section describes possible problems and
provides basic solutions to problems which may be
encountered during machine operation. This section is
only a guide: not all possible problems and corrections
are addressed. If a problem is not covered, or if the
problem is not corrected by the action described in
this section, refer the problem to Unit Maintenance for
resolution.
23. Cab Blower Produces Less Air Flow Than
Normal ..............................................................98
24. Recoil Alert Sounds During Earthmoving
Operations.........................................................98
Problem 1: Starter Fails to Crank When Start
Switch Is Held in START Position
Probable Cause(s):
Problem List
• Transmission not in NEUTRAL
1. Starter Fails to Crank When Start Switch Is Held
in START Position..............................................88
• Main disconnect switch OFF
2. Engine Cranks but Will Not Start .......................89
3. Engine Runs Roughly After Starting ...................90
4. Engine Smokes More Than Normal After
Warm-up ...........................................................91
5. Engine Overheats During Normal Operation.......91
6. Greater-Than-Normal Fuel Consumption ...........92
7. Greater-Than-Normal Oil Consumption..............93
8. Low Engine Oil Pressure....................................93
9. Engine Stops During Operation .........................93
10. Engine Power Less Than Normal.......................94
11. Transmission Will Not Go in Any Gear ...............94
12. Transmission Will Not Shift into High Gear in
SELF-DEPLOY Mode ........................................95
13. Transmission Overheats During Normal
Operation ..........................................................95
14. Parking Brake Will Not Release .........................95
15. Service Brakes Slip............................................96
16. Machine Drifts or Pulls to One Side During
Straight Travel ...................................................96
17. Machine Turns in Opposite Direction Than
Expected During REVERSE Travel .....................96
18. Machine Not Level on Level Ground ..................96
19. Hydraulic Functions Erratic or Noisy ..................97
20. Blade Functions Exhibit Less Power Than
Normal ..............................................................97
21. Blade Will Not Lower .........................................97
Change 1
• Circuit breaker(s) tripped
• Batteries not providing voltage
1. Transmission not in NEUTRAL:
a. Inspect the position of the transmission control
lever. If the transmission control lever is in
NEUTRAL, go to Step 2. If the transmission
control lever is not in NEUTRAL, go to Step b.
b. Move the transmission control lever to
NEUTRAL, and attempt to start the engine
again. If the engine does not crank, go to Step
2.
2. Main disconnect switch OFF:
a. While holding the start switch in the START
position, observe the tension fail indicator, the
low brake pressure indicator, the engine oil
pressure indicator, and the hydraulic oil
temperature indicator. If any of these lamps
illuminates, go to Step 3. If none of these lamps
illuminates, go to Step b.
b. Check the position of the main disconnect
switch. If the main disconnect switch is ON, go
to Step 3. If the main disconnect switch is OFF,
go to Step c.
c. Move the main disconnect switch to ON, and
attempt to start the engine again. If the engine
will not crank, go to Step 3.
3. Circuit breaker(s) tripped:
Reset the following circuit breakers: main, start
switch, ECM, and EPTC II. Attempt to start the
engine again. If the engine will not crank, go to
Step 4.
89
Operation Section
Troubleshooting
TM5-2430-200-10
4. Batteries not providing voltage:
! WARNING
! WARNING
Batteries produce flammable gasses. Do not
smoke when working around batteries. Open
flames or sparks can cause an explosion.
Diesel fuel is combustible. Do not smoke when
working around diesel fuel. Open flames or
sparks can cause a fire or explosion.
Remove jewelry and dog tags when working with
batteries. Metal shorting across battery poles can
cause electrical shock.
a. With the start switch in the ON position, observe
the position of the needle in the fuel gauge. If the
needle is above the empty mark and there is fuel
visible in the tank, go to Step c. If the needle is
on the empty mark, go to Step b.
Batteries contain a strong acid solution. Wear
protective gloves and safety glasses or goggles
when working around batteries.
b. Add the correct grade of fuel to the fuel tank,
and attempt to restart the engine. If the engine
will not start, go to Step 2.
a. With the start switch in the ON position, observe
the position of the needle in the voltmeter. If the
needle lies within the first green zone, go to Step
b. If the needle in the voltmeter points to the first
red zone, go to Step c.
b. The batteries are fully charged. Refer the
problem to Unit Maintenance for repair.
NOTE: If the fuel system is completely empty, contact
Unit Maintenance to prime the fuel system before
attempting to start the engine.
c. Refer the problem to Unit Maintenance for
repair.
2. Engine in crank-without-inject mode:
c. Inspect the battery for damage, or loose or
corroded connections. Clean and apply grease
to the battery terminals and terminal clamps.
Tighten terminal clamps to the battery terminal
clamps. Proceed to Step d.
a. With the start switch in the ON position and the
blackout light switch in STOP LIGHT, observe
the crank-without-inject indicator. If the indicator
is not illuminated, go to Step 3. If the indicator is
illuminated, go to Step b.
d. Attempt to start the engine again. If the engine
does not crank, refer the problem to Unit
Maintenance for repair.
b. Refer the problem to Unit Maintenance for
repair.
Problem 2: Engine Cranks but Will Not Start
Probable Cause(s):
• No fuel or incorrect fuel
• Engine in crank-without-inject mode
• Needle valve open
• Engine oil level low
• Restriction in air intake system
• Cold ambient temperatures
• Batteries not providing sufficient voltage
1. No fuel or incorrect fuel:
3. Needle valve open:
Ensure that the needle valve on the remote
hydraulic tool manifold is closed. Refer to
“Maintenance Features, Remote Hydraulic Tool
Ports” in this section. If the needle valve is open,
close the valve, and attempt to start the engine. If
the needle valve is closed, go to Step 4.
4. Engine oil level low:
a. Check the engine oil level. If the engine oil level
is normal, go to Step 5. If the engine oil level is
low, go to Step b.
b. Fill the crankcase with the appropriate type of
engine oil, and attempt to start the engine again.
If the engine does not start, go to Step 5.
5. Restriction in air intake system:
90
Operation Section
Troubleshooting
TM5-2430-200-10
a. Check the air filter indicator. If red does not
appear in the window, go to Step 6. If red
appears in the window, go to Step b.
b. Clean the primary air filter element, and attempt
to restart the engine. If the engine does not
restart, go to Step 6.
6. Cold ambient temperatures:
7. Batteries not providing sufficient voltage:
Follow the procedure given in Problem 1, Step 4.
Problem 3: Engine Runs Roughly After Starting
Probable Cause(s):
• Cold ambient temperatures
• Water in fuel
! WARNING
Do not operate the engine coolant heater in an
enclosed area. The heater produces combustion
gasses which may be harmful. Always start and
operate the heater in a well ventilated area.
a. If the temperature is above approximately 5°C
(40°F), go to Step 7. If the temperature is
between -32°C and approximately 6°C (-25°F
and 40°F), go to Step b. If the temperature is
below -32°C (-25°F), go to Step e.
b. Observe the start-aid indicator after moving the
start switch from OFF to ON. If the start-aid
indicator illuminates for approximately 30
seconds, go to Step d. If the start-aid indicator
does not illuminate, go to Step c.
c. Reset the start-aid circuit breaker and the intake
air heater circuit breaker. Observe the start-aid
indicator when the start switch is moved from
OFF to ON. If the start-aid indicator does not
illuminate, go to Step 7. If the start-aid indicator
illuminates, go to Step d.
d. Hold start-aid switch in the ON position for three
seconds, and attempt to start the engine. If the
engine does not start go to Step 7.
e. Turn the engine coolant heater ON. If the
indicator in the engine coolant heater switch
illuminates, go to Step g. If the indicator does
not illuminate, go to Step f.
f. Reset the engine coolant heater circuit breaker,
and turn the engine coolant heater ON. If the
indicator in the engine coolant heater switch
illuminates, go to Step g. If the indicator does not
illuminate, refer the problem to Unit Maintenance
for repair.
g. Allow the engine coolant heater to operate for
40 minutes. After a three-minute cool down
period, attempt to start the engine. If the engine
does not start, go to Step 7.
• Restriction in air intake system
1. Cold ambient temperatures:
Refer to the engine starting procedure for the
appropriate air temperature, and follow the steps in
the procedure to start the machine and warm it up.
If the machine does not run smoothly after 10
minutes, go to Step 2.
2. Water in fuel:
! WARNING
Diesel fuel is combustible. Do not smoke when
working around diesel fuel. Open flames or
sparks can cause a fire or explosion.
a. Check the water separator in the primary fuel
filter for water or sediment. If water or sediment
is not present, go to Step 3. If water or sediment
is present, go to Step b.
b. Drain the water and sediment from the water
separator into a container, and discard the fluid
in accordance with local regulations. Operate
the engine for several minutes. If the engine
does not run smoothly after several minutes of
operation, go to Step 3.
3. Restriction in air intake system:
a. Check the air filter indicator. If red does not
appear in the window, refer the problem to Unit
Maintenance for repair. If red appears in the
window, go to Step b.
b. Clean the primary air filter element, and check
the engine operation. If the engine does not run
smoothly, refer the problem to Unit Maintenance
for repair.
91
Operation Section
Troubleshooting
TM5-2430-200-10
Problem 4: Engine Smokes More Than Normal
After Warm-up
b. Report the fuel quality problem to Unit
Maintenance.
Probable Cause(s):
c. Report the problem of more than normal amount
of white smoke to Unit Maintenance for repair.
• Engine wear or mechanical problem
• Engine not at normal operating temperature
• Restriction in air intake system
Problem 5: Engine Overheats During Normal
Operation
• Incorrect or poor quality fuel
Probable Cause(s):
1. Engine wear or mechanical problem:
a. Observe the color of the smoke. If the smoke is
dark black or blue, go to Step b. If the smoke is
white, go to Step 2.
b. Report the problem of more than normal black
or blue smoke to Unit Maintenance for repair.
2. Engine not at normal operating temperature:
a. After the engine has idled for approximately five
minutes, observe the engine coolant
temperature gauge. If the engine coolant
temperature is below normal, go to Step b. If the
engine coolant temperature is normal, go to
Step 3.
b. While operating the engine at low idle, lift and
lower the blade for several minutes. If the engine
coolant temperature does not increase to
normal, refer the problem to Unit Maintenance
for repair. If the engine coolant temperature
increases to normal but the white smoke
remains, go to Step 3.
3. Restriction in air intake system:
a. Check the air filter indicator. If red does not
appear in the window, go to Step 4. If red
appears in the window, go to Step b.
b. Clean the primary air filter element, and check
the engine operation. If the white smoke is still
greater-than-normal, go to Step 4.
4. Incorrect or poor quality fuel:
a. Check the grade of fuel which was last added to
the tank. If the fuel grade is not correct for the
current operating environment, go to Step b. If
the fuel grade is correct for the operating
environment, go to Step c.
• Low engine coolant level
• Low engine or power train oil levels
• Cooler cores blocked
• Cooling fan not operating
• Restriction in exhaust system
• Water to antifreeze ratio too high for operating
environment
NOTICE
If the engine is overheating, investigate the cause
immediately. Operating the machine while the engine
is overheating may cause damage.
1. Low engine coolant level:
! WARNING
At operating temperature, the engine coolant is
hot and under pressure. Any contact with the
skin can cause severe burns. Also, cooling
system additive contains alkalis. Avoid contact
with the skin, eyes, and mouth. Do not open the
engine coolant fill cap until the temperature of the
engine coolant is below 36°C (98°F).
a. Check the coolant level. If the coolant level is
normal, go to Step 2. If the coolant level is
below normal, go to Step b.
b. Inspect the machine for visible coolant leaks. If
leaks are found, go to Step c. If no leaks are
found, go to Step d.
c. Report the location of the coolant leak to Unit
Maintenance for repair.
92
Operation Section
Troubleshooting
TM5-2430-200-10
d. Check the engine oil level. If the engine oil level
is normal, go to Step 3. If the engine oil level is
low, go to Step 2. If the engine oil level is high,
go to Step e.
e. Report to Unit Maintenance that the machine is
overheating and has a possible internal coolant
leak.
2. Low engine oil or power train oil level:
a. Check the engine oil level. If the engine oil level
is normal, go to Step c. If the engine oil level is
low, go to Step b.
b. Fill the crankcase with the appropriate type of
engine oil, and go to Step c.
c. Check the power train oil level. If the power train
oil level is normal, go to Step 3. If the power
train oil level is low, go to Step d.
d. Fill power train with the appropriate type of oil,
and go to Step 3.
3. Cooler cores blocked:
a. Inspect the fins of the cooler cores for debris. If
debris is found, go to Step b. If no debris is
found, go to Step c.
b. Clean the debris from the cooler cores, and go
to Step c.
c. Look for evidence of debris in the coolant. If
rust, dirt, or a green slime is present, go to Step
d. If the coolant is not contaminated, go to Step
4.
d. Report the contamination to Unit Maintenance
for repair.
c. Report to Unit Maintenance that the machine is
overheating, and possibly has a cooling fan
problem.
5. Restriction in exhaust system:
a. Inspect the exhaust system for restrictions. If
restrictions are found, go to Step b. If no
restrictions are found, go to Step 6.
b. Report the location of the restrictions to Unit
Maintenance for repair.
6. Water to antifreeze ratio too high for operating
environment:
If operating in a hot climate with a high
concentration of antifreeze, inform Unit
Maintenance that the machine is overheating
during normal operation.
Problem 6: Greater-Than-Normal Fuel
Consumption
Probable Cause(s):
• Restriction in air intake system
• Fuel leak
• Incorrect or poor quality fuel
1. Restriction in air intake system:
a. Check the air filter indicator. If red does not
appear in the window, go to Step 2. If red
appears in the window, go to Step b.
b. Clean the primary air filter element, and go to
Step 2.
2. Fuel leak:
4. Cooling fan not operating:
a. Inspect the cooling fan. If the cooling fan is not
operating, go to Step c. If the cooling fan is
operating, go to Step b.
b. Listen to the speed of the cooling fan when the
coolant temperature is greater than 100°C
(212°F). Allow the engine to cool to 90°C (194°F)
or less, and listen to the fan speed. If the fan
speed sounds the same, go to Step c. If the fan
speed is noticeably slower, go to Step 5.
! WARNING
Diesel fuel is combustible. Do not smoke when
working around diesel fuel. Open flames or
sparks can cause a fire or explosion.
The fuel supply lines contain high pressure fluid.
Do not use hands to inspect for fuel leaks. High
pressure fluid can penetrate skin.
a. Inspect the fuel system for visible leaks. If leaks
are found, go to Step b. If no leaks are found,
go to Step 3.
93
Operation Section
Troubleshooting
TM5-2430-200-10
b. Refer the fuel leak to Unit Maintenance for
repair.
3. Incorrect or poor quality fuel:
Refer the problem of greater-than-normal fuel
consumption to Unit Maintenance for repair.
Problem 7: Greater-Than-Normal Oil
Consumption
Problem 8: Low Engine Oil Pressure
Probable Cause(s):
• Low engine oil level
NOTICE
Stop the engine immediately after low engine oil
pressure is detected. Operating the engine with low oil
pressure may damage the engine.
Probable Cause(s):
•Oil needs to be changed
• Oil leakage
• Wrong grade of oil used
• Engine wear
1. Oil needs to be changed:
1. Low engine oil level:
a. Check the engine oil level. If the engine oil level
is normal, go to Step e. If the engine oil level is
low, go to Step b.
b. Inspect for visible oil leaks. If leaks are found, go
to Step d. If no leaks are found go to Step c.
a. Determine the service meter reading at the last
engine oil change or AOAP reading. If more than
250 service hours have elapsed since that
reading, go to Step b. If less than 250 service
hours have elapsed, go to Step 2.
c. Fill the crankcase with the appropriate type of
engine oil, and carefully watch the engine oil
pressure during machine operation. Also watch
for engine overheating (refer to “Problem 5,
Engine Overheats During Normal Operation” in
this section). If low oil pressure continues, go to
Step e.
b. Deliver the machine to Unit Maintenance for
performance of a 250 hour maintenance service.
d. Report the leaks to Unit Maintenance for repair.
2. Oil leakage:
a. Inspect the machine for visible engine oil leaks. If
leaks are found, determine the class of leak (I, II,
or III), and then go to Step b. If no leaks are
found, go to Step 3.
b. Report the oil leak to Unit Maintenance for
repair.
3. Engine wear:
a. Observe the color and quantity of exhaust
smoke. If the exhaust smoke is greater-thannormal and blue or black, go to Step b. If the
exhaust smoke is of normal quantity and color,
go to Step c.
b. Report the greater-than-normal oil consumption
and greater-than-normal amount of exhaust to
Unit Maintenance for evaluation.
c. Report the greater-than-normal oil consumption
to Unit Maintenance for evaluation.
e. Report the low oil pressure to Unit Maintenance
for repair.
Problem 9: Engine Stops During Operation
Probable Cause(s):
• No fuel or wrong grade of fuel
• Circuit breaker(s) tripped
• Water in fuel
1. No fuel or wrong grade of fuel:
! WARNING
Diesel fuel is combustible. Do not smoke when
working around diesel fuel. Open flames or
sparks can cause a fire or explosion.
a. Check the fuel level. If the machine has fuel, go
to Step c. If the machine does not have fuel, go
to Step b.
94
Operation Section
Troubleshooting
TM5-2430-200-10
b. Add the correct grade of fuel to the fuel tank,
and attempt to restart the engine. If the engine
will not start, go to Step 2.
NOTE: If the fuel system was completely empty,
contact Unit Maintenance to prime the fuel system
before attempting to start the engine.
c. Check the grade of fuel which was last added to
the tank. If the fuel grade is not correct for the
current operating environment, refer the problem
to Unit Maintenance. If the fuel grade is correct
for the current operating environment, go to
Step 2.
2. Circuit breakers tripped:
Reset the following circuit breakers: main,
alternator, engine control, and transmission control.
Refer to “Monitoring Systems and Cab Features,
Circuit Breakers” and “Machine Features, Main
Circuit Breakers” in this section. Attempt to start
the engine again. If the engine will not start, go to
Step 3.
3. Water in fuel:
a. Check the water separator in the primary fuel
filter for water or sediment. If water or sediment
is not present, go to Step c. If water or sediment
is present, go to Step b.
b. Drain the water and sediment from the water
separator into a container and discard the fluid
according to local regulations. Attempt to start
the engine. If the engine does not start, go to
Step c.
c. Refer the problem to Unit Maintenance for
repair.
Problem 10: Engine Power Less Than Normal
Probable Cause(s)
• Restriction in air intake system
• Poor quality or wrong grade of fuel for operating
conditions
1. Restriction in air intake system:
a. Check the air filter indicator. If red does not
appear in the window, go to Step 2. If red
appears in the window, go to Step b.
b. Clean the primary air filter element, and operate
the machine. If the engine power is still below
normal, go to Step 2.
2. Poor quality or wrong grade of fuel for operating
conditions:
a. Check the grade of fuel which was last added to
the tank. If the fuel grade is not correct for the
current operating environment or the fuel quality
is poor, go to Step b. If the fuel grade is correct
for the current operating environment, go to
Step c.
b. Report the fuel grade or quality problem to Unit
Maintenance.
c. Report the low power problem to Unit
Maintenance for evaluation.
Problem 11: Transmission Will Not Go in Any
Gear
Probable Cause(s):
• Parking brake is engaged
• Low power train oil pressure
1. Parking brake is engaged:
a. Release the parking brake and go to Step b.
Refer to “Problem 14: Parking Brake Will Not
Release” in this manual.
b. With the service brake depressed, move the
transmission control lever to the desired gear. If
the transmission does not go into gear, go to
Step 2.
2. Low power train oil pressure:
a. Check the power train oil level. If the power train
oil level is low, go to Step b. If the power train oil
level is normal, go to Step d.
b. Check for visible leaks in the power train
hydraulic system. If leaks are found, go to Step
d. If no leaks are found, go to Step c.
c. Add the appropriate amount and grade of oil to
the power train hydraulic system, and attempt to
move the machine again. If the machine does
not move, go to Step d.
d. Refer the problem to Unit Maintenance for
repair.
TM5-2430-200-10
Problem 12: Transmission Will Not Shift into
High Gear in SELF-DEPLOY Mode
Probable Cause(s):
95
Operation Section
Troubleshooting
b. Refer the shifting problem to Unit Maintenance
for repair.
• Machine in EARTHMOVING mode
Problem 13: Transmission Overheats During
Normal Operation
• Drive belts too tight
Probable Cause(s):
• Engine power lower than normal
1. Machine in EARTHMOVING mode:
a. With the blackout light switch in the STOP
LIGHT or SERVICE DRIVE position, observe the
self-deploy indicator, the blade down indicator,
and the blade down alarm. If the self-deploy
indicator is not illuminated, the blade down
indicator is illuminated, and the blade down
alarm is sounding, go to Step b. If the selfdeploy indicator is illuminated, the blade down
indicator is not illuminated, and the blade down
alarm is not sounding, go the Step 2.
b. Fully raise the blade and observe the self-deploy
indicator, the blade down indicator and the
blade down alarm. If the self-deploy indicator is
not illuminated, the blade down indicator is
illuminated, and the blade down alarm is
sounding, go to Step d. If the self-deploy
indicator is illuminated, the blade down indicator
is not illuminated, and the blade down alarm is
not sounding, go the Step 2.
c. Operate the machine. If the machine still will not
go into high gear, go to Step 2.
d. Report to Unit Maintenance that the machine is
stuck in the EARTHMOVING mode.
2. Drive belts too tight:
a. Determine if the procedures for emergency drive
belt tension or emergency suspension charging
have been performed recently. If either of these
procedures have been completed, go to Step b.
If these procedures have not been completed,
go to Step 3.
b. Inform Unit Maintenance that the suspension
system must be recharged as soon as possible.
3. Engine power lower than normal:
a. Refer to “Problem 10, Engine Power Less Than
Normal” in this section. If low engine power is
determined not to be the problem, go to Step b.
• Low power train oil level
• Engine or hydraulic system overheating
1. Low power train oil level:
a. Check the power train oil level. If the power train
oil level is low, go to Step b. If the power train oil
level is normal, go to Step 2.
b. Check for visible leaks in the power train
hydraulic system. If leaks are found, go to Step
d. If no leaks are found, go to Step c.
c. Add the appropriate amount and grade of oil to
the power train hydraulic system, and operate
the machine again. If the power train oil
continues to overheat, go to Step 2.
d. Refer the problem to Unit Maintenance for
repair.
2. Engine or hydraulic system overheating:
a. Determine if the engine or the hydraulic system
is overheating. If either or both of these systems
are overheating, have the problem corrected. If
neither of these systems are overheating, go to
Step b.
b. Refer the overheating problem to Unit
Maintenance for repair.
Problem 14: Parking Brake Will Not Release
Probable Cause(s):
• Service brake not engaged or transmission not in
NEUTRAL
• Emergency brake release valve closed
1. Service brake not engaged or transmission not in
NEUTRAL:
a. Move the transmission control lever to
NEUTRAL. Go to Step b.
96
Operation Section
Troubleshooting
TM5-2430-200-10
b. Cycle the parking brake ON and OFF. If the
parking brake does not release, move the
parking brake switch back to the ON position
and go to Step 2.
2. Emergency brake release valve closed:
1. Drive belt loose:
a. Observe the tension fail indicator. If the tension
fail indicator is illuminated, go to Step c. If the
indicator is not illuminated, go to Step b.
a. Turn the needle valve counterclockwise, and
attempt to release the parking brake. Refer to
“Machine Features, Emergency Brake Release
Valve” in this section. If the parking brake does
not release, go to Step b.
b. Visually inspect the belt tension to determine if
one drive belt is significantly more loose than the
other. If one drive belt is determined to be
significantly more loose than the other, go to
Step c. If differences between the tension of the
drive belts cannot be detected, go to Step e.
b. Refer the problem to Unit Maintenance for
repair.
c. Perform the emergency drive belt tension
procedure, and go to Step d.
Problem 15: Service Brakes Slip
Probable Cause(s):
• Drive belt loose
• Front idlers worn
1. Drive belt loose:
a. Observe the tension fail indicator. If the tension
fail indicator is illuminated, go to Step c. If the
indicator is not illuminated, go to Step b.
b. Estimate if the drive belt is sufficiently loose to
cause the brake slippage. If the drive belt is
determined as the probable cause for the brake
slippage, go to Step c. If the drive belt is
determined not to be the likely cause of the
problem, go to Step e.
c. Perform an emergency drive belt tension
procedure, and go to Step d.
d. Inform Unit Maintenance that the suspension
system must be recharged as soon as possible.
e. Refer the brake problem to Unit Maintenance for
repair.
2. Front idlers worn:
Report to Unit Maintenance that the front idlers
should be check for excessive wear.
Problem 16: Machine Drifts or Pulls to One Side
During Straight Travel
Probable Cause(s):
• Drive Belt Loose
d. Inform Unit Maintenance that the suspension
system must be recharged as soon as possible.
e. Refer the problem to Unit Maintenance for
repair.
Problem 17: Machine Turns in Opposite
Direction Than Expected During REVERSE
Travel
Probable Cause(s):
• Circuit breaker tripped
1. Circuit breaker tripped:
a. Check the operation of the gauges or kneeling
switch. If the gauges and kneeling switch
function properly, go to Step c. If the gauges
and kneeling switch do not function properly, go
to Step b.
b. Reset the auxiliary circuit breaker and check the
steering operation in REVERSE. Also check the
function of the gauges and the kneeling switch.
If any of these checks show a malfunction, go to
Step c.
c. Report the steering malfunction to Unit
Maintenance for repair.
Problem 18: Machine Not Level on Level Ground
Probable Cause(s):
• One manual suspension lock valve closed
• Suspension system not charged correctly
1. One manual suspension lock valve closed:
TM5-2430-200-10
a. Examine the position of the manual suspension
lock valves. If both valves are in the same
position, go to Step 2. If one valve is open and
one is closed, go to Step b.
b. Place the machine in the EARTHMOVING mode,
and open the manual suspension lock valve
which was closed. Go to Step c.
c. Place the machine in the SELF-DEPLOY mode,
and lower and raise the machine using the
kneeling switch. Go to Step d.
d. Determine if the machine is level. If the machine
is not level, go to step 2.
2. Suspension system not charged correctly:
a. Determine if the condition of the machine
interferes with the operation of the machine. If
the machine cannot be operated in its current
condition, go to Step b. If the machine can be
operated in its current condition, go to Step c.
b. Perform the emergency machine-leveling
procedure. If the procedure restores the
machine to an operational condition, go to Step
c. If the procedure does not change the
condition of the machine, go to Step d.
97
Operation Section
Troubleshooting
c. Add the appropriate amount and grade of oil to
the hydraulic tank. If the hydraulic functions
continue to be erratic or noisy, go to Step e.
d. Inform Unit Maintenance of the leaks, and have
the leaks repaired as soon as possible.
e. Refer the problem to Unit Maintenance for
evaluation.
Problem 20: Blade Functions Exhibit Less Power
Than Normal
Probable Cause(s):
• Needle valve on remote hydraulic power manifold
open
1. Needle valve on remote hydraulic power manifold
open:
a. Determine if the engine is hard to start and if the
engine produces black smoke after starting. If
yes, go to Step b. If no, go to Step d.
b. Examine the position of the needle valve on the
remote hydraulic power manifold. Refer to
“Maintenance Features, Remote Hydraulic Tool
Ports” in this section. If the valve is open, go to
Step c. If the valve is closed, go to Step d.
c. Continue to operate the machine. However,
deliver the machine to Unit Maintenance as soon
as possible for a complete charging of the
suspension system.
c. Close the valve, and observe the operation of
the blade functions. If the blade functions still
exhibit less power than normal, go to Step d.
d. Refer the problem to Unit Maintenance for
repair.
d. Report the low power problem to Unit
Maintenance for evaluation.
Problem 19: Hydraulic Functions Erratic or
Noisy
Probable Cause(s)
• Low oil level
1. Low oil level:
Problem 21: Blade Will Not Lower
Probable Cause(s):
• Machine in SELF-DEPLOY mode
1. Machine in SELF-DEPLOY mode:
a. Check the oil level in the hydraulic tank. If the oil
level is low, go to Step b. If the oil level is
normal, go to Step 2.
a. Examine the position of the selfdeploy/earthmoving switch. If the switch is in
EARTHMOVING, go to Step c. If the switch is in
SELF-DEPLOY position, go to Step b.
b. Examine the hydraulic system for loose fittings
and visible leaks. If loose fittings or leaks are
found, go to Step d. If no loose fittings or leaks
are found, go to Step c.
b. Move the self-deploy/earthmoving switch to
EARTHMOVING position, and attempt to lower
the blade. If the blade does not lower, go to
Step c.
98
Operation Section
Troubleshooting
TM5-2430-200-10
c. Report the malfunction to Unit Maintenance for
repair.
Problem 22: Lights Do Not Work
Probable Cause(s):
• Lamps burned out
• Circuit breaker(s) tripped
1. Lamps burned out:
a. If a single indicator will not illuminate when it
should, go to Step b. If multiple lamps do not
illuminate when they should, go to Step 2.
b. Report the burned-out indicator to Unit
Maintenance for repair.
2. Circuit breaker(s) tripped:
a. If the dome light and remote throttle indicator,
start-aid indicator, check engine indicator, winch
indicator, and crank-without-inject indicator do
not function, go to Step b. If other lamps do not
function, go to Step c.
b. Reset the horn/dome circuit breaker and the
start-aid circuit breaker, and retest the lamps.
Refer to “Monitoring Systems and Cab Features,
Circuit Breakers” and “Machine Features, Main
Circuit Breakers” in this section. If the lamps still
do not function, go to Step c.
c. Report the malfunctioning lamps to Unit
Maintenance for repair.
Problem 23: Cab Blower Produces Less Air Flow
Than Normal
Probable Cause(s):
• Circuit breaker tripped
• Cab air filters plugged
1. Circuit breaker tripped:
a. Determine if the blower motor operates when
the blower switch is moved to ON. If the blower
does not operate, go to Step b. If the blower
operates, go to Step 2.
b. Reset the air conditioning and blower motor
circuit breaker. If the blower operates but still
produces less air flow than normal, go to Step
2. If the blower does not operate, go to Step c.
Change 1
c. Report the blower malfunction to Unit
Maintenance for repair.
2. Cab air filters plugged:
a. Clean the external and internal cab air filters. If
the blower still produces less flow than normal,
go to Step b.
b. Report the diminished air flow to Unit
Maintenance for repair.
Problem 24: Recoil Alert
Probable Cause(s):
• Excess material trapped in undercarriage
NOTICE
During earthmoving operations it is possible to
collapse the recoil cylinder completely. Operation of
the machine in this condition may cause damage to
the track belts.
1. Excess material trapped in undercarriage.
a. If the recoil alert sounds during earthmoving
operations reverse the direction of the machine
to clear any excess material from the
undercarriage area.
b. If the recoil alert continues to sound, stop the
machine and visually inspect tracks for
blockage. Remove any excess debris from
undercarriage area.
c. Report malfunctions to Unit Maintenance for
repair.
99
Maintenance Section
Cooling System Specifications
TM5-2430-200-10
Cooling System Specifications
General Coolant Information
Water
Distilled or deionized water is recommended for use in
cooling systems. Do not use hard water, tap water, or
salt softened tap water in engine cooling systems. If
distilled or deionized water is not available, use the
cleanest water available and have the cooling system
cleaned and the coolant replaced.
NOTICE
Water that does not meet the minimum acceptable
limits will reduce engine service life when used in
cooling systems.
Additives
Additives must be included in all coolant mixtures.
Additives help prevent the formation of rust, scale, and
mineral deposits. Additives protect metals from
corrosion, prevent liner cavitation, and contain antifoaming agents.
Glycol
Engine coolant glycol is normally either ethylene or
propylene. Glycol raises the boiling point of water to
help prevent boil-over, provides freeze protection,
helps prevent water-pump cavitation, and reduces
cylinder liner pitting.
NOTICE
For ambient temperatures requiring lower freeze
protection (higher than 50 percent glycol), use
ethylene glycol. do not use propylene glycol.
Proper freeze and boil protection requires the proper
ratio of glycol and acceptable water. Use the following
charts to determine glycol concentrations to mix with
acceptable water.
Percentage of
Propylene Glycol
Freeze
Protection
Anti-Boil
Protection
30%
CH6051
-15°C (-5°F)
102°C (216°F)
40%
-23°C (-9°F)
104°C (219°F)
50%
-37°C (-35°F)
106°C (223°F)
Percentage of
Ethylene Glycol
Freeze
Protection
Antiboil
Protection
30%
-15°C (-5°F)
CH6052
-24°C (-11°F)
104°C (219°F)
40%
50%
-37°C (-35°F)
108°C (226°F)
60%
-57°C (-71°F)
111°C (232°F)
NOTICE
MIL-A-53009 Supplemental Coolant Additive (SCA) is
not acceptable for use in the engine on this machine.
106°C (223°F)
100
Maintenance Section
Cooling System Specifications
TM5-2430-200-10
Coolant Recommendations
Preferred—Caterpillar Extended Life Coolant (ELC) or
a commercial ELC that meets the Caterpillar
specification (EC-1).
Acceptable—A Caterpillar Diesel Engine
Antifreeze/Coolant (DEAC) or a commercial heavy-duty
coolant/antifreeze that meets ASTM D4985, ASTM
D5345, or MIL-A-46153 specifications.
Unacceptable—Any high silicate coolant that is
classified as meeting ASTM D3306.
NOTICE
Most commercial engine coolant/antifreeze is
formulated for gasoline engine applications and
have a high silicate content. High silicates are
conducive to cylinder liner cavitation and corrosion.
Caterpillar does not recommend high silicate
coolant/antifreeze.
NOTICE
Never add coolant to an overheated engine; allow the
engine to cool first. Do not add coolant too quickly.
Filling the cooling system at over 19 L (5 U.S. gal) per
minute can create air pockets in the cooling system.
Engine damage can result.
NOTE: MIL-A-4615 Antifreeze can be mixed with the
Caterpillar ELC supplied in the DEUCE.
When filling or adding coolant to the system, premix
the coolant solution prior to pouring it into the cooling
system. Pure, undiluted glycol will freeze at –23°C
(-0°F). Use a coolant solution in a range which will
provide protection to the lowest expected outside
(ambient) temperature and provide the required boilover protection.
101
Maintenance Section
Fuel Specifications
TM5-2430-200-10
Fuel Specifications
Fuel Recommendations
NOTICE
Fill the fuel tank at the end of each day of operation to
remove moist air and prevent condensation. Maintain
a constant level in the tank (near the top) to avoid
drawing moisture into the tank as the level decreases.
Do not fill the tank to the top. Fuel expands as it
warms, and may overflow.
Do not fill fuel filters with fuel before installing them.
Contaminated fuel causes accelerated wear to fuel
system parts.
Use only the fuel recommended in this section of this
manual. Fuel grades recommended for use in
Caterpillar diesel engines are: No.2-D diesel fuel with
low sulfur (0.05 percent maximum), or regular sulfur
(0.5 percent maximum). No.1 grades are acceptable.
The table lists worldwide fuel standards which meet
Caterpillar requirements.
WORLDWIDE FUEL SPECIFICATIONS
FOR DIESEL ENGINES
Specifications
Designated Fuels
American Standards (U.S.) No. 1-D
No. 2-D fuel oil
ASTM D975
No. 1 fuel oil and No. 2 fuel oil
ASTM D396
No. 1-GT fuel for the gas turbine
ASTM D2880
engine and No. 2-GT fuel for the
gas turbine engine
British Standards
BS 2869
Class
Class
Class
Class
Class
German Standards
Diesel fuel
DIN 51601
DIN 51603
A1 diesel fuel
A2 diesel fuel
B1 diesel fuel
C2 fuel for heating and
D fuel for heating
CH6068
Australian Standards
Automotive diesel fuel
AS 3570
Japanese Standard
JIS K2204
U.S. Government
W-F-800C
W-F-815C
U.S. Military Standards
Type
Type
Type
Type
Type
1
1
2
3
3
(spl) fuel oil
fuel oil
fuel oil
fuel oil
(spl) fuel oil
U.S. DF-1 diesel fuel
U.S. DF-2 diesel fuel
U.S. DF-20 diesel fuel
FS-1 fuel oil for heating and
FS-2 fuel oil for heating
Marine oil
MIL-L-16884G
Aviation kerosene-type fuels meeting acceptable limits
may also be used as an engine fuel. The table below
lists some of the acceptable kerosene-type fuels.
ACCEPTABLE KEROSENE FUELS
Standard
ASTM D 1655-80
MIL-T-83133B
W-F-800F1
Description
Aviation Turbine Fuel (JET A-1)
Aviation Turbine Fuel (JP-8)
CH6057
(NATO Code No. F-34)
Grade DF-A (Arctic)
102
Maintenance Section
Lubricant Specifications
TM5-2430-200-10
Lubricant Specifications
Engine Lubricant Specifications
Diesel Engine Oils
The performance of commercial diesel engine oils is
based on API categories. These API categories are
developed to provide commercial lubricants for a wide
variety of diesel engines that operate at various
conditions.
If Caterpillar DEO (multi-grade) is not used, use only
the following commercial oils:
Preferred — API CG-4
Allowed — API CF-4
Oils which meet specification MIL-L-2104 are
acceptable for use in the engine on this vehicle. These
oils can be mixed with the preferred and allowed oils
described above.
Caterpillar Transmission/Drive Train Oil
(TDTO) (TO-4)—Hydraulic System,
Power Train, Offset Arms, Rear Idlers,
Midrollers
Caterpillar TDTO TO-4 is balanced to give maximum
frictional material life in power shift transmissions. TO4 oil specifications include frictional and gear wear
requirements. TO-4 oil is offered in several viscosity
grades, including SAE 50, for maximum component
life at high ambient temperatures and heavy duty
cycles.
NOTICE
TO-4 is formulated for transmissions and drive trains
only. Using TO-4 in an engine would result in
shortened engine life.
Do not use engine oils for lubricating transmissions or
drive trains. Failure to follow this recommendation can
cause shortened transmission life due to material
incompatibility and inadequate frictional requirements
for disk materials.
NOTE: Use of a single viscosity grade MIL-L-2140 oil
in the Hydraulic System, Power Train is acceptable.
Single viscosity oils which meet MIL-L-2104 can be
mixed with the Caterpillar TDTO oils
Caterpillar does not currently offer multigrade oils for
use in transmissions. Multigrade oils which use high
molecular weight polymers as viscosity index
improvers lose their viscosity effectiveness (permanent
and temporary shear), and are therefore not
recommended for transmission and drive train
compartments. The Caterpillar TO-4 specification
includes a test for multigrade oil shear stability; oils
that meet this specification may be available in the
future.
Lubricating Grease
The National Lubricating Grease Institute (NLGI)
classifies grease, based on ASTM D217-68 Worked
Penetration characteristics. Grease characteristics are
given a defined consistency number.
Molybdenum Grease: NLGI No. 2 Grade contains
three percent molybdenum disulfide to five percent
molybdenum disulfide. This grease is a multipurpose
grease with an operating temperature range from
-28°C to 149°C (-18°F to 300°F).
Water and Temperature Resistant Grease: NLGI No.
2 Grade is highly resistant to water. This grease meets
the ASTM D-1264 “Water Washout Test” requirement
and resists low temperatures and high temperatures.
This grease has a starting torque at -40°C (-40°F) and
is not fluid at 316°C (600°F).
103
Maintenance Section
Lubricant Viscosities and Refill Capacities
TM5-2430-200-10
Lubricant Viscosities and Refill Capacities
Lubricant Viscosities
Refill Capacities
REFILL CAPACITIES (APPROXIMATE)
LUBRICANT VISCOSITIES FOR AMBIENT
(OUTSIDE) TEMPERATURES (1)
°C
Oil
Viscosities
Engine
Crankcase DEO
SAE 0W20
-40
+10
SAE15W40
-10
+50 +15 +122
SAE 0W20 (SPC)1
-40
+10
SAE 30
0
+35 +32 +95
+5
+45 +41 +113
Min M a x Min M a x
SAE 40
SAE 50
1
Cab/Radiator Tilt
PumpTDTO
1
U.S.
Gal.
Imperial
Gal.
Cooling System
42
11
9.2
-40
Fuel Tank
341
90
75
-40
Engine Oil With Filter
35
9.2
7.7
Power Train
152
40
33.3
Hydraulic Tank
72
19
15.8
Midrollers
.125
4.2 oz
4. 4 oz
Winch Gearbox
1.1
.3
.2
Rear Idlers
1.5
.4
.3
Windshield Washer Bottle
3.8
1.0
.8
Cab/Radiator Tilt Pump
1
.26
.22
+50
+50
+10 +50 +50 +122
1
Hydraulic System, SAE 0W20 (SPC)
Suspension
SAE 10W
Cylinders, Recoil
SAE 30
Cylinders TDTO
Winch
Gearbox
TDTO
Liters
°F
Compartment
or System
Power Train,
Midrollers, Rear
Idlers
TDTO
Compartment
or System
-40
+10
-40
+50
-20
+40
-4
+104
+10 +50 +50 +122
SAE 0W20 (SPC)
-40
+10
SAE 40
+5
+45 +41 +113
SAE 50
-40
+50
+10 +50 +50 +122
1
SAE 0W20 (SPC)
-40
+50
-40 +122
Special oils with synthetic base stocks that do not contain
polymer viscosity index improvers. The high viscosity index of
the “synthetic” oils provide natural multiviscosity properties.
Change 1
TM5-2430-200-10
50
50
50
50
250
50
50
50
Change 1
Lubrication Chart
104
Maintenance Section
Lubrication Chart
10
50
250
250
250
250
50
50
50
250
50
250
50
50
10
50
50
10
TM5-2430-200-10
105
Maintenance Section
Maintenance Intervals
Maintenance Intervals
When Required
250 Service Hours or 3 Months
Engine Air Intake System—Service Filter.............106
Cab Pins—Lubricate.............................................127
Cab Air System—Service Filters ..........................108
Winch—Check Hooks, Cable/Lubricate/..............127
Radiator—Clean Radiator.....................................110
Doubling Block......................................................128
Circuit Breakers—Reset .......................................110
Castor Wheel Assembly .......................................128
Windshield Wipers—Replace ...............................111
Engine Coolant Heater—Check Operation ...........128
Windshield Washer Fluid—Refill ..........................111
10 Service Hours or Daily
*First perform maintenance items from previous
service intervals.
Walk-Around Inspection—Inspect Machine ..........112
Seat Belt—Inspect for Damage ............................118
Engine Crankcase—Check Oil Level....................118
Hydraulic Tank—Check Oil Level .........................119
Power Train Oil—Check Oil Level ........................120
Radiator—Check Coolant Level ...........................120
Water Separator—Drain Water/Sediment.............121
Indicators, Gauges, Horns and Lights—
Check Operation ..............................................121
Brakes—Check Operation ....................................122
Backup Alarm—Check Operation .........................123
Undercarriage—Lubricate.....................................123
Undercarriage—Check Oil Level ..........................124
Undercarriage—Check Balance ...........................124
50 Service Hours or Weekly*
Undercarriage—Lubricate ....................................125
Undercarriage—Check Oil Level ..........................125
Pintle Hook—Lubricate .........................................126
Blade—Lubricate ..................................................126
Change 1
106
Maintenance Section
When Required
TM5-2430-200-10
When Required
You must first read and understand the warnings
and instructions contained in this manual before
performing any operation or maintenance
procedures.
Service Primary Element
1
Engine Air Intake System
Service Filter Elements
! WARNING
If nuclear, biological, or chemical (NBC) exposure
is suspected, all filter media should be handled
by personnel wearing protective equipment.
Consult the unit NBC officer or NBC
noncommissioned officer for appropriate
handling or disposal procedures.
1. Open air intake compartment access door (1) on
the left side of the machine.
NOTICE
Service the air intake filters only with the engine
stopped, or engine damage could result.
2
1
2. Open two latches (2), and remove the air cleaner
cover.
3
Air Filter Service Indicator (1)—Service the air intake
filter elements when red appears in the viewing
window or when the arrow is at the 25 inches
position. Reset the indicator by pushing up on the
button.
3. Remove primary filter element (3) from the air
cleaner housing.
4. Clean the inside of the housing.
5. Clean and inspect primary element (3).
TM5-2430-200-10
NOTE: For cleaning procedures, refer to “When
Required, Cleaning Primary Element,” in this section.
6. Install the clean primary element.
7. Clean and install the air cleaner cover. Close
latches (2).
8. Reset the air filter service indicator.
107
Maintenance Section
When Required
NOTE: If the secondary element is plugged with dust
or damaged, have Unit Maintenance replace the
element.
6. Uncover the air inlet opening. Install secondary
element (3).
7. Install primary element (1). Install cover (4).
9. Close air intake compartment access door (1).
Cleaning Primary Element
NOTE: If the air filter service indicator shows a
restriction after cleaning the primary element, have
Unit Maintenance install a new primary and secondary
element.
NOTICE
Do not clean the filter element by bumping or tapping
the element. Do not use a filter element with damaged
pleats, gaskets, or seals. Engine damage can result.
Inspect Secondary Element
NOTICE
Never attempt to clean and reuse a secondary filter
element.
The secondary filter element should be replaced at the
time the primary element is serviced for the third time.
Make sure the cleaned filter element is completely dry
before installing it into the filter housing. Water
remaining in the element can cause false indications of
contamination in oil sampling test results.
NOTE: Primary filter elements can be cleaned with
pressure water at a maximum of 280 kPa (40 psi), or
detergent washing.
1
2
3
4
1. Remove air cleaner housing cover (4) and primary
element (1).
2. Remove secondary element (3).
3. Cover the air inlet opening. Clean the inside of air
cleaner housing (2).
4. Inspect the gasket. Have Unit Maintenance replace
the gasket if it is damaged.
5. Inspect secondary element (3) for plugging and
damage.
1. Direct water along the pleats inside and outside the
filter element.
NOTE: If the element is washed in warm water and
nonsudsing household detergent, rinse the inside and
outside of the pleats with clean water, and air dry the
filter element completely.
108
Maintenance Section
When Required
TM5-2430-200-10
Cab Air System
! WARNING
If nuclear, biological, or chemical (NBC) exposure
is suspected, all filter media should be handled
by personnel wearing protective equipment.
Consult the unit NBC officer or NBC noncommissioned officer for appropriate handling or
disposal procedures.
Service Filter Elements
2. Use a light source to inspect the filter elements after
cleaning. Do not use a filter element with damaged
pleats, gaskets, or seals.
Clean the filter elements when a significant reduction
in air circulation is noticed. Maximum performance can
not be achieved unless the filter is kept clean.
NOTE: If the filter element is damaged, have Unit
Maintenance replace the element.
Before servicing the filters, switch off the blower, close
all windows, and forcibly close the door. The resulting
back pressure will dislodge most of the loose dirt from
the outside of the filters.
3. Wrap and store the clean filter elements in a clean,
dry place.
NOTE: In humid conditions, such as often occurs in
the early morning, do not switch on the blower prior to
servicing the filter. Damp particles drawn into the filter
may be difficult to remove when cleaning.
External Filter
1
2
1. Open access door (1) on the right side of the cab.
2. Open latch (2) at the bottom of the filter bracket
and remove the bracket.
TM5-2430-200-10
109
Maintenance Section
When Required
NOTE: If the filter elements are excessively dirty or
damaged, notify Unit Maintenance that the filter
elements must be cleaned or replaced.
3
4. Clean the filter chamber with a damp cloth.
5. Install the filter elements.
4
6. Close access door (1) and install the bolt.
3. Remove air filter element (4) by pulling on tab (3) at
the top or bottom of the filter.
4. Inspect filter element (4) for plugging or damage.
NOTE: If filter element (4) is excessively dirty or
damaged, notify Unit Maintenance that the filter
element must be cleaned or replaced.
5. Clean the filter chamber with a damp cloth.
6. Install filter element (4).
7. Install the filter bracket and close latch (2) at the
bottom of the filter bracket.
8. Close access panel (1).
Internal Filter
1
1. Remove bolt and open access door (1) at the front
of the blower assembly.
2. Remove the filter elements.
NOTE: There are two filter elements installed together.
3. Inspect the filter elements for plugging or damage.
110
Maintenance Section
When Required
TM5-2430-200-10
Radiator
Circuit Breakers
Clean
Reset
1
1
2
3
4
5
1. Lift the radiator guard by pulling up sharply on grab
rail (1).
Press the button to reset the following circuit breakers
on the front circuit breaker panel:
(1) Engine Control—20 Amps.
3
2
(2) Dome/Horns—15 Amps.
(3) Transmission Control—20 Amps.
(4) A/C Blower—15 Amps.
(5) Auxiliary—15 Amps.
4
7
6
9
2. Prop radiator guard (3) open with prop rod (2).
8
3. Clean any accumulated debris from the top of cores
(4).
10
11
NOTICE
Do not brush the radiator with your hands, or another
object, or you may bend the cooling fins.
4. Return prop rod (2) to its storage location.
5. Lower radiator guard (3), pressing down on it firmly
to secure the guard in place.
Press the button to reset the following circuit breakers
on the main circuit breaker panel:
(6) Main—105 Amps
(7) ALT (Alternator)—105 Amps
(8)
(Engine Coolant Heater)—30 Amps
(9) AIH (Intake Air Heater)—80 Amps
(10) Start—10 Amps
(11) Ether—15 Amps
Change 1
TM5-2430-200-10
111
Maintenance Section
When Required
Windshield Wiper
Windshield Washer Fluid
Replace Blade
Refill Container
1
1
2
When the windshield wiper no longer wipes the
window clean, inform Unit Maintenance that wiper
blade (1) needs to be replaced.
1. Remove cap (1).
2. Fill bottle (2) with windshield washer solvent.
NOTE: The capacity of the windshield washer
container is 3.79 L (1 U.S. gal).
3. Reinstall cap (1).
Change 1
112
Maintenance Section
Every 10 Service Hours or Daily
TM5-2430-200-10
Every 10 Service Hours or Daily
You must first read and understand the warnings
and instructions contained in this manual before
performing any operation or maintenance
procedures.
Midrollers and Idlers
3
4
Walk-Around Inspection
When checking the specific components or areas on
the machine, be alert for oil or fuel leaks, loose or
missing fasteners, filler caps, or identification/safety
plates, and cracked or bent components. Have Unit
Maintenance make any needed repairs before
operating the machine.
NOTE: Army operators should perform the Operator’s
Preventive Maintenance Checks and Services
(OPMCS) before operating the machine. Refer to
Appendix A in this manual for the check list.
Undercarriage
Clean away any dirt and debris that has accumulated
in the undercarriage area, then inspect the following
components.
Drive Belts
5
Have Unit Maintenance repair or replace idlers (3) or
midrollers (4) if the following conditions are met:
• Oil is leaking enough to form drops.
• Oil level is low or not visible in sight gage (5) on
outside midroller or rear idler.
• More than 50 percent of the rubber is missing from
any midroller (4) or more than 25 percent of the
rubber is missing from any idler (3).
• There are loose or missing bolts.
Swing Arms
1
2
Have Unit Maintenance replace belts (1) if any of the
following conditions are met:
• More than two guide blocks (2) in a row are missing.
• More than 12 guide blocks (2) (one quarter of the
total number) are missing.
• Belt (1), including internal cables, is severed more
than 40 percent of the width of the track, at any
location.
Change 1
6
Check swing arm pivot joints (6) for loose or missing
bolts.
113
Maintenance Section
Every 10 Service Hours or Daily
TM5-2430-200-10
Cylinders, Accumulators and Hoses
Pin Retention Bolts
6
10
7
10
10
7
Inspect suspension cylinders (6), accumulators (7),
and visible hoses for leaks large enough to form
drops. Use a soft cloth to remove any dirt from the
cylinder rods. Check for loose or missing fasteners. If
leaks or loose or missing fasteners are found on any
component, inform Unit Maintenance.
Inspect undercarriage pins (10) for loose or missing
retention bolts. Inform Unit Maintenance if any loose or
missing retention bolts are found.
Belt Guides
Drive Wheels and Scraper Bars
8
11
9
Inspect drive wheel (8). Have Unit Maintenance repair
or replace the drive wheel/hub if any of the following
conditions are met:
Inspect belt guides (11) for wear and loose or missing
bolts. Notify Unit Maintenance if the belt guides are
worn enough for holes to form, or if the bolts are loose
or missing.
• More than two drive slats in a row, more than four in
a group of ten, or more than six total, are missing
from a single drive wheel.
• Oil is leaking from the hub severely enough to form
drops.
• There are loose of missing mounting bolts.
Inspect scraper bars (9) for damage and loose or
missing fasteners. Notify Unit Maintenance to repair or
replace the scraper bar if it is bent, the rubber flaps
are missing, or if any bolts are loose or missing.
Change 1
114
Maintenance Section
Every 10 Service Hours or Daily
TM5-2430-200-10
Dozer Blade
Back Rippers
Cutting Edge
5
4
1
6
7
2
Inspect cutting edges (2) and end bits (1) for wear and
damage. Have Unit Maintenance replace the cutting
edge or end bits if the adapters are exposed to wear,
or if they are broken or cracked. Have Unit
Maintenance repair any loose or missing fasteners.
Hydraulic Cylinders and Hoses
5
4
6
7
3
Inspect the four back rippers (4) for wear and damage.
Have Unit Maintenance replace any missing ripper tips
(5), or tips that have worn through to the adapter.
Have Unit Maintenance replace any worn or cracked
shanks (6) and loose or missing chains (7).
Inspect hydraulic cylinders (3) and hoses. Have Unit
Maintenance repair or replace any hydraulic cylinder or
hose that is leaking enough oil to form drops. Have
Unit Maintenance repair any loose or missing
fasteners.
Change 1
TM5-2430-200-10
Winch
115
Maintenance Section
Every 10 Service Hours or Daily
Radiator
1
2
1
3
4
Inspect winch hydraulic motor (1) and any visible
hydraulic hoses at the rear of the tractor for leaks.
Have Unit Maintenance repair or replace the winch
motor or hose if oil is leaking enough to form drops.
Check winch frame (2) for cracks, bends or loose or
missing fasteners. Check for cracked or bent rollers (3)
on the fairlead. Have Unit Maintenance repair or
replace the winch if any defects are discovered.
Check the safety latch, if equipped, on hook (4) for
cracks, bends, or a loose or missing hinge spring.
Have Unit Maintenance repair or replace the safety
latch if any defects are discovered.
2
Raise radiator guard (1), and inspect cooler cores (2).
Clean accumulated debris from the top of the cooler
cores. If debris is lodged between the cooling fins,
inform Unit Maintenance that the cooler cores need to
be cleaned.
NOTICE
Do not brush the radiator with your hands or another
object or you may bend the cooling fins.
Coolant Reservoir
Power Train
3
1
Check the coolant level in coolant reservoir (3). Refer
to “Every 10 Service Hours or Daily, Radiator, Check
Coolant Level” in this section.
Check the power train oil level in sight glass (1). Refer
to “Every 10 Service Hours or Daily, Power Train,
Check Oil Level” in this section.
Check for leaks large enough to form drops on all
visible components. Report any leaks found to Unit
Maintenance for repair.
Change 1
116
Maintenance Section
Every 10 Service Hours or Daily
TM5-2430-200-10
Air Filter Compartment
Hydraulic Oil Tank
1
2
1
Inspect the following components in the air filter
compartment:
• Check engine oil level (2). Refer to “Every 10 Service
Hours or Daily, Engine Crankcase, Check Oil Level”
in this section.
• Check air filter service indicator (1). Refer to “When
Required, Engine Air Intake System” in this section.
• Check for oil leaks large enough to form drops on
any hoses and components in view.
Check for leaks large enough to form drops. Check
the hydraulic oil level in the tank. Refer to “Every 10
Service Hour or Daily, Hydraulic Oil Tank, Check Oil
Level” in this section.
NOTE: Use the marks on decal (1) to determine the
correct oil level in the tank. Do not use the marks on
the sight glass.
Cab
Windows and Wiper Blades
Oil Filter Compartment
1
1
Check the following items in the oil filter compartment:
• Check for leaks large enough to form drops at each
filter and hose visible in the compartment.
• Check fuel and water separator (1) for water and
sediment.
2
Keep windows (2) clean to ensure maximum visibility.
Use a ladder, or other suitable device, to access the
upper windows for cleaning. Clean the lower windows
from the ground. Use commercially available cleaning
solutions to clean the window.
Check to be sure wiper blades (1) are installed and are
not damaged.
Remove any build-up of dirt, trash or debris from the
cab interior. Keep the cab interior clean.
TM5-2430-200-10
Mirrors
117
Maintenance Section
Every 10 Service Hours or Daily
Windshield Washer Fluid Bottle
3
6
Refill windshield washer bottle (6) if the level is low.
4
Inspect the side mirrors (3) and rear view mirror (4).
Have Unit Maintenance replace any damaged or
missing mirrors. Be sure to check the mirror
adjustment to get maximum visibility while seated in
the cab.
Gauges
5
Inspect all gauges on instrument panel (5). Have Unit
Maintenance repair or replace any unreadable gauges.
Change 1
118
Maintenance Section
Every 10 Service Hours or Daily
TM5-2430-200-10
Seat Belt
Engine Crankcase
Inspect for Wear or Damage
Check Oil Level
1
1
2
3
2
Seat belt (1) and mounting hardware (2) must be
inspected for wear, damage and expiration before the
machine is operated. Have Unit Maintenance replace
the belt or mounting hardware if worn, damaged or
expired.
1. Open air filter compartment door (1) on the left side
of the machine.
2
3
4
The seat belt must be replaced after three years of
use, regardless of appearance. Tag (4) is sewn into
the belt. Fully extract the belt and check the date on
the tag. If the date on the tag is more than three years
prior to the current date, report the seat belt to Unit
Maintenance for replacement.
Adjust seat position (3) so that all of the machine’s
controls are easy to reach.
2
ADD
4
FULL RANGE ENGINE STOPPED
5
2. Maintain the oil level between ADD (4) and FULL (5)
marks on dipstick (2) with the engine stopped. The
oil level should be checked when the engine is cold.
NOTE: When operating on severe slopes, the oil level
in the engine must be at the FULL mark on dipstick (2)
when the machine is on level ground.
TM5-2430-200-10
3. Remove oil fill plug (3) and add oil, if necessary.
4. Clean and install oil fill plug (3).
119
Maintenance Section
Every 10 Service Hours or Daily
Hydraulic Tank
Check Oil Level
5. Close air intake compartment door (1).
1
Hydraulic oil tank (1) is located on the right side of the
machine.
2
3
4
5
1. Maintain the oil level in sight gauge (3) between top
(4) and bottom (5) marks on the decal to the rear of
the sight gauge when the machine is on level
ground.
NOTE: Use the marks on the decal to determine the
correct oil level in the tank. Do not use the marks on
the sight glass.
2. Remove oil fill cap (2) and add oil through the fill
tube, if necessary.
3. Clean and reinstall oil fill cap (2).
120
Maintenance Section
Every 10 Service Hours or Daily
TM5-2430-200-10
Power Train Oil
Radiator
Check Oil Level
Check Coolant Level
1
1
2
4
3
1. Maintain the oil level so that oil is visible in sight
gauge (1).
NOTE: Park the machine on flat ground, and check
the oil level with the engine not running.
2
NOTE: Check the coolant level when the engine is at
normal operating temperature. Use the engine coolant
temperature gauge on the instrument panel to
determine the engine’s current temperature.
1. Maintain the coolant level in sight gauge (4)
between top (2) and bottom (3) marks on the decal,
to the rear of the sight gauge.
2. If necessary, remove cap (1) and add the
appropriate mixture of coolant and water for the
current operating environment.
3. Clean and replace cap (1).
5
2. Lift the access cover, and remove fill cap (2) and
add oil, if necessary.
3. Clean and reinstall the fill cap.
NOTE: If the coolant reservoir is completely empty,
allow the engine to cool to ambient temperature. After
the engine is cool, fill the radiator directly through
radiator cap (5). Operate the machine until the engine
has reached normal operating temperature. Add
additional coolant to the coolant bottle through cap
(1).
121
Maintenance Section
Every 10 Service Hours or Daily
TM5-2430-200-10
Water Separator
Indicators, Gauges, Horn and
Lights
Drain Water and Sediment
Check Operation
1
Look for broken gauge lenses, indicator lights,
switches, etc.
1. Start the engine. Refer to “Before Starting Engine”
and “Engine Starting” in this manual.
1
2
NOTE: The water separator is located in oil filter
compartment (1), on the right side of the machine.
3
4
5
6
2. Check for inoperative gauges on instrument panel
(1).
7
2
1. Open the oil filter compartment access door.
2. Open drain valve (2) and allow the fuel and water
mixture to drain into a suitable container. When no
more water is present in the drain stream, close the
drain valve.
NOTE: Discard the fluid in accordance with local
regulations. Ensure that no fuel from the drain valve
drips onto the ground.
3. Close the drain valve.
4. Close the oil filter compartment access door.
10
8
9
3. Move blackout light switch (8) into the SERVICE
DRIVE or STOP LIGHT position, and move horn
enable switch (9) to ON.
122
Maintenance Section
Every 10 Service Hours or Daily
TM5-2430-200-10
Brakes
11
12
13
14
Check Operation
1. Start the engine. Refer to “Operation Section,
Before Starting Engine” and “Engine Starting” in this
manual.
1
15
4. With the engine running, hold engine start switch (2)
in the START position to check the operation of the
indicators (7) on instrument panel (1), and indicators
(11) and (12) on the right console. Make note of any
inoperative indicators. Release the start switch
when the test is complete.
2
5. Have an assistant activate the recoil alert switch on
each side of the machine to verify that lights (13)
and (14), and the alarm (15) function properly.
6. Using blackout switch (8), turn signal switch (5),
work lights switch (10), and service brake (4), check
all machine lights for correct operation. Refer to
“Monitoring Systems and Cab Features, Switches”
in this manual for information about indicator
operation.
3
3
4
7. Press button (6) to sound the forward horn.
8. Report any problems found to Unit Maintenance for
repair.
2. Press and hold service brake pedal (2), then push
down on knob (4) to release the parking brake.
3. With the service brake still engaged, move
transmission control lever (1) to FIRST FORWARD.
4. Release service brake pedal (2), and move the
machine FORWARD very slowly. Refer to “Machine
Operation” and “Machine Parking” in this manual.
5. Press service brake pedal (2) to stop the machine. If
the service brake does not stop the machine, pull
knob (4) up to engage the parking brake to stop the
machine. If the parking brake does not stop the
machine, immediately push blade control lever (3)
forward to drop the blade, and move transmission
control lever (1) to NEUTRAL.
6. Place the machine in NEUTRAL and engage the
parking brake.
Change 1
123
Maintenance Section
Every 10 Service Hours or Daily
TM5-2430-200-10
7. Report service brake malfunctions to Unit
Maintenance for immediate repair.
Backup Alarm
Check Operation
1. Start the engine. Refer to “Operation Section,
Before Starting Engine” and “Engine Starting” in this
manual.
1
2
3
2. Place the blackout light switch into STOP LIGHT
and the horn enable switch into ON.
3. Press and hold service brake pedal (2), then push
down on knob (3) to release the parking brake.
4. With the service brake still engaged, move
transmission control lever (1) to FIRST REVERSE.
5. The backup alarm should sound while the
transmission control lever is in FIRST REVERSE.
6. Report backup alarm malfunctions to Unit
Maintenance for immediate repair.
Change 1
124
Maintenance Section
Every 10 Service Hours or Daily
TM5-2430-200-10
Undercarriage
Check Balance
Lubricate
1. Start the engine. Refer to “Operation Section,
Before Starting Engine” and “Operation Section,
Engine Starting” in this manual.
1
2
3
4
Lubricate four undercarriage fittings on each side of
the machine. The four fittings are: (1) tension cylinder
pin, (2) front minor bogie pin, (3) major bogie pin, (4)
rear minor bogie pin.
2. Ensure that the suspension manual lockout valves
are open. Refer to “Operation Section, Machine
Features, Suspension Manual Lockout Valves” in
this manual.
3. Put the machine into SELF-DEPLOY mode. Refer to
“Operation Section, Machine Operation, Self-deploy
Mode” in this manual.
4. Move the machine to a flat surface, and engage the
parking brake. Refer to “Operation Section,
Machine Operation, Moving the Machine” and
“Operation Section, Machine Parking” in this
manual.
NOTE: There are eight undercarriage fittings to be
lubricated at this service interval.
Check Oil Level
7
6
5. Check that the left and right side of the machine are
approximately the same distance off the ground.
Inform Unit Maintenance that the suspension must
be recharged if the machine is visibly tilted to the
left or right.
5
Check oil level in sight gages (5), on outside midrollers
(6) and rear idlers (7).
Change 1
NOTE: If the fenders are bent, another point of
reference should be used.
NOTE: If necessary, an emergency suspension
charging can be performed in the field. For the
emergency charging procedure, refer to “Operation
Section, Machine Operation, Emergency Suspension
Charging” in this manual.
TM5-2430-200-10
125
Maintenance Section
Every 50 Service Hours or Weekly
Every 50 Service Hours or Weekly
You must first read and understand the warnings
and instructions contained in this manual before
performing any operation or maintenance
procedures.
12
Undercarriage
Lubricate
13
If operating in temperatures above 38°C (100°F), or in
very wet conditions (such as fording), lubricate the
fittings at this service interval every 10 service hours or
daily.
8
7
6
4
1
2
5
14
3
9
10
11
NOTE: There are 28 undercarriage fittings to be
lubricated at this service interval.
Check Oil Level
15
Lubricate 14 undercarriage fittings on each side of the
machine. The 14 fittings are: pivot arm (1), bogie
cylinder–upper (outer [2] and inner [7]), bogie cylinderlower (3), middle swing arm (4), rear swing arm (5),
rear suspension cylinder–lower (6), middle suspension
cylinder–lower (8), front suspension cylinder–upper (9),
middle suspension cylinder–upper (10), rear
suspension cylinder–upper (11), front suspension
cylinder–lower (12), offset arm (13), and front swing
arm (14).
16
Check oil level in sight gauges (15), on the inside of
midrollers (16).
Change 1
126
Maintenance Section
Every 50 Service Hours or Weekly
TM5-2430-200-10
Pintle Hook
Blade
Lubricate
Lubricate
1
1
2
2
3
3
4
Lubricate a total of three fittings on the pintle hook.
Lubricate four fittings in the tower area of the blade.
The four fittings are: (1) angle cylinder–rod end, (2)
angle cylinder–head end, (3) singletree–upper, (4)
singletree–lower.
5
6
7
On each side of the machine, lubricate three fittings.
The three fittings are: (5) lift cylinder–top, (6) lift
cylinder–bottom, (7) C-frame.
NOTE: The blade has a total of ten fittings.
TM5-2430-200-10
127
Maintenance Section
Every 250 Service Hours or Monthly
Every 250 Service Hours or 3 Months
You must first read and understand the warnings
and instructions contained in this manual before
performing any operation or maintenance
procedures.
Check Hooks
10°
10°
Undercarriage
Cab Pins
Lubricate
1
Check the cable and doubling block hooks. Inform
Unit Maintenance that the hook must be replaced if it
is bent beyond the angle shown above.
Lubricate cab tilt pin fitting (1) on each side of the
machine.
Check Cable
NOTE: There are two cab tilt pin fittings.
Winch
Lubricate
1
2
4
3
Unwind the cable, and check it for kinks and frays.
Have Unit Maintenance replace the cable if it is kinked,
worn or frayed.
NOTE: For more information, refer to FM-5-125,
Rigging, Techniques, Procedures, and Applications.
Lubricate four fittings on the fairlead rollers of the
winch.
Change 1
128
Maintenance Section
Every 250 Service Hours or Monthly
TM5-2430-200-10
Doubling Block
Engine Coolant Heater
Lubricate
Check Operation
5
NOTE: The engine coolant heater is an option that is
installed with the arctic starting system. This
procedure does not need to be performed if the
engine coolant heater is not installed.
1
Lubricate the doubling block. There is one fitting.
NOTE: The doubling block is normally stored in the BII
box.
Castor Wheel Assembly
Lubricate
Operate the optional engine coolant heater to keep
the unit functioning correctly. This procedure should
be performed before the engine is started in the
morning, while the engine coolant is still at ambient
temperature.
NOTE: Do not start the engine.
2
1
1. Press engine coolant heater switch (1) to turn the
system on. The lamp inside the coolant heater
switch will turn on when the system is operating.
2. Allow the engine coolant heater to operate for 10 or
15 minutes, and then press engine coolant heater
switch (1) again to turn the coolant heater off.
3. Wait until the lamp inside the coolant heater switch
turns off (at least three minutes) before starting the
engine.
Lubricate castor wheel assemblies (1). There are two
fittings (2), one on each side of the wheel.
NOTE: There are two castor wheel assemblies. They
are normally stored in the BII box.
Change 1
NOTICE
Do not start the engine while the light in the engine
coolant heater switch is on. The engine coolant heater
requires three minutes to purge itself of diesel fumes.
Damage to the engine coolant heater may result if the
engine is started too soon after use.
TM5-2430-200-10
129
Index Section
Index
Index
A
Additives..................................................................99
After Starting Engine................................................60
Air Conditioning .......................................................32
Air Conditioning/Heating Controls ............................32
Air Transport (C–130, C–141, C–5), Preparation for
...........................................................................82
Alternate Exit ...........................................................32
Arm Rest .................................................................30
Auxiliary Start Receptacle (NATO Slave)...................41
B
Back Rippers.....................................................50 ,66
Back Rippers, Inspect ...........................................114
Backup Alarm........................................................123
Before Starting the Engine .......................................52
Belt Guide, Inspect ...............................................113
BII Compartment .....................................................49
Blackout Light Switch ..............................................21
Blade, Lubricate ....................................................126
Blade Controls.........................................................50
Blade Down Indicator ..............................................26
Brake Release Valve, Emergency.............................49
Brake Switch, Parking .............................................38
Brake, Parking .........................................................38
Brakes, Check Operation.......................................122
Brakes, Service .......................................................38
C
Cab Air System, Service Filter Elements ................108
Cab Door ................................................................31
Cab Pins, Lubricate ...............................................127
Cab/Radiator Tilt Controls .......................................45
California, Proposition 65 Warning .............................3
Cap, Engine Coolant Fill ..........................................47
Cap, Fuel Tank Fill ...................................................48
Cap, Hydraulic Oil Tank Fill ......................................48
Cap, Power Train Oil Fill ..........................................48
Castor Wheel Assembly, Lubricate ........................128
Caterpillar Transmission/Drive Train Oil (TDTO) (TO-4)
.........................................................................102
Check Engine Indicator............................................26
Circuit Breakers .......................................................33
Circuit Breakers, Main .............................................41
Circuit Breakers, Reset ..........................................110
Coat Hook...............................................................37
Coolant Information, General ...................................99
Coolant Recommendations ...................................100
Coolant Reservoir, Inspect.....................................115
Coolant Temperature Gauge....................................24
Cooling Fan .............................................................29
Cooling System Specifications.................................99
Crank-Without-Inject Indicator .................................26
Cutting Edge, Inspect ............................................114
Cylinders, Accumulators and Hoses, Inspect .........113
D
Decontamination Container Bracket.........................46
Diagnostic Codes, Engine........................................86
Diesel Engine Oils ..................................................102
Disconnect Switch, Main .........................................40
Door, Cab ...............................................................31
Doubling Block
Installation ...........................................................63
Lubricate ...........................................................128
Dozer Blade...........................................................114
Drive Belt Tension, Emergency ................................66
Drive Belts, Inspect................................................112
Drive Off ..................................................................84
Drive Wheels And Scraper Bars, Inspect ...............113
Drive-on...................................................................82
E
Earthmoving Mode ..................................................61
Electrical Panel and BII Compartment and
Tool/Battery Compartment ..................................49
Emergency Brake Release Valve..............................49
Emergency Drive Belt Tension Adjustment
Controls ..............................................................45
Emergency Machine Leveling...................................69
Emergency Suspension Charging and Emergency
Drive Belt Tension Procedure ..............................66
Engine Air Intake System .......................................106
Cleaning Primary Element..................................107
Filter Elements, Service .....................................106
Inspect Secondary Element...............................107
Primary Element, Cleaning.................................107
Secondary Element, Inspect..............................107
Service Filter Elements ......................................106
Service Primary Element....................................106
Engine Controller Diagnostic Port ............................19
Engine Coolant Fill Cap ...........................................47
Engine Coolant Heater...........................................128
Engine Coolant Heater Switch ................................18
Engine Coolant Temperature Gauge ........................24
Engine Crankcase, Check Oil Level .......................118
Engine Diagnostic Codes.........................................86
Engine Diagnostic Switch ........................................19
Engine Lubricant Specifications ............................102
Engine Oil Pressure Gauge ......................................24
Engine Oil Pressure Indicator ...................................26
Engine Oils, Diesel .................................................102
Engine RPM Gauge .................................................24
Engine Start Switch .................................................17
Engine Starting ........................................................54
Engine Starting Above 0°C (32°F) ............................54
Engine Starting Below –32°C (–25°F).......................57
Engine Starting Between 0°C and –32°C
(32°F and -25°F) .................................................56
Change 1
130
Index Section
Index
TM5-2430-200-10
Engine Starting with Auxiliary Start (NATO Slave)
Receptacle ..........................................................58
Engine Stopping ......................................................77
Equipment Controls .................................................50
Every 10 Service Hours or Daily.............................112
Every 250 Service Hours or 3 Months ...................127
Every 50 Service Hours or Weekly .........................125
Exit, Alternate ..........................................................32
External Filter.........................................................108
F
Fan, Cooling ............................................................29
Fire Extinguisher Bracket .........................................46
Fluid Bottle, Windshield Washer...............................36
Foreword ...................................................................3
Fuel Level Gauge.....................................................25
Fuel Recommendations .........................................101
Fuel Specifications.................................................101
Fuel Tank Fill Cap ....................................................48
G
Gauges....................................................................24
Gauges, Inspect ....................................................117
General Coolant Information ....................................94
General Information, Transportation .........................79
Glycol ......................................................................99
Grab Rails ...............................................................47
Grease, Lubricating ...............................................102
Ground Transportation.............................................79
Guard, Rear Windshield...........................................37
H
Hazard Warning Lights ............................................29
Heating....................................................................32
Horn ........................................................................28
Horn Enable Switch .................................................20
Hydraulic Cylinders, Inspect...................................114
Hydraulic Oil Tank Fill Cap .......................................48
Hydraulic Oil Temperature Indicator .........................28
Hydraulic Tank, Check Oil Level.............................119
I
Important Safety Information......................................4
Indicator Check Function .........................................27
Indicators ................................................................25
Indicators, Gauges, Horn and Lights, Check
Operation ..........................................................121
Interior Light ............................................................30
Internal Filter, Cab .................................................109
Change 1
K
Kneeling Indicator ....................................................26
Kneeling Lock Pin....................................................44
Kneeling Switch .......................................................42
L
Leaving the Machine................................................77
Lifting ......................................................................81
Literature Information.................................................3
Lockout Valves, Suspension Manual........................46
Low Brake Pressure Indicator ..................................25
Lubricant Specifications.........................................102
Lubricant Viscosities ..............................................103
Lubricant Viscosities and Refill Capacities..............103
Lubricating Grease ................................................102
Lubrication Chart ...................................................104
M
Machine Description ..................................................3
Machine Features ....................................................38
Machine Leveling, Emergency..................................69
Machine Lifting and Tie Downs ................................81
Machine Operation ..................................................61
Machine Parking ......................................................76
Machine Pre-Start Checks.......................................52
Machine Roading.....................................................81
Machine Shipping ....................................................79
Machine Stopping ...................................................76
Main Circuit Breakers ..............................................41
Main Disconnect Switch ..........................................40
Maintenance..............................................................3
Maintenance Intervals ............................................105
Manual Suspension Locking ....................................61
Midrollers and Idlers, Inspect .................................112
Mirrors.....................................................................35
Mirrors, Inspect .....................................................117
Monitoring Systems and Cab Features ....................17
Moving the Machine ................................................71
O
Operation ..................................................................3
Operating Techniques..............................................73
Bulldozing ...........................................................73
Roading Information ............................................75
Back Ripping.......................................................75
Operational Troubleshooting ....................................88
TM5-2430-200-10
P
Parking Brake ..........................................................38
Parking Brake Switch ............................................113
Pin Retention Bolts, Inspect...................................110
Pin, Kneeling Lock...................................................44
Pintle Hook........................................................46, 72
Lubricate ...........................................................126
PLGR Bracket .........................................................35
PLGR/SINCGARS Power Strip ................................36
Power Strip, PLGR/SINCGARS ...............................36
Power Train Oil, Check Oil Level ............................120
Power Train Oil Fill Cap ...........................................48
Preparation for Air Transport (C–130, C-141, C-5)...82
Preparation for Special Shipping Width....................84
Preparation for Use of Remote Hydraulic Tools........64
Problem List ............................................................88
Product Identification and Serial Number
Locations ............................................................15
Proposition 65 Warning .............................................3
R
Radiator.........................................................110, 120
Check Coolant Level .........................................120
Clean ................................................................110
Rear View Mirror ......................................................35
Rear Windshield Guard............................................37
Recoil Alert ........................................................27, 98
Refill Capacities, Lubricant Viscosities and.............103
Remote Hydraulic Power Manifold ...........................64
Remote Hydraulic Tool Ports ...................................44
Remote Throttle Indicator ........................................27
Remote Throttle Switch ...........................................42
Returning Machine to Normal Operation ..................65
Rifle Bracket ............................................................36
Rippers, Back....................................................50 ,66
Roading, Machine....................................................81
131
Index Section
Index
Safety, Machine Operation.......................................12
Safety, Machine Parking ..........................................13
Safety, Mounting and Dismounting ..........................11
Safety, Oils ..............................................................10
Safety, Performance of Maintenance .........................9
Safety, Pressure Air ...................................................9
Safety, Rollover Protective Structure (ROPS) or
Falling Objects Protective Structure (FOPS) ...........9
Seat Adjustment ......................................................35
Seat and Seat Belt Checks......................................52
Seat Belt .................................................................34
Inspect for Wear of Damage..............................118
Self-Deploy Mode ....................................................62
Self-Deploy Mode Indicator......................................26
Self-Deploy/Earthmoving Mode Switch ....................43
Service Brakes ........................................................38
Shipping Width, Preparation for Special...................84
Side Window ...........................................................32
SINCGARS Bracket Installation................................36
Specifications and Model Views...............................14
Speedometer...........................................................24
Start Receptacle, Auxiliary .......................................41
Start-Aid Indicator ...................................................26
Start-Aid Switch ......................................................18
Steering Column......................................................28
Extend/Retract ....................................................29
Tilt.......................................................................28
Steering Wheel ........................................................39
Suspension Charging and Drive Belt Tension,
Emergency ..........................................................66
Suspension Locking, Manual ...................................61
Suspension Manual Lockout Valves.........................46
Swing Arms, Inspect..............................................112
Switch, Kneeling ......................................................43
Switch, Self-Deploy/Earthmoving Mode ...................43
Switch, Winch Control .............................................43
Switch, Winch Enable ..............................................43
T
S
Safety....................................................................3 ,4
Safety, Alternate Exit................................................11
Safety, Batteries ......................................................10
Safety, Before Operating the Machine .....................12
Safety, Before Starting the Engine ...........................11
Safety, Burn Prevention ...........................................10
Safety, Coolant ........................................................10
Safety, Crushing or Cutting Prevention ......................9
Safety, Engine Starting ............................................12
Safety, Ether............................................................11
Safety, Fire Extinguisher...........................................10
Safety, Fire or Explosion Prevention.........................10
Safety, Fluid Penetration ............................................9
Safety, General Hazard Information ...........................8
Safety, Lines, Tubes and Hoses ..............................11
Table of Contents ......................................................1
Tension Fail Indicator ...............................................25
Throttle Switch, Remote ..........................................42
Tie Downs ...............................................................82
Tool Ports, Remote Hydraulic ..................................44
Tool/Battery Compartment ......................................49
Towing Information ..................................................85
Transmission Control Lever .....................................39
Transmission Controller Diagnostic Port...................19
Transmission Diagnostic Check Switch....................19
Transmission Diagnostic Scroll Switch .....................19
Transmission Oil Temperature Gauge ......................24
Transportation Information .......................................79
Transportation, Ground............................................79
Troubleshooting.......................................................86
Turn Signal ..............................................................28
Change 1
132
Index Section
Index
TM5-2430-200-10
Turn Signal Indicator................................................26
U
Undercarriage................................................123, 125
Check Balance ..................................................124
Lubricate ...........................................................123
Lubricate ...........................................................125
V
Ventilation Louvers...................................................33
Voltmeter .................................................................24
W
Walk-Around Inspection.........................................112
Air Filter Compartment ......................................116
Cab...................................................................116
Dozer Blade ......................................................114
Hydraulic Oil Tank .............................................116
Oil Filter Compartment ......................................116
Power Train.......................................................115
Radiator ............................................................115
Seat Belt ...........................................................118
Undercarriage....................................................112
Winch................................................................115
Warning Labels..........................................................5
Washer/Wiper Control .............................................28
Water ......................................................................99
Water Separator, Drain Water and Sediment .........121
When Required......................................................106
Winch ....................................................................127
Check Cable .....................................................127
Check Hooks ....................................................127
Inspect ..............................................................115
Lubricate ...........................................................127
Winch Clutch ...........................................................51
Winch Control Switch ..............................................43
Winch Control Switches...........................................43
Winch Controls ........................................................51
Winch Enable Switch ...............................................43
Winch Indicator........................................................26
Winch Operation......................................................63
Window, Side ..........................................................32
Windows and Wiper Blades, Inspect .....................116
Windshield Washer Fluid, Refill Container ..............111
Windshield Washer Fluid Bottle................................36
Windshield Washer Fluid Bottle, Inspect ................117
Windshield Wipers, Replace Blade.........................111
Work Light Switch ...................................................20
Change 1
TM5-2430-200-10
APPENDIX A
Operator Preventive Maintenance Checks and Services (PMCS)
GENERAL
a.
Do your “before” PMCS just before you operate the tractor. Pay attention to
CAUTIONS and WARNINGS.
b.
Do your “during” PMCS while you are operating the tractor. Pay attention to
CAUTIONS and WARNINGS.
c.
Do your “after” PMCS right after operating the tractor. Pay attention to CAUTIONS and
WARNINGS.
d.
Do your “weekly” PMCS every 7 days.
e.
Do your “quarterly” PMCS every 90 days.
f.
If something does not work, troubleshoot it with the instructions in this manual. Report
any deficiencies using the proper forms. See DA PAM 738-750.
g.
Always do your PMCS in the same order so they become a habit. Once you have had
some practice, you’ll spot anything wrong in a hurry.
h.
If anything looks wrong and you can’t fix it, write it on your DA Form 2404. If something
is seriously wrong, report it to Unit Maintenance RIGHT NOW.
i.
When you do your PMCS, take the proper tools needed to make all checks. Always
use clean rags.
PMCS PROCEDURES
a.
Doing PMCS will help avoid unnecessary equipment breakdowns.
b.
The following items are a description of the columns in the PMCS table.
(1)
Item Number. These numbers indicate the order in which the PMCS should be
performed. They are to be used when recording the results of PMCS for the TM
number column on DA Form 2404, Equipment Inspection and Maintenance
Worksheet.
(2)
Interval. The interval tells when the PMCS should be performed. See the key at
the top of the table to determine what each column represents.
(3)
Item To Be Inspected/Procedure. This column tells you the specific item to be
checked or serviced and how to do the check or service.
A–1
TM5-2430-200-10
(4)
c.
d.
Equipment Is Not Fully Mission Capable If. This column lists equipment
conditions that mean the tractor or its implement cannot be safely used. DO
NOT use the tractor until the condition has been remedied.
Leakage definitions for Operator/Crew PMCS are as follows:
(1)
Class I—Seepage of fluid (as indicated by wetness or discoloration) not great
enough to form drops.
(2)
Class II—Leakage of fluid great enough to form drops, but not enough to cause
drops to drip from the item being inspected.
(3)
Class III—Leakage of fluid great enough to form drops that fall from the item
being inspected.
If possible, park the machine on level ground when finishing operation. This will allow
you to get accurate fluid level readings when performing the PMCS before resuming
operation.
A–2
TM5-2430-200-10
PREVENTIVE MAINTENANCE CHECKS AND SERVICES—DEUCE
Item
No.
Interval
Item To Be Inspected
! WARNING
You must first read and understand the
warnings and instructions contained in
this manual before performing any
operation or maintenance procedures.
Failure to follow the instructions or
heed the warnings may result in injury
or death.
NOTE: Perform all weekly and before
operation PMCS if:
(1) You are the assigned operator and
have not operated since the last
weekly PMCS.
(2) You are operating the machine for the
first time.
See TM11-5825-291-13 for PLGR PMCS
See TM11-5820-890-10 for SINCGARS
PMCS
1
UNDERCARRIAGE
NOTE: For illustrations of these steps,
refer to “Maintenance Section, Every 10
Service Hours or Daily, Undercarriage” in
this manual.
Before
(1) Clean away any dirt and debris on the
idlers, rollers, accumulators and
cylinders.
A–3
Equipment Status
TM5-2430-200-10
PREVENTIVE MAINTENANCE CHECKS AND SERVICES—DEUCE
Item
No.
Interval
Before
Item To Be Inspected
Equipment Status
(2) Check for missing guide blocks on the
drive belts.
• The equipment is not
ready/available if more than two
guide blocks in a row are
missing or if more than 12 guide
blocks are missing from a single
track.
! WARNING
Eye protection and gloves must be worn
when cutting cables.
NOTICE
Failure to remove protruding cables will
cause damage to the belts, front idlers,
midrollers and the rear idlers.
Before
During
After
(2A) Check the drive belts for protruding
main/zero degree cables. The 72
main/zero degree cables run
lengthwise inside the belt.
• If more than one inch of cable
protrudes, the cable must be cut.
(2B). Using the BII cutters, cut off the
protruding cables. Cables should be
cut off as close as possible to the belt
surface to complete the mission. Upon
return to the maintenance area or the
arrival of a maintenance repair truck,
cut or grind cables flush with the belt
surface.
• If more than one inch of cable is
exposed or 28 of the 72 cables
are broken, the vehicle is not
ready/available and the belt
must be replaced.
Change 1
A–4
TM5-2430-200-10
PREVENTIVE MAINTENANCE CHECKS AND SERVICES – DEUCE
Item
No.
Interval
Item To Be Inspected
Before
(3) Check the midrollers and the front and
rear idlers for oil leaks.
Equipment Status
• The equipment is not
ready/available if class III leaks
are present.
Before
(4) Check the oil level in the sight gauge
on the outside of the midrollers and
the rear idlers.
• The equipment is not
ready/available if no oil is
visible in the sight gauge or oil
is not at the required level.
Before
(5) Inspect the midrollers for wear and
damage.
• The equipment is not
ready/available if more than
50% of the rubber is missing
from any of the midrollers.
Before
(6) Inspect the front and rear idlers for
damage and loose bolts.
• The equipment is not
ready/available if more than
25% of the rubber is missing
on any component or there are
any loose idler bolts.
A–4.01 (A–4.02 Blank)
Change 1
TM5-2430-200-10
PREVENTIVE MAINTENANCE CHECKS AND SERVICES—DEUCE
Item
No.
Interval
Before
Item To Be Inspected
Equipment Status
(7) Check the swing arm pivot joints for
loose or missing bolts.
• The equipment is not
ready/available if there are any
loose or missing bolts.
Before
(8) Check the suspension cylinders,
accumulators and hoses for leaks.
• The equipment is not
ready/available if class III leaks
are present.
Before
(9) Check the drive wheels for leaks,
missing drive slats, and/or loose bolts.
• The equipment is not
ready/available if class III leaks
are present around the hub,
more than two drive slats in a
row are missing, more than
four drive slats in a group of
ten are missing, more than a
total of six drive slats on a
drive wheel are missing, or
there are any loose or missing
bolts.
Before
(10) Check the scraper bars for damage
and loose or missing bolts.
• The equipment is not
ready/available if there are any
loose or missing bolts, the
scraper bars are bent, or the
rubber flaps are missing.
A–5
TM5-2430-200-10
PREVENTIVE MAINTENANCE CHECKS AND SERVICES—DEUCE
Item
No.
Interval
Before
Item To Be Inspected
Equipment Status
(11) Check all undercarriage pins for
loose or missing retaining bolts.
• The equipment is not
ready/available if there are any
loose or missing pin retaining
bolts.
Before
(12) Check the belt guides for wear and
loose or missing bolts.
• The equipment is not
ready/available if a hole has
worn in belt guide, or if there
are loose or missing bolts.
Before
(13) Lubricate the undercarriage pins.
There are a total of eight fittings.
• The equipment is not
ready/available if grease does
not flow out of the pin seals
when grease is added to the
joint.
Before
(14) Check suspension manual lockout
valves if the machine will be operated
in the SELF-DEPLOY mode. Move
the valves to the OPEN position.
Refer to “Operation Section, Machine
Features, Suspension Manual
Lockout Valves” in this manual.
Before
(15) Check balance. Check that the left
and right side of the machine are
approximately the same distance off
the ground. Refer to “Maintenance
Section, Every 10 Service Hours or
Daily, Undercarriage” in this manual.
• The equipment is not
ready/available if the machine
appears to be out of balance
an estimated 102 mm (4 in) or
more.
Change 1
A–6
TM5-2430-200-10
PREVENTIVE MAINTENANCE CHECKS AND SERVICES—DEUCE
Item
No.
Interval
2
Item To Be Inspected
Equipment Status
DOZER BLADE
NOTE: For illustrations of these steps,
refer to “Every 10 Service Hours or Daily,
Dozer Blade” in this manual.
Before
(1) Check the cutting edges and end bits
for damage or loose or missing
hardware.
• The equipment is not
ready/available if the cutting
edges, bolts, or end bits are
missing, or if the cutting edges
or end bits are worn within 19
mm (0.75 in) of the base edge
of the blade.
Before
(2) Check the angle, lift, and tilt cylinders,
and attached hoses for leakage.
• The equipment is not
ready/available if class III leaks
are present.
Before
(3) Check the back ripper teeth and
shanks for wear and damage.
• The equipment is not
ready/available if a tooth is
worn through, exposing a
retainer, or if any tooth or
shank is missing or damaged,
when the mission requires use
of the ripper.
A–7
TM5-2430-200-10
PREVENTIVE MAINTENANCE CHECKS AND SERVICES—DEUCE
Item
No.
Interval
Before
Item To Be Inspected
Equipment Status
(4) Check blade for cracks, bending, or
loose or missing fasteners.
• The equipment is not
ready/available if any
components are cracked or
bent, or any fasteners are
loose or missing.
3
WINCH
NOTE: For illustrations of these steps,
refer to “Maintenance Section, Every 10
Service Hours or Daily, Winch” in this
manual.
Before
(1) Check the winch motor and attached
hoses for leaks. Also, check any other
visible hoses at the rear of the
machine for leaks
• The equipment is not
ready/available if class III leaks
are present.
Before
(2) Check the winch frame for cracks,
bending, or loose or missing fasteners.
• The equipment is not
ready/available if there are any
cracks, bent components, or
loose or missing fasteners, and
mission requires the use of
winch.
Before
(3) Check for cracked or bent fairlead
rollers.
• The equipment is not
ready/available if any roller is
bent or cracked, and mission
requires the use of winch.
A–8
TM5-2430-200-10
PREVENTIVE MAINTENANCE CHECKS AND SERVICES—DEUCE
Item
No.
Interval
Item To Be Inspected
Before
(4) Check the winch hook for bending or
damage.
Equipment Status
• The equipment is not
ready/available if the winch
hook is bent or cracked. and
mission requires the use of
winch.
4
POWER TRAIN (DIFFERENTIAL STEER)
NOTE: For illustrations of these steps,
refer to “Maintenance Section, Every 10
Service Hours or Daily, Power Train” and
“Every 10 Service Hours or Daily, Power
Train Oil” in this manual.
Before
(1) Check the power train oil level. Oil
must be visible in the sight glass.
• The equipment is not
ready/available if oil is not
visible in the sight glass.
Before
(2) Check the power train housing and
steering motor for leaks.
• The equipment is not
ready/available if class III leaks
are present.
5
RADIATOR
NOTE: For illustrations of these steps,
refer to “Maintenance Section, Every 10
Service Hours or Daily, Radiator” in this
manual.
A–9
TM5-2430-200-10
PREVENTIVE MAINTENANCE CHECKS AND SERVICES—DEUCE
Item
No.
Interval
Before
Item To Be Inspected
Equipment Status
(1) Check for accumulated debris by
raising the radiator guard.
• The equipment is not
ready/available if the radiator
cooling fins are plugged by
accumulated debris.
Before
(2) Check the cooling system for leaks.
• The equipment is not
ready/available if class III leaks
are present.
Before
(3) Check the coolant level in the coolant
reservoir.
• The equipment is not
ready/available if the coolant is
not visible in the reservoir.
6
AIR FILTER COMPARTMENT
NOTE: For illustrations of these steps,
refer to “Maintenance Section, Every 10
Service Hours or Daily, Air Filter
Compartment” and “Every 10 Service
Hours or Daily, Engine Crankcase” in this
manual.
Before
(1) Check the engine oil level (engine not
running).
• The equipment is not
ready/available if the oil level is
below the ADD mark or above
the full mark.
A–10
TM5-2430-200-10
PREVENTIVE MAINTENANCE CHECKS AND SERVICES—DEUCE
Item
No.
Interval
Item To Be Inspected
Equipment Status
! WARNING
If nuclear, biological, or chemical
(NBC) exposure is suspected, all filter
media should be handled by personnel
wearing protective equipment. Consult
the unit NBC officer or NBC
noncommissioned officer for
appropriate handling or disposal
procedures.
Before
(2) Check the air filter service indicator.
Refer to “Maintenance Section, When
Required, Engine Air Intake System,
Service Filter Elements.”
• The equipment is not
ready/available if red reappears
in the window after the
indicator has been reset and
the engine operated at full
speed.
Before
(3) Check all visible hoses in the air filter
compartment for leaks.
• The equipment is not
ready/available if class III leaks
are present.
7
OIL FILTER COMPARTMENT
NOTE: For illustrations of these steps,
refer to “Maintenance Section, Every 10
Service Hours or Daily, Oil Filter
Compartment” and “Every 10 Service
Hours or Daily, Water Separator” in this
manual.
A–11
TM5-2430-200-10
PREVENTIVE MAINTENANCE CHECKS AND SERVICES—DEUCE
Item
No.
Interval
Before
Item To Be Inspected
Equipment Status
(1) Check the filters for leaks.
• The equipment is not
ready/available if class III leaks
are present.
Before
(2) Check all visible hoses in the oil filter
compartment for leaks.
• The equipment is not
ready/available if class III leaks
are present.
Before
8
(3) Check for water in the fuel and water
separator. Drain any water or debris in
the fuel water separator into a suitable
container. Discard the fuel in
accordance with local regulations.
HYDRAULIC TANK
NOTE: For illustrations of these steps,
refer to “Maintenance Section, Every 10
Service Hours or Daily, Hydraulic Oil
Tank” and “Every 10 Service Hours or
Daily, Hydraulic Tank” in this manual.
Before
(1) Check the hydraulic oil level.
• The equipment is not
ready/available if the hydraulic
oil is below ADD on the decal.
Before
(2) Check the hydraulic tank for leaks.
• The equipment is not
ready/available if class III leaks
are present.
A–12
TM5-2430-200-10
PREVENTIVE MAINTENANCE CHECKS AND SERVICES—DEUCE
Item
No.
Interval
9
Item To Be Inspected
Equipment Status
CAB
NOTE: For illustrations of these steps,
refer to “Maintenance Section, Every 10
Service Hours or Daily, Cab” and “Every
10 Service Hours or Daily, Seat Belt” in
this manual.
Before
(1) Check that you can see clearly
through all windows. Clean any dirty
windows with window cleaner.
a. The equipment is not
ready/available if the front
windshield is cracked and the
vehicle is to be used on public
roads.
b. The equipment is not
ready/available if the front
main windshield is
permanently cloudy or is
cracked and obstructs the
operator’s vision.
Before
(2) Check the wiper blade.
• The equipment is not
ready/available if the blade is
missing or damaged and
conditions require wiper use.
Before
(3) Check the inside and outside mirrors.
• The equipment is not
ready/available if any mirror is
broken so that there are pieces
of glass missing.
A–13
TM5-2430-200-10
PREVENTIVE MAINTENANCE CHECKS AND SERVICES—DEUCE
Item
No.
Interval
Before
Item To Be Inspected
Equipment Status
(4) Check all gauges for damage.
• The equipment is not
ready/available if any gauge is
not readable.
Before
(5) Check the date tag on the seat belt.
Fully extend the belt to check the tag.
• The equipment is not
ready/available if the date on
belt tag is more than three
years old.
Before
(6) Check the seat belt for wear and
damage.
• The equipment is not
ready/available if the seat belt
is worn or frayed.
Before
(7) Check the seat and seat belt mounting
hardware.
• The equipment is not
ready/available if any seat or
seat belt mounting bolt is loose
or missing.
Before
(8) Check the seat adjustments.
• The equipment is not
ready/available if the seat will
not lock in a position for safe
operation.
Before
(9) Check the windshield washer
reservoir. Fill the reservoir with
windshield washer solvent if the level
is low.
A–14
TM5-2430-200-10
PREVENTIVE MAINTENANCE CHECKS AND SERVICES—DEUCE
Item
No.
Interval
10
Item To Be Inspected
Equipment Status
INDICATORS, GAUGES,
HORN AND LIGHTS
NOTE: For illustrations of these steps,
refer to “Maintenance Section, Every 10
Service Hours or Daily, Indicators,
Gauges, Horn, and Lights” in this manual.
a. Indicators
Before
(1) Check the backup alarm for correct
operation. Refer to “Maintenance
Section, Every 10 Service Hours or
Daily,” “Back-up Alarm.”
• The equipment is not
ready/available if the backup
alarm does not sound.
Before
(2) Start the engine. Refer to “Operation
Section, Machine Operation, Engine
Starting.” Operate the indicator test
function. Refer to “Monitoring System
and Cab Features, Indicator Check
Function.”
• The equipment is not
ready/available if the
appropriate indicators fail to
illuminate when the start switch
is held in the start position.
Refer to “Operation Section,
Monitoring System and Cab
Features, Indicator Check
Function.”
Before
(3) Have an assistant activate the recoil
alert switch on each side of the
machine. Alarm and light should
activate.
• The equipment is not
ready/available if the light
and/or alarm does not activate.
A–15
Change 1
TM5-2430-200-10
PREVENTIVE MAINTENANCE CHECKS AND SERVICES—DEUCE
Item
No.
Interval
Item To Be Inspected
Equipment Status
b. Horn
Before
Test the operation of the machine horn.
• The equipment is not
ready/available if the horn does
not function properly.
c. Lights
Before
Check operation of all machine lights.
• The equipment is not
ready/available if any light does
not illuminate and the light is
required for the mission. Refer
to “Operation Section,
Monitoring Systems and Cab
Features, Switches” in this
manual.
Change 1
A–16
TM5-2430-200-10
PREVENTIVE MAINTENANCE CHECKS AND SERVICES—DEUCE
Item
No.
Interval
11
Item To Be Inspected
Equipment Status
MACHINE CONTROLS
NOTE: For illustrations of these steps,
refer to “Maintenance Section, Every 10
Service Hours or Daily, Steering and
Brakes” in this manual.
a. Service Brakes
Before
Check that depressing the service brake
pedal stops the machine while it is moving
ahead slowly.
• The equipment is not
ready/available if the brakes do
not stop the tractor.
b. Steering Controls
Before
(1) Check that turning the steering wheel
causes the machine to turn in the
expected direction while it is traveling
in FORWARD and REVERSE.
• The equipment is not
ready/available if the machine
fails to turn in the expected
direction.
Before
(2) Check the steering response at
moderate speeds.
• The equipment is not
ready/available if the steering
is sluggish.
A–17
TM5-2430-200-10
PREVENTIVE MAINTENANCE CHECKS AND SERVICES—DEUCE
Item
No.
Interval
Item To Be Inspected
Equipment Status
c. Implement Controls
Before
(1) Check that the blade controls will fully
raise, lower, angle and tilt the blade.
Refer to “Operation Section,
Equipment Controls, Blade Controls” in
this manual.
• The equipment is not
ready/available if the blade
does not function correctly.
Before
(2) Check that the winch control switch
operates the winch. Have an observer
verify that the cable runs in and out.
Refer to “Operation Section, Machine
Features, Switches” and “Equipment
Controls, Winch” in this manual.
• The equipment is not
ready/available if the winch
does not function correctly and
mission requires use of winch.
d. Kneeling Mode
Before
Check that the kneeling switch raises and
lowers the front of the machine. Refer to
“Operation Section, Machine Features,
Switches” in this manual.
• The equipment is not
ready/available if the machine
fails to lower or raise, and
C130/C17 air transportation is
required.
A–18
TM5-2430-200-10
PREVENTIVE MAINTENANCE CHECKS AND SERVICES—DEUCE
Item
No.
Interval
Item To Be Inspected
Equipment Status
e. Self-Deploy/Earthmoving Mode
Before
(1) Check that the suspension system is
active when the machine is in the
SELF-DEPLOY mode by having an
observer watch the suspension
components while the machine is
moving slowly over rough terrain (or
driving over a solid object). Refer to
“Operation Section, Machine Features,
Self-Deploy/Earthmoving Mode
Switch” and “Machine Features,
Suspension Manual Lockout Valves” in
this manual.
• The equipment is not
ready/available if the rear
suspension cylinder fails to
extend and retract as the idlers
roll over the rough terrain (or a
solid object).
Before
(2) Check that the suspension system is
locked when the machine is in the
EARTHMOVING mode by having an
observer watch the suspension
components while the machine is
slowly moving FORWARD over rough
terrain (or driving over a solid object).
Refer to “Operation Section, Machine
Features, Self-Deploy/Earthmoving
Mode Switch” and “Machine Features,
Suspension Manual Lockout Valves” in
this manual.
• The equipment is not
ready/available if the rear
suspension cylinder continues
to extend and retract as the
idlers roll over rough terrain (or
a solid object.)
A–19
TM5-2430-200-10
PREVENTIVE MAINTENANCE CHECKS AND SERVICES—DEUCE
Item
No.
Interval
12
Item To Be Inspected
Equipment Status
EXHAUST
Before
Check for excessive black, blue, or white
smoke, and unusual noise.
• The equipment is not
ready/available if the engine
produces excessive black,
blue, or white smoke; or the
engine is making an unusual
noise.
13
BATTERIES
Before
Check batteries for corrosion, loose wires,
and low water.
• The equipment is not
ready/available if the water
level is below the plates or if
the vehicle will not start.
14
COMPONENTS OF END ITEM (COEI)
Before
Check that all COEI are on the vehicle
and are in working condition. Refer to
“Appendix B, Components of End Item
(COEI)” in this manual.
• The equipment is not
ready/available if COEI are
missing or broken.
15.
BASIC ISSUE ITEMS (BII)
Before
Check that all BII are on the vehicle and
are in working condition. Refer to
“Appendix C, Basic Issue Items (BII) List”
in this manual.
•The equipment is not
ready/available if BII are
missing or broken.
A–20
TM5-2430-200-10
PREVENTIVE MAINTENANCE CHECKS AND SERVICES—DEUCE
Item
No.
Interval
16
Item To Be Inspected
Equipment Status
INDICATORS, GAUGES,
HORN AND LIGHTS
During
Inspect the indicators during normal
operation.
• The equipment is not
ready/available if the engine oil
pressure indicator, tension fail
indicator, low brake pressure
indicator, or hydraulic oil
temperature indicator
illuminates.
During
a. Indicators
Monitor recoil alert during normal
operations.
The equipment is not
ready/available if the recoil alert
sounds. Refer to “Operation
Section, Operating Techniques,
Bulldozing,” in this manual.
b. Gauges
During
Inspect all gauges for proper readings.
• The equipment is not
ready/available if any gauge is
not indicating normal operation.
Refer to “Operation Section,
Monitoring Systems and Cab
Features, Gauges,” in this
manual.
A–21
Change 1
TM5-2430-200-10
PREVENTIVE MAINTENANCE CHECKS AND SERVICES – DEUCE
Item
No.
Interval
Item To Be Inspected
16A
Equipment Status
FUEL TANK
NOTE: Refer to “Operation Section
Machine Features, Fuel Tank Fill Cap” in
this manual.
After
(1) Check for missing or damaged fuel
cap.
• The equipment is not
ready/available if the fuel cap is
missing or damaged.
After
(2) Check the fuel level and the fuel tank
for visible leaks. Fill the fuel tank if it is
low.
• The equipment is not
ready/available if any leaks are
found.
After
17
(3) Check the cleanliness of the fuel cap.
Clean the fuel cap if it is dirty.
UNDERCARRIAGE
NOTE: For illustrations of the lubrication
points, refer to “Maintenance Section,
Lubrication Chart,” and “Every 50 Service
Hours or Weekly, Undercarriage,” in this
manual.
a. Lubricate
Weekly
Lubricate the undercarriage grease
fittings. There are 28 fittings to be
lubricated at this interval.
• The equipment is not
ready/available if grease does
not flow out of the pin seals
when grease is added to the
joint.
Change 1
A–21.00
TM5-2430-200-10
PREVENTIVE MAINTENANCE CHECKS AND SERVICES – DEUCE
Item
No.
Interval
Item To Be Inspected
Equipment Status
b. Check Oil Level
Weekly
Check oil level in sight gauges on inside
midrollers and rear idlers.
• The equipment is not
ready/available if oil is not
visible in the sight gauge, or at
the required level.
A-21.01
Change 1
TM5-2430-200-10
PREVENTIVE MAINTENANCE CHECKS AND SERVICES—DEUCE
Item
No.
Interval
18
Item To Be Inspected
Equipment Status
BLADE
NOTE: For illustrations of the lubrication
points, refer to “Maintenance Section,
Lubrication Chart” and “Every 50 Service
Hours or Weekly, Blade” in this manual.
Weekly
Lubricate the blade grease fittings. There
are ten fittings.
• The equipment is not
ready/available if grease does
not flow out of the pin seals
when grease is added to the
joint.
19
PINTLE HOOK
NOTE: For illustrations of the lubrication
points, refer to “Lubrication Chart” and
“Maintenance Section, Every 50 Service
Hours or Weekly, Pintle Hook” in this
manual.
Weekly
20
Lubricate the pintle hook grease fittings.
There are three fittings.
WINCH
NOTE: For illustrations of the lubrication
points, refer to “Maintenance Section,
Lubrication Chart” and “Every 250 Service
Hours or 3 Months, Winch” in this manual.
Quarterly (1) Lubricate fairleads. There are four
fittings.
Quarterly (2) Lubricate the doubling block. There is
one fitting.
NOTE: The doubling block is normally
stored in the BII box.
A–22
TM5-2430-200-10
PREVENTIVE MAINTENANCE CHECKS AND SERVICES – DEUCE
Item
No.
Interval
Item To Be Inspected
Equipment Status
Quarterly (3) Check cable for fraying, kinking, and
signs of damage or rusting.
• The equipment is not
ready/available if the cable is
kinked or frayed. For additional
information about checking
cables, refer to “FM-5-125,
Rigging, Techniques,
Procedures, and Applications.”
Quarterly (4) Check the doubling block hook for
wear and damage.
• The equipment is not
ready/available if the hook is
worn, cracked, or bent beyond
10 degrees.
21
CAB
NOTE: For illustrations of the lubrication
points, refer to “Maintenance Section,
Lubrication Chart” and “Every 250 Service
Hours or 3 Months” in this manual.
Quarterly Lubricate the cab pin grease fittings.
There are a total of two fittings.
22
ENGINE COOLANT HEATER
Quarterly Operate the engine coolant heater if it is
installed on the machine.
• The equipment is not
ready/available if the engine
coolant heater does not
operate correctly, and
temperatures below –32°C
(–25°F) are expected.
A–23
Change 1
TM5-2430-200-10
PREVENTIVE MAINTENANCE CHECKS AND SERVICES – DEUCE
Item
No.
Interval
23
Item To Be Inspected
Equipment Status
AIR CONDITIONER UNIT
NOTE: Refer to Periodic Maintenance and
Special Operation , Deployable Universal
Combat Earthmover (DEUCE), Operations
Section, Machine Storage, Preparation of
Air Conditioner Unit for Seasonal Use.
Quarterly (1) Check operation of the air conditioner
compressor. Run compressor for a
minimum of 30 seconds.
24
CASTOR WHEEL ASSEMBLIES
Quarterly Lubricate fittings located on each castor
wheel assembly. Rotate each wheel
assembly and castor to check for free
movement.
• The equipment is not
ready/available if the machine is
required to be air transported
and a castor wheel assembly is
missing or the wheels or castor’s
stick, bind or do not turn freely.
Change 1
A–24
TM5-2430-200-10
APPENDIX B
Components of End Item (COEI)
GENERAL
This listing is for information purposes only, and is not authority to requisition replacements. These
items are part of the DEUCE. As part of the end item, these items must be with the end item
whenever it is issued or transferred between property accounts. Items of COEI are transferred
between property accounts. Items of COEI are removed and separately packaged for transportation
or shipment only when necessary. Illustrations are furnished to help you find and identify the items.
EXPLANATION OF COLUMNS
The following items are a description of the columns in the COEI table.
(1) Illust No. - This column gives the number of the item illustrated.
(2) National Stock Number - This column identifies the stock number of the item to be used
for requisitioning purposes.
(3) Description CAGEC and Part Number - This column identifies the Federal item name (in
all capital letters) followed by a minimum description when needed. The last line below the
description is the commercial and Government Entity Code (CAGEC) (in parenthesis) and
the part number.
(4) U/M - This column indicates how the item is issued for the National Stock Number shown in
column two.
(5) Qty Rqd - This column indicates the quantity required.
B-1
TM5-2430-200-10
COMPONENTS OF END ITEM
2
1
3
4
6
5
7
8
(1)
Illust
No.
(2)
National Stock
Number
1
3940-01-473-5761
2
2910-00-646-9727
3
4
5315-01-476-1388
4320-01-476-1389
5
2590-01-476-1392
6
7
8
Change 1
4720-01-476-1391
(3)
Description
CAGEC and Part Number
DOUBLER BLOCK, WINCH (PART NUMBER 146-2671,
CAGEC 11083)
CYLINDER ASSEMBLY, ETHER (PART NUMBER 7N-0296,
CAGEC 11083)
PIN, KNEELING LOCK (PART NUMBER 144-7887, CAGEC 11083)
HAND PUMP, HYDRAULIC (PART NUMBER 156-3436,
CAGEC 11083)
(FOR USE BY UNIT MAINTENANCE PERSONNEL ONLY)
LEVER ASSEMBLY, HAND PUMP (PART NUMBER 144-7890
CAGEC 11083)
LINES GROUP, GAUGE (PART NUMBER 162-8243
CAGEC 11083)
LINES GROUP, COUPLER (PART NUMBER 156-3437
CAGEC 11083)
HOSE ASSEMBLY (PART NUMBER 169-3173, CAGEC 11083)
B-2
(4) (5)
U/M Qty
Rqd
EA
1
EA
EA
1
2
EA
1
EA
1
EA
1
EA
EA
1
1
TM5-2430-200-10
APPENDIX C
Basic Issue Items (BII) List
GENERAL
These essential items are required to place the DEUCE in operation, to operate it, and to do
emergency repairs. Although shipped and packaged separately, BII must be with the DEUCE during
operation and when it is transferred between property accounts. This list is your authority to
request/requisition them for replacement, based on authorization of the end item by the TOE/MTOE.
Illustrations are furnished to help you find and identify the items.
EXPLANATION OF COLUMNS
The following items are a description of the columns in the BII table.
(1) Illust No. - This column gives the number of the item illustrated.
(2) National Stock Number - This column identifies the stock number of the item to be used
for requisitioning purposes.
(3) Description CAGEC and Part Number - This column identifies the Federal item name (in
all capital letters) followed by a minimum description when needed. The last line below the
description is the commercial and Government Entity Code (CAGEC) (in parenthesis) and
the part number.
(4) U/M - This column indicates how the item is issued for the National Stock Number shown in
column two.
(5) Qty Rqd - This column indicates the quantity required.
C-1
TM5-2430-200-10
BASIC ISSUE ITEMS (BII) LIST
1
3
2
TM5-2430-200-10
January 1999
Operator’s Manual
Deployable Universal Combat
Earthmover (DEUCE)
NSN: 2430-01-423-2819
PIN: 7RR00001-Up
Approved for public release; distribution is unlimited.
Headquarters, Department of the Army
4
(1)
Illust
No.
(2)
National Stock
Number
1
2
3
4
5
TM5-2430-200-10
2540-00-670-2459
7510-00-281-6180
5140-00-356-8471
9905-00-148-9546
Change 1
5
(3)
Description
CAGEC and Part Number
OPERATOR’S MANUAL
BAG, PAMPHLET (PART NUMBER 11676920, CAGEC 19207)
BINDER, 3-RING (PART NUMBER 0391M, CAGEC 88001)
BAG, TOOL, SATCHEL (PART NUMBER 7541507, CAGEC 19204)
WARNING TRIANGLE (PART NUMBER 11669000, CAGEC 19207)
C-2
(4) (5)
U/M Qty
Rqd
EA
EA
EA
EA
EA
1
1
1
1
1
TM5-2430-200-10
BASIC ISSUE ITEMS (BII) LIST
6
7
8
9
(1)
Illust
No.
(2)
National Stock
Number
(3)
Description
CAGEC and Part Number
6
5340-01-050-7059
7
4210-00-775-0127
8
9
4930-00-253-2478
4930-00-288-1511
PADLOCK SET, 5 KEYED ALIKE
(PART NUMBER AA59486-1AB05S2, CAGEC 58536)
EXTINGUISHER, FIRE (WITH BRACKET)
(PART NUMBER 7015266, CAGEC 19207)
GUN, GREASE (PART NUMBER 8F9866, CAGEC 11083)
ADAPTER, GREASE GUN, (PART NUMBER G6, CAGEC 0AYB6)
C-3
(4) (5)
U/M Qty
Rqd
SET
1
EA
EA
EA
1
1
1
Change 1
TM5-2430-200-10
BASIC ISSUE ITEMS (BII) LIST
10
13
(1)
Illust
No.
(2)
National Stock
Number
10
5120-00-449-8083
11
5120-00-227-7356
12
5120-00-234-8913
13
14
5120-00-223-7396
5110-00-541-6730
15
5340-01-504-3223
Change 1
12
11
14
15
(3)
Description
CAGEC and Part Number
ADJUSTABLE WRENCH, 10 INCH
(PART NUMBER 1B7536, CAGEC 11083)
SCREWDRIVER, FLAT TIP,
(PART NUMBER 88213, CAGEC 57068)
SCREWDRIVER, CROSS TIP,
(PART NUMBER 546-019-001, CAGEC 59211)
PLIERS, (PART NUMBER 276, CAGEC 93389)
CUTTER, CABLE, HAND OPERATED,
(PART NUMBER C-12, CAGEC 65196)
CASTER ASSEMBLY, (PART NUMBER MPCU1031,
CAGEC 1BEE8)
C-4
(4) (5)
U/M Qty
Rqd
EA
1
EA
1
EA
EA
1
1
EA
1
EA
2
TM5-2430-200-10
APPENDIX D
Additional Authorization List
GENERAL
This list identifies items that do not have to accompany the DEUCE and that do not have to be
turned in with it. These items are authorized to you by CTA, MTOE, TDA, or JTA.
EXPLANATION OF COLUMNS
The following items are a description of the columns in the AAL table.
(1) Item No. - This column gives the number of the item.
(2) National Stock Number - This column identifies the stock number of the item to be used
for requisitioning purposes.
(3) Description CAGEC and Part Number - This column identifies the Federal item name (in
all capital letters) followed by a minimum description when needed. The last line below the
description is the commercial and Government Entity Code (CAGEC) (in parenthesis) and
the part number.
(4) U/M - This column indicates how the item is issued for the National Stock Number shown in
column two.
(5) Qty Rqd - This column indicates the quantity required.
D-1
TM5-2430-200-10
ADDITIONAL AUTHORIZATION LIST
(1)
Item
No.
(2)
National Stock
Number
(3)
Description
CAGEC and Part Number
2910-01-486-9911
STARTING KIT—COLD WEATHER
(PART NUMBER 2104713 CAGEC 11083)
PART NUMBER INCLUDES ENGINE HEATER, BATTERY BOX,
COMPLETE WIRING AND ELECTRICAL HOOKUPS WITH
INSTRUCTION BUT DOES NOT INCLUDE BATTERIES.
BATTERY(PART NUMBER 1131CMF CAGEC 04055)
HOSE ASSY, HYDRAULIC (FROM SMALL EMPLACEMENT
EXCAVATOR (SEE)(PART NUMBER FF11093 CAGEC 01276))
SEE TOOL KIT:
PAVEMENT BREAKER (PART NUMBER BR6713016
CAGEC 54252)
BIT CHISEL, 3 IN (PART NUMBER A43014 CAGEC 06626)
BIT MOIL POINT (PART NUMBER 02336 CAGEC 54252)
CLAY SPADE (PART NUMBER 09262M CAGEC 54252)
HAMMER DRILL (PART NUMBER 4045110 CAGEC 54252)
BIT CARBIDE 3/4 IN (PART NUMBER 05172 CAGEC 54252)
BIT CARBIDE 1 IN (PART NUMBER 02281 CAGEC 54252)
BIT CARBIDE 2 IN (PART NUMBER 02283 CAGEC 54252)
CHAIN SAW (PART NUMBER CS0662001 CAGEC 54252)
IMPACT WRENCH 3/4 IN (PART NUMBER 1W1214005
CAGEC 54252)
FIRST AID KIT (PART NUMBER UA-6882 CAGEC 64616)
SHOVEL (PART NUMBER 11655784 CAGEC 19207)
LEATHER GLOVES (PART NUMBER 37G2938 CAGEC 90142)
6140-01-457-2424
4720--01-461-7076
3820-01-242-1440
3820-01-161-4753
3820-01-160-2901
3820-01-242-1210
5130-01-178-6338
5130-01-232-8047
5130-01-061-4115
3820-01-232-8048
3695-01-243-2325
5130-01-300-6052
6545-00-919-6650
5120-00-293-3336
8415-00-634-5021
Change 1
D-2
(4) (5)
U/M Qty
Rqd
EA
1
EA
1
EA
1
EA
EA
EA
EA
EA
EA
EA
EA
EA
1
1
1
1
1
1
1
1
1
EA
EA
EA
EA
1
1
1
1
E-1
TM5-2430-200-10
Appendix E
Unit Level Transportation Information
NOTE: This appendix is for information purposes only
and is not authorization for the U.S. Army Operator to
maintain additional tools on the machine.
g. Check fuel level. The level indicator should read one
half to three fourths of a tank. Refer to “Operation
Section, Monitoring Systems and Cab Features,
Indicators,” in this manual.
Machine Preparation for Low
Velocity Air Drop (LVAD)
NOTE: Park the machine on a flat, level surface to
remove the top half of the cab. If the machine is not
level, there is an increased chance of breaking a
window during the procedure.
Start By:
a. Check the undercarriage and belts for dirt and
excess debris.
1
2
b. Perform all “Before” and “Weekly” Preventive
Maintenance and Service (PMCS) checks. Refer to
“Operator Preventive Maintenance Checks and
Services-DEUCE,” in this manual.
c. Perform unit “Quarterly” PMCS checks. Refer to
“Unit Preventive Maintenance Checks and ServicesDEUCE.
d. Check the undercarriage balance. Refer to
“Maintenance Section, Maintenance Intervals, Every
10 Service Hours or Daily, Undercarriage, Check
Balance,” in this manual.
e. If more than one year has elapsed since the
machines accumulators were charged, or if there is
reason to suspect that the accumulators are not
properly charged, charge the accumulators. Refer to
Specifications Systems Operation, Testing and
Adjusting, Deployable Universal Combat Earthmover,
(DEUCE) Undercarriage, Steering and Brakes,
“Testing and Adjusting, Suspension System
Procedures, Accumulator Charging Procedure.”
NOTICE
Proper charging of the suspension system
accumulators is critical to a successful Low Velocity
Air Drop (LVAD). The nitrogen gas in the accumulators
provides the cushion necessary to prevent damage to
the suspension system. Failure to properly charge the
accumulators will result in significant damage to the
machine during landing.
4
3
1. Remove clamp (4) and muffler extension (2).
2. Remove clamp (3), and precleaner hood (1).
5
3. Store the muffler extension, precleaner assembly
and the associated hardware in BII compartment
(5).
f. Check the suspension hydraulic pressure. Refer to
Specifications Systems Operation, Testing and
Adjusting, Deployable Universal Combat Earthmover,
Undercarriage, Steering and Brakes, “Testing and
Adjusting, Suspension System Procedures,
Suspension Charging Procedure.”
Change 1
E-1.00 (E-1.01 Blank)
Appendix E
Unit Level Transportation Information
TM5-2430-200-10
6
6
Second Main Disconnect Switch for Optional Arctic Starting
System.
4. Move both main disconnect switches (6), if
equipped, into the OFF position.
7
5. Remove four bolts (7) and tread the plate.
Change 1
E-2
Appendix E
Unit Level Transportation Information
TM5-2430-200-10
8
9
14
6. Remove four bolts (9) with washers, and rifle
bracket (8).
9. Remove four bolts (14) with the washers from the
left front corner of the cab.
15
10
11
7. Remove one nut (10) with the washers, and
disconnect ground cable (11) from the ground stud.
12
10. Remove four bolts (15) with the washers from the
right front corner of the cab.
16
13
8. Loosen one screw (13), and disconnect
connecter (12).
NOTE: Screw (13) is located in the center of
connector (12).
Change 1
11. Remove four bolts (16) with the washers from the
right rear corner of the cab.
TM5-2430-200-10
E-3
Appendix E
Unit Level Transportation Information
17
20
12. Remove four bolts (17) with the washers from the
left rear corner of the cab.
21
22
18
13. Detach the insulation cover on the back of the cab
at seam (18).
19
14. Lift the cab vertically for approximately
25 mm (1 in) to allow the mounting pads in the
upper cab to clear guide pins (20) at the rear of
the cab platform. Once the cab has cleared the
guide pins, slowly move the cab forward until it
has cleared accelerator pedal (22), and then
remove it.
NOTE: Pay close attention when lifting the cab away
from the platform. Make sure that the cab does not
damage accelerator pedal (22), instrument console
(21), or the back of the operator’s seat.
13. Attach a hoist to upper cab (19). The weight of the
upper cab is approximately 431 kg (950 lb).
! WARNING
Improper lifting can allow the load to shift and
cause injury or damage.
E-4
Appendix E
Unit Level Transportation Information
TM5-2430-200-10
17
23
15. Verify that suspension manual lockout valve (23,
on both sides of the machine) are turned fully
clockwise to the OPEN position.
17. Install four bolts (17) with the washers in the left
rear corner of the cab. Tighten the bolts to a
torque of 460 ± 60 N•m (340 ± 45 lb ft).
NOTE: Rig the DEUCE in accordance with FM 10-521
and TO 13C7-6-21
16
NOTE: The following procedure is for reconfiguring
the machine after it has been air dropped.
NOTE: Before the cab is replaced, the integrity of the
seals between the cab and the platform should be
checked. Replace the seals if necessary. Reseal any
areas that may leak with 4C9613 RTV SiliconeClear.
20
18. Install four bolts (16) with the washers in the right
rear corner of the cab. Tighten the bolts to a
torque of 460 ± 60 N•m (340 ± 45 lb ft).
15
16. Lower the cab on guide pins (20) at the rear of the
cab platform.
NOTE: Pay close attention when lowering the cab
onto the platform. Make sure that the cab does not
damage accelerator pedal (22), instrument console
(21), or the back of the operator’s seat.
Change 1
19. Install four bolts (15) with the washers in the right
front corner of the cab. Tighten the bolts to a
torque of 460 ± 60 N•m (340 ± 45 lb ft).
TM5-2430-200-10
E-5
Appendix E
Unit Level Transportation Information
7
14
20. Install four bolts (14) with the washers in the left
front corner of the cab. Tighten the bolts to a
torque of 460 ± 60 N•m (340 ± 45 lb ft).
23. Install four bolts (7) with the washers, and the
tread plate.
12
18
13
21. Connect connector (12), and tighten screw (13) to
a torque of 0.9 N•m (8 lb in).
8
9
22. Install four bolts (10) with the washers, and rifle
bracket (9).
24. Attach the insulation cover on the back of the cab
at seam (18).
E-6
Appendix E
Unit Level Transportation Information
TM5-2430-200-10
1
2
6
3
4
27. Install precleaner hood (1) with clamp (3).
28. Install muffler extension (2) with clamp (4). Make
sure to install muffler extension (2) with the rain
cap hinge facing towards the front of the machine,
as shown.
6
Second Main Disconnect Switch for Optional Arctic Starting
System.
25. Move both main disconnect switches (6), if
equipped, into the ON position.
5
26. Retrieve the muffler extension, precleaner
assembly and the associated hardware in BII
compartment (5).
Change 1
TM5-2430-200-10
E-7
Appendix E
Unit Level Transportation Information
Preparation for Special Shipping Width
The machine should be prepared for special shipping
width when it is necessary to reduce the width of the
machine to 2591 mm (102 in).
6
4
NOTE: The following procedure is for reducing the
shipping width of the machine by collapsing the blade.
There may be other steps required to fully prepare the
machine for shipping. Refer to “Operation Section,
Transportation Information” in the Operator’s Manual.
1. Drive the machine onto the transport vehicle, park
the machine in position for shipping, and apply the
parking brake.
NOTE: It is possible to perform this procedure while
the machine is not on the transport trailer, and then
drive the machine onto the transport trailer after the
blade has been collapsed. However, care must be
taken not to operate the blade angle function while the
blade is collapsed, to avoid damaging the angle
cylinders.
2. Angle the blade fully in the desired direction, and
put the blade in position 25 mm (1.0 in) off the deck
of the transport vehicle.
NOTE: The blade must be off the deck of the
transport machine to allow manual positioning of the
blade after the angle cylinders are disconnected.
3. Stop the engine. Refer to “Operation Section,
Machine Parking, Engine Stopping,” in the
Operator’s Manual.
2
4
5
7
5. Slide angle cylinders (4) and (5) with the spacers out
of single tree (7). Collect the spacers, and place
them in a location where they will not get lost
during transport.
6. Rotate blade (6) by hand until the blade stops
against the singletree.
7. Slowly move the blade control lever into the down
position to allow the blade to rest on the transport
vehicle deck.
NOTE: It is not necessary to start the machine to
lower the blade. The blade will lower under its own
weight when the blade control valve is moved into
LOWER. If the start switch is in the ON position, the
machine must be in EARTHMOVING mode to lower
the blade.
8. Secure the blade in the fully angled position to
ensure that it does not move during transport.
9. Secure angle cylinders (4) and (5) to keep the rod
eyes from moving during transport. Make sure that
the chrome portion of the cylinders will not come
into contact with any hard surfaces during
transport.
3
1
5
4. Remove bolt (2), pin retainer (3), and pin (1) from
retracted angle cylinder (4) and extended angle
cylinder (5). Put the pins, bolts and retainers in a
location where they will not be lost during transport.
NOTE: It may be necessary to drive pin (1) in the right
angle cylinder down in order to remove the pin.
NOTICE
Do not wrap metal chains or other metallic retainers
around the chrome portion of the angle cylinders.
Damage to the chrome surfaces will cause the
cylinders to leak and allow dirt into the hydraulic
system.
10. Cover the exposed chrome portion of the cylinders
in a suitable material to protect the chrome from
damage during shipment.
E-8
Appendix E
Unit Level Transportation Information
TM5-2430-200-10
NOTE: The following steps are for returning the blade
to normal service after the blade has been prepared
for special shipping width.
2
1
11. Remove all of the tie-down fasteners and
protective coverings from the blade and the angle
cylinders.
12. Start the engine. Refer to “Operation Section,
Engine Starting” in the Operator’s Manual.
4
3
9
13. Raise the blade until it is approximately 25 mm (1
in) above the transport vehicle deck.
2
18. Put rod eye (9) of retracted angle cylinder (4) into
position in singletree (7).
7
1
5
8
3
19. Operate the blade angle function to extend or
retract the rod eye of retracted angle cylinder (4)
until the rod eye is aligned with the hole for the pin
in singletree (7).
20. Install one spacer above and below the rod eye to
remove the vertical gap between the rod eye and
the singletree.
21. Install pin (1), retainer (3) and bolt (2).
14. Move rod eye (8), of extended angle cylinder (5)
into position in singletree (7). Rotate the blade by
hand to achieve correct alignment between the
holes in the singletree and the hole in the rod eye.
15. Install one spacer above and below the rod eye to
remove the vertical gap between the rod eye and
the singletree.
16. Install pin (1), retainer (3), and bolt (2).
17. Lower the blade to the ground, and apply slight
downward pressure to the blade to keep it from
rotating.
NOTE: The machine must be in EARTHMOVING
mode to lower the blade when the start switch is in
the ON position.
22. The blade is now ready for normal operation.
NOTE: Be sure grease the angle cylinder pins before
using the machine to do work.
F-1
TM5-2430-200-10
Appendix F
PLGR Instructions
NOTE: For additional information about the PLGR, refer
to TM 11-5825-291-13, Operations and Maintenance
Manual, Satellite Signals Navigation Sets AN/PSN-11 and
AN/PSN-11(V)1.
5
NOTE: This appendix is not authorization for the operator
to maintain additional tools or perform maintenance
tasks.
1. Move the main disconnect switch to the OFF position.
Refer to “Operation Section, Maintenance Features,
Main Disconnect Switch.”
1
2
6. Use four 10-24 (16 mm [0.625 in] long) screws with
two washers and one 10-24 nut per screw to install
PLGR mount (5) to the mounting bracket on the right
console.
6
2. Remove plug (2) from the hole in the cab near antenna
mounting bracket (1).
3. Install the nonmetallic grommet in hole (2).
3
4
7
1
8
4. Use one 10-32 screw with a washer to install antenna
(3) on antenna mounting bracket (1).
NOTE: The screw is installed through the bottom of
mounting bracket (1).
5. From inside the cab, feed antenna wire (4) through the
hole, and connect the end of the wire to antenna (3).
NOTE: Inside the cab, feed the end of antenna wire (4),
which attaches to the navigation set, through the straps
along the upper right side and down the right side of the
cab. Use wire ties to secure the wire to the straps.
7. Connect end (8) of the power cord to power strip (6),
and end (7) to the navigation set.
NOTE: Power strip (6) is 24 volts. Route the power cable
through the same straps as the antenna cable. Secure
any excess power cable and antenna wire with wire ties.
TM5-2430-200-10
PLGR BILL OF MATERIAL
1
2
3
4
(1)
Illust
No.
(2)
National Stock
Number
1
2
5985-01-375-4660
6150-01-375-8661
3
6150-01-375-8662
4
5
-
5825-01-374-6643
5975-01-375-1302
5305-00-576-7521
-
5305-00-043-6733
-
5310-00-934-9758
5310-00-014-5850
-
5325-00-291-9366
5975-00-111-3208
5
(3)
Description
ANTENNA, REMOTE AS-4333/V
CABLE ASSEMBLY, POWER (AN/PSN-11
EXTERNAL POWER CABLE
CABLE ASSEMBLY, SPECIAL (AS/PSN-11 TO REMOTE
ANTENNA CABLE
NAVIGATION SET, SATELLITE SIGNALS (AN/PSN-11[V]1)
MOUNT
10-32X3/8 SLOTTED PAN HEAD MACHINE SCREW
(PART NUMBER MS35224-61)
10-24X5/8 SLOTTED PAN HEAD MACHINE SCREW
(PART NUMBER MS35225-64)
10-24 NUT (PART NUMBER MS35649-202)
WASHER, HOLE ID 0.214 TO 0.227 IN
(PART NUMBER MS27183-42)
GROMMET, NONMETALLIC (PART NUMBER MS35489-11)
STRAP, TIE DOWN, ELECTRICAL COMPONENTS
(PART NUMBER MS3357-5-9)
F-2
(4) (5)
U/M Qty
Rqd
EA
1
EA
1
EA
EA
EA
1
1
1
EA
1
EA
EA
4
4
EA
EA
9
1
EA
10
9920209
DISTRIBUTION: To be distributed in accordance with the initial distribution
requirements for IDN: 256552, TM 5-2430-200-10
RECOMMENDED CHANGES TO PUBLICATIONS
AND BLANK FORMS
For use of this form, see AR 25-30; the proponent agency is ODISC4.
Use Part II (reverse) for Repair Parts and
Special Tool Lists (RPSTL) and Supply
Catalogs/Supply Manuals (SC/SM).
TO: (Forward to proponent of publication or form) (Include ZIP Code)
FROM: (Activity and location) (Include ZIP Code)
AMSTA-LC-LMPP / TECH PUBS, TACOM-RI
1 Rock Island Arsenal
Rock Island, IL 61299-7630
Your mailing address
DATE
Date you filled out
this form.
PART I – ALL PUBLICATIONS (EXCEPT RPSTL AND SC/SM) AND BLANK FORMS
Title
PUBLICATION/FORM NUMBER
DATE
TM 5-2430-200-10
ITEM
NO.
PAGE
NO.
PARAGRAPH
01 Mar 0`
LINE
NO. *
TYPED NAME, GRADE OR TITLE
Your Name
DA FORM 2028, FEB 74
FIGURE TABLE
NO.
NO.
Deployable Universal Combat, Earthmover
(DEUCE)
RECOMMENDED CHANGES AND REASON
(Provide exact wording of recommended changes, if possible).
*Reference to line numbers within the paragraph or subparagraph.
TELEPHONE EXCHANGE/AUTOVON, PLUS EXTENSION
Signature
Your Signature
REPLACES DA FORM 2028, 1 DEC 68, WHICH WILL BE USED.
USAPPC V3.00
TO: (Forward direct to addressee listed in publication)
FROM: (Activity and location) (Include ZIP Code)
AMSTA-LC-LMPP / TECH PUBS, TACOM-RI
1 Rock Island Arsenal
Rock Island, IL 61299-7630
Your address
PUBLICATION NUMBER
PART II – REPAIR PARTS AND SPECIAL TOOL LISTS AND SUPPLY CATALOGS/SUPPLY MANUALS
TITLE Deployable Universal
DATE
TM 5-2430-200-10
PAGE
NO.
COLM
NO.
LINE
NO.
DATE
Date you filled out this
form
01 Mar 01
NATIONAL STOCK REFERENCE FIGURE ITEM
NO.
NO.
NO.
NUMBER
Combat Earthmover (DEUCE)
TOTAL NO.
OF MAJOR
ITEMS
SUPPORTED
RECOMMENDED ACTION
SAMPLE
PART III – REMARKS
(Any general remarks or recommendations, or suggestions for improvement of publications and blank
forms. Additional blank sheets may be used if more space is needed.)
TYPED NAME, GRADE OR TITLE
Your Name
TELEPHONE EXCHANGE/AUTOVON, PLUS EXTENSION
SIGNATURE
Your Signature
USAPPC V3.00
RECOMMENDED CHANGES TO PUBLICATIONS
AND BLANK FORMS
Use Part II (reverse) for Repair Parts and
Special Tool Lists (RPSTL) and Supply
Catalogs/Supply Manuals (SC/SM).
For use of this form, see AR 25-30; the proponent agency is ODISC4.
TO: (Forward to proponent of publication or form)(Include ZIP Code)
DATE
FROM: (Activity and location) (Include ZIP Code)
AMSTA-LC-LMPP / TECH PUBS, TACOM-RI
1 Rock Island Arsenal
Rock Island, IL 61299-7630
PART I – ALL PUBLICATIONS (EXCEPT RPSTL AND SC/SM) AND BLANK FORMS
PUBLICATION/FORM NUMBER
DATE
TM 5-2430-200-10
ITEM
NO.
PAGE
NO.
PARAGRAPH
TITLE Deployable Universal Combat
01 Mar 01
LINE
NO. *
FIGURE TABLE
NO.
NO.
Earthmover (LDEUCE)
RECOMMENDED CHANGES AND REASON
(Provide exact wording of recommended changes, if possible).
*Reference to line numbers within the paragraph or subparagraph.
TYPED NAME, GRADE OR TITLE
DA FORM 2028, FEB 74
TELEPHONE EXCHANGE/AUTOVON, PLUS
EXTENSION
SIGNATURE
REPLACES DA FORM 2028, 1 DEC 68, WHICH WILL BE USED.
USAPPC V3.00
TO: (Forward direct to addressee listed in publication)
DATE
FROM: (Activity and location) (Include ZIP Code)
AMSTA-LC-LMPP / TECH PUBS, TACOM-RI
1 Rock Island Arsenal
Rock Island, IL 61299-7630
PUBLICATION NUMBER
PART II – REPAIR PARTS AND SPECIAL TOOL LISTS AND SUPPLY CATALOGS/SUPPLY MANUALS
TITLE Deployable Universal Combat
DATE
TM 5-2430-200-10
PAGE
NO.
COLM
NO.
LINE
NO.
01 Mar 01
NATIONAL STOCK REFERENCE FIGURE
NO.
NO.
NUMBER
PART III – REMARKS
TYPED NAME, GRADE OR TITLE
ITEM
NO.
Earthmover (DEUCE)
TOTAL NO.
OF MAJOR
ITEMS
SUPPORTED
RECOMMENDED ACTION
(Any general remarks or recommendations, or suggestions for improvement of publications and blank
forms. Additional blank sheets may be used if more space is needed.)
TELEPHONE EXCHANGE/AUTOVON, PLUS EXTENSION
SIGNATURE
USAPPC V3.00
RECOMMENDED CHANGES TO PUBLICATIONS
AND BLANK FORMS
For use of this form, see AR 25-30; the proponent agency is ODISC4.
Use Part II (reverse) for Repair Parts and
Special Tool Lists (RPSTL) and Supply
Catalogs/Supply Manuals (SC/SM).
DATE
TO: (Forward to proponent of publication or form) (Include ZIP Code) FROM: (Activity and location) (Include ZIP Code)
AMSTA-LC-LMPP / TECH PUBS, TACOM-RI
1 Rock Island Arsenal
Rock Island, IL 61299-7630
PUBLICATION/FORM NUMBER
TM 5-2430-200-10
ITEM
NO.
PAGE
NO.
PARAGRAPH
LINE
NO. *
DATE
01 Mar 01
FIGURE
NO.
TABLE
NO.
TITLE
Deployable Universal Combat
Earthmover (DEUCE)
RECOMMENDED CHANGES AND REASON
(Provide exact wording of recommended changes, if possible).
*Reference to line numbers within the paragraph or subparagraph.
TYPED NAME, GRADE OR TITLE
DA FORM 2028, FEB 74
TELEPHONE EXCHANGE/AUTOVON, PLUS
EXTENSION
SIGNATURE
REPLACES DA FORM 2028, 1 DEC 68, WHICH WILL BE USED.
USAPPC V3.00
TO: (Forward direct to addressee listed in publication)
FROM: (Activity and location) (Include ZIP Code)
DATE
AMSTA-LC-LMPP / TECH PUBS, TACOM-RI
1 Rock Island Arsenal
Rock Island, IL 61299-7630
PUBLICATION NUMBER
PART II – REPAIR PARTS AND SPECIAL TOOL LISTS AND SUPPLY CATALOGS/SUPPLY MANUALS
TITLE Deployable Universal Combat
DATE
TM 5-2430-200-10
PAGE
NO.
COLM
NO.
LINE
NO.
PART III – REMARKS
TYPED NAME, GRADE OR TITLE
01 Mar 01
NATIONAL STOCK REFERENCE FIGURE
NO.
NO.
NUMBER
ITEM
NO.
Eathmover (DEUCE)
TOTAL NO.
OF MAJOR
ITEMS
SUPPORTED
RECOMMENDED ACTION
(Any general remarks or recommendations, or suggestions for improvement of publications and blank
forms. Additional blank sheets may be used if more space is needed.)
TELEPHONE EXCHANGE/AUTOVON, PLUS EXTENSION
SIGNATURE
USAPPC V3.00
THE METRIC SYSTEM AND EQUIVALENTS
LINEAR MEASURE
SQUARE MEASURE
1 Centimeter = 10 Millimeters = 0.01 Meters = 0.3937 Inches
1 Meter = 100 Centimeters = 1000 Millimeters = 39.37 Inches
1 Kilometer = 1000 Meters = 0.621 Miles
1 Sq Centimeter = 100 Sq Millimeters = 0.155 Sq Inches
1 Sq Meter = 10,000 Sq Centimeters = 10.76 Sq Feet
1 Sq Kilometer = 1,000,000 Sq Meters = 0.386 Sq Miles
WEIGHTS
CUBIC MEASURE
1 Gram = 0.001 Kilograms = 1000 Milligrams = 0.035 Ounces
1 Kilogram = 1000 Grams = 2.2 Lb
1 Metric Ton = 1000 Kilograms = 1 Megagram = 1.1 Short Tons
1 Cu Centimeter = 1000 Cu Millimeters = 0.06 Cu Inches
1 Cu Meter = 1,000,000 Cu Centimeters = 35.31 Cu Feet
LIQUID MEASURE
TEMPERATURE
1 Milliliter = 0.001 Liters = 0.0338 Fluid Ounces
1 Liter = 1000 Milliliters = 33.82 Fluid Ounces
5/9 (oF -- 32) = oC
212o Fahrenheit is equivalent to 100o Celsius
90o Fahrenheit is equivalent to 32.2o Celsius
32o Fahrenheit is equivalent to 0o Celsius
9/5 Co + 32) = Fo
APPROXIMATE CONVERSION FACTORS
TO CHANGE
TO
Inches . . . . . . . . . . . . . . . . . . . . . . . . .
Feet . . . . . . . . . . . . . . . . . . . . . . . . . . .
Yards . . . . . . . . . . . . . . . . . . . . . . . . .
Miles . . . . . . . . . . . . . . . . . . . . . . . . . .
Square Inches . . . . . . . . . . . . . . . . . .
Square Feet . . . . . . . . . . . . . . . . . . . .
Square Yards . . . . . . . . . . . . . . . . . . .
Square Miles . . . . . . . . . . . . . . . . . . .
Acres . . . . . . . . . . . . . . . . . . . . . . . . .
Cubic Feet . . . . . . . . . . . . . . . . . . . . .
Cubic Yards . . . . . . . . . . . . . . . . . . . .
Fluid Ounces . . . . . . . . . . . . . . . . . . .
Pints . . . . . . . . . . . . . . . . . . . . . . . . . .
Quarts . . . . . . . . . . . . . . . . . . . . . . . . .
Gallons . . . . . . . . . . . . . . . . . . . . . . . .
Ounces . . . . . . . . . . . . . . . . . . . . . . . .
Pounds . . . . . . . . . . . . . . . . . . . . . . . .
Short Tons . . . . . . . . . . . . . . . . . . . . .
Pound--Feet . . . . . . . . . . . . . . . . . . . .
Pounds per Square Inch . . . . . . . . .
Miles per Gallon . . . . . . . . . . . . . . . .
Miles per Hour . . . . . . . . . . . . . . . . . .
Centimeters . . . . . . . . . . . . . 2.540
Meters . . . . . . . . . . . . . . . . . 0.305
Meters . . . . . . . . . . . . . . . . . 0.914
Kilometers . . . . . . . . . . . . . . 1.609
Square Centimeters . . . . . . 6.451
Square Meters . . . . . . . . . . 0.093
Square Meters . . . . . . . . . . 0.836
Square Kilometers . . . . . . . 2.590
Square Hectometers . . . . . 0.405
Cubic Meters . . . . . . . . . . . . 0.028
Cubic Meters . . . . . . . . . . . . 0.765
Milliliters . . . . . . . . . . . . . . . 29.573
Liters . . . . . . . . . . . . . . . . . . 0.473
Liters . . . . . . . . . . . . . . . . . . 0.946
Liters . . . . . . . . . . . . . . . . . . 3.785
Grams . . . . . . . . . . . . . . . . 28.349
Kilograms . . . . . . . . . . . . . . 0.454
Metric Tons . . . . . . . . . . . . . 0.907
Newton--Meters . . . . . . . . . 1.356
Kilopascals . . . . . . . . . . . . . 6.895
Kilometers per Liter . . . . . . 0.425
Kilometers per Hour . . . . . . 1.609
MULTIPLY BY
TO CHANGE
TO
Centimeters . . . . . . . . . . . . . . . . . . . .
Meters . . . . . . . . . . . . . . . . . . . . . . . .
Meters . . . . . . . . . . . . . . . . . . . . . . . .
Kilometers . . . . . . . . . . . . . . . . . . . . .
Square Centimeters . . . . . . . . . . . . .
Square Meters . . . . . . . . . . . . . . . . . .
Square Meters . . . . . . . . . . . . . . . . . .
Square Kilometers . . . . . . . . . . . . . .
Square Hectometers . . . . . . . . . . . .
Cubic Meters . . . . . . . . . . . . . . . . . . .
Cubic Meters . . . . . . . . . . . . . . . . . . .
Milliliters . . . . . . . . . . . . . . . . . . . . . . .
Liters . . . . . . . . . . . . . . . . . . . . . . . . . .
Liters . . . . . . . . . . . . . . . . . . . . . . . . . .
Liters . . . . . . . . . . . . . . . . . . . . . . . . . .
Grams . . . . . . . . . . . . . . . . . . . . . . . . .
Kilograms . . . . . . . . . . . . . . . . . . . . . .
Metric Tons . . . . . . . . . . . . . . . . . . . .
Newton--Meters . . . . . . . . . . . . . . . . .
Kilopascals . . . . . . . . . . . . . . . . . . . .
Kilometers per Liter . . . . . . . . . . . . .
Kilometers per Hour . . . . . . . . . . . . .
Inches . . . . . . . . . . . . . . . . . 0.394
Feet . . . . . . . . . . . . . . . . . . . 3.280
Yards . . . . . . . . . . . . . . . . . . 1.094
Miles . . . . . . . . . . . . . . . . . . . 0.621
Square Inches . . . . . . . . . . 0.155
Square Feet . . . . . . . . . . . 10.764
Square Yards . . . . . . . . . . . 1.196
Square Miles . . . . . . . . . . . . 0.386
Acres . . . . . . . . . . . . . . . . . . 2.471
Cubic Feet . . . . . . . . . . . . . 35.315
Cubic Yards . . . . . . . . . . . . . 1.308
Fluid Ounces . . . . . . . . . . . . 0.034
Pints . . . . . . . . . . . . . . . . . . . 2.113
Quarts . . . . . . . . . . . . . . . . . 1.057
Gallons . . . . . . . . . . . . . . . . . 0.264
Ounces . . . . . . . . . . . . . . . . 0.035
Pounds . . . . . . . . . . . . . . . . . 2.205
Short Tons . . . . . . . . . . . . . . 1.102
Pound--Feet . . . . . . . . . . . . 0.738
Pounds per Square Inch . . 0.145
Miles per Gallon . . . . . . . . . 2.354
Miles per Hour . . . . . . . . . . 0.621
MULTIPLY BY
PIN: 077426-000
This fine document...
Was brought to you by me:
Liberated Manuals -- free army and government manuals
Why do I do it? I am tired of sleazy CD-ROM sellers, who take publicly
available information, slap “watermarks” and other junk on it, and sell it.
Those masters of search engine manipulation make sure that their sites that
sell free information, come up first in search engines. They did not create it...
They did not even scan it... Why should they get your money? Why are not
letting you give those free manuals to your friends?
I am setting this document FREE. This document was made by the US
Government and is NOT protected by Copyright. Feel free to share,
republish, sell and so on.
I am not asking you for donations, fees or handouts. If you can, please
provide a link to liberatedmanuals.com, so that free manuals come up first in
search engines:
<A HREF=http://www.liberatedmanuals.com/>Free Military and Government Manuals</A>
– Sincerely
Igor Chudov
http://igor.chudov.com/