1
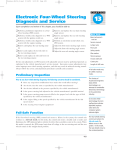
AlterKtion™
Installation manual and information booklet
CAUTION! PLEASE READ THIS ENTIRE BOOKLET
BEFORE PROCEEDING WITH INSTALLATION
Assembling the Components --------------------------------------------------------------------2
Preparing your car for the installation--------------------------------------------------------8
Installing the AlterKtion system---------------------------------------------------------------10
Installation tips and notes-----------------------------------------------------------------------17
Alignment and Explanations -------------------------------------------------------------------19
Disclaimer
Reilly MotorSports, Inc. cannot control how this product is installed or used. By purchasing this product,
the buyer/end user assumes all risks associated with its use and agrees to having the proper skills for it's
installation. Reilly MotorSports Inc. and its suppliers will not be held responsible, liable or accountable for
any injury, damage, loss, penalties, or fines that occur from using this product in any manner.
1
Getting to know your new suspension
Shown above is the basic suspension kit, with the sway bar and wedge motor
mount options. Actual parts may vary from picture.
Please heed the following warnings for your own protection.
Machined threads are much more sensitive than regular nuts and bolts ALWAYS use anti-seize compound on any machined threads, such as the tierod adjusters, balljoints, and shock threads.
2
The first step is to organize the sub-assemblies.
Start with the shocks. First slide the locking ring
on and screw it all the way down to the bottom,
then do the same with the adjuster, with the
raised shoulder facing up.
Next install the spring bearings if you opted to
get them - first a "washer", then the bearing,
then the second "washer". These allow the
spring adjusters to turn freely, even with the
spring loaded.
Next, slide the spring on and insert the upper seat.
Turn the lower adjuster up to bring it all together and
you're done. As a rule of thumb, you should preload
the spring 1.5" before installing them - this should get
you close to the proper ride height, or at least a good
starting point. Note - turning the spring seat does
NOT increase the spring rate - it merely adjusts ride
height of the car.
Find the four shock mounting bolts, and set them aside with the shocks.
3
Next locate all the steering parts as seen below. The power steering unit has similar parts.
Place a small amount of lube on the rack bushings and install them from each side.
Rack Mounting Bushing
Rack Mounting Bolt
4
Install the bolts from the back, so the nut will be
inside the mounting bracket on the K-frame.
Next locate the tie rod ends. The ends are preassembled to make things easier, and only need
to be threaded onto the ends of the rack tie rods.
First screw the jam nuts onto the rack ends, then
the adjusters.
You'll also find in the same bag, the steering shaft and u-joints. For now, just put them
aside with the assembled rack.
5
Next locate the lower pivot shaft
components. You'll notice there's an extra
bolt - this is for a reason, which we'll cover
later.
Slide the 3/4" end caps onto the shaft with the
recess facing out. Then put the 3/8" end caps on
the ends with the bolts - these caps will capture the
lower a-arm bushings when installed, preventing
them from hammering out over time.
Assembled pivot shafts. The
extra bolt and set screws will
be covered during the install.
A few final items are the
shock tower backing plates,
two plates and four bolts, and
the ends for the upper a-arms.
Both of these are simple
assemblies and are covered
further during the install.
6
Options such as engine mounts and the sway bar are self-contained packages and will be
covered later.
With all the sub-assemblies complete, everything makes much better sense, and will be
quite a bit easier to install.
7
Preparing your car for the installation
1.
It is unsafe to support engine/transmission assembly by a temporary means while
doing this work. Engine/trans should be removed prior to removing the OEM
suspension assembly unless motor plates, or elephant ear style mounts are used.
2.
Support car using jack-stands. Place the stands BEHIND the front wheels, under
the frame rails. You must have safe, unrestricted access to the entire K-frame
assembly from the front and sides.
3.
Remove wheels and tires. Completely back off torsion bar adjusting bolts to
remove all tension. Remove the torsion bar retaining rings from the back of the
transmission cross member. Remove torsion bars.
4.
Remove rubber brake hoses and temporarily cap steel lines at frame (vacuum caps
work well).
5.
Remove upper shock attaching nut. Loosen and remove upper control arm
eccentric bolts.
6.
Disassemble coupling block on steering column.
7.
If you have the equipment to handle this much weight, firmly support the K-frame
assembly and remove the 4 K-frame bolts from the frame. Lower the entire OEM
system to the ground and discard. If weight is a problem, see step 8.
8.
Remove the outer tie rod ends and lower control arm attaching nuts. Remove each
spindle/arm assembly separately, followed by the steering box/linkage assembly.
Finally, support the bare K-frame and remove the attaching bolts. Lower the frame to
the ground.
9.
The only items you need to save are the upper control arm eccentric bolts, the 4
K-frame attaching bolts, and the pressed-in dowel pin in the steering column.
8
10.
Using an electric drill with a ½” spot weld cutter, or ½” drill bit, drill out the 6
spot-welds holding the lower bumpstop bracket to the frame. Remove this bracket
and discard. On 62-72 A-body models, this is
all that’s necessary. On all other models, the
upper bumpstop bracket must also be
removed. A grinder or cut-off wheel can be
used to grind most of the poor quality welds
away. A simple twist with pliers is usually
all that’s needed to pull the bracket from the
frame rail. This picture shows a 73-up abody - both brackets must be removed. The
picture in step 11 is a pre-72 A-body - notice the upper bumpstop bracket clears the
tower in these models.
11. At this point, the frame rails should be cleaned up. Trial-fit the AlterKtion frame,
bolting it to the rails. Tighten all 4 bolts
to be sure it fits correctly. Shock towers
should slide up outside of frame rails. It’s
ok if the fit is slightly tight or loose, as
the two attaching bolts will anchor the
towers solidly to the frame rails to ensure
a tight, secure assembly. Remove the
AlterKtion frame and do any remaining
cleanup on your stock frame rails.
12.
13.
All bare steel AlterKtion components should now be painted/powder coated for
corrosion protection.
You are now ready to begin installing your system.
9
Installing the AlterKtion System
1.
2.
Slide the AlterKtion frame into place. The shape is awkward and we recommend
you have a buddy help raise the frame
into position. Install your old K-frame
bolts. The frame is designed for the
OEM style bolts with the over-sized
¾” shoulder. These bolts may be a
tight fit, and they will pull the frame
into perfect alignment with the car.
On the shock towers, you’ll notice each tower has 2 - 3/8” holes. Using a 3/8” bit,
drill these holes through the frame rails and install the supplied backing plates using
the supplied 3/8” bolts. The backing plates are pre-drilled to the same spacing as the
shock tower holes. It’s difficult to hold a
drill perfectly straight to get through the
interior side of the rails at the correct
spacing. It’s recommended you drill one
hole straight through, install the bolt and
backing plate, and then drill the interior
side of the second hole from the engine
compartment. Once installed, firmly
tighten the bolts. Be careful to only
tighten the bolts until the frame and shock
tower are tightly together. Tightening too
much can excessively crush the factory
frame rail. The purpose of these bolts is
to firmly hold the tower against the
frame. No two cars are the same, and a
means was needed to make up for
irregularities in factory frame rails. In
use, the forces on the shock tower hold it
against the frame rail, they do not pull it
away, so it's merely an added security,
not a structural necessity.
10
3.
Install the lower a-arms onto the frame using the supplied hardware. Both lower
arms are identical. There is no right or left, unless you have the sway bar option - in
that case, the sway bar brackets are on
the front leg of the arm. The balljoint
must point up. Place the 3/4” ID end caps
on the inside bushing and slide the arm
into place on the pivot tubes on the frame.
The pivot shaft can be installed from
either direction. Be sure to coat the shaft
with anti-seize compound before
installing. An extra fastener is supplied, and should be installed loosely in one end of
the shaft during assembly so the shaft is not damaged from hammering. With the
shaft greased, they install quite easily. Once in place, remove the hammered fastener
and use the 2 new
ones to secure the
3/8" ID endcaps.
Tighten the
fasteners to
25lbs/ft. Thread
locker should be
used to prevent
backing out. Next,
install the set-screw into the pivot tube and tighten to 25lbs/ft. It's good idea to use
thread locker on the set screw.
Finally, grease the ends. GREASE UNTIL THE HANDLE STOPS - YOU'RE ONLY
FILLING THE VOID INSIDE THE BUSHING END. Periodically check to be sure
the void is full - bushing life is drastically increased if the end is always full of grease. To
remove the shaft if needed, hammer it out using a long pin. The best pin is a 3/8"X24
threaded rod that will screw into the end of the shaft, locked with a jam nut. This will
prevent damaging the threads or the end of the shaft.
11
4.
Install the assembled coil-over shock with the supplied ½” bolts.
5. Next install the spindles onto the lower a-arms. Steering arm must point forward.
Install washer and retaining nut. Tighten to 100ft-lbs.
6.
Installing the tubular uppers works best by first installing it loose on the spindle to
hold it in place while you fit the hardware into the frame rails. A good starting point
for the rod ends is about 3 turns out.
12
7.
Swing the arm into place and install the OEM eccentric bolts along with the
supplied spacers. The longer spacers go towards the front, smaller spacers towards the
rear, so the pivots are offset slightly towards the rear of the brackets. Also note - on
all A-body models, some clearancing is required on the forward mount as shown.
13
8. Next, install the rack and pinion
assembly on the rear side of the
cross-member. Use a washer on each
side of the rack bushings – do not put
a washer behind the nut.
9. Next, attach the tie rod ends to the spindles. The nut should be on top of the steering
arm, the bolt inserted from the bottom-up.
10. Slide one U-joint onto the steering input shaft and center the rack in its travel by
hand. At this point, check your steering
column for excessive play in the end. If your
steering shaft is sloppy, see page 18
concerning other steps to take. The set-screw
on the rack should seat in the notch between
the two sets of splines on the input shaft.
Tighten set-screw temporarily. Remove the
press-fit pin from your factory column. Slide
the pre-drilled, smoothbore u-joint onto the
shaft. Do not re-install the pin yet. The supplied DD shaft is shipped extra long to
allow for power/manual columns and chassis differences, so some trimming will be
done before you secure everything.
14
11. With the column u-joint lined up with the hole, measure between the two joints. The
steering shaft protrudes into each u-joint 7/8“.
Add 1 ¾” to your measurement and cut the
supplied shaft to length. Trial fit the shaft and
joints to be sure of a proper fit. Be sure the
steering shaft does not protrude passed the
socket and into the universal joint area. This
may cause interference and binding. Although
not necessary, it's easiest to remove the steering
column from the car to re-install the pin - it's a
very tight fit and using a bench vice is much
easier than hammering it while in the car. Shown
below is the factory coupler alongside the new
u-joint, with the solid pin from the end of the steering shaft. Also shown is the new ujoint installed on the OEM column.
12. Reinstall the column loose and attach the
new steering shaft and rack u-joint to the
end. Have a buddy line up the u-joint with
the rack while you slide the column into
place - taking care to ensure the steering
wheel is straight. The end result is a cleanlooking, and extremely strong steering
assembly. A cosmetic note - the u-joints
have long set screws and jam nuts - it's much
nicer, and sometimes helps with clearance, if
you trash the long set screws and get short
ones that recess into the u-joint. Just use a
little thread locker on them. Most fastener
supply houses, like Fastenal, can get them in
any size you like.
15
That's it for the basic install. See the following below for additional info on some of the
options and other tips to make life easier.
Motor Mount Note
Although the engine mounts are a straight-forward bolt-on, some big blocks have
abnormally large bosses on the driver side, making it necessary to do a slight
clearance grind for the mount.
If you have this problem, grind the BLOCK, NOT THE MOUNT.
16
Sway Bar Installation
The sway bar is also a straight-forward install, with only a few comments to make.
The bar can be installed above or below the control arms by flipping it over. However
It is very close to the coil-over when installed on top of the arm, so it’s best to place it
underneath, as shown in the pictures.
17
Steering Column Notes
In step 10 of the install, we mentioned steering column play. Pre-67 Mopars, 71-up Bbodies, aand 70-74 E-bodies did not have a support bearing in the bottom of the steering
column, and on many other cars, the OEM plastic bearing has simply fallen apart with
age. We go over this during your order placement, so you may already have our Delrin
support bushing. It gets installed in the end of the column as shown, preferably with red
thread-locker - it's nicer than drilling screws
into the sides. It's also a good idea to shorten
the outer housing of the column, so that only
the steering shaft protrudes down into the
engine compartment. This provides A LOT
more clearance for the #7 header tube, and is
a highly recommended modification while
your car is apart. First, mark the housing
near the firewall with the column in your
car. Then simply take the column apart as
per a service manual, cut the outer housing
on your mark and re-assemble the column.
Obviously, column shift internals must be removed if you do this. If you have our support
bushing to install, that's all that's required. If you have the factory bearing, you need to
grind a notch to match the tab on the side of the bearing. Back in place, the housing is
now out of the way, gaining you an additional 3/4" for header tubes.
18
Alignment Tips
HERE ARE A FEW GENERAL ALIGNMENT TIPS TO GET YOU STARTED,
HOWEVER IT WOULD BENEFIT YOU GREATLY TO READ THE
FOLLOWING PAGES ON ALIGNMENT TO GAIN AN UNDERSTANDING
OF HOW THE FRONT WHEELS AFFECT YOUR CAR.
Strip - Caster Dial in 6 degrees positive for the most stability.
(more than this works fine, but causes a lot of vibration).
Camber should be zero on both wheels.
Toe-in should be 1/16" total.
Street -Caster Manual steering – 3-degrees positive. Power steering – 6 degrees
positive. Remember, there are no vibration reducers in this system like OEM cars
have, so steering wheel feedback is quite sensitive to caster settings when manual
steering is used. The following pages provide insight as to the affects of using too
much caster.
Camber 1/4 degree neg on left, 1/2 degree neg on right. This offsets the tendency
of your car to follow gravity and drift off of the road. Slightly better street
handling can be had by using 1/2 negative on the left and 3/4 negative on the
right, however accelerated tire wear may result on the inside edges. More than 1/2
degree difference from left to right sides and the car will drift or pull the opposite
way.
Toe-in should be 1/16" total.
19
Camber
Camber is the inward or outward tilt of the spindle in relation to the ground.
Camber in theory, should always be zero to keep the largest possible tire surface
area contacting the ground. Due to the fact that the vehicle leans in corners, it's physically
impossible. Using other than a zero camber setting can benefit some types of cars. If a
tire leans, it has a slight steering affect. On a street car that spends it's time on crowned
public roads, a little negative static camber on the right tire will offset the vehicle's
tendency to follow gravity and drift off of the road. In a road course car where cornering
ability is most important, negative camber settings can be used to keep the outside tire
flat with the road when the vehicle is leaning. Care should be taken when using static
negative camber, since the wheels will no longer be flat on the road when the vehicle is
going straight. Severe tire wear on the inside edge can happen in short order, and straight
line braking can suffer due to less tire contact.
20
Caster
Caster is the forward or backward tilt of the spindle in relation to the ground. It also
deserves a bit of explanation in regards to stability.
Negative caster is typically unstable, and should be avoided, as it provides no
performance benefits. The only benefit at all is a very low steering effort, but at the cost
of stability. Positive caster has a stabilizing effect. When positive caster is used, the tire's
contact area with the road is actually behind the lower ball joint. If the ball joints where
directly in line with the tire, this would have an effect similar to a car pulling a trailer.
Since the weight on the tire is outside of the ball joints, both tires would pivot outward
until they hit their stops. Since the wheels are connected with the steering linkage, these
forces will cancel each other out when both wheels are straight. The greater the caster
(within limits), the more force there is holding the wheels straight. The down side of this,
to be simple, is comparable to pushing a flat screwdriver at the same angle on a surface.
Positive caster doesn’t “catch” anything like the screwdriver, but it instead resists upward
motion. Roads are not smooth, and a lot of the shock and vibration is transmitted through
the suspension and steering system to the drivers hands. Also, a lot of positive caster
causes excessive camber change as the wheel is turned which can cause tire wear and
scrubbing on the edges.
These problems can start to show themselves with more than a few degrees of
caster. Overall, the caster angle should be determined by what you intend to do with the
car. Stability only, as in a strip car, would call for as much caster as possible, as the
negative effects wouldn’t be a problem. A performance street car would be concerned
with long term tire wear and driver comfort, so caster should be limited somewhat, with
an emphasis on driver comfort as a gauge.
21
Toe – In
Both wheels should be parallel in a perfect world. However, bushing and chassis
flex can cause the wheels to toe outward in many instances. Toe-out typically causes the
car to wander, or dart around unexpectedly. Excessive toe-in increases rolling resistance
and causes tire scuffing on the edges. Toe-in is another adjustment best kept to a
minimum. The toe-in setting is used mostly to prevent the wheels from toeing out under
any situation. Wheel assemblies with bushings tend to flex inward in operation while the
steering remains rigid, since it doesn’t use bushings in its linkage. So, rear steer
suspensions (with the steering behind the control arms) tend to toe-in more in operation,
while front steer suspensions tend to toe-out in operation. How much depends on the size,
type, and number of bushings, as well as the tire diameter, the severity of the use and the
overall weight of the vehicle. In general, front steer systems should use more toe-in than
rear steer, however other factors come into play. Aftermarket suspensions are typically
designed with strong components and a minimum of bushings to prevent unwanted
movement, so the toe setting is sometimes even less than most OEM cars, regardless of
design.
22
Limitations
As with any performance product, there are some compromises to achieve bolt-on status.
In the case of this system, wheel backspacing is limited, depending on tire size.
The following numbers allow approx. 1/4" of clearance between the rim and tie rod end...
14" rim - 3.25" backspace maximum
15" rim - 3.25" backspace maximum
17" rim – 5.75" backspace maximum
18"+ rim – 6”+ backspace
Note - a 17" rim clears the tie rod end entirely, however with more than 5.75"
backspacing, the rim may hit the tie rod at full lock in either direction. If wider 17" rims
are needed, an adjustable stop may be welded to the lower a-arm to limit turning radius.
These figures are based on suspension clearance only.
There’s no guarantee that a wider 17" rim, or the tires, will clear the frame rails or other
parts of the car. Large wheels and tires typically require clearancing in other areas as
well, and it is the owner’s responsibility to determine the requirements of his/her
particular situation.
As always, we're always happy to help or answer any questions you might have.
Disclaimer
Reilly MotorSports, Inc. cannot control how this product is installed or used. By purchasing this product,
the buyer/end user assumes all risks associated with its use and agrees to having the proper skills for it's
installation. Reilly MotorSports Inc. and its suppliers will not be held responsible, liable or accountable for
any injury, damage, loss, penalties, or fines that occur from using this product in any manner.
23