1
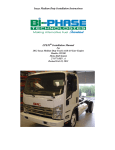
LPEFI Installation Manual For 2008-2009 GM Medium Duty Trucks with 8.1 Liter Engine Models: C5500 Mono-Rail System First Edition January 2008 Manual # M4-120-08 Bi-Phase Technologies, LLC Eagan, Minnesota, U.S.A. 2 Bi-Phase Technologies, LLC Introduction This instruction booklet shows how to convert a gasoline vehicle to run on clean burning propane utilizing our LPEFI (Liquid Propane Electronic Fuel Injection) system. The system is vehicle specific and installing a system on any vehicle that the kit was not designed for will void the warranty and may also violate emission laws. Anyone who installs or repairs the LPEFI system must be trained and certified. This must also include training in the safe handling and characteristics of propane. Bi-Phase Technologies provides such training upon request. Some states may require a license to work on propane vehicles. Consult your state or local authorities or your state propane gas association. Bi-Phase Technologies, LLC is not responsible for your oversight to comply with federal, state or local laws regulating the installation or repair of propane gas systems. The LPEFI system is a sequential multi-port fuel injection system that injects propane in a liquid state to the engine. It works much the same way as a modern sequential multi-port gasoline fuel injection system and can be diagnosed with the same diagnostic scanners used for gasoline vehicles. The LPEFI system is covered by U.S. and International patents. The LPEFI system is also certified to the United States E.P.A. standards. The information in this manual is believed to be accurate as of its date of publication, but it is subject to change. Up-to-date information and changes, if any, can be requested from Bi-Phase Technologies. In the event of any safety-related changes Bi-Phase Technologies will notify all customers who returned the warranty registration card for the affected vehicles. For more information contact: Bi-Phase Technologies, LLC 2945 Lone Oak Drive, Suite 150 Eagan, MN 55121 (651) 681-4450 Tech. Support line (888) 465-0571 3 Bi-Phase Technologies, LLC Table of Contents Introduction………………………………………….. Table of Contents……………………………………. Notes……………………………………………….... Propane Safety……………………………………….. Facts about Propane & Propane Powered Vehicles…. Approximate Properties of LP Gases………………... Pre-Installation Inspection…………………………... 2 3 4 5-6 7 8 9 Instructions Remove air filter box Remove engine compartment cover Remove oil filler tube Modify oil filler tube Remove gasoline system LPEFI System Prepare LPEFI fuel rails Install LPEFI system Fuel rails Spark plugs Main wire harness Gauge Tank Primary hose & crossover 10 10 10 11 12-13 Secondary Tank/Transfer System…………………. Completing Wire Harness Installation…………..… Protective Heat Shield…………………………..…. Installing Labels…….……………………..…….… Testing the Installation…………………….…….… Purge Logic…………………….………………..… Tank Control Box Wiring…………………………. Post-Installation Inspection………………………... 26-30 30 31 32 33-34 35 35 36 Bi-Phase Technologies, LLC 14 15 15 16-18 19 20-21 21-25 4 Notes Bi-Phase Technologies, LLC 5 Propane Safety This is a safety alert symbol. It is used through out this manual to alert you to potential hazards. Whenever you see this symbol, you should read and obey the safety warnings that follow. Failure to obey these warnings could result in serious personal injury or property damage. Please read some of the Specific Warnings below before proceeding with the installation or repair of any propane system Warning: Always unplug the LPEFI control box or disconnect the battery before you work on any part of the LPEFI system. The LPEFI tank contains an electronic control box. Any time the driver door is opened, the LPEFI system could go into a purge mode, pumping liquid propane through the hoses and injectors. To prevent a sudden release of cold liquid propane, disconnect the power from the control box before you loosen any hose fittings. Failure to do this could cause personal injury and fire hazard. Warning: Never loosen fittings or vent any propane unless you are wearing insulated PVC rubber gloves. Escaping liquid propane can cause frostbite and severe freeze burns. Propane is stored as a liquid. When you release liquid propane, it tries to evaporate as quickly as it can, by absorbing heat from its surroundings. Everything it touches gets chilled to –44 degrees F (-42 deg. C). If liquid propane sprays on your fingers, it will freeze them-right down to the bone. Anyone who works with liquid propane must wear insulated PVC rubber gloves. Danger: Do not remove any valves, bulkheads or fittings from a propane tank unless the tank has been properly drained (evacuated) completely. The pressure inside a propane tank can push a loosened bulkhead or valve out with enough force to cause injury. Release of propane in an uncontrolled situation will create a flammable/explosive mixture of air and propane, which could cause serious injury, death and property damage. Propane is stored under pressure. When you remove a valve or bulkhead from the tank, all of the pressure is released at once, in a violent rush. Always drain the tank before you work on it. Failure to do this will result in damage to the tank or valves and can result in severe injury or death. You should drain the tank using a flare stack in an approved safe manner. Your propane supplier can help you with this. (Cont’d) Bi-Phase Technologies, LLC 6 Propane Safety (cont’d) Danger: Do not vent or release propane indoors or near sewers, pits or low lying areas. Propane can accumulate in low spots, creating a fire hazard. Propane can also displace oxygen, creating a suffocation hazard. Propane is heavier than air. It can fill low, sheltered areas with flammable vapors. If these vapors are ignited, they can create a fire or explosion, causing severe property damage, injury or death. Never release propane near sewers, pits or indoors. Warning: Keep all sources of ignition away from propane vehicles while the fuel system is being serviced. Even if the tank and fuel lines are empty, there may still be flammable vapors near the vehicle. Do not allow smoking, sparks, flames, running vehicles or other sources of ignition near the vented propane. Failure to do this could result in fire or explosion, causing severe property damage, injury or death. Warning: Do not disconnect any propane hoses unless they have been properly drained completely. Propane in the hoses is kept under pressure, even when the engine is off. When you disconnect a hose, the internal pressure is released all at once. Always drain the fuel lines before you disconnect them. Failure to do this can result in damage to the hose fitting and possible injury. WARNING: NO SMOKING OR OPEN FLAMES IN OR AROUND PROPANE VEHICLES DURING FUELING OR SERVICING. 7 Bi-Phase Technologies, LLC Facts about Propane & Propane Powered Vehicles Propane gas is the most widely used alternative fuel, with nearly 4 million vehicles worldwide running on propane. More than 350,000 vehicles run on propane in the U.S., according to the U.S. Department of Energy’s Alternative Fuels Data Center. Propane powered vehicles offer the best combination of durability, performance and driving range. The first propane powered vehicle ran in 1913. Bi-Phase Technologies’ LPEFI (Liquid Propane Electronic Fuel Injection) system has surpassed other technologies today by introducing liquid fuel injection. This technology improves power, efficiency and operating characteristics. For more information call for our General Information and Training Manual. Safety comes first is a motto you should always live by. Without knowledge of a product it is hard to follow this motto. In our manuals we try to stress the need for knowledge and provide warning signs to alert you. It is your responsibility to know the law. NFPA, National Fire Protection Association, has manuals to help you understand safe handling of many products. We recommend that you obtain and read their NFPA #58, Standard for the Storage and Handling of Liquefied Petroleum Gases. To further enhance the industry’s safety and service, a number of training programs and efforts have been implemented throughout the country. The National Propane Gas Association has developed a Certified Employee Training Program (CETP), which provides service personnel with a complete technical training curriculum. We encourage you to contact your state propane gas association or the National Propane Gas Association for more information on how you can benefit from such programs. Visit www.propanesafety.com for more information. 8 Bi-Phase Technologies, LLC Approximate Properties of LP Gases (Commercial Propane) Specific gravity of liquid (water = 1) at 60 degrees F. 0.504 Initial boiling point at 14.7 psia, degrees F. - 44.0 Weight in lbs per gallon of liquid at 60 degrees F 4.24 Specific heat of liquid, BTU/lb. at 60 degrees F. 0.630 Cubic ft. of vapor per gallon at 60 degrees F. 36.38 Cubic ft. of vapor per pound at 60 degrees F. 8.66 Specific gravity of vapor (air = 1) at 60 degrees F. 1.50 Ignition temperature in air, degrees F. 920 to 1120 Maximum flame temperature in air, degrees F. 3,595 Limits of flammability in air Percent of vapor in air/gas mixture a) Lower b) Upper 2.15 9.60 Heating values a) BTU per cubic foot b) BTU per pound c) BTU per gallon 2,488 21,548 91,500 Chemical formula C3H8 Vapor pressure in psig a) 70 degrees F b) 100 degrees F c) 105 degrees F 127 196 210 9 Bi-Phase Technologies, LLC Pre-Installation Inspection (Recommended) If your ’08-09 vehicle is equipped with a single gasoline fuel tank, and you will be installing a single propane fuel tank follow the procedure in this manual. If your ’08-09 vehicle is equipped with dual gasoline fuel tanks, and you will be installing dual propane fuel tanks follow the procedure in this manual. If your ’08-09 vehicle is equipped with a single gasoline fuel tank, and you will be installing dual propane fuel tanks, contact Bi-Phase Technologies before installation. If your ’08-09 vehicle is equipped with dual gasoline fuel tanks, and you will be installing a single propane fuel tank, contact Bi-Phase Technologies before installation. If the vehicle is new and has less than 1,500 miles we recommend the following: Visually inspect the vehicle Is the malfunction indicator lamp illuminated? Does the engine start and run smooth? Are there any fluid leaks? Install a diagnostic scan tool and verify there are no DTCs (Diagnostic Trouble Codes) stored in the computer memory If the vehicle is used and has more than 10,000 miles we recommend in addition to the above: Note: Remove and examine the spark plugs and conduct a compression test During diagnostic scan mode document the following from the scan tool data stream: Short term fuel trim, bank 1 & 2 Long term fuel trim, bank 1 & 2 IAC (idle air control %) Oxygen sensor activity Proceed with the LPEFI system installation if all conditions are acceptable. If any problems are discovered it is not recommended to install the LPEFI system until the problems are repaired. After the installation is complete refer to the Post-Installation Inspection found on page 37 in this manual. 10 Installation Manual, GM Medium Duty Trucks, 2008-09 Remove air filter box: Disconnect the battery Disconnect mass air flow sensor Loosen clamp where the hose from the throttle body connects to the plastic tube from the air filter box Remove one nut and one bolt 13 mm #2 Screwdriver Remove air filter box assembly from engine compartment Remove in-cab engine compartment cover: Release four latches to remove from the cabin Remove oil filler tube: Remove three bolts; one at top behind the oil filler cap & two on the intake manifold Remove the oil filler tube assembly and retain for modifications Note: Place a rag in the hole to prevent dirt, particles or other objects from entering the engine. Remove four bolts holding the wiring harness brackets to the manifold, this will give flexibility of the harness for the following steps 13 mm 10 mm 11 Installation Manual, GM Medium Duty Trucks, 2008-09 Modification & relocation of oil filler tube assembly for all models: Cut the metal tube about 2-3/4” from the bracket where it mounts into the engine, or at the first notch from that 90-degree bend Clean & smooth out the sharp edges after cutting Cut the original bracket from the oil filler tube, the bracket closest to the oil filler cap Grind any sharp edges and touch up with black paint Install the clamp, provided in the kit to the oil filler tube (as shown in photo at left) Reassemble the oil filler assembly with rubber hose Remove the nut on the upper right corner, engine side of the electrical distribution box, located on passenger side of engine compartment Install the filler tube here and tighten; the electrical harness may require repositioning to make room for the filler cap access Reinstall the oil filler tube section into the engine Hacksaw Hacksaw Black spray paint 7/16” wrench Socket & ratchet 13 mm wrench Use the original hose, cut to proper length and install between the filler tube mounted on the engine and the oil fill cap end of tube; use the original hose clamps Note: Position the hose clamp at the engine forward or horizontal. If left in the upward position the clamp may interfere with the reinstallation of the fuel injector rail. Razor knife or hose cutting pliers Pliers 12 Installation Manual, GM Medium Duty Trucks, 2008-09 Remove gasoline fuel rails, fuel line, tank & evaporative emission system (if the vehicle is equipped with the EVAP components): Disconnect map sensor connector on top rear of intake manifold for wiring harness flexibility Disconnect injector wiring harness connector Remove fuel pressure regulator vacuum hose and install vacuum cap (supplied in kit) at the manifold vacuum port Remove four (6 mm) mounting studs and nuts holding the gasoline fuel rails to the intake manifold 10 mm socket & ¼” drive ratchet Place drain pan under driver side of bell housing to catch any gasoline spilled while disconnecting the fuel lines Using a 3/8” QD tool, disconnect the supply fuel line; use a 5/16” QD tool to disconnect the return fuel lines from the rail assembly Note: Gasoline residue could drain out of the lines and rails when you disconnect. __________________________________________ 3/8” QD tool 5/16” QD tool Caution: Gasoline under pressure. Gasoline is flammable & toxic. Use extreme caution and eliminate all sources of ignition while handling. Wear gloves & goggles. __________________________________________ If equipped with EVAP Cut or disconnect the plastic clamps holding the evaporative emission line to the fuel rail and disconnect the line from the canister purge solenoid If necessary, install a vacuum cap (not supplied in kit) to the canister purge solenoid (Cont’d) Pliers 13 Installation Manual, GM Medium Duty Trucks, 2008-09 Remove gasoline fuel rails, fuel line, tank & evaporative emission system – if the vehicle is equipped with the EVAP components (cont’d): Remove the gasoline fuel rails from the engine with harness attached, through the back of the engine compartment inside cab Remove injector wiring harness for use on the LPEFI injectors ________________________________________ Caution: Gasoline under pressure. Gasoline is flammable & toxic. Use extreme caution and eliminate all sources of ignition while handling. Wear gloves & goggles. ________________________________________ Disconnect electrical connector, hoses and remove temporary gasoline tank from frame rail Note: These procedures may change if the vehicle was originally equipped with the larger permanent gasoline tank. This could also affect other procedures in this manual. Call Bi-Phase for information about this. Remove all fuel lines and evaporative emission line from frame rail Drain all gasoline from the lines and discard in the proper environmental manner 15/16” socket & ratchet with same size wrench 3/8” QD tool 14 Installation Manual, GM Medium Duty Trucks, 2008-09 Prepare the LPEFI fuel rails for installation: Remove the new fuel rails from the package; retain the envelope with the rails Note: The envelope contains decals, owner information card and a warranty registration card. The warranty registration card, along with the Post-Installation Inspection form on page 37, must be filled in and returned to Bi-Phase Technologies for warranty to be valid. Label placement is described on page 33. The bushings and hold down clamps are not mounted on the rails and will need to be installed prior to installation on the engine Place both rails on the bench as shown in the photo at left 1. Injector tubes turned to the inside 2. Injector electrical connector positioned to face toward the rail 3. The rails must be positioned on the bench with the QD inlet fittings to the rear as they will be installed on the engine 4. Installing the bushings and clamps Driver side Install bushings & clamps in the forward most slots on the rail with the clamps positioned flat side down Passenger side Install bushings & clamps in the rear most mounting slots on the rail with the clamps positioned flat side down 15 Installation Manual, GM Medium Duty Trucks, 2008-09 Install LPEFI system Fuel Rails: Lubricate the lower o-rings (green) on each injector and place each rail on the engine with the QD hose inlet connector facing toward the rear of the engine Clean motor oil Note: The injector electrical connectors should be facing outward to allow clearance between injector & intake plenum. The electrical connector could interfere with the installation of the rail or the installation of the rail could damage the injector if not pre-positioned outward as shown in photos on page 14. Using the original 6 mm studs and nuts taken from the gasoline rail mounting bracket secure the LPEFI injector rails to the intake manifold; tighten to a torque of 12 NM (106 inlb) Install original gasoline injector wiring harness and connect each injector connector to the proper cylinder Reconnect the large harness connector as disconnected earlier 10 mm wrench or socket & ratchet Note: When disconnecting or connecting injector connectors be careful and pull green locking tab up to disconnect and push in on connector (squeeze) to disconnect. After reconnecting push green locking tab down to lock connector. Be careful not to break this plastic tab and locking piece. Note: If the vehicle is equipped with air brakes, a kit containing a pipe nipple, tee & instruction is available from Bi-Phase. This kit will be required to install the additional LPEFI engine coolant temperature sensor. Call Bi-Phase to order this kit for air brake equipped vehicles. New Spark Plugs: Replace the spark plugs with NGK #TR6 plugs. They should be set to the correct gap, which is 0.035” (0.89mm) Installation Manual, GM Medium Duty Trucks, 2005 (Cont’d) 5/8” spark plug socket 16 Installation Manual, GM Medium Duty Trucks, 2008-09 Install LPEFI system Main wire harness: Warning: Disconnect the battery before you work on any part of the LPEFI system. Note: Route the main LPEFI harness before completing any connections. Lay out the main harness with the orange lead with ring terminal toward the front of the truck Guide the main LPEFI wiring harness (to door switch) branch, under the cab and along the drive side frame Pull grommet from the firewall, located on driver side upper firewall Cut the nipple from the grommet and push the grommet over the single loomed white wire (to door switch) Push the wire and grommet up through the fire wall and seat the grommet into the hole Route the main LPEFI harness (to power distribution box) branch, across the cross member to the passenger side frame rail to the power distribution box Route the main LPEFI harness (to existing GM wire harness) branch, along the driver side frame rail, to the OEM harness connection (original fuel pump harness) Route the remaining main LPEFI harness along the driver side frame rail to the rear of the main tank. (Cont’d) Cutters 17 Installation Manual, GM Medium Duty Trucks, 2008-09 Install LPEFI system Main wire harness (cont’d): Warning: Disconnect the battery before you work on any part of the LPEFI system. Note: Before securing any of the harness makes sure it is routed to meet the length requirement to make each connection. Main LPEFI harness (to existing GM wire harness) branch There are four wires to connect together with the OEM original fuel pump/fuel level sending unit harness Route the LPEFI harness (to existing GM wire harness) along the inside frame to the OEM harness. If the harness is too long trim it to fit. Cut off the OEM connector. Note: The original connector will not be used. Strip a ½” of insulation from each wire. It is recommended that these four wires be soldered and heat shrunk for a good connection Make the following connections LPEFI harness to OEM harness Purple…..to……14 g. Purple Black……to……14 g. Black Orange… to……18 g. Black Pink……..to…………. Gray Leave the main trunk of the LPEFI harness loose along the inside chassis frame rail to permit routing in the engine compartment Review the previous routing of the LPEFI harness forward to the engine compartment; it should be routed inside the driver side chassis frame rail Main LPEFI harness (to door switch) branch, it is a white 16-gauge wire Inside the cab find the white 16-gauge wire previously routed through the grommet; pull it in to take up any slack; route it to the left driver side kick panel (Cont’d) 60/40 rosin core solder Solder flux Heat shrink tubing Soldering iron Wire strippers Heat gun Nylon tie straps 18 Installation Manual, GM Medium Duty Trucks, 2008-09 Install LPEFI system Main wire harness (cont’d): Warning: Disconnect the battery before you work on any part of the LPEFI system. Remove the driver side kick panel and locate the body connector Connect the white 16-gauge wire from the LPEFI harness to the violet wire (see 1st photo); it is recommend to solder and heat shrink this wire Tie strap the harness as needed and re-install the kick panel Inside the engine compartment make sure the harness is routed up from the chassis frame rail with an OEM harness; secure with nylon tie straps and confirm there is no interference with exhaust or any other components that could cause a problem Nylon tie straps Pliers Scotch lock ½” wrench or socket & ratchet Main LPEFI harness (to power distribution box) branch, is an orange wire with an in-line fuse and eyelet connector on the end Route it across the top of the engine with the OEM harness and secure with nylon tie straps Remove the small cover that protects a +12 volt terminal at the power distribution box located on the passenger side of the engine compartment Attach the orange wire to this terminal Replace the terminal cover Install the four bolts holding the OEM wiring harness brackets to the intake manifold (removed earlier) and make sure the map sensor is connected Replace the air filter box & connect the mass air flow sensor Completely secure main LPEFI harness with ties; ties should be placed about 12” apart 10 mm & 13 mm socket & ¼” drive ratchet #2 screwdriver 19 Installation Manual, GM Medium Duty Trucks, 2008-09 Install LPEFI system Gauge: Warning: Disconnect the battery before you work on any part of the LPEFI system. Phillips screwdriver Wire connector tool or equivalent Magnet Install fuel level sending unit on the primary tank Note: Use the 250-40 ohm resistance fuel level gauge sending unit supplied in the kit. When installing a fuel level gauge sending unit always reset the sender to zero using a small magnet; after installed on the tank the sending unit’s needle should register zero or empty unless there is fuel in the tank Note: When the secondary tank is used, the fuel level sending units have a different resistance value. Secondary tank sending unit has a 40-250 ohm resistance value. Main LPEFI harness (to sending unit) branch, it is a black two pin connector Connect the main LPEFI harness (to sending unit) branch to the fuel level gauge; route inside the frame and use nylon wire ties to secure Note: Always be aware of routing. Do not route near the exhaust and always use split loom to prevent chaffing. Prepare to install the LPEFI protecting cover with the 3/8” bolts provided; at this time leave the bolts loose and do not connect the main LPEFI harness (to purge box, relay and LPDM, to the electronic control box and relay Installation Manual, GM Medium Duty Trucks, 2006 9/16” wrench or socket & ratchet 20 Installation Manual, GM Medium Duty Trucks, 2008-09 Install LPEFI system Tank: Primary tank is installed on the driver side Use a prepared template or measure the tank to mark the holes to be drilled in the frame; the front tank support mounting holes are located 9 ¼” from the most rear portion of the cab; measure rear mounting hole appropriate with the rear tank mounting bracket Use an 11/16” drill bit to drill mounting holes; use the 5/8” bolts, washers & nuts provided in the kit to mount tank Raise the tank into place and install the bolts, two bolts per support; tighten all the mounting bolts until the Belleville washers are flat or torque to about 52 ft-lb or 70 Nm Note: Due to the OEM placement of the exhaust system a tank heat shield may be required. Fill hose installation Note: This can be done before the tank is installed if you choose to prepare the tank for installation. Install the remote fill valve on the vertical bracket that is welded to the tank just behind the cab (Cont’d) 11/16 drill bit and drill 15/16” wrench, socket & ratchet or impact 21 Installation Manual, GM Medium Duty Trucks, 2008-09 Installing LPEFI system Tank (cont’d): If dual tank setups refer to page 27 before completing next step. Preassemble fill hoses to fill filter 25” fill hose – Install 90-degree hose end fitting to inlet side fill filter; tighten with 90-degree end point down (Torque to 44-48 ft-lb.) 39” fill hose – Install 90-degree hose end fitting to outlet side of the filter; tighten with 90degree end point up (Torque to 44-48 ft-lb.) Place fill filter mounting clamp onto fill filter and mount entire assembly to step bracket with ¼” bolt, washer and nut; mounting hole is located 8” from the frame on the bracket; tighten parallel with bracket Connect the other end of the 25” fill hose to the fill valve and tighten (Torque to 29-31 ft-lb.) Route the other end of the 39” hose across the tank toward the rear of the tank; clock the stop fill valve elbow to 90-degrees to the front of the tank; stop fill valve is located appox. 26” from the rear of the cab Warning: Stop fill valve elbows are never tightened at the tank manufacturer. The fill valve is tight but the elbow must be tightened and clocked to the proper position. Do not allow the valve itself to move while tightening the elbow. Connect the straight end of the 39” hose to the stop fill valve and tighten (Torque to 25-39 ftlb.) Install a rubber coated clamp around the two hoses and secure it at the ¼” hole on the tank (located across from tank mounting bracket) Primary hose: Route the primary fuel line with flare end fitting toward the front of the engine 1) The hose will route from the LPDM, under the frame, and follow along the inside frame rail (Cont’d) 1 ¼” wrench 7/8” wrench 3/4” wrench 7/16” wrench, socket & ratchet 10” or 12” crescent wrench 22 Installation Manual, GM Medium Duty Trucks, 2008-09 Install LPEFI System Primary hose (cont’d): 2) Turn the hose toward the transmission bell housing, it will run over the left side of the bell housing, then over the left engine rocker cover and under the main harness 3) Continue to route the hose, and loop back towards the left injector rail behind the AC compressor Attach primary fuel hose to injector rail See photos on the left Pull out about 2-1/2 inches of the white inner hose out of the primary fuel line Lubricate inner line with clean motor oil Carefully guide the inner line into the center of the rail and feel for the line to engage the internal o-ring (see picture on left); 2” of inner line must be inserted into the rail to make a proper connection Pull the outer hose onto the fitting on the end of the rail, tighten the flare nut (torque for -10 SAE 45 degree is 1 ½ FFWR* with a reference torque of 60 ft-lbs); use a “backup wrench” on the rail to keep the brass fitting from turning as you tighten the flare nut; do not over tighten the flare nut; (brass fitting on the rail is tightened to 5-6 ft-lb) *Flats From Wrench Resistance.(Wrench resistance is definded as approx 30 in-lbs) After tightening the flare nut, verify the hose does not come in contact with AC compressor or any components (Cont’d) 7/8” open end wrench 1” open end wrench 23 Installation Manual, GM Medium Duty Trucks, 2008-09 Install LPEFI System Primary hose (cont’d): Attach the primary line to the LPDM Position the primary hose to be connected to the LPDM by routing the hose under the frame Remove retaining screws, plate, gasket and split collar retainers from LPDM Install plate and gasket onto hose end fitting of primary hose Lubricate hose end fitting metal surface and white nylon inner line Insert into center of LPDM port and push in slowly until metal hose end fitting is touching the top of the brass bushing in the port T-20 Torx driver Clean motor oil Note: This end may be very difficult to push in all the way and may require slightly tapping in with a screwdriver and hammer. Do not damage the locking ring on the hose end fitting. Once it is inside the port ½” or more you can install the split collar retainers, screws, gasket, plate and tighten firmly, assuring that the plate is flush to the LPDM casting and the gasket is tight. Clean motor oil Attach the crossover hose to the injector rails Start with the 80-degree hose end on the crossover hose, lubricate the white nylon inner line and insert into injector rail on the driver side Lubricate white nylon inner line on the 45degree hose end and insert into the injector rail VERY IMPORTANT: Take extreme care to center the nylon line into the rail end fitting and slowly push the line all the way in (turn the hose from side to side or twist it as you are pushing it in). Once the white inner line is completely in, push the entire fitting into the rail until it clicks and locks. Installation Manual, GM Medium Duty Trucks, 2005 (Cont’d) 24 Installation Manual, GM Medium Duty Trucks, 2008-09 Install LPEFI System Primary hose (cont’d): Secure the crossover hose Connect the crossover hose to the bell housing with a P-clamp and nut; use the existing bolt in bell housing along with P-clamp and nut from the kit to secure the hose 13 mm wrench or Ratchet & socket Verify the hose is routed in a way that there is no interference with chassis components that could cause chaffing Secure the Primary Hose Primary hose loop will determine how much slack is available to secure the primary hose; verify the primary hose is routed in a way that there is no interference with chassis components that could cause chaffing Remove the driver’s side rear AC compressor hold-down bolt. Install primary hose P-clamp and the flat fender washer provided onto the hose and secure the clamp with the AC compressor bolt previously removed Make sure the flat fender washer is installed under the Pclamp resting on the A/C compressor boss and supporting the P-clamp. Torque A/C compressor bolt to 37 ft lbs. Insure that the hose is aligned so that no tension will be created on the fuel rail or the hold down clamps. Attach hose suppot bracket to engine block with M10-1.5x20 and washer. Tighten (refer to picture on left for correct bracket position) Attach hose to other end of support bracket with P-Clamp, bolt washer and pal-nut. Tighten Verify the primary hose is routed in a way that there is no interference with chassis components that could cause chaffing (Cont’d) 13 mm wrench or Ratchet & socket 25 Installation Manual, GM Medium Duty Trucks, 2008-09 Install LPEFI System Secure the Primary Hose (cont’d) Secure the primary hose to the frame with 3” bolt, 2” spacer, P-clamp, washer and nylok provided in the kit; the mounting hole is located in the frame above the leaf spring and forward of the front tank mounting bracket Secure the primary hose to the frame with 3” bolt, 2” spacer, P-clamp, washer and nylok provided in the kit; the mounting hole is located in the frame between the middle and rear tank mounting bracket Secure the primary hose to the tank mounting bracket with 1/4-20 x1 bolt, Pclamp, washer and nylok provided in the kit.; the mounting hole is located on the rear tank mounting bracket, lower hole on the bracket. Note: The hose must not extend below the bottom of the tank. ½” wrench, Ratchet & socket ½” wrench, Ratchet & socket 7/16” wrench, Ratchet & socket 26 Installation Manual, GM Medium Duty Trucks, 2008-09 Secondary Tank/Transfer System: Tank Follow the same procedures as on page 21 for mounting the tank to the frame 15/16” wrench, socket & ratchet or impact Tape measure Hoses Install the flare tee with the flare swivel provided in the secondary tank installation kit to the outlet side of the fuel fill filter (Torque to 25-31 ft-lb.) Connect the No. 8 x 91” long fill hose; position the straight hose end to the tee and tighten (Torque to 25-31 ft-lb.); route the hose back and up over the chassis frame into the channel (rear bottom of the cab) under the back of the cab; cross the chassis and route it back down to the rear along the top of the secondary tank to the stop fill valve (located between the tank and frame rail between the tank mounting supports) ___________________________________________ Warning: Stop fill valve elbows are never tightened at the tank manufacturer. The valve is tight but the elbow must be tightened and clocked to the proper position. Do not allow the valve itself to move while tightening the elbow. ___________________________________________ Clock the stop fill valve elbow to about a 10:00 position (to the rear of the tank) before installing the hose Connect the 90-degree end to the stop fill valve and tighten (Torque to 25-31 ft-lb.) Leave hose under cab loose at this time.; it will be positioned and secured in procedures to follow (Cont’d) 7/8” wrench ¾” wrench 10” crescent wrench 27 Installation Manual, GM Medium Duty Trucks, 2008-09 Secondary Tank/Transfer System: Hoses (cont’d) Connect the No. 6 x 130” transfer hose to the secondary tank LPDM as shown in photo left; connect the 90-degree hose end to the flare fitting on the LPDM and tighten 10” crescent wrench Note: Always verify the fittings in the tanks are tight and sealed. Recheck for leaks during the post-installation inspection. Route the hose forward on top of the secondary tank, through the channel under the rear of the cab, across to the primary tank, on top of the primary tank to the one-way check valve Verify the flare elbow in the one-way check valve on the primary tank is tight and clock at the 10:00 position Leak detection fluid or electronic leak detector ___________________________________________ Warning: Do not allow the one-way check valve to turn in the tank. When tightening the elbow into the one-way valve, back it up using a wrench. Clock this elbow to about the 10:00 position (to the front of the tank). ___________________________________________ Connect the transfer hose to the one-way check valve and tighten At this time verify routing of the transfer hose and the fill hose and tighten all the hose end flare nuts; all connections must be leak tested with an approved leak detection fluid or an electronic leak detector Using two clamps provided in the kit, straighten the clamps as shown in photo on the left; using the two clamps and four self tapping screws mount the clamps as shown to secure the hoses up inside the channel under the rear of the cab; install the clamps so the opening in the rubber protector is facing down or so the hoses are sitting on the solid rubber side of the clamp; use necessary nylon tie straps to secure the hoses together and aid in the proper routing; the hoses should be routed not to interfere with future body installation or other pieces of the body or chassis that could cause chaffing (Cont’d) 5/16” socket & extension & ratchet Drill motor or electric screw driver 28 Installation Manual, GM Medium Duty Trucks, 2008-09 Secondary Tank/Transfer System: Hoses (cont’d) Secure transfer hose from the secondary LPDM to the tank thread standoff, (in front of rear tank support bracket) using clamps, ¼” bolt and washer provided in kit Secure the transfer and fill hose to the tank thread standoff, (in front of front tank support bracket) using clamps, ¼” bolt and washer provided in kit Secure the supply and fill hoses together using nylon ties; the nylon ties should be spaced about a foot apart Make sure all hose end fittings are tightened at this point Assemble wire cover to secondary tank support bolts with two nylock nuts. Tighten (Cover will protect loose wire looms) 7/16” socket & ratchet 7/16” socket & ratchet Nylon tie straps 29 Installation Manual, GM Medium Duty Trucks, 2008-09 Secondary Tank/Transfer System: Wiring Warning: Disconnect the battery before you work on any part of the LPEFI system. Route the secondary LPDM harness through the small hole in the frame near the end of the tank Continue routing the harness along the right frame rail toward the rear of the vehicle Locate OEM secondary fuel pump connector; route secondary LPDM harness to connector Remove blank plug from OEM secondary fuel pump connector (Some trucks will not use this plug, contact Bi-Phase Technologies for correct installation) Install secondary LPDM wire harness terminals into blank connector (terminal placement, A = Black, B = Red) Connections LPEFI Sec. LPDM to OEM harness Red to Green Black to Black Plug connectors together Install fuel level sending unit on the tank Note: Use the 40-250 ohm fuel level sending unit supplied in the kit. When installing a fuel level gauge sending unit always reset the sender to zero using a small magnet (refer to page 20); after installed on the tank the sending unit’s needle should register zero or empty unless there is fuel in the tank Route the secondary fuel level sending unit harness through the same small hole as is the secondary LPDM harness (1st photo on this page) Continue routing the harness along the right frame rail toward the rear of the vehicle Locate the OEM secondary fuel level connector. Installation Manual, GM Medium Duty Trucks, 2005 (Cont’d) 13 mm wrench 60/40 rosin core solder Solder flux Heat shrink tubing Soldering iron Wire strippers Heat gun Nylon tie straps 30 Installation Manual, GM Medium Duty Trucks, 2008-09 Secondary Tank/Transfer System: Wiring (cont’d) Side cutters The OEM secondary fuel connector has two leads from the connector that are spliced together; cut the splice to separate the two leads, but leave the connector plug in; there should be about 4” of wire remaining (Some trucks will not use this connector, contact BiPhase Technologies for correct installation) Pliers or small wrench Nylon tie straps Route the secondary fuel level harness to the OEM secondary fuel connector It is recommended that these two leads be soldered and heat shrunk for a good connection Connections LPEFI harness to OEM harness Blue.…….to…....Blue Black……to…...Black 9/16’ wrench or socket & ratchet Use nylon tie straps to secure the LPEFI harness along its entire routing Install the protective tank guard to the tank mounting lugs using the hardware (bolts, washers and speed nuts) provided in the kit 31 Installation Manual, GM Medium Duty Trucks, 2008-09 Completing Wire Harness Installation: Primary tank side Main LPEFI harness (to purge box, relay and LPDM) branch, is 4 connectors on 4 branches, tied together. Connect main LPEFI harness connection to electronic purge box and relay and LPDM Assemble cover plate to rear of the primary tank Secure hardware to cover plate and tank Phillips screwdriver Small magnet Protective heat shield: Heat shield mounted to lower tank supports using six ¼” bolts on the primary tanks or four on the secondary tanks. Use pre-existing holes in the lower part of the tank supports. Note: Per the requirements of the National Fire Protection Association, LP Gas Code Handbook #58 & Handbook #52, Natural Gas Code Handbook #58 Chapter 8 “If the fuel container is installed within 8” (20cm) of the engine or exhaust systems, it shall be shielded against direct heating.” On the GM 560s, depending on the chassis, the exhaust is routed on one side or the other and the propane tank depending on the chassis may require a heat shield. The heat shield is not included in the kit. It is the responsibility of the installer to install a heat shield where required and in compliance with the National Fire Protection Associations LP Gas Code Handbook #58. The heat shield can be constructed from light sheet metal preferably galvanized for corrosion resistance. The shield can be easily mounted to the lower part of the tank supports. There are two ¼” holes in the lower portion of the tank supports. After the tank is mounted the holes are visible just below the chassis frame rail. Recommended dimensions Primary tank 9” X 60” Secondary tank 9” X 60” Galvanized sheet metal & cut to fit see recommended dimensions ¼” bolts, washers & nuts 7/16” wrench, socket & ratchet 32 Installation Manual, GM Medium Duty Trucks, 2008-09 Install labels on the truck/registration: Note: For best results when applying labels, dip the label in soapy water before you apply it to the truck. Slide the label into position, and then use a rubber squeegee to force out the air and water. Install one “LPEFI” transparent label on each fender under the GM model identification as shown in photo left. Install the EPA emissions label on driver’s side air housing; once placed do not try to remove this label as it would be destroyed. Install Spec. label to passenger side support bar. Install orange warning label on the inside of the doghouse cover; this label warns not to remove any hoses unless the system has been properly prepared If the truck does not have a box or body installed yet, put the propane diamond in the glove box for later placement After the body is installed on the truck, install the blue “PROPANE” diamond on the back panel of the truck, toward the bottom right corner; do not install on the bumper. Attach Temp. sensor to temp sensor harness Attach Transmission Fluid tag to Transmission Dip Stick with cable tie Fill out vehicle warranty registration card and return to Bi-Phase Technologies along with the PostInstallation Inspection Place laminated owners information cab card in the glove box with the OEM’s owners manual & other GM information Rubber squeegee 33 Installation Manual, GM Medium Duty Trucks, 2008-09 Testing the Installation 1. Visually inspect the tank(s), the hoses, the wiring and the engine compartment. Is everything assembled properly? 2. Fill the tank with 20 to 30 gallons of propane. It is recommended that you purge the tank with propane vapor and check all the fittings on the tank for leaks before filling the tank completely. Use an approved leak detection fluid or an electronic leak detector to verify there are no leaks. If any leaks are found stop and repair the leaks. The battery should not be connected at this time. (If the tank was filled before installation it should have been checked for leaks at that time.) 3. Connect a fuel pressure test gauge to the Shrader valve on the LPDM (rear end of the main tank, red cover) or on the wye located on the chassis frame rail. 4. Fuel pressure should be 0 psi at first. 5. If the connections on the electronic purge control assembly have not been made connect at this time. 6. Connect the battery. You may hear a click at the tank. 7. Open the driver door to start a purge cycle. You should hear the solenoid valves click and the pump running inside the tank. If not, check the electrical connections and refer to the troubleshooting section in the service manual. 8. Simultaneously with the preceding step you should inspect all hose connections, the LPDM, the fuel rail connections and the injectors for leaks. If any leaks are found you should disconnect the electronic purge control assembly, evacuate the lines and repair. See the service manual for procedures. 9. When the purge cycle ends, listen for leaking fuel near the hoses and around the entire system. If you do not hear any obvious hissing or smell propane, turn on the ignition key but do not start. This will start the fuel pump, followed by a purge cycle. The chart on page 36 explains the purge strategy. 10. When you hear the fuel pump stop running notice the fuel pressure on the test gauge. This pressure should be anywhere from 30 psi in cold weather to 180 psi in hot weather. 11. Turn the key off, then on again to start another purge cycle. 12. While the pump is running, observe the fuel pressure. It should be 35 to 55 psi higher than it was in step 11. 13. Turn the key off and check for leaks at every hose fitting on the vehicle. Apply an approved leak detection fluid (similar to soapy water) or use an electronic propane leak detector. The tank, tank valves, fuel injectors and fuel rails have been tested at the factory but you must recheck, and check the hoses and hose fittings. On dual tank trucks check all of the hoses between the tanks, too. Installation Manual, GM Medium Duty Trucks, 2008-09 Testing the Installation (cont’d) 34 14. If there are no leaks, start the engine. 15. Connect a diagnostic scan tool to the vehicle. (The connector is usually under the bottom of the dash.) 16. With the engine running, check the diagnostic trouble codes (DTCs). Correct any problems you find. If the engine is not running smoothly, refer to the LPEFI service manual. 17. If there are no codes and the engine is running smoothly let the vehicle run until it is to full operating temperature (190° F on your Scan tool). 18. Turn the key off and follow the testing procedures described in the Post-Installation Inspection on page 37. 19. Fill out the Post-Installation Inspection completely. 20. Turn off the engine and disconnect the fuel pressure gauge set. Be sure to reinstall the dust cap on the Shrader valve. 21. Drive the vehicle for at least 15 minutes, if possible. Drive under various conditions and a variety of speeds. 22. After the drive notice the long-term fuel trims as noted in the post-inspection. The long-term fuel trims should not be the same as they were before the drive. The long-term fuel trims should not be more than + or – 20%. 23. After driving and inspecting the vehicle turn it off and let it sit with the hood and doors closed for 15 minutes. After 15 minutes return to the vehicle, open the door to initiate a purge and start the engine. If the engine starts easily, 3 seconds or so, the vehicle is ready to use. 24. If there are no leaks, no DTCs and the engine runs well (smooth idle, smooth acceleration, good power), the vehicle is ready to use. 25. If you did not fill out the warranty registration card in the Installing Labels Procedure on page 33 do so now. Also complete the Post-Installation Inspection and return both to Bi-Phase Technologies to establish the warranty start date for your vehicle. 35 Installation Manual, GM Medium Duty Trucks, 2008-09 36 Post-Installation Inspection Installation & test date VIN Make Customer name City Engine size Model Address Zip State Mileage Mfg date Installer company name Phone Phone Tank mfg. Primary tank s/n Purge & fill propane tank Yes Quantity of propane gallons Leak test tank & LPEFI system complete Leaks found & repaired Yes Where Secondary tank s/n No Yes No No Before starting engine check and top off coolant level. After starting engine observe coolant level and heater operation until engine is at 190°F on the scan tool and all air has purged from the cooling system. Tank Temps & Operating Pressures @ LPDM DataStream ECT/Temperature Tank temperature (bottom of tank) ______°F At Idle: Static pressure (tank pressure) Bank 1 Bank 2 STFT LTFT Room temperature ______°F ____p.s.i.g. Pump Pressures with Engine Running Does the engine idle smoothly? Static + supply valve + pump ___p.s.i.g. Yes No Static + supply valve + return valve + pump p.s.i.g. Transfer System Any faults found using transfer system inspection tool? Yes If yes describe fault/repair Diagnostic Trouble Codes Any DTCs in computer memory? Yes List all codes: No No If any DTCs found, repair all codes and retest Comments: Turn off vehicle & let it sit for 15 minutes with hood and doors closed. Return to vehicle, open driver door. Does purge cycle initiate? Yes Does vehicle restart easily after purge cycle is complete? Yes No No Technician Name: This inspection form must be returned to Bi-Phase Technologies. Any problems found must be noted in the comment section and if a problem cannot be resolved Bi-Phase Technologies must be contacted at 1-888-465-0571.