1
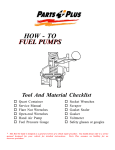
HOW - TO THE CHARGING SYSTEM Tool And Material Checklist Belt Tension Gauge Aerosol Belt Dressing Hydrometer Voltmeter Jumper Cables Tachometer Screwdriver Pry Bar Sandpaper Wrenches Battery Terminal Puller Safety glasses or googles * This How-To Guide is designed as a general overview of a vehicle repair procedure. You should always refer to a service manual designed for your vehicle for detailed instructions. incorrect procedure. Parts Plus assumes no liability for an The charging system performs two basic functions: 1. Maintains the battery’s state of charge. 2. Provides power for all of the car’s electrical systems while the engine is running. It’s a fairly simple system, consisting of a battery, alternator, voltage regulator, indicator gauge or warning light, and the wiring that connects the components to each other and to the units they serve. As you’ll see in this booklet, maintaining, troubleshooting, and repairing the charging system are all within the range of the do-it-yourselfer. alternator; otherwise, the source of the noise is outside the charging system. NOTE: A good rule of thumb is to replace the alternator drive belt every three years, regardless of its appearance. Instructions for this procedure are included later in this booklet. PROBLEM DIAGNOSIS BELT MAINTENANCE It is very important to regularly check the alternator dive belt; this can be done whenever the cooling system is serviced. Check the belt tension using a belt tension gauge. And while both “new” and “old” belt tension specifications are provided in your service manual, keep in mind that a belt is considered old after just 10 minutes of use! If you do not have a belt tension gauge, press down on the belt with your thumb midway between tow pulleys. If it deflects more than 1/2", it is too loose. The belt should also be inspected for signs of wear. Check for oil, grease or hard glaze on the underside of the belt; any of these can cause it to slip on its pulleys, resulting in reduced output from the alternator. Another sign of a worn belt is squealing noise. (This sound can also mean that the alternator is developing a bearing problem.) To find the source of the squeal, apply aerosol belt dressing to the belt. If the squealing stops or changes pitch, the belt is the source of the noise. If the noise continues as before, remove the belt and run the engine. If the noise is gone, the problem is inside the It’s usually easy to know when the charging system is not generating enough power – just look at the warning light or gauge. If the light or gauge is not working, the battery will discharge to alert you of a potential problem. The charging system should also be checked if the engine cranks slowly or if dim headlights brighten upon acceleration. A problem that is not as easy to diagnose is overcharging, which occurs when the voltage regulator fails to limit alternator output. This causes the alternator to overcharge the battery, which in turn can ruin the components that use electricity. Also, the sulfuric acid battery fluid vaporizes at a faster rate when too much current is being supplied. If the battery cells are allowed to empty, the dry plates will d eteriorate and the battery will die. It is even possible for an overcharged battery to explode. For this reason, the battery fluid level should be checked every few weeks. If the level is frequently low, the system is probably overcharging. Also, check the level immediately if you should smell “rotten eggs,” which can be caused by vaporized sulfuric acid. An overcharging condition can be detected with an ammeter, though a voltmeter is much easier to use. If the ammeter shows continuously high charge rates or if the battery voltage often exceeds 14.5 volts, overcharging is the probable cause. TROUBLESHOOTING NO-LOAD TEST The troubleshooting procedures that follow will This test will determine whether or not the system help you head off charging system problems before they is charging the battery and, if not, whether the alternator occur. Be sure to do each procedure in its entirety; or regulator is at fault. It requires a voltmeter capable of do not skip any steps. measuring at least 16 volts, down to tenths of a volt. If the charging system on your car has an externally mounted regulator, warm up the engine before performing the following test: 1. Connect the positive lead of the voltmeter to 1. Turn off the engine, lights, and all other the positive terminal of the battery and the negative accessories. lead to the negative terminal. 2. Attach an engine tachometer according to the NOTE: Protect your eyes with safety glasses manufacturer’s instructions. or goggles when doing this procedure. 3. Connect the voltmeter to the battery by 2. Remove the coil cable from the distributor cap. attaching the positive lead to the positive terminal 3. Ground the coil cable to the engine block by and the negative lead to the negative terminal. connecting a jumper cable between the two. This will 4. Note the voltmeter reading. If it is less than 12 prevent dangerous arcing of the high-voltage spark. (To volts, charge the battery. Then note the voltage reading disable the HEI ignition on some GM cars, just again and record it. disconnect the small lead attached to the BAT terminal 5. Start the engine and slowly increase the speed to on the distributor.) 1,500 rpm. 6. Note the voltmeter reading again. If it exceeds the engine-off voltage by more than 2 volts, the system has a faulty regulator, a poor regulator ground, or a short circuit in the wiring between the alternator and regulator. 7. If this voltage reading exceeds the engine-off voltage by less than 2 volts, perform a load test. BATTERY CHECK LOAD TEST 4. While cranking the engine, observe the voltage reading. It should be above 9.6 volts for conventional batteries and above 10 volts for maintenance-free batteries. NOTE: A hydrometer can be used in place of this voltmeter test to check battery capacity. Be sure the hydrometer is clean, inside and out, to ensure an accurate reading. 1. Keep the tachometer and voltmeter connected as they were for no-load test. 2. Note and record the voltage reading. 3. Start the engine and turn on the heater (or air conditioner) at high speed. Turn on all lights and accessories. 4. Increase the engine speed to 3,000 rpm and note the voltmeter reading. 5. If this reading exceeds the engine-off voltage by 1/2 volt or more, the charging system is functioning properly. 6. If his reading exceeds the engine-off voltage by less than 1/2 volt, perform a full-field test. FULL-FIELD TEST When the regulator’s control function is bypassed, the alternator runs full-field. The method of bypassing the regulator differs, depending on the type of vehicle. For this reason, Step 1 of the full-field test changes from car to car, while the remaining steps are the same for all models. 1. GM models. Insert a screwdriver blade no more than 3/4 inch into the D-shaped testing hole in the alternator end frame. When the screwdriver contacts both the metal tab and the alternator housing, the regulator is being bypassed. 4. If the increase in the voltage is less than 1/2 volt, either the alternator or wiring is faulty. 5. Inspect the wiring for signs of wear or heat damage. 6. If the wiring looks good, the alternator is probably the faulty component. NOTE: When performing the no-load, load, and full-field tests, try to finish them within a total engine running time of 5 minutes. If more time is needed to finish the tests, wait 30 minutes before continuing. This will allow the catalytic converter to cool, thus preventing it from being damaged. REGULATOR REPAIR Once it has been determined that the problem is with the regulator and not the alternator, you can find out if the source is the regulator itself or its wiring or ground. 1. Check the wiring between the regulator and alternator for heat damage or wear. The regulator is usually mounted on the firewall or on the finder under 1B. Ford models. Turn off the engine and remove the hood. the regulator connector. Connect a jumper wire between 2. Remove the bolts from the voltage regulator. the “A” and “F” terminals of the plug. 3. Use sandpaper to clean off the area around the bolts and the spot where the voltage regulator mounts on the car. This will assure a good ground. 4. Clean, reinstall, and tighten the bolts. 5. Perform all of the troubleshooting procedures again to see if the problem still exists. 6. If so, the problem is either in the wiring or the regulator itself. If you have already inspected the wiring, try replacing the regulator. 1C. Chrysler models. Turn of the engine. Locate the green wire connecting the alternator field terminal to the regulator; disconnect this wire from the alternator. Connect a jumper wire from the alternator field terminal to a good ground. 2. Once the regulator has been bypassed, repeat the load test. 3. If the full-field voltage exceeds the engine-off voltage by 1/2 volt or more, the regulator is defective and must be replaced. ALTERNATOR DRIVE BELT REPLACEMENT 7. Most voltage regulators are housed inside the alternator and should be replaced by a professional. The externally mounted type can be replaced easily enough – just be sure to label any wires that have to 1. Loosen the two alternator bolts and push the be disconnected. alternator toward the fan. Caution: The battery ground cable should be 2. In some cases, additional belts must be removed disconnected before replacing the voltage regulator. to gain access to the drive belt. Take note of which belts ride in which grooves before removing them. 3. Remove the drive belt. 4. Install the new drive belt, being careful not to stretch it. Reinstall any other belts. 5. Use a pry bar to tighten the belt, then tighten the bolts. Do not over tighten the belt; it should be firm but flexible. 6. Check and adjust the belt tension. 7. Run the engine to make sure all belts are working properly. Check the belt tension again after a few weeks. If the alternator is found to be malfunctioning, you can either replace it or have it repaired. To replace an alternator, proceed as follows: 1. Disconnect the battery ground cable, using a battery terminal puller if necessary. 2. Loosen the alternator bolts. There are usually two: one adjustment bolt at the top and one connecting the alternator to the engine block. 3. Push the alternator toward the fan and slip the Simply put, a serpentine belt is one belt that takes drive belt of the pulley. the place of many. To replace it, proceed as follows: 4. Label and disconnect the wires attached to 1. Position the pry bar in the tab on the spring the alternator. canister. 5. Remove the mounting bolts and alternator. 2. Pull down to raise the tensioning pulley. 6. Reinstall the new or repaired alternator and 3. Remove the serpentine belt from the other the mounting bolts. pulleys and replace it with a new one. 7. Reconnect the wires in their proper locations. 8. Slip the drive belt over the pulley. Use a pry bar to pull the alternator away from the fan until the belt is tight. 9. Tighten the mounting bolts. 10. Check the drive belt for proper tension and make any necessary adjustments. ALTERNATOR REPAIR SERPENTINE BELT REPLACEMENT