1
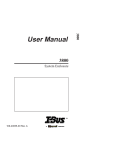
Electronic Jet Kit™ Instructions
Thank you for choosing the Free Spirits Fuel Injection Module, the module1.
The module is “ONLY” usable for the following Harley Davidson models:
• 2007-2013 Sportster (all 883,1200 - XR 1200 models)
This is an Electronic Jet Kit. Like jet kits in the past, the more you modify, the more responsibility you take in
getting your fuel curve right. Going to www.freespirits.it will help you obtain better high horsepower tuning.
INSTALLATION PREP
• Install Time: 60 minutes
• Required Tools for:
….Disconnecting the negative terminal of the battery.
…. Removing your seat
.… Loosening and propping up the fuel tank
Some vehicle modifications with Techlusion Inc. products
must not be used on public roads and in some cases may
be restricted to close course competition. Those products
not identified as US EPA legal are intended for off-road or
marine applications only. Not intended for use on emission
controlled vehicles.
Free Spirits
Telephone 0039 (0) 445-390437
Fax 0039 (0) 445-395539
Email [email protected]
Site: www.freespirits.it
1
Electronic Jet Kit™ Instructions
and remove the rear tank mounting bolt
INSTALLATION
(For any and all help during install or tuning please call us(8-5M.T. m-f), we can’t help if you don’t call)
1. Before installing the module you must first disconnect the negative lead from the battery.
2. Determine a location for the Module unit. We suggest behind the Maxi fuse area next to
left side battery or left side top of battery under the frame.
3. Make sure your motorcycle is cold, be sure to disconnect the fuel line using the quick disconnect
feature on the fuel fitting, (DO NOT UNSCREW THE FITTING) and remove the rear tank mounting bolt
and remove the rear tank mounting bolt (under the seat) loosen and lift up the fuel tank (make sure not to
come in contact with the steering with the front of the fuel tank when propping it up). You will need
something to hold the fuel tank up (block of wood or a towel) from the frame to gain access to the injectors.
4. Underneath the fuel tank you will locate the fuel injectors. (See the service manual for help if
needed) The injectors are mounted in O rings. This allows them to be rotated in the throttle body
without further disassembly. From the left side of the bike, rotate the injectors toward you enough
to gain access to the locks on the injector connectors.
5.
Disconnect the factory injector connectors from the fuel injectors and replace with the Module
injector connectors from the Module unit. The stock rear injector lead is tagged with a label (REAR)
and MUST connect, through the Module harness, back to the rear injector. When completed, rotate
the injectors to locate the connectors to a near verticle position, to provide clearance for the fuel
hose. IMPORTANT: It is a good idea to make sure there is a little slack in the harness to prevent
engine vibration from damaging/breaking the wiring at the connectors.
6.
The front factory O2 connector is cable tied to the left front frame down tube near the oil filter area.
Follow the lead from the O2 sensor in the front exhaust pipe. Disconnect the sensor and plug the
Module O2 harness (long harness with pink/tan wires) inline with the factory O2 harness and secure.
Cable tie the harness back to the frame tube as necessary
IMPORTANT: Make sure connection is firmly secure and allow a little slack at the connection to
prevent engine vibration from damaging/breaking a wire on the harness.
7.
The rear factory O2 connector is located on the frame behind the rear cylinder. Again, follow the lead
from the rear O2 sensor, disconnect the sensor and plug the Module O2 harness (short harness with
purple wires) inline with the factory O2 harness then secure. Cable tie the harness back to the frame
as necessary.
IMPORTANT: Make sure connection is firmly secure and allow a little slack at the connection to
prevent engine vibration from damaging/breaking a wire on the harness.
8.
Replace the fuel tank. (Making sure that all bolts are in place and fuel connections are correct).
9. Use the Velcro provided to secure the TFI .
10. Connect the TFI ground lead to negative terminal of battery along with factory ground lead.
11. Re-assemble any removed parts to complete the installation.
Free Spirits
2
Telephone 0039 (0) 445-390437
Fax 0039 (0) 445-395539
Email [email protected]
Site: www.freespirits.it
Electronic Jet Kit™ Instructions
Final Installation
• After connecting the box, check all wire connections to ensure proper connection.
Do this by pulling on the connection to make sure the connectors are properly locked in.
• Be sure to check the wire harnesses are not in direct contact with any sharp edges, exhaust and/or other
objects, which could result in long term wear and/or damage.
• To program your controller the bike must be running.
• Always make sure your bike is at normal operating temperature when making tuning adjustments
CONTROLLER FUNCTIONALITY
• The TFI controller can be adjusted “on the fly” to tune your vehicle. No computer or other external device
is needed to make tuning adjustments. All that is required is for your vehicle to be running which provides
power to the TFI controller.
All TFI controllers come pre-programmed to the recommended base light settings which represents a
typical stage 1 (air filter + exhaust) vehicle modification.
It is recommended to Install the TFI controller and take a test ride first before making any mode
adjustments.
• If at anytime you stay in an adjusting mode for longer than 4 seconds without pressing any buttons, the
controller will exit adjusting mode and will return to the ready state.
• Start the bike up, the lights inside the module will energize and become visible.
With a proper installation, the module will have a continuous lighting sequence where green lights come
on from left to right and then back again.(Page 4) Sequence repeats until the bike is fully warmed up.
It will then stop scrolling the lights and go to a steady green light to the far left.
If the number 1 LED is flashing green and the number 8 LED is flashing red at indicates a connection issue.
Re-check the wires from the EFI and make sure they are connected to the proper wire of your bike’s stock
harness. The TFI unit only needs power and a proper ground to show this error display. to start then you
will also need to recheck the wiring. If you have not connected the ground wire to the negative post of the
battery then make sure you have attached the wire to a proper grounding source on the frame.
(The flashing green and flashing red lights is common for a proper installation during deceleration because
the stock fuel map shuts off the fuel injectors during this process.)
• At this point you are ready to adjust the module to the base settings supplied with the unit.
The unit comes with pre-programmed base settings which should
match the recommended starting settings on pag. 7.
Checking that the 5 programmable features are available.
5 modes are available to make adjustments. You enter the adjustment mode by pressing the MODE button.
Correctly entering the adjustment mode will display flashing LEDs on the LED display.
Pressing the MODE button repetitively will move you through all the modes.
Take note that the MODE button is sensitive and will at times skip a mode.
Pressing the MODE button at the last mode will bring you back to the first mode.
If each mode is present then the proper code exists and you are ready for making manual adjustments.
See the first (page 4,5,6).
If you failed to enter a mode, try going through the sequence again and be sure to only press the MODE
button once for step.
To exit the adjustment mode and return to operation mode you just wait several seconds until the LED
display reverts back to solid LED colors.
It is recommended to Install the TFI controller and take a test ride first before making any mode
adjustments
3
Electronic Jet Kit™ Instructions
CONTROLLER FUNCTIONALITY (Continued)
• You are now ready to manually program each mode. Consult the base settings supplied with the
unit or you can look up the most up-to-date settings by going to www.dobeckperformance.com.
The 5 modes available are distinguished by an LED color combination. The 5 modes in respective
order are as follows: Green, Yellow, Red, Yellow-Blue, and Red-Blue.
All six modes have 15 possible light settings. The settings are adjusted by pressing the PLUS (+) and
MINUS (-) buttons.
For easy reference the LEDs are numbered 1 through 8.
However, the LEDs can be adjusted to the following positions: 0.5, 1, 1.5, 2, 2.5, 3, 3.5, 4, 4.5, 5, 5.5, 6,
6.5, 7, 7.5, 8.
For example, in a particular mode, if LED 4 is flashing then the LED display is set to 4 in that mode.
If the PLUS (+) button is pressed once then LEDs 4 and 5 will flash simultaneously and the LED display is
set to 4.5.
If the PLUS (+) button is pressed once again, only LED 5 will flash and the LED display is set to 5.
The LED display can also be set to 0.5 by pressing the MINUS (-) button and scrolling the colored LED to
position 1 and then pressing the (-) button once more until the LED in position 1 is flashing twice as fast
as normal.
Modes 4 and 5 are distinguished by the 8th LED also blinking blue.
• Every mode represents an adjustable feature within your vehicle’s drive cycle.
Reference the Example Drive Cycle diagram to gain a visual understanding (Page 6).
Each mode can be defined as either a FUELING mode GREEN/YELLOW/RED (Modify the fuel amount
levels.)
or a SWITCH POINT mode Yellow-Blue/Red-Blue (Determine the transition point between two corresponding zones.)
The higher the light setting the longer it takes for a zone to engage.
The lower the light setting the faster a zone will engage.
Note: Switch point modes do not have to be adjusted that frequently.
• Your module should now be properly programmed and you are now ready to tune your bike.
Always make sure your bike is at normal operating temperature when making tuning adjustments.
• Additional Notes: The TFI controller can be set to a stock fueling without uninstalling the unit.
Start-Up Light Sequence
General Layout
Free Spirits
Telephone 0039 (0) 445-390437
Fax 0039 (0) 445-395539
Email [email protected]
Site: www.freespirits.it
4
Electronic Jet Kit™ Instructions
TUNING ADJUSTMENT
IMPORTANT: Your TFI controller already comes pre-programmed with our recommended stage 1
settings. We highly suggest installing the controller and going for a test ride before making any
adjustments
Mode 1 - GREEN - Fuel addition during cruise/steady throttle.(functions like a fuel mixture screw on a
carburetor)
Adjusts for the motorcycle's fuel requirements during light load operation, from idle through legal highway
cruising speeds and steady throttle. We have found that manufacturers have generally leaned out the fuel
mixtures for emissions to a specific rpm (see below). To set this GREEN LED functions, make sure the
motorcycle is up to a full operating temperature, then while in neutral, pick a fast idle that is not easy to
hold a steady rpm (V-twins 1800-2200 rpm and multiple cylinders 2500-3000 rpm), hold the throttle at
that spot and increase green GREEN LED from its minimum setting, while listening to the exhaust sound.
You should hear the exhaust sound change form an irregular and uneven sound to an even and smooth
one. You may also see an increase in rpm as you increase fuel, and if you continue to increase fuel past
this point to where the revs start to fall back away, then you can stop and decrease GREEN LED to a point
half way between where the exhaust note first smoothed out and the point where the highest rpm starts to
fall away. When the LED display shows solid GREEN lights then the GREEN zone is active and fuel is
modified by this mode. Mode has the largest affect on fuel mileage.
Mode 2 – YELLOW - Fuel addition during acceleration.(functions like an accelerator pump)
Tuning for this mode depends greatly upon your individual bike and can vary widely from the base setting.
After market high flow exhaust systems and high flow air filters “MAY” cause you to tune differently from
the base settings. This combination could have a setting difference as great as three YELLOW LED’s. Note
that this adjustment is only for hard acceleration. This fuel adjustment adds fuel into the fuel map whenever the throttle is opened rapidly. This function needs to be adjusted from test riding, by performing brisk
roll-ons in a specific gear, and by always starting at the exact same rpm. Try one position increases
YELLOW LED between roll-on tests until you can't feel any more improvement, and then go back to the last
setting that improvement was noticed.
When the LED display shows solid YELLOW lights then the YELLOW zone is active and fuel is modified by
this mode.
Mode 3 RED - Fuel addition during full throttle. (functions like a main jet on a carburetor)
This adjustment deals with adding fuel for primarily 4000 RPM and up to red line, Is generally required
when either air intake or quality exhaust system. Similar to the road test procedure listed above in yellow
fuel. For example, running to red line in 1st shifting, running to red line in 2nd shifting, and continuing this
all the way through the gear range,you would have been engaging the red zone all the time. This mode
could vary widely from the base settings depending on the set up of your bike and could have a difference
as great as three RED LED’s or more. When the LED display shows solid RED lights then the RED zone is
active and fuel is modified by this mode. Mode has the largest affect on tuning for the vehicle’s top
horsepower value.
Free Spirits
Telephone 0039 (0) 445-390437
Fax 0039 (0) 445-395539
Email [email protected]
Site: www.freespirits.it
5
Electronic Jet Kit™ Instructions
TUNING ADJUSTMENT (Continued)
Mode 5 YELLOW / BLUE - Acceleration switch point/ Adjustment for when the yellow zone of the tachometer.
Represents transition between GREEN and YELLOW fuel zones which relates to cruising and accelerating
conditions. This mode “MAY” vary from the base settings depending on the set up of your bike. The lowest
LED setting (1) represents the lightest load to switch on the yellow fuel zone and the highest LED setting
(8) represents the heaviest load to switch on the yellow fuel zone. A flashing YELLOW LED should appear
somewhere on the display along with a solid BLUE LED on the right.
Mode 6 RED / BLUE - Adjustment for when the full throttle fuel engages.(Full throttle switch point)
Represents transition between YELLOW and RED zones which relates to accelerating and full throttle.
The base setting for this mode will rarely have to be changed. The RED LED should be engaged during the
full throttle period. The lowest LED setting (1) represents the lightest full throttle load to switch on the red
fuel zone and the highest LED setting (8) represents the heaviest full throttle load to switch on the red fuel
zone. A flashing RED LED should appear somewhere on the display along with a solid BLUE LED on the
right.
(The flashing green and flashing red lights is common for a proper installation during deceleration because
the stock fuel map shuts off the fuel injectors during this process.)
Adjustment Modes
Mode 1 – Green
Mode 2 – Yellow
Mode 5 – Yellow/Blue
Free Spirits
6
Telephone 0039 (0) 445-390437
Fax 0039 (0) 445-395539
Mode 3 – Red
Mode 6- Red/Blue
Email [email protected]
Site: www.freespirits.it
Electronic Jet Kit™ Instructions
Before setting “Fuel Stock”
Stage 1 Settings
Mode 1 - Green 3
Mode 2 - Yellow 2,5
Mode 3 Red 2
after the first 3 settings
Mode 5 - Yellow/blue 4
Mode 6 - Red/blue 4
Settings Complete
Free Spirits
Telephone 0039 (0) 445-390437
Fax 0039 (0) 445-395539
Email [email protected]
Site: www.freespirits.it
7
Electronic Jet Kit™ Instructions
Stage 2 Settings
Mode 1 - Green 3
Mode 2 - Yellow 3,5
Mode 5 - Yellow/blue 4
Free Spirits
8
Mode 3 Red 2,5
Mode 6 - Red/blue 4
Telephone 0039 (0) 445-390437
Fax 0039 (0) 445-395539
Email [email protected]
Site: www.freespirits.it
Electronic Jet Kit™ Instructions
Sportster Stage 3 Settings
For XR 1200 models with Racing exhaust & filter
Mode 1
Mode 2
Mode 3
Mode 4
Mode 5
Free Spirits
Telephone 0039 (0) 445-390437
Fax 0039 (0) 445-395539
Email [email protected]
Site: www.freespirits.it
9
Electronic Jet Kit™ Instructions
Sportster Stage 4 Settings
For XR 1200 models with Racing exhaust & filter 204010
Mode 1
Mode 2
Mode 3
Mode 4
Mode 5
Free Spirits
10
Telephone 0039 (0) 445-390437
Fax 0039 (0) 445-395539
Email [email protected]
Site: www.freespirits.it
Free Spirits
Tel. 0039 (0) 445-390437
Fax 0039 (0) 445-395539
Email [email protected]
Site: www.freespirits.it