1
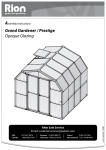
Hobby Gardener ASSEMBLY INSTRUCTIONS Hobby Gardener 74131_EN Authorized Rion Distributors USA Backyard Living Source, Inc. - BLS 149 S. Adkins Way, Suite 101 Meridian, ID 83642 +208-287-6601 Fax: 208-898-9518 [email protected] www.ecogreenhouse.com Canada Footprint Tools Canada Limited Corporate Headquarters 1745 Bonhill Road, Unit # 1 Mississauga, ON L5T 1C1 1-800-866-5749 905-564-6007 Fax: 905-564-0059 [email protected] Australia Oldfields Pty Ltd Germany CLEMENS HOBBYTEC GmbH Korea Dowin Polychem Co., Ltd South Africa Easy Greenhouses CC Czech Republic Scotland Lanit Plast S.R.O. Lomond Horticultu ral Products Ltd. England New Zealand Palram Applications UK Bear Forest 8 Farrow Road Campbelltown N.S.W. 2560 +61 2 4627 0777 Fax: +61 2 4627 0999 [email protected] http://www.oldfields.com.au/treco/index.htm 1031-2, Banbaehomestel #209 Bangbae-dong, Seocho-gu Seoul, Korea +82-2-583-8511 Fax : +82-2-583-8512 [email protected] www.rionkorea.com Hlubocinka 809 Sulice +420 251 562 734 Fax: +420 251 560 278 [email protected] www.lanitplast.cz Unit 15 Delta Court Sky Business Park Finingley, Doncaster DN9 3GN 01302-380775 [email protected] Two Wests & Elliott +01246 451077 Fax: +01246 260115 [email protected] www.twowests.co.uk Rudolf-Diesel-Str. 8 D-54516 Wittlich / Germany +49 (0) 6571 / 929-222 Fax: +49 (0) 6571 / 929-198 [email protected] www.clemens-hobbytec.de 8 Sherwell Avenue, Boskruin Ext 5 Johannesburg, South Africa 2154 Sales and Support: Linda Hill +27 11 792 7583 Mobile: +27 82 777 6681 [email protected] www.easygreenhouses.co.za The Oaks, Balfron Station Glasgow, Scotland, G63 0QN +44(0)1360 449042 [email protected] www.lomondhp.co.uk Po 404059 Puhoi Auckland 1095 +64(0)9 889 0839 Mobile: +64(0)27 682 5265 www.thegreenhouseshop.co.nz [email protected] Safety First • Please read these Assembly Instructions completely before assembly and keep them in your records so you can refer to them if you wish to add options or make repairs. • The instructions in this manual lead you through each step in the assembly process. It is important for you to follow them closely. • We recommend that you use gloves during assembly. • Hobby Gardener is not responsible for the misuse of tools or parts. • If local building codes require permits or licenses make sure that they are acquired before beginning. • Your Greenhouse should be secure ly anchored to the prepared foundation using the recommended hardware. • If you prepare a concrete foundation do not ex cavate and pour concrete in frozen ground. • Exercise caution when lifting heavy assemblies. • Do not attempt to assemble your Greenhouse in high winds. • We recommend that you place your Greenhouse in a spot where it will receive direct sunlight and will be protected from the wind as much as possible. The door should not face prevailing winds. • When your Greenhouse is fully assembled examine it for sharp edges and trim with a razor knife if necessary. • Close all roof vents in high winds. • It is important to clear your Greenhouse of snow in the winter. • If you live in a hot climate, where outside temperatures exceed 46° C (115° F) in the sun or 36° C (99° F) in the shade, this may cause the temperature inside the greenhouse to exceed 55° C (131° F). Such conditions may harm your plants and will damage the greenhouse by warping structural profiles. In order to prevent damage: • Ensure good ventilation during hot days. • Make sure that the temperature inside the green house never exceeds 55° C (131° F) by providing a shading screen, such as the Shade Net (available as an accessories option). Note: Hobby Gardener is not responsible for any damage due to high temperatures. Important: Make sure that you check the contents of the greenhouse packaging against the packing list and the required parts for your model on page 4 and following. Do not begin assembly if any parts are missing. Required Tools Before you start assembly have the following available: • Power drill • Measuring tape • Level • Scissors • Gloves • Awl • Razor knife • Sponge and soapy water Note: You may find some parts easier to assemble if you first moisten them with soapy water. Accessories Hobby Gardener offers a wide range of accessories for your greenhouse from modular bases for the foundation, automatic window openers, and shelving for your plants. Hobby Gardener Assembly Instructions 1 Introduction Congratulations on purchasing an EcoGrow. We are certain that it will give you many happy years of pleasure in your garden. Hobby Gardener has been designed to be as easy to put together as it is beautiful to look at. Most of the work can be done by a single person. Only attaching the roof requires the help of a family member or neighbor for a short while. Easy assembly methods eliminate the need for tools or special expertise. Connect the specified parts. Match the holes in the profiles and the connectors. Place a pin on the pin tool and push the pin through the lined-up holes to lock the parts in place. Many connections require pins on both sides. Note: Extra pins are included. If you wish to disassemble the parts at any time, remove the pins using the pin tool. Place the end into the exposed hole and lever the pin out. If a hole in the connector is missing, drill a hole with a 6 mm (¼") drill bit through the assembled profile and then insert the pin. In extremely rare cases connectors will not slip into some round or oval profiles. In this case place the affected part into10 cm (4”) of boiling water for 15 seconds before connecting. Important: In order to maintain the life of your greenhouse, it is essential to insert glazing elements fully and completely. Moisten the glazing element with soapy water. Insert one end of the glazing element into the profile until it snaps into place. Push the glazing element along its length. Continue until the end of the glazing element snaps in place. The callout ( ) shows an enlarged cross-section of the profile and glazing element when it is seated correctly Greenhouse assembly is done in the following steps: Prepare a Foundation for Your Greenhouse ------ 3 Identify Greenhouse Parts ----------------------------- 4 Prepare Your Parts for Assembly --------------------- 7 Lay Out the Greenhouse Frame ---------------------- 8 Secure the Frame to Foundation -------------------- 9 Assemble the Roof Pediments ----------------------- 10 Assemble Roof Framework ---------------------------- 12 Cover the Greenhouse Roof --------------------------- 13 Cover the Walls ------------------------------------------- 17 Raise the Roof --------------------------------------------- 18 Seal Palnels ------------------------------------------------ 19 Seal The Door --------------------------------------------- 21 Assemble the Door -------------------------------------- 20 Hang the Door -------------------------------------------- 22 Assemble Door Latches -------------------------------- 24 Assemble the Door Holders --------------------------- 25 Final Touches --------------------------------------------- 26 Hobby Gardener Assembly Instructions 2 Prepare a Foundation for Your Greenhouse Before assembling your new Greenhouse a proper foundation must be prepared. A number of anchoring options are possible, based on wind and ground conditions in your area. Make sure that you have checked with your local authorities regarding any required building permits. Decide at this time the final orientation of your Greenhouse. We recommend that you place your greenhouse in a spot where it will receive direct sunlight and will be protected from the wind as much as possible. The door should not face prevailing winds. It is important to clear your Greenhouse of snow in the winter. Modular Base (Option) If you have purchased the optional Greenhouse Modular Base follow the assembly instructions in the packaging. The Greenhouse Modular Base can be placed in an excavated hole or on the ground. In either case you will require sufficient gravel, earth or other suitable material to fill the base (see table below). All required hardware is included. Rion Resin Greenhouse Base If you have purchased the optional Rion Resin Greenhouse Base follow the assembly instructions in the packaging. The Greenhouse Modular Base can be placed in an excavated hole or on the ground. In either case you will require sufficient gravel, earth or other suitable material to fill the base (see table below). All required hardware is included. Treated Wood Base Build a framework composed of 4 6 () and 2 12 () treated lumber using deck screws or galvanized lag bolts and fill it with gravel or earth or other suitable material to fill the base up to the top surface of the 4 6 (). Attach the greenhouse frame through the connectors using screws that are 6 mm (B") in diameter and no less than 70 mm (2C") long (not supplied). Model HG 8’ x 8’ HG 8’ x 12’ HG 8’ x 16’ Base Width 2.65 meter (8’ 8J”) 2.65 meter (8’ 8J”) 2.65 meter (8’ 8J”) Base Length Fill Quantity 2.65 meter (8’ 8J”) 0.68 cubic meters (24 cubic feet) 3.90 meter (12’ 9L”) 1.02 cubic meters (36 cubic feet) 5.14 meter (16’ 10E”) 1.36 cubic meters (48 cubic feet) Screw/Lagbolts 20 28 36 Note: You may assemble the greenhouse on its base on a hard surface and move it to its final position when you have finished. Make sure that there are no obstructions between the assembly area and the final position. Other Foundation Options Wood Deck Your Greenhouse can be secured to a wood deck with screws (not supplied) through the frame connectors. Use screws that are 6 mm (B”) in diameter and no less than 70 mm (2C“) long. Make sure that the wood deck itself is securely anchored to the ground. See hardware quantities and foundation measurements above. Excavated Trench Your Greenhouse can be placed in an excavated trench to anchor it to the ground. See the foundation measurements above for dimensions. Concrete Foundation Prepare a poured concrete foundation according to local building codes. Do not excavate and pour concrete in frozen ground. Make sure that there is a slight slope for drainage. Pour your foundation according to the size of the greenhouse model you have selected. Make sure that the foundation is at least 10 cm (4") larger than the size of the greenhouse. The Greenhouse is secured to the concrete foundation using screws and concrete anchors or expansion anchors (not supplied). Use screws 6 mm (B") in diameter and no less than 70 mm (2C") long. A drill with an appropriate masonry bit is required. Model HG 8’ x 8’ HG 8’ x 12’ HG 8’ x 16’ Middles HGF +HGB + HGM HGF +HGB + HGM (2) HGF +HGB + HGM (3) Foundation Width 2.70 meter (8’ 10”) 2.70 meter (8’ 10”) 2.70 meter (8’ 10”) Foundation Length Expansion Anchor Sets 2.70 meter (8’ 10”) 20 3.95 meter (12’ 11”) 28 5.20 meter (17’) 36 3 Identify Greenhouse Parts Because of the Greenhouse modularity, you may purchase additional HGM double Middles to fit your needs. Note: HGM single Middles are also available. Take a minute to make sure you have everything you need. Note: Do not proceed with assembly if any parts are missing. The part code is stamped on each connector. Profiles are listed in order by size, largest to smallest. Panels are identified with stickers. Exact dimensions can be found in the packing list. 4 Hobby Gardener Assembly Instructions The drawings in this manual are designed for the greenhouse owner who has purchased a Greenhouse 8’ x 8’, which consists of one front unit (HGF), and one back unit (HGB) and one HGM (Middle) unit. If you have purchased additional Middles the instructions are indicated in the text. P a r t C od e Fr ont B a ck M i dd l e D es cr i pti on 01 2 2 0 Corner Frame Connector 2D 3 4 4 Frame Connector 15 1 0 0 Doorway Frame Connector 3A 1 1 0 Left Rib Connector 4A 1 1 0 Right Rib Connector 5A 3 2 10 Rib Connector 6A 1 1 0 Left Pediment Connector 7A 1 1 0 Right Pediment Connector 8A 1 1 0 Top Pediment Connector 09 7 3 0 T-Oval Connector 10 0 3 0 Oval Junction Connector B2 6 6 4 Base Profile (50 cm, 1' 711⁄16”) 18 8 0 0 Corner Oval Connector DoorH33 1 0 0 Door Handle R1 R8 R2 2 2 2 2 2 2 0 0 0 Round Profile (113 cm, 3' 8½”) Round Profile (80.2 cm, 2' 79⁄16”) Round Profile (53.4 cm, 1' 9”) E12 E1 E6 E2 E4 E5 1 7 1 8 2 2 0 4 1 12 3 2 0 4 4 14 0 0 Oval Profile ( 116.2 cm, 3' 9¾”) Oval Profile ( 113 cm, 3' 8½”) Oval Profile (85 cm, 2' 97⁄16”) Oval Profile (54 cm, 1' 9¼”) Oval Profile (39.4 cm, 1' 3½”) Oval Profile (13.4 cm, 5¼”) E101 E103 SR1 4 6 2 0 Oval Profile (30 cm, 1113⁄16”) Oval Profile (46.5 cm, 1' 65⁄16”) Inner Round Profile (40 cm, 1' 3¾”) 0 5 Pa r t C od e Fr ont B ack M i ddl e D es cr i pti on D1 1 1 0 Side Cap D2 1 0 2 Middle Cap PN1 4 6 4 Wall Panel - (59.7 x 118.3 cm / 1' 11½” x 3’109⁄16”) PN2 0 0 4 Lower Roof Panel - (60.5 x 66.7 cm / 1' 1113⁄16” x 2’2¼”) PN2A 2 2 0 Lower Roof Panel (side) - (61.7 x 66.7 cm / 2' 5⁄16” x 2’2¼”) PN5L 1 1 0 Side Panel (Left) - (58.1 x 44.9 cm / 1' 107⁄8” x 1’511⁄16”) PN5R 1 1 0 Side Panel (Right) - (58.1 x 44.9 cm / 1' 107⁄8” x 1’511⁄16”) PN8R 1 1 0 Pediment Panel Half (Right) PN8L 1 1 0 Pediment Panel Half (Left) ST7 2 2 0 Window Couplers PN9 0 2 0 Upper Back Wall Panel - (59.9 x 44.7 cm / 1' 119⁄16” x 1’53⁄8”) PN40 0 0 3 Top Roof Panel - (60.5 x 97.6 cm / 1' 1113⁄16” x 3’23⁄8”) PN40A 2 2 0 Top Roof Panel (outside) - (61.7 x 97.6 cm / 2' 5⁄16” x 3’23⁄8”) PN123 2 0 0 Top Door Panel - (52.2 x 35 cm / 1'8 ½” x 1’16⁄8”) PN124 2 0 0 Lower Door Panel - (52.2 x 118.3 cm / 1'8 ½” x 3’109⁄16”) WIN33 0 0 1 Roof Vent WINH31 0 0 1 Roof Vent Handles (packages of 2) GSC10 0 2 0 Back Pediment Strengthening Bar GSE12 1 0 0 Front Pediment Strengthening Bar DSN 1 0 0 Door Sealer (roll) GF 1 1 1 Flexible Glazing Seal (roll) RA1 1 1 2 RA Glazing Element (57.3 cm, 1' 109⁄16”) RB4 RB6 RB1 1 2 3 1 2 3 4 0 4 RB Glazing Element (84.8 cm, 2' 93⁄8”) RB Glazing Element (80 cm, 2' 7½”) RB Glazing Element (52 cm, 1' 8½”) RC5 RC1 RC3 3 3 1 3 3 1 4 4 2 RC Glazing Element (95.5 cm, 3' 15⁄8”) RC Glazing Element (66.6 cm, 2' 2¼”) RC Glazing Element (58 cm, 1' 1013⁄16”) RD1 4 4 8 RD Glazing Element (56.9 cm, 1' 103⁄8”) PIN1 160 160 120 Connector Pin (inside E12) 6 Hobby Gardener Assembly Instructions P a r t C od e Fr ont B a ck M i dd l e D es cr i pti on GT1 1 1 0 Pin and Glazing Tool SF 1 1 1 Soft Foam Roof Insulation (roll) Latch 2 0 0 Inner Door Latch 7218 2 0 0 Latch Addaptor 7216 2 0 0 Left Door Hinge 7215 2 0 0 Right Door Hinge 7217 6 0 0 Hinge Base 7273 1 0 0 Hendle holder 7272 1 0 0 Door Holder 7224 22 0 0 M6 x 80 Bolt 4016 4 0 0 M6 x 20 Bolt 466 21 0 0 M6 Flange Nut 7279 5 0 0 M6 Nylock Nut 425 4 0 0 Washer 423 8 0 0 M4 Nylock Nut 7222 8 0 0 M4 PH Bolt 7281 4 0 0 Philips Screw 6x25 AS 70 2 0 4 Cable screw AW5 1 0 0 Allen Wrench Hook1 1 0 2 Top Catch CAB40 1 0 2 Cable Doors Kit SUPP1/2 Prepare Your Parts for Assembly Remove everything from your packages and sort them according to part type. Since assembly is done from taking parts from every box, it is best to put everything together. The boxes are printed with a ruler to help you distinguish between profiles. Note: Protect unassembled panels from the sun to prevent identification stickers from adhering to the glazing. 7 Lay Out the Greenhouse Frame Decide in which direction the door will face and place the parts on the prepared foundation or wood deck. Note: If you are using a modular base or other foundation option (see page 3) assemble the base on a flat surface (such as a driveway or a garage) and them move it into position when you are done. Slide the SR1 profiles into the two B2 frame profiles that will be used for the doorway. Note: Arrange all 2D connectors with the stamped word OUT facing the outside of the greenhouse. Place the other parts of the frame in place and push them together. Make sure that the channel of the 2D connectors faces outward. Each base connector is stamped with an arrow pointing to the outside direction. Lock the frame together with pins. 466 2D B2 466 7224 7217 7224 B2 466 B2 466 7217 7224 15 7224 B2 Make sure that the frame is perfectly rectilinear by measuring the diagonals and verifying that they are the same. Use a spirit level to make sure that the frame is level. 8 Hobby Gardener Assembly Instructions Secure the Frame to the Foundation Make sure you have the proper hardware before beginning this step. (See page 3.) Note: If you are using a modular base and filler you may assemble the greenhouse on a hard surface and move it to its final position when you have finished. Make sure that there are no obstructions between the assembly area and the final position. Rion Resin Greenhouse Base, Wood Deck, or Treated Foundation Insert screws into the frame connector holes and secure them to the base. Note: If you have purchased the optional Rion Resin Greenhouse Base all necessary hardware is included. Concrete Foundation Mark the foundation through each connector using a scribe or screw. Carefully move the frame and then drill holes using an appropriate masonry bit. Insert concrete anchors or expansion anchors (not supplied) in each hole. Move the frame back into place. Make sure that it is still perfectly rectilinear. Secure the screws/anchors in place. 9 Assemble the Roof Pediments Put ST7 couplers on the PN8R and PN8L pediment panel halves as shown. The tops of each coupler are trimmed to match the angle of the panel. Note: The outside surface of the panels have special UV protection, indicated by the logo and the plastic identification strip. Remove plastic ID strips as panels are locked in place. Slide the two pediment panel halves together. Assemble the left half of the front pediment. Attach the E12 profile to the 09 connector. The GSE12 Strengthening Bar, which is inside the profile, slides into the 09 connector. Assemble the second 09 connector to the E12 profile. Slide the assembled PN8R/ PN8L pediment panel into the open space of the pediment. Complete the front pediment, taking advantage of the flexibility of the profiles. Lock the pediment in place using pins and remove the ID strips from the panels. Complete Doorway Pediment Attach an E4 and R2 profiles to the lower right pediment. Slide the PN5R panel in place. Make sure that the plastic ID strip faces out. Connect the 4A and 09 connectors to an E2 profile and put it in place taking advantage of the flexibility of the profiles. Lock the panel with pins. Assemble the lower left pediment in the same way. Remove the ID strips from the panels. 10 Hobby Gardener Assembly Instructions Back Pediment Put ST7 couplers on the PN8R and PN8L pediment panel halves with the ID plastic strip facing out. The tops of each coupler are trimmed to match the angle of the panel. Slide the two pediment panel halves together. Assemble all parts of the back pediment except for the 7A connector and the R8 profile and slide the assembled PN8R/PN8L pediment panel into the open space of the pediment. Complete the back pediment, taking advantage of the flexibility of the profiles. Lock the pediment in place using pins and remove the ID strips from the panels. Hold a 10 connector with the identifying “10” on top and insert two GSC10 strengthening bars at an angle, as shown, from each side. They overlap inside the connector with their ends flush with the far end. Note: The strengthening bars cannot be inserted all the way if the identifying “10” is not on top. Slide two E2 profiles over the GSC10 strengthening bars. The ends of the strengthening bars extend beyond the E2 profiles. Complete the back pediment support with 10 connectors, E2 profiles and 4A and 3A connectors as shown. Put the remaining profiles on the back pediment top. Slide the back pediment panels in as shown. Make sure that the plastic ID strip faces the outside. Put the back pediment support in place, taking advantage of the flexibility of the profiles. Lock everything into place using pins and remove the ID strips from the panel. 3A 11 Assemble Roof Framework Note: Assemble the roof in an area not too far away from the completed base. First assemble the first arch. Slip one end of the CAB40 cable through the 6 mm (¼") channel on the underneath side of the 5A connector. You may use the GT1 pin and glazing tool to assist you. The cable does not go through the central hole of the connector. Screw an AS70 screw using the AW5 Allen wrench through the CAB40 cable and the pin holes in both sides of the connector. Note: The end of the screw should not extend beyond the outside channel of the E2 profile so it won’t interfere with the placement of the RB1 glazing element (page 13). Repeat the previous two steps for the 5A connector on the other side of the arch. Lock the parts in place using pins. Repeat steps through for the rest of the arches according to the number of HGM Middles you have purchased. Grasp the center of each CAB40 cable with the Hook1 Top Catch and slide it into the top 5A connector as shown. Add E2 profiles to the front pediment and lock the parts in place using pins. Add E2 profiles to the completed ribs according to the number of Middles you have purchased and lock them into place with pins. Complete the roof by attaching the back pediment. Lock it into place with pins. 12 Hobby Gardener Assembly Instructions Cover the Greenhouse Roof Step in the framework of the lower window to reach the top of the roof conveniently. Place RA1 glazing elements on the top of the roof by placing one end in the top channel and pushing it down along the length of the profile. Important: In order to maintain the life of your greenhouse, it is essential to insert glazing elements fully and completely, using soapy water, as explained on page 2. Place RB1, RB4, and RB6 glazing elements along the arches where shown. Place one end of the RB elements in the channels of the profiles and slide them down the length of the profile. Note: If you have difficulty inserting the top of the RB1 glazing element slightly loosenthe AS70 screw holdin g in the CAB40 cable. Tighten the AS70 screws holding the CA B40 cables with the AW5 Allen wrench. 13 Place RD1 elements where shown by placing one end in the channel and pushing it down along the length of the profile. Note: You may find it easier to insert RD elements into profiles by pushing them in from the top while rolling the element downwards. Important: In order to maintain the life of your greenhouse, it is essential to insert glazing elements fully and completely, using soapy water, as explained on page 2. Place the four PN40A side panels in place by sliding one corner into the RD1 glazing element. Continue until they are fully inserted. Decide which of the inner Middles to use for the Roof Vent. Note: The Roof Vent cannot be inserted in the outside spaces. Assemble the two WINH31 handles to the WIN33 Roof Vent using the included pins. Insert the Roof Vent in one of the remaining central spaces by sliding one corner into the RD1 glazing element. Note: Additional Roof Vents are available as an option. Install the remaining PN40 panels and remove the ID strips from the panels. Caution: Close windows in high winds. Automatic window openers are available as an option. 14 Hobby Gardener Assembly Instructions Lock the sides of the Roof Vents and the PN40 using RC5 glazing elements. Make sure that the end of the RC glazing elements are in line with the bottom of the RD elements. Finish locking the panels into place by placing RC3 glazing elements across the top of the roof. Important: In order to maintain the life of your greenhouse, it is essential to insert glazing elements fully and completely, using soapy water, as explained on page 2. Snap the roof caps in place on the top rib intersections. Note: If you need to remove the roof caps push them on one side and then lift. Note 15 Making sure that the plastic ID strip faces out, slide a PN2A panel in the lower RD1 element. Bend the panel until it enters the upper RD1 element. Continue with the rest of the PN2 and PN2A panels. Lock the lower panels into place using RC1 glazing elements. Make sure that the end of the RC glazing elements are in line with the bottom of the RD elements. Note: You may now remove the plastic ID strips from the panels. Important: In order to maintain the life of your greenhouse, it is essential to insert glazing elements fully and completely, using soapy water, as explained on page 2. 16 Hobby Gardener Assembly Instructions Cover the Walls Put the R1 round profiles in place. Insert two pins in each R1 profile to lock them in place. Do not insert pins in the inner (panel) channels. Add the E1 oval profiles until the frame is completed. Secure the E1 profiles with pins. Take a PN1 panel with the plastic ID strip facing out, and put the panel in place by gently curving it so that it enters the side channels of the columns. Lower the panel towards the frame and insert the lower end into the frame channels. Continue with the rest of the PN1 panels. Remove the ID strips from the panels. 17 Raise the Roof Make sure that the roof is in the same orientation as the base and door. Lift the roof from both edges and walk through the door towards the back wall. Note: You will need the help of another person for a short while to lift the roof and put it in place. Place the roof on the columns and circle around the greenhouse and insert the first 1 cm (½") of the roof connectors into the columns. Panel by panel, circle around the greenhouse and lower the roof into place. Use the GT1 glazing tool to guide the corners of the PN1 panel into the channels. Lock the roof in place with pins. 18 Hobby Gardener Assembly Instructions Seal Panels Take the roll of GF sealer, divide it as shown, and pull out enough for one side of a PN1 panel. Note: If the GF Sealer is not divided it will not fit in the channel of the column profile. Cut it to length. Align it with the channel of the column profile with the double ridge facing the panel. Push it in to seal the panel using the GT1 glazing tool if needed. Repeat for the other PN1 panels and the panels in the front and back pediments. 19 Assemble the Doors Assemble the profiles and connectors of the lower portion of the doors. Use the DoorH33 handle where shown on the left door. Put the PN124 panel in place with the plastic ID strip facing outwards. Assemble the upper portion of the door. Put the PN123 panel in place with the plastic ID strip E101 facing outwards. E103 E103 E101 PN123 PN123 E103 E101 PN124 PN124 E103 Hinges & Pins E101 E103 E103 466 7215 466 7215 7216 7216 7224 466 7224 Pin1 Pin1 Pin1 Pin1 Pin1 Pin1 7224 466 466 7216 7216 7215 7224 7215 20 Hobby Gardener Assembly Instructions Seal the Door A=B A B B A GF GF GF GF GF GF 21 Hang the Doors Remove all pins where screws are needed, using the glazing tool. pin1 pin1 466 1 pin1 466 pin1 7224 7217 7224 7279 2 7279 2 +3 466 1 +3 7272 7217 7224 7224 4016 3 425 4 7279 4 4 4016 425 7279 22 Seal the Doors 1 DSN DSN 1 DSN DSN 2 DSN DSN 2 DSN DSN DSN 23 Assemble Door Latches Remove all pins where screws are needed, using the glazing tool. 1 2 Latch 7218 7281 7222 7217 423 7281 3 466 7224 1 +2 +3 INSIDE 4 +5 4 7224 5 7218 Latch 7222 423 7224 466 466 24 466 Attach Door Holder 1 pin1 2 7273 7281 Holding the doors open: 25 Final Touches Go inside your new Greenhouse and seal any gaps between the PN2 pieces of SF soft foam insulation 2.5 cm (1") long, remove the adhesive backing, and place where shown, making sure that the area is clean and dry. easy to clean and maintain. Put this manual in a safe place so you can refer to it if you decide to add options or need to make a repair. For your safety and convenience, please take note of the following: • Examine your Greenhouse for sharp edges and trim with a razor knife if necessary. • It is important to clear your Greenhouse of snow in the winter. • If you live in a hot climate, where outside temperatures exceed 46° C (115° F) in the sun or 36° C (99° F) in the shade, this may cause the temperature inside the greenhouse to exceed 55° C (131° F). Such conditions may harm your plants and will damage • Ensure good ventilation during hot days. • Install a shading screen, such as the Rion ShadeNet (available as an option). • Always close roof vents in high winds. additional windows, automatic window openers, and others. See our web page at http://www.rion.com for a complete listing. Thank you for your purchase. We wish you many years of pleasure with your greenhouse. Please feel free to contact us with any questions, comments, or suggestions. Rion Hobby - Assembly Instructions - V1-6 - Aug 2012 26 Warranty 1. Warranty Coverage Subject to the exclusions set forth below, Rion Ltd. warrants that the greenhouse covered by this warranty (the "Greenhouse" or the "Product") is warranted to the original purchaser only ("Purchaser") against damage or breakage caused, through normal use for the purpose intended by Rion Ltd. and in accordance with its instructions, by any defects in material or workmanship for the following periods: (a) With respect to the Product's structure (i.e., the profiles of the Greenhouse) – for a period of 5 years from the original date of purchase ("Purchase Date"). (b) With respect to Discoloration and/or fading of the Greenhouse's panels caused through normal use- for a period of 10 years as of the Purchase Date. For the removal of doubt, this warranty does not cover discoloration caused by use of chemicals and/or any other reason other than exposure to the sunlight. (c) With respect to malfunction and/or possible distortions of the Greenhouse's jointers- for a period of 7 years as of the Purchase Date. (d) The purchaser 's exclusive remedy is as set forth in section 5 ("Remedies") below, and valid only upon presentation of the original purchasing invoice of the greenhouse. 2. Notification of Claims If Purchaser believes that the Greenhouse is defective in material or workmanship, then written notice providing details of the alleged defect must be sent by Purchaser to the local representative as per our website's contact list at www.rion.com, within 30 days after discovery of alleged Product defect, and in any event within the warranty period. Any such notice must note Purchase Date and include documentary evidence thereof (such as invoice or receipt) in order to establish warranty eligibility. Repair or replacement of any Product or part thereof will not extend the warranty period as to the entire Product. Repaired or replaced parts shall be subject to a specific warranty for a period of 90 days, following repair or replacement, or the remaining period of the Product part's warranty, whichever is greater. 3. Exclusions from Warranty Coverage This warranty provides a remedy only for defects reported in accordance with section 1.4 above. In addition this warranty does not provide a remedy in any of the events specified below: (a) This warranty does not cover Greenhouses larger than 8 or 6 foot by 16 foot. (b) This warranty does not cover Greenhouses in climates in which the temperature exceeds 50° (fifty degrees) Celsius (122º degrees Fahrenheit) or have a load exceeding 50 kg / 110 Lb per 1 Sq. Mr. / 10.89 Sq. Ft. (c) This warranty does not apply to Product exposed to wind speed exceeding 90 KM/HR (55 Miles/HR). (d) Rion shall have no liability or obligation to Purchaser with respect to any Greenhouse covered by this Warranty which is subjected to any of the following: abuse; improper use or operation; incorrect handling; use of force; negligence or accident; modification; alteration; impact from foreign objects; vandalism; pollutants; set-up on an un-level foundation; painting; fading; assembly not in accordance with the users manual; failure to follow the instructions outlined in the users manual; failure to follow the maintenance procedures in the service manual for the Greenhouse where a schedule is specified for regular replacement or maintenance of certain parts (based on usage) and Purchaser has failed to follow such schedule; failure to erect the Greenhouse according to the instructions provided by Rion; defects or damage that result from purchaser constructing the Greenhouse using components other than original Rion components supplied by Rion; attempted repair by non-qualified personnel; defects or damages resulting from service, testing, adjustment, installation, maintenance, alteration, or modification in any way by someone other than Rion, or anyone authorized by it; operation and/or use of the Greenhouse outside of the published parameters and for purposes other than those defined by Rion in this manual, or if such Products' original identification (trademark, serial number) markings have been defaced, altered, or removed; normal wear and tear; defects or damage that result from the use of Non-Rion branded or certified Greenhouse or other peripheral equipment; acts of God such as earthquakes, tornados, floods, hail, storms, hurricanes, blizzards, floods, fire effects or other similar severe weather or similar natural phenomena; any other act which is not the fault of Rion is excluded from coverage. Rion excludes from warranty coverage Greenhouses sold AS IS and/or with ALL FAULTS and excludes used Greenhouses which have not been sold by Rion (or by those authorized to do so by Rion) to the Purchaser. 4. Exclusion of Implied Warranties; No other Expressed Warranties; Except for the foregoing warranty and without derogating from provisions of Section 3 ("Exclusions from Warranty Coverage") above, Rion hereby disclaims and excludes all other warranties, express or implied, including but not limited to any and/or all implied warranties of merchantability, fitness for a particular purpose or any other warranties otherwise arising from a course of dealing or a usage of trade or advertising (except where such warranties arise under applicable consumer product warranty laws and cannot lawfully be disclaimed, in which event such warranties are limited to their minimum applicable scope and to the shortest period permitted or required under applicable law). Rion hereby disclaims any representation or warranty that the Greenhouse is compatible with any combination of non-Rion products Purchaser may choose to connect to the Greenhouse. In no event shall Rion be liable, whether in contract or tort (including negligence) for damages in excess of the purchase price of the Greenhouse, or for any indirect, incidental, special or consequential damages of any kind, including but not limited to, personal physical injuries to any person, compensation, reimbursement or damages on account of loss of revenue or profits, loss of business, loss of information or data, or other financial loss arising out of or in connection with the ability or inability to use the products to the full extent these damages may be disclaimed by law, or for breach of any expressed written or oral or implied warranty on Greenhouses. 5. Remedies This section provides for the sole remedy available to the Purchaser from Rion for any defect in the Greenhouse proven to be defective in material or workmanship under normal use during the relevant Warranty Period. In the event of any defect covered hereby, or any implied warranty, Rion at its sole discretion shall replace the defective Product or any part thereof which requires replacement or pay the replacement cost. Rion reserves the right to make substitutions for warranty claims if parts or the Greenhouse are unavailable or obsolete. Purchaser's failure to make a claim as provided in section 2 above or continued use of the Greenhouse shall constitute an unqualified acceptance of such Greenhouse and a waiver by Purchaser of all claims thereto. Rion reserves the right to discontinue or change any of its products, including colors, without notice. Should a Greenhouse or a part thereof covered by this Warranty be unavailable, Rion reserves the right to substitute a Greenhouse or part thereof that is of equal value according to Rion's sole discretion, or to provide Purchaser with a refund which reflects the cost of the Greenhouse or the part thereof. Taxes, shipping costs, inconvenience, loss of use, installation fees, incidental or consequential damages are not covered by this Warranty.