1
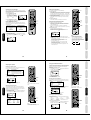
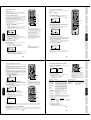
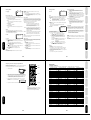
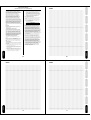
Connecting an HDMI™ or a DVI device
This connection allows you to watch videos recorded on a camcorder.
You will need:
• one set of standard AV cables
VHS Camcorder
[1] EIA/CEA-861/861B compliance covers the
transmission of uncompressed digital video with highbandwidth digital content protection, which is being
standardized for reception of high-definition video
signals.
Because this is an evolving technology, it is possible
that some devices may not operate properly with the
TV.
This input is designed to accept HDCP (High-Bandwidth DigitalContent Protection) program material in digital form from EIA/
CEA-861/861B-compliant[1] consumer electronic devices (such
as a set-top box or DVD player with HDMI or DVI output).
AUDIO
L
The HDMI input is designed for best performance with high
definition video signals. They will accept and display 480i, 480p,
720p and 1080i signals.
R
OUT
NOTE: DO NOT CONNECT A PC USING
THE HDMI INPUT.
ALWAYS use the VGA port provided to connect a PC.
TV/DVD back panel
To ensure that the HDMI or DVI device is reset properly, it is recommended that you follow these procedures:
• When turning on your electronic components, turn on
the TV/DVD first, and then the HDMI or DVI device.
• When turning off your electronic components, turn off
the HDMI or DVI device first, and then the TV/DVD.
To connect an HDMI device, you will need:
• one HDMI cable (type A connector)
S-VIDEO
VIDEO
Note:
AUDIO
L
R
OUT
TV/DVD back panel
To connect a DVI device, you will need:
• one HDMI–to–DVI adapter cable
(HDMI type A connector)
HDMI cable transfers both video and audio. Separate
analog audio cables are not required (see illustration
below).
For proper operation, the length of an HDMI-to-DVI
adapter cable should not exceed 9.8 ft (3m). The
recommended length is 6.6 ft (2m).
• one pair of standard analog audio cables
You must set the HDMI audio input setting to “HDMI”
in the AUDIO menu (see page 42).
An HDMI-to-DVI adapter cable transfers only video.
Separate analog audio cables are required (see
illustration below).
Some CDVs (Video CDs) may not output digital audio
signals. In that case, you may hear sound by connecting
analog audio cables. If you do use analog audio cables for
this reason, you will need to set the HDMI audio input
setting to “DVI” to hear the analog audio (see page 42).
Note: If you connect an HDMI device and analog audio
cables and play media with digital audio output, to hear
digital audio you must set the HDMI audio input setting
to “HDMI” (page 42).
You must set the HDMI audio input setting to “DVI”
in the AUDIO menu (see page 42).
DVI device
VIDEO
DVI
OUT
AUDIO
L
R
IN
OUT
Using the
TV/DVD’s Features
For better picture quality, if your camcorder
has S-video, you can use an S-video cable
(plus the standard audio cables) instead of a
standard video cable.
Do not connect both a standard video cable
and an S-video cable at the same time, or the
picture performance will be unacceptable.
For proper operation, it is recommended that you use
as short an HDMI cable as possible. You should not
encounter difficulty if you use an HDMI cable that is
shorter than 16.4 ft (5m).
Setting up
your TV/DVD
S-VHS Camcorder
You will need:
• one S-video cable
• one pair of standard audio cables
Connecting
your TV/DVD
Connecting
your TV/DVD
VIDEO
The HDMI input on your TV receive digital audio and
uncompressed digital video from an HDMI source device, or
uncompressed digital video from a DVI (Digital Video Interface)
source device.
Introduction
Connecting a camcorder
HDMI device
VIDEO
AUDIO
L
R
IN
HDMI
OUT
TV/DVD back panel
TV/DVD back panel
16
17
To COAXIAL
DIGITAL AUDIO OUT
To COAXIAL
type digital
audio input
Digital Theater Systems (DTS)
DTS is a high quality surround technology used in theaters and now
available for home use, on DVD video discs or audio CDs.
If you have a DTS decoder or processor, you can obtain the full benefit
of 5.1 channel DTS encoded sound tracks on DVD video discs or audio
CDs.
TV/DVD back panel
Amplifier equipped with
a DTS decoder
Manufactured under license from Dolby
Laboratories. Dolby, Pro Logic, and the
double-D symbol are trademarks of Dolby
Laboratories.
You will need:
• one coaxial cable
Notes:
• Connect the COAXIAL DIGITAL AUDIO
OUT jack of the TV/DVD to the “COAXIAL”
input of a Receiver or Processor.
• Refer to the owner’s manual of the
connected equipment as well.
• The output sound of the TV/DVD has a wide
dynamic range. Be sure to adjust the
receiver’s volume to a moderate listening
level. Otherwise, the speakers may be
damaged by a sudden high volume sound.
• Turn off the amplifier before you connect or
disconnect the TV/DVD’s power cord. If you
leave the amplifier power on, the speakers
may be damaged.
DTS and DTS Digital Out are trademarks of
Digital Theater Systems, Inc.
To COAXIAL
type digital
audio input
Connecting
your TV/DVD
TV/DVD back panel
• Connect the COAXIAL DIGITAL AUDIO
OUT jack of the TV/DVD to the “COAXIAL”
input of a Receiver or Processor.
• Refer to the owner’s manual of the
connected equipment as well.
• The output sound of the TV/DVD has a wide
dynamic range. Be sure to adjust the
receiver’s volume to a moderate listening
level. Otherwise, the speakers may be
damaged by a sudden high volume sound.
• Turn off the amplifier before you connect or
disconnect the TV/DVD’s power cord. If you
leave the amplifier power on, the speakers
may be damaged.
To COAXIAL DIGITAL AUDIO OUT
Amplifier equipped with an
MPEG2 audio decoder
To COAXIAL
type digital
audio input
Connecting an amplifier equipped with a
digital audio input
2 channel digital stereo
You can enjoy the dynamic sound of 2 channel digital stereo by
connecting an amplifier equipped with a digital audio input and speaker
system (right and left front speakers).
You will need:
• one coaxial cable
Notes:
• PCM audio is limited to DVD or CD
playback.
• Connect the COAXIAL DIGITAL AUDIO
OUT jack of the TV/DVD to the “COAXIAL”
input of a Receiver or Processor.
• Refer to the owner’s manual of the
connected equipment as well.
• The output sound of the TV/DVD has a wide
dynamic range. Be sure to adjust the
receiver’s volume to a moderate listening
level. Otherwise, the speakers may be
damaged by a sudden high volume sound.
• Turn off the amplifier’s before you connect
or disconnect the TV/DVD’s power cord. If
you leave the amplifier power on, the
speakers may be damaged.
TV/DVD back panel
To COAXIAL DIGITAL AUDIO OUT
Amplifier equipped with a
Digital audio input
Appendix
To COAXIAL
type digital
audio input
18
Notes:
DVD Playback
To COAXIAL
DIGITAL AUDIO
OUT
• DO NOT connect the COAXIAL DIGITAL
AUDIO OUT jack of the TV/DVD to the AC-3
RF input of a Dolby Digital Receiver. This
input on your A/V Receiver is reserved for
Laserdisc use only and is incompatible with
the COAXIAL DIGITAL AUDIO OUT jack of
the TV/DVD.
• Connect the COAXIAL DIGITAL AUDIO
OUT jack of the TV/DVD to the “COAXIAL”
input of a Receiver or Processor.
• Refer to the owner’s manual of the
connected equipment as well.
• The output sound of the TV/DVD has a wide
dynamic range. Be sure to adjust the
receiver’s volume to a moderate listening
level. Otherwise, the speakers may be
damaged by a sudden high volume sound.
• Turn off the amplifier before you connect or
disconnect the TV/DVD’s power cord. If you
leave the amplifier power on, the speakers
may be damaged.
You will need:
• one coaxial cable
Using the
TV/DVD’s Features
Connecting an amplifier equipped with a
DTS® decoder
Notes:
MPEG2 sound
You can enjoy motion picture and live concert DVD video discs
encoded via the MPEG2 recording system with dynamic realistic sound
by connecting an amplifier equipped with an MPEG2 audio decoder or
MPEG2 audio processor.
Setting up
your TV/DVD
Amplifier equipped with a
Dolby Digital decoder
You will need:
• one coaxial cable
Connecting
your TV/DVD
TV/DVD back panel
Connecting an amplifier equipped with an
MPEG audio decoder
Introduction
Connecting an amplifier equipped with a
Dolby® Digital decoder
Dolby Digital
Dolby Digital is the surround sound technology used in theaters
showing the latest movies, and is now available to reproduce this
realistic effect in the home. You can enjoy motion picture and live
concert DVD video discs encoded via the Dolby Digital recording
system with this dynamic realistic sound by connecting the TV/DVD to
a 6 channel amplifier equipped with a Dolby Digital decoder or Dolby
Digital processor. If you have a Dolby Surround Pro Logic decoder, you
will obtain the full benefit of Pro Logic from the same DVD movies that
provide full 5.1-channel Dolby Digital soundtracks, as well as from titles
with the Dolby Surround mark.
Appendix
HDMI, the HDMI logo, and High-Definition Multimedia
Interface are trademarks or registered trademarks of HDMI
Licensing, LLC.
DVD Playback
OUT
19