1
WARNING
THE FOLLOWING SERVICING lNSTRUCTlONS
ARE FOR USE BY QUALIFIED PERSONNELONLY.
TO AVOID PERSONAL INJURY, DO NOT
PERFORM ANY SERVICING OTHER THAN THAT
CONTAINED IN OPERATING INSTRUCTIONS
UNLESS YOU ARE QUALIFIED TO DO SO. REFER
TO OPERATORS SAFETY SUMMARY PRIOR TO
PERFORMING ANY SERVICE.
PLEASE CHECK FOR CHANGE 1NFORMATION
AT f HE REAR OF THIS MANUAL.
7A42
LOGIC f RIGGERED
VERTICAL AMPLIFIER
SERVICE (VOLUME 1)
For Qualified Service Personnel Only
INSTRUCTION MANUAL
-.
Tektronin, Ine.
P.0. Box 500
Beaverton, Oregon
070-42WM)
Product Grwp 42
97077
Serial Number
Firs! Printing May 1983
Revised MAR 1988
Copyright 'e 1983 TekZrmix. Inc. All rights reserved.
Contents of this publication may not be reproduced in any
form without the written permission of Tektronix, Inc.
Products of Tektronix, Inc. and its subsidiaries are wvem
by U.S. and foreign patents anUlw pending patents.
@
TEKTRONIX, TEK, SCOPE+MOBILE, and
are
registered trademarks of Tektron~x.Ine. TELEQUIPMENT
is a registered trademark of TektrCmiK U.K. Lirnlted.
Printed in U.5.A. Specification and price change privileges
are reserved.
INSTRUMENT SERIAL NUMBERS
Each instrument has a serial numbw on a panel insert. tag,
or stamped on the chassis. The first numter or letter
designates the country of manufacture. The last Ave dig~ts
of the serial number are assigned sequentially and are
unique to each instrument. Those manufactured in the
Un~ted States have six unique digrts. The country of
manufacture is identified as follows:
BOO0000
100000
200000
300000
700000
Taktrcnix, tnc., Beavertm, Oregon, USA
Tektmin Guernsey,Ptd., Channel Islands
Tektronix United Kiqdom, Ltd., London
SonyKektronix, Japan
Tektronix Holland, NV, Heerenveen,
The NetMands
7A42 S d w Volume 1
TABLE
OF CONTENTS (CONT)
THEORY OF OPERATION (CONT)
Paes
AUTO RESTAFT ...............................2.16
WAITSTATE GENERATOR ......................
2.16
REAL TIME CLOCK .............................2.16
GENERAL INPUT IATCM .......................
2.18
PROBE OFFSR ACQUISITTON .................. 2.16
PROBE CODING AND DIAGNOSTICW
S
MUX ..........................................2.19
DIAGNOSTIC HOOKS .......................... 2.19
READOUT ........................................ 2.19
POWER SUPPLY AND MSTRIBVTION .............. 2.19
POWER STAGE ................................2.19
RECTIFIERS AND FILTERS ...................... 921
CURRENT LIMIT .............................. -2-21
INPUT FILTER .................................P21
PULSE WIDTH MODULATION ICONTROLLER ................................. 2.21
IDRIVERS ........................
..............2.27
SNUBBER ..................................... 2 . 2
ATTENUATOR SUPPLIES .......................2.22
=ON
!&MAINTENANCE
PREVaVTlVE MAINTENANCE ............................. 3-1
PLUG-IN PANEL REMOVAL .........................5 1
CLEANING ........................................2-1
W E R I O R ......................................3-1
INTERIOR ............................
..........91
LUBRICATION ..................................... 36
VISUAL INSPECTION ...............................3-4
SEMICONDUCTORCHECKS ........................ W
ELECTRICAL ADJUSTMENT ........................
3.4
ADJUSTMENT A-ER
REPAIR ...................... W
TROUBLESHODTIMG.....................................36
TROUBLESHOOTING AIDS ........................ "3-4
DIAGRAMS ..................................... %4
CIRCUIT BOARD ILLUSTRATIONS ...............M
COMPONEM CQLOR CODING
. . . .................. %5
WIRING COLDR CODE .........................3 5
SEMlCONDUCTOR LEAD CONFIGURATIONS ..... 8 5
STATlGSENSllVE ONICE
CLASSIFlCATtON ............................... 5 5
MULTI-PIN CONWECTOR IDENTIFICATION .......5 8
TROUBLESHOOTING EQUIPMENT ..................5 8
TROUBLESHOOTING TECHNIQUES ................. 3-9
1. CHECK CONIROL S m l N G S .................3-9
2. CHECK ASSOClATED EOUIPMEM............. W
3. Y ISUAL CHECK ...............................%g
4 ISOLATE TROUBLE TO A CIRCUIT .............3-9
5. CHECK INSTRUMENT AQJUSTMENT ...........3-9
8 CHECK VOLTAGES ........................... 3-9
7. CHECK INDIVIDUAL COMPONENTS ...........3-9
TRANSISTORS ...............................3 9
INTEGRATED CIRCUITS ......................9 8
DIODES ................................... -810
RESISTORS.................................
510
CAPACITORS ............................... 810
8 REPAIR AND ADJUST M E ClRCUfT ..........3-10
m
MAIMTNANCE ICONT)
DIAGNOSTICS AND TADUBLESHOOTING................ St2
SELF TEST .......................................b12
EXTENDED DIAGNOSTICS......................... 3 1 2
BACKGROUND INFORMATTON ON
SIGNATURE AFEALYSlS .........................515
EXTENDING CIRCUIT BOARDS FOR
TROUBLESHOOTING...........................315
HOW TO EXTEND THE A6 TRtWES BOARD ..515
HOW TO EXTEND THE A7 DIGITAL BOARD 815
WHAT TO W IF THE 7A42 OOES NOT
RESPOND TO FRONT-PANEL CONTROCS .......... 918
FORCEQINSTRUCTION FREERUN .............. a18
EKIERNAL BUS EXERCISE (XBUSXJ............. 2-21
INTERVAL 1 (SEE FIG. 3.9) ...................2-21
INTERVAL 2 ................................
3-21
INTERVAL 3 ................................s21
tNTERVAl4 ................................5 2 1
EXTERNAL BUS OPERATION ................3-22
FRONT-PANEL LED OPERATION .............8 Z 2
FRONT PANEL KEYS AND WM OVSRdY .....322
PROBE OFFSET OAC AND 00MPAFIATOR ....$22
AUTO RESTART CIRCUIT ...................3 2 2
DIAGNOSTIC f EST DESCRIPTIONS ................823
ROMS .........................................
S25
1-FPOM A8V145 ............................. 3-2fr
2-ROM A8U245 .............................3-25
S R O M Am340 .............................3-25
4-ROM A8U345 ............................. %25
RAMS .........................................3.25
E-UAM Am815 ............................. 825
G R A M AW615 ............................. 5 2 5
MPU BOARD MISCELLANEOUS ................. 325
7-REAL TIME INERRUPT ClRWlT (RST5.5)
MU815 A
m ........................... 3-a5
&EXTERNAL B4JS CLEAR .................. 926
%WAIT STATE GENERATOR ABW835 ........ 3-26
I S P R O B E OFFSFT ADZ ABUBOR
...
.
A 8 U W
...................................926
DtGITAL BOARD MISCELLANEOUS ............. 3-T7
11-DISPLAY CONTROL A7U7M1. A m h
Am820 A7U900 ............................. 3-27
12-READOUT: m . 5 ABUB30A B, D AND
.
. .
..................................%27
SID A7Q720C ................328
A6 TRIGGER WARD DIAGNOSTICS ............... 928
LEGEND .......................................3-30
EXAMPLE # I .................................. .a
EXAMPLE #2 ...................................S31
INSTRUCTIONS ................................2-31
ABQ720A
12-READOUT;
TROUBLESHOOTiNQ TIPS FOR THE
TRIGGER BOARD ................................. 3-38
TRIGGER CONTROL L M j l C ....................W
At . TRIGGER COMROC (WRMO) LATCH
AGU1010 ....................................
3s
A2 TRIGGER WMTROL LEVEL SHIFTING
TRANSISTORS, RESET BUFFER .............338
.
TA12 Senlee Volume 1
TABLE OF CONTENTS (CONT)
MAINTENANCE (DMUT)
mW
A3. TRIGGER CONTROL
REGISTERS................................. 3S
TRIGGER INTEFtOONNECT ..................2-26
01. TRIGGER TEST BIT IWERCDNNECT .....3-38
82 TRIGGER FILER INTERCONNECT ....... 3.37
B3. A THEN B GATE OUTPUT GABLE ........ 3-37
THRESHOLD OACS AND GOMPARATORS .......3-37
C f . THRESHOLD DACS ......................$37'
C2. THRESHOLD COMPARATORS............3-38
BGULWN LOGIC AND TRIGGER FILTERS .......538
D l. BOOLEAN L W I C .......................S
D 2 TRIGGER FILTERS ...................... M
03.TRIGGER FILTER CURRENT SOUROES ...
A THEN B LOGIC ..............................2-39
E l. A THEN 8 L m I C ........................S39
W E E E C T O R S ............................3.39
F1. SYNC CONTROL L I N E ..................3-39
F2. EDGE-DETECTOR CIRCUITS .............5 6 1
F3. MULTiPLEXERS.......................... 5 4 1
W f m M CLOCK ............................ -541
GI .CLOCK CONTROL LINES ................2-47
G2. EXTERNAL CLOCK LOGIC ............... 241
TRtGGER BOARD TEST DESCRIPTIONS............3-41
TRIGGER CONlROL ........................... 2-41
lGTR1GGER CONTROL REGISTER.......... 3-41
15-TRIGGER PICKOFF A D 1 ................ M1
ISTRIGGER PICKOFF A D 1 ................ Wl
17-TRIGGER PICKOFF A D 1 ............... .MI
IFTRIGGER PICKOFF fvD-1 ................ Wl
ISTRIGGER PICKOFF AD-2 ................3-41
STRIGGER PICKOFF -2
................ 2-42
21-TRIGGER PICKOFF IVO-2 ................ 342
22-TRIGGER PICKOFF AW?................ 3-42
&BI)OLEAN LOGICFUNMION A .......... W2
%BOOLEAN LOGIGFUNCTION6 .......... 3-42
S B O O L E A N LOGIGTCR .................. 3
6
4
2
E-A THEN B LCGlC ....................... W
27--A THEN B LCGlC ....................... W Z
2B-A THEN B LOGIC ....................... 3-42
rn THEN 0 LOGIC
2 4
-A
THEN 6 LOGIC ....................... M
31-A THEN B L M j l C ....................... 2-42
3Z-A THEN 0 LOCilC ....................... 3-62
%A THEN B LOGIC .......................3-42
3 b B M D G E DETECTMS ................... W2
E-BUFFERED EXTERNAL CLOCK ...........542
67-BUFFERED EKTERNAL CLOCK
MZ
M U F F E R E D EmRNAC CLOCK ...........3-42
%BUFFERED EXTERNAL CLOCK ........... 543
7MXTERNAL CLOCK ...................... 3-43
71-EXTERNAL CLOCK ...................... 3-44
7% EXTERNAL CLOCK ...................... 3-44
TROUBLESHOOTING CIRCUITS MOT COMRED
BY DiffiNOSTlCS ................................. 944
MAINFRAME SUPPLY CURRENT LrMITEO........ &44
7 A 4 +5 VD -2 VD. -5 Vo FAILUAES .......... 5 4 4
.......................
...........
.
MAINTENANCE ICONT)
P.aa
AMPLIFIER BOARD ........................... 5 4 4
TRIGGER BOARD ............................ 8 6 5
TRlGGER OUT TO MAINFRAME ........... 3 4 5
TRIGGER ViEW OUTPUT .................. 3-45
FRONT PANEL TRIGGER OUT ............. 3-45
ATlENWATORS .....................
......... 8 4 5
DlGlTAL BOARD ............................. 3 4 5
ARMATURE RELAY DRtVE CIRCUITRY .... MS
READOUT ............................. .
... 5 4 7
CALIBRATION AND TROUBLESHOOTING
AIDS ............................................ 5 4 7
ROM PART NUMBER (LEVEL43 KEfi .......... 3-47
FRONT-PANEL INTERACTIVE (LEVEL*
KEY) ......................................... 3-47
SPEAKER CONTROL (PROBE OFFSET KEY) . . 3-47
THRESHOLD DAC RAMP [ A KEYI ............. W
ATTENUATOR OFFSET CALIBRATOR
(B KEY) ...................................... 3-48
DISPLAY READOUT CHARACTERS
(A THEN q KEY) .............................. 3-48
TRIGGER THRESHOLD CALlBRATlON
(NOT KEY) ................................... 948
CORRECTIVE MAINTENANCE ......................... 3-49
OBTAINING REPLACEMENT PARTS ............. 3-49
SPECIAL PARTS ...................... .
..... 349
ORDERING PARTS ........................... 3-49
SOLDERING TECHNlQUES ..................... 3-49
REMOVING AND REPLACING PARTS ............ 2-50
SEMICONDUCTORS.............. .
......... 3-W
CHASSIS PARTS ............................. 9 5 1
HOW TO REMOVE THE FROM-PANEL
ASSEMBLY ................................ 5 5 1
HOW TO REPLACE THE FRONT PANEL ... 351
HOW TO REPLACE FROM-PANEL
COMPONENTS ............................ 9 5 2
LEOS .................................. 3-52
POTENTIOMETERS .................... 9-52
SWITCHES ............................. 3-53
HOW TO REMOVE AND REPLACE THE FROMPANEL OVERLAY AND/OR THE A10 DVM
BOARD .................... ..... .. ..... 3-53
HOW TO REMOVE AND REPLACE THE REAR
PANEL .................................... 3-53
CtRCUlT BOARDS ............................ 3-H
HOW TO REMOVE THE A1 SWITCH BOARDA2 LED BOARD ASSEMBLY ............... %
HOW TO INSTALL THE AI s w l T c n BOARDA 2 LED BOARD ASSEMBLY ............... 5 5 4
HOW TO REMOVE THE A4 ATTEPJUATOR
CONTROL BOARD ........................ 3-55
HOW TO REPLACE THE A4 ATTENUATOR
CONTROL BOARD ........................ 3-55
HOW TO REMOVE THE A 5 AMPLPFIER
BOARD ................................... 555
HOW TO REPLACE THE A5 AMPLIFIER
BOARD ................................... 956
..
T M 2 Servlm Volume ?
LIST OF ILLUSTRATIONS (CONT)
m
W
E
a
l W o r m d'ispky d the 50 !d+
referemre signal and ths muttant trim wtput
signal.. .......................................,4611
Locatim of J7Ol (Link-Plug) on t
h A6
Trigger Board .................................-4%
Trigger v l w iranslllm mfmmed 10 the
CHI wavelonn voltege M s ..................... d-6?
Relationship M w m n the CHI, CH2. and
Trigger VIM wavefern whm &eclti% the
input pulw widh .............................. -4-64
'Relalionshlp benveen the CHI. CH2, and CH3
waveforms when checking the M e t Input Pulse
Wdth ..........................................4&
'Locaticn of the J747 BE (Batterj Enwe)
link plug ...................................... ,443
S e m b n d u h r I&
mnflgcnatlons.
?A42 b o d b d m Illustration.
A l - m h clwlt board arsambt+.
AZ-LED clrcuit b a r d m b b .
h4Artsnuator Conlml circuit M-My.
A5AmpllAsr clrcurt board -bW.
AFDigital cirarti tmwd ari4emblf.
AGTrtgger clmlt board assembly.
AaMPU circuit board r d b V
A4Pmuer Supply c~rculth a r d ~ssembly.
Aslnterconnect circud b a r d aesemb.
7AQ2 mica Volume 1
OPERATORS SAFETY SUMMARY
The generah safety information in this part of the summary is for both operating and servicing personnel. Speciflc
warnlngs and cautions w ~ l be
l found throughout the manual where they apply, but may not appear in this summery
TERMS
WARNINGS
IN THIS MANUAL
POWER SOURCE
CAUTION statements identify wnd~tionsor practices
that could result in damage to the equipment or other
property.
m l c product Is Intended to operate in a malnframe
connected to a power source that will not apply more
than 250 volts rms betwmn the supply conductors or
between either supply conductor an6 ground. A
prolective ground connection by way of the grounding
conductor ~n the power cord is essent~al for safe
operation.
WARMING statements Identify condftlons or practices
that could result in personal injury or loss of life.
AS MARKED ON EQUIPMENT
GROllNDrNG THE PRODUCT
CAUTION Indicates a personal injury hazard not
immediately accessible as one reads the marking, or a
hazard to property incfudlng the equipment itself.
COqduCmr
DANGER indicates a personal injury hazard immediately
accessible as one reads the marklng.
This Product is grounded through the grounding
Of the
power
avo'd
electric Shock, plug the malnframe power cord Into a
properly w l r d receptacle before connecting to the
product input or output terminals. A protectiv&ground
connection by way of the grounding conductor in the
mainframe power cord 1s essential tor safe operation
DANGER ARISING FROM LOSS OF
SYMBOLS
IN THlS MANUAL
@ Static-Sensitive Dwioes
n
Thls symbol indicates where applicable
cautionary or other information is to be found.
'DO NOT OPERATE IN EXPLOSIVE
ATMOSPHERES
To avold explosion, do not operate this p r d u c t in an
atmosphere of explosive gasses.
DO NOT REMOVE COVERS
AS MARKING ON EQLlFPMENT
4
DANGER-High
voltage
@ Protective ground (earth) terminal.
ATTENTI~N-refer to manual.
GROUND
Upon loss ot the protective-ground mnnection, all
accessible conductive parts (including knobs and
controls that may appear to be insulating), can render
an electrlc shock.
OR PANELS
To avoid personal Injury, do not remove the product
Cowers or panels. Do not operate the product wtthout the
comers and panels properly installed.
DO NOT OPERATE WITHOUT COVERS
To avoid personar injury, do not operate this product
without covers or panels installed Do not apppl power
to the plug-!n ula a plug-in extender.
7A42 Sewlea Volume 1
SERVICING SAFETY SUMMARY
FOR QUALIFIED SERVICE PERSONNEL ONLY
Refer also to the preceding Operators Safety Summary
DO NOT SERVICE ALONE
Do not perform ~nternalservice or adjustment of this
product unless another person capable of renderingflrst
aid and resuscitation Is present
USE CARE WHEN SERVtCrNG WITH
W W E R ON
Dangerous voltages axlst at several points in thls
product. To avoid personal infury,do no1 touch exposed
wh"e power Is On.
cO"nBCtionsand
Disconnect power before removing protective panels,
sddeting, or replacing components.
7A42 Sewlce Volume 1
7A4Z FEATURES
The ?A42 L w i c Trrggered Werttcal Ampl~fleris a four channel. wide bandwidth, plug-ln unlt, compatible wlth Tektronix 700hWrles
Oscilloscopes It was specifrcally designed to display and make measurements on drg~tallogic srgnsls rn Ih@TTL. ECL and CMOS
logic famll~es Whrle the dusplay output from the 7A42 is analog, the trrgger output 13dlgltal and IS comprised of a user selectable
Boolean iunctron of the lour Input channels A flith TRrGGER VIEW rrece dep~ctseither the trigger functlon output or the external
clock Input
Ssctlon 1-?A42
Volume 1
GENERAL INFORMATION
This section contains a basic content descrbption of both the Opemtors and Service manuals, Information On
Instrument instsllatron, power requirements, packaging for shipment, Standard Accessories. Optional Accessories,
Specifications and a dimensional drawing of the 7A42. The s ~ c l f l c a t l o nportion consists of three tables: Electrical.
Envlronmental, and Physlcal Characterrstics.
TECHNICAL MANUALS
with
An operBtors and two wwioe manuals are
your 7A42 as standard acc-ries'
The fo'lOwing
~nforrnat~on
outlines the content of these manuals.
Operetom Manual
Section I-GENERAL
INFORMATION contains
content ddegriptions of the Operaton and service
manuals, mainframe and plug-in compatibility,
packaging instru.ctlons, instrument spec~fications,
and operating instructions.
he Ogerators Manual 6s divided knto the following four
sectlonr
Section 2-THEORY OF OPERATION contatns bask
and general circuit analysis that Is useful for sewiclng
the instrument.
Sectlon 1-GENERAL INFORMATION contains
content dsscript~onsof the Operators and Service
manvals, instrument descrlption, mainframe and
plug-in compatibility, packsging Instructions and
instrument specifications.
Section 3-MAINTENANCE descrik-s preventlve
malntenanm procedures, convent~onaltroubleshootIng and diagnostic troubleshooting prmedures wlth
detalled ~nstructlons for replacing assemblies.
subassemblies, and individual compomnts.
Section 2--OPERATING INSTRUCTIONS c o n 2 a i ~
a
block diagram description, a front-panel drawing and
brlef descript~on of controls, connectors and
indicators. Get-Aoquainted Exercises prwide n basic
operating procedure for the first-tlma user followed
by a systematic demonstration ol all front-panel
controls. A detailed description of all front-panel
controls Is also glven In t h ~ ssection.
Sectlon 3-APPLICATIONS gives examples of how to
use the TA42 to make some difficult rnmsurements.
Section 4-INSTRUMENT OPTlONS contains a
description of available options.
Serrka Manual
The Iollowing sewice instructrons are fw use
by qualified personnel onty. To arold
personal injury. do not perform any service
other than thet contained in the operating
instructrons unless you ere quallfled to do
so. Refet to Operators Safely Summary and
Servtce Safety Summary prior to performmg
any service.
The servtoe manual is divided Into 2 volumes. Volume 1
wntains the following:
Section 4-CHECKS AND ADJUSTMENT contains
proc6dures to cheek the aperateonal pwformance
and electrical characterlstlcs of ihe instrument.
Procedurm also include methods for adjustment of
the instrument to meet specifications.
Section 5-INSTRUMENT OPTlONS EOntafnS a
description of available options.
Section 6--REPLACEABLE ELEGTRFCAL PARTS
contatns information necessary to order repfaceable
parts and assembllas related to the electrical
functions of the instrument.
AND CIRCUIT BOARD
Section 7-DIAGRAMS
ILLUSTRATIONS Includes detailed c i r c u i t
schematics. locations of assembled b a r d s wlthln the
instrument, voltage and waveform ~nformat~on
and
circuit board component locators.
Section 1-REPLAC'EABLE MECHANlCAL PARTS
Includes information necessary to order replaceable
mechanical pans and shows explodd drawings
which Identify asemblfes.
Volume 2 of the service manual contains signature
analysis tables to be used wtth the diagnostic
~nformationprovided in the Maintenance section of the
Volume 1 service manual.
INSTALLATION
Thls lnstrument was inspected both mechanlcatly end
electrically before shipment. It should b e free of mars or
scratches and should meet or exceed all electrical
specifications. To confirm this, inspect the instrumentfor
physical damage incurred in transit and check the basic
Instrument functlona by petforming the Parlormance
Check Procedure In the Checks and Adjustment section
of thrs manual. It there is damage or daflciency, contact
your local Tektronfx Fteld Offlce or representative.
OPERATING TEMKRATURE
The 7A42 can be operated where the ambient air
temperature Is from 0" to +500 C and can be stored in
amblent temperatures from - 5 5 O to + 7 5 O C . After storage
at temperatures outside the opereting limits, allow the
chassis temperature to rmch operating l~mitsbefore
applying power.
INSTALLING THE FA42 IN THE MAFNFRAME
The ?A42 Is deslgned to operate in the two center or the
two Ieft pprg-in compartments of a Tektmnix 7 m s e r i e s
oscilloswps mainframe.
NOTE
Switch o n the maintfeme power belore
msmlling of removing the 7A42.
To install the 7A42 in the mainframe, align the groores
in the top and bottom of the rnstrument with the guidm
at the top and bottom of the plug-in compartment. Then
push the 7642 in untll Its front panel IS flush with the
front panel of the mainframe.
To remove the ?A42 from its host mainframe, pull the
release latch (we Fig. 1-1) to disengage the unit from
the mainframe, then pull the 7A42 straight out from the
plug-in compartment leaving the malnframe on the
bench.
MAINFRAME COMPATlBrLlTY
The 7A42 is compatible with all Tektmnix 7000 series
mainframes. I n four-wide plug-in compartment
mainframes, It can be Installed In either the two teft or
two center plug-in compartments. When used in the two
left compartments, select the Left Vertical Mods to
dtsplay the analog signals. The asswieded time bme
plug-in Tr~pgerSource should be Left Vert~calwith the
time-base trtgger controls set to Auto or Norm, b,
Internal. Slope to +, with the Level control centered. The
A Then B Gate Output can be plcked ofl from the
RlGHT VERTICAL TRIGGER SOURCE by a 7011 or
7D15 from either horizontal compartment. In three-wide
plug-in compartment mainframes, the ?A42 must be
used in the two Ieft Compartments in a similar way.
When the 7A42 Is Installed In the center two plug-In
compartments of a four wrnpartment maidrame: set the
malnfmme Vertfcal Moda and Trigger Source to Right
Vertical. The mainframe A Then B Gate Output can not
be used in this configuration, however, the A Then 0
Gate is stilt avallable at the front-panel TRIGGER OUT
bnc connector.
Slnm all analog channels are sent out the 7A4Ts left
interface connector, it cannot use the full capabilities of
a dual beam oscilloscope such aa the 7844, R7844. and
the 76120. However, it has full competlbillty with thew
mainframes in a single beam configuration.
Slnm the 7A42 uses the mainframe crt readout to
display the channel volts per div~sionand error warning
messages, the 7A42 IS not recommended for use in
mainframes without readout.
If the 7A42 is used with two tlrnebase units In a tour
compartment mainframe where Chop has been selected
as the Horizontal Mode, and if exactly four traces are to
be d ~ s p l a y dby the 7A42, two of the traces may
synchronize to one time base while the other two traces
synchronize to the other time base. To prevent this from
happening, one trace should be removed, or a filth trace
should be added to the mainframe crt display (even i f it
is positioned off screen so it cannot b seen). Wlth one,
two, three, or f l w traces, the channel display will not
synchronize to the horimntal chop frequency.
The 7A42 is compatible with the 7854 Oscill~soopeh
mainframe when the 7854 is operated In real-time.
However, whan the 7854 is operated in digital storage,
and waveform and readout acquisitron is deslred, the
7A42-7854 mode should be selected by moving jumper
P540 ta the 7BM mode. To locate P540 refer to Figure 37 in the Maintenance section of this manual. On- the
7AG7854 mode has been selected, proper readout and
waveform acquisition can be guaranteed with the
following 7R42 display conditions:
PACKAGING
FOR SHIPMENT
If this instrument Is to be shipped by cornmerclal
transportatton, we recommend that the instrument be
packaged in the orig~nal manner. The carton and
packaging material in which your instrument was
s h ~ p p dshould be saved end used tor thls purpose.
NOTE
Package and ship Plug-Ins and Mainlramas
S8pSr8?9w.
H thls inslrument is to be shipped to a Tektronix Sewlce
Center for sewlce or reparr. a m c h a tag to the
instrument showing the following: Owner of the
instrument (with address), the name of a person at your
firm who can be contacted, complete Instrument type
and serial number, and a description of the service
required.
If the original package is unfit for use a not available,
package the instrument as follows:
1. Obtaln a corrugated cardboard shipping carton
having inside dimensions at least six inches greater
than the instrument dimensions; refer to Table 1-1
tor carton test strength requirements.
2. Enclose the lnstrument with polyethylene sheeting
or equivalent to protect the flnish of Ihe instrument.
3. Cushion the insnummt on ark sides by tightly
packaging dunnage or urethane foam &tween the
carton and the instrument, allowing zhme inches of
packaging an each side.
4. Seal the carton with shipping tape or wfth an
industrial stapler.
1. Any single channel displayed alone (CH?, CH2,
CH9, CH4. or TRIG VIEW).
5. Mark the address of the Tektronix Serrlce Center
and your return address on the carton in o n e or
more prominent locations.
2. Channels 1 and 2 only displayed together, ALT
TABLE 1-1
Shlpphg Carlon Tml StmmgM
display mode selected.
arm TOM
3. Channels 3 and 4 only displayed together, ALT
display mode selecM.
Refer to the Appllcatlons wction In the Operatots
manual for further information.
1O-M
275
d.nem
Genemi Inlann~Hon-7A42 Volume t
SPECIFICATION
The electrical characterist~csllsted In fable 1-2 apply when the following conditions a n met: (1) Adlustment of the
tnstrurnent must have taken place at an ambient temperature betwmn +20°and +30° C, (2) the instrument is allowed a
2Wminute warm-up period, (3) specifications are valid at an ambient temperature of Oo to +50° G, unless otherwise
stated. (4) the Instrument must be in an environment that meets the limits described in Table 1-3, (5) the Instrument
must be operated m a cal~brated7 m r r e a rna~nframe.
Any applicable conditions not listed above may be stated as part of the characteristic. Environmental characteristics
are llsted in Table 1-3 and Physical characterlsttcs are listed in Table 1-4.
TABLE 1-2
E k t r l w l CharactwWcr
mu
i p-hl
Palormanes
Charaeierlrtse
lnbnnstlon
Requirement
DISPLAY
Ueflectlon Factot
Cal+br6itedRange at lnput
BNC Connector
TTL (CMOS) Family
0 1. 0 2. 0.5 V/dlv.
ECL Famlly
20. 50. 100 mV/dlv.
Calibrated Range through a
1OX Probe
1, 2. 5 V/div.
TTL (CMOS) Farnlly
0.2. 0.5. 1 V/div.
ECL Famlly
Channel to Channel Galn Match
Within 2% In ECL Logle Family.
20 mV/dlv. 1 Megohm rnput
~mpedance.
Gain Ratio Accuracy
within the same Channel
Within 2% of mdicared deflect~on
factor relative M ECL Logrc
Farnlly. 20 rnV/diu, 1 Megohm
rnput impedance.
Rerrnita adjustment 01 deflection
factor lor callbrafed operatton
w ~ l hany mllbrated 7-series
rna~nframeAdlustable at least
+4% to -4% from cal~DWted
setting.
OAlN Range
1
Frequency Response
Bandwidth
350 MHz h 7 1 0 4 , P - W C
mainframe arnent tmIperatUm.
Refer to TeRtmnix.Product
Catalcg 700O-Smks b - z f l ~
System Speckatsonfor syslem
bandwhs.
1-4
REV JWM 1884
Chamterlstlc
§upplmentrl
Porfmmnee
Requlmrnsnt
lnhrmstlm
-
DlSPlAY (CONT)
lnput Signal Dynarnte Range
Maxlrnum Slgnsl Voltage at
tip of lOX Probe
TTL (CMOS] Family
ECL Famlly
Output Dynamic Range
I
I
Llmdted to me CRT display
area Ma~nframeVen~calTram?
Separatron should not be used
to brlng an o f f a r e e n s~gnal
onlo screen
Maxlmurn lnput Voltage
25 V (dc + peak ac)
1 Megohrn
36 MHz or less, derated llnearly
to 3 V (peak ac) at 30C1Mhr.
--
50 Ohm
---
r
-
5 V RMS during any 1 rns trrne
Interval Act~veinternal proteztlon
opens all Inputs rf overvoltage
.-IS-applled-to-any channel
50-Ohm Input Protection
Reaetlon Time
Maxlmum tlrne to open rmut
w ~ t happlred overvoltage of
1OVDC
1 0 pseonds
15VOC
1 second.
Input Characferistics
Input Coupling
Incoming signal is dc-coupled
DC
to lhe ampllfter.
A grwnded Input IS actually
open at the input BNC. (i a,.
1 Megohm or $O Ohm termlnatlon
1s drseonnected). Internally.
the arnplit~erinput is grounded
to provlde a z e r w o l t mpureference.
High tmpxlance
1 Megohrn 91%. En parallel with
approximately 1 5 pF.
Cow Impedance
54 ohms +1 ohm at de.
-
VSWR
51.15:1, dc to
300 MHz.
Genwd Inlormatlan--?A42 Volume 1
T A B U 1-2 (CONT)
Electrkal CherecI%rlatlc*
--
.-
DISPLAY (CDNT)
0.2 d~w~s~ons
or t6ss shift when
VOLTWDTV Is changed m ekher
T T L or ECL Farr~illrsor between
VOLTS/DIV Shift
Famtl~ea
At leas1 +7 divrsions to -7
POSITION Range
divirlons but less lhan +9
divisions l o -9 divisions from
graticule center with gain
calibrated.
Grounded rnput at maxlrnum
wnsitivily, 7h42 trrggered on
another channel, tested at
1 rnsld~vand 10 ns/drv,
not more than 0.M divrsiona
RMS. as measured in a 7854.
Dlsplay%dNoise
Drift with T i m
Not more than 0.2 divisions in
any 10 minutes after twenty
minute warn-up (ambient t s m p
erature and line voltage wnslant).
Drift wtth Temperature
Not more than 0.2 divisions
lor lon C ambient change nine
voltage constant).
Differential Delay Between Any
TWOChannels, set to Same
Logic Family and VOLTS/DIV
Plug-in Delay Time
Typically 25 ns from channel
Input to A l l and 811 of
malnlrsme inlerfaee connector
Channel to Channel Crosstalk
Typ~callyless than 0.05 dlvlslons
with logic slgnal Inputs applied
through a 10X probe
.-
I
Chop Frequency
See ma~nfrarnemanual for
sp~~ifications
TRIG VlEW or External
Clock View
Arnwlilude
I
0 3S dlvs lI1.l div.
I
Baseline to be set 3 d~visrols
(M5dlvislons) below grnticule
center. Internally adjustable
appmximately ?4 dlvlsionsfrom
graticule center. Sae Sectwn 4
for adjustment pmcadure
2 ns or I-.
General Inbmilon-TA42
Volume t
OlSPLAY (CONT)
TRlG VlEW or External
Clock View (cant)
Tlrne Golncldenoe with
Channel Dimlay
TRIG VIEW
Wlthln 3 ns.
External Clock View
Wlthln 5 ns.
D~splayedon cn, see detailed
operating mforrndlon.
Rendoul
TRIGGER
SWITCHING THRESHOLD
Voltage Range
A i lnput BNC
TTL (CMOS) Farnu y
+1 28 V to -1.27 V
ECC Famlly
+256mV to -254 mV.
At lip of 1 0 X p r o k wRh
readout compensation
TTL (CMOS) Family
+12 8 V to -12.7 V
ECC Family
+258 V fa -2.54 V.
Resolution
At Ilp of 10X proba wfih
readout wmpensatton
~n(CMOS) Famlly
100 mv
ECL Family
20
mV
Accuracy, at Center Value of
Hysteresis Window
Af lnput BNC
TTL (CMOS} Family
?5 mV G%of setting
ECL Famrly
f l mV t2% of setting
At tip of 1 0 X p r o k wrth
readout compensation
TTL (CMOS) Family
f50 mV 9%
ot =#tin$.
ECL Famhy
k 1 0 mV
M%
of setting
nystaresrs. Cent%r%dat
Threshold. %Hz
Bnewaw)
At lnput BNC
n~(CMOS] Fam~ly
REV DEC 1963
40 mv
+2m.
m.
1-7
Genersl Inlorma4lon-7A42
Volume 1
TABLE 1-2 (CONT)
ElectrEcfil Characterlaiicl
TRIGGER (CONT)
SWITCHING THRESHOLD (mnt)
Hyaterwla. Centored
at Threshold. 50kHz (sin-wave)
EGL Famlly
8mV +20%
-5046.
At I l p of 10X probe wlth
readout wmpensation
TTL (CMOS) Farnrly
400 rnV +2W,-50%
ECL Pamlly
80 mV
t 21% -50%
Presets
At llp of 10X probe wilk
readout wrnpensation
+1 4 V
TTC (CMOS) Famlly
-
ECL Family
-1.30 V.
PROBE OFFSET Actlvawd
0 V.
TIP (PROBE OFFSET) Input
Maximum Vollage Range
+5 10 V to -5
l a V. dc only.
Input Resistance
,100 K n
OVM Resolution
20 mV.
DVM Accuracy
i20 rnV ?2%of reading.
TRIGGER FILTER
Off, or adjustable from 4 5 ns
to 1300 n$
Range
Match. Funct~onA to
Function B
~
E
Within
2G%,
The rrlgger fllter cannot be
activated if the EXT CLOCK 1s
turned on, nor will rt operate
wlth any trigger function that
wntains an edge sensltlve channel
at mmlmum setting
X CLOCK
T
Input
+ 5 to~ - 5 (DC
~
Maximum Voltage Range
-
t
peak AC)
Two EXT CLOCK INPUT modes are
avatlable, TTL or ECL; for
selectron of ather mode see
F~gure1-71,
Threshold
- -
- .
TTL Level
Logic Zero
508V
L w i c One
22 V.
-
REV DEC 1883
General Informelion-7A42
Volume 1
f ABLE 1-2 {CONT)
E k t r i t 6 l Cheracledstlca
SuppFemenlal
Inlormatlon
Perfommnee
Roqulmmenl
Cbra~terlrllc
TRIGGER (CONT)
EXT CLOCK lnput (COnt)
Maximum Voltage Range (Con$)
ECL Level
Logic Zero
5-1 5 V.
Logic One
12-1 1 V
I
Input Impedance
he EXT CLOCK INPUT may be
connected directly to the clock
source. or through m 1X p r ~ b e
{TTT only) The EXT CLOCK
rnput i8 not compatible wrth
a 10X probe
n~
Level
Approximately 10K Ohm in
parallel wtth approxirnatefy 55 pF.
termmaled to +5 V.
ECL Level
Appmximalely 50 ohms.
tsrmlnated to -2 V
-.
Mlnlrnurn Input Slew Rate
None.
TTC Level
-
100 rnV/ns
ECL Level
Pulw W~dth
TTL Level
20 ns minimum.
Either pulse trensltlon selected
ECL Level
5 ns mlnimum
Leading pulse transltron s%l%cted
I 10 ns minimum.
I Trailinn pulse transition selected.
Set-up Time
10 ns minimum.
Time tHat level SenSltlVe
channels must be valid belore
EXT CLOCK INPUT transillon.
Hold Time
10 ns minimum
Tlrne that level sensiliva
channels must remain valid after
EXT CLOCK INPUT transition.
5 ns mlnlmum.
Time that level sensitive portion
of trlgger function must be tlUe
before EDGE sensitive chennel
transition.
Channel EDGE Sensitivity
Set-up Time. Channel
to Channel
-
-
Wold Time. Channel
to Channel
Time that level sensttive portion
of trrgger function must remain
true after EDGE sensitive channel
transition.
-
General Information-7A12 Volume 1
TABLE 1-2 ( C O W
Ektrlcal Characteristlc8
-
.-
Fdonnanee
Chnactarhtlc
Supplementsl
IRlormalion
Requirsmenl
--.
-
TRIGGER (COMT)
--
Channel EDGE Sensitlvlty (cant)
Set-up T~me,EDGE Sens~liue
Channel
10 ns manrmum
Time that level of EDGE senaltrve
channel must be stable before
transrtion.
Hold Time. EDGE Sensltlw
Channe?
5 ns rninrrnum
Tlrne that Iwel of EDGE sensEtlve
channel m u d remarn stable after
transrtlon
Marnframe Tngger Output
Amplitude, 1 MHz square wave
3Ml mV t50 mV p-p dlfferentlal.
Into A13 and B13 of maln
interface connection on left
srde of plug-ln.
Centering. 1 MHz square wave
Mean value of square wave
wlthln one dwisron of gratrcule
center
p
p
Rlset~m,10% to W
Fallt~me.90% m 4W
-
QTRIGGEA
2
ns +Ins
OUT Conneetor
Output Voltage
Logrc Zem
i112 V lnta 50 ohm laad
Logle One
8 V rnto 54 ohm load
-
,
Output Impedance
Toggle Frequency
125 MHz maximum
Appr~~lmately
50 ohms
R Mode or B Mode, wlth
ddsplayed Input Gignal of 6LmV
p-p In ECL or 3WmV p p m
TTL Logrc Farnrly. centered at
threshold
Prwagatron Delay
Channel Input to Trlgger Output
25 ns or less.
Dlfferentlal Propagation Delay
from Channel rnput to Tngger
Output through any Trigger
Functlon
5 ns ar less.
A THEN B Mode
Tlrne Berween R and B
5 ns m~nimum
Tlme From B to A
5 ns mlnlmum
Mlnlmum &-up t ~ m efrom
event A to event 0 to rnsure
that trigger output occurs rlth
event B
-
-
Mlnlrnum t l m after went B
to next event A to Insure
proper armrng
rAeLE 1-2 (CONTI
Electrfesl Ckanctarlarlm
P
a
-
Ckmchrlme
Suppl-l
InfonnmWm
Requlmmmt
TRIGGER O W
Connector (cant)
Minimum time to in%ur%prop3
armlng and trlgger~ng.
Evem Duratlon
Event A
5 ns minlrnum.
Event 6
5 ns mlnlmum.
me front-panel A THEN 0
Fmnt-Panel A THEN 0
Gate Output
Gate Output is active only
if selected and bn the A THEM B
mode, see Figure 1-t5 107
sslection
Voltqe
@ic Zero
a.2Y Into 5 [ ) ohm Imd.
Logic One
a . 6 V lnto 50 ohm load.
Output Impadan-
Approximately 50 ohms.
Tlmlng
Time from Event A
Reccgnltlon to Rking
Edge of Gate
25
or Ms.
Mainframe A THEN I
GUM output
mV p p d l t r m t l a ~ ,
into A13 end 813 of maln
interlam connector on right
slde of plug-in.
Amplitu6e. 1 MHz S q m Wave
3M)mV
Centering, 1 MHz Square Wnve
Mean d u e ol square wave
within one dhrlslon of gratlcule
center.
RiSBtime. 1Wi to 808b
2 ns k1 ns.
Falltime, gD% to 40%
2 na *l ns.
TTmlng
Tlme Imm Event A
Flecagnltlon to Rislng
Edge (5Wb point) of
Gate Output
Approlrlmately 15 ns.
Tlme Imrn Event B
Rewgnlt~onto Falllng
Edge (50sb polnt) ol
Gate Output
Approxlmntely 15 mi.
W a r d Inlormlltlon-?A42
Volume 1
TABLE 1-2 (CONT)
U ~ e sChamcterl8flll~
l
Chamhrl.tk
Gupplonwntal
Inf~rmalh
P.rlRequlrameM
TRIGGER [CONT)
Mulnframs A THEN 0
Gate Output (cont)
Pulse Wfdth
Greater than the tlrne between
ns.
event A and went B by 5 ns
Gate Output wldth,
Measured at the
50% Points
I
RESET Inpul
Marclrnurn tnput Voltage
Approx~mately50 ohm*.
Input lmpsdanca
Lopic Zero
g . 2 Y.
~ o g l cOne
a . 8 V.
Pulse Width
1W ns minimum.
TlrnFng. Post-AESET lnhlbit
Time to Next Trlaaer
10 na minimum.
hapon= Time
I
Ttrrm from fallrnp edge of RESET
m
nexl reeognlzable went.
R E S F pulse must lead or k
oolncrdent with went reeognitim,
to inh~bittrigger output. Evem
rmgnrtlon muat lead the RESFT
pulse by 10 ns to guarantm
trlpger output
BAmERY BACK-UP
-
Ni-Cmd Battery (3.75 V)
-
Rmvldes p w r to preswve
front-panel control Status a
rnrnrmurn of 200 hours whikt
main power Is dl. EJartery
requires about 24 hours t o fully
charge from dlseharged condrtion.
G e m l Information-TM2 Volume f
TABLE 1-8
Enulronmental Characterlstlcu
Charsel&llu
-
Informalon
-A
Temperature (External Ambient Mainframe)
Temperature
0 to +WC in 7403NR803 wlthout fan (fan kt1 Is avaltabW
0 to + M W CIn other 7000-serres malnframes.
Opratlng
- 5 5 O 6 to +7S0 C.
-Storage
--Altrtwde
Operating
15,000 feat (d 6 Km).
Nonoperat~ng
To 50.WO fee? (15.2 Km).
, Tested to MlL-T-28800C, MIL-STD-461A (excluding RE-01).
EMC
Vibration
Opemtlng and Nonoparaling
Tested to MlL-T-ZBBOOC. SECT. 4.5 5.3.1 Type Ill, Class 5.
Shock
'bested to MtL-T-28800C. SECT
Bench Handling
Testsd to MIL-T-2880DC. SECT. 4.5.5.4.4 Type Ill. Class 5.
Transporlation
Natfonel Safe Trunsit A m l a t i o n . Preshiprnent Test Procedure.
Vibration and Bounce (peckaged product)
NSTA, PROJECT t A-6-1.
Dmp (packaged pmduct)
NSTA. PSOJEGT 1 A-0-2.
4 5 5 4 1 Type Ill. Class 5.
TABLE 14
Physkal Characletl~lc~
Chaaelerlstlcm
--
Inlormsllm
.
Net Welght
Dlmensions
Appromlmately 8.2 Ib. 28 Kg.
j
See dimensional drawing Figura 1-2.
Genera! mlormath-7A42
Volume 1
ls,F
353
r
N M E : OIMEHSIONS ARE GIVEN WITH TOP
FIGURE IN 4NmES AND BOmOM
FIGURE IN MILLIMETERS.
4%1M
General Inlormath-?A42
Volume 1
STANDARD ACCESSORIES
r ea
1 ea
1 ea
1 ea
..........................................................................
O p e t o r s Manual
.....................................................................
Sewice Manual (Vo!ume ?)
.....................................................................
Service Manual (Volume 2)
...........................................................................
SMB to BNC Gable
For part numbers, refer to the tabbed Accessories page at the rear of this manual.
OPTIONAL ACCESSORIES (not included)
The following accessories have been selected from our catalog specifically for your Instrument. They are listed as a
~onvenienceto help you meet your measurement needs. For detailed information and prloes, refer to a Tektronix
Products Catalog or contact your local Tektronix Field Representatives.
PROBES
The P6131 10X passive probe (20 Mqohm. 10.8 pF) has a 1.3 meter cable, a narrow barrel and varf&y of probe tips
[hooks. IC grabbers, and ground leads) available.
The m230 is an active 450 ohm variable biadoffset probe, which is an excellent ECL logic probe due to its low
capacitances and minimal loading (kcause of the variable biasioffset feature). The 7A42's PROBE OFFSET feature IS
designed to work w ~ t hthe P6230. Tho mi31 accessories will abo 6t the P6230. (See ECL Probing Techniques in the
Application sect~onof the 7A42 Operators manual.)
Pess+veprobes such as the P613t. requlre low-frequency compensation into the inputs of the 7A42, as wfth any vartlcah
amplifier. The mainframe calibrator prwides a signal su~tablefor making this adlustment. For optimum high-frequency
performance, the probe high-frequency compensation should also be adjust& directly Into the 7A42 Inputs. See the
probe manual for instruc!ions to perform this adjustment.
OPERATlNG INSTRUCTIONS
This section will familiarize you with the capabilities and operation of the 7A42. A thorough understanding of this
information will remove later uncertainty when operating your 7A42.
OPERATION
For operation, your 7A42 Logic Triggered Vertical Amplifier must be properly anstalled in a Tektronix 7 m r i m
mainframe. Installation is explained in tha General Information sectlon of this manual.
CONTROLS, CONNECTORS, AND INDlCATORS
All controls, connectors, and indlcaton required for the normal operation of the 7A42 Loglc Triggered Vertical
Ampl~ferunit are located on the front panel. Figure 1-3 shows an exploded front panel and g~vesa br~effunctional
description of each control, connector, and indicator.
General kntomation-7A42
I 'I'
I
Volume 1
t
-
'
1
2
WOE CHAW orTRIG-PvshbutlonscracP oneol
lwo modes when hght 13 on. thme dontrols
essc08ted wllh programming Ihe TRIGGER
FUNCTION are operable (see 6 Fend q01 when
llght 1s out. Ihose controls assoctaled wlth CH1,
CH2. CH3. CH4 $elup c o n d ~ t ~ o narn
f operable
[see 6 and 2)
DlSPLRY-Pushbunon burn$on 0roH thed~splay
of the nncorning mqnal % e l e c l dby controls IIsI&
under number 6' Nondlsplayed channels may
strll conlr~buleto the TRIGGER FUNCTION.
YOLTSmIv-Two
pushbutton swltchw lncree$e
or decrease verl~cel dellecluon factor of Ihe
c?annel selected by conlrols Ihsted under number
6
GHD-Pusnouttm grounds the selected channel
amplllw rnpul and drsconnects the Incomunp
s~gnal.01 the channel seleclw by controls lrsted
under number 6'
~ ~ n t ~ o n - p u s h b u t t o swllch
n
selects mpul
~mpeaanee
to be elrherone rnegohmor53ohms of
the chann<el SeleCled by Controls IlstW under
number 6
T T L I E C L - P ~ s h b - l l o n 3wllCn 9C O C t S the
det ecl on lactor ranqe and presel lnreshold l o be
compal,b err !he rhrr TT-or E C - t o ( ) l c ~ e m l l l e ~ ~ 1
the channel seleclpd o y controls llsred under
number 6'.
THRESH-Pushbutton
switch ect~uates Ihe
LEVEL pushbultons and SWITCHING
THRESHOLD VOLTS d ~ s p l w .allo*u~ngoperator
10 set lhn lhresholdvollageol thechanne! selected
by Control$ lilted under number 6'
FFgure 1.3. ?A42 controls, conneelors, and Indlcatom.
1-16
Genernl In-aH-?A42
3
0
0
4
ALTfCHOP-Pu5hbulton
Switch. d e t e r m l n ~
h e t h a r the displayed chsnnal{sJ are d i s p l w
slternsldy, bharench sweep 01 the tlms base, or
are dlaplsyed srrnullanwusly ( n u chopped mode.
TRlGQER nCTER-Vari~DIe t o n t m l Eeis
rninlmum duration ol TR1G0ER FUNCTION
output W o r e It Is sen! to thn trme lass or
TRIGGER OUTpul Oonnecior.
TRIG VIEW-Ptmhbunon l o display TRIGOER
FUNCTION output slgnal or EXT CLOCK 5ignbl
on wr.
TUIGDER OUT-Pmvids~ a front-pmal o u l p l o t
the trtgger slgnal.
The following controlm, connsclors. and
mdicalors arm common to CHI. CH2. CH3, and
CHI,
0 tm
CLOCK IMPW-Provides externml clock
rnput
lor synchron~z~ng
triggars l o an external
clock slgnsl source [EKTCLOCK SYNClight must
be on).
Q
tl(rCLOCKB1HC-PuahbuttOnsw1tEhLlloWSBn
exlernal clock l o qualily the TRIGGER
FUNCTION.
Inprl Connutor-Bnc for aignal mnlleetion.
W W ~ O N - V W I I C ~wsltions
I~
the i n m i n p
aignal. Clockw~serotalion moves displayed
Ire&? upward
on. chann*
/ D m n b u n o n w l k h swects positive gomg
or negativa F l n g edge ol theexlemal Clolkslgnal
wh~chauml1t1e5TRIGGER FUNCTION
is sslscted lor display.
ECVTtL-When lndrcater llgnl is on the
preset threshold uoosge and range 01
dell6ction factors ere compntlble wlth TTL
l o g ~ cIwels: ~ n e ofllhay
n
are cornp3tnbltr v ~ i h
ECL Logic tmla.
10
0
GMD-When i n d i m o r light iaon.lhssmplifi~
input is grounded end the input srgnal is
almrlcally diswnneclecl from the amplli#er.
GAIM-stmrvw
mlGGER FLAICTIOH-LED dloplw Indrcatame
B ~ l e a foncllon
n
v h # c nwhll prcduca a TRIGGER
FUNCTIONwlpul Numberll, 7 ,andfiOcon1mIs
are used lo prDgram TRIGGER FUNCTION
11qnIs2
m m m l sdjus19 alapley galn
of channels CHI. CH2. CH3, and CW.
CHI, CH2. W3, md c ~ ~ - - ~ p e r ni ni elfher
e
the
PROG CHAN W Ine PROG TRIG mOdRS In the
PROG CHAN mode the sell-cancelling
pushbunon swlwhes detnrmrne whlch channel 1s
atieecled W Ihe m n l r d s Instea undwnurnber2' In
the PROG TRIG mode Ihe CHI through CH4
pushbutton 6wllhns delermine whlch chennel 1s
programmeo unlo rhe TRIGGER FUNCTION, a6
selectsd by lhncontmls Ihsledunder number loP
CLEAR-Pushbutton s w i t c h clasrs the
~roararnmedTRIGGER FUNCTION selaclsd by
tnecontmla listed under 10'
A m , OR, NO'-Pushbutton SwitChsa LSW w th
controls li6tW lnder nJmner 0 to pogram the
TRIGGER FLhCT Oh seec(6d by thp COnlfOs
listed under 1&
EDGE-PUS~~U
satects
~~~~
ssnslllvrty for
the channel baing pmgrammedinioltre TRlGOER
FUNCTION?
s.A THEN 8-Two 8ndeDendenl TUIGGER
FlJtxCT,ON pr,meere~a,labI@
(A.M.,
7.e
A THEN 0 8s e nested cornrrlnel on A e m A m ~ B l
occur to arm triggering before B is allow& l o
produce a trigger oulput.
A,
RESET-Emternal rnpul to dlsobla the TRlGGER
FUNCTION (lulput and dlmrm inn A THEN B
nwred triqgerlng, no erminq or trlggerlng a n
=cur while a hlgh level IS applied
SOOIIMIt-Ymm indleator llght is on, me
input lrnpndance is one megohm. 15
plcoimd3: whenolf. Input ~mpudmcs1s 50R.
1
Volume 1
12
SWWHtNG THRESHOLD VOLTB-CE3 d l l p l w
n
Idcl.,
th,e,od
l
w l t n g ~ 01 lhn ch,.
seledM by controls tlgled under number 6 or
displays p i & = olfsa?
WVEL-Two pushbuttOn Brvfichoa set tnreshold
voltage d chmnel serecrsd by h e controls listed
under number 6'.
~ O B L
OFF~E~-M~~UM
~ 0 n - e 01
probe connect& l o the chnnnel selW*rd by
mnlrols Iusled under number 8'.
'MOOC H M A t O mutl b.M l o CHAN.
'PROG C H A N m l G rnwl b.IQ! to TRIG.
PROG
CHANKRIO murl bs a d to CHAH,md THRESH
must b. adlvo-
General Infomation-?A42
Volume I
DETAILED OPERATING INFORMATION
Detailed rnlormation concerning the controls and operation of the 7A42 1s given in the following pages.
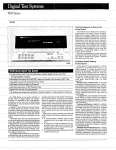
SELF-TEST
When power is applied to the 7A42 an internal self-test
sequence is automat~callyperformed. While the self-test
sequence us In progress the mainframe crt readout
shows 7A42 TEST BUSY, see Figure 1-4 When the selftest sequence IS flnrshed, the message 7A42 TEST
GOMPLETE appears momentarily an the mainframe
oscilloscope crt. as shown in Figure 1-5. During the selftest sequence some of the front-panel pushbuttons and
all of the indicators are Illumlnatsd.
The SWITCHING THESHOLD VOLTS indicator will
d~splay 8.8.8.8 durlng the flrst part of the self-test
sequence to verify that all segments operate. If there are
no self test failures, the Flrmware Version number will
then be dtsplayed for a few seconds before the self test
IS completed.
Self-test failures are lndrcated by three different
methods: 1 on the rna~nframe crt, 2. on the 7A42
SWITCHING THRESHOLD dlsplay, and 3. on the
TRIGGER FUNCTION indicators. Figure 1-6 fllustrates a
typical self-test fallure, lndlcated by the three display
methods Displaying the self-test failure messages in
three different ways Increases the chance that the failure
message will be displayed, even if the fallure affects the
operation of two of the three display methods.
color green. If a failure occurs, the self-test sequence
wifl stop.
The SWITCHING THRESHOLD VOLTS lndlcator and
mainframe crt readout display indicate a self-test fatlure
w ~ t ha numeric c d e . All of the self-test code numbers
are llsted rn Table 1-5, along wlth the nature of the
failure and an explanatlon of the severity of the failure
The severity information is helpful In determining if the
7A42 can still be used for the intended :purpos% or
whether repair is necessary. To continue the self-test
sequence, press any of the f A 4 2 front-panel
pushbuttons.
NOTE
Before the 7A42 Self Test feature can verify
that the ?A42 readout circurtry is operating
properly, rnernlrams crf readout system must
bs set lo the "FreerUn"(non-Gated) mode.
FRONT-PANEL INlTrAlLlZbTlON
The TRIGGER FUNCTION display lndlcates a self-test
failure with the copor red and self-test passed wlth the
While getting acquainted with the 7A42, it mlght be
desirable to b q l n operation with the front-panel
controls set to a known state (Initialized). The front
panel will ~ n ~ t ~ a to
l i zthe
e control settings listed tn Table
1-6 To inrtlallze the 7A42 front-panel controls to a
known state, perform the procedure of Figure 1-7.
Figure 1-4. SelFtert In progrens.
Figure t-5. Self-bt Ilnlahed.
1-18
G m t 1 R l o ~ l o n - 7 A 4 Z Volume 1
n w u r MEDIA
TYPICAL MEOIA
IRt6GfR WMCIIOI
TRIGGER FUUCflOH PEDS
OREEN = =ST PASSED
@
RED = TEST FAILED
-RED
0=OFF
SWTCHlN(3 THRESHOLD
VOLTAGE MOHITOR
(Nume* DlsplayJ
SWITCHING THRESHOLD
0 LNtl O
VOLIS
CRt READOUT
(Numerlc Qlsphy)
MOTE Durlw roma salt
b t m , ttre crt readout Is
umlabk: thla ccmdlfbn Is
normal.
NUMBER
BAWERY BACKUP
The 7A42 battery backup feature restorm the ?A42
front-panel control settings to the same settlngs that
were present when the power was turned off.
The batteq-ckup
feature can be deiented if so
dmired. If the battery-backup feature has been dimbled,
the 7642 front-panel control sattlngs will return, at
power up, to the settings listed in Table 1-6. To disable
the battery back up feature disconnect J747 from tha
M W Board, see F~gure1-8.
m f m
OPERATOR MESSAGES
Operator Messages occur under several operating
conditions and are accompanied by an nudlble beep.
When they occur, the mainframe readout will display a
mnemonic at the top of the crt and a number code at the
bottom. The mnemonic is an abbreviated explanation of
the operating condition which ceused the message to be
displayed. The code number references the message to
Table 1-7 which gives a more complete e%planatlonof
the operating condition.
TABLE 1-5
7A42 %If-f-t FUllUm Meas4W
- --
TRIGGER FUNCTlOH
(LED dl9play)
SWlTCHlNO THRESHOLD
VOLTS and crt readout dkplay
lndkallan
Tmt
CHI.
flrst mlurnn
ROM
01 to 04
ROM
CH2.
RAM
05t006
RAM
M~moprmeSSor
control log~c
07 to 09
Microprocessor
control IWIC
PAOBE
10
--
Severlty OI
faiiure:
fumlonal uaablllty
of Instrument
Possible loss of front-panel
control repair MfOm use
f~rstcolumn
CW3.
first column
CHI.
flrst column
CHI.
second column
:
i
-
Avoid u~ of probe 0ffsd
feature 7A42 otherwise fully
tunctlonal Repaw when
convenlent.
PROBE
OFFSET
OFFSET
Crt d~splay
and readout
11
Cri
trace display
Channels 1 through 4
may not be displayable
Repalr M o r e use
12.13
Crt readout
Crt re%dout may not be
functioning Cause could b%
lack of malnfrarne readout
Repsir when conuenlent.
-
CH2,
second mlumn.
Trlgger
14
Trigger control
15
Trigger logic
"nolean
23
Some or all trigger functrons
may not be operation8l
Repair before use
Some channels may no!
trrgger property Raparr
before use
Some trigger func:~ons may
not be operational. Repalr
before use
logic
CH3.
26
A THEN B
Edge detectors
34
Edge detectors
EXT CLOCK
70
EXT CLOCK
second column
,
Avoid use 01 A THEN 0 mode.
Repalr when CO~renienl
Avoid use of Edgequalrfied
tnggerlng mode and
external clmk Reparr
when conwnlent
-
CH4.
second mlurnn.
Avo~duse of external clock
Repair when wnvenlent.
-
NOTE
For mure d e t a i w inlormalio~see T$hk 3 6 , exfended lest fatlure rneasages, in this 17~3nUnl.
Qmwd tnformath-?A42
Volume I
+-
a. SBt the FROG pushbutton 1 to the
CHAM mode (pushbutton Ilght out).
b. Press the THRESH pushbutton 2 so
that the pushbutton Itght Is on
(Threshold Mode).
c P m a the PROBE OFFSET pushbutton
3 until it illuminates md (Acqulnr
Mode).
d. Turn the ascllloscope mainframe
Power off and then on agaln.
-173
RIGHT SIDE V!EW OF 7A42
A8 MPU BOARD
BE
(BATTERY
ENABLE
LINK-PLUG)
42W-
Flgum I-&
m b n of 5741 W r y E n a h llnk plug.
L
NOTE
The audible bmp cen be turned off, by
Instelling a link plug on P730. See Figure 3-8
in the Meintenence secton of ihts manuel for
the location of P730.
SIGNAL CONNECTIONS
Generally, probes offer the mmt ccoveeient meens of
connecting rnput signals to the instrvment. Probes are
sh~eldedto prevent electromagnetrc rntsrlerence. The
TABLE 1-7 (CONT)
7 M 2 Operator M-go
Surnmmy
TABLE 1-6
7A42 F d P a n d Control Sattlnas W l m lnlallwd
~
DsrerfpHm m d Comcm Action
Mnlmonk:
1
PROD CflAhffrRlG
Program Chsnnel (light ofl
Pmgrammabls Channel
CH1 only
DlSPLAY
C H l only
VOLWD1V
.(CHI lhrwgh CHd)
Preael to 0.5 Vnllv at bnc input
TNECC
(CHI thmugh
PUSH PROG
Key(s1 p e s d Ware actlve only
in PROG CHAM mode To use key,
first press PROG CHAN.
DUSH PROG
K%y(s) pressed iuam active only
In PROG TRlG mode. 5 0 use key,
flrst press PROG TRIG.
lunctlon, a CHI, CH2. CH3.
CH4. NOT, or EDGE was premed
when en AND or an OR key was
CH4)
Ungrounded
GNO
(CHI hruugh CH4)
:
H
1 M r n
{CHI thmugh W 4 )
ALTIWOP
ALT
TRIG VIEW
Off
SWITCHING THRESHOLD
voltage (cni lhwgh CH4)
P&
THRESH
m
PROBE OFFSET
Mr
A TRIGGER FUNCTION
CHl (HI)
0 TRIGGER FUNETlON
ClearA
*n (+1.4V); dlspky
off
KEY REQ Whits programming n tngger
funetlcn, hvg Emlean operatcr
keys (AND or OR)mpressed
wlthout pressing a channel key
[CHI, CH2, CH3, or CH4) tn
between Channel keys and &alean
owrutor keys should be preswd
sltmetely, e.g.. CHI AND 'NOT
CH2 OR CH3 EDGE.
The OR key was pressed again.
Only one TRIGGER F UINCTION OR
is nllowa.
The EOGE key was premed whik
in the E X f CLOCK SYNC mode.
The wlection of an EDGE
sensitive channel and the
EXT CLOCK SYNC mode are mutually
exclusive. If EDGE wns~tivity
Is &sired, first turn 011 the
EXT CCOCK SYNC mode.
TRlGGf R MODE
A THEN B
A
Off
EXT CLK SYNC
Off
TRIGGER FlJNC710N
The EXT CLOCK slope key was
premed when the EXT CLOCK
SYNC bunm was turned off
The EXT CCOCK SYNC slope key IS
opwational only when the EKT
CLOCK SYNC button IS turned on.
MOTE
Controts noi Nsred ahwe am not pretzel.
EOGE IS ON
TABLE 1-7
?Ad2 0-r
Cods
1
2
mnsmonk
Mew8ge Summay
DHerlpHonAd~Acnml
OVERLOAD A ehannd Input is werlwded
f?arnovethe overvoltage and
ungrwnd the channels i o
continue operatton.
whlle ProM
OFFSET A M A key war p
Offrpet scquislHon was In
progress Push PROBE OFFSET mce
to Yxk +nacqulred value,
or kv~cttto turn PROBE OFFSET
off, M o r e wntinu~ngoperation.
he EKT CLOCK sync key wes
pressed when one of the Irlgger
functions (either A. B, or Wlh)
already have an EOGE sensitive
channel. Channel EDQE
aensitiuity and EXT CLOCK am
mutually mclushre. If EXT CLOCK
SYNC uwratlon is desired. Hrst
CLEAR the channel EDGE
98ns1tluetrlgqer function.
'HRESH R E 0 Either a LEVEL key or the PROBE
OFFSET key was prea3ed w~thout
p m l n g the THRESH key first.
The THRESH key must be Ilt to
change a lhnrshold &'el or
m u i r e a probe offset.
G e n m l lnfonnatlm-fA42
TABLE 1-7 (CONT)
7A42 Operator Mesaage Summary
wrthout havrng programmed
functron A: or while In A
THEN 0 mode functfon A was
CLEARed. Both trrgger tunctrons
(A and B) must be programmed
lor proper R THEN B operation
Program function A then proceed
1 NO FUNC 6
The R WEN B button was pressed
wllnout having programmed
lunc-ion B, or whrle m A
THEV B mode function & was
CLEARed Bolh trigger functions
(A and 8) must be programmed
for proper A THEN B operatlon.
Progrem functron B, then continue
WARMING BEEPS: Atthough no messages are display&. short
warnrng beeps are lssued to rndlcate "out of
range" A beep WII sound when the
VOLTS/OIV keys are pushed beyond the
avarlable setections or when the variable
threshold level reaches its lrrnits
The audible beep can DR turned all, by msI~1Itng8
link plug on P730. See Figure 3-8 m !ha
Melntenance m t l o n of this menual kr localion of
P730.
10X probe offers a high input impedance to minimize
circuit loading when measurements are made; signal
amplitude is attenuated by a factor of 10 by the probe,
so the scale-factor readout 1s swrtched to indicate the
correct scale factor.
The limited TTLIECL VOLTSDIV ranges r q u i r e that
attenuation be used to obtain useful signal levels W the
71942 channel ~ n p u t s . Ten times probes are
recommended on the channel inputs to attenuate TTL
and ECL s~gnals;otherwise 10X attenuators should be
used. When 1DX probes are used the VOLTSlulv and
SWITCHING THRESHOLD are automatically
compensated to reflect the characteristics at the probe
tip.
Volume 1
The Tektronix P6230 Is an active 450 ohm b~as/offset
probe which 1s especiafly useful with ECL loglc circu~ts
due to ~ t sminimal Circuit loadfng chancteristlcs. For
information on hew to use the PB230 probe, refer to the
Application section in the 7A42 Operators manual.
Probe Compensation
Makad~ustmentof probe compensation is one source of
measurement erfor. Most 1DX passive high impedance
probes are equipped wlth a compensation adjustment.
To ensure optimum measurement accuracy, always
compensate the oscilloscope probe before making
measurements. Refer to the probe instruction manual
for probe adjustment procedure.
For optlrnvm 7A42/P6131 performancethe P6131 should
be high-frequency compensated while connected to the
7A42; see the P6131 probe manual for high-frequency
m-npensatlon adjustment procedure.
COAXIAL CABLES
AHhough the 71\42 Input channel VOLT/DIV ranges are
intended to be used with 10X probes, w m i a l cables may
be used for s~gnalcannwtlons. When waxial cables are
used a 10X attenuator must be used to reduce TTC/EGL
sicnals to usable levels. When 1DX attenuators are used
the VOLTS/OlV and SWITCHING THRESHOLD
readrngs are not automazically compensated and will
indicate values a factor of 10 lower than actual.
Cables also may be used to connect signals to the Input
connectors, but they may have wnsiderable effect on
the accuracy of the displayed waveform. To maintain the
orrginal frequency characteristics of an applied signal,
use only low-loss. 50 ohm, high-qvallty coaxial cable.
Gables should be terminated into 50 ohms. The ?A42
has an internal 50 ohm termination tor each input
channel which can be selected from the front-panel.
CRT 'READOUT
Flgures 1-9 and 1-10 show the 7A42scale factor readout
location. Figure 1-10 was taten with X I 0 p r o h
attachedtothechannelinputs.Figure1-9wastaken
wlthout probes attached to the channel inputs and
without changing the channel VOLTSIDW settangs from
those of Figure 1-10,
NOTE
RECOMMENDED PROBES
The Tektronix P613: and P6230 probes are
recommended for use with the 7A42. The Tektronix
P6131 is a 10X passive pro& wlth 10 rnegohm at 10.8
picofarads. A variety of probe tlps (hooks. IC grabber
and ground leads) are aveilable with this probe.
Improper cri readout operation may be
caused by the 7A42-7854 mode being
selected when ma 7A42 is operated m other
7000-series meinframes. See Figure 3-7 1rr
the Maintenance secrron of this mama/ lo
determtne if the 7A42-7854 mode is selected.
General lnbmallon-7A42
cni
TTL
Volume 1
GAIN
en3
TTL
This screwdriver control adiusts the 7A42 display output
(of all four channels) to match the vertical gain
tolerance of any Tektronix 700@series marnframe.
STATUS 'INDICATORS
(CH1, CH2, CH3, CH4)
Each channel has four status indicators (DISPLAY,
ECVTTL. GND and 50SIllMR). These indicators show
the status of each ~ndividualchannel A description of
each rndlcator 1s given below.
DISPLAY
I
CH2
ECL
I
CH4
IECL
I?BQIca
Flgum 1-9. Channel w d w t dlaplay.
CHI
7TL
When the DISPLAY rndlcator is lit, the associated
channel IS displayed o n the mainframe cr? If the
indicator is extlngulshed, any signal applied t o the
channel input w ~ l lstill be routed t o the TRIGGER
FUNCTION crrcultry, providing the GND indicator is not
lit.
ECmL
When the ECLlTTL indicator is Irt, the channel threshold
voltage range and deflect~onfactors match the voltage
levels and s ~ g n a lampl~tudesof the TTL logic famrly.
When the indicator is extinguished the threshold voltage
range and deflection factors are in accord with the ECL
logic famlly.
CH3
TTL
GND
When the GND indicator 18 Itt, the input to the selected
channel amplifier is grounded and the signal path from
the front-uanel bnc connector to the a r n ~ l i f ~ eisr open
An external signal applied to this channel is not
terminated (it is open). Grounded channel traces are still
displayed to enable the ground reference position to be
established.
I
CH2
I
CH4
ECL
ECC
When the 5 0 n l l M R lndlcator IS lit, the input impedance
of the associated channel IS one megohm When the
indicator rs extinguished the Input rrnpedance is 50
ohms.
4%1W
Flgure 1-1Ih Channel readout dlsplay wlth TOW pmbes attaehed
to Inputs of CHI, Cnf C n 3 , and CH4.
POSITIO'N
A POSITION control rs provided for each of the four
channels The control vertically posttions the displayed
trace on the host mainframe crt (cfockwise rotation
moves the trace upward).
1-24
ALT/CHOP
The ALTlCHOP pushbutton selects either alternate or
chopped as the dlsplay mode (for all channels). When
the ALT/CMOP Indicator is lit, the channels selected far
drsplay are alternately displayed on the mainframe
oscrlloscope crt after each sweep of the time base.
When the ALTICHOP lndlcator IS extinguished, the
drsplay is electronically swltched between channels at
about a one-megahertz rate. In general, the ALT mode
provides the best drsplay at sweep rates of TO0
REV DEC 1983
General Inlormallon-7A42
mlcmcondsldivision and faster while the CHOP mode
provides the &st display at sweep rates slower than
about 200 m~crosecondsldivfslonor whenever multiple
singleshot signals are to be photographed.
TRIGGER FUNCTION
The tw*wtor TRIGGER FUNCflON indicators display
the Boolean trigger functmn. The color red Indtcates a
HI (logrc I , or higher than threshold voltage) conditlon.
Green indicates LO (logic B, or lower than threshold
voltage) condition. An ind~catorthat 4s not lit represents
the X (don't care) condition. A red flashing or green
flashlng indicator signiflss that the channel is edge
sensitive (rlsing, red; or ialltng, green) as opposed to
bemg level sensitive.
The TRIGGER FUNCTION Indicators are arranged in
two columns of four each. Each coTumn represents a
logical AND funct~on,(a Boolean prcduct of the four
Input channels). After the AN0 functions are performed,
the columns are ORed together to form the complete
Boolean TRIGGER FUNCTION. Thus each TRIGGER
FUNCTION ts equivalent to two fowr-blt word
remgnrzers ORed together.
There is one exception to thls convention. While an
extinguished Indicator reprewnts the "don't cam"
condltlon, an entrre column lhat is not 11tis considered
to be inactive. If an unlit column w r e Interpreted as a
don't care, that column ORed wlth any other coTurnn
would always be true.
A TRIGGER FUNCTION AND B TRrGGLR
FUNCTlON
..
There are two separate TRIGGER FUNCTIONS
available. A and B. They are identical; either may be
used. One pushbutton will always be Ilt to indicate
which function is dtsplayed by the TRIGGER
FUNCTION indicators and therefore, the function that
will produce the trigger output. The other function is
stored in memory and may be called up by presslng that
pushburton. The programming or clearing ot the
function displayed will not affect the other function.
.A THEN B NESTED TRlGGERlNG
.-
One level of nested triggering IS avaitable when this
mode is used. The trlgger output to the mainframe time
base occurs only after the trrggerlng is frnt armed by
the occurrence of functnon A. The trigger output then
takes place with the next occurrence of function B. After
thrs cycle, the ?A42 wlll begin to look for another
occurrence of funct~onA, to w i n the next nested
trigger cycle.
Volume 1
The TRlG VlEW traca prwldes a uistble replica of the
trtgger output signal a9 It IS prooessed by the ?A42
according to the programmed TRIGGER FUNCTION.
This trigger slgnal is also sent to the time base. When
the EXT CLOCK S W C pushbutton swrtch fs Ilt, the
TR!G VIEW trace displays the external clock lnput
signal.
The TRlG VlEW trace Is normally located near the
bottom of the crt display. There is an Internal prwislon
for repcaitloning the tram: refer to the Performance
Check and Adjustment section of fhls manual. for a
pmcedure to reposition the TRIG VlEW trace. If all of
the channel dlsplays are turned off the TRlG VlEW trace
wlll be on and cannot be turned off.
TRIGGER FILTER
The TRIGGER FILTER control providea a selectable
amount of delay btween the time that the TRIGGER
FUNCTION Is recognized as true, and the time lhat the
Trigger Output is sent to the time base to trigger the
sweep. Thus the TRIGGER FILTER w ~ l linhibit trigger
events that are shorter In duration than those for which
the control I S set. A longer trigger event will pass
through the TRIGGER FILTER and can cause a
triggered sweep as well as a signal at the front-panel
TRIG OUT connector. The TRIGGER FILTER control
can be used only with level-sensitive trEgger functrons (rt
is inactive wlth any TRIGGER FUNCTlON that contains
an edge-sensltlve channel). The TRlGGER FILTER
operates independently on TRIGGER FUNCTION A and
TRIGGER FUNCTION 8. I n the A THEN 0 mode, the
TRlGGER FILTER may be inacthe on function A
because of an edge sensltfva channel, whlla at the same
time be adlve on functlon 8. The TRIGGER FllTER is
no1 act+ve when in the EXT CLOCK SYNC mode Or
when the control is m the counterelwkwise detent
(OFF) position.
EXT CLOCK SYNC
The EXT CLK SYNC pushbutton allows the 7A42 to be
used in a synchronous mcde of operation. The trigger
output (in either A. B. or A THEN 8 mo&) will occur
on y on the selected edge of an external clack slgnal,
providing the TRIGGER FUNCTION Is also true st that
time. If TRlG VlEW IS selected, a replica of the external
ctcck input signal having a f i ~ e d
amplitude and position
wll! be displayed on the TRIG VlEW tram.
SLOPE SELECT
Elther the rlslng or falling edge of an external clock
s~gnalcan be used to qualify the TRIGGER FUNCTION.
When the Slope Select pushbunon Is I11 the TRrGGER
FUNCTION 1s qualifi6d on the rising transition of the
external clock signal
A6 TRIGGER BOARD
EXTERNAL CLOCK
JUMPER
(LINK-PLUG)
SHOWN IN THE
ECC POSlTlOt4
1 s 4 2 6
ngum
1-11. -Ion
of J65A Exiern8l Clock Jumper, on A6 Tdgw b r d .
EXT CLOCK INPUT
me EXT
rs directly compmibla with
famil,es, me instrument is
either nL
or ECL
shipped from the factory In the TTL mode.
For selection of
EGL or TTL mode see Ficlure ,-ll.
The E X T CLOCK INPUT can be used wrth a l i probe in
TTL mode, or can be directly connected to the logic
circuit In elther TTL or ECL mode: 10X probes should
not be used wlth thls input.
RESET INPUT
The RESET FNPUf allows the operator to apply a signal
to rnhibit the trigger output. Applying a positive 0.8 volt
level to the RESET input wll'l prevent the programmed
TRIGGER FUNCTION from belng recognized as true.
The result is that no trrgger output signal will occur until
the msed voltage is removed.
If the A THEM B nestabtrigger mode is selected,
TRIGGER FUNCTION A has occurred, and TRIGGER
FUNCTION 5 has not occurred, the RESET signal w ~ l l
reset function A (the armed condit~on)as well as lnhrbtt
function B. Therefore, the RESET input can be used to
enhance the A THEN 8 nested trigger operatlon by
prov~dingan "A THEN 0 unless RESET feature.
TRIGGER OUT
The TRlGGER OUT bnc connector is a trigger output
signal source. This signal can be used to synchronlze
dhwr equipment with the TA42 TRIGGER FUNCTION.
The output of the TRIGGER FUNCTION is determined
:he mttlng of the A. B. or A THEN B pushbuttons, the
programming of the A and B funct~ons,and the channel
Input signals. T~ming dragrams for a typlcal set of
corditlons are shown in Figures 1-12 and 1-13.
Two modes of operation can be selected for the
TRIGGER Out connector; Normal, and A THEN 8 Gate.
In Normal Mode, the A THEN B frlgger Out IS a pulse,
regardless of the duration of Trlgger Function 0. A
lyp~calturning diagram depicting the Normal and A
THEN B Gate modes. is shown in Figure 1-14. For
selection of e~thermode see Figure 1-15. The TRIGGER
OUT stgnal levels are compatlble with the RESET Input
lwels.
PROG CHAN/TRlG
The PROG CHANmRlG pushbutton selects one of two
modes. PROG CHAN (program channel) or FROG TRlG
(program trigger). I n the PROG CHAN mode the
DISPLAY, VOCTS/DIV. GND. 1Mn/50fi, TTVECL, and
THRESH pushbuttons are activated. These controls are
used with the CHI, CH2. CH3 and CH4 pushbuttons to
Indlvidually set the channel status. In the PROG TRlG
mo3e CLEAR, AND, OR, NOT, and EDGE pushbutton
controls are activated and are used wlth the CHI. CH2.
CH3, and GH4 pushbutton controls to program a
Boolean equation Into the A TRIGGER FUNCTION or B
TRIGGER FUNCTION. The following text discusses first
the PAOG CHAN controls and then the PROG TRlG
controls.
Genemr Infom1ion-7A42
I =cni Ann NOT cn2 A
I
I
I 1
~ HOT
D
Volume 1
cHa
? I
I 1
em1
I I
I1
SIGNALS
I I
11
I I
E I
1 I
1 2
ll
1 I
II
I
11
I
CH3
OUT
COHMECTOR
II
I
11
1 1
-108
Figure 1-12. Tlmlng dlaflram a h d n g the rel#tltlarahlp el the TRIGGER OUT wavefom t@ Iho inprrt slgnds.
J =HOT CHI AND NOT CU2ANU EDGE CH3
SIGNALS
I
.,I.
OUT
CONNECTOR
FCue 1-13. Tknlng dlagrm doplellng the TRlOOEA
i
I
11&110
OUT wmlnm, w a rasull of
Ihp TRIGGER
FUNCTION r-1-
to lb hpul
signals.
PROGRAM CHANNEL MODE
The TTLIECL, VOLTS/DIV. GND, tMn/SOR, and
DISPLAY, controls are actlve In the FROG CHAN mode.
These controls are used with the CFH, CH2. CH3, and
CH4 pushbunons to $el the status of each channel.
CH1, CH2,
CH9, CH4. I n the PROG CHAN mode the
CH1, CH2. CH3, and CH4 pushbuttons are used to
Select and Indrcate the channel which will respond to
the TL/ECL, VOLTSIOIV. GND, IMWSOR, DISPLAY
and THRESH pushbutton controls.
DISPLAY. The DtSPLAY pushbutton turns the selected
channel display on or off. In the off posltlon the trace is
removed from the cri dlsplay. However, the signal
applied to that channel is Sill routed to the TRIGGER
FUNCTION ~ [ r c u ~ i r yproviding
,
the channel GND
indbcator IS not lit.
TTLACL. The TTVECL pushbutton offers a threshold
range and ~ l e c t l o nof display sensitlvltles appropriate
for either TTL or ECL logic tarnllies.
VOLTSIDIV. The VOLTSlOlV pushbuttons set the
scale factor of the selected channel. Ths $Galefactor Is
d~splayedon the mainframe crt readout: refer to GRT
Readout in this section. Three sens~tiv~ties
are available
in each lugic fam~ly: see Table 2-4. To Increase the
sensitivity {display size) press the upper button.
Gsneral Infonnatlon-fA02
Vdume t
fo
=CHl AND CHZ
cnz AND NOT EDGE cn3
(b =
I
I
t I
I I
cns
SB
1
1 1 E
I
I
I1
I
I1 I
I I
I I
I I
I
1
'
3
I
I
f
NORMllL
I
TRIGGER
1 AAY'D
OUT
CONNECTOR ~ . ~ E N 1B
GATE
,
I
IB
I I 1
I I 1
I I I
I TRIGGER-*
1 I
II I
I
I
I
I
I
I
I
4-111
Flgum 1-14. Elanple ol A THEM E, level and EDGE sensltlve TFlrGQER FUNCTION, shwrlng the Normsl and A THEM B Gale
wevetom alternalhea
J701
JUMPER
(LINK-PLUG)
SHOWN IN THE
"A THEN B GATE
TO'P VIEW OF ?A42
Flgure 1-15. Loutlon 01 5701. on A6 Trigger Board.
General Informatton-IA42
Volume 1
CLEAR. The CLEAR pushbunon erases the TRIGGER
FUNCTION program currently displayed 'by the
TRIGGER FUNCTIOM indicators. The other stored
TRIGGER FUNCTION program remains unaffected by
the CLEAR operation (sm A, B and A THEN B).
HOT. The NOT pushbunon 1s used to negate a varlable
In the Boolean TRIGGER FUNCTION. For example, if
CHI is entered into the TRIGGER FUNCTION display
(that Is, CHl is an active HI, red), pressing the NOT key
will change it to an active LO (green) Successively
pressing the NOT key will alternately change the CHI
indicator from HI to LO, t h ~ ssequence will continue
until a delirnlter la entered (AND or OR).
EDGE. The EDGE pushbutton is used to change a level
sensitwe variable m a Boolean TRIGGER FUNCTION
from level to edge sensitive. The NOT pushbutton is
used wrth the EDGE pushbutton to select falling edge
sensitivity. For example, the keystroke sequence CHI
EDGE programs the 7A42 to trigger on the rwng
trans~tion of GH1; the keystroke sequence CH3 NOT
EDGE sets ~tto trigger on the falling tmnsltion of CH3.
Pressing the EDGE key twice changes the channel to
edge-sensitive and back to level-senslt~ve,similar to the
operation of the NOT key.
The 7A42 allows one independent EDGE-sensitive
channel per product in each TRIGGER FUNCTION (A
and Rl.
NOTE
The chenoal (CHI. CH2, GH3 or CH4),
EDGE, and NOT keys can be entered in any
order. For inslarice, fha keystroke sequences
CHI NOT EDGE, NOT CH7 EDGE, and
EDGE NOT CHF are equivelent.
I f the product already contams one edgesensitive channel at !he time a second edgesenstlive channel rs entered into the same
product, the last entefed channel will receive
the edge-senstlive status. The prevrous edgesens~tivechaonef will become Isvet-sensitwe
only. This is because only one edge-sensitive
channel par pmduct a allowed. If the last
entered channel is converted back lo levelsensrtrve, the previous edge-sensttive
channel will again becorn~ledge-wnsrlrve.
THEORY OF OPERATION
This section descrlbas the. circuitry in the 7A42 Logk Triggered Verticafi Amplifier. The description starts with a
discussion of the instrument, using the blwk diagram shown In Figum 2-1. Next. each circuit is described In detail with
supporting illustrations, where appropriate, to show the relatlon b t w w n the stages in each major cimult. Detailed
schematic diagrams of each clrcu~tare located in the Diagrams and CFrcuit Board flfuatratrons swtion at the back of
t h ~ smanual. Refer to these schematrcs throughout the following description far specific values and relationships.
BLOCK DIAGRAM
The forlowing dlscusslon presents an overview d the ?A42 before discussing the individual circuits la detall. In the
slmplifaed block diagram shown in Figure P I , each major circuit has a block. The number(s) in each Mmk refer@)to
the schematic diagrarn(s) that showfs) the complete clrcultry. The schematic dfagtams are located at the back of this
manual
WAIRFRAME
DESCRIPTION
of clrcultry;
attenuators, amplifiers, channel-switehing, triggerthreshold generators, trigger comparators, and trigger
IC€jlC (s%% Flg. 2-1).
The ?A42 has stn functional blocks
Each channel (Chl through Ch4) has Its own menuator.
ampllfler, trigger-threstwld generator, and trlgger
comparator. lmpedanoe selection (50 ohms or 1
rnegohm) and gstn switching (voltsldiv) are
accomplished by the attenuator. Each channel's
attenuator has two signal outputs, one for the trigger
comparator and another for the arnpllfier.
The arnplffiws provide t b gain necessary to d r h the
verticar amplifiers in the host osellloscope. The channel-
disslay the channel traces and the trlgger-vlew trace on
the hmt oae~lloscopecrt. This is accompsshed by either
chopping between the channels select6d tor display, or
by displaying them alternately after each sweep.
f h a trlgger comparator compares t b signal from the
attenuator with the voltage from the tr~gger-threshold
generator. When the slgnal from the attenuator e x d a
the threshold voltage, tha trigger compar%torproduces
an output whlch rs a p p l i d to the trigger-loglc stag%.
The trigger-logic stago accepts outputs from tha
wmparator and compares them wlth the programmed
loglc level of each channel. When the spptied input
slgnel(s) match the programmed trigger-logic
conditions, a trlgger pulse is produced. The user sets
the t r i g g e r - l ~ i cconditions
vEa
the ?A42 front panel.
swltchlng stage provldes vertical s~gnalproce#ing to
-
TABLE a1
Slgrul m e D l c U m ~
on o q r m
-rim
8lgrur Nema
+15 wlt wwer supply--Dewupled matnframa p w s r aupply fmm
tight slue of 7A42.
+15B
1
+5 volt pwver slupply--Dewupled power auppfy tmm Hghl stde
d 71\42,
I,
2 d, 10, 11
I
1. 2, 4. 10. 11
+5 vdl pDwr supply4lgltal power supply from F w w Suppb
+5D
Board.
I
-150
-15 l f ~ Rpower a u p p ~ y - n ~ e ~
malnframa
p ~ ~ d power supply from
lstl aide of 7A42.
-1 5 roll m a r supply4ecoupled power supply fmm left side
Of ?A%
-1%
l o l l -r
-20
.
dD
dV1-+V4
1
-5 volt -r
Separate -5
supply-rce
1.2.4.10.11
1
I
1.5. 6. 7. 8.1. 10
3 . 4 7. 10. 11
Is Power Supply Board.
supply--Source Is Power Supply Mard.
won pwer supptles b CHlCH4 ultenumtor hybrids.
2, 11
p
p
-1 1V1--1W4
Soparst* -11 volt rupplles to CHlGH4 attenuator hybrfds.
IAXON. ..ABYON
Chennel (I), Functkn (A), Flml Product (X). O n a t r o l line9
from the trigger hgic contfol shm rqlsrer level shlften to me
Booleen logic Thwe llnes gate the Ueslred signals into the
Booleen logic
5
Channsl (1). Function [A), First Product (X), Invert-entrol llnm
fmm lhe trigger loglc control shlfl reglster lwsl ahift8ters to Me
Boolean Iwlc These Ilnw sctlectively invert the input slgnals.
5
Clockwlse-Con~lonsto CHt poaltlon control pot. Them is
0 ohms W e e n 1W (wiper) and th~spin when the knob Is rotated
m the clockwise (CW) posltlon.
5 12
IAXWV, ...~ B Y ~ W
1CW4CW
2,11
+-=
theory bf Oparatlon-?A42
TABLE 2-1 (CONT)
Slgnal Name Dielknary
--Slgnrr ~ s m s
D%scrlptbn
L
1CCW-4CCW
hunterclmkwrse-Connsctionr lo CHl poultion wntrol potentiometer
There Is 0 ohms between thls pln and pin 1W (wlper) when the
knob is rotated to the counterclockwrse ICCW) pos~tion
1W-4W
Wwr-Wper
7854
I
connection 01 C H I pm~tioncontml potentiometw.
7854-Decoded read strobe used to determine the loedton of
link-plug jumper 540.
Address-Address
lines to an address dwoFer on the Digital
-
-
MODE-When
R MODE
-
low, enables trigger fuoctlan A.
Volume 7
d on Olmgram
3. 12
-
1
48
7.8
I
control signal to enable the A THEN 6 larch
A THEN &
A THEN B-A
ALE
Address Latch Enable-Decodes the mulllplexed AD bus fmm
the microprwessor.
A LT
AL?--Selects ALT d~splaymode
ALT DRIVE
hlalnframe ALT DRIVE-A8 of Main Interface COnneCtM.
--
ALTSN
I
mmi
n
ALT Sync-when high, this signal synchronizes the displayed
channel to the ALT DRIVE sipnal.
Pttenuator Column-An address decoded wrrte select whlch
crocks the Attenuator Column latch (part of the armature relay
driver Circu~t).
AT ROW
Attenuator Row--An address deooded write select which clmks the
Attenuator Row larch (part of the armature mlay driver chrcult)
BDUBD7
Buffered Data-Buffered Data Bus l~neszere through seven
(external to kemal).
-
BEXTCLK
BUSCLR
Buffered External Clock-This Is the external clock signal from
the clock buffet to the edge detector
Bus Clear-This s~gnal(In the XBUSX diagnostic test) lights
B LEO ~fth8 External Bus IS operatronal
CAaS
Mot Implemented
GATSRO
Not rmplemented.
CHl3.
CH12. m-
d
I
4
2, 4
2. 4
1.2,4.5.8.0.10.12
8. 7
9
9
Control lines 10 the [CW. CH2) and (CH3. CHd) channel swrtches
(M211sJ.
h n t r o l I4nes to the (CHI. CH2) or (CH3, CH4) channel switch
M211).
CHI ROW
Channel 1 Row-7K-series CHI row readout inforrnatlon.
CHI-CHd SIG
Input l i m from the hybrid attenuator ~rnpedanceconverter l o the
trlggar ampllfler.
CHI-CH4-lndleates
9
g
C H l Cot
Channel 1 Column-JK-eer~es CHI column readwl Information.
-
ism-m
7. 8
cunently displayed channel when low.
3, 4
5. 4
10
10
3
4
TABLE 2-1 (COHT)
Slgnal Name Otctlonary
-
.
mlNams
-
h e a l e d on Mqnm
Ddptkn
CH2 COC
Channel 2 Column-?K-s%n%s CH2 column readovt information
10
CH2 ROW
#annel2
'0
CHOP
WOP-Selects
Row-7K-ries
CH2 row readout ~nforrnat~on
CHOP dfsplay made.
CHOP DRIVE
CnOP DRIVE-45 of Maln Interface conneelor.
Em
Display Control-An address deeded wnte select whrch clocks the
Usplay Contml latch
I
I
1
Msplay View-Channel Switch signal controlling Trlgger View display.
DVDW-DVD3
.-
OVM Digit-Robe MFsst DVM display Digit rlr~vers(aclive low)
Bimm
Cigilal Volt Meter LED-An a d d m d%cod%d write s % k l which
cbcks the Probe Ofl$et DVM display driver lC (721BB).
DVSGDVS7
W M Segment-PlobeOlfsat
ZmiRE
Error Trigger-When used in the dlagnostres r n d e . IS pulsed by
d~ngnosticfrrmware whenever an error IS d-ed
(active low).
ETST
EXEOGEN
3. 4
1. 12
DVM display Segment drivers (actdue h~gh)
Enable Test-Used to enabk the Wail State Test clrcult.
9
External Edge Enable-When low enables external clock
See Theory of Operatlm for more detalls.
6 7
--
-
4
wrlte select which clocks the
KXsplay Test-An address de&
Cisplay Test latch.
DSW
I
EXT CLK EXER
External C l x k Exercise--Thls signal is high during some diagnostirs
to control Iha slate of the External Clock Inplt.
EXTCLKSLOPE
External Clmk Slope--A conlrol signal which selects the desrred
external clock edge.
7, 8
EXT CLK SYNC
External Clock Sync-A control signal which enables the slrtarnal
clock buffer when external c l c d synchmnizatton is desired
7, 8
I
Errternal Clock Input-This input is from a peltola connector on the
EXT CLOCK INPUT
I front panel jack to the Trigger
7 8
?
Board
Fltered Data bus-The buffered data bus after passing thmugh
some series resistors that slow the transistions.
FILTER OFF
Filter Qff
control
d signal used to disable the trigger filter.
FNA. FNB
Functlwl A. Functfon 6-The output 01 the Bool6-m logic. These
lines go high when the function rs true.
FP LED
FPLRO-FPLR4
I
6
5, 7
Front Panel LED Column-Front panel LED column drlvers zero
though seven.
F m t Panel LEO-An addrms decoded write salect which clccks
the display driver IC I7218A) of the Front Panel LEDs.
I
Front Panel CEO Row-Front
Panel LED row drivers zero throuah four.
General Inpvt-An address decoded red selmt (actlve low) used
to read the General Input latch onto the data bus.
I
1 , 12
T&BLE 2-f (Corn)
81grml Name D l c t l o ~ r y
GBKjiiT
General Oulput-Address -bed
writs mlsct (aclhre Fw)umd to
write data into the General Output latch.
KPD1-4
Relay Pull Down--Pull-down lines In arrnnture drive clrcult.
KPU1-4
Relay Pull U-Pull-up
ltnea In armature drbe
2. 12
ClrCUY.
p
p
p
Rday Pull Up-Dm-Pull-upldown
KPUDI-5
llm in armature drlw drculr.
l,12
p
p
p
it'm6
Key W e - A n add ma^ decoded read aele-3 (actlvs low) used to
read keywcte data.
1, 9
ziFim6
Lower Rsadcut-An addrms demded write %ale13 whlch clocks
Ihe lower readout Intch.
4, 10
Kn'rim
Matffrr-Addm dewd6d wrlte select (active low) to LED
matrlx drlver IC.
1,
Multlplever Ennble, Function (A), Flmt Product (XJ-Control llnm
lrcm the trbgger logtc wMrol ahlfi register Level shiftera to the
Edge Detectors. Thew llnes enable the mun~p!%*erfor nn edge
sensltlve chsnnel.
Multiplexer Select. Channet p),Functlon (A) First Product (X)Control lines fmm the triggrn logic control shlR reglster level
sh~ftersto me Edge Detectors. These lines select the m i r e d
edge sensit~vechannel.
Metrlx Column X nnd Matrix Column Y - 4 a M x LED column drlver
llnes (act~velow].
MXCX. MXCY
Matrlx Rowa-Matfix LED row drlver llnes (nctlve hlgh) zero
through m n .
PC1-4
I Probe ~odlng-Probe coding channels one through bur.
Plug-In M o d e - - m wrslon of Plug-In Mode, 835 of 7K-series
Interfac%.
Probe QfMt DAC-4ddress d e m d d select (acthre low) used to Wrk9
data m the Probe Offset OAC which Is u s d b do an analog to
dlgltel Conwmion 01 the Probe Offset voltage
I
.-
Probe Oflsel Green-R slgnnl which llghts the grean hob
Ofset LED.
POR
Robe Offset Red--A slgnal which lights the red P m k
O W LED.
PWCK
Power u p C W - 4 t m k
PIJSfi
Pull Up Stmbe ?--Strobe which clocks thearmature nlay
drive circuitrv.
riiEE
dgnsl indicates ~ns!mrrmntpower up.
Pull Up Strobe 2 S l r o b e whtch clocks the armsture d a y
drlw c~rcultry.
WSTiPtm
Putl Up S t m b e m l l Down StroBe--Strnb% whlch clocks the
armatum relay drlve clrcultry
I
*
TARLE 2-1 (CONT)
l g n a l 'Name Dlctlonary
STAX.
...STBY
m.
.T@5
TB1
2-6
Strobe, Functlon (A). Firat Product (XI-Stmbe Wigger function.
56
Sync. Function (A), nrst Roduct (X)--Control IInes from the trlgger
logic control shift register lwel shlfters to the Edge Detectors.
The line is low when edge sensitivity or external clock is adive.
5
T&
bit &Used
in Self Test and Diagnostlrs from *rimer Boars.
T w t Blt 1-Used in Self Test and Dlsglrmtlcs from Dlgital Board.
8
6.7, 9
4, 9, 12
REV JUN 1984
theory of Operallm-7A42
Volume 1
TABLE 2-1 (CONT)
Slpnal Name Dtctctronaw
Deacrlplbn
s l g ~ l
~ocaasdon awmm
fg2
Test bit 2-Used ~nSelf T%st and Diagnost~mfrom Trigger Boad.
6 Q, 12
TB3
Test bit 3--Used in Self Test and Diagnostics from Trigger B m d .
5, 6, Q, 12
TB4
Test bll 4--U&
5, 5, 9. 12
TB5
Test bit 5--Used In Self Test and Dlagnostles from Trlgger Board
TEST
In Self Test and Dlagnmtles from Trlgger Board.
Test-When sctive, this Eine muses the PAL to ibe in test mode.
.
8, 8. 12
4
e g setup lor I S S D (Leuel Sensitrve Scan Design).
two connections to the trlgger Illter
TFP1-TFPZ
Trlgger Fllter Pot-The
potentiometer.
TFS1-TFS2
Trigger Filter Swltch-The
TIP
Tjp-Front panel Probe Offget lack
TRAP
It wlll occur when any
Trap-A nonmaskable interrupt to the
of the 50 ohm input resistm am over diss~pated.T h ~ sinterrupt IS
rlslng edge senait~ve.
2, 8, f 2
TRAP1-TRAP4
Trap-The source of these signals Is the attenuator hybrid. Thew
analog slgnals represent 1Im power dlsslpatlon of the 5 4 ohm Input
reS18tOE8
2. 12
TRIG VIEW OUT
Trigger Wew Outpwt-me Trlgger View output slgnat to the
digplay channel swltch on the Arnpllller Board
TRIGEN
Trlgger Ewbl%A cwltrol sbnal which enables the trigger f ~ g l c
output and releases reset to the A THEN B flip k p .
7. 8
TmTl-fRSn4
Threshold 1-?hreshold 4 - A d d n ~ decodsd wits lines (acttve low)
used to wrlte the trlgger threshold DRUI.
5, 9, 12
TS1
Tlme Slot One-7K-serlm rmdwt.
10
TSX
Tlme Slot X-Thls slgnal is the result of dl&% ORing Tlme Slot
llnas one thfOtIgh ten.
10
UP READ
Upper Readout-An address d m d e d write r l e c t wh~chclocks the
upper readout latch
WmtE
Wrlk Keyboard-An address decoded wrlte select (aetlve low) to
keyboard controller tC
WRMD
WRTL
KB[JSR
XWR
two mnsetrons to the trigger filter awkch.
5 , 12
8. 12
9. 12
7
1. 10
1. B
Wrlte Mode-An address decoded write select line (active low)
used to clock the trigger mode latch on the Trigger Board
8.9. 72
Wnta Trigger Logic-An address M % d write line (active low) used
to clock the trlgger functlon Into the lrlgger m t r o l shift registers.
6.912
External Bus Exercise-An uddrws deooded select (salve low)
used to determine ~f tne XBUSX strap is Installed.
9
X W r i t e d system write stmbe which becomes a mad atmbe
durlng slgnalwre analys~s.
9
DETAILED CIRCUIT OPERATION
Complete schematic d~agremsare provided in Section 7, DFagrarns and Circutt Board Itlustrations. The number inslde
the dramond preceding a herding in the following discusarons refers to the schematic diagram f o r that circuit. The
schemat~cdlagrams contatn wide shaded borders around the major stages of the circult to conveniently locate the
components mentioned in the following discussions. The name of each stage is given C a shaded box on the diagram,
ond appears as a subheading in the discuss~onof that schematic dlagram.
All logic functions are described using the posltlve logic convention. Positive logic IS a system of notation where the
more positive of two levels (511) IS called the true or 1-state; the more negative level (LO) is called the lake of &state.
The HI-10 method 07 notatlon is used In this logic descriptfon The specific voltages that constitute a HI or LO state
vary between individual devices. Whenever possible, the rnput and output lines are named to indicate the function that
they perform when In the HI (true) state.
MATRIX LED DRIVER
FRONT PANEL DISPLAY
AMD COMfROL
KEYBOARD DECODEA
The Matrix LED Driver circuit (U105) 1s essentiafly the
same as the Channel Status and Swltch LEO Driver
(U320) described above, except that the output of U105
drive3 the Matrix LEDs. (Also. U105 1s designed to drive
a common-cathode array, where U320 drives a
common-anode array.)
The keyboard decoder IC decodes the keyboard swltch
array, informs the MPU {Mlcroprocessor Unit) when a
key is pressed, and sends a binary code to the MPU
tndicating which key was pressed.
The keyboard IS continually scanned by U205. When a
key Is pressed. U205 interrupts the MPU (vla RST 8.5)
and loads the corresponding eight-bit code onto an
internal flrst-ln/$irst-out register which is then read by
the MPU.
Detailed information about the internal functioning of
the keyboard decoder IC may be obtalned from the
manufacturer's data books.
CHA'NNEL STATUS AND SWlTCH LED DRIVER
The 72lB LED driver (U32D) accepts binary data from
the MPU and drives the Channel Status LEDs and the
Swftch LEDs. The 7218. LED driver 1s set in " 0 decode'
mode to dnve the LEOS directly with the binary data
from the MPU. Refer to the manufacturer's data for
detaHed informat~onon the internal functtonlng and
programming of the 7218 LED driver.
THRESHOLD DISPLAY DRIVER
The Threshold Display Driver (U110) accepts BCD data
from the MPU and drives the Threshold Display array.
The 7218 LED driver is configured to store and decode
the input data from the MPU and produce the
appropriate outputs to drive the swen-segment LED
d~splays.
ARMATURE RECAY DRIVERS
Figure 2-2 shows a simpllfred block diagram of the
Armature Relay Matrix us& In the 7A42. The relay%are
armnged +nthis matrix to mlnlmize the total number of
drives and Interconnects.
Each series pair of coils represents a single relay. The
nomenclature beside each wrl shows the function
invoked when current is pulsed in the indicated
d~rection.
The KPU fPull Up) and KPD (Pull D m ) drive lfnes are
unidirectional. The KPUD (Pull Up Down) lines are
bidirectional (able to source or sink curWftt).
While idle, all outputs of AT COL latch (ATtenuator
COLumn latch) A7 U42l are hlgh, as are pins 15 and 16
of AT ROW latch (ATtenuator ROW latch) A7 U420. Thrs
results in sll d a y drive lineg being h ~ g hnmpedance.
To activate a relay, the drive signal must be present for
about 15 ms.
Aa an example, the following Is the swuence of events
whtch take plam to insert the CH1 2.5X attenuator. I$
Indicates a hexadecimal number.)
Theory of Operstlon-?A42
1.
Votume I
Write $FQ to AT COL latch: selects KPDl (only one
output of this latch will be tow at a tlme to Insure
that KPU and KPD drives are never activated
simultaneously).
PUS TI^ low
to enable KPD1; s e w KPUDS to pull up, all other
KPUD Ilnes to pull h:PUSTI, PUST2 are set hlgh
(same as dle state).
CHANNEL SWITCHING
AND AMPLIFIERS
2. Write 570 to the AT ROW latch: set
3. Wnte 110 to A T - l a t c h ~
data as step 2, but
this time w~thPUSTl and PUST2 set low to mabta
KPUD dnves.
4.
Wait approximately 15 ma.
5.
Write $FF to the A T COL Iatch: disables all KPU,
KPO lines.
6. Wait 5 rns for transients to decay. (see below)
7.
Write XXllXXXX (binary) to the A T ROW latch to
dlsabte the KPUD lines. Diodes GR520, CR521,
CR530, and CRB30 on the KPU lines protect the
75325 from voltage spikes when t h m lines turn off.
There is s~milarprotection internal lo the 75325's on
the KPD lines. Step E above insures that relay coll
current has decayed before releasing the KPUD
drive
Jumper A7 J401, RELN, i s provided to disaMe the relay
dr~vesin Cmes of lmuble (e.g., pr-wr
out of control)
The dc resistance of the relay coils Is about 40 ohms
each. Thrs reslstatance along wrth the 18 ohm coflector
resrstance on pin 1 of the 75325's results in a'bout 12
volts across the pair of relay coils being activated.
OVERLOA'D COMPA'RATORS
Four identical voltage comparator c~rcvitsare used to
monitor the TRAP lrnes from the Attenuator hybrids
Their open collector outputs are wire-ORed at pull-up
resistor R236. If any of the four attenuator Wohm
termrnation resistors is over-dissrpated, 11's assocrated
negatlve temperature coefficient sensing network wrll
dr~vethe comparator's + input below the reference
voltage set by R234. A235 CR230. and CR231. Thls
drives the output low, whlch IS Inverted through U830 to
cause a high priority TRAP interrupt to the processor.
The prc-cessor then disconnects all inputs uslng relay
control.
The feedback resistors, along with the 1K reslstors and
0.1pF capacitors prwide hysteresis and nolse filtering.
CHANNEL AMPLIFIERS
Channels 1 through 4 each have an independent
amplifier stage which pmvldss voltage galn between the
attenuator output and the channel switch input. All four
of these stages are rdentlcal, therefore, only channel 1
will b% descr~bed.
The input signal from the attenuator module enters the
amplifier board through two Interconnect phs. The
single ended s~gnal(with an offset of -5 volts) then goes
through a small 'balun transformer to convert the hlghfrequency wmponant Into a true ditferential signal. The
-5 volt offset was chosen at t h ~ s
point so that no further
level shlftlng in the amplifier path would be necessary.
The balun owtput ts connected to the input bases of a
differential amplifier IC. Afkr looping through the bases
it is termmated by R1011. Capacitors integral to the ECB
and the rnductanoe of the amplifier 1C leadframe and
bondwires form bridged, tee-co~lpeaking, at the b a r n
to offer a resistive load impedence to the attenuator and
Improve the bandwidth of the stage.
The ampllf~er stag- use hybrid thick-film resistor
networks as blas and 'long tails*. The resistor networks
are placed k t m n the channel amplifiers and are
shared between adjacent channels. A total of five
networks are needed; the networks above channel 1and
below channel 4 are only partially used. Within the
nelwork are three resistors In a series divrder
contlguratlon from ground to -5 volts. Taps at -3 volts
and -4 volts set the bias Inside the amplifier to ensure
that the signal IS sent through the proper pair of output
trans~stors.For a glven amplifier IC. the network located
physically below that IC provides these bias voltages.
The resistor network located above an amplifier IC
s e m s as a long-taif current source to the ampllfier
emitters. The long tail is divided into two sectlons by a
tap. Low-frequency {thermal) compensat~on IS
connected between the taps. Hlgh-frequency
compensation is connected directly between the
emitters. The total resistance IS set to pravide a 12.5 mA
current source at each emitter.
The outputs of the amplifiers are connected to the
channel switches through 75-ohm microstrip
transmission fines on the ECB. The lndlvldual channel
gain adjustment rs made with a trimmer potentlometer
that shunts a portfon of the differential slgnal. Diodes to
ground provide protection to the channef switches ~fthe
amplifier IC inadvertently becomes dlsmnnected.
me
attenuator modules w n d the trigger output signal
through the attenuator wntrol board and a series
resistance to the trigger board comparators.
2-10
The position control circuit provides 6 5 mA of the 12.5
mA standing current needed by the ampllfier stage. The
REV JUN 1984
Theory ol OpemHon-7A42
trace is pasitioned by addhg additional current to one
side and taking an equal amount from the other. For
each channel, the two PNP transistor$ serve as these
position control current sources. They are controll& by
the front-panel POSITION control and a long-tail
network chosen to minimize the common mode
positioning current variation over the entire position
range. Diodes CR900 and CR910 protect the channel
switch Inputs ~f the posltlon control potentlometer
should inadvertently become dtswnnected.
Vuluma 1
The resistor network across the channel switch outputs,
along with the channel swltch output ~mpedance.
provides a 50-ohm reverse termlnatlon (per side) and a
small amount of front-panel gain adjustment.
The trigger view slgnal arrives at the A5 Amplifier board
as a differential signal. The associated reslston set the
trrgger vlew display amplitvde, and the TRIGGER VtEW
'POSITION wntrol allows it to be moved to any locstlon
on screen.
The posftlon control circult IS Isolated fyom the analog
signal lines by series resistors a910 and R911 and balun
transformer TBOO that has been installed backwards.
The transformer wlll pass common mode s~gnalsbut will
reject differentla1 signals. Series resistor, RBOO, and
capacttor. C700, shunting the posit~on control
trans~stors,pmvlde m~d-(requencycompensation.
CHANNEL SWITCHES
The 7A42 uses three hybrid channel switches. Channel
switch U6M) comblnes the channel 1 amplifier output
with that of channel 2. Channel switch U640 cnmbines
the outputs of channels 3 and 4. The outputs of U600
end U640, after passing through delay lines, are
combined by a third channel switch, U240, wh~chalso
introduces the trigger view signal.
ADDRESS 'DECODER AND LATCH
The QWR (Qualified WRtte) and processor address llnes
kg. A14 and A l l are used to generate eight wrlte
str~beson the A7 Dlgrtal board using an LS13B address
decoding chip. The write strobes are the same width as
the processor WR signal (700 ns) and are active low.
DISPLAY COPlTROL
The channel swltches select one output signal from four
input signals. The deslrPd input slgnal is selected via
four TTC-compatible control lines (pins 13, 14. 24, and
25). The output is intended to drive a 150-ohm load and
lpravide reverse termination tor a delay line.
Inputs R and B require a current source drive and have a
transimp6dance of 300 ohms from Input to output.
lnputs G and D requlre a voltage drive from a 150-ohm
source and have a voltage gain of 0.75.
The control lines are active low, i.e., when low the
sssoctated lnput signal will appear at the output.
The outputs from the channel 1 through channel 4
amplifier $tages are connected to the A and 0 inputs of
the first twa channel swilchs. These inputs supply the
remainlnp 6 ma of standing current required by the
ampl~fierstage output.
Channel swltching is predomlnantfy conlrolled by U800,
a PALISRG, which contains a fuss pattern configuring it
as a synchronous state rnachlne. Channels to be
displayed are presented to the PAL as the input vector
via Display Control latch outputs D l through 0 5 . Here
D l corresponds to CHI, 0 2 to CH2. etc. and 0 5 to
Tngger Vlew.
With each clock to the PAL on pin 9, the output vector
through 18
advances to dlsplay
on pins 14
Ihe next channel. The outputs are active low snd
mutually excfusivs.
(m)
(m)
As an enample, assume that the desird display selected
from the front panel is CHI, 1343, and Trigger View.
Wiih each clock pulse to the PAL the outputs would
change as follows:
Two bfas networks are required to support these
channel switches. The 1.24 K resistor provides an
accurate 4 mA bias, while the variable realstance to
ground is used to optimlze the front corner of the step
response. The pair of 7 M h m resistors connect an
unused portion of the circuit to ground.
The channel switch output impedance is 75 ohms per
side. The outputs drive two matched 75.5 ns, 1517-ohm
delay lines, DL603 and DL640 The delay lines are
termrnated by the third channel-switch's inputs (C and
13). The trrgger view signal is injected through input B.
TPe PAL is clocked on both rlslng and falling &ges of
either the Chop Drive or Alt Drive signals which are
supplied by the mainframe and selected through analog
switch U820.
RMory 01 Opratlon-7A42
Volume 1
The voltage levels of CHOP and ALT Drive are typically
-0.6 to 1 1 volts and are not suitable to dr~vethe TTL
inputs of the PAL directly. Transistors 0 8 1 0 and QB11.
and their surrounding components, form a comparator
with hysteresis and varlable reference [eve1 to decrease
propagalon delay from Ghop Drive's edge to channel
switch settling time. The varying reference level is
necessary because of the slow rise and fall times of
Chop Drive.
In "test" mode, when TEST is high on pin 7 of the PAL.
the PAL'S internals are rwonfigvred so that it can be
tested using Level Sensitwe Scan Deslgn tachnlques.
Psuedo random data Is entered to the PAL by the
processor on D l of the Display Control latch, and
clocked in with
of the Display Test latch. Output
data from the PAL is read back by the prDcessor vla TB1
and entered into a Signature Analysis routine.
m,
Other outputs on the Display Test latch Include
used to activate the piezo speaker; MODE, used as an
input t o 2 1 0 a n 1 3 2 0 when writing their control
words, POG and POR, 'Probe Offset Green and Probe
Offset Red LED drivers.
The negative bias for U820 Is set by CR810, G R H I , and
R811.
HORN
Timer U730 is wired as an astable rnultivibrator which
freeruns at about 4 kHz. The oscillator is disabled by
pulling the Discharge Ilne, pin 7 to ground. The software
contrors the horn through the Display Test latch and
saturating switch Q720D. It is also disabled at power up
by 07208, untif the processor has initialized the
hardware.
CO'MPARATORS
The channel 1 through 4 comparators, U200, U210,
U220, and L1230, wnvert the analog signals from the
channel 1 through 4 attenvators to ECL level
complementary dig~talsignals. The 24.3U resistos from
the inverted output to the negative Inputs supply
positive feedback and provide a fixed amount of
hysteresis. The comparator outputs drive the Boolean
Loglc and Edge Detectors.
BOOLEAN LOGIC
The Boolean Logic is divided into two parts, function A
and function 0. Each function consists of two products
of b u r brts (CHI-CH4). Each lproduct 18 Implernsnt6d
wlth AND gates from WOO, U302,V332,and U330 which
select the channels forming the product, and with EXOA
gates from U4W. U410. U420, and U430, which set those
channela to be active high or actwe low. The AND
function which forms the product 1s a negatlve log~c
wired-AND of the EXOA gate outputs. The Boolean
Logic gates are controlled by 32 lines from the Trigger
Control hardware.
Thwe are several rules regardrng the control of the
Boolean Logic gates. The O N l~nes(IAKON, JBYON,
etc.1 must be low for any unused channels In a product.
m3
elc.) must be
The
lrnes
manipulated depending upon the state of the rest of the
chaqnels in the product. If any channel In a particular
product is used, the INV tines of unused channels in that
product (if any) must be set low. Ifthe entire product IS
unused, i6N must be set high for at least one channel. If
a gwen p r d u c t is edge sensitwe and contalns no level
sensrtive channels. I& must be set low for all channels
in that product.
(mg!m.
fRK;GER FILTERS
The signal path is fmrn the wired-AND of each product
TRIGGER COMPARATORS,
BOOLEAN LOGIC, AND FILTERS
THRESHOLD OACs
The trigger threshold volwes for channels 1 through 4
are determined independently by threshold DACs
U1020, U1030, U1022, and U1032 respectively. The
OACs are controlled by the buffered data bus, BDO-BD7,
wh~chp w e s through series resistances to form the
f i l t e r d data bus, FDO-FD?. Slower trans~tiontimes on
the filtered data bus requires that wrltes to the A6
Trlgger board include a wait state A low level on select
lines T R S f l l - r n latcbes data into the DACs. The
analog output voltage r a n p of the DACs 1s from 0 volts
to +2.55 volts. A resistive d~vrdernetwork shifts thls
range down to 7048 volts to +048 volts at the
comparator inputs and provides gain and offset
adjustment.
through gates U402A, U412A, U422A, and U432A where
the two products of each function are wireOR6d
together forming signsts FNA and FNB. These signals
are active hrgh (high when the funct~onis true). The
function A and B trrgger filters are separate but
identical, and prov~deamounts of time delay which track
one another. The trlgger filter for a given function is not
operational i f e~therproduct in that function contains an
edgsssnsitlve channel or ~f the trlgger filter Is turned
off. The following description for function A applies to
funtt~onB as well. If both products In funct~onA are
lwel sensitive and the trigger filter is turned on, the
conlrol lines STAX, and STAY will be low; W N m a n d
SvnCAv will be high. The output of U50M will be hlgh
until either product becomes true. At that t11m ~t w ~ l l
begin to go low at a rate detrmlned by the 470 pF
capacitor and the current source from U532. As soon as
i1 1s low enough to cross the swttching threshold of
'USODD, positive feedback from USOODs output speeds
the transition and sends a posltive going signal to
'L11402B and U412B and then a negative going signal to
Thwry of O m l m - f A 4 2
U402A and U402B. This negative lwel ensbtes that gate
and allows the waAlng signal at the other input to pass
through. The principar of the trigger frlter is that if the
delay tlme caused by the capacitor between UWOA and
U500D W K C ~ W the
~ S tlme that the product Is true, the
resultant functlon, FNA, will not become true.
When the products become false ( b t h high), the output
of U5WA will go hlgh and rapidly charge the capacitor,
readydng it for the next cycle
When the trigger filter is turned off from the front panel.
the lines STAX and STAY from the edge detectors will
go high. This prewnts low levels to U402A and U412A,
enabllng them continuously.
If,for example, the first product wntafns an edge
sensitive channel and the second does not, m w l l l
go low. SYNCAY will remain high. The trigger fllter is
now prevented from worklng wlth the flrst product by
U500B. The signal STAX will strobe high corresponding
to the edge sensitive channel transition In the first
product. The level sensitive portion of that product will
be gated through at this time only.
Transistor array 0532A-E provides twtn tracking dc
current sources to the functlon A and function B trigger
filters. Each current source Is twloe the magnitude of the
current flowing into the clrcuit through the 330 ohm
resistor and therefore dependent upon the position of
the front panel potentiometer The base-em~ttervoltage
for U532A, B. D, and E is set by U532C. Since all
transistors are closely matched, their collector currents
wlll be equal wlth equal baseemltter voltages.
Volume 1
the qualifying edge comes along, the output of U310 wlll
4e high, setting the output of U402C low. When the edge
arrives. U310 output will go low and the output of W02D
wlll go hlgh momentarily until a high level has
propagated to U402C's output, at which time It w ~ l l
return low. The width of this pulse is determined by the
propagation delay of U402C and the addsd delay of the
series resistor and shunt capacltor between U310 and
U432C. This pulse becomes the STAX slgnal which
strobes the level sensitive portlon of the irigger function
on to the output. When the output of U310 goes high,
the circuitry is restored to Its initial Sate
All four edge detectors work in unison when the external
clock circuitry is activated. In thrs mode, ,MENAY.
and M a r e all high but the signal
ExEDGEN 1s low. The external clock comes in with the
slgial BEXTCLK. When BEXTGLK goes high the output
af USIDA goes low and produces a STAX pulse and the
falling edge of BEXTCLK restores the fiircuttry as above.
-
m,
W b n the trigger filter is turned off from ihe front panel,
the signal FILTER OFF goes high. If, for instance,
fumtlon A contains no edge sensitrve channels and the
external clock is not being used, S W t Z X and SYNCAY
wlll be hlgh. With FILTER OFF high. Ihe outputs of
U7DOA and V7WB will go high forcing the outputs of
U510A, E15108, U 4 0 X , and U412C low, and therefore
STAX and STAY will be high to prevent the trigger filter
from functioning.
The functlon 0 edge detectors have several minor
ditferences from thcse in function A. The outputs of
U422C and V432C are not wire-OR& wllh sfgnals from
the reset circuitry as is lvnctlon A. Flnally, a test bit is
picked off the output of U322 through a refatlvely hfgh
resistance for use in self test and sxtendcd dlagnostics.
EDGE DE~ECTORS
There are four independent edge detector circuits, one
for each product in functions A end B. The following
descnptlon for the one assocrated with the first product
of functlon A applies to all the others as well. The
channel 1 through 4 signals and thew complements are
presented to the input of the multiplexer. U310. It the
product contatns an edge sensvtive channel, the mntrol
IM low to enable the multrplexer output;
llne =will
l h~gh
or low to
lanes MSOAX,MSIAX, and MS2AX w ~ lbe
select the proper channel and polarlty so that the
multiplexer output will make a negative golng transition
corresponding to the channel edge to which sensitivity
has been programmed. Stnce MENAX is low, the output
of U800B is low as is pin 3 o l U f O B The slgnal
~ C A goes
X low to drsable the trrgger fllter. With
BEXTCLK high, output of U510A is low, allowing U402C
and U402D to be drlven by the output of U310. Before
A THEN B LOGIC
AND TRIGGER I/O
k THEN B LOGK
The A THEN B Logic passes the trigger signal from the
trfgger fllters to the trigger outputs in one of three
modes. A mod%, & mode, or A THEN B mode. The mode
is determined by the control lines A
K N and
~ A
In A mode. Awill be high and
wlfl be row. The FNA signal from the funct~onA trigger
filter can propagate through U600B and U6fOD to the
trigger outputs. This is possible because U5208's output
IS hlgh, U520A and U610B's outputs are low, preventmg
UGODA from latching In B mode, operatron 1s slrnllar
mar.
m
y of Opemilon-7A42
Volume 1
except the signal propagates from FNB through U600C
and U670D
the tr'gger outp*'
'Oth
line
must be high in thrs mode. FNA is blocked from getting
through by U600B,
In A THEN 0 mode. wntro? line A wlll be low
and A wlll be hlgh. An occurrence of functlon A
will arm the trlgger, The next occurmnce of function B
causes a trigger output pulse and resets the armed
condrtion. In this mode, the output of LE61OB is initially
held high. When FNA goes hlgh, this high state is
latched by U600A Gate UMOB prevents this signal from
reaching the trlgger outputs. However, C1800C becomes
enabled so that when FNB goes high, a trlgger output
occun. When t h ~ shappens, the output of U6MIC goes
hlgh, causing the outputs of U520A and 6108 to go low,
and resets latch U600A in preparation for the next cycle.
The width ot the resulting tr~ggeroutput lpulse is set by
the propagation delays of U520A and U6lOB. In this
mode the A THEN 8 GATE OUTPUT is also active. Pln
15 of UGOOD goes high when high when function A
occurs and back low again when funct~onB oacun. By
rnovrng a jumper on the A 8 Trigger Board, a
representation of the A THEN B GATE wall be piped to
the Front-panel TRIGGER OUTPUT connector via
U610A and U620B.
TRIGGER OUT AMPLKlER
The trlgger output signal is sent to a front-panel bnc
connector (as well as to Ihe time base). With its pin 7
normally low, U520A makes the trigger output signal
into complementary ECL Isvel signals to dr~vethe frontpanel Trigger Output Amplifler. The circult oonsists of
one dllferential amplifier stags w ~ t ha single-ended
output whose levels are &out 2 volts high, and 0 volts
low from a SQohm s o u m ~mpedance.
The function of RESET differs slightly if the 7A42 is In A
THEN 0 mode rather than A mode or B mode. In the
latter modes, when the rwet input Is drlven high, the
trlgger output is slrnply ~nhibited.In A THEN B mode, in
addrtlon to lfnhibit~ng the trigger output while high,
RESET causes the armed oond~tionto be reset ~fit has
previously been set by funct~onA belng true. After reset
term~nates,narmal triggering can resume.
A reset input signal more posltlve than about 0.5 volts
causes the comparator stage (Q720, 0 3 2 0 ) to switch,
pulling s~gnalsRSAX. RSAY, and pin 10 of U520D high.
When the collector of 0720 goes low, trlgger output is
Immediately inhibited by U610D. That same signal
propagates through U6109 to reset the A THEN B latch
U600A, assuming that the signal FNA 1s low. This is
assured by RSAX end RSAY which act on U402C and
U412C to force signals STAX and STAY low The IOW
srgnal at the collector of Q720 also forces EXEDGE'N
and m C A Y (on dlagram 6) low to
low and =AX
disable the trlgger fllter path and guarantee a false FNA.
EXT CLOCK
If the external ctmk is active, the control line EKT CLK
wl,l be high to present an ECLlow level to U S P ~
whlch enables the external clock buffen, a low to
U6lOC whlch enables the edge detmtors. and a low to
U630 whlch allows the trigger view multiplexer to pass
the external clock s~gnalto the A6 Am~lrfierBoard.
The external clock can be selected to e i t b r TTL or ECL
logic levers by an internal jumper. The TTL threshold is
about +1.4 volts where the ECL threshold is about -1.3
volts. The external clock srgnal from the front-panel bnc
goes to the TTL buffer and the internal jumper. If the
jumper is in the TTL position, the ECL buffer (U520C) is
disconnected. The TTb buffer consists or a differential
amplifier stage w ~ t h some positwe feedback and
hysteresis. The Input to the stage is clamped to +5 volts
and ground to prevent overdrive. The ourput has ECL
level voltage swings. With the ECL buffer disconnected,
the output of U520C is not pulling high so the TTL
buffer can drive U620A. If the jumper is In the ECL
position, the external clock input Is now terminated by
abcut 54 ohms to -2 volts to be compatible with ECL
log~clevels. Sinm the ECL htgh and low lwels are both
more negatlve than ground, the TTL buffer is always
clamped in its low input state which rasults in a low
output from 0724, thus allowing U52OC to drive UGZOA.
The input of L15ZOG is clamped to ground and -5V to
prevent damage from overdf~ve.The wntrol line EXT
CLK EXER is used In self test and extended diagnostics
to synthesize a low level TTL clock level. If the jumper IS
in ECL, the input level 1s already low, so EXT CLK EXE8
will have no effect.
The slope of the external clack is controlled by line EXT
CLK SLOPE. The edge detwtors are sensitive to a rising
edge of the signal BEXTCLK, so U62OA is set to e~ther
invert of not Invert to select the deslred clock edge. EXT
CLK SLOPE Is w t high for a ris~ngclock edge and low
for a falling. If EXT CLK SYNC IS not active (low), the
output of U520E is forced hlgh, and EXT CLK SLOPE IS
set high to assure that BEXTCLK wfll be high so as not
to Interfere with the edge detectors In channel edge
sensltkvlty. The BEXTCLK signal is driven into the edge
datactors by U510A, B, C, and D on diagram 6.
TRIGGER VIEW SELECT
If the tr~ggerview is turned on at the front panel, the
trigger vrew trace will be a representation of the trigger
out signal sent to the time base and to the front-panel
output connector. unless the e~twrnalclock is actlve. If
the external clock is on, the trlgger view tram will
disllay a representation of that slgnal. The ?.electron is
made by mult~ptexerU6300 which IScontrolled by th%
EXT CLK SYNC line. If the external clock is active, the
slgnal on route to the multiplexer is delayEd by U W A .
6,and C to make the external clock trace on screen lane
up with the other anelog t r a m .
Tlmury of Operation-?A42 Volume 1
position due to the particular readout requirements of
the 7854.
TRIGGER CONTROL
TRIGGER CONTROL LATCH
The trlgger control latch is set by the flltered data bus
FDWF07 on a rising edge of select l~nem.
In most
cases, its outputs are level shifted to drive ECC inputs as
described above. The only exceptions are EXT CLK
EXER and TRIGEN. When TRIGEN is driven low it
causes an internal reset This is used to inhibit fals%
tr~ggeroutputs during the loading of tngger functions
into the trigger control shlfi registers. Atter the load is
complete, TRlGEN is returned h~gh.
TRIGGER CONTROL SHIFT REGISTERS
The trigger control shin registers consist of n serial
string of 48 b l b wh~chare loaded from FD7 of the
flltered data bvs on a rlslng edge of select l i n e m .
The TTL outputs of the reglatars are revel shifted down
to EGL levels by resistive-d~vidernetworks and sent on
to the Boolean Lcgrc and Edge Detectors. The output of
the register strlng 1s buflered and sent back to the A8
MPU Board as a test b ~ for
t self test and extended
diagnost~cs.
e
CPU
The 7A4T contains two separate data bus structum: an
internal bus, and an external bus. The internal bus is
located completely on the A 8 MPU Board, and is the
main data bus for the 8085A mlcroprooessor. The
external bus IS used by the rest of the 7 A 4 and is
accessed as a block of memory-mapped I/O ports. The
data buses are separated in thls way to minimize noise
propagatlon through the Instrument by Isolating the
bulk of the data 110 (i.e., RAM and ROM access) to the
A8 MPU Board. This data 'trafflcVs blocked from the
rest of the Instrument by the External Bus Buffers. The
external bus also provides fault ksolatlon so that the
MPU can still run diagnostic routines if there is a fault
on the external bus.
DIAGNOSTIC CONTROL
The other three positions of the jumper are for
diagnostics purposes only: thew use is descr~bedin the
Maintenance sectlon of this manual.
The ?A42 uses an M 8 5 A microprocessor to control the
low-frequency functions of the instrument (e.g.,
attenuator control, readout, etc.) A detailed description
of the functions and command set of the 8085A
rn-croprocessor is beyond the swpe, and intent, of this
manual. Please refer to tha appropriate data books for
detailed qnformat~on.
m
On power up. R531 and C337 hold the RESET input
of U305 low until the power supplies have stabilized.
Dwde CR530 discharges C337 quickly when the RESEf
Tm line IS pulled tow by the Auto Restart circuit, or In
case of momentary power fallure.
ADDRESS CATCH
The address latch dtmultlplenes the lower eight blts of
tha address lnformatlon from the address/data lines of
the 80B5A. The InTormatlon on the addressldata llnes Is
latched and transferred to the lower e~ghtaddress lines
by the ALE signal from the 8085A.
ROM DECODER
The ROM Qecodet generatas the chlpselect slgnals for
the ROMs.
RQM
The ROM consists of three Bk-byte EPROMs and a
socket for an additional 4k-byte EPROM (for future
expansion).
RAM
The two RAM ICs provide lk-byte d statlc read-write
memory. This memory has an associated battery backup
circult to maintain Ws contents when the mainframe
wwer is off.
BATTERY BACKUP
This circuit ensurm that valid data is maintained in the
RAM by disabling the chip-select signal to the RAM
chlps as soon as a powerdown condlt~onIs detected,
and prwiding power from the rechargable battery to the
RAM until normal power is restored.
The diagnostic control circuit determines the operating
mode of the 7A42; disgnostic mode (for signature
analysis), or normal operation. In normal operation, the
jumper selects the readout m d e .
A fully charged battery wtll provtde iback-up power to
the RAM for at leest 200 hrs.
The Mode selector jumper (P540) should d in the Norm
position when the 7A42 is used with any 7OOWseries
ma~nfnmeexcept the 7854. If the 7A42 is being used in
a 7854 mainframe, the jumper should be in the 7854
The external bus buffers provide a data path between
the internal and external data buses. Lalch U300 allows
data on the internal bus to be transfer& to the external
EXTERNAL BUS BUFFERS
T h w ~01 Opsrdlon-TA42
Volume 1
bus, and latch U320 transfers the data on the external
bus to the internal bus. When the external bus is not
belng addressed, the output of U32U 1s disabled (three
state output) and U3OO latches the external-bus data on
rt's output to reduce the number of transltionr on the
external data bus. Latch U300 also provides the extra
current drlve required by the additional load on the
external bus.
ADDRESS DECODER
This circuit produces various enable signals based on
the addresses and control signals generated by the
MPU.
The 110 circuit is an eight-bit latch which hotds control
signals for use during the diagnostic routines.
POWER-UP RELAY DRIVE DISABLE
The output of UgDOA (m)
is set h ~ g h
on power-up or
reset to d~sablethe armature relay drlves until the MPU
and relay drive s~gnalshave been mitiallzed.
AUTO RESTART
This circuit causes a hardware auto reset to the
microprocessor whenever tt detects that Real Time
Interrupts are not belng serviced in a regular manner.
This should occur only when there are hardware or
flrrnware problems in the kernel.
Refer to Figure 2-3 during the foltowing discussion.
During normal operation. Real Tlme Interrupts am
generated when the rising edge of astable rnultivibrat~r
A8 U875 clocks D flip flop A8 UQGU. Shortly after the
RST 5.5 interrupt 1s recognized by the processor, the
Interrupt Acknowledge line 1s pulsed low to reset the f l ~ p
flop.
Gates A 8 U927A and U927B are cross wupted to form a
set-met flip flop. Because the output duty factor of
U815 IS 5096, the nutputs of the set-reset flip flop will
also h 50% data factor. Components R924, W925,
ClDDO, and GlQ35 taka the average value of the Q and Q
outputs whlch are then diode
OR-ad, and presented to
the comparator. With the ARST link-plug removed (auto
restart circuit enabled), the noninvert~nginput rests
about 0.7 volts above the lnvertlng Input, so that
IN IS high, and RESET OUT IS low.
-
If a failure or temporary fault occurs, Interrupt
Acknowledge will no longer match the frequency of the
astable. It may b locked low, or locked high, or occur
too frequently, but in any case, the average vatue of
either the 0 or Q output of the set-reset f l ~ pflop will
begin to rlm. When the V- input bewmes greater than
the reference voltage on the V+ input. the open collector
output of the Comparator will pull low to -15 volts, and
cause the processor to be reset.
The RESET OUT slgnal is fed back to the inverting input
of the comparator through R1002 (for hysteresis) to
ensure stable operation.
With RESET OUT high, ClMS eventually charges to a
voltage greater than the V- comparator Input, and
R
E
returns to a high level
If the fault persi*, the above swuence repeats, and wlll
continue to cycle at about a 2 Hz rate untll the fault rs
removed.
WAITSTATE GENERATOR
The waitstate generator provides a low pulse of one CLK
period (approximately 0.5 US) duration on the READY
line to the MPU. This circuit is enabled (by U630, lpin 11)
only when the filtered date bus is addressed.
REAL T1ME CLOCK
Timer U815 is wrred as an astable multivibrator with a
period of approxrmately 15 ms. The output of U815
clocks D flip flop UW08 to prcduce the RST 5.5 slgnal
to the MPU.
GEMERAL INPUT LATCH
Latch U605 provides a means to latch signals from other
circuits, and transfer them to the external data bus for
inspection by the MPU.
PROBE OFFSET ACQUISITION
Qur~ngprobe offset aequ~srtion, an analog-to-digital
conversion of the TIP voltage is perlormed by the
processor using sucoesslve approximation. See F~gure
2-4. The processor makes a first guess at the TIP voltage
by setting the output of D/A converter {UWO) to it's
midrange value. Thls is done by setting the MSB d the
DAC equal to 1, and a!! other data bits to 0. Whetherthe
guess IS too high or too low IS determined by
comparator U5(15A, and the (rutcoma Is read by the
processor on data lblt 4 of the General lnput Latch
(U635). If the DJA output is too high, the MSB (bit 7) of
the DAC is reset to 0; ~fit was too low, it will mrnaln set.
Next, bit 8 is set high, wlth all tower-order bits remaining
low, and the wrnparlson Is again checked by the
processor. BTt 8 w ~ lremain
l
set, or be met, according to
the same crrteria as above.
This conttnues for the remaining bits, and after 8
iterations, the processor will ham the &bit digital
representation of the TIP voltage.
The usable lnput range at the TFP jack is fi volts, which
is attenuated to approwimately f3.75 volts at the
camparator by a resistive divider.
The output range of the EIAC is 0 to 10 volts. This is
level shifted and attenuated to give a range of
approximately d.75 volts at the comparator.
Theory oi Operation-7A42 Volume I
Fl~~2
r-e
3. h r t l a l A8; Aute ReaMrl Clrrxllt.
Theory of Opemtlon-7A42
Diodes CR505 and CR5D0 protect the comparator
against over voltage. Zener diode VR510 shifts the
comparator output to W L levels.
PROBE CODING AND DIAGNOSTIC HOOKS
MUX
Multiplexer U700 selects one of eight input signats to be
connected to pin 13 of U605 (General lnput Latch).
DIAGNOSTIC HOOKS
Quad op-amp US00 acts as a low-speed ECL-to-lTL
stlgnal translator while the dlagnostic routines are
running.
Volume 1
performed by O flip-flop U630 whfch is aired so that
R A I and WA1 will always be 180 degrees out of phase.
A compl~cationarises when a "jump" is issued either by
the rnainlrame or by another plug-in unit. Rather than
t~rneslotsoccurring In an orderly manner, tlmeslot ? may
repeated up to 4 times, II
threw consecutive jumps occur.
The 7b42 acccornmodatas this in the following way.
Doring tbmeslot 10, the processor writes ttlrneslot 1's data
lnto location 2 of the registers by lifting WA2 via latch
U5m. With RA2 wired to SID, anytlme trmeslot 1 occurs.
data will be read from reg~sterlocatton 2
The
new
first
SID
processor keeps a history of the SlD llne so that
timeslot data (timeslot 2 data) is written only on the
occurrence of timeslot 1 (i.0.. ~t checks for a low
line before writing timeslot 3 data).
Digital to Analog conveners present the analog row and
column currents to the mainframe.
Thrs dlscusaion assume$ an understanding of the 7000series readout system. Refer to a su~tablemainframe
service manual for background information.
The 7A42 uses the CHI and CH2 mainframe readout
positions sssmlated with the left side of the plug-in to
display vertical deflection information and error
messages.
Figure 2-5 shows a timing diagram of the 7A42 readout
signals.
The C H I and CH2 readout circuitry are identical; only
CHI will be discussed here TSX is the result of diode
OR-ing the ten tlmestot lfnes together on the A5
Ampllfter b a r d . With each falltng tirneslot edge, a 1 . 5 ~
pulse (RST 7.5) is prMluced at the output of U83IIA.
The rising edge of RST 7.5 interrupts the processor, end
a short time later data for the next tl.meslot is written to
data registers UBO1, U800. U401, and 'C1400. As an
example, the RST 7.5 at the beginning of timeslot 9
signifies to the pracessor the time has come to write
tirneslot 10 data. Thts scheme of wrlting the next
timeslots data instead of the current timeslot's data is
necessary because of the high rate at whrch timeslots
occur, relative to prmessor speed.
Timeslot 1 rs transformed lnto TTL levels by 0720C and
wfmd to the $ID (Serial lnput 'Data) lnput of the
It is also
processor where ~tIs used for synchron~zat~on.
used as an address line to the reglstan, and to
synchronize the WAI, RA1 flip-flop.
With the exceptlon of timeslot 1, data is always
alternately written to and read from Imahons 0 and 1 of
the registen (WA2 and RA2 = 0). Addressing is
POWER SUPPLY
AND DISTRIBUTION
The 7A42 uses a wltchlng power supply to develop
output voltages of +5 volts, -2 volts, and -5 volts from
the mainframe + S v o l t supplies. This type of power
supply Is used because of ~t'scompactness and high
efficiency.
POWER STAGE
Thls section is composed of the flyback transformer TI,
and the Darlmgton switch (Q402 and 0500).
For high efflciency. the franslstor combination must
exhibit low storage time, low current rise- and fall t h e .
and low saturatlon voltage.
At turn-on time, Q402 saturates, Q500 is held at the
edge of saturation, and approxfimately 100 volts Is
applied to the primary of TI. Current ramps-up at a rate
determined by the applied voltage and the transformer
primary inductance, which is about 2 mh. Switch closure
duration 1s typically 20 @, giving a peak current of 1
ampere.
Whan the swltch is opened, the collector current falls
and the collector voltage nses according to the
transformer leakage Inductance and the snubbing
network. The flnal value of the voltage on the primary
side of the transformer is the output vdtags reflected
through the transformer by the turns ratlo
Theory of Opratlon-7A42
Volume 1
Resistors R405 and a401 discharge the base storage
capacitance of Q4D2 and 0500 to reduce turn-on time.
RECTIFIERS AND FILTERS
Diodes CR410, CR520v and CRBM are used to rectify
the square-wave output. Schottky diodes ere used here
because of thelr low forward-voltage drop and low
storage time.
The output pi filters r W c e the sc component of the
rectifter output voltage and reduce supply output
Impedance at higher frequencies where regulator loop
gain begins to fall.
Speclal consideration 6s glven to the selection of C410,
C530, and C530 regarding equivarent series resistance
(ESR). Peak current values of 1to 5 amperes are typical
and without low values of ESR, excessive heating will
occur.
CURRENT LlMlT
The current limit circuit senses excess primary current.
When a fault is detected, it clamps the PWM comparator
input to ground, causing the supply to shut down for
about 100 ms. It then <eleases the comparator and
allows the supply to sttempt to recover. Wlth e short
clrcult on the secondary slde, the Current Limit wilf
cycle at about 10 Hz.
Currant limiting occurs when the primary current
through R4tO exceeds about 1.2 amperes. Transistors
0100 and Q2W are turned on by 0313 and 0317 when
the maximum prlmary current Is exceeded. When 0100
turns on, 03D3 also turns on, pulling the base of QlOO
high. Thls keeps Q200 saturated, and the supply down,
while C200 charges.
Because the transformer prlmary current is
discontinuous and contains some hlgh-amplitude, highIrequency harmonics, the ?SO-volt mainframe power
supplles are docoupled from the ?A42 swltchsr by C220.
G33Q. C325. and L220.
Due to the highly capacftlve load on the 50-volt
supplies, surge current may cause the mainframepower
supply to current limlt when the instrument is turned on
initially. Diode CR230 keeps C220 from discharging
between attempts to start the mainframe power supply.
PULSE WIDTH MODtltATlON (PWM)
CONTROLLER
The primary function of the PWM integrated circuit & to
monitor the -5 volt output and adjust the duty cycle of
the power stage so that the secondary output voltages
are maintained at constant values under varying load
conditions.
The 5 volt output is level shlfted through R119, R122,
and FH25 to +2.5 volts and presented to the noninvertlng
input of the error amplifier where It Is compared to the
+2.5 volt reference level. The reference IS determined by
the +S volt referenm from the PWM IC and the 2X
drvider R120 and R121. The output of th%error arnplifrer
is compared to the 20 kHz free-runn~ngoscillator output
which is a ramp whose frequency IS set by R218 and
C105. It Is the output of this comparator whlch
determines the duty cycle of the power stage. Under
ncrrnal operating conditions, the duty cycle 1s about 38
percent. (The Darllngton switch is ON about 38% of the
time, and OFF about 82% of the time.)
Stability of the regulator is ensurd by R109 and ClOE at
the error-ampllfier output.
Components R105, C115, CRI10, end CR111 are used to
"son start" the swltcher whan mainframe power is
lnitlally applied. Thls prevents excessively high current
in the power stage.
When power is Initially applied to the 7A42 through ~t's
host mainframe, GI15 is fully discharged and the output
of the error amplifrer is clamped to ground through
CR110, thus disabling the regulator. As GI15 IS charged
through R105, the duty cycle slowly increases until it
reaches It's steady state value. The capacitor Is charged
to a final vaTue of t.5 volts and under normal operation is
disconnected from the error-ampl~freroutput by CR110.
In the event that mainframe power momentarily drops,
or cycles. CR111 quickly discharges C115 to ensure soft
start when power returns.
These three transistors provide the necessary current
drive durlng ON and OFF times to control the power
stage.
At turn-on, the PWM output Iransirnor saturates,
resulting in C2 (pin 13 of U210) and E2 (pin 14 of U210)
being at about 3 volts. Transistor Q315, in a oornrnon
base configuration, supplies about 15 ma of basa drive
to Q402 throughout ON tlme. Addltlonal current drive is
providd by by305 through G301 to quickly turn the
Darlington on. 'Resistor a301 discharges C3Ql to 0 volts
during the OFF time.
Previous to the turn-off signal from pin 13 of U21(1,0312
is off, and it's collector is biased to approximately -42
volts by divider R225. R228. Gapa~ltorC122 Is charged
to about 7 volts through CR406 and CR407. When turnoff occurs, 0312 saturates and the base of Q402 is
pulled to about -55 volts through the capacitor. Yhis
causes the etored charge In the base of 0902 to be
removed quickly, decreasing the total turn-off time. The
capcltor is tied to the base of Q402 through CR121,
which prevents the dlvider from turning the Darlington
on durlng the OFF time.
SNUBBER
Because the transformer is non-ideal and contalns
leakage inductance, some means to protect the
Darlington pair. 0402 and 0500. against avalanche and
secondary breakdown is needed. The reactive snubber
i$ used to limrt the flyback voltage to prevent
breakdown, and to shape the swltch's load line during
current fall time to m~nimizen's power dlsslpatlon.
First, assume 0802 ahd 0500 are saturated and recalve
a turn-off s~gnalat the base of Q402. A storage-tlme
delay later, the collector current &gins to decrease and
the currant in C405 begins to increase an equal amount.
Over this time frame, the transformer's primary current
remains approxrmately constant. As the collector of the
Darlington rises to a peak value of approx~mately150
volts, C405 is charged to about 100 volts and remains at
that value until turn-n time. Note that during the ttme
C4a5 IS charging, not only does the snubber control the
manner in which the collector voltage rises, but also, a
port~onof the energy stored in the transformer's leakage
inductance<whrch would othennrlse be lost, is returned
to the +5W supply.
At the swltch's turn-on time. C1105 and L310 are
paralleled through QSMl and the voltage at the cathode
of CR402 Is -150 volts. This voltage rises to a peak value
of nearly +5U volts when the current through L310 and
C4D5 attempts to reverse, but is b l o c k d by CR4Q2.
Durlng this portion of the cycle, the voltage on 6405 IS
always restored to a value of something less than 100
volts.
Notice that, had the vonage stored on C405 dur~ng
Tlyback been greater than 1M) volts (at the switch turnon time), the LC tank would have trled to rlng higher
than +50 volts but would be clamped by CCR400.
ATTENUATOR SUPPLIES
Operational amplifiers U300 and U310 form an
individual set of -5 and -11 volt power supplies lor each
of the four attenuator modules. The supplies are
separate from each other to help minlmlze crosstalk,
and to provide lndivldual offset adjustment as needed.
The -5 volt supply Is genemted at the output of an
operational amplifier wlth a galn of -1, by using +5 volts
as a reference. The -11 volt supply is adlustable to
cornpenate for any varlatlons In the +5 volt and -5 volt
supplies. This IS done to prevent drlR in the attenuator
lm3edance converter, caused by power-supply
variations. Since all the supplies track each other, drift
from thrs Source is reduced.