1
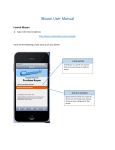
User Manual
This manual is intended to get you started using the basics of the program, and then going
step by step into the more complex options available.
There are some example tutorials available on the website to help you fully utilize the
program and get the most out of it when using it in your venue.
If, after reading this manual, you still need help or need to report a possible bug you can
email me.
[email protected]
I do check my email often, but I also go on vacations and may just not get a chance to
respond to you right away. I will attempt to get back as soon as I can though as this was a
fun program to write and I’d like to support it as much as possible.
For now the only thing I ask is that I (.00 Buck) have a ticket +2 and Chris Hunter has a
ticket +2 (6 in all) to any event that uses this program. What are the odds that we’ll make it
to all of the events that use this program? Probably slim, but I’d like to have the option.
CONTENTS
QUICK START
CONTROL PANEL
SLIDESHOW
STAT WINDOW
STAT DISPLAY WINDOW
PARAMETERS PANEL
REMOTE CONTROL
SCOREBOARD DISPLAY
TRIGGERS & EVENTS
2-7
2-14
11-14
14-15
16-18
19-25
23-25
26-31
31-36
Quick Start
Once opened the Control Panel can be resized if it is too small or big. Simply click and
drag from the edges to make it the desired size. Under Control Panel\View clicking
“Display Hot Keys” will display the keyboard hot keys on the buttons in red. Clicking “Edit
Hot Keys” brings up a window that allows remapping of the hot keys. Remember that the
control panel must be the active window if you’re using the keyboard commands.
To configure the scoreboard to display team
names and jammers start at the fields
labeled “Team 1” and “Team 2” on the right
top side of the control panel. Type in the
desired Team names. And press Enter or
click the Update button to apply them to the
scoreboard display.
To enter the roster hold Shift and click on
one of the white or gray fields below the
team name. A Skater Entry window pops
up. You may now type in the skater’s name
in the field at the top. To enter the entire
roster at once click on the Edit Entire Roster
Button and the window changes to resemble
the example on the right.
You can now enter each skaters name on a separate line. Pressing the Apply button will
populate the field with the name you just entered. We’ll discuss the other functions of the
Skater Entry window later on in the section - “Control Panel – Skater Entry” on pg 7. For
now lets keep going and get to running our first bout!
Next we need to apply our team
logos. Click on the small image
button to the right of the team
name. A window pops up and you
can now browse to the image file
of your choice. For this example
I’m using the Death Rattle Rollers image.
Once you have chosen an image (or hit cancel to keep the same
image) you can select a background color for the team. For this
example I chose black. Next, you can choose a new text color. I
chose yellow. Notice in the example below how it changes the
background of the roster and score sections on the control panel to
match.
It also changes
certain fields on the
Scoreboard Display
along with the
displayed team logo.
By default certain
fields are tied to the
team background/text colors you choose but
this can be changed as described in the
section – “Field Properties Window – Font
Color” on pg 29, and “Back Color” on pg 31.
After adding the properties for Team 2 the next thing to do is move the
scoreboard display onto the projector window and make it full screen.
Once the scoreboard display is in place click the Scoreboard Full
Screen button on the control panel and the scoreboard display will fill
up the projector screen.
Don’t panic if you accidentally fill your entire working screen with the display and can no
longer get to your control panel. Simply press and hold the Alt key and press the Tab key
until you have selected the Control Panel again. Another method is to press the Windows
key that is usually located on the bottom left of the keyboard to bring your menu bar back
onto the screen and select the control panel.
The last thing to do before we start this bout is select the current
jammers. Click on the skater name of the jammer on the roster.
The name is highlighted in green to show who is the current
jammer. To select another jammer just click on her name and to
deselect a jammer just click on the name again.
Save
Okay, I lied. There’s really one more thing you should do before starting
the bout. Save your template! The current scoreboard setup can be saved
by pressing the “Save” button located in the “Template” dropdown. Once
pressed it will open up a file browser window prompting you to browse to a
folder and name your saved file.
Pressing “Cancel” will close the window without any further action.
Pressing “Save” will save a copy of all of the information on the control
panel, the scoreboard display, and the items panel (assuming a valid
name was typed in).
Note: It’s a best practice to keep any images and media files you use in the scoreboard in
the same folder you save your template file in. Better yet you can put them in a sub folder
titled “Images.” By doing this you can move the entire folder to another computer and load
it. Other wise the program might not be able to find the files.
The program will look for image and media files in the Images directory
in the install location first. Then it will look for the files in the same
directory the template was saved in. Finally, it will look for the files in a
sub directory named “Images.”
Pressing the “Load” button will open up a similar window as above
prompting you to select a previously saved file.
Pressing “Cancel” will close the window without
any further action. Pressing “Open” will open the
selected file.
The last 2 options on the dropdown are Roster Save/Load. These operate
just like saving the template except they only save roster specific info. If
you click on Roster Save you will then be asked which roster you would like
to save. Team 1 refers to the roster on the left and Team 2 is the one on
the right.
You can also load rosters from saved template or roster files. The program will ask you
which team you want to extract (if loading from a template file), and which team you would
like to replace. In other words, would you like to overwrite the current Team 1 or Team 2
roster.
Okay, NOW you’re ready to move on to the Clocks section and
start the bout!
Clocks
Navigating to Control
Panel\View and clicking
“Show All Clocks” will
change the clock display
to match the image to the
far right.
This can be toggled at any time. Typically, you won’t want such a
busy clock control panel, but we’ll use this to illustrate how to have a
countdown clock to the start of the bout.
First, adjust the halftime clock to the minutes
desired. You can either type in the value or use
the arrow buttons on either side of the clock
The arrows on the left adjust the minutes while the arrows on the
right adjust the seconds.
Clicking the “Time Until Derby” button starts the
clock and displays a message to the audience
telling them how much time until the bout starts.
Pressing the “Jam Start” button will start the Jam Clock,
Period Clock, and increments the jam number by one.
By default the program is set up to start a 30 second
timer to run between jams so pressing the button once
starts the jam. Pressing it a second time (if the jam is
called off) stops the jam and starts the timer to
countdown to the next jam. Pressing it a third time starts
the jam clock again and increments the jam number by
one (starting another jam). If the 30 second clock
(Lineup Clock) runs down it will NOT automatically start
the next jam.
The “Official Timeout” button stops all other clocks and starts the Official Timeout. This
clock counts up. The button can be clicked again to stop the official timeout or the “Jam
Start” button can be clicked to automatically end the timeout and start the next jam.
The “Undo” button is used when the operator accidentally starts\stops a jam or a timeout.
Play with the functionality to get used to it. The “undo” functionality is meant for the
occasional mistake. It won’t prevent bad communication between the head timekeeper and
the scoreboard operator. If the clocks or jam count get too far out of sync it is
recommended that an official timeout is taken to adjust these values.
The clocks and number fields can all be adjusted live by using the arrow buttons or by
typing in a new value. The program expects the format of minutes : seconds . Milliseconds,
but it will attempt to guess at what the user means if a mistake is made.
Score, Lead Jammer, Team Timeouts
Beneath the team name is the score field. The score can be edited in a few
ways. As with all other number fields the value can be typed in or the arrow
buttons can be clicked to increment the value up or down. There are also
numbered buttons (1-5) below it. These can be clicked to automatically add
that value to the score. By default the score updates live (as you change it)
but it can be set to only update upon pressing the “Update” button, or any of
the clock buttons. This is discussed in greater detail in the Parameters section
on pg 20.
Below the score is the “Lead Jammer” button. Clicking this indicates which
team has lead jammer status. It will clear automatically at the end of the jam.
Beneath the score are the Team Timeout Controls. The top number is the
number of timeouts available. Under that is the Timeout Clock. The “Team
Timeout” button starts the clock and subtracts one from the available team
timeouts.
NOTE: To make it easier for the operator the “Official Timeout” button can be
clicked first, then the “Team Timeout” button can be clicked and the timer will automatically
subtract the time already passed. This helps when it isn’t apparent what timeout is being
called. The operator can always just default to the official timeout first. Because of this it is
important to first stop the official timeout before starting a team timeout if that’s what is
actually happening on the track.
The “Official Review” button starts the official timeout clock and removes 1
from the corresponding number field. Depending on the result the number of
timeouts and/or the number of official reviews must be manually changed.
Remember most of the controls in this section have
keyboard hotkeys associated with them. These keys can
be remapped as described on pg 2. Familiarize yourself
with these controls (especially the “Jam Start” button) as
these will be used most frequently during a bout. They are
also the most important as the time displayed on the
scoreboard is used by the audience and skaters alike.
The behavior of the clocks, the number of timeouts, and
other aspects of these controls can be edited in the
Parameters Window. This is discussed in more detail
starting on pg 20.
This ends the Quick Start section. From here on we’re going to
go into greater detail on the functionality of the program.
Skater Entry
Hold Shift and click on one of the Skater fields to open up the Skater
Entry Window as discussed on pg 2.
Instead of editing the entire roster we’re going to enter in a single
skater and assign her a media file. Click the Media button. This
opens up a file browser and you can find a media file to associate
with the skater. For this example I’m choosing one of the Windows
Sample wildlife videos.
The video will play in the screen to the left reminding us which one
we’ve associated with the skater. I also named this skater “Wild
Child.” At this point we can click the Clear button under the video to
remove it or move on.
An image can be associated to the skater in the same way with the
right hand controls. You can even have both an image and a media
file associated with the same skater. Crazy!
When you have the skater name, media, and image set click the
Apply button. Now the roster has the names and the little checkbox
is checked letting us know there is an associated image/media file.
As the examples to the left
show us, when we click on the
skater the media/image file
associated with that skater is
displayed.
Note: this example is using the default scoreboard display. The Jammer Image field is
bound to the current Jammer image and media files and are triggered to start playing the
media or gif animation when the current jammer is changed. For more info on this check
out the section on assigning Image and Media files (pg 30) and setting triggers/events (pg
35).
Menu Bar
To the top right of the Control Panel is the
Menu Bar. Here we find the options to save/
load templates, open up other control
windows, and find help.
The first dropdown is “Control Panel.” The first menu item is “View”
which is already discussed on pg 2 & 9. Under that is “Background
Color. This opens up a color dialog and can be used to choose a
background color and text color for the control panel
The last item is “Edit Layout.” When this is checked the Control Panel is
in edit mode. A Layout window appears as shown below allowing the
user to make certain controls visible/invisible, position controls, and
make the controls take up more/less space on the Control Panel.
The Control Panel is laid out in table format.
The dotted lines can be dragged around to
resize the controls. In the Layout Window The
total number of columns and rows can be
changed in the Panel Parameters. If a control is
selected in the dropdown the Item Parameters
becomes active. Here you can set the Column and
Row of the top left corner of the control. You can also
make the control span multiple columns and/or rows.
The control can be made visible or not. The control
can even be separated from the main panel by using
the “Popout” button.
The next dropdown in line on the menu bar is “Stats.” From here you can
show the Stat Window or clear all of the stats accumulated. The Stat
Window is discussed in greater detail on pg 14.
Next up is the Template dropdown that allows you to Save or Load a
template file. This is discussed in the Quick Start Section on pg 4, but
we’ll go into a bit more detail on the best practices for saving and loading
your templates.
Saving a template records all of the values on the control panel like the time, score, etc. It
also saves the layout and position of the scoreboard display. It doesn’t save your images
and media files though. It was decided that it didn’t make sense to replicate files on your
hard drive that may be pretty large to begin with. So, how do you transfer a saved template
file to another computer? Well, the best way to do this is to create a folder with your saved
template and all of your image/media files.
The examples below illustrate viable folder layouts for transferring your saved templates
that depend on loaded image/media files.
Now you can turn the entire “Bout1”
folder into a zip file and move it to a
new computer. As long as the Ultimate
Derby Scoreboard is loaded on that
computer you can load it and it will find
the necessary image/media files.
Note: If you transfer the template to another computer like this you should know the order
the program will search for the files. First, it will look in the “Images” directory that is in the
same location Ultimate Derby Scoreboard.exe is located (probably “Program Files”). Next,
it will look for the files in the same location as the saved template file. Finally, it will look for
the files in a directory named “Images” or “images” in the same location as the saved
template file. It’s important to note the order because if you create an image for a template
and name it “AmericanFlag.jpg” the program will find the “AmericanFlag.jpg” image in the
Images folder in the install directory first and use it instead. The best way around this is to
name the image something different or just replace the image in the folder, although
Microsoft wants you to have admin privileges to edit files in your Program Files directory in
newer versions of Windows so be careful!
Next up is the “Parameters Panel” choice that opens up the window allowing
changes to the overall function of the scoreboard. This is discussed later
starting on pg 19.
Last but not least is the “Help” dropdown that allows you to
display the User Manual (although if you’re here reading this
you probably knew that already), and a little “About” window
with info on the version and credits to Chris Hunter and
myself.
Scoreboard Display Controls
These toggle buttons will affect the Scoreboard Display and will turn green when activated
and grey when deactivated. The first 4 Scoreboard Display buttons activate and deactivate
Triggers (pg 31). By default certain fields react to these Triggers.
The first button, labeled American Flag, controls the American Flag Activate and American
Flag Deactivate Triggers. By default it makes a field appear on the display of a flag that fills
up the entire scoreboard display.
The “Alternate Flag” button controls Alternate Flag Activate/Deactivate Triggers and shows
the Canadian Flag by default.
The “Time Until Derby” button starts the Halftime Clock and activates a
trigger of the same name. The “Halftime” button does the same with it’s
own trigger. Although these buttons start and stop the Halftime Clock the
clock can be controlled via it’s own control (see pg 5). The difference is that these buttons
activate certain triggers that (by default) change the scoreboard display. The Halftime
button will automatically activate between periods as well. The default time for the halftime
and even it’s automatic activation can be edited in the Parameters Window (pg 21).
The “Unofficial Final” and “Final” buttons activate triggers of the same
name. By default these change the scoreboard display. When the bout
ends the “Unofficial Final” button will automatically be activated.
The last 2 buttons affect the entire Scoreboard Display. The first one,
Scoreboard Full Screen, makes the Scoreboard Display fill the entire
screen as discussed on pg 3. The second one will remove the menubar
when it is deactivated. When this is deactivated it will NOT be possible to use the mouse to
drag the Scoreboard Display around, but it CAN still be moved via the Properties Window
(pg 27).
Custom Controls
No matter how hard we’ve tried there
may still be something missing that you
want to add to the scoreboard. For
those times there are the Custom User
Fields.
As a default there are 5, but if you need more you can click the Add Custom button to add
another. Clicking the Del Custom button will remove the last one in line (but never the
default 5). The toggle buttons along the left side activate and deactivate the display field
(by default) but not until we assign some parameters to it first using the dropdown field.
None
The default state of these controls. This will clear any parameters previously entered and
make the field dissapear.
Bound Text
Clicking on any of the white fields on the left will open
up a dropdown. The first selection available is “Bound
Text.” Select that option. Once any option is selected
you can activate the field by using the button to the
right of it. The field is just a red default rectangle that
appears in the upper left of the Scoreboard Display
(under the Menu Bar as pictured on the right).
Bound Text means that the text on the Custom Field is
bound to the text you type on the Control Panel. As the
example below illustrates when something is typed into the
textbox on the right of the “Bound Text” label it appears on
the Display Field on the Scoreboard.
Double-Clicking on the Display Field opens up the Properties
Window (text control in the Properties Windows are
discussed in greater detail on pg 28). As the example to the
right shows you can NOT control the text here, only on the
Control Panel. Triggered Events can override this but we
won’t get into that now...
Un-Bound Text
If “Un-Bound Text” is selected the text is NOT controlled from the text box
on the Control Panel. You can still type into it though to create a
description of the Field. This text will NOT
show up on the field itself.
Slideshow
Slideshow allows the user to create a set of changing images that will appear on the
Scoreboard Display. Once you have configured one of the Custom User Fields as a
Slideshow (pg 9) you can access the properties window. It will pop up automatically but
can later be accessed by shift-clicking the white field
Shown below.
None of these properties will take effect until you
select at least one image, but we’ll get into that later.
For now we’ll start with the fields at the top. The first
fields control the time in seconds that the slideshow
fades in and out. The fade in starts the moment the
slideshow is activated and the fade out starts the
moment it is deactivated. Keep this in mind if you
have music cues or other needs for exact timing! The
“Slide Time” field controls the amount of time each
slide is displayed for after the dissolve between slides
has completed. The Dissolve is the amount of time it
takes for one slide to fade out and the next to fade in.
Auto Advance moves the slideshow images from one
to the next automatically. When un-checked it will be
completely up to the user to manually advance the
slides. Loop will move from the last image to the first
image continually. The “Name” Field allows you to
name the slideshow for easy recognition on the
Control Panel.
The next section is for selecting the background image that will stay constant through the
slideshow. This is useful for having a background image like a flag or even a watermark of
the team logo while the skater images appear and fade out.
The Select Image button opens up a browser
that lets you choose an image file. If the
image is an animated gif you can choose to
play and loop the animation with the corresponding checkboxes. By checking “Image In
Front” you can display this image in front of the slide images instead of behind them.
Again, this could be useful for a team logo watermark.
Under that is a similar section for choosing a
background audio file. You may want a song
to play through the entire slideshow while
other audio files play for each slide, or maybe you just need the one audio file. Either way,
you select the audio file as above. The volume can be changed and represents a
percentage (0 – 100) of the max volume. The audio can be looped and if the slideshow
itself is looped you can choose to restart the audio file from the beginning when the
slideshow starts over rather than let the audio file continue playing.
The next section controls the positioning of
the slideshow. The first 2 fields control the X
and Y position and are set to “C” (centered)
by default, but you can enter in the coordinates to fix it to a certain spot. Next the Width
and Height fields control the sizing of the slideshow and are set to “A” (auto) by default.
When set to “A” the slideshow will size itself to the Scoreboard Display. Any other value
will set it to that width or height in pixels. The Master Color buttons on the far right allow
you to set the background color of the slideshow. By default it is set to Transparent.
Clicking off Transparent enables the color button.
The next section controls the actual slides
themselves. Click a slide and notice it now
has a green border. The blank grey slide will
always be there for adding a slide to the end
or adding the first slide. Once selected you
can click the Select Image button to assign
an image to it. If you have selected a
Background Image it will show up along with
your slide image in the little slide preview
box.
Once an image is selected you can change the Slide Time for this particular slide or leave it
at the default chosen as described on the previous page. Note that if you change the
Master Slide Time it will change the Slide Time for EVERY slide.
If the Slide Image is an animated gif you can choose whether or not to play the animation
and loop the animation using the corresponding checkboxes.
If you want to change the order of the slides you can simply click and
drag the slide to the right or left. To delete a slide right click it and a
message box will appear asking if you’re sure you want to delete it.
Clicking yes will delete the slide.
At the bottom of the screen are the controls
for assigning an audio file to the slide. Once
a file has been selected you can change the
volume, make it loop when finished or wait
to start after the dissolve has completed. This is handy for team intros when you have a
specific audio file for a skater. You may want to wait until the skater’s image is at full
opacity on the display before playing the file. Checking “Start Audio After Dissolve” is the
way to do that.
Playing The Slideshow
There are 2 ways to start the slideshow. The first is to control it from the
Slideshow window. To activate the play controls click the Play Slideshow
button.
The window collapses to show only the slide
preview boxes and a set of play controls. The
controls are as follows from left to right: Reverse
one slide (if slideshow is playing), Stop
Slideshow, Play Slideshow, Activate the next
slide (if slideshow is playing). When the
slideshow is playing the “Play” button is replaced
with a “Pause” button, that pauses the slideshow.
The slideshow cannot be edited when the player window is active. If you want to edit the
slideshow again click the Show Properties button to expand the window back to it’s original
form. Although it’s possible to edit the slideshow while it is playing it isn’t recommended as
it might have strange results.
The second way to control the slideshow is by clicking the
Custom Field Toggle Button. Notice how the description field
Includes the name of the Slideshow and “Ready” in parenthesis. When it says “Ready” that
means it can be activated. If it says “No Slides” it cannot be activated until at least one
slide has been assigned an image.
The slide that is active will be displayed in parenthesis and the
slideshow can be stopped by clicking the toggle button again.
Clicking the description field will manually advance to the next slide. Holding Shift while
clicking it will open the Slideshow Properties window. This method is handy for a single
scoreboard operator as it requires less windows to be open and just looks less confusing.
Note: you can always manually advance the slides even if set to Auto Advance.
Note: The Slideshow will ALWAYS be displayed on top of ALL other fields of the
Scoreboard Display.
Note: The slides appear in a perfectly square box in the Slideshow Properties Window.
The aspect ratio will probably be different on the actual Scoreboard Display. Always check
your slideshow for appearance on the Scoreboard Display before playing it for a live
audience to be sure the sizing and position looks exactly the way you want.
Note: In Master/Slave operation you can have slave machines running a slideshow and
control them from a master as long as the corresponding Custom Display control is
correctly set to master or slave accordingly. More info on Master/Slave operation can be
found on pgs 23
Stat Display
The last choice for the Custom Field is “Stat Display. You can use the Custom Field control
to toggle a Stat Display Window over the Scoreboard (pg 16).
Stat Window
By default the Stat Window looks
like the example to the left. The
overall team stats are located on the
top while both teams are below it.
As each new jam is started a new
column is created ready to be
populated with more stats.
This is an example of a Stat Window
during a bout. The Team colors are
represented and the team rosters are
populating the lower part of the
display. Each jam is in a separate
column and the windows auto scroll
to the right to display the current jam.
The first 5 columns are fixed keeping
them on the screen.
It isn’t necessary to have team rosters (see pg 2 & 7), as the stats will still accumulate for
each team. If a roster is entered after the bout has already started it obviously won’t have
any stats for the skaters, but will accumulate stats from that point on.
We’re going to take a closer look at the Stat
Window items and go over what they mean. The
Team Stat area starts with the color coded team
names.
To the right is the JAMS stat. This number should always equal the number of jams that
have run in the bout (including the current jam). The next column is the number of times
that team has had lead jammer status. The two team LEAD columns probably won’t add
up to the total jams since sometimes there are jams without a lead jammer.
The POINTS column will update live as the score is changed so it will always mimic the
control panel but might not be the same as the scoreboard display. The PTS/JAM column
keeps track of the team’s average number of points per jam. It is updated the moment the
jam ends. This means that although the POINTS will update all the time (like at the end of
the jam while the lineup clock is running) the PTS/JAM will not.
After that we see the scrolling columns for each jam. They have a header like “P1 JAM 4”
designating it as the column for Period 1 Jam 4 as an example. These cells are populated
by the number of points scored by that team during that jam. They also update as the
score is changed. They will keep updating even at the end of the jam and all the way up
until the next jam is started. If a team has been awarded lead jammer during the jam the
cell will turn blue to indicate that as well.
Each team has it’s own stat area with similar
columns as above. After the skater’s name there is
a column that displays how many jams the skater
has jammed in.
Unlike the team JAMS column this one won’t add to the value until the END of the jam. As
above, the LEAD cell keeps track of the number of times the skater has been lead jammer
and it will update live. The POINTS column also updates live, and the PTS/JAM column
updates at the end of the jam. The scrolling jam columns are also similar to above with the
amount of points scored by the skater during that jam in the cell and a blue highlight
marking lead jammer status.
The active jammer’s row will be highlighted in
light green on the Stat Window. You can also
select a skater by clicking on the name. That cell
will be highlighted in blue.
You can select the same skater as the active skater, but they don’t have to be the same.
The difference between the active skater and the selected skater is important to remember
as we go into the next section – “Stat Display Window.”
Stat Display Window
On the bottom left of the Stat Window is the button – Show Stat
Display Window. Clicking that will bring up the Stat Display
Window. This can also be viewed by shift-clicking a Custom Field
text box that’s been set to Stat Display (pg 14).
The Stat Display Window is used to create custom stat displays that
will be shown on the scoreboard display. The first dropdown is a list
of all the Stat Displays and will always have the defaults – “Team
Compare” and “Skater Compare.” As you make new Stat Displays
the names will be added to this list. The buttons to the right of the
dropdown are used to show and hide the currently selected stat
display. As changes are made to the parameters below you must
click the Show button to refresh the stat display. Think of the Show
button as a camera button. Each time it is clicked you get a
snapshot of the values. Even if a jam is running the values on the
stat display won’t change until the Show button is clicked again.
The Type dropdown lists options for the overall layout of the stat
display. The effect on the layout is pretty much how the name sounds
and examples of each are below.
Dual Vertical
Dual Horizontal
Single Vertical
Single Horizontal
The Content dropdown dictates where the stats come from that populate
the stat display. The first 2 choices are Team 1 and Team 2 that simply
display the respective team stats. The rest of the choices find a
particular skater(s). For example “Skater By Jams” displays the current
skater(s) with the most jams, “Skater By Points” is the one with the most
points, and so on. The last selections are for the current jammer or the
selected skater as discussed at the bottom of the previous page.
If “Single Vertical” or “Single Horizontal” are selected in the Type dropdown the display will
only show the content you select but if either of the “Dual” options are selected both teams
will be represented on the stat display.
The Images and Media selections affect the top of the
Stat Display. As a default the images that appear at
the top are the team logos which are chosen
elsewhere (pg 3). After that is the Skater Image
selection.
That will tie it to the image chosen for the skater as described on pg 7. The Custom
selection will enable the Image 1 and Image 2 buttons that will themselves open up a
browser to choose an image. Choosing None will remove any loaded images.
The Media dropdown functions in exactly the same way as the Images dropdown tying the
image to the selected team or skater media or even giving you the ability to select custom
media files.
The Image In Front Checkbox does just what it sounds like. If both a media file and image
file are being used the image will be displayed in front of the media file when checked and
behind it when unchecked.
The Fade In and Fade Out values control how much
time in seconds it takes for the Stat Display to appear
and disappear when activated or deactivated.
Location X and Location Y are where the top left corner
of the Stat Display will be located on the Scoreboard
Display. If “C” is entered the display will be centered
(horizontally and/or vertically).
The Width and Height determine the size in pixels of the Stat Display.
The Background section lets you select a color, an
image, and the opacity of the background of the Stat
Display. As a default the opacity is set to 90 just making
the background visible behind it.
The Fields section allows you to change the Font and Font
Color of the stats that appear on the Stat Display.
The Item Checkboxes can be used to choose which
stats are to be displayed and even in what order. If an item is unchecked it will not be
displayed and it will move the other stats up or over to fill up the space on the Stat Display.
If the item is checked again it will be displayed but it will be at the bottom (or far right) of the
Stat Display.
For example:
The Lead checkbox is unchecked.
When the Show button is clicked the
Stat Display shows all the fields except
for the Lead stats.
The Lead checkbox is checked. Now
when the Show button is clicked the
Stat Display shows the Lead stats but
they are at the bottom.
You don’t have to use the 2 default Stat Displays. If
you’d like you can create a new one and name it
whatever you like.
Type a name into the text field at the bottom and click the Make New button. A popup will
appear confirming you have created a new Stat Display.
You’re newly created Stat Display will now appear in the dropdown
at the top of the window. It will also appear in the Custom Field
selection as described on pg 14.
If you would like to remove any Stat Display that you create just select it from the dropdown
and click the Remove button on the bottom right. You cannot remove the 2 default stat
displays.
To activate the Stat Display from the Control Panel using a
Custom Field select “Stat Display” from the dropdown on the
left. Next select the particular Stat Display from the field on
the right. Now when the button is pressed to activate the Custom Field it will bring up the
Stat Display.
Parameters Panel
Pressing the “Parameters” button on the Control Panel
will open up the “Parameters” window that contains
detailed options about the scoreboard display fields and
default values.
From here you can change the way the scoreboard behaves, set up remote displays, or
even more complex multi-user scoreboards
Display
The display section at the top left of the
Parameters panel covers broad changes
to the scoreboard display like making
fields visible/invisible and adjusting their
size/position. The leftmost column of
options in this section starts with the
“Relative Size Fields” checkbox.
When “Relative Size Fields” is checked the program will try to resize the fields on the
scoreboard display as the scoreboard display itself is resized.
“Relative Position Fields Horizontal” will try to maintain the same relative placement of the
fields on the scoreboard display as the width of the scoreboard display changes. Likewise,
the “Relative Position Fields Vertical” checkbox tries to do the same when the height is
changed.
When these 3 checkboxes are checked the program will attempt to move, grow, and shrink
the entire scoreboard display as it appears originally with the width and height of the
scoreboard display window.
If the “Live Score Change” checkbox is checked any changes made to the score on the
control panel will update the scoreboard display as they occur. Otherwise the score will
update only when the Update button is pressed or the Jam clock is started/stopped. Note
that the Jam Points fields will always update live as you change the scores.
The “Lock All Fields” checkbox will prevent the fields from moving to the front when clicked.
When it is checked the fields are locked. When it is unchecked the fields are free to move
to the front again.
The “Display Properties” dropdown is used to display the properties of the selected field.
Use of this function is discussed in greater detail in the section “Display Fields” on pg 27.
The Reverse Teams button swaps the location of the team specific fields (Name, Logo,
Score, Timeouts, Jammer Label, Jammer Name, Skater Image, Lead Indicator, and Jam
Points).
Clocks
The “Clocks” section in the top right of
the Parameters panel contains controls
that allow you to specifically change the
way the clocks behave on the control
panel and scoreboard display.
The first field under the “Global
Superstring” label is the text that will be
displayed in the Period Label field on the
Scoreboard display. By default it
contains the text “PERIOD *.” This can
be changed to whatever you like by
selecting the field and inputting new text.
The star character (*) is used as a
placeholder for the period number value
on the control panel. If a star is placed
in the text it will be replaced by the value
of that field when it appears on the scoreboard display. Changes to this field will
override any previously set values to individual fields! This will be discussed in greater
detail in the “Field Properties” section.
To the right of that is the default value of the clock. When the reset button is clicked this
value is what will be displayed. This field is set up to only accept values according to the
time format.
To the right of those fields are the dropdowns for selecting leading and trailing zeros. For
instance, the period clock would display “30:00” if 10 was selected in the Minutes
dropdown. It would display “0:00” if 1 was selected in the Minutes dropdown. The seconds
dropdown works the same way. If 1/Sec is chosen the display wouldn’t have any decimal
places after the seconds. If .100/Sec is chosen it would display to the hundredth of a
second.
Below that is the dropdown – “Period Ends On:” If Jam is chosen the jam clock will
continue to run after the period clock reaches 0. If Period is chosen the Jam clock will stop
and reset when the period clock reaches 0.
To the right of that is the number of total periods until the end of the bout. Usually this is 2.
Under that is a checkbox that will reset the jam count at the end of each period when
checked or keep incrementing during subsequent periods when unchecked. Below this is
the Jam and Lineup Clock fields which behave exactly as the Period fields explained
above.
Below these fields the “Lineup Clock Function:” dropdown controls how the Lineup Clock
behaves. If Count Down is selected it will count down from the Max Time value. If Count
Up is selected it will count up from 0 and end when it reaches the Max Time value. If
Disable is selected the Lineup Clock will not run at all.
Note: The jam will NOT automatically start if the Lineup Clock reaches it’s end. By default
the jam number and jam clock (at it’s start time) will just be displayed again.
The next checkbox will start the Halftime Clock automatically when checked. This will start
it immediately at the end of the period (which is determined by the ‘Period Ends On:’
dropdown explained above). The last checkbox enables the Lineup Clock to run when the
Halftime Clock ends.
Timeouts
The Timeouts section allows you to
specifically change the way timeouts behave.
The top fields in the section are the Minutes
and Seconds dropdowns that control how the
timeout clock is displayed. These behave
exactly like the dropdowns for the Period, Jam, and Lineup clocks discussed on the
previous page.
The next section is marked “Team Timeouts” and will affect the Team Timeout fields on the
scoreboard display. The first field is the text that will be displayed when no team timeout is
running and by default contains the text “Timeouts: *.” The star character (*) is used as a
placeholder for the corresponding Team Timeout value on the control panel. If a star is
placed in the text it will be replaced by the value of that field when it appears on the
scoreboard display.
The next field to the right is the default number of timeouts.
The dropdown to the right of that is for choosing whether or not the number of team
timeouts is per period or per bout. If the selection is changed to “Per Period” each time the
Period Number is changed (on the Control Panel) the team timeouts will reset to the
number indicated here.
The field below is the text that will be displayed when the team timeout is running and by
default contains the text “TO: *.” The star character (*) is used as a placeholder for the
corresponding time remaining of the current team timeout. If a star is placed in the text it
will be replaced by the time when it appears on the scoreboard display.
The next field to the right is the default time for a team timeout.
To the right of that are the dropdowns for the Minutes and Seconds displayed when either
team timeout is active.
Master / Slave
The Master/Slave section allows you to set up remote control of
multiple scoreboards. This is useful when a scoreboard is used to
display to an audience at a venue while simultaneously broadcast
with a scoreboard overlay. It can also be used to have multiple operators handling different
functions if one user isn’t enough.
To begin with, any computers involved in this setup must be able to communicate over a
network. I’m not going into how to set this up here but if you need help and cannot find it I
can assist you by email.
Double-click the “Remote 1” field to open up the
Remote Setup window. From here you can name
your remote session, enter the IP Address of the
remote computer, and specify the port you want to
use for communication. The rest of the fields have
a dropdown when clicked that has the following
options:
Independent – this item does NOT participate in
the remote session
Master – this item will be transmitted to the remote
computer.
Slave – this item will be updated by the remote
computer.
The buttons along the top – All Master, All Slave,
and All Independent will force all of the fields to
whatever choice is clicked. Usually, one computer
is the master of all functions and values while the
other is the slave, but in more advanced setups computers can be setup to receive and
send information to each other.
The fields on the left deal with values. For example – Jam/Period/Timeout Clocks deals
with the actual values in the clock fields. If it’s the master it will push the clock times to the
remote machine. If it’s the slave it will receive clock information meaning the clocks are
controlled from the other side.
The fields on the right deal with triggers. Triggers are dealt with in greater detail later on pg
31.
NOTE: even if an item is designated as Slave the local computer can still fight for control.
For example – if a user starts the clocks on a slave machine that is setup to receive clock
values the clocks will run but will skip as the remote info tries to override the local and vice
versa.
After setting up one side the other computer must be setup as well. Follow the same steps
as above except use the opposite dropdown selection for the fields (Master instead of
Slave or vice versa).
If you would like to add a remote session to another
computer click the Add button and repeat the steps above for
that one.
Web Server
The Web Server section allows the scoreboard to
become a hub for devices to pull up a webpage
designed to control or view the scoreboard remotely.
Click the Start button to activate the web server.
Right now the web server is running locally and is only accessible on the same computer.
We’ll get into changing that in a bit. For now, copy the text at the bottom of the section
(“http://localhost:8080/UDSWeb” as default) and paste it into the address bar of your
browser.
You should see a web page similar to the example on the
right appear. From here you can click on the various
control/display pages. Right now there are only 2, but more
are being designed.
Click the Clock button. The web
page on the left should appear.
Now you can control the clocks from
this browser AND the control panel.
This browser is designed to replace
the stopwatch on the track with a
handheld device (smart phone,
tablet, etc) that can run local time
and control the display that the
audience sees.
The controls are set up exactly as they are on the control panel. The Password field is
blank as a default but if anything is typed into it on the Web Server section back at the
computer running the scoreboard it will have to be entered in here to allow remote control.
It is important to note that this remote browser is a separate clock than the actual
scoreboard. In other words if the computer crashes that is running the scoreboard this
browser will continue to run and keep time. Vice versa, if the browser crashes the
scoreboard will continue to function as normal. For times like this we use the Push and Pull
buttons.
Push sends the current values on the browser to the scoreboard. Pull gets the current
values from the scoreboard and makes the browser match.
If you have another device that can open a browser window put it on the same network as
your scoreboard computer and we’ll run a demo. I won’t describe how to network devices
here or how to find your IP Address but we will make a training video soon that will cover all
of that.
To start a web server you MUST open the scoreboard as an Administrator. You cannot do
this from a shortcut on your desktop or the start menu. You must find the ‘Ultimate Derby
Scoreboard.exe’ file (typically located in the ‘C:\Program Files (x86)\Ultimate Derby
Scoreboard’ directory. Right click it and select “Run as administrator.” You may also have
to open up a hole in your firewall or security software for the port that you’re using. The
easiest method is to simply turn your firewall/security software off, but if you’re computer is
on an unsecured network this might be risky!
The example to the left shows a common
configuration. I have set the IP Address to the
address of the local machine (the one running UDS).
I changed the default port from 8080 to 8008 as I
have another piece of software utilizing that port.
Since this setup is using a WiFi hotspot at the venue I also set a password of “Snarf” so
that people in the audience can’t just open up a browser (if they happen to know the IP and
Port) and start messing with the values. When possible it is always best to use a secure
and controlled network. If you’re league can provide a wireless router to use during the
event that is only used for scoreboard operation that is ideal. All that’s left to do is click the
start button and we’re off!
As the examples above show we are controlling the clocks from our tablet. The Team
Timeout buttons on our browser window change color to match the team colors on the
scoreboard as well. The layout of the browser control may change as we are still
developing it along with penalty tracking and other functions. The overall functionality will
be the same though. Again, don’t panic if this manual hasn’t explained this well enough as
we will be making some training videos soon.
Scoreboard Display
The scoreboard display is what the audience sees. This is where the displays and flashy
effects take place. This is basically the whole point of the program. In this section we’ll go
over customizing the scoreboard to meet the needs of your event. Each of the items on the
scoreboard is referred to as a “display field” or just “field” in this manual.
Note: most of the changes available to the individual display fields can also be made to the
scoreboard background itself like resizing, color, and even transparency.
There are six display fields on the default
scoreboard display that are hidden to start
with. They are highlighted in blue in the
example on the left. The display fields
with the stars are the lead jammer
indicators for each team. The blank fields
are for displaying the current jammer image/media. Two fields not pictured take up the
entire scoreboard display and by default have an image of the American Flag and the
Canadian Flag respectively. The last two are Halftime and Final fields that are sized and
positioned to match the current Period Number Field.
Display Fields
Each item on the Scoreboard Display is a Field. The Fields can
be manipulated in a number of ways. The first thing to do is
activate the field’s Properties Window, by double-clicking it.
Double-click the Team 1 Name Field. The Properties Window
should look like the example to the right.
Opacity
Fields can be made semi-transparent or even
hidden completely by moving the Opacity Slider.
As you can see by moving the slider back
and forth the field becomes more or less
transparent accordingly.
Moving Fields
Fields can be moved two ways – by typing the X, and Y locations
into the Properties Window, or by Moving it with the mouse. First
type “100" into the Y (Vertical) field.
As you can see the Field has been moved
down to that coordinate.
You can also type “C” into either of the “X”
or “Y” text boxes to center the field on the
main scoreboard panel.
Now press the “M” key and click and drag the Team 1 Field to move it with the mouse.
Notice how the X and Y location fields change as you move the Field around. Release the
mouse button to stop moving it with the mouse.
Rotating Fields
To rotate a field you can either
type in the desired angle, use the
up/down arrows, or resize it with
the mouse by pressing the “R”
key and clicking and dragging to
the desired angle.
Resizing Fields
For the next example I’m going to reset the opacity to
100% and the angle to 0. Resizing a Field is similar to
moving one. You can either type in the desired Width
and Height in the Key In Window or resize it with the
mouse by pressing the “S” key and clicking and dragging
to the desired size.
Notice how the text size changes with the height of the
field but not the width. The text also stays centered as
the field size changes. We’re going to change that next!
Changing Field Text & Text Properties
You can control the text that appears in a field by utilizing the Source Dropdown and the
Superstring Text Field. Let’s switch to another field for this exercise. Click on the Team 1
Logo Field. Notice how it automatically moves to the front? That can be turned off as
described in the section – “Parameters\Display” on pg 8.
Type “Blue Bombers” into the Superstring Text Field.
Notice how the text shows up in our Team 1 Logo Field,
but it’s way too big and it’s over the image. Don’t worry.
We can fix it!
The first thing to do is change the font size. You can
either change it on the Font Properties window
(discussed on the following page) or press the “T” key
and click and drag the text. Whether you drag the text
or type it in it looks like 25 is the best font size for the
current size of the Field.
What’s that? You say now the text looks kind of weird being right over
the top of the image like that. Sheesh, you’re high maintenance! But
we can fix that anyway!
The position of the text within the Field can be changed with the
mouse or by entering the desired offset into the X Offset or Y Offset
fields. Notice that as a default the values are “C” for each. That
means the program will try to center the text in the Field as best it
can.
Type “136” into the Y Offset field. As you can see it dropped the
text down but not quite far enough. We’ll move it the rest of the way
with the mouse. Press the “A” key and click and drag over the text.
As you can see we can move the text anywhere we want to like this
(even off of the field entirely). Move the text to the bottom of the Field but not off the Field
so that it looks like the example above. Note that if the “X Offset” or “Y Offset” fields have a
number in it instead of the “C” value (as is the case when the mouse is used) you can just
type “C” in again to make sure the text is centered horizontally or vertically.
Now we’re going to bind the text to a specific value. Select “Team 1 Name” under the
Source Dropdown.
Notice how the text in the field has changed.
Even though we still have “Blue Bombers” as our
Superstring it has been overridden by the source
text. If you were to change the name of Team 1
the field would change accordingly.
Now let’s use the Source and Superstring together. Type “The *” into the Superstring text
box.
If there is a value chosen (besides ”(None)”) the field
text will be the Superstring replacing the asterisk with the value chosen. Any
other time the Source will overwrite the Superstring.
Field Properties Window – Select Font
There are still more ways to manipulate the text on a field.
Clicking the “Select Font” button opens up a Font Window.
From here you can choose the font family from the dropdown. You can
change the size of the font. You can also choose text decorations like
Bold, Italic, and Underline from here as well. The bottom portion of the
window allows changes to the drop shadow on the text. The easiest
way to learn about these controls is to adjust them and watch what
happens on the display!
The Font Color Dropdown allows the color to be bound, or opens up a color palette to
choose the color of the font.
Note: You can also change the font size by pressing the “T” key and dragging over the
display field as described on the previous page.
Changing Image and Media Properties
The next section of the Properties Window deals
with the image positioning within the field. “Image In
Front Of Media” is checked by default meaning that
any image we load will appear in front of any media
(video) we load. When it is un-checked the opposite is true.
The next item is the Stretch Dropdown. By default “Uniform” is checked meaning that the
background image will stretch to fit within the size of the field, but retain it’s aspect ratio.
When this option is checked you cannot change the positioning of the image as it will
always be centered. The next option is “Fill” which will stretch the image to fill the entire
field regardless of it’s original aspect ratio. The final choice is “None” which will leave the
image at it’s original size. Select “None” from the dropdown.
Notice that now the “X Offset” and “Y Offset” inputs are active.
We can only re-position the image if it isn’t being stretched.
Now we can move the image around the field. You can either type in
the values in the text boxes or press the “I” key while dragging the
image around with the mouse. By typing “C” into either text box it will
center the image either horizontally or vertically. In the example to
the left the image has been moved outside the bounds of the field
cropping it off. It’s hard to tell where the boundaries of some fields
are when they’re back color is set to transparent. Don’t worry, we’ll be changing that later
too!
The long text area under these controls
displays the location of the image file (if any).
Clicking on it activates a dropdown menu.
You can bind the image to the team logo or active jammer images,
Choose an image by browsing to it, or remove any image from the
field by selecting “None.” For this example I selected “Choose
Image” and then selected the UDS Logo from the window that
popped up. By default the window starts in the images directory of
UDS.
The Media Section of the panel behaves in exactly the same way as the Image Section
above it. However, you won’t see any video until you trigger the player to start. This will be
discussed in greater detail on page 17. As with the image you can align the player by typing
in values or pressing “P” and dragging the player within the field.
Changing Back Color And Border Properties
The next section deals with the background color of the field.
For this example I reset the scoreboard to the default to start
with a clean display. The Back Color dropdown allows you
to change the back color of the field by making it transparent,
binding it to the Team colors, or choosing a color from the
palette window. In the example I chose to bind it to the
Team 1 color.
Next, give the Border a size of 1. Notice how the
Position and Size change as well. This is because the
field size includes the border around it.
Keep that in mind when resizing the field as the scoreboard won’t let you size a field
smaller than 2 times the border size. You can change the radius of the border (rounded
edges) and it’s color as well using the next 2 parameters. You can even change the radius
with a zero border size to round the edges of the background color.
Triggers And Events
One of the key features of UDS is the ability to create automatic changes to the display
based off events that occur during a bout. This is done by defining them in the table at the
bottom of the Properties Window.
To the right is an example of the default
Triggers Table for the Jam Clock Field.
This field displays the Jam Clock, the
Lineup Clock, and the Official Timeout
Clock when they run.
Now let’s wreck it! Start by deleting the Triggers. To delete a Trigger click on the first
column (the one with the little triangle in it) of the row to be deleted. Once selected press
the Delete key and poof! It’s gone. Delete all of the rows of the Trigger Table.
When you’re done the Triggers Table should look like the example above and to the right.
Now we’re going to build them again newb!
Verify that the default Source from above is still set to “Jam Clock” and run
a few jams. As the example on the next page displays - notice how the clock will only ever
display the Jam Clock even when the Official Timeout or the Lineup Clock is run.
Click the blank cell under “Source” and a dropdown appears. Click
“Trigger.” Another dropdown appears. This is the list of available
triggers that can set off events. Select “Official Timeout Start.”
Now Anytime the Official Timeout Clock starts it will trigger the
events we define here. ...but we haven’t defined any events yet...
To tie an event to the trigger hold Shift and click on the field under the “Event”
column.
This brings up the Events Window. This is where we can define
the events that will occur when the trigger goes off. In other words
– what do we want to happen to this field when the Official Timeout
Clock Starts? Click the blank cell under the Type column and
select “Value.”
The ‘Value’ event changes the displayed text on the field to whatever we
choose. We want this field to display the Official Timeout Clock when it
starts so we’re going to bind it to that value.
Now the Official Timeout works, but once we run it we lose our Jam Clock!
This illustrates an important point about triggers. The scoreboard field won’t know what to
do if the Official Timeout Clock stops or if the Jam Clock starts unless we tell it to react to
those triggers. Remember to test your triggers and make sure the scoreboard display is
behaving the way you want it to when it’s actually bout time!
Another point to remember about text in a scoreboard field is that it can be changed either
by changing it on the Properties Window (pg 27) or by triggered events. Whichever one
occurs LAST will override whatever text is currently in the field.
To get a better idea of assigning events to triggers reload the scoreboard and look at the
default settings of the Period and Jam clocks. We’ll make some instructional videos soon
too so stay tuned!
The field can also be triggered by a formula based on a value. Open the
properties on the Team 1 Logo. Instead of selecting “Trigger” in the Source
Dropdown select “Value.” Then select “Period.” Notice the slightly different
data that appears in the row of the Triggers Table.
Instead of “ACTIVE” in the Value cell there is a “0”
displayed and we can now change the Formula cell to
something other than “=.”
Click on the “=” and a dropdown appears. Select “>”
(greater than). Next type “1” in the Value cell.
This is creating a trigger for this field that will go off every time the number of Periods in the
bout goes from less than 1 to greater than 1. Remember! Triggers are only activated when
the change occurs so if the current Period was already greater than 1 this wouldn’t activate.
Shift-Click to open up the Events Table and create a “Fade Out” event. Leave
the Time at the default “0.00.” Advance the Period Clock to 2 either by
running the clock down, or just typing “2” into the Period Textbox on the
Control Panel. Check it out! Our Team 1 Logo has disappeared.
Bring the Opacity of the Team 1 Logo field back up to
100% using the slider on the top of the Properties Window
(pg 27). Change the Source Value to Period Clock. Set
the Formula to “<” and set the Value to “29:50.” This sets up a trigger to go off whenever
the Period Clock counts down from above 29 minutes and 50 seconds to below it. Leave
the event the same (Fade Out).
Run the Period Clock and wait for it to get to get to 29:49. When it does the Team 1 Logo
disappears again. When comparing values like this remember that numbers like Team
Timeouts or Jams are whole numbers and time values like the clocks are in time format. If
you type in a value like text or a number in the incorrect format the trigger might not go off.
Events - Explained
Events can be added and removed just like Triggers can. The Events Table is very similar
to the Triggers table in that items can be added or deleted in the same way. Remember
that each Trigger can have multiple events tied to it. For example, you may want a field to
fade in and go into motion when the Period Clock starts. Make a Trigger on the field for the
Period Clock, Shift-Click to open the Events Window, and then add 2 events. The first will
be a Fade In Event and the Second a Motion Event. The next time the Period Clock starts
the field will fade in (if it’s opacity was anything other than 100% and move to the top left
corner of the screen. This next section will cover the details of each event.
Fade In
The first event is the Fade In event. This will bring any field
to opacity 100%.
The first editable value is the time (in seconds) that it will take to bring the opacity up. You
may want a smooth fade in rather than have the field just appear suddenly. Clicking on the
field brings up a cell with up/down arrows that you can use to adjust the value or you can
simply type in the desired value. The next cell has a dropdown with “True” or “False” in it.
If set to True the field will appear in front of any overlapping fields when it fades in. If False,
it will remain in it’s current order. The last cell has the time to delay until the field will
automatically fade out again. If it’s set to “0.00” the field will NOT automatically fade out. If
it’s set to any other value it will wait for that many seconds and then fade out based on the
time entered in the “Time” cell.
So in the example on the right the field will take 3.5
seconds to fade in. It will appear in front of all other fields.
Once it’s completely faded in it will wait for 1 second then
it will take 3.5 seconds to fade out again.
Fade Out
The Fade Out event is pretty much just like the Fade In
event except in reverse!
The only editable value is the time. This is the amount of time (in seconds) it will take to
bring the field to 0% opacity.
Motion
The Motion event moves the field around the scoreboard.
Basically it changes the location of the field.
The first cell is the time. Just like with Fade In/Fade Out this is the amount of time (in
seconds) it will take for the field to travel from it’s current position to the desired end
location. The End Location cell is where the field will end up after the time has elapsed.
The format is X,Y coordinates. X is the horizontal coordinate and Y is the vertical. So the
default “0,0” in the cell would be the very top left of the scoreboard display. Location of the
fields are taken from the very top left of the field as well. Remember you can always get
the current location of the field from the Position Textboxes on the Properties Window (pg
27).
The example on the left shows the Team 1 Logo with
text that displays the default location. The example
on the right shows the location if “0,0” were set as the
location (The top is actually hidden under the menu
bar). If the Scoreboard width or height are changed
you may want to test and re-enter your triggered
location values as they will probably have to be
adjusted to account for the changed overall area.
Image
This event changes the image on the field when the trigger
fires. Controlling it is done exactly the same way as on pg
30.
Gif Animation Start
This event starts a gif animation on the image currently in
the field. If the image is not an animated gif it has no effect.
The second attribute to change is Loop. This is controlled by a dropdown choice. When
set to True the gif will start over at the beginning and play through again indefinitely. If set
to False the gif will only play through once. This event can be used within the same Trigger
as “Image” above but remember to set the image above the Gif Animation Start event as it
will go in order from top to bottom when the Trigger fires.
Gif Animation Stop
This event stops a gif animation on the image currently in
the field. If no gif is currently playing this has no effect.
The second attribute to change is Wait Until End. This is controlled by a dropdown choice.
When set to True it will allow the animation to run all the way to the last frame of the gif.
When set to false it will immediately stop at the current frame.
Media
This event changes the media file on the player in the field.
This doesn’t mean it will be visible though unless triggered
to play.
Media Start
This event will start the player assuming there is a media
file to play. The second column controls the time in
seconds the media file will fade in to full opacity and
volume. The second value to change is the maximum volume by percentage. After that
the user can select True if the player is meant to be displayed (like a video) or False if
meant to be invisible (like an audio only file, or a file that you only want the audio from).
The final choice is to loop the file continuously from the beginning as soon as it reaches the
end.
Media Stop
This event will stop the player. The first value to change is
the time in seconds it takes to fade the media file out (audio
& video). The next choice will wait to stop the player until
the end of the media file if True is chosen. If False is chosen the player will stop
immediately when this event is triggered.
Font Color
This event changes the font color of the field. Clicking the
Color cell activates a dropdown. The user can choose
“Transparent” which will basically make the text dissapear.
The second choice opens up a color palette to choose a color for the text.
Back Color
This event changes the back color of the field. Clicking the
Color cell activates a dropdown. The user can choose
“Transparent” which will make the background transparent.
The second choice opens up a color palette to choose a color for the background.