1
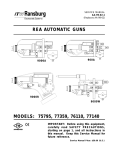
Ransburg
REA Automatic Applicators - Maintenance
BARREL ASSEMBLY
REMOVAL
(REA 9000W)
1. Remove air cap retaining ring.
2. Pull shroud or applicator cover straight off the
applicator exposing the trigger/dump and barrel
assemblies.
3.REA 9000W ONLY- remove the high voltage
module to barrel mounting bracket.
4. Loosen barrel nut with spanner wrench.
5. Pull barrel and automatic body STRAIGHT apart. Take extra care in handling barrel assembly
to prevent damage.
6. Remove the color valve manifold assembly by
turning the nut counter-clockwise until loose, then
pull the manifold straight out of the barrel.
7. Remove the trigger valve. Remove the ferruled
connector for the fluid tube. Remove the coiled
fluid tube by removing the ferruled connector at
the trigger valve manifold.
BARREL DISASSEMBLY
(REA 9000W)
1.Remove needle shaft assembly from rear of
the barrel with the 19749-00 spanner wrench.
2. Firmly pull the needle/electrode shaft assembly
out of the packing chamber.
!
CAUTION
> During this operation, be CAREFUL that
the interior surface of packing chamber is NOT
damaged (marred or scratched)! This chamber
is a seal area and the barrel assembly will have
to be replaced if it is damaged.
3. Unscrew needle/electrode from shaft and slide
parts off of the shaft (see Figure 7).
4. Inspect and replace parts as necessary. Since
the needle shaft in the REA 9000W does not
move, the packing wear should be minimal.
Rear
NOTE
> There is no need to remove retaining
ring or barrel nut from barrel unless they
are damaged. If they are to be removed,
lift one end of ring out of its groove and
spiral it off of the end of the barrel. The
nut can be removed. To replace them
on the barrel, slide nut onto the barrel,
place ring against the back of the barrel,
lift one end of it onto the barrel and spiral
it on and into its groove.
!
Front
Conductive
Retainer
Figure 7: Chevron Seal Assembly
CAUTION
> Firmly spreading the retaining ring may
break it!
29
AA-99-02.5