1
2.13.1 Electrical System Installation Procedures
Determine the location of the Relay and Fuse Holder wire harness. Most common
installations locate these components inside the driver’s compartment and close to the
fuse panel under the dash. You can also mount the Relay and Fuse Holder and
harness close to the battery. However, these connectors are water-resistant, not
waterproof, so care is required when mounting this assembly under the hood of your
vehicle.
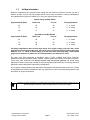
Wire Schematic Origin and Destination Map
Wire Color System
Red
Red
Black
Black
Black
Blue
White
White
2.14
Battery Voltage
Arming Switch
Relay Ground
Solenoid Ground
Arming Switch Ground
Solenoid Power
Microswitch
Microswitch
Origin
Destination
Terminal Used
Relay Harness
Underdash
Relay Harness
Solenoids
Arming Switch
Relay Harness
Relay Harness
Arming Switch
Bat. Volt. Signal
Switched 12v
Chassis Ground
Chassis Ground
Chassis Ground
Solenoids
Microswitch
Microswitch
Ring
Spade/Wire Intercept
Ring
Ring
Ring
Spade
Spade
Spade
Relay and Fuse Holder Installation
The wire harness attached to the relay and fuse holder includes 8 feet of color-coded wires to
make the electrical system installation for your Edelbrock Nitrous System as easy as possible.
We recommend you do not cut any lengths of wires from the wire harness or complete the
wiring of the nitrous system until all of the mechanical components are securely mounted in their
permanent locations.
Once all of the solenoids and switches are placed, then route the un-cut wires from the harness
to each location allowing enough wire length on each circuit to not interfere with operating
linkages, heat sources, brackets, etc. Pay particular attention to sharp edges along the route of
your wire harness, as they can chafe the wire and cause your system to fail.
After you have accounted for the routing of your wires, follow the Wire Harness Schematic on
page 15, and use the Origin and Destination Map as a guide for which electrical connectors are
used in each circuit.
Once you have determined the location of the relay and fuse holder, secure them with fasteners
(not included with kit) such as sheet metal screws, bolts and nuts, etc. Allow for some slack in
the red wire that connects the relay and fuse holders together.
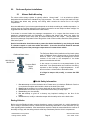
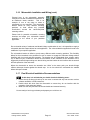
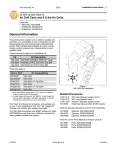
When mounting your relay and fuse holder,
make sure the mounting surface is strong
enough to support servicing the relay and
fuse. Also, ensure you allow for some slack in
the wire that joins the fuse holder to the relay
mount. This will avoid any potential loss of
power due to stress on the wire harness.
The fuse is covered by the fuse mount
housing.
The relay for the Performer System is 30
amps. The fuse is 15 amps.
©2008 Edelbrock Corporation
Catalog #70001, #70002
Page 17
Brochure #63-70001
Rev. 06/08 - AJ/mc