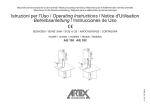
1
ImageVet DC
Operation, Assembly & Installation Manual
Rev. 4.1 June 2015
OPERATION INSTRUCTIONS
1. General precautions 4
1.1. Description of the symbols used 4
1.2. Purpose and use of the equipment 5
1.2.1. Classification5
1.2.2. Environmental conditions5
1.2.3. Guarantee5
2. Description of the system 6
2.1. Description of the X-ray unit 6
2.2. Operating mode 6
3. Operation7
3.1. Turning the X-ray unit on and off 7
3.1.1. Turning on the basic X-ray unit 7
3.1.2. Turning on the remote 7
3.1.3. Automatic remote shut off 8
3.1.4. Remote stand-by according to time8
3.2. Remote display functions 8
3.3. Control panel8
3.4. Checking the parameters9
3.5. Factory settings 10
3.6. Batteries and charge level indication10
4. Using the X-ray unit11
4.1 Position of the patient11
4.2. Positioning the X-ray head11
4.3. Position of the X-ray plate or sensor11
4.4. Setting the exposure mode and time12
4.5. Setting the mode and exposure time in USER mode12
4.6. Procedure to be followed when taking the X-ray13
5. Advanced options14
5.1. Setting the operating mode14
5.2. Setting the type of movable collimator14
5.3. Restoring factory settings15
6. Error messages15
7. Routine maintenance16
8. Cleaning and disinfection16
9. Dismantling the equipment when no longer used17
10. Technical specifications17
11. Dimensions19
12. Identification nameplates21
INSTALLATION & ASSEMBLY INSTRUCTIONS (WALL MOUNT)
Drawings 23-24
1. General safety precautions25
2.Packaging25
2.1. Dimensions and contents25
2.2. Handling and storage25
3.Pre-Installation26
3.1. Mechanical specifications required26
3.2. Central control unit power supply26
3.3. Wiring connection between central control unit and “In-Use” light26
2
INSTALLATION & ASSEMBLY INSTRUCTIONS (WALL MOUNT - CONT’D)
4.Installation27
4.1. Positioning the X-ray unit’s yoke27
4.2. Wall-mounted plate for supporting the X-ray unit27
4.2.1. Vertical single stud installation with wooden post28
4.2.2. Horizontal double stud installation with wooden post28
4.2.3. Vertical single/double stud installation with iron post(s)28
4.3. Extension arm29
4.3.1. Bottom mount installation extension arm (vertical)30
4.4. Installing the folding arm31
4.5. Installing the tubehead33
4.6. Installing the collimator36
4.7. Balancing the folding arm37
4.8. Adjusting the folding arm end-stops37
4.9. Wall-mounted plate wiring connections38
4.10.Completion of wall-mounting plate and holder for remote39
5. Setup & Technician Setup Menus40
5.1. Restoring factory settings41
5.2. Calibrating the x-ray head41
6. Central Control Unit Card P/N 9766051542
7. Basic Head Control Card P/N 9766051443
8. X-ray Tubehead45
8.1. Pairing the Remote with the X-ray Tubehead46
8.2. Check occupation of radio frequencies for remote47
8.3. Error codes given on the remote49
Block Diagrams51
MOBILE SYSTEM ASSEMBLY INSTRUCTIONS
1. Legs, Base & Column54
2. Installing Folding Arm & Adaptor Plate55
3. Hanging the Timer Plate Assy56
4. Electrical Connections57
5. Installing Covers58
6. Installing the Tubehead59
7. Installing the Collimator62
8. Balancing the Folding Arm63
9. Installing the Remote Holster65
10.Installing the Handles66
3
1. General precautions
These instructions explain how to properly use the X-ray unit. Please carefully read and become familiar with the content of this manual before attempting
to use the apparatus.
NOTE: This manual does not specify the rules and regulations for acquiring, possessing or using a source of ionizing radiation as
each country has its own laws. Only the most common ones shall be mentioned and this means that it is the user’s responsibility to check local standards and observe the relevant laws.
No part of this manual is to be reproduced, stored in a retrieval system or transmitted in any form or by any means, i.e. electronic, mechanical, photocopying,
translation or otherwise, without the prior written permission of the manufacturer.
The manufacturer has a policy of ongoing development and is committed to improving its products. Therefore, some instructions, specifications and
illustrations given in this manual may differ slightly from the product actually purchased. The manufacturer reserves the right to make changes to this
manual without giving prior notice.
1.1. Description of the symbols used
The following symbols are used:
WARNING!
Indicates a situation where failure to observe the instructions could cause damage to the
equipment or injury to the user and/or patient.
NOTE:
Indicates important information for the user and/or technical support personnel.
Earth connection.
Alternating current.
On.
Off.
Ionizing radiation.
FCC ID
F.C.C. mark (Federal Communication Commission)
Equipment conforms to the essential requirements established by USA and Canada.
4
1.2. Purpose And Use of the Equipment
This X-ray unit is designed for use in veterinary dentistry to provide intra-oral X-rays for diagnostic purposes.
This equipment can be used to produce film X-rays developed with chemicals, or digital images from photo-phospher plates, or digital X-ray sensors.
1.2.1. Classification
RADIO EQUIPMENT AND TELECOMMUNICATIONS TERMINAL EQUIPMENT Classification
Equipment classification in accordance with directive 99/05/EEC art.12: Class I.
EMC classification
Classification of the equipment according to standard CEI EN 55011: Group 1 - Type B.
1.2.2. Environmental Conditions
• The equipment should be installed in an area where the following conditions are present:
• Temperature from +50° to +104° F
• Relative humidity from 25 to 75% without condensate
• Atmospheric pressure from 700 to 1060 hPa
• The electrical wiring in the room where the equipment is installed must conform to the I.E.C. 60364-7-710;V2 specification (i.e. the regulations
concerning the electrical wiring to be used in surgeries) or equivalent standards in force in the country where the equipment is installed.
• ELECTRICAL CONNECTIONS : The electrical wiring must have an effective ground conductor as set forth by I.E.C. – US National Electrical
Codes and C.E.I. standards. These rules require that a ground fault circuit interrupter is installed upstream. The ground fault circuit interrupter
must be as specified below:
- Contact capacity: 120V 15A in compliance with standards IEC 60898-1 and IEC 60947-2.
- Differential sensitivity: 0.03A.
- Power supply: 3 x 14AWG (single conductor) OR 3 x 16AWG (stranded).
The color of the 3 wires should be as specified in the standards (BROWN/BLACK power, BLUE/WHITE neutral, YELLOW/GREEN ground).
1.2.3. Guarantee
•
•
•
•
•
•
•
The manufacturer guarantees the safety of the operator as well as the reliability and high performance of the equipment. The guarantee shall be
voided if the following precautions are not taken:
Observe the conditions specified in the guarantee certificate itself.
The equipment must only be used by following the instructions contained herein.
Equipment installation, expansion and technical support must be performed exclusively by personnel authorized by the manufacturer to carry out
these operations.
Never open the equipment casing. Installation, repairs and, in general, any other operations requiring the casing to be opened are to be performed
exclusively by personnel authorized by the manufacturer to carry out these operations.
The equipment must be installed in areas which comply with that stated above at point 1.2.2 “Environmental Conditions”.
The area where the X-ray unit is installed must comply with official regulations regarding protection against radiation in the country where the
equipment is used.
SAFETY PRECAUTIONS
•
•
•
•
•
•
•
•
•
•
If any person who is not an authorized technician changes the product in any way by replacing parts or components with others not used by
the manufacturer they shall assume responsibility for the product.
Do not forget to turn off the main switch on the equipment before leaving the surgery.
This equipment is not water-proof (risk of electrocution).
This equipment is not suitable for use in the presence of a mix of inflammable anaesthetic gas with oxygen or nitrous oxide.
This equipment must be stored properly so that it is kept in top working order at all times.
Use of electric apparatus that do not comply to standard I.E.C. 60601-1-2, in the doctor’s office or in the immediate vicinity
of it may cause electromagnetic interferences or interferences of other types, resulting in equipment malfunctions. In these cases it’s strictly
recommended to shut off the power supply to the equipment before hand.
The manufacturer shall not be held responsible for misuse, carelessness or improper use of the equipment.
This equipment is to be used exclusively by qualified personnel with the proper veterinary training.
The user must be present at all times when the equipment is turned on or ready for start-up. In particular, never leave the equipment unattended
in the presence of children, mentally disabled or other unauthorized personnel in general.
If the X-ray equipment is damaged or oil leaks, do not use the equipment and contact customer service immediately.
PROTECTION AGAINST RADIATION
•
•
•
X-rays are hazardous and adequate precautions must be taken when using them. Areas where it is possible to be exposed to the X-rays
shall be clearly indicated by using this symbol which should remind personnel to observe the safety rules laid down by the laws in force
in the country where the equipment is used.
Control the emission of X-rays from the greatest distance possible (6 feet) from the focal spot and the X-ray irradiation beam in the
opposite direction from where the rays are emitted.
Only authorized personnel and the patient should remain in the area when X-rays are being emitted.
5
2. Description of the system
2.1. Description of the X-ray unit
Description of the parts:
aX-ray tubehead.
Depending on the operating mode, the high frequency constant
potential X-ray tubehead works at 60KV 7mA (En60 mode), 63KV 6mA (En63 mode) or 65KV 6mA (En65 mode).
Rotation is limited by mechanical end-stops.
b
Removable collimator/cone.
The tubehead can work with different types of collimators that are
automatically recognized:
• 8” round collimator (incorporated in the tube head): minimum
skin/focal distance 20 cm and 60 mm output beam
• Removable 12” round collimator (standard in RX DC): minimum source/skin distance 30 cm and diameter of X-ray beam exiting cone 55 mm (with cone attached).
cFocal spot.
d
Folding arm.
e Extension arm (available in three lengths with the wall-mounted
version): - 40 cm, 60 cm and 90 cm.
fRemote controller
The remote can be placed either near the central central control unit or in a
remote position. As a result, the doctor can move conveniently around the
room and move out of the area where X-rays are emitted.
g Hand held remote holder.
h Central central control unit.
iMaster switch.
2.2. Operating mode
The X-ray unit can function in different modes (MULTI-MODE technology):
1)En60 operating mode
X-ray emission at 60KV and 7mA. The X-ray unit automatically calculates the
best exposure time (from 0.01s to 1.00s) based on the selected tooth and
patient size.
2)En63 operating mode
X-ray emission at 63KV and 6mA. The X-ray unit automatically calculates the best exposure time (from 0.01s to 1.00s) based on the selected tooth and patient size.
3)En65 operating mode
X-ray emission at 65KV and 6mA. The X-ray unit automatically calculates the best exposure time (from 0.01s to 1.00s) based on the selected tooth and patient size.
4)AUTO operating mode
The X-ray unit automatically suggests the best operating mode (En60, En63, En65) and exposure time (from 0.01s to 1.00s) based on the selected tooth and patient size.
The suggested exposure time can be corrected from the remote.
In addition, the X-ray unit has a special USER mode that can be set by the
user. The user can select the best combination of load factors (operating mode and exposure time) for each tooth and patient size.
6
d
e
h
i
c
a
b
f
g
3.Operation
3.1.Turning the X-ray unit on and off
3.1.1.Turning on the X-ray unit
The central control unit is turned on and shut off with switch (A). The switch lights up to signal the central control unit is energized.
NOTE: The technical specifications of the switch are given in paragraph 1.2.2.
The central control unit is turned on and off with the main switch (A), as illustrated in the figure below. The switch lights up when the central control unit is
energized. Whenever turned on, the equipment performs an operational test
that takes a few seconds. A beep is provided at the end of the test.
NOTE: The exposure time and the parameters displayed when the unit is
turned on are the last ones set before the central control unit was turned
off. If the remote controller is left untouched for a few minutes it will go into
standby mode. Simply press any key on the control panel to reactivate it.
3.1.2. Turning on the remote
The remote is turned on by pressing any key, except for the exposure key. The unit will be in the standard configuration described in detail in paragraph 3.1.3 and then search for the base it works with. If the base is off, the remote will not indicate the field or status “READY”. If the base is turned on, the remote will detect it within thirty seconds.
NOTE: To optimize the range of the remote while it is being used, keep it away
from walls and metal instruments and above all, do not cover its antenna found
on top of the screen. In addition, performance may be reduced if the remote is
moved too quickly while X-rays are being taken. Error E 31 may be displayed if
out of range.
7
3.1.3. Automatic remote shut off
Once the central control unit has been turned off, the remote automatically shuts off after approximately one minute. The remote also
automatically shuts off when it is further than the maximum allowable distance from the control until.
3.1.4. Remote stand-by according to time
The entire X-ray unit will switch over to stand-by (even if the base is on) and the remote will automatically shut off after approximately five minutes of non-use to save battery power. The remote turns back on displaying the last selection made by the user whenever any key, except for the X-ray exposure button, is pressed. To edit the standby time, refer to chapter 4 that deals with the remote’s “Advanced options”.
3.2. Remote display functions
Cool Down Time
Battery Level
Field Strength
Tooth Selection
Patient Size
Removable Collimator
Not Present
Exposure Time
and Dose
Thermal Load Bar
3.3. Control panel
As illustrated in the figure below, the remote has four function keys and a single X-ray exposure button
Tooth Selection
Size Selection
Decrease Time
Increase Time
X-ray Exposure
8
NOTE: The main functions of the keys on the remote vary according to how they are pressed:
KEY
BRIEFLY PRESSED (less than 3 sec.)
PRESSED LONGER (more than 3 sec.)
Changes over from LARGE to SMALL and vice
versa (takes place when key is released).
Saves the selected setting (exposure time, sensitivity, etc…). The
memo icon
lights up when the data item can be saved.
Changes amongst the various types of teeth
to select the area to be examined.
Increases the exposure times in steps, according
to the set scale.
It displays the values corresponding to the tooth exposure times in
mGy and in mGy*cm2 if pressed again.
Decreases the exposure times in steps, according
to the set scale.
NO EFFECTS ARE OBTAINED IF THE KEY
IS PRESSED LESS THAN A SECOND.
Increases the scroll speed of the values in increasing order.
Decreases the scroll speed of the values in decreasing order.
STARTS X-ray EXPOSURE (the button has to be held down while the
X-rays are being emitted, “dead man” function).
NOTE: “Dead man” function: When the exposure button is depressed on the wireless remote, X-rays will be emitted only when the user presses
and holds down the button. X-ray emission will terminate if the key is released too soon.
NOTE: The function related to pressing the key briefly is performed by pressing the key which will activate the function assigned to it. On the other
hand, to perform the function carried out when the key is held down longer, press the key until the relative function is started. A short beep will
signal the function has started.
NOTE: Warm-up: When the machine has not been used for a prolonged period (more than 3 months) or when turned on for the first time, a number of exposures with short times (0.01-0.02 seconds) is recommended to stabilize operation.
3.4. Checking the parameters
Before actually taking an exposure, make sure the exposure parameters for the examination in progress are correctly set.
• Controlling the type of collimator selected.
The X-ray unit is normally used in conjunction with its 12” collimator.
When the collimator is removed, an icon appears on the display.
ICON ON: indicates the X-ray unit is using the built-in round cone (diameter 60mm, focal spot-skin distance 8”).
ICON OFF: indicates the removable round cone is attached (source-skin distance 12”).
Refer to paragraph 5.2 to set the type of movable collimator used.
NOTE: After the removable collimator (12”) has been attached or detached, exposure times will automatically change. Allow a couple of seconds before the display is refreshed, showing the new exposure time and the collimator icon.
• Checking the selected patient size.
Large Patient
Selected
Small Patient
Selected
NOTE: Whenever a change has been made, the preset exposure times will automatically be modified.
9
• Checking the selected type of intraoral exam.
Upper PreMolar/Molars
Upper Canines
Incisors
Lower Canines
Lower PreMolar/Molars
3.5. Factory settings
The X-ray unit is supplied with the following factory settings:
•
•
•
•
Operating mode: AUTO
Sensitivity: Level 17
Remote stand by: 5 minutes
Exposure times as per standard R20: 0,010 - 0,011 - 0,012 - 0,014 - 0,016 - 0,018 - 0,020 - 0,022 - 0,025 - 0,028 - 0,032 - 0,036 - 0,040 - 0,045 0,050 - 0,056 - 0,063 - 0,071 - 0,080 - 0,090 - 0,100 - 0,110 - 0,125 - 0,140 - 0,160 - 0,180 - 0,200 - 0,220 - 0,250 - 0,280 - 0,320 - 0,360 - 0,400
- 0,500 - 0,560 - 0,630 - 0,710 - 0,800 - 0,900 - 1,000
NOTE: These times comply with current standards I.E.C. 60601-2-7 (1999) and the ISO 497 series R20 recommendations and
CANNOT BE MODIFIED.
3.6. Batteries and charge level indication
The remote runs on two AA alkaline batteries to assure sufficient stand-alone operation. The charge level of the batteries is given on the screen as follows:
Battery fully charged (a symbol does not appear in the area that shows the battery charge level).
Battery half-charged.
Battery charge level low or almost dead (causing the remote to automatically shut off).
NOTE: The batteries should be removed from the remote if it is not going to be used for an extended period.
10
4.
Using the X-ray unit
4.1 Position of the patient
Patients may be in sternal, dorsal or lateral recumbancy on a wet table.
Position the X-ray head so that the cone is aligned at the desired angle. There is an angulation bezel provided for those who prefer to work with specific angles (either sternal or dorsal recumbancy).
4.3.
Position of the X-ray plate or sensor
The parallel technique, where applicable, provides more accurate images in terms of size compared to the bisecting technique. However, in most cases this is only possible for the most caudal of mandibular molar/premolars. A 12” focal-skin distance (collimator installed) is preferable to obtain better quality pictures. To avoid exposing the image receiver only partly (whether it is a sensor or photo-phosphor plate system) proper alignment should be observed.
H
OT
TO
E
GL
AN
BIS
EC
TIN
GA
NG
LE
X-R
AY
CO
N
MAXILLARY
E
Positioning the X-ray head
CE
BE NTRA
AM L
X-R
AY
4.2.
SENS
90°
NOTE: X-RAY BEAM
IS PERPENDICULAR
TO THE BISECTING
ANGLE
OR P
LANE
• The X-ray emission axis is perpendicular to bisecting angle between the image receiver (for example a sensor or photo-phosphor plate) and the tooth’s long axis.
• As a result, the picture of the tooth will only be distorted by the divergence of the X-rays in relation to the focal spot.
11
4.4. Setting the exposure mode and time
The exposure parameters are set by following the directions given below:
1)select the tooth to be examined
2)select the patient size
The exposure time is automatically shown on the remote screen.
NOTE: Each operating mode (En60, En63 or En65) is displayed for approximately 1 second according to the tooth or patient size just selected.
The suggested exposure time can be changed with keys and . Exposure times ranging from 0.01s and 1.00s belonging to the R20 scale can be
set. Random exposure times different from the ones provided in the R20 scale cannot be set.
When the exposure time displayed differs from the default setting, icon comes on.
To save the new setting, make sure icon is on and then press and hold key for approximately 2 seconds. The remote will beep to confirm the setting
has been saved. At this point, make sure icon is off.
NOTE: If the exposure time is not saved, the change made will be lost after a new entry or as soon as the remote changes over to stand-by.
Important: after customized settings have been made, the “Original exposure value charts” are no longer valid.
If icon is displayed while the exposure time is changed, it means the set time cannot be saved for the selected tooth-patient size combination. Either way, the X-rays may be taken with the time displayed.
Important: when the suggested exposure time is changed, the sensitivity factor is also modified (by default set to F=17). Once this change has been saved, it is applied to all the teeth and both patient sizes
The exposure time can also be modified by changing the sensitivity factor. Press keys and at the same time , the actual sensitivity factor will
be displayed.
Use keys and to change the value from 3 to 25. If the displayed value differs from the one previously saved, icon comes on. To quit this
mode, press key or . The change made to the sensitivity factor is applied to all the teeth and both patient sizes.
The selected operating mode is always used for each tooth and patient size combination in modes En60, En63 and En65.
In AUTO mode, each tooth and patient size combination is associated to the best mode from amongst the ones available. In this mode it is not possible to
assign a mode other than the default for each combination. To set the mode, refer to paragraph 4.5 “Setting the mode and exposure time in USER mode”.
To change the mode amongst En60, En63, En65 and AUTO, refer to paragraph 5.1 “Setting the operating mode”.
4.5. Setting the mode and exposure time in USER mode
In USER mode, it is possible to assign an exposure time and a mode from amongst En60, En63 and En65 to each tooth-patient size combination. The default
setting corresponds to the AUTO mode settings with sensitivity factor F=17.
To activate USER mode, regardless of the mode currently being used, press keys and at the same time. Icon will come on to signal USER
mode is active.
12
To deactivate USER mode, press keys and again (icon
goes off).
The exposure parameters are set as directed below:
1)select the tooth under examination.
2)select the patient size.
The exposure time is automatically displayed on the remote.
NOTE: It is not possible to access the sensitivity factor menu in USER mode. In addition, keys
inoperative in USER mode.
and
are
The exposure times and mode assigned to the tooth – patient size combinations are custom set by following the directions given below:
1)press and hold down key about two seconds. Customized settings can be entered and icon
comes on.
2)select the desired tooth-patient size combination.
3)
change the exposure time with keysand.
NOTE: It is possible to set exposure times ranging from 0.01s and 1.00s that are part of the R’20 scale.
4)press keys and simultaneously to open the menu used to select the operating mode.
select the operating mode with keysand.
5)
6)quit the menu and press key to make the entry operative (if key is pressed, the menu will quit without changing the previous setting).
7)press and hold down key for approximately two seconds to confirm the entry and disable customized settings (icon goes out).
NOTE: It is possible to set the exposure parameters for several combinations. To do this, repeat steps 2 through 6 before going on to step 7.
4.6. Procedure to be followed when taking the X-ray
• Pick up the remote and move to a safe distance away (at least 6 feet) from the X-ray unit during the exposure. Make sure “READY” is indicated.
• Press and hold down the “Exposure” key on the remote until the audible warning sound (beep) stops and the yellow light goes off.
“X-ray Exposure” key
Light on control panel illuminated during X-ray emission
NOTE: If the Exposure key is released at any time before exposure has terminated, exposure will be interrupted and error code E01 will appear on the display. If this occurs, press the “Patient Size” key to reset.
• Once exposure has been completed, it is possible to proceed with the next exposure unless the X-ray unit has reached the maximum allowable temperature. The percentage of the maximum allowable temperature is always shown on the screen (see icon below).
13
• Once the maximum temperature has been reached, the pause time for cooling will be signaled by symbol .
• At this point the exposure function will be disabled until the screen shows “READY” again.
• As soon as “READY” appears on the remote, another exposure may be taken.
5. Advanced options
The remote allows the user to view, edit and set some operating parameters by simply combining the keys provided. Follow the steps given below to access:
+
+
+
Press these two keys to adjust the sensitivity levels (determined based on the table given below and type of
sensor/receiver used), modifying the current value from the minimum to the maximum allowable one (on a scale
from 3 to 25), with keys “+” and “-”. Press key “size” to confirm the desired level and go back to the main screen.
This menu is not available in USER mode.
Hold down these two keys to go to the set up menu (from P 01 to P 07).
Press key “Patient Size” to make the selection. Once within the individual configurations, they can be scrolled
with keys “+” and “-” and selected by pressing key “Patient Size” again. Key “tooth” quits set up without saving
the setting.
The configurations are given in detail below:
P 01: Sets the standby time (from a minimum of 5 to a maximum of 30 minutes).
P 02: Assigns an identification tag to the X-ray unit’s base (from 1 to 5 or none).
P 03: Shows the list of software versions.
P 04: Remote code display.
P 05: Reserved.
P 06: Selects the operating mode (En60, En63, En65 and AUTO).
P 07: Sets the type of removable cone used.
Activating/deactivating the USER mode. Icon comes on to signal USER mode is activated.
5.1.Setting the operating mode
The X-ray unit features the following operating modes:
• En60: all the X-rays are taken at 60KV and 7mA.
• En63: all the X-rays are taken at 63KV and 6mA.
• En65: all the X-rays are taken at 65KV and 6mA.
• AUTO: the system automatically selects the best setting from amongst En60, En63 and En65 for each tooth-patient size combination.
NOTE: the current setting is displayed on the remote for approximately 1 second for each tooth-patient size selected before the relative exposure time is shown.
To set the operating mode, press the
and keys to go to the set up menu. Scroll the parameters up to parameter P06 and then press key.
Scroll the options to find the desired operating mode and then press
key. Press key to quit the set up menu.
5.2. Setting the type of movable collimator
NOTE: In order to obtain top performance of the X-ray unit, set the cone according to the type used.
To set the type of cone, press the
and keys to go to the set up menu. Scroll the parameters up to parameter P07 and then press the key . Scroll the options to find the type of cone used ( Round Ø55 mm ) and press the key . Press to quit the set up menu.
14
5.3. Restoring factory settings
To restore the factory settings (see paragraph 3.5) press keys and to go to the set up menu. Press keys and simultaneously. "rESS" will
briefly appear and the remote will be rebooted.
6. Error messages
NOTE:
In presence of strong wireless communication traffic, the connection between the remote and the main control may
break down.To restore the connection, run the “Restoring factory settings” procedure.
FAULT
CAUS E
S O L UTION
E01
X-RAY KEY RELEASED TOO EARLY
Hold down the key until the image has been captured.
E02
SHOOTING SEQUENCE NOT COMPLETED
Remote most likely lost the signal. Try to repeat
exposure. If the problem persists, contact technical
service.
E03
REMOTE INTERNAL TEST ERROR
Take out the batteries and then put them back in after
waiting a few seconds. If the problem persists, contact
technical service.
REMOTE AUTO DIAGNOSIS TEST FAILED
Contact technical service.
GENERAL REMOTE ERROR
Try to repeat exposure. If the problem persists, contact
technical service.
RF SIGNAL TOO LOW
Remote lost the signal. Try to repeat exposure. If the
problem persists, contact technical service.
REMOTE SERIAL NUMBER INCORRECT OR NOT
INITIALIZED
Contact technical service.
X-RAY UNIT INTERNAL ERROR
Contact technical service.
DSP ERROR (See sub codes on page 50)
Refer to page 50.
COLLIMATOR SELECTION NOT CONSISTENT
After turning the rectangular collimator on or off, wait a few
seconds to allow the icon on the handheld to be updated.
GENERIC TUBEHEAD FAULT
Contact technical service.
DSP ERROR (See sub codes on page 50)
Refer to page 50.
DEVICE OVERHEATED
HEAD RELEASED
Wait approximately 15 minutes for automatic system reset.
E04
E05
E08
E06
E07
E09
E10
E12
E13
E16
E11
E14
E15
E17
E18
E19
E30
SUPPLY VOLTAGE TOO HIGH/LOW
Check the supply system.
If the problem persists, contact technical support.
TRACKING ERROR (See sub codes on page 50)
Refer to page 50.
E31
E32
REMOTE CONTROL ERROR
Reduce the distance between the remote
control and X-ray head and then repeat the
X-ray. Follow the information given on how
to properly use the remote’s antenna.
E33
NO POWER SUPPLIED TO X-RAY TUBEHEAD
X-ray Tubehead or arm cord may be faulty. Contact
technical support service.
With regards to other error codes, contact the technical support department.
15
7.Routine maintenance
ATTENTION!
Any technical maintenance work required must be carried out by qualified personnel or by a specialized technician authorized by the manufacturer.
It is the user’s responsibility to check that routine maintenance is carried out by an authorized technician at least once every 2 years. The maintenance
methods are specified in the Technical Service Manual in possession of an authorized technician.
8. Cleaning and disinfection
The X-ray unit may be a source of infection passed from one patient to another if it is not cleaned properly. For this reason it should be disinfected on the
outside after each use.
If digital X-ray sensors are used, make sure they are always used with disposable hygienic sheaths. When disinfecting the X-ray unit use soft disposable paper
towels and avoid using corrosive substances or immersing the unit in liquids. Do not use sponges or any materials that can be reused.
Wipe down the unit with paper towels dampened with warm water. Alternatively, Lysol or Clorox wipes will work well.
•
•
•
•
•
Compatibility tests between plastics and the following products have been carried out with no negative consequences:
Incidin Spezial (Henkel Ecolab).
Omnizid (Omnident)
Plastisept ( ALPRO ) (not tuberculocide as not an alcohol-based disinfectant)
RelyOn Virkosept ( DuPont).
Green & Clean SK ( Metasys ) (not tuberculocide since it is not an alcohol-based disinfectant)
ATTENTION!
Do not use products containing isopropyl alcohol (2-propanol, iso-propanol).
Do not use products that contain sodium hypochlorite (bleach).
Do not use cleaners that contain phenol.
Do not spray anything directly on the surfaces.
Never combine products with each other or with liquids other than the products listed above.
All products must be used as directed by the manufacturer.
ATTENTION!
Shut off the unit prior to cleaning and disinfecting the external parts.
All material used to clean and disinfect should be thrown away.
16
9. Dismantling the equipment when no longer used
As set out in Directives 2002/95/ EC, 2002/96/ EC and 2003/108/ EC, on the restrictions of the use of certain hazardous substances in electrical and electronic
equipment along with collection, treatment, recycling and disposal of waste, electrical and electronic equipment, the latter must be treated as municipal
waste, therefore sorted and collected separately. When new equipment of equivalent type is purchased, the waste equipment should be returned to the
distributor on a one-to-one basis for disposal.
As far as reuse, recycling and other forms of waste recovery mentioned above are concerned, the manufacturer is responsible for the actions specified by
individual local laws. Efficient collection of sorted waste separately to recycle and treat waste electrical and electronic equipment aids in preventing negative
environmental impacts while protecting human health. In addition, it facilitates recycling of the materials used to construct the equipment.
The crossed out garbage bin(s) placed on the identification nameplates of the equipment indicates that the waste equipment must be collected separately
from other waste.
ATTENTION!
Illegal waste disposal may involve fines defined by local laws.
10.Technical specifications
SPECIFICATIONS
•
•
•
•
•
•
•
•
•
•
•
•
•
•
•
•
•
•
•
•
•
Rated voltage: 230Vac/115Vac (according to the model).
Max. mains voltage fluctuation: ±10%.
Nominal current: 6A for the 230Vac version; 10A for the 115Vac version.
Frequency: 50/60Hz.
Maximum absorbed power: 1,4KVA.
Apparent line resistance:: 0,5Ω(230Vac), 0,2Ω(115Vac).
Fuses: 6.3A T for the 230Vac version; 10A T for the 115Vac version
Generator: constant potential type.
High nominal voltage: 60 / 63 / 65KV.
Nominal current: 6 / 7mA.
Power requirements at 0.1 sec: 420W (60KV 7mA), 378W (63KV 6mA), 390W (65KV 6mA).
Current reference time: 0.7 mAs (7mA – 0.1s) / 0.6 mAs (6mA – 0.1s).
Focal spot : 0.7mm
Total filtration: 2.5mm Al @ 65KV.
Half-value layer (HVL): >2mm Al @ 65KV.
Leaked radiation: <0.25mGy / h at 3 feet from focal spot.
Reproducability: 0.05.
Electrical classification: Class I - Type B, intermittent service.
Set exposure time: from 0.010 to 1.000 seconds.
Accuracy of times indicated: ±10%.
mGy display precision: ±30%.
WEIGHTS
• Weight of the unit with packaging: 77 lbs max.
• Weight of the hand-held remote: approximately 9 oz.
17
X-RAY TUBE:
•
•
•
•
•
•
X-ray tube: TOSHIBA D-0711.
Focal spot: 0.7mm in accordance with IEC 336 / 1993.
Tolerance of focal spot position on reference axis : ± 2%.
Nominal high voltage and maximum current: (65KV, 7mA) ± 10%.
Anode construction material: Tungsten (W).
Anode inclination: 16.0°
• Thermal load on anode: 7.0 KJ (10 KHU).
• Maximum continuous heat dissipation: 210 W.
• Work cycle: 1:60 (1 second exposure - 60 second pause).
CONE TECHNICAL SPECIFICATIONS:
• With round cone: SSD=30cm (12”), X-ray beam less than or equal to Ø55mm,
• Without round cone: SSD=20cm (8”), X-ray beam less than or equal to Ø60mm.
REFERENCE AXIS
AA––REFERENCE
AXIS
FOCAL SPOT IDENTIFICATION
BB– –FOCAL
SPOT IDENTIFICATION
REMOTE BATTERIES:
• Type 2 x AA Alkaline 1.5 V
TECHNICAL MEASUREMENT FACTORS:
The high voltage value is measured with a non-invasive instrument.
The anode current is controlled inside with measurement resistors and circuits to obtain very precise measurements. Operation of the circuits is checked at
the time of testing. Once assembled, the anode current can no longer be directly measured.
The exposure time should be evaluated by measuring the time that elapses from the moment in which high voltage exceeds 75% of the nominal value to the
moment in which it drops below this value. Considering the high gradient of the rising and trailing edges of the anode voltage and squaring due to inherent
filtration, use of a threshold ranging from 25% to 75% may be considered non-influential.
18
11.Dimensions
SIDE VIEW
All dimensions are expressed in millimeters (inches).
60
(2.4)
1340
(52.8)
200
(7 . 9 )
95
(3 . 7 )
400/600/900
(15.7/23.6/35.4)
15
0°
0°
880
(34.6)
11 2 5
(44.3)
11 4 5
(45.1)
15
525
(20.7)
265
(10.4)
8 90 / 1090 / 13 90
400
( 35 .0 / 4 2.9 / 5 4.7)
( 1 5 .7 )
1 490 / 169 0 / 1 9 9 0
( 58 . 7 / 6 6 .5 / 7 8 .3 )
13 1 0
(51.6)
735
( 2 8 .9 )
115
(4.5)
265
( 1 0 .4 )
2 00
(7.9)
95
(3.7)
SIDE VIEW
17 2 0
( 67. 7 )
6 1 5 / 815 / 111 5
(2 4 . 2 / 3 2 . 1 / 43 .9 )
8 9 0 / 10 9 0 / 1 3 90
( 3 5 .0 / 42.9 / 5 4 .7)
8 60
(33.9)
880
( 34 . 6)
1145
(45.1)
21 8 5
(86.0)
400
( 1 5 .7 )
19
TOP VIEW
450°
0°
1490 / 1690 / 1990
( 5 8. 7 / 6 6 .5 / 7 8 .3 )
2020 / 2220 / 2520
(7 9. 5 / 87 . 4 / 9 9. 2 )
20
5°
16
26
15°
400/600/900
(15.7/23.6/35.4)
12.Identification nameplates
WARNING!
Never remove the identification nameplates provided on
the tube head, central control unit or collimator cone.
Central control unit
The nameplate is found beside the main switch.
Details shown on the nameplate:
• Name of the manufacturer
• Name of the equipment
• Rated voltage
• Type of current
• Rated frequency
• Maximum absorbed power
• Serial number
• Manufacturing date
Tubehead
The nameplate is found on the lower cover at the back of the tubehead.
Details shown on the nameplate:
• Name of the manufacturer
• Name of the equipment
•Specifications
• Model and serial number of X-ray tube
• Equipment serial number
• Manufacturing date
Collimator/Cone
The nameplate for the collimator/cone is found inside it.
Details shown on the nameplate:
• Name of the manufacturer
• Type of cone
• Serial number
• Manufacturing date
Remote
The nameplate for the remote is found in the battery compartment.
Details shown on the nameplate:
• Name of the manufacturer
• Name of the equipment
• Rated voltage
• Number and type of batteries
• Serial number
21
22
SIDE VIEW
60
(2.4)
1340
(52.8)
200
(7 . 9 )
95
(3 . 7 )
400/600/900
(15.7/23.6/35.4)
15
0°
0°
880
(34.6)
11 2 5
(44.3)
11 4 5
(45.1)
15
525
(20.7)
265
(10.4)
8 90 / 1090 / 13 90
400
( 35 .0 / 4 2.9 / 5 4 .7)
( 1 5 .7 )
1 490 / 169 0 / 1 9 9 0
( 58 . 7 / 6 6 .5 / 7 8 .3 )
1310
(51.6)
735
( 2 8 .9 )
115
(4.5)
265
( 1 0 .4 )
200
(7.9)
95
(3.7)
SIDE VIEW
1 72 0
( 67. 7 )
6 1 5 / 815 / 111 5
( 2 4 . 2 / 3 2 . 1 / 4 3 .9 )
8 9 0 / 10 9 0 / 1 3 90
(3 5 .0 / 42 .9 / 5 4 .7)
8 60
(33.9)
88 0
( 3 4. 6)
114 5
(45.1)
2 18 5
(86.0)
400
( 1 5 .7 )
23
TOP VIEW
450°
0°
5°
16
26
15°
1490 / 1690 / 1990
( 5 8. 7 / 6 6 .5 / 7 8 .3 )
2020 / 2220 / 2520
(7 9. 5 / 87 . 4 / 9 9. 2 )
24
400/600/900
(15.7/23.6/35.4)
1. General safety precautions
The manufacturer warranties the safety, reliability and performance of the equipment under the following conditions:
- Installation and technical service is performed by authorized technicians using Cela Sc - Cela Dental Group original
parts.
- The electrical system in the dental area corresponds to standards I.E.C. 60364-7-710;V2 (Standards regarding electrical systems in a medical
environment) or equivalent standards currently in force in the country where the equipment is installed.
- The place where the X-ray unit is installed must comply with official directives regulating radiation in the country where the equipment is used.
- The equipment is operated as directed in the Operations Manual..
This device complies with part 15 of the FCC Rules. Operation is subject to the following two conditions: (1) This device may not cause harmful interference,
and (2) this device must accept any interference received, including interference that may cause undesired operation.
This equipment has been tested and found to comply with the limits for a Class B digital device, pursuant to part 15 of the FCC rules. These limits are
designed to provide reasonable protection against harmful interference in a residential installation. This equipment generates, uses and can radiate radio
frequency energy and, if not installed and used in accordance with the instructions, may cause harmful interference to radio communications
Changes or modifications not expressly approved by the party responsible for compliance could void the user’s authority to operate the equipment.
2.Packaging
2.1. Dimensions and contents
• Dimensions: 40.5x21x13.8 inches
• Weight: 71 Lbs
•Contents:
-Documentation and warranty
-Template for installation
-Parts kit
- Single-stud Interface Plate (if requested)
- Central Control Unit Assembly with aluminum wall-mount plate
and plastic cover
-Tubehead Assembly
-Extension Arm
-Cone/Collimator
-Folding Arm
- Remote (with Holster)
2.2. Handling and storage
Markings regarding storage, handling and unpacking are provided
on the outside of the cardboard packaging.
These markings must be strictly observed.
1) The package must be kept upright in the direction indicated
by the arrows at all times during handling and storage
2) Fragile: Avoid dropping the package
3) Keep the package dry
4) Do not use hooks
5) Ambient conditions for storage
1)
2)
3)
4)
a) Temperature from 5° to 122° F
b) Relative humidity from 10 to 90%
c) Atmospheric pressure from 500 to 1060 hPa
5)
25
3. Pre-Installation
Refer to the drawings on pages 23 and 24 to help determine the ideal extension arm length as well as proper distances from the floor to the bottom of the central control unit (timer assembly).
3.1.Mechanical Specifications
If the wall is thin (hollow bricks or similar), use the optional Counter Plate (part no. 9660048) to be mounted on the wall or placed on the other side of the wall where the unit is to be installed. When using the Counter Plate, it is recommended to also use the optional Interface Plate
(part no. 70640115) to allow a method to directly attach the two to each other. (See section 4.2.3.)
For mounting the timer assembly in a vertical manner on a 4” X 4” wooden beam or post, use the optional Interface Plate (part no. 70640115) and attach directly to the aluminum plate on the timer (See section 4.2.1.)
Decide on a suitable method for attaching the plate according to the characteristics of the wall and its ability to withstand an extraction
force of 446 Lbs applied at each anchorage point.
If the wall is made of cement or solid bricks, use the wall plugs supplied.
Alternatively, we recommend using the Fischer chemical wall plugs which include:
• Braid type injection insert (item FiP 16x85)
• Threaded bar with bar and washer (item FiP 16m, 8x110)
• Chemical fixer (item FiP c 150)
3.2. Central Control Unit Power Supply
The supply line running to the central control unit (timer assembly) should be 3-conductor 14 AWG wire on a dedicated 120VAC line with a
20-amp circuit breaker which conforms to relevant electrical codes.
The color of the three conductors should be LINE (brown or black) NEUTRAL (blue or white) and GROUND (green/yellow).
An alternative to running the supply line from a junction box is to use a hospital-grade three-prong grounded plug in conjunction with a
three-conductor 16 AWG stranded wired and plugging into a standard 120VAC/20 Amp grounded and dedicated wall outlet.
3.3. Wiring Connection Between Central Control Unit and “In Use” Light
This connection enables an optional “In Use” light to be located outside the door to the dental suite.
Designated “LP” the “In Use” light should be connected to the Central Control Unit with (2) 20 to 22 AWG conductors (see paragraph 4.9.).
The “In Use” light power supply should conform to the same standards stated above for the Central Control Unit.
120VAC/20 amp
supply w/circuit
breaker
)) ) ) )
Central Control Unit
(Timer Assembly)
Remote Control
(handheld)
Optional “In Use” light
26
4. Installation
The X-ray unit must be installed by a qualified technician in compliance with the installation instructions given below with
regards to both the mechanical and electrical parts.
WARNING !
Verify that the voltage indicated on the central control unit’s nameplate corresponds to that for the electrical
system.
4.1. Positioning the yoke for the extension arm
• Place the locator pin in the opening provided (d) while orienting
the yoke in one of the three positions available as follows:
A – Preset configuration with central control unit mounted horizontally with
yoke placed to the right.
B - Central control unit mounted vertically with yoke placed at the top.
C - Central control unit mounted horizontally with yoke placed to the left.
• Secure the yoke to the central control unit plate using the
screws (f) and washers (e) provided.
4.2. Wall-mounted plate for supporting the x-ray unit
• Determine the position of the X-ray unit by using the INSTALLATION TEMPLATE (P/N 97042058).
• First check that the plate is at the correct height and perfectly horizontal and then mark out the four points where it is to be
fixed on the wall. Drill the holes and install the most suitable type of fastening system according to the characteristics of the
wall (see paragraph 3.1).
• Pass the supply cable through one of the holes in the wall-mount plate and fix this to the wall by partially tightening the
top and bottom screws.
16”
Center Line of Yoke
For Extension Arm
.56”
Wall Mounting Slot
2.8”
Electrical Supply
3.37”
6”
6.8”
3.37”
Main On/Off
Switch
.56”
8.6”
8.6”
17.1”
27
4.2.1. Vertical single stud installation
•
•
•
•
Insert the 4 TPSEI M8x35 screws provided in the interface plate.
Run the power supply wires through one of the holes in the interface plate.
Attach the interface plate to the wooden post with no. 3 dia. 3/8’’ x L 3’’ wood screws (not supplied).
Attach the X-ray unit’s wall-mounting plate to the interface plate by tightening the washers and nuts provided on the TPSEI M8x35 screws.
4.2.2. Horizontal double stud installation
• The interface plate is not needed for 1.5’’ wooden studs with 16’’ spacing. Simply attach the RX-DC plate with no. 4 dia. 3/8’’ x L 3’’ wood screws (not supplied).
4.2.3. Vertical single or double stud (hollow steel) installation with iron stud(s)
• Attach the wall-mount counter-plate to the iron studs (not completely seen) with the threaded bars and screws provided.
• Attach the interface plate to the counter-plate. Secure the X-ray unit’s wall-mounting plate to the latter.
Interface
Piastra di
plate
interfaccia
Piastra
RX
murale RX
wall-mounting
plate
Contropiastr
Counter-plate
a
murale
28
4.3.Extension arm
Warning!
Do not lubricate the pin of the extension arm: the wall-mounted plate is provided with self-lubricating bushings.
Figure B
• Insert the pin (b) of the extension arm (c) in the hole provided in the wall-mounted plate.
• Take the clutch (a) from the kit, install it on the plate using the corresponding screws and adjust the friction to arm (c) as required.
Figure B
Figure C
• Use a spirit level to check that the arm (c) is slightly tilted upwards (approx. 1°). If necessary, add a shim to the plate near the bottom wall bolts (d).
• Fully secure the plate.
Figure C
Figure D
• If the X-ray unit is installed in one of the corners of the dental room, make sure the extension arm cannot rotate too
far (90°) by installing the two end-stop pins (included in the kit) on the X-ray unit itself.
• Find the right position for installing the pair of pins (a, b) and insert them in the holes provided using a hammer.
Figure D
29
4.3.1. Bottom mount installation extension arm (vertical)
Fig. A
Fig. B
Check the direction of the pin support: it should be set as shown in Figure (A) for this type of installation.
Insert the extension arm pin in the hole in the wall-mounting plate from below. Place the ring nut supplied on top of
the pin and tighten the ring nut with the spanner wrench provided, as shown in the Figure (B).
Take the clutch (a) from the kit, install it on the plate using the corresponding screws and adjust the friction to arm (c) as required.
30
4.4. Installing the folding arm
Warning!
The arm is supplied bound together with a velcro strap.
This strap should not be removed until the two free ends of the arm have been connected to their corresponding attachments:
The extension arm (already secured to the wall) and X-ray tube head.
If the strap is loosened prior to securing both ends in place, releasing it suddenly could hyper-extend the arm, resulting in damage.
Additionally, this could result in serious injury to the installer/operator.
Figure E
• Take the washer (f) from the kit and position it at point (i) corresponding to the extension arm (c).
• Pass the cable (m) of the folding arm (e) through the extension arm (c) so that it comes out of the hole below.
• Install the folding arm (e) on the extension arm (c)
NOTE: The extension arm’s bushing is self-lubricating. Do not lubricate the pin of the folding arm.
• Pass the cable (m) through the inside of the extension arm (c) so that it comes out of the wall-mounted plate.
• Install the plugs (g) in the corresponding holes in the extension arm (c).
31
Figure F
• Take the rotation stop screw (o) from the X-ray unit kit and tighten it at point H (tighten it fully and then loosen by ½ turn).
NOTE: Turn the folding arm to check that the adjustment has been made properly.
• Take the clutch assembly (friction element, screw and 4 curved washers) from the X-ray unit kit and install at point L.
NOTE: Insert the curved washers (j) and the friction element (k) as indicated in Figure F.
NOTE: The friction element (k) can be placed in the correct position by inserting a screwdriver in the hole provided for the screw (n).
Figure F
Figure G
• Adjust the clutch which has just been installed.
NOTE: Turn the folding arm during the adjustment to check that the clutch is providing the correct amount of friction.
• Install the end caps (p) on the extension arm (c).
• Attach the adhesive bumper (q) (supplied in the kit) in the center of the end cap at the point indicated in the diagram.
Figure G
Figure H
• There are 2 end-stop screws in the wall-mounted plate yoke to which Loctite has been applied to provide friction.
• These have been adjusted according to the length of the extension arm supplied.
NOTE: Adjust these screws (a) as necessary in order to limit movement of the extension arm more or less.
Figure H
32
4.5. Installing the tubehead
• Take the tubehead out of its packaging.
• Lubricate the bushing of the folding arm and the tubehead pivot pin with bearing grease.
Figure I
33
• Take the washer (a) from the kit supplied and place it in pin (b) with the protruding tooth (c) pointed towards the front of the head. (see Fig.K)
Figure K
Position the protruding tooth (c) of the washer (a) in zone 1 of the pin (b). (see Fig. L)
Warning! Do not position the protruding tooth (c) of the washer (a) in zone 2 of the pin (b).
Figure L
• Insert the power supply cable of the folding arm into the tube head pin until it comes out of the hole below (see point c – Fig. M)
• Raise the cover (a)
• Insert the pin in the sleeve making sure the corresponding slots are lined up and then install the retaining clip (d) supplied
• Lower the cover (a) so that the hole (f) in the cover (a) is aligned with the hole in the plastic ring (e)
• Fit the M4x6 screw (g) into the hole (f) and tighten it to 1 mm below the outer surface of the cover (a)
Figure M
34
Figure M
• Fit the connector of the folding arm cable to that of the tube head cable
• Place them inside the hole provided (c)
• Fit the plug (e) supplied into the hole then tighten the screw that is already in place. (see Fig. N)
Figure N
35
4.6. Installing the collimator
• Take the collimator out of the packaging:
Figure O
• Insert into the tube head all the way until it clicks.
36
4.7. Balancing the folding arm
This step is optional and may not be necessary with each installation/assembly. If the folding arm does not stay in a stable position, adjust the spring
tension by using an 8mm allen wrench or “T” bar which should be at least 20cm long and adjust in the following manner:
The folding arm segment that connects to the horizontal extension arm will be referred to as the vertical segment (a). The segment connected to the tubehead will be referred to as the horizontal segment (b).
If the vertical segment (a) pulls back when angled forward, it is too tight. If it continues to drift in the same direction when angled forward, it is too loose.
Adjust the vertical segment at position A.
If the horizontal segment (b) pulls up when angled down, it is too tight. If it continues to drift down when angled down, it is too loose.
Adjust the horizontal segment at position B.
Turning the 8mm allen wrench clockwise will tighten the spring tension. Turning the wrench counter-clockwise will loosen the spring tension.
Figure P
4.8. Adjusting the folding arm end-stops
If the end-stops of the folding arm need to be adjusted, adjust screws (i - l - m - n) shown in the diagram.
NOTE: To adjust the screw (n) on the articulated joint of the extension side place the arm (a) in a horizontal position.
Figure Q
37
4.9. Wall-mounted plate wiring connections
• Connect the power cable (LINE) to terminal K2, observing the following positions:
L - SUPPLY (brown wire)
- GROUND (yellow/green wire)
N - NEUTRAL (blue wire)
• Connect the generator’s power cable to the respective connectors, observing the following positions:
K6 - brown wire and blue wire.
K5 - white wire – black wire – red wire – green wire – purple wire.
Eyelet connectors - Both found near the card (see Figure).
NOTE: Place the excess cable under the card.
• Connect the 2 control wires (22AWG) for the “in-use” indicator light (LP) to connector K3.
Figure R
K3
K5
K2
38
4.10.Completion of wall-mounting plate and holster for remote
Figure S and Figure T
• Take the cover (a) and place it over the wall-mounting plate fully tightening the phillips screws (b) provided and pre-installed on the plate.
• Place the cover (c) in the area shown in the figure. The cover (d) will automatically snap into place when it is closed.
• Place the supplied decal into the indicated area (e) on the cover, oriented according to the position in which the wall mounting plate is installed.
c
Figure S
b
a
d
e
• To install the remote holster (f), refer to the INSTALLATION TEMPLATES.
Figure T
f
39
b
5. Setup and Technician Setup menus
The remote allows a number of work parameters to be viewed and edited by pressing a combination of keys present on the control panel.
Key serves to confirm/save the function, key
is used to undo/quit the menu while keys and edit the values of the
selected parameters on all the setup menus. Proceed as directed below to access the menus:
Combination of keysDescription
+
+
Sensitivity Levels
Press these two keys to adjust the sensitivity levels (determined based on the table given below and type of sensor/receptor
used). Set the current sensitivity level to a value within the allowable range (on a scale from 1 to 25), with keys “+” and “-”. To
confirm and save the desired level, press the patient size button.
Setting the rated current (7mA or 3.5mA)
Press these two keys at the same time to set the rated current used to take the X-rays.
Two values can be set: 7mA indicated by “NORM” and 3.5mA indicated by “SENS”. We highly recommend always using
“NORM” unless otherwise indicated by technical service personnel.
The presently rated current of the X-ray unit will be displayed when the remote is turned on.
+
Setup Menu
Hold down these two keys to go to the set up menu (from P 01 to P 07).
Press key “Build” to make the selection. Once within the individual conigurations, they can be scrolled with keys “+” and “-”
and selected by pressing key “Build” again. Key “tooth” quits set up without saving the setting.
The conigurations are given in detail below:
P 01: Sets the stand by time (from a minimum of 5 to a maximum of 30 minutes)
P 02: Assigns an identiication tag to the X-ray unit’s base (from 1 to 5 or none)
P 03: Shows the list of software versions
P 04: Remote code display
P 05: Reserved
P 06: Selects the operating mode (En60, En63, En65 and AUTO)
P 07: Sets the type of removable cone used
+
Technician Setup Menu
Hold down these two keys when in position P07 on the setup menu to go to the technician setup menu (from P 10 to P 18).
As for the previous menu, the selection is made by pressing key “patient size”. Once the single configurations have been
accessed, scroll through them with keys “+” and “-” and make the selection by pressing “patient size” again. The items that
can be set are given below:
P 10: Supply voltage setting
a: A shot can be taken to improve the reading
b: The mains voltage is shown in real time on the screen and refreshed every 5 seconds. If a shot is taken the
reading is refreshed every second during the cool down period
c: As soon as key + or – is pressed the display is blocked until the change is confirmed
P 11: Displays the voltage or charge level of the batteries. The reading may range from 1.5 to 3Vdc
P 12: StepUp value. This value should be 3.3 + o – 0.2Vdc. If a value outside this range is displayed, there is a fault in the remote
P 13: Shows the type of batteries used for the remote:
a: “ALCA” default setting, indicates that disposable alkaline batteries are being used. b: “NIHM” indicates rechargeable batteries are being used
P 14: Indicates DEMO status of the remote
a: “PALM” default setting, standard operating mode
b: “DEMO” when the remote is in this mode it does not communicate with the head but “READY” is shown on
the display even if the control unit is shut off
P 15: Indicates DEMO status of the entire system
a: “SHOT” default setting, standard operating mode
b: “DEMO” a pad lock shaped icon appears on the display; all the functions are operative as if in standard mode, the remote communicates regularly with the head but X rays are not emitted when the shoot button is pressed
P 16: “STANDBY” function of the head is shut off
P 17: When this menu is opened, the remote starts a special procedure to deactivate the DSP default settings. A number of shots are required at a set time of 0.01 sec to recalibrate the card. Once the menu has been opened, 20 will appear on the display. Press key “Patient” again to completely cancel the previous setting. (See par. 14.5.)
P 18: This menu starts the procedure so that the remote can work with the head
+
Activating/deactivating the “USER” mode Icon comes on to signal USER mode is activated.
40
5.1. Restoring factory settings
To restore the factory settings press keys and to go to the set up menu. Press keys and
simultaneously. “rESS” will briely appear and the remote will be rebooted.
5.2. Calibrating the X-ray head
This operation requires the execution of 20 shots, at a pre-set time of 0.01 s, during which time X-ray emission occurs. It is therefore necessary to pay close attention to radiation safety protocols.
Turn on the remote and go to menu P17. To access this menu press the keys and . Scroll the menu using the buttonuntil you see P07.
Press and to enter the technical menu and press the key repeatedly until P17 appears. Press the button2 times. Enter the
menu and confirm the calibration. Number 20 appears on the remote. Make the 20 shots until the counter reaches 0. Wait about 15s and press the
buttonto exit the menu. If E03 should appear on the remote, wait 10 seconds and press the button again being careful not to press the
firing button. In case of error, you must repeat the procedure from the beginning.
41
1
2
3
4
1
2
L
N
1
2
3
K1
LAMP
LAMP
P2
P1
1 2 3 4 5 6
1 2 3
1 2
K5
K6
K3
F2
L_2
L_1
N_1
N_2
RT+
GND
RT-AUX
6. Central control unit card P/N 97660515
NOTE: An interlock switch
may be attached by cutting
F1
the brown wire that attaches
to terminal K6 about two
inches away. Splice in a wire
to the supply end of the brown
wire and route to one terminal
of the interlock switch. Return
a wire from the other switch terminal
to the piece of brown wire still
attached to K6.
SCHEDA CENTRALINA RX DC
UNIT CONTROL CARD
97660515
DL1=V_LINE
DL2=V_BUS
DL3=BUS OK
DL5=READY
DL6=ENABLE DL7=V_CTRL
DL4=V_DRVR
J1
DL8=HV_ON
K2
Diagnostic Led indicators
LEDColorStatusExplanation
DL1
V_LINE Red On Indicates 230Volt input voltage if 110Volt the led indicator is illuminated but not as bright.
DL2
V_BUSRedOnIndicates the input voltage to the capacitors.
DL3
BUS_OKGreenOnIndicates the supply voltage is correct.
DL4
V_DRVRGreenOnIndicates the power control part fed 12Volt.
DL5
READY Yellow On If the head is connected it indicates READY status, relay RL1 is closed, the indicator light’s signal is activated.
DL6
ENABLEYellowOffIt lights up if x-rays are emitted.
DL7
V_CTRL Green On Indicates 15Volt output voltage to supply the card inside the head.
DL8
HV_ONNot used.
Fuses
F16.3AMain fuse If blown, all LED indicators will be off.
F2 1.6A Fuse for capacitors If blown, only DL1 will be illuminated. All others will be off.
Dip-switch
If the power supply is 230Volt, all the dip switches must be in the OFF position. If the supply voltage is 110V, dip switch No. 1 must be set to ON.
(if the board software version is 1.2). If the software version is 1.1, only dip-switch No. 4 must be positioned at ON.
42
EARTH
RT+
GND
V+15
AUX
RT--
7.Basic head control card P/N 97660514
1 2 3 4 5 6
K2
KF2
KF1
BASICSCHEDA
HEADTESTATA
CONTROL
RX DCCARD
K1
1
2
3
4
K4
1
2
3
4
5
6
7
97660514
DL1=DSP
DL2=VDD
DL6=CONE DL7=HNDL
DL3=CPU
DL4=ERR
DL8=PWM DL9=ACT
FL_OUT
GND_FIL
VFB
FB
V+15
GND
CAP_SDA
CAP_CLK
CONE_SW
HAND_SW1
HAND_SW2
DL5=NTWK
DL10=FIL
K3
1
2
3
4
5
GND
V+15
EN_ACT
EN_S/U
HV_FB
K5
1 2
Gruppo LED CPU
DL7
DL1
DL6
DL1=DSP
DL5
DL2
43
DL4
DL9
DL3
DL8
Diagnostic LED Indicators
DSP LED
LEDColorStatusDescription
DL1 Yellow Flashing If the diagnostic LED indicator flashes once a second everything is OK. If it flashes once every half-second,
DSPcount the times it flashes and check the error table.
When first turned on, the DSP executes internal diagnostics and then displays the FW version using two flashing sequences separated by pauses. The first sequence indicates version code xx while the second revision code yy. The LED flashes regularly, immediately after showing the version.
The version was not displayed in FW versions 1.2 or earlier.
CPU LED UNIT
LEDColorStatusDescription
DL2GreenOnIndicates 3.3Volt input voltage.
VDD
DL3 Yellow Flashing If the diagnostic LED indicator flashes once a second everything is OK. If steady, replace the card.
CPU
DL4RedOffIlluminates to indicate an error.
ERR
DL5GreenOnIndicates the radio frequency communication network has been created.
NTWK
DL6Not used.
CONE
DL7YellowOffIlluminates if one of the two keys is pressed.
HNDL
DL8 Yellow On Indicates the indicator light is illuminated. It works simultaneously with DL5 for card 97660515.
PWM
DL10YellowOffIf illuminated it indicates voltage present at the filament, (preheating).
FIL
When turned on, the CPU executes internal diagnostics and then displays the FW version using two flashing sequences separated by pauses. The first
sequence indicates version code xx while the second indicates revision code yy. The LED flashes regularly immediately after showing the version.
Red LED ERR goes out when the version is about to be displayed.
If the network forming procedure is not successfully completed, LED DL5 – NTWK stays off.
In the event of a DSP error, LED DL1 will flash quickly.
• DL1= Once every 0.5 sec means one needs to count the number of times it flashes between pauses and read the error code in the error table.
• DL1= Very fast means one should check the error code given on the remote.
If the DSP is faulty, the DSP error subcode can be viewed on the remote by pressing keys “tooth” and “+” at the
same time, it assumes format xxxx (e.g. 8033).
44
The DSP can also signal an alarm condition. This condition is signaled when LED DL1=DSP flashes faster than usual separated by pauses. The number of
times it flashes between pauses indicates the alarm code.
In the event of a CPU fault, the status of the CPU LEDs is as follows:
• DL3=cPU lashing yellow
• DL4=eRR illuminated red
Both conditions may be present at the same time. This indicates that two errors have been identiied (from both the DSP and CPU) or the DSP caused a fault
which, in turn, caused the CPU error. In this case, the error code is shown on the handheld in format Exx.
8. X-ray Tubehead
Replacing the basic head control card
Pull out the collimator and panel stop ring. Take off the screw cover caps and loosen the screws that secure the lower cover. Detach all the connectors and
work on the two support pins to pull out the card. Put the new card back in the correct position, being careful to run the cables behind the card support pins
as shown in the figure. Make sure they do not pass in front of the X-ray collimator.
Before closing the covers, turn on the X-ray unit and make sure the diagnostic LED indicator is as shown in the table. When the head’s basic control card is
replaced, the remote should be re-associated to the head by following the instructions given in the relevant paragraph.
IMPORTANT: The head has to be calibrated with function P17 on the technical menu when this card is replaced.
This operation requires the execution of 20 shots, at a pre-set time of 0.01 s, during which time X-ray emission occurs. It is therefore necessary to pay close attention to radiation safety protocols.
Replacement
Follow the instructions given above to remove the basic head control card P/N 97660514. Detach all the cables connected to the head that may get in the
way. Loosen screw A that secures the head, move it to the rear and lift it as shown in the figure.
NOTE: To reinstall the head, perform the procedure in reverse order, being careful to place the cables properly.
A
45
8.1. Pairing the remote with the X-ray tubehead
If the remote controller or the head control card P/N 97660514 needs to be replaced it is only necessary to associate the remote with the head. To do this, you first need to set the head in combination mode and then send a recognition signal from the remote control.
1)Setting the head in combination mode:
This procedure can only be activated within ten seconds of the radiographic unit being turned on.
Remove the collimator from the head, turn on the radiographic unit. You will hear a beep, then turn the collimator microswitch on and off at least seven times. The head will emit a beep that confirms the head has switched to combination mode.
If the procedure is unsuccessful, turn off the central control unit, wait a few seconds and start again.
2)Sending the recognition signal from the remote to the tubehead:
Turn on the remote and go to menu P18. This menu is accessed by simultaneously pressing and releasing the and keys.
Scroll the menu with the key until P07 appears. Press and together to access the technical menu and press the
key several times until P18 is displayed. Press key to open the menu and confirm association. E14 will appear on the remote control.
Press key to reset. If association has been successfully completed, the radio field icon should appear on the remote with the
word “READY”. If this is not the case, repeat the operation.
IMPORTANT: The head should be re-calibrated with function P17 from the technical menu after the pairing procedure. (See 5.2.)
This operation requires the execution of 20 shots, at a pre-set time of 0.01 s, during which time X-ray emission occurs. It is therefore
necessary to pay close attention to radiation safety protocols.
46
8.2. Check occupation of radio frequencies for the remote
The procedure described below enables the user to check the availability of radio frequencies on the channels of communication used by the remote control.
Open the battery compartment of the remote and remove the batteries. See Fig. 1
Fig. 1
Using a jewelers screwdriver, move switch 2 of the dip-switch shown in figure 2 in the direction indicated by the arrow.
Fig. 2
47
The remote should now be ready for radio frequency detection mode. Replace the batteries. When switched on, the display shows the channel to be
examined (C11). Pressing and chooses the channel (C11-C26). Pressing the key displays a percentage value representing the signal
quality on the selected channel. See Fig. 3
Fig. 3
If, on most channels, the values are higher than 80%, remote features are guaranteed. During normal use, the remote performs automatic scans of the
available channels and uses the frequencies available for communication.
Once the test on the radio frequencies has been completed, remove the batteries again while moving switch 2 of the dip-switch shown in Fig. 2 back to its
starting position.
48
8.3. Error codes given on the remote
When an error appears on the remote screen, it can be reset by pressing or to set the X-ray unit back to “READY”. If the error is still
displayed after pressing the two keys mentioned above, refer to the error code and solution given in the table below.
Remote Errors
N°Error Code DescriptionSolution
E 01 Exposure button released too early. Press and hold the button to take the X-ray again until the beep stops.
E 02 Max. shooting time 7s. Take the X-ray again. If the problem persists, go near the head and try again.
E 03 CPU internal error. Take out the batteries to reset the remote. Wait a few seconds, put the batteries back in and take the X-ray. If the problem persists, replace the remote.
E 04 Software internal error. Take out the batteries to reset the remote. Wait a few seconds, put the batteries back in and take the X-ray. If the problem persists, replace the remote.
E 05 ALU internal error. Take out the batteries to reset the remote. Wait a few seconds, put the batteries back in and take the X-ray. If the problem persists, replace the remote.
E 06 Status switching too long. Take the X-ray again. If the problem persists, go near the head and try again.
E 07 RF field too low ( 16 consecutive messages lost). Take the X-ray again. If the problem persists, go near the head and try again.
E 08 Incorrect firmware version. Update the firmware for the remote and head control card.
E 09Wrong remote serial number.Enter the correct remote serial number.
Head Control Card Errors P/N 97660514
N°Error Code DescriptionSolution
E 10 Exposure button released too early. Press and hold the button to take the X-ray again until the beep stops.
E 11Cone type error.Wait approximately 4-5 seconds before taking another X-ray after removing or
putting on the collimator cone. Hold down the button to take the X-ray again until the beep stops.
E 12 Hardware internal error. Reset the X-ray unit by shutting it off with the main switch. Wait a few seconds, turn the X-ray unit back on and take the X-ray again. If the problem persists, replace the basic head control card P/N 97660514
E 13 Emission time greater than 4.9s. Reset the X-ray unit by shutting it off with the main switch. Wait a few seconds, turn the X-ray unit back on and take the X-ray again. If the problem persists, replace the basic head control card P/N 97660514
E 14 Internal cycle error. Reset the X-ray unit by shutting it off with the main switch. Wait a few seconds, turn the X-ray unit back on and take the X-ray again. If the problem persists, replace the basic head control card P/N 97660514
49
Error codes given on the remote (Cont’d)
When an error appears on the remote screen it can be reset by pressing or to set the X-ray unit back to “READY”. If the error is still
displayed after pressing the two keys mentioned above, refer to the error code and solution given in the table below.
Head Control Card Errors P/N 97660514 (Cont’d)
N°Error Code DescriptionSolution
E 15DSP ErrorDSP error detected. Check the error subcode by pressing keys “tooth” and “+” at the same
E 16time.
0001Overvoltage HW.
0002Overcurrent HW.
0004Overvoltage SW. It may be caused by incorrect calibration or after an
extended period of inactivity. Perform the calibration procedure from menu P17.
0008Overcurrent SW. It may be caused by incorrect calibration or after an extended period of inactivity. Perform the calibration procedure from menu P17.
0040Anode voltage not zero. Replace the basic head control card P/N 97660514.
0080Anode voltage not zero. If the problem persists, replace the basic head control card P/N97660514.
0100Filament voltage not zero. If the problem persists, replace the basic head control card P/N97660514.
0200Tube filament faulty or cable (code 97520672) between monoblock card
(P/N 97660511) and head card (P/N 97660514) not connected or interrupted.
1000Parameter incorrect. If the problem persists, try resetting the calibration values from menu P17 and then calibrate again.
E 18 Mains voltage over maximum limit (more than 15%) Make sure the supply voltage corresponds to the rated one (menu P10).
E 19 Mains voltage below minimum limit (more than 15%) Make sure the supply voltage corresponds to the rated one (menu P10).
E 99 General error Shut off the X-ray unit with the switch to reset it. Turn the X-ray unit on after a few seconds and take a X-ray again. If the problem persists, contact technical support.
Central Control Unit Card Errors P/N 97660515
N°Error Code DescriptionSolution
E 30Tracking ErrorMake sure led DL5 on control unit card code 977660515 is yellow and illuminated. If it
is not, replace the card. Check the error subcode by pressing keys “tooth” and “+” at the same time.
0010kV incorrectly set.
0020mA incorrectly set.
0030kV and mA incorrectly set. If the error occurs systematically, calibrate the X-ray unit
with function P17 on the technician’s menu, cancelling the existing one.
If the problem persists, contact technical support.
E 31 No RF trigger pulse 0400 Take the X-ray again. If the problem persists, go near the head and try again.
E 32 DSP disabled by CPU 2100 Shut off the X-ray unit with the switch to reset it. Turn the X-ray unit on after a few seconds and take another X-ray. If the problem persists, contact technical support.
E 33 Head power cable disconnected or pinched 8030 Make sure the power cable for the X-ray unit is connected to the control unit card P/N 97660515. Measure, with a multi-meter, the resistance between connector
thick cables of power (typically brown and white or grey and purple). Under normal conditions, the resistance should be less than 1 ohm. If not, it should be
verified and checked for continuity of the cables between the Central Control Unit Card and X-ray unit. If the problem persists, replace card P/N 97660515.
50
51
LINE
FILTER
CONTROL UNIT CARD
DIS E G NO R IS E R V AT O A NOR MA DI LE G G E V IE T AT A LA R IP R ODUZIONE
TOTAL ELECTRICAL WIRING FOR IMAGE VET DC
BASIC HEAD CONTROL CARD
SUPP. HEAD
THERMAL
E LA DIV ULG AZIONE
CAPACITORS CARD
ROCKER
STEPUP CARD
SENSORS
CONE SENSOR CARD
MONOBLOCK CARD
ImageWorks Veterinary
14 Inverness Drive East
[email protected]
52
Suite C130
Englewood, CO
www.imageworksveterinary.com
80112
ImageVet DC
Mobile System Assembly Instructions
Rev. 1.1 May 2015
53
1. Assemble Mobile Stand. Start by locating the hardware kit from within the mobile stand box.
Note that the casters come pre-installed on the legs.
2. Insert four(4) 8mm x 1.5” allen cap
head bolts in 2 places for each leg,
thus assembling the legs to the base.
Be sure to include one split lockwasher under each of the cap heads.
An 8mm allen wrench is provided
in the accessory and parts kit.
Fig. A
3. Assemble the column to the base,
using the locator pin (inserted into
the column) to ensure correct
allignment with the base. Insert
one(1) 8mm x 2.25” allen cap
head bolt including a flat washer and
split lockwasher under the cap head,
using the 8mm allen wrench provided. Tighten the bolt.
Fig. B
Timer Plate Bolt
Hex head - 1/2”
head - (4)
Adapter Plate Bolt Leg Bolt 8mm x 1.5” Column Bolt 8mm x 2.25”
6mm Allen cap
Allen cap head - (4) Allen cap head - (1)
head - (2)
54
4. Using the two 6mm Allen cap head bolts provided, mount the back plate onto the mobile stand upright,
making sure the side with the sticker is facing you.
New style
upright
6mm Allen cap
head bolt
Fig. C
Fig. D
5. Guide the folding arm wires down through the top of the adapter collar and out the bottom.
Position the black anodized aluminum adapter collar up against the base of the folding arm.
Make sure that the two(2) 1/4 - 20 allen set screws are completely recessed into the inner diameter of the adapter collar to
ensure that they don’t interfere with pushing the collar up completely against the bottom of the folding arm.
Gently tighten the two allen set screws of the adapter collar against the folding arm using a 1/8” hex wrench.
DO NOT OVERTIGHTEN.
6. Guide the folding arm wires through the two stainless steel washers and slide them up to the folding arm pin and the base
of the adapter collar that interfaces the folding arm with the mobile stand upright.
Adapter Collar
Stainless Steel Washers (2)
Fig. E
55
Install adapter
collar
Install SS
washers
Fig. F
Fig. G
7. Install folding arm into mobile stand upright.
Move the mobile stand near a table or chair that
the folding arm can be placed upon. Then feed the folding arm wires down through the main hole in the top of the upright and gently pull the wires out
of the same hole where the main power cable is placed.
8.
Resting the folding arm on a shoulder, continue to
push the wires down through the top of the
column until the folding arm pin is very close.
Then raise the folding arm vertically and insert
the pin into the column making sure that the arm
faces towards the legs. Make certain that the
pin on the bottom of the adapter collar pivots between the screw head “stops” on
the top of the column. (Fig I) The rotation of the arm should now be limited to between the legs of
the system.
Fig. H
Column “stops”
Fig. I
9.
Hang the timer board onto the plate using one(1) hex-head bolt in the upper right-hand corner as shown. Then, route both the folding arm wires and the main input wires through the rectangular cutout near the bottom-center of the timer board.
(Fig J)
Then, gently pull both wires through the cutout
while swinging the timer board into position.
Using the 3 hex-head bolts, washers, and locking washers remaining, place the timer board housing onto the back plate.
Fig. J
56
10.
Make electrical connections from the folding
arm cables and incoming power supply.
Connector from
folding arm
Hex-Head bolts
in four(4) places.
Connector from
folding arm
Ground wires from
folding arm
Fig. L
Fig. K
Note: A jewelers flat head
screw driver will be needed
to attach power supply to
the input header.
Input wires from
main power supply
(left to right) :
line (hot) - ground neutral
(lower right corner of timer board)
Fig. M
57
11.
Install front cover by engaging the
bottom of the cover first (near the on-off switch) and then swinging the rest of the cover up and into place. Place
Imageworks Vet logo sticker into the recess in the center.
(See Fig a through d)
ImageWorks
Generations of Imaging
b. Tighten the plastic
tabs with phillips
screwdriver.
a.Engage
plastic tabs with
screws.
Fig. a
Fig. b
c. Place cover
into place by
inserting the
hinge posts into
the recesses in
the plastic tabs.
d. Close cover.
Fig. d
Fig. c
58
12.
Install tubehead using the following instructions:
Installing the RX DC Tubehead
• Take the tubehead out of its packaging.
• Lubricate the outside surface of the tube head pivot point with grease designed for bearings.
Fig. N
59
12. (Cont’d)
Take the special washer (a) from the kit supplied and fit it into the pin (b) with the protruding tooth (c)
pointed towards the front of the tubehead. (see figure O)
Fig. O
Position the protruding tooth (c) of the special washer (a) into zone 1 of the pin (b). (See figure P)
WARNING! DO NOT position the protruding tooth (c) of the special washer (a) into
zone 2 of the pin (b).
Fig. P
60
12. (Cont’d)
Insert the molex plug from the folding arm cable into the tube head pin while pushing the tube head up into
the tube of the folding arm. The molex plug should partially come out the hole in the bottom of the tube head yoke.
See figure R - item (c).
See figure Q - Raise the cover (a).
Fit the retainer “C” clip (d) into the grooves in the folding arm tube and pin of the tube head.
Lower the cover (a) so that the hole (f ) in the cover (a) is aligned with the hole in the internal washer (e).
Fit the M4x6 allen set screw (g) into the hole (f ) and tighten with small metric allen wrench until recessed about 1mm.
Fig. Q
Using a pair of needle nose pliers to grip the molex connector from the folding
arm, carefully plug the molex connector from the tube head into that of the folding arm.
Gently push both connectors up into the yoke (c) of the tube head.
Place the round gray plastic cover (e) up into the opening in the yoke and secure
with the allen cap head screw. (Note that the screw should first be removed from
the threaded brass fixture on the underside of the yoke)
Gently push connectors and
wires up into the yoke. (yellow
string was used to help pull
the folding arm connector
down to access both).
Fig. R
Cover access hole lined up with threaded hole in
plastic insert
61
13.
Installing the collimator
Take the collimator out of the packaging:
Fig. S
Insert it into the tubehead all the way until it clicks.
62
14.
This step is optional and may not be necessary with each assembly.
The folding arm may be adjusted in the following manner:
If the folding arm does not stay in a stable position, adjust the spring tension by using an 8mm allen wrench or “T” bar which should be at least 20cm long.
The folding arm segment that connects to the
upright (column) will be referred to as the
vertical segment (A). The segment connected to
the tubehead will be referred to as the
horizontal segment (B).
If the vertical segment (A) pulls back when angled forward, it is too tight. If it continues to drift
in the same direction when angled forward, it is
too loose.
If the horizontal segment (B) pulls up when
angled down, it is too tight. If it continues to drift
down when angled down, it is too loose.
Turning the 8mm allen wrench clockwise will
tighten the spring tension. Turning the wrench
counter-clockwise will loosen the spring
tension.
Fig. T
63
14. (Cont’d)
Make adjustments using the following procedure:
Gently remove the end caps (f ) from the tubehead
end of the horizontal segment (B) AND the upper
end of the vertical segment (A).
b
a
Using a small flatblade jewelers screwdriver,
gently pry off the small white plastic cover (a)
that covers the small phillips screw (b)
underneath. Using a small phillips screwdriver,
loosen and remove the two(2) small phillips
screws (b). This will loosen the two white plastic side covers and allow easier access to the
main lead screw. The horizontal segment (B)
should be raised to a fully horizontal position
before inserting the 8mm allen wrench for
adjustment.
f
f
Fig. U
Fig. V
Using a medium to large phillips screwdriver,
loosen and remove the two(2) phillips screws
from the white plastic cover at the junction of
segments A and B. This will allow access to the
main lead screw.
Fig. W
64
14. (Cont’d)
The vertical segment (A) should be pulled out to an
approximate 45 degree position to allow access to
the main lead screw before inserting the 8mm allen
wrench for adjustment. A step ladder will normally
be needed to make this adjustment.
Adjusting the vertical segment
Fig. X
15.
Install the handheld wireless remote control holder.
Fig. Y
65
16.
Finally, screw in the two black plastic handles provided into the holes near the top of the upright on both the left and right sides.
Fig. Z
Assembly is now complete.
ImageWorks Veterinary
14 Inverness Drive East
[email protected]
66
Suite C130
Englewood, CO
www.imageworksveterinary.com
80112