Download Dorman® Power Window Regulator. Installation
Transcript
741-585
INSTALL/REMOVAL INSTRUCTIONS: WINDOW REGULATOR
ATTENTION: Refer to the appropriate shop manual for your vehicle to obtain specific service procedures for this part. If you do not have
a service manual or lack the skill to install this part, it is recommended that you seek the services of a qualified technician. Pay special
attention to all cautions and warnings included in the shop manual. Read and follow all instructions carefully.
REMOVAL/INSTALL OF WINDOW REGULATOR (741-585)
Ford Focus 2000–2007
General Tech Tips:
•
Use painter’s tape rather than duct tape to secure window. It will not damage paint or leave sticky residue.
•
A plastic pry tool is useful. It will not easily damage delicate trim like a screwdriver or metal pry bar.
•
The replacement regulator should have a liberal amount of grease on slide area. If there is not much grease
present, white lithium grease works well to lubricate the slide area.
•
Aftermarket window tinting can cause the window to travel slower and put additional strain on the window
regulator assembly.
•
Window run channels should be cleaned and lubricated before installation of a new window regulator
assembly. Silicone spray works well.
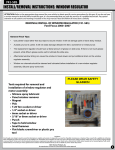
Tools required for removal and
installation of window regulator and
motor assembly:
• Silicone spray lubricant
• Panel retainer remover
• Magnet
• Pick
• T-20 Torx socket or driver
• 1/4” socket or driver
• 6mm socket or driver
• 5/16” or 8mm socket or driver
• Punch
• Tape to hold window
• Small hammer
• Flat-blade screwdriver or plastic pry
tool
PLEASE WEAR SAFETY
GLASSES!
741-585
INSTALL/REMOVAL INSTRUCTIONS: WINDOW REGULATOR
ATTENTION: Refer to the appropriate shop manual for your vehicle to obtain specific service procedures for this part. If you do not have
a service manual or lack the skill to install this part, it is recommended that you seek the services of a qualified technician. Pay special
attention to all cautions and warnings included in the shop manual. Read and follow all instructions carefully.
Removal Instructions
STEP 1: Gain access to the Window
Regulator assembly by removing the interior
trim panel.
STEP 1a: Gently pry underneath plastic
triangular trim piece in upper right-hand
corner above trim panel. Remove trim piece.
STEP 1b: Gently pry underneath door
handle trim piece and remove trim piece. A
plastic pry tool is recommended to protect
the trim. Remove the two 1/4” screws that
hold the door handle to the door. A magnet
is helpful for retrieving the screws once they
are loosened.
741-585
INSTALL/REMOVAL INSTRUCTIONS: WINDOW REGULATOR
ATTENTION: Refer to the appropriate shop manual for your vehicle to obtain specific service procedures for this part. If you do not have
a service manual or lack the skill to install this part, it is recommended that you seek the services of a qualified technician. Pay special
attention to all cautions and warnings included in the shop manual. Read and follow all instructions carefully.
STEP 1c: Use a pick to remove the small
circular button under the door handle that
covers the screw holding the door handle
to the door. Remove the screw using a T-20
Torx socket or driver.
STEP 1d: Gently pry underneath the door
handle and switch trim bezel and remove
bezel. Unplug switch and set bezel aside.
STEP 1e: Remove the six T-20 Torx screws
that secure the door trim panel to the door.
Remove the six T-20 Torx screws that
are located where the arrows point
741-585
INSTALL/REMOVAL INSTRUCTIONS: WINDOW REGULATOR
ATTENTION: Refer to the appropriate shop manual for your vehicle to obtain specific service procedures for this part. If you do not have
a service manual or lack the skill to install this part, it is recommended that you seek the services of a qualified technician. Pay special
attention to all cautions and warnings included in the shop manual. Read and follow all instructions carefully.
STEP 1f: Remove the interior door panel by
lifting from the bottom and pushing upward
to lift off of door lip.
STEP 2: Remove the side impact bolster by
twisting it clockwise to disengage the three
plastic retainer hooks from the door panel.
741-585
INSTALL/REMOVAL INSTRUCTIONS: WINDOW REGULATOR
ATTENTION: Refer to the appropriate shop manual for your vehicle to obtain specific service procedures for this part. If you do not have
a service manual or lack the skill to install this part, it is recommended that you seek the services of a qualified technician. Pay special
attention to all cautions and warnings included in the shop manual. Read and follow all instructions carefully.
STEP 3: Remove the speaker by removing
the four 6mm screws that hold it to the door
panel. Unplug electrical connector and set
speaker aside.
STEP 4: Remove the interior door handle by
unsnapping it from the door frame. Insert
panel retainer tool or flat blade screwdriver
underneath the center of the door handle
bezel and carefully pry until the retainer
unsnaps from the door frame. The handle
completely separates from the door frame
by then sliding forward (towards the car) to
disengage the rear clip.
741-585
INSTALL/REMOVAL INSTRUCTIONS: WINDOW REGULATOR
ATTENTION: Refer to the appropriate shop manual for your vehicle to obtain specific service procedures for this part. If you do not have
a service manual or lack the skill to install this part, it is recommended that you seek the services of a qualified technician. Pay special
attention to all cautions and warnings included in the shop manual. Read and follow all instructions carefully.
STEP 5: Remove foam vapor barrier by
peeling away from door frame. A putty knife
may help if it does not peel off easily. There
is one plastic side bolster retainer that needs
to be removed prior to completely removing
vapor barrier. Remove retainer by inserting
panel retainer tool underneath and prying it
out. Once vapor barrier is removed, set aside
being careful not to get black sealant on
clothes or interior of car. It is very difficult to
remove from cloth. Sealant can be removed
from metal surfaces with some gum cutter
or a similar chemical. Check to make sure the
chemical will not damage the paint surface.
STEP 6: Plug the window switch back into vehicle connector. If the Window Regulator still
operates, it is helpful to move the Regulator up and down using the switch. If the Window
Regulator operates, move the Window Regulator slider until it aligns with the oval hole in
the door frame. (See Photos on Following Page).
STEP 7: If the Window Regulator does not operate or is bound up, you may need to cut
the Window Regulator cable in order to maneuver the slider into position. Be sure to fully
support the window glass before cutting the cable so that it does not fall and break. Cut
the cable using a heavy duty cable cutter. After cable is cut, move the slider until it aligns
with the oval hole in the door frame. You will have to then support the window in this
position using a helper or tape. (See Photos on Following Page).
741-585
INSTALL/REMOVAL INSTRUCTIONS: WINDOW REGULATOR
ATTENTION: Refer to the appropriate shop manual for your vehicle to obtain specific service procedures for this part. If you do not have
a service manual or lack the skill to install this part, it is recommended that you seek the services of a qualified technician. Pay special
attention to all cautions and warnings included in the shop manual. Read and follow all instructions carefully.
STEP 8: With the slider aligned with the door
frame hole, you should see a circular plastic
retainer with another smaller retainer inside
of it. This setup goes through the holes in
the Window Regulator slider as well as the
hole in the window glass to secure the glass
to the slider. The smaller pin pushes into the
larger retainer and spreads it apart to make
a tight fit against the slider and the glass. For
reference, look at the replacement Window
Regulator to visualize the slider to glass
fitment. In order to separate the window
glass from the Window Regulator slider, you
need to push the center pin out of the larger
retainer and then push the larger retainer
out of the slider and window glass. Using
a small hammer and a punch, tap the small
pin out first and then tap the larger pin out.
These will fall into the door frame. Retrieve
these pieces as you will need them to
reattach the replacement Window Regulator.
The Window Regulator should now be free
from the window glass.
STEP 9: Use the window switch or manually
move the window glass into the full upright
position. Secure the window glass to the
door frame using tape. Painter’s tape works
well because it will not damage the door
paint or leave a sticky residue.
Line slide
holes up
with
oval door
frame hole
Outer and inner
retainer pieces –
use punch to tap out
741-585
INSTALL/REMOVAL INSTRUCTIONS: WINDOW REGULATOR
ATTENTION: Refer to the appropriate shop manual for your vehicle to obtain specific service procedures for this part. If you do not have
a service manual or lack the skill to install this part, it is recommended that you seek the services of a qualified technician. Pay special
attention to all cautions and warnings included in the shop manual. Read and follow all instructions carefully.
STEP 10: Unplug the window lift motor
connector. It may be helpful to use a pick to
disengage the clip holding the connector to
the window lift motor.
Clip to disengage connector.
Use a pick to help disconnect.
STEP 11: Remove the three 8mm (5/16”)
bolts that hold the Window Regulator to the
door frame. Remove the Window Regulator
from the vehicle.
STEP 12: The door is now ready for the installation of the replacement part.
Remove
these 8mm
(5/16”) bolts
741-585
INSTALL/REMOVAL INSTRUCTIONS: WINDOW REGULATOR
ATTENTION: Refer to the appropriate shop manual for your vehicle to obtain specific service procedures for this part. If you do not have
a service manual or lack the skill to install this part, it is recommended that you seek the services of a qualified technician. Pay special
attention to all cautions and warnings included in the shop manual. Read and follow all instructions carefully.
Installation Instructions
STEP 1: Position Window Regulator in door
frame and line up bolt holes. Install the
three 8mm bolts that were removed and
tighten evenly.
Line up this hole
with hole in
window glass
Threaded
mounting holes
STEP 2: Reconnect the window lift motor electrical plug.
741-585
INSTALL/REMOVAL INSTRUCTIONS: WINDOW REGULATOR
ATTENTION: Refer to the appropriate shop manual for your vehicle to obtain specific service procedures for this part. If you do not have
a service manual or lack the skill to install this part, it is recommended that you seek the services of a qualified technician. Pay special
attention to all cautions and warnings included in the shop manual. Read and follow all instructions carefully.
STEP 3: Position the window glass so that
you can access the hole in it that is used to
secure it to the window Regulator slider.
You will need to access the hole in the glass
from inside the door frame, not through the
small hole that you tapped the retainer out.
You may need to move the Regulator slider
out of the way and or move the glass into a
different position. If you do move the glass,
make sure to secure it before going forward.
With the glass in the position that you need,
push the pin into the larger retainer just
enough to hold it in place. Insert the retainer
into the Window glass and center it. Push the
pin all the way into the retainer to spread it
apart and hold it tight against window glass.
Make sure the retainer stays centered in
the window hole. The window glass is now
ready to be attached to the Regulator slider.
If plastic retainer is missing or damaged, a
replacement is available from Ford. The part
number is: XW4Z-54234A44-AA. The new
retainers come in one piece. You have to cut
the new one in half with a razor knife before
installing.
Outer and inner retainer pieces
Push inner pin into retainer just
enough to hold in place
STEP 4: Move the window glass into the Window Regulator slider. Once the holes in the
slider are aligned with the plastic retainer, the glass and the slider should snap together
in place. Wiggle the window glass around making sure that they are secured. Using
the window switch, move the window up and down to make sure everything functions
properly. Lubricate the window run channels with silicone spray as you are operating the
window up and down.
STEP 5: Park the window in the full upright position and unplug the window switch. Set
window switch and bezel aside.
741-585
INSTALL/REMOVAL INSTRUCTIONS: WINDOW REGULATOR
ATTENTION: Refer to the appropriate shop manual for your vehicle to obtain specific service procedures for this part. If you do not have
a service manual or lack the skill to install this part, it is recommended that you seek the services of a qualified technician. Pay special
attention to all cautions and warnings included in the shop manual. Read and follow all instructions carefully.
STEP 6: Replace the foam vapor barrier. Make sure to snap the plastic clip that was
removed back into place.
STEP 7: Reinstall the interior door handle by sliding the rear clip (away from car) into
place and then snapping the front clip in place against the door frame.
STEP 8: Reinstall the speaker by reconnecting the electrical plug and then reinstalling the
four 6mm screws that were removed
STEP 9: Reinstall the side impact bolster by lining up the three plastic retainer hooks and
then twisting clockwise to seat properly.
STEP 10: Reinstall the interior door panel by catching the top on the lip of the door frame
and then pushing downward so that the screw holes line up with the plastic blocks that
they screw into. Make sure that the window switch electrical plug is protruding through
the proper hole and is not trapped by the panel.
STEP 11: Reinstall the two 1/4” screws that go through the door handle and tighten.
Snap door handle cover in place.
STEP 12: Reconnect the window switch electrical connector and snap window switch/
door handle bezel in place. Reinstall the T-20 Torx screw that holds the bezel in place and
tighten. Snap plastic button over screw.
STEP 13: Reinstall the six T-20 Torx screws that hold the door panel to the door frame.
STEP 14: Reinstall triangular trim piece by snapping back into place.
DORMAN WINDOW REGULATOR
WINDOW REGULATOR PARTS


