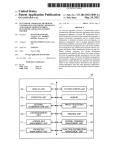
1
LIMITED WARRANTY FOR HENNY PENNY APPLIANCES
Subject to the following conditions, Henny Penny Corporation makes the following limited warranties to the
original purchaser only for Henny Penny appliances and replacement parts:
NEW EQUIPMENT: Any part of a new appliance, except lamps and fuses, which proves to be defective
in material or workmanship within two (2) years from date of original installation, will be repaired or replaced
without charge F.O.B. factory, Eaton, Ohio, or F.O.B. authorized distributor. To validate this warranty, the
registration card for the appliance must be mailed to Henny Penny within ten (10) days after installation.
REPLACEMENT PARTS: Any appliance replacement part, except lamps and fuses, which proves to be
defective in material or workmanship within ninety (90) days from date of original installation will be repaired
or replaced without charge F.O.B. factory, Eaton, Ohio, or F.O.B. authorized distributor.
The warranty for new equipment and replacement parts covers only the repair or replacement of the defective
part and does not include any labor charges for the removal and installation of any parts, travel or other expenses
incidental to the repair or replacement of a part.
EXTENDED FRYPOT WARRANTY: Henny Penny will replace any frypot that fails due to manufacturing or
workmanship issues for a period of up to seven (7) years from date of manufacture. This warranty shall not cover
any frypot that fails due to any misuse or abuse, such as heating of the frypot without shortening.
0 TO 3 YEARS: During this time, any frypot that fails due to manufacturing or workmanship issues will be replaced at no charge for parts, labor, or freight. Henny Penny will either install a new
frypot at no cost or provide a new or reconditioned replacement fryer at no cost.
3 TO 7 YEARS: During this time, any frypot that fails due to manufacturing or workmanship issues will be replaced at no charge for the frypot only. Any freight charges and labor costs to install
the new frypot as well as the cost of any other parts replaced, such as insulation, thermal sensors,
high limits, fittings, and hardware, will be the responsibility of the owner.
Any claim must be represented to either Henny Penny or the distributor from whom the appliance was purchased. No allowance will be granted for repairs made by anyone else without Henny Penny’s written consent. If
damage occurs during shipping, notify the sender at once so that a claim may be filed.
THE ABOVE LIMITED WARRANTY SETS FORTH THE SOLE REMEDY AGAINST HENNY PENNY
FOR ANY BREACH OF WARRANTY OR OTHER TERM. BUYER AGREES THAT NO OTHER REMEDY
(INCLUDING CLAIMS FOR ANY INCIDENTAL OR CONSQUENTIAL DAMAGES) SHALL BE AVAILABLE.
The above limited warranty does not apply (a) to damage resulting from accident, alteration, misuse, or abuse;
(b) if the equipment’s serial number is removed or defaced; or (c) for lamps and fuses. THE ABOVE LIMITED
WARRANTY IS EXPRESSLY IN LIEU OF ALL OTHER WARRANTIES, EXPRESS OR IMPLIED, INCLUDING MERCHANTABILITY AND FITNESS, AND ALL OTHER WARRANTIES ARE EXCLUDED.
HENNY PENNY NEITHER ASSUMES NOR AUTHORIZES ANY PERSON TO ASSUME FOR IT ANY
OTHER OBLIGATION OR LIABILITY.
FM01-286
Revised 2-23-06
ecti
Section 1. NTRODUCTION
l-l.
::g*
1-4:
1-5.
eated Holding Cabinet ......................................
~,,:::::::::::::::::::::::::::::::::
sistance ..................................................
Safety .....................................................
Section 2. INSTALLATION.
l-l
l-l
l-l
l-2
1-2
...............
...............
2-l
................................................
2-1. Introduction ................................................
2-2. Unpacking .................................................
2-3. Location ...................................................
2-4. Electrical Connection ........................................
2.5. Cabinet Dimensions. .........................................
2-6. Water Supply Connection. ....................................
2-l
2-1
2-2
2-2
2-3
2-4
ON ....................................................
3-1
Section 3.
3-1.
3-2.
3-3.
3-4.
3-5.
Introduction ................................................
Operating Controls and Components ...........................
Start-Up ...................................................
uct
Operation with
.........................................
Cleaning Proce
..
2:;:
!.
.......................
.;
.“.*.
......
3-l
3-l
3-4
,: -.3:5
3-5
NG ............................................
4-l
ction ................................................
shooting .............................................
4-l
Section 4.
Section 5.
l-1
................................................
NTENANCE
................................................
duction ................................................
Instruments ............................................
oval of Module Access Panel ..............................
al ............................................
odule Housing ..................................
.....................................................
r S~tch ...............................................
................................................
ights ............................................
..............................................
....................................................
mit .................................................
5-l
5-l
5-l
5-l
5-l
5-2
5-2
555-5
5-6
;:;
.
_
Model HC-900
TABLE OF CONTENTS (Continued)
Section
Page
5-13.
5-14.
5-15.
5-16.
5-17.
5-18.
5-19.
5-20.
5-21.
5-22.
5-23.
Blower ................................................................................................................ 5-9
Door Gasket Replacement ................................................................................... 5-10
Cleaning Water Strainer ....................................................................................... 5-10
Replacing Water Strainer ..................................................................................... 5-11
Cleaning Water Valve .......................................................................................... 5-11
Replacing Water Valve ......................................................................................... 5-13
Float Switch ........................................................................................................ 5-13
Time Delay Relay ................................................................................................ 5-14
Infinite Regulator ................................................................................................. 5-15
Water Heater ...................................................................................................... 5-15
Wiring Diagram ................................................................................................... 5-17
Section 6. PARTS INFORMATION .............................................................................................
6-1. Introduction .........................................................................................................
6-2. Genuine Parts ......................................................................................................
6-3. How to Find Parts ...............................................................................................
6-4. How to Order .....................................................................................................
6-5. Prices ..................................................................................................................
6-6. Delivery ..............................................................................................................
6-7. Warranty .............................................................................................................
6-8. Recommended Spare Parts for Distributors ..........................................................
Parts List .............................................................................................................
6-1
6-1
6-1
6-1
6-1
6-1
6-2
6-2
6-2
6-3
Henny Penny Distributor List
206
i
el
enny Heated Holding Cabinet is a basic unit
of food processing equipment designed to hold hot foods
at proper temperature in commercial food operations.
This cabinet will keep hot foods humid while maintaining temperature.
Adjustable, Thermostatically Controlled Heat
Lift-off Doors
s to Electrical Components
Stainless Steel Construction
Full Perimeter Magnetic Door Seals
As in any unit of food service equipment, the
Holding Cabinet does require care and maintenance.
Suggestions for the proper care and maintenance are
contained in this manual.
or your convenience, this manual consists of the following sections:
he conscientious use of the recommended procedures,
ante, will result in few
coupled with regular m
such repairs are required,
repairs to the equipment..
they may be accomplished by following the repair steps
contained in this manual.
Henny Penny
1-4. ASSISTANCE
Model HC-900
Should you require outside assistance, just call your local
independent distributor maintained by Henny Penny Corporation.
In addition, feel free to contact our corporate headquarters in
Eaton, Ohio. Dial 1-800-417-8405 toll free, or 937-456-8405.
1-5. SAFETY
The only way to insure safe operation of the Henny Penny
Heated Display Cabinet is to fully understand the proper installation,
operation and maintenance procedures. The instructions in this
manual have been prepared to aid you in learning the proper
procedures. Where information is of particular importance or is
safetyrelated, the words NOTE, CAUTION, or WARNING are
used. Their usage is described below.
NOTE
The word NOTE is used to highlight especially important
information.
The word CAUTION is used to alert you to a procedure
that, if not performed properly, may damage the unit.
The word WARNING is used to alert you to a procedure
that, if not performed properly, may cause personal injury.
1-2
1287
5. Peel off any protective covering from the exterior
of the cabinet.
eated Holding Cabinet is now ready for
location and set up.
e certain to save any literature that is packed inside the
cabinet.
The HC-900 should be placed in an area where the doors
can be opened without interruption and loading and
unloading of product is easy. or proper operation, the
cabinet must be level.
Do not set anything on top of the cabinet that might close
off the vent holes.
eated Holding Cabinet is available from the factory
20 VAC unit. The data plate, located on the side
of the module, will specify the correct electrical supply.
e unit requires a grounded receptacle with a separate
ctrical line protected by a fuse or circuit breaker of
the proper rating.
The cabinet must be adequately and safely grounded
to prevent the
according to local el
o the table below
possibility of electrical
for electrical ratings for t
er
05148
120
1940
16.2
0 with
Model
umidity
Adjust
Product No. 05148
24 =h”
(62.8 Cm)
(181 cm)
The automatic water fill system requires a water supply.
he unit is equipped with a water strainer and clamp for
a hose connection. It i
o equipped with an eight foot
nylabraid hose tubing.
the tubing to the cabinet location, providing enough tubing to allow movement of the
unit for cleaning or maintenance. The use of a water
conditioner or filter is recommended. A shut-off valve
should be installed in the supply line.
rate this unit without water connected to
mage to components will result.
To install water supply connection, follow these steps:
lush the incoming water line.
2. Slide tubing over end of water strainer.
3. Tighten tubing clamp.
4. Check for leaks.
This section provides operating procedures for the
C-900. Sections 1, 2 and 3 should be read, and all
instructions should be followed before operating the
cabinet.
his section contains an explanation of all controls and
components and information on operating procedures and
daily maintenance.
Figures 3-1 through 3-10 identify and describe the
function of all the operating controls and the major
components of the cabinet.
. ,
013
012
016
017
-.._,-
Fig.
No.
Item
Description
No.
Function
3-l
1
Power Switch
The power switch is a toggle switch that switches
electrical current to the unit.
3-l
2
Power Light
When illuminated, the power light indicates that the
power switch is in the “ON” position and the
components are energized.
3-l
3
Water Light
When illuminated, the water light indicates the float
switch is calling for water.
3-l
4
Thermometer
The thermometer indicates the air temperature inside
the cabinet.
3-l
5
Temperature Light
When illuminated, the temperature light indicates that
the thermostat has turned the heaters on.
3-l
6
Thermostat Control
The thermostat control is an electromechanical device
that controls the temperature inside the cabinet.
3-2
7
Blower Motor
There are two blower motor assemblies in the HC-900.
The blower motors are used to recirculate the hot
humid air throughout the cabinet.
3-2
8
Heater
There are two heaters in the HC-900. The heaters are
of open-resistance wire type construction.
3-2
9
High Limit
The high limit is a safety device mounted next to the
heater which protects the unit from overheating.
3-3
10
Fuse
The fuse is a protective device that breaks the circuit
when current exceeds the rated value. The fuse
provides an overload protection for the electrical
components. To remove the fuse, twist and pull the cap.
(The fuse is used only on the 12OVl1940 Watt units.)
3-4
11
Water Pan
The water pan holds the water that, when heated,
creates humidity in the cabinet.
3-5
12
Water Heater
The water heater is a 440 watt cast aluminum heater
that heats the water pan to produce humi@y.
3-6
13
Infinite Regulator
This control, located on the rear control panel,
regulates the water heater. Counterclockwise rotation
increases the amount of humidity, clockwise rotation
decreases the amount of humidity within the cabinet.
3-6
14
Water Strainer
The water strainer is a filter that prevents particles
from entering through the water line and obstructing
the water valve.
Fig.
No.
Item
16
No.
Funtion
Description
Float Switch
The float switch is an electro-mechanical level switch
that controls water level in the water pan.
Water Valve
The water valve is an electro-magnetic valve that is
openedby the float switch. When open, the valve allows
water to flow to the water pan.
Time Delay Relay
The time delay relay is an electrical device used to
reduce the electrical load on the float switch and
provide an automatic time delay of approximately 10
seconds to prevent overflowing.
Cabinet, the unit should
efore using the
thoroughly cleaned as described in the “Cleaning
oeedures” section of this manual.
into operation, move the power
99position. The power light should
d and the blowers should be in
operation.
he unit should take approximately 25-35 minutes to heat
to temperature during start up. e sure that the
temperature light goes out before lo ing with product.
2. The water light should illuminate, i
water is flowing into the water pan.
is filled to the proper level, the water light will go
out and water will stop flowing.
There is a 10 second delay before the float switch will
activate the water valve. This is to eliminate over-working
the components in the event the cabinet is bumped or
moved.
3. The heat light should illuminate indicating the unit
is heating. VVhen heat light goes out, the unit has
reached proper operating temperature.
4. Although the cabinet and water temperature are
factory preset, they are adjustable. If more cabinet
temperature is desired, remove the plug button from
front of control panel and rotate adjustment shaft
f less cabinet temperature is
tment shaft counter-clockwise.
humidity is required, remove the plug button from
rear panel and rotate adjustment shaft clockwise to
increase humidity and counterclockwise to decrease
humidity.
1. Place the hot product on pans and insert between the
cabinet racks.
2. Serve the product first that has been in the cabinet
the longest.
3. Open the doors only as necessary to load and unload
his will help temperature stay constant and
will save energy.
urn all controls to the “ FF” position.
2. Disconnect the electrical supply to the cabinet.
Allow the unit to cool before cleaning, as the interior of
the cabinet may be hot enough to burn.
3. Open the doors and remove all trays from the cabinet.
ake the trays to a sink and clean them thoroughly.
e cleaned with a soft
5. Wipe the control panel with a damp cloth.
splash water around the controls.
6. Clean the exterior of the cabinet with a damp cloth.
pen the doors and remove side racks. Clean the
racks with soap and water.
8. Clean the interior of the cabinet thoroughly with a
cloth and soapy water.
ut the side racks and water pan back into the
cabinet.
eave at least one door open over night to allow the
unit to thoroughly dry out.
or more effici
cleaned daily.
ter pan must be
efore removing water pan, be sure unit has cooled down.
Severe burns will result.
pan by rotating the
rain the water pan into a bucket
drain cock on the front of the pan.
with a soft cloth, soap and water.
necessary to avoid lime build-up on the
build-up on the float switch will cause
\,.i
This section provides troubleshooting information in the
form of an easy to read list.
If a problem occurs during the first operation of a new
cabinet, recheck the installation per section 2 of this
manual.
Before troubleshooting, always recheck the operating
procedure per section 3 of this manual.
To isolate a malfunction, proceed as follows:
1. Clearly define the problem (or symptom) when it
occurs.
2. Locate the problem in the troubleshooting table.
3. Review all possible causes, then, one at a time, work
through the list of corrections until the problem is
solved.
f the problem that you are having is not described
m the troubleshooting section of this manual
tribut
maintained by
call your local
enny
enny Corporati
Penny or call
assistance.
Refer to maintenance procedures in section 5 to check
and repair the unit safely and properly.
Doors are left open.
Keep doors closed except to load and
unload product.
Thermostat set too low.
Increase thermostat setting by moving
the knob to a higher number setting.
Gasket torn or worn.
Replace gasket per section 5-14.
Heater not working.
Check heater. Replace per section
5-11.
Blower not working.
Check blower. Replace per section
5-13.
Product held too long.
Hold product only for recommended
time.
Low or improper voltage.
Using meter, compare receptacle
voltage to data plate vbltage.
B. Cabinet
steaming product
becoming
WZY
Too much humidity inside the cabinet.
Reduce setting on infinite regulator
switch on rear panel,
Holding product too long.
Hold product for recommended time.
A. Unit will
not heat
Faulty thermostat.
Check thermostat per section 5-8.
Faulty high limit.
Check high limit per section 5-12.
Faulty heater.
Check heater. Replace per section
5-11.
Faulty wiring.
Check wiring for loose connections or
broken wires and repair as necessary.
Faulty blower.
Check blower. Replace per section
5-13.
A. Product not
holding
temperature
Y
a
B. Unit will
not heat to
desired
temperature
Thermometer
temperature.
not indicating
One of heaters defective.
true
Check cabinet temperature with
another thermometer. If necessary,
replace thermometer per section 5-10.
Check heater. Replace per section
5-11.
_;
.
C. Unit overheating
A. Water pan will
not start to fill
after 30 seconds.
B. Water pan
overflows.
C. Water in water
pan does not
heat up or
humidity levels
are low.
Doors being left open too much.
Gaskets torn or. worn.
Only open doors as necessary.
Replace gasket per section 5-14.
Defective high limit on one of heaters.
Check high limit. Replace per section
5-12.
Faulty thermostat.
Check thermostat. Replace per section
5-8.
Faulty blower.
Check blower. Replace per section
5-13.
Water supply shut off or disconnected.
Check water supply line.
Plugged water strainer.
Clean water strainer per section 5-15.
Corroded water pan.
Clean water pan.
Faulty or corroded water valve.
Clean water valve per section 5-17.
Replace water valve per section 5-18.
Faulty float switch.
Check float switch per section 5-19.
Faulty time delay relay.
Replace time delay relay per section
5-20.
Water pan not installed properly.
Check installation of water pan.
Corroded water pan.
Clean water pan.
Faulty or corroded water valve.
Clean water valve per section 5-17.
Replace water valve per section 5-18.
Faulty float switch.
Check float switch per section 5-19.
Faulty time delay relay:
Replace time delay relay per section
5-20.
Infinite switch is in the “off” position
or at too low of a setting.
Turn infinite switch on or to a higher
position.
Faulty infinite switch.
Check and replace infinite switch per
section 5-21.
Faulty water heater.
Check water heater and replace per
section 5-22.
.
This section provides procedures for the testing and
replacement of the various parts used within the cabinet.
efore replacing any parts, refer to section 4,
roubleshooting. It will aid you in determining the cause
of the malfunction.
You may use two test instruments to check the electric
components.
1. A Continuity Light
2. An Ohm Meter
When the manual refers to the circuit being closed, the
continuity light will be illuminated or the ohm meter
should read zero (0) unless otherwise noted.
When the manual refers to the circuit being open, the
continuity light will not illuminate or the ohm meter will
read one (1) or infinite resistance.
n most procedures of the maintenance section, the access
panel must be removed from the top of the module. This
accesspanel can easily be removed by taking out the four
screws that fasten it to the module shell.
a
If the control module of the HC-900 has to be removed,
be sure to remove the four screws (one at each corner)
before lifting it from the unit. Also, when work has been
completed on the module, be sure to relocate it properly
and reinstall the screws that fasten the module to the
cabinet. Failure to do so might cause the unit to perform
inadequately.
If the need for extensive service is required on the module
components, the entire outer shell of the module can be
removed to make servicing easier. To remove the outer
shell of the module, follow these
emove the module from the cabinet
emove the six (6) screws that are located on the sides
of the module.
emove the four (4) screws located at the corners of
the module top.
emove the screws from the control
ack panel that fasten them to the m
ift the shell of the module off the unit.
en work is corn leted, reassemble in reverse or
f both blowers quit working at the same time:
1.
emove electrical
plied to the cabinet.
osition and unplug
lace the power switch in the “
e to do so could result in electrical
shock.
emove the cap
counterclockwise.
the fuse holder by turning it
ocated above the power cord.)
ull the fuse from the holder.
4. Check the fuse for defectiveness by putting both leads
of the ohm meter or continuity light on opposite ends
of the fuse. The fuse should be closed, or read no
f the fuse is found to be defective, replace
it with a new one. e sure to use an identical fuse as
the one being replaced.
5. Replace the cap to the fuse holder.
6. Reconnect the electrical supply to the cabinet.
iseonnect the electrical supply to the cabinet.
lace the power switch in the “
” position and unplug
the power cord. Failure to do so could result in electrical
shock.
2. Remove the four (4) screws from the control panel and
pull it down.
emove all wires from the switch. Check across the
h the
two terminals 0 e switch for continuity.
circuit should be open. f the switch is found to be
defective, replace it by continuing with the following
instructions in this section.
oosen the nut holding the stiitch on the back side
of the control panel and then remove the nut on the
front of the control panel.
emove the switch.
nstall a new switch in reverse order.
‘7. Reconnect the wires to the switch on the same
terminals that they were previously on.
8. Push the control panel back in place and put in screws.
9. Reconnect the electrical supply to the cabinet.
1.
isconnect the electrical supply to the cabinet.
F” position and unplug
lace the power switch in the “
the power cord. Failure to do so could result in electrical
shock.
2.
emove the access panel from the top of the module.
emove the four (4) screws from the control panel
d pull it down.
4.
move the wires from the thermostat. With the
ermostat set at the maximum setting (all the way
uld be closed. With the
clockwise), the circui
’ position (all the way
thermostat in the “
counter-clockwise), the circuit should be open. If the
thermostat is found to be defective, replace it by
continuing with the following instructions in this
section.
emove the four (4) nuts that hold the blower box
to the cabinet.
ift the blower box up to expose the thermometer
and thermostat bulbs.
7. Remove the two (2) nuts that secure the bulb retaining clamps and remove the thermostat bulb from the
clamps.
emove the two (2) nuts that hold the thermostat
bracket to the control panel.
^.,I
9. Remove the two (2) screws that hold the thermostat
to the bracket.
emove the thermostat from the unit.
nstall a new thermostat in reverse order.
eposition the blower box and secure it with the four
(4) nuts previously removed.
Be sure that both the thermometer and thermostat
capillary tubes pass through the notches in the front
corners of the blower box. Failure to do so could
permanently damage the thermometer or thermostat and
cause improper operation of the cabinet.
13. Reseal the notches in the blower box corners with
silicone rubber sealant.
14. Push the control panel back in place and put in
screws.
15. Replace the access panel to the module.
16. Reconnect the electrical supply to the cabinet.
his section should be followed when replacing any of the
three (3) indicating lights in the control panel.
isconnect the electrical supply to the cabinet.
ace the power
e power cord.
shock.
n the “
to do s
” position and unplug
Id result in electrical
emove the four (4) screws from the control panel and
pull it down.
3. Cut the light wires just behind the body of the light.
emove the light by squeezing the retainers on the
body and pushing the light out through the control
panel.
nstall a new light by pushing it through the
he control panel until it snaps securely in
& Strip the ends of the cut wires and connect them to
the new light with wire nuts.
ush the control panel back in place and put in screws.
econnect the electrical supply to the cabinet.
1.
isconnect the electrical supply to the cabinet.
ace the power
e power cord.
shock.
’ position and unplug
Id result in electrical
.,
emove the access panel from the top of the module.
emove the four (4) screws from the control panel
and pull it down.
emove the four Q ) nuts that hold the blower box
to the cabinet.
ift the blower box
thermostat bulbs.
to expose thermometer and
emove the two nuts that secure the bulb retaining
clamps and remove the thermometer bulb from the
clamps.
7.
the two (2) nuts that hold the
on the back of the thermomete
ing
emove the thermometer by pulling the body and
capillary tube through the control panel.
nstall a new thermometer in reverse order.
e-position the blower box and seem-eit with the four
(4) nuts previously removed.
.-’
e sure that both the thermometer and thermostat
capillary tubes pass through
e notches in the front
corners of the blower box. ailure to do so could
permanently damage the thermometer or thermostat and
cause improper operation of the cabinet.
eseal the notches in the blower box corners with
silicone rubber sealant.
eplace the access panel to the top of the module.
ush the control panel back in place and put in
screws.
econnect the electrical supply to the cabinet.
ing either of
is a heating
This section should be followed wh
the two (2) heaters in the
problem, both heaters sho
12.
isconnect the electrical supply to the cabinet.
sition and unplug
esult in electrical
shock.
emove the accesspanel from the top of the cabinet.
emove the two (2) screws holding the high limit to
the heater.
emove the wires attached to the two (2) heater
terminals.
the two (2) screws ho1 ing the heater to the
emove the heater.
nstall a new heater in reverse order.
eattach the heater wires.
9. Refasten the high limit to the new heater.
eplaee the access panel to the module.
11.
econnect the electrical supply to the cabinet.
This section should be followed when replacing either of
the two (2) high limits in the cabinet. f there is a heating
problem in the cabinet, both high limits should be tested.
1.
isconnect the electrical supply to the cabinet.
Place the
the cord.
osition and unplug
n electrical shock.
emove the accesspanel from the top of the cabinet.
emove the wires attached to the high limit.
4. Check across the high limit terminals for continuity.
As long as the cabinet temperature is below 210°
and the blower has been operating properly, the high
limit should be closed, or read no resistance. If the
high limit is found to be defective, replace it by continuing with the following instructions in this section.
emove the two (2) screws that hold the high limit
to the heater.
emove the high limit.
7. Install a new high limit in reverse order.
econnect the two wires to the high limit.
eplace the access panel to the module.
10. Reconnect the electrical supply to the cabinet.
.*&/
Procedures for blower motor replacement are the same
on both blowers.
1.
isconnect the electrical supply to the cabinet.
Place the power
the power cord.
shock.
o&ion and unplug
esult in electrical
2. Remove the accesspanel from the top of the cabinet.
emove the three (3) screws that fasten the blower
motor to the blower housing.
4. Cut the two (2) blower wires approximately 2” away
from the blower.
5. Lift the blower motor and wheel out of the blower
housing.
The blower motor can be ordered as an assembly. This
will include the motor, the fan, and the wheel. Normally,
otor would need replacing if found to be
you are just replacing the motor, continue
lowing procedures.
6. The fan can be pulled off the shaft of the motor.
” Allen wrench, loosen the set screw that
holds the blower to the motor shaft and remove the
wheel.
8.
move the four (4) screws that hold the blower cover
the motor.
9. Install a new blower motor in reverse order.
e sure to put the spacers back between the blower
cover and the motor.
hen replacing a blower motor, be sure that the motor
coil is positioned away from the heater when reinstalling.
11,
econnect the two wires to the new blower by
stripping the wire ends and fastening with wire nuts.
eplace the access panel to the module.
econnect the electrical supply to the cabinet.
I
1. Pull the gasket to the side to expose the screws that
hold the retainer to the cabinet.
2. Loosen the screws around the full outside perimeter
of the gasket.
3.
ith the screws loose, the gasket should slide out from
under the retainer.
e the gasket and replace with a new one by
ng the above procedures.
I
1. Shut off water supply.
2.
3.
move the hex cap at the bottom of the water
ainer .
ove the screen from inside the strainer and clean.
lme has built up on the strainer, lime remover can
be used.
4. Reassemble in reverse order.
5. Turn on the water supply and check for leaks.
.__
Y
1. Shut off the water supply.
nneet the water sup
emove the water straine with the fittings on both
ends still attached.
sfer the two fittings from the old strainer to a
strainer on the unit.
econnect the water supply tubing,
he water supply and cheek for leaks.
isconnect the electrical supply to the cabinet.
osition and unplug
result in electrical
shock.
2. Shut off the water supply.
isconnect the water sup
strainer.
ing from the water
emove the cabinet top y taking out screws around
module.
5.
ake note of how the wires are connecte
remove the wires from the water valve.
iseonnect the water tubing from the outlet side of
the water valve.
oosen the large nut holding the fittings on the inside
back wall of the cabinet.
ivot the water valve against the side wall of the
cabinet, hold the brass fitting on the inlet side of the
valve with a wrench, and turn the valve
counterclockwise to loosen it. Continue this step until
the valve is removed from the fitting.
emove the two screws (H) from the coil retainer (
10. Remove the retainer and pull the coil (A) off of the
valve to expose the stem (
emove the stem by carefully pulling upward. The
plunger (C), spring (D) and seat (E) will now be
exposed.
12. Remove the plunger, spring, and seat and check the
rubber seat for foreign material.
13. Clean the valve body (G) and the rubber seat if
necessary by flushing them with clean water. Let
water run both ways through the body to flush any
foreign material from the valve.
14. Carefully place the seat, spring and plunger back into
the valve body. e sure the large diameter of the
tapered spring is up.
.*<.,9
lace the stem over the plunger and lightly press the
stem seal into place.
16. Replace the coil and firmly press it against the body.
osition the coil terminals so that they are in line with
the outlet of the water valve.
18. Position the coil retainer with the open side up and
fasten with the two screws removed earlier.
19.
emount the water valve and reconnect the tubing
to it in reverse order of disassembly.
eeonnect the wires to the valve.
eplaee the cabinet top and put the screws back in.
econnect the water supply tubing to the water
strainer and turn on the water supply.
econnect the electrical supply to the cabinet.
\‘,&
1. Follow step 1 through 8 of cleaning of the water valve.
in electrical shock.
2. Remove the brass fitting from the outlet side of the
water valve.
nstall the fitting just removed on the outlet side of
a new water valve.
Pipe sealant should be used on the threads of the two
fittings that connect into the new water valve.
4. Mount the new water valve and connect the tubing
to the outlet side in reverse order of disassembly.
5. Reconnect the wires to the valve.
6. Replace the cabinet top.
econnect the water supply tubing to the water
strainer and turn on the water supply.
econnect the electrical supply to the cabinet.
1.
isconnect the electrical supply to the cabinet.
lace the power switch in the “
” position and unplug
the power cord. Failure to do so could result in electrical
shock.
2.
emove the cabinet top by taking the screws out.
3.
he float switch can be tested by putting a continuity
tester across the two float switch wires. With the
float switch in the raised position, the circuit should
be open. With the float switch in the lowered
position, the circuit should be closed.
switch is defective, replace it by continuing the
following steps. If the float switch is not defective,
refasten the float switch wires.
4. Cut the float switch wires.
5.
emove the float switch guard.
6. Unscrew the float switch from the bulkhead fitting.
nstall the new float switch.
nly tighten the float switch finger tight.
nut more than finger tight can damage the float switch
and cause improper operation of the cabinet.
8.
econnect the other float switch wires.
9.
eplace the cabinet top.
10.
econnect the electrical supply to the cabinet.
isconnect the electrical supply to the cabinet.
Place the power
the power cord.
shock.
osition and unplug
result in electrical
2, Remove the cabinet top.
3. Remove the nut holding the relay to the back of the
control panel.
4. Transfer the relay wires one at a time from the old
relay to a new one.
5. Mount the new relay on the back of the control panel
with the nut removed earlier.
eplace the cabinet top.
econnect the electrical supply to the cabinet.
isconnect the electrical supply to the cabinet.
osition and unplug
Place the power
the power cord. Failure to do so could result in electrical
shock.
2. Shut off water supply.
3. Remove the water line from water valve.
4. Lower rear accesspanel down to gain accessto infinite
regulator.
5. Remove 318” nuts holding regulator bracket to access
panel.
6. Transfer wires, one at a time, to new infinite
regulator.
7. Install new regulator to bracket.
einstall bracket to access panel.
econnect the electrical supply to the cabinet.
isconnect electrical su
to the cabinet.
” position and unplug
lace the power switch in the “
the power cord. Failure to do so could result in electrical
shock.
2. Shut off water supply and remove tubing.
emove module from cabinet.
emove heater wire cover. here are two (2) screws
on the outside of cover and also two (2) screws on
inside of water pan cradle.
5.
ark and cut wires on old heater leaving enough wire
to splice onto.
emove four (4) screws securing heater to water pan
7. Slide heater out from front.
nstall new heater and splice wires.
9. Reconnect the electrical supply to the cabinet.
18
WATER VALVE SOLENOID
HEATER
THERMOSTAT
WATER
HEATER
HEAT LIGHT
LIMIT
I
POWER LIGHT
I
BLOWER MOTOR
5
‘7
6
MODEL HC-900
120 VOLT 60HZ
1940
WATT
HENNY PENNY CORP,
EATON OHIO 45320
POWER
SWITCH
20
-
Henny Penny
LIMITED WARRANTY FOR HENNY PENNY APPLIANCES
Subject to the following conditions, Henny Penny Corporation makes the following limited warranties to the
original purchaser only for Henny Penny appliances and replacement parts:
NEW EQUIPMENT: Any part of a new appliance, except lamps and fuses, which proves to be
defective in material or workmanship within two (2) years from date of original installation, will be
repaired or replaced without charge F.O.B. factory, Eaton, Ohio, or F.O.B. authorized distributor. To
validate this warranty, the registration card for the appliance must be mailed to Henny Penny within ten
(10) days after installation.
REPLACEMENT PARTS: Any appliance replacement part, except lamps and fuses, which proves to
be defective in material or workmanship within ninety (90) days from date of original installation will be
repaired or replaced without charge F.O.B. factory, Eaton, Ohio, or F.O.B. authorized distributor.
The warranty for new equipment and replacement parts covers only the repair or replacement of the defective
part and does not include any labor charges for the removal and installation of any parts, travel or other expenses
incidental to the repair or replacement of a part.
EXTENDED FRYPOT WARRANTY: Henny Penny will replace any frypot that fails due to manufacturing or
workmanship issues for a period of up to seven (7) years from date of manufacture. This warranty shall not cover
any frypot that fails due to any misuse or abuse, such as heating of the frypot without shortening.
0 TO 3 YEARS: During this time, any frypot that fails due to manufacturing or workmanship
issues will be replaced at no charge for parts, labor, or freight. Henny Penny will either install a
new frypot at no cost or provide a new or reconditioned replacement fryer at no cost.
3 TO 7 YEARS: During this time, any frypot that fails due to manufacturing or workmanship
issues will be replaced at no charge for the frypot only. Any freight charges and labor costs to
install the new frypot as well as the cost of any other parts replaced, such as insulation, thermal
sensors, high limits, fittings, and hardware, will be the responsibility of the owner.
Any claim must be represented to either Henny Penny or the distributor from whom the appliance was
purchased. No allowance will be granted for repairs made by anyone else without Henny Penny’s written
consent. If damage occurs during shipping, notify the sender at once so that a claim may be filed.
THE ABOVE LIMITED WARRANTY SETS FORTH THE SOLE REMEDY AGAINST HENNY PENNY
FOR ANY BREACH OF WARRANTY OR OTHER TERM. BUYER AGREES THAT NO OTHER REMEDY
(INCLUDING CLAIMS FOR ANY INCIDENTAL OR CONSQUENTIAL DAMAGES) SHALL BE
AVAILABLE.
The above limited warranty does not apply (a) to damage resulting from accident, alteration, misuse, or
abuse; (b) if the equipment’s serial number is removed or defaced; or (c) for lamps and fuses. THE ABOVE
LIMITED WARRANTY IS EXPRESSLY IN LIEU OF ALL OTHER WARRANTIES, EXPRESS OR
IMPLIED, INCLUDING MERCHANTABILITY AND FITNESS, AND ALL OTHER WARRANTIES ARE
EXCLUDED. HENNY PENNY NEITHER ASSUMES NOR AUTHORIZES ANY PERSON TO ASSUME
FOR IT ANY OTHER OBLIGATION OR LIABILITY.
Model HC-900
SECTION 6. PARTS INFORMATION
6-1. INTRODUCTION
This section identifies and lists the replaceable parts of the Henny
Penny Model HC-900 Heated Holding Cabinet.
6-2. GENUINE PARTS
Use only genuine Henny Penny parts in your cabinet. Using a part
of lesser quality or substitute design may result in cabinet damage or
personal injury.
6-3. HOW TO FIND PARTS
To find items you want to order from the Parts List, proceed as
follows:
1. Refer to the photographs in the front of the Operation Section
and the exploded drawings in this section to identify the part
needed.
2. Use the item number from the exploded drawing to locate the
corresponding part in the Parts List in this section. In this list will
be the Henny Penny part number and a description of the part.
6-4. HOW TO ORDER
Once the parts you want to order have been found in the Parts List,
write down the following information:
1. From the photograph and Parts List (SAMPLE)
Item Number _____________44_______________
Part Number ____________22198______________
Description __________Power Switch____________
2. From the data plate (SAMPLE)
Product Number _________05148_______________
Serial Number ___________00179_______________
Voltage _________________120________________
3. The following table has been provided as a sample format for
you to use in preparing your spare parts orders. By providing
all the entries, your distributor will be able to insure the correct
parts will be sent to you. Also, by prepayment your order will
be expedited.
1287
6-1
Model HC-900
6-4. HOW TO ORDER
6-5. PRICES
Your distributor has a priced parts list and will be glad to
inform you of the cost of your parts order.
6-6. DELIVERY
Commonly replaced items are stocked by your distributor and
will be sent out when your order is received. Other parts will be
ordered by your distributor from Henny Penny Corporation.
Normally, these will be sent to your distributor within three
working days.
6-7. WARRANTY
All replacement parts (except lamps and fuses) are warranted
for 90 days against manufacturing defects and workmanship. If
damage occurs during shipping, notify the sender and the carrier
at once so that a claim may be properly filed. Refer to warranty
in the front of this section for other rights and limitations.
6-8. RECOMMENDED
SPARE PARTS FOR
DISTRIBUTORS
Recommended replacement parts, stocked by your distributor,
are indicated with √ in the parts lists. Please use care when
ordering recommended parts, because all voltages and variations are marked. Distributors should order parts based upon
common voltages and equipment sold in their territory.
6-2
206
Model HC-900
HC-900 CONTROL MODULE
(with Adjustable Humidity)
No.
√
√
√
√
√
√
√
√
1
2
3
4
5
6
7
8
9
10
11
12
13
14
15
16
17
18
19
20
21
22
23
24
25
26
27
28
28
29
30
31
32
33
34
35
36
37
38
39
40
41
42
43
44
Part No.
25704
SC01-053
28719
EC04-002
MS01-212
25765
SC01-010
EF02-007
EF02-042
SC02-023
NS02-001
EF02-006
NS02-005
EC01-010
25602
25628
SC02-016
25620
25624
28723
25619
25618
SC02-012
SC01-055
EF02-031
EF02-033
25627
28707
25616
NS02-001
25698
25622
25623
25621
SC01-090
LW02-010
25632
25767
25751
SC01-091
25768
25706
25738
18201
22198
Description
Panel - Access
Screw #8-32 x 1/2 PH RHD
Panel - Rear S/A
Terminal Flag #10-10-12 Ga.
Cable - 12/3 90C 600Y
Plug 125V 20 Amp
Screw #6-32 x 1/2 PH PHP
Fuse - 15 Amp
Connector - Cable 3/4
Screw 8#-B x 3/8 PH THP
Nut #10-32 Hex Keps
Fuse Holder
Nut #6-32 Hex Keps
Wire Nut 12-18 Ga.
Top
Insulation - Cover
Screw #8 A B x 1/2 PH PHD
Seal
Seal
Heater 240V, 1750W (120V, 440W)
Gasket - Blower Outlet
Gasket Retainer
Screw #10 - ABX 3/8 PH PHD
Screw #10-32 x 3/4 Hex HD
Clamp 1/4 ID x 3/8 W
Clamp 7/16 x 3/8 W
Gasket
Box - Blower
Rear Box - Blower
Nut #10 x 32 Hex Keps
Gasket - Blower Plate
Inlet - Flange
Housing - Blower
Wheel - Blower
Screw #6-32 x 5/16 SL RH
Lockwasher - Internal #65
Plate - Blower
Spacer - Motor
Motor - Blower 120V
Screw #6-32 x 1 3/4 SL
Spacer - Cooling Fan
Fan - Cooling 3 1/2”
Heater 120V/750W
Hi Limit Thermostat
Power Switch
Qty.
1
4
1
1
8 ft.
1
2
1
1
15
1
1
2
2
1
1
18
2
2
1
2
2
12
2
2
2
2
2
2
2
4
2
2
2
8
8
2
8
1
8
2
2
2
2
1
√ recommended parts
206
6-3
Model HC-900
HC-900 CONTROL MODULE
(with Adjustable Humidity)
No.
√ 45
√ 46
√
√
√
√
√
√
47
48
49
49
50
51
52
53
54
55
56
57
58
59
60
61
62
63
64
65
66
67
68
69
70
71
72
73
74
75
76
77
78
79
80
81
82
83
Part No.
16624
25183
25863
SC02-030
25986
61469
27006
25263
25241
14209
25734
25733
25735
PL01-001
FP05-002
NS01-017
28722
28856
28687
SC02-014
28703
25644
28689
MS01-129
25147
22045
FP01-012
NS02-005
28697
PL01-015
FP01-013
FP05-007
FP02-009
25208
FP01-053
MS01-263
28731
EF02-043
28699
25994
Description
Indicator Light
Thermometer
Knob - Thermostat-Optional
Screw #8- B x 3/8 PH
Label - Control Panel with Power + Warm
Label - Control Panel - Wendy’s
Panel - Control S/A
Extension - Thermnostat Shaft - Optional
Bracket - Thermostat Mount
Thermostat
Insulation 5 x 7 x 1
Insulation 6 x 6 _ x 1
Insulation 5 x 10 _ x 1
Plug Button _
Union Bulkhead
Nut
Fitting - Bulkhead
Float Switch
Guard - Float
Screw #8-AB x 3/8 PH THD S.
Cradle
Spacer
Cover - Heater
Tubing 1/4 OD .030 WALL
Valve Solenoid
Infinite Switch
Nipple - Reducing
Nut Hex Keps #6-32
Bracket - Infinite Switch
Plug Button - 13/16
Bulkhead Adapter
Elbow (1/4 pipe to 1-4 pipe)
Nipple - Close (1/4)
Water Strainer
Fitting 3/8 ID Tubing 1/4 NPT
Clamp
Hose
Grommet
Bottom - False
Timer - Delay
Qty.
2
1
1
4
1
1
1
1
1
1
2
4
2
1
1
1
1
1
1
*
1
4
1
2 ft.
1
1
1
2
1
1
1
1
1
1
1
1
8 ft.
1
1
1
√ recommended parts
6-4
206
Model HC-900
1287
6-5
Model HC-900
HC-900 CABINET ASSEMBLY
(with Adjustable Humidity)
No.
Part No.
1
2
3
4
5
6
7
8
9
10
11
12
13
14
15
16
17
18
19
20
21
22
√ 23
24
25
26
27
28
29
30
31
32
33
34
35
36
37
38
39
28726
SC01-092
27049
25702
LW02-013
SC01-086
SC01-074
LW 01-002
SC01-039
27155
27154
25715
SC01-075
25695
25644
25687
SC02-016
25689
28710
NS01-008
LW02-006
SC01-053
25643
28714
SC01-038
LW02-005
25712
28711
28712
28729
28728
NS03-024
LW02-006
25696
SC01-076
25937
SC01-099
28691
25984
Description
Control Module - 120 V - 1940 W
Screw #10-32 x 3 SL RHD
Door Assembly (Optional 4 Door)
Hinge Assembly
Lockwasher External #10
Screw #12-32 x 3/4 PH TH
Screw #10-32 x 1/2 PH TH
Lockwasher Split 1/4”
Screw #1/4-20 x 1 Hex Head
Caster 5”
Caster 5” W/Brake
Decorator Cover
Screw #10-32 x 3/4 PHT TH
Washer
Spacer
Retainer
Screw #8-AB x 1/2 PH PHD
Retainer
Cabinet Assembly - Less Module
Nut #8-32 Hex S
Lockwasher - Internal #8 S
Screw #8-32 x 1/2 PH RHD
Door Gasket
Water Box Weld Assembly
Screw #10-24 x 3/8 PH THD S
Lockwasher #10 Internal
Cock Drain
Handle Protector
Handle - Plastic
Air Duct Assembly - Upper
Air Duct Assembly - Lower
Nut #8-32 B PL Acorn
Lockwasher Internal #8 S
Hanger
Screw #8-32 x 1/4 PH THD S
Latch Assembly
Screw
Slide - Tray
Leg Assembly - Optional (not shown)
Qty.
1
4
2
4
16
8
8
8
8
4
4
2
12
12
12
4
12
4
1
5
5
5
2
1
2
2
1
1
1
2
2
*
*
8
*
8
4
√ recommended parts
6-6
206
Model HC-900
1287
6-7