1
OPERATING
AND
SERVICE
MANUAL
OSCILLOSCOPE
130C
••••
...:: .
• --=....0_
HEWLETT~PACKARD
CERTIFICATION
The Hewlett-Packard Company certifies that this instrument was
tlwroughly tested and inspected and found to meet its '[YUblished
specifications when it was shipped from the facWry. The HewlettPackard Company further certifies that its calibration measurements are traceable to the U.s. National Bureau of Standards to
the extent aUowed by the Bureau's calibration facility.
WARRANTY AND ASSISTANCE
All Hewlett-Packard products are warranted against defects in
materials and workmanship. This warranty applies for one year
from the date of delivery, or, in the case of certain major components listed in the operating manual, for the specified period. We
will repair or replace products which prove to be defective during
the warranty period provided they are returned to HewlettPackard. No other warranty is expressed or implied. We are not
liable for consequential damages.
Service contracts or customer assistance agreements are available
for Hewlett-Packard products that require maintenance and repair on·site.
For any assistance, contact your nearest Hewlett-Packard Sales and
Service Office. Addresses are provided at the back of this manual.
,...-----f-OPERATING AND SERVICE MANUAL
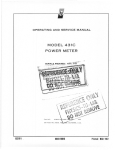
MODEL 130C
OSCILLOSCOPE
SERIALS PREfiXED: 6 ....-
(for Oth.r Suial .p,.fix Insfru",.nt,
S•• Sution I And Appendix 1)
For lnalrumenls With Options,
See SecUon I
( ••••1...
IUWUU_'ACII:A.D CO."ANY
"'2
ISOI '011.01 •• U 'OAD.',UO UfO. (ALUOU.. A, U.S.A.
01819·5
PRINTED: NOV 1966
Model l30C
Table of Contents
TABLE OF CONTENTS
Section
I
GENERAL ll\"FORMA nON· . • • . . .
1-1. Description.·········
1-3.
Manual Identification and Changes
1-5.
CRT Warranty
.
1-7.
Equipment SuppHcd or Available·
1-9.
Options Covered' .
n
III
IV
V
II
INSTALLATION . . . . .
2-1.
Incoming Inspection
2-4.
Rack Installation' •
2-6.
Cooling······
2-8.
Power Requirement
2-10. Instrument Ground·
2-12. Repackaging for Shipment.
2-15. Installation of Amber Filter·
OPERATION· . . . . . . .
3-1.
Introduction·····
3-3.
Front and Rear Panel
Familiarization .
3-6.
Sensitivity. •
3-8.
DC Balance· •
3-10.
Level····
3-12.
Normal-Single·
3-14.
Beam Finder .
3-16. Operational Check
3-18. Operating Procedures
3-20.
Internally Triggered Sweep
Operation
.
3-22.
Externally Triggered Sweep
Operation
.
3-24.
Single Sweep C4leration. . .
3-26.
DiHerentiallnput Operation·
3-28.
X-Y Operation• • • . . • .
3-30. Operating Considerations . . •
3-31.
Use of Amplifier andInputAC-DC
3-33.
Applying Input Signals
PRINCIPLES OF OPERAnON . •
4-1.
Introduction······.
4-4.
Low Voltage Power Supply
4-6.
-100 Volt Supply. • . .
4-8.
+100 and +250 Volt Supplies·
4-10.
+12.5 Volt Supply . . .
4-12. High Voltage Power Supply
4-15. Sweep Generator· . .
4-17.
Trigger Generator· . .
4-19.
Gate Generalor • • . .
4-21.
Integrator. . • • . • ·
4-24.
Sweep Termination and Hold-Off .
4-26.
Free Run Circuit Operation·
4-28.
Single Sweep ClrcuU· • • • . •
4-30. Vertical Amplifier . . . • . . ••
4-32.
Input AUenualor· • . . . . • .
4-34.
Differential Feedback Amplifier .
4-36.
Output Amplifier·
4-39. Horizontal Amplifier
MAINTENANCE . . • • .
5-1.
Introduction····
5-3.
Performance Check·
5-4.
General. . . • •
5-6.
Preliminary Procedure·
5-7.
Vertical Sensitivity
5-8.
External Callbrator . .
Page
1-1
'-1
'-1
'-2
1-2
1-2
2-1
2-1
Page
Vertical Calibrator'
•
5-2
Vertical Bandwidth·
.••
5-2
Vertical Common Mode Rejection 5-2
Horizontal Sensitivity . .
5-2
Horizontal Calibrator
.
5-2
Horizontal Bandwidth .
5-3
Horizontal Common Mode
Rejection'
..
5-3
Phase Shift . . . • . .
5-16.
5-3
Triggering
..
.
5-17.
5-3
5-18.
Trigger Point and Slope
5-4
5-19.
Sweep Calibration'
5-4
Sweep Vernier
.,
5-20.
5-4
5-21.
Sweep Magnifier' . .
5-4
5-22.
Intensity Modulation .
5-4
5-23.
Single Sweep
5-5
••
5-24. TroubleBhooUng
5-5
5-26. Isolating Troubles to a Major
5-5
Section"
.
5-28.
Power Supplies
•
5-5
5-29.
Amplifiers
.
5-5
5-30.
Sweep Generator
5-5
5-31. Low Voltage Power Supply
Troubleshooting·
..
5-5
5-33.
Excessive Ripple· .
•
5-5
5-35.
Loss 01. Regulation'
.
5-5
5-38. High Voltage Power Supply
Troubleshooting···
5-9
5-41. AmpWier Troubleshooting
5-9
Unbalance' . .
..
5-9
5-43.
5-45.
Gain"
5-9
5-47.
Low-Frequency Noise
5-9
Compression . . . .
5-9
5-49.
5-51. Sweep Generator Troubleshooting
5-9
5-53. Repair and Replacement-·
• 5-10
5-56. Cathode Ray Tube Replacement
. 5-10
.•.
. 5-10
5-58. Adjustments··
5-60.
Required Test Equipment
. 5-11
5-62.
Preliminary SeUings' .
. 5-11
5-64. Group I Adjustments
.
• 5-11
5-67.
High Voltage Power Supply
. 5-11
5-68.
Astigmatism
. 5-11
5-69.
Intensity Limit •
. 5-11
5-70. Group n Adjustments·
. 5-11
5-72.
Vernler Balance· .
·5-11
5-73.
Coarse DC Balance·5-11
5-74.
Output Stage Current·
. 5-11
Gain . . . .
..
. 5-12
5-75.
Neutralization' • . .
. 5-12
5-76.
5-77.
Input Capacitance and AUenuator
Frequency CompensaUon
·5-12
5-81. Group m Actjustments·
·5-14
5-83.
Calibrator'"
. 5-15
5-84.
Sweep Stability . .
·5-15
5-85.
Sweep Length .
. 5-15
5-86.
Sweep Time Calibration
. 5·15
5-87. Component Location. 5-15
Section
5-9.
5-10.
5-11.
5-12.
5-13.
5-14.
5-15.
2-'
2-'
2-1
2-1
2-1
2-1
3-'
3-'
3-1
3-1
3-1
3-'
3-3
3-3
3-3
3-3
3-3
3-3
3-3
3-4
3-4
3-4
3-4
3-5
4-1
4-1
4-1
4-'
4-'
4-'
4-1
4-2
4-2
4-3
4-3
4-3
4-3
4-4
4-4
4-4
4-5
4-5
4-5
5-'
5-'
5-'
5-1
5-1
5-1
5-1
VI
REPLACEABLE PARTS' . .
6-1.
Introduction
.
..
6-4.
Ordering Information'
6-1
6-1
6-1
APPENDIX I MANUAL CHANGES
APPENDIX II OPTIONS"
..
1-1
II-I
01879-3
Model13OC
List of mustrationsandTables
LIST OF ILLUSTRATIONS
Number
Title
I-I.
Model 130C Oscilloscope·
3-1.
3-2.
3-3.
3-4.
3-5.
3-6.
3-7.
3-8.
4-1.
4-2'.
4-3.
4-4.
4-5.
5-1.
5-2.
5-3.
5-4.
5-5.
Controls and Terminals (Vertical,
CRT Display and Power)' ..
Controls and Terminals (Horizontal.
Sweep, and Triggering)
DC Balance Procedure·
Internal S~ep with Internal Trigger
Internal Sweep with External Trigger
Single Sweep q:teration
Differential Operation
X-V ~rat1on'
Model 130C Overall Functional
Block Diagram .
LV Power Supply Block Diagram
HV Power Supply mock Diagram
Sweep Generator Functional Block
Diagram .
Vertical Amplifier Functional Block
Diagram .
Page
I-I
3-0
3-2
3-6
3-7
3-8
3-"
3-10
3-11
4-0
4-1
4-2
4-2
4-4
Model 130C Top View (Cover Removed)· 5-6
Model 130C Bottom View (Cover
Removed)
5-7
Horizontal NeutralIzation Adjustment
5-13
Waveforms'
Hor izontal Attenuator Compensation
5-13
Waveforms'
Vertical Attenuator. A2, Component
5-16
Location'
Number
Title
Vertical Amplifler, AI, Component
5-6.
Location·
5-7.
Vertical Attenuator and Amplifier
Schematic
5-8. Sweep Generator Circuit Waveforms .
5-9.
Tr-igger Source-Level Switch, AI02.
Component Location .
5-10. Sweep Generator, AI0l, Componut
Loca11on .
5-11. Sweep Generator SChematic·
5-12. Sweep TIme Switch. A175.
Component Location·
5-13. Sweep TIme Schematic .
5-14. Horizontal Attenuator, A202,
Component Lvcation.
5-15. Horizontal Amplifier, A201,
Component Location.
5-16. Horizontal Attenuator and
Amplifier Schematic.
5-17. High Voltage Power Supply, A301.
Component Location·
5-18. High Voltage Power Supply Schematic
5-19. Low Voltage Power Supply. A401,
Component Location.
5-20. Low Voltage Power Supply Schematic
-
Page
5-16
5-17
5-18
5-18
5-18
5-19
5-20
5-21
5-22
5-22
5-23
5-24
5-24
5-25
5-25
6-1.
Modular Cabinet Replaceable Parts
6-0
n-1.
Option 05 SChematic Diagram .
OpHon 06 Schematic Diagram .
n-I
n-I
n-~.
LIST OF TABLES
Number
Title
1-1.
Specifications... - • . . . . .
1-2.
Equipment and Accessories Availabie
1-3.
Description of Options . . . . . .
3-1.
3-2.
5-1.
5-2.
5-3.
5-4.
5-5.
Required Test Equipment. . . . . . . .
3-4
3-4
5-0
5-1
5-3
5-5
5-5
5-8
5-10
5-11
5-14
5-15
5-7.
5-8.
5-9.
5-10.
Vertical/Horizontal Sensitivity Calibration
Sweep Calibration . . . . . • . .
Sweep Magnifier CalIbration· • . .
Ripple Measurements. . . . . . .
Low Voltage Supply Troubleshooting
Sweep Generator Troubleshooting .
Low Voltage Power Supply Adjustment
Input Capacity Adjustment. . . .
Sweep Time Calibration· . . . .
6-1.
List of Reference Designators and
6-2.
6-3.
Abbreviations. . . . .
Replaceable Parts • . • . . •
Code List of Manufacturers . •
6-1
6-2
6-16
ll-1.
Replaceable Parts for Options .
n-,
5....
01870-3
Common Mode Rejection . . . . .
Characteristics and Applications for
Amplifier and Input Coupling Combinations·
Page
1-0
1-2
1-2
ill
Model 130C
Section I
Table 1-1
Table 1-1. Specifications
SWEEP GENERATOR
INTERNAL SWEEP:
21 ranges, 1 Ilsec/cm to 5
sectcm, accuracy within :1:3%. Vernier provides
oontinuous adjustment between ranges and extends slowest sweep to at least 12.5 sec!cm.
MAGNIFICATION: X2, X5, XIO, X20, X50 overall
sweep accuracy within :1:5% for sweep rates which
do not exceed a maxinwm rate of 0.2 /lsec/cm.
AUTOMATIC TRIGGERING: Base lineisdisplayed
in the absence of an input signal.
Internal: 50 cps to 500 kc signal causing 0.5
cm or more vertical deflection and also from
line voltage.
External: 50 cps to 500 kc, 0.5 volts peak-topeak or more.
Trigger Slope: Positive or negative slope of
external sync signals or internal vertical
deflection signals.
AMPLITUDE SElECTION TRIGGERING:
Internal: 10 cps to 500 kc, 0.5 cm or more
vertical deflection signal.
External: DC (dc to 500 kc) or AC (20 cps to
500 kc) coupled, 0.5 volts peak-to-peak or
more.
Trigger Point and Siope: Internally from any
point of the vertical waveform presented on
screen or oontilU1OUsly variable from +10
volts to -10 volts on either positive or negative slope of external signal.
BALANCED INPUT: On all sensitivity ranges.
COMMON MODE REJECTION:
(dc to 50 kc) At
least 40 db from 0.2 mv/cm through 0.1 v/cm
sensitivity; common mode signal not to exceed 4
volts p-p. At least 30 db from 0.2 v/cm to 20
v/cm; common mode signal not to exceed 4 volts
p-p on O. 2 v/cm,40 v p-p from. 5 v/cm through
2 v/cm, or 400 volts p-p from 5 v/cm through
20 v/cm.
PHASE SHIfT: With :1:10 relative phase shift at
frequencies up to 100 kc with verniers in CAL
position and equal inpJt sensitivities.
GENERAL
CALIBRATOR: Approximately 350 cps, 500 mv
:1:2% available at front panel.
CATHODE RAY TUBE:
hp Type 5083-0353 (P31)
Internal Graticule, mono-accelerator, 3000 volts
accelerating potential. P2, P7, and Pll phosphors
are availabie. Equipped with non-glaring safety
glass faceplate. Amber filler supplied with P7.
INTERNAL GRATICULE:
Parallax-free 10 cm x
10 cm marked in cm squares. 2 mm subdivisions on major horizontal and vertical axis.
BEAM FINDER: Depressing Beam Finder control
brings trace on CRT screen regardless of
setting of balance, position or intensity oontrols.
SINGLE SWEEP: Front panel switch permits Single
sweep operation.
INTENSITY MODULATION:
Terminals on rear;
+20 volt pulse blanks CRT at normal intensity.
VERTICAL AND HORIZONTAL AMPLIFIERS
POWER: 115 or 230 volts
Approximately 90 watts.
BANDWIDTH:
DC Coupled: DC to 500 kc
AC Coupled (input): 2 cps to 500 kc.
AC Coupled (amplifier): 25 cps to 500 kc at 0.2
mv/cm sensitivity. Lower cut-off frequency
(fco) is reduced as sensitivity is reduced;
at 20 mv/cm fco is 0.25 cps. On less sensitive ranges, response extends to DC.
:1:10%, 50 to 1000 cps.
DIMENSIONS:
r----- ,·t ~-..,
SENSITIVITY:
0.2 mv/cm to 20 v/cm. 16 ranges
in 1,2,5,10 sequence with an attenuatoraccuracy
within :1:3%. Vernier permits contilU1OUs adJustment of sensitivity between ranges and extends
mininwm sensitivity to at least 50 v/cm.
INTERNAL CALIBRATOR:
ApproXimately 350cps
square wave. 5 mV:l:3%. Automaticallyconnected
for checking gain when the sensitivity is switched
to CAL.
INPUT IMPEDANCE: 1 megohm shunted by 45 pf,
constant on all sensitivity ranges.
MAXIMUM INPUT: 600 v peak (dc + ac).
1-0
WEIGHT: Net, 31lbs (14kg); Shipping, 38 lbs (1 '1, lkg).
01879-3
Model l30C
Section I
Paragraphs 1-1 to 1-4
SECTION I
GENERAL INFORMATION
1~1.
DESCRIPTION.
1-2. The Hewlett-Packard Company Model 130C
Oscilloscope (shown in Figure 1-1) is a versatile
instrument for laboratory, production line, or industrial process measurements. Horizontal and vertical
display sensitivity is 200 microvolts per centimeter
and the measurement bandwidth is 500 kc. A sweep
magnifier of up to X50 allows expansion of a trace to
the equivalent of 500 centimeters for viewing waveform
details. Slngle sweep operation is also provided to
allow observation of single shot phenomena or random
occurrence events. Trigger adjustments are minimized
by USing either a front panel trigger-level control with
preset stability or automatic triggering which provides
a base line even with no inp.1t signal. Also, for fast,
expanded sweep times where the automatic trigger
baseline would be too dim, a free run m:lde may be
used to provide a bright base line display. An of!screen trace may be easily located by depressing a
front panel Beam Finder Button which returns the
trace to the screen regardless of intensity, balance,
or position settings. Careful engineering design of
the Model 130C has resulted in high stability of gain
and minimal DC drilL The Model13OC has an internal
graticule CRT, which eliminates parallax ambiguity
and minimizes reflections and glare. The instrument
Is packaged in the hp modular cabinet, allowingquick,
easy conversion to rack mounting and also prOVides
easy accessibility to internal circuits for maintenance.
1~3.
MANUAL IDENTIFICATION AND CHANGES.
1-4. Information in this manual applies directly to
Model 130C instruments with a serial prefix of 644(see manual title page). The serial prefix of a hp
instrument is the first three digits (1. e. those before
the dash, as XXX-OOOOO)ofthe serial number stamped
on a plate attached to the rear panel. Appendix I
contains information on changes required to adapt
this manual to an instrument with any serial prefix
listed there. A separate change sheet (included with
this manual) provides information to adapt this manual
to an instrument with any serial prefix other than those
mentioned in this paragraph or Appendix I. Any errors
in this manual when it wasprintedare called ERRATA,
and these corrections will appear only on the separate
change sheet included.
Note: Instruments with serial prefix 226-,
235-, or 248- require a different manual,
written for the 235- prefix (hp Part No.
130C-901), for correct information.
Figure 1-1. Model13OC Oscilloscope
01879-5
1-1
Section 1
Paragraph 1-5 to 1-10
Model l30C
Table 1- 2 Equipment and Accessories Available
1-5. CRT WARRANTY.
1·6. The cathode ray tube used in the Model l30C is
covered by a warranty separate from the inBtrument
warranty. The CRT warranty is included at the back
of the manual tor your use in the event of CRT failure
during the warranty period.
lUOA
Clip-on AC CUrrent Probe
lUIA
Current AmplUier (tor IUOA)
l0001A!C
1-7. EQUIPMENT SUPPLIED OR
AVAILAIU.
Compensated 10:1 divider probe
(5 It cable)
l0001B/D
Compensated 10:1 divider probe
(10 ft cable)
1-8. Each instrument Is supplied with detachable
power cable and raCk-mounting hardware. Other
equipment available tor use with the Model l30C is
listed in Table 1-2.
IOOO2A/C
Compensated 50:1 divider probe
(5 tt cable)
IOOO2B/D
Compensated 50:1 divider probe
(10 tt cable)
1·9. OPTIONS COVERED.
l0025A
General purpose straight-through
probe
1-10. ThiB manual applies to Model 130C instruments
with the options listed and described in Table 1-3.
Refer to Appendix II for complete information on all
10100B
100 ohm termination for lUOA
10U1A
Adapter, BNC female to dual banana
plug
q)tions.
Table 1-3. Description of Options
Option Number
1-2
Description
0'
External graticule with scale light in lieu of internal graticule. Specify
phosphor: PI, P2, P7, PU, P31 available.
06
Rear terminals in parallel with front panel terminals. 11U'ee-pin AN-type
coonectors (supplied) for horizontal and vertical signal inputs; BNC connector for trigger soorce.
13
6-31/32 in. x 19 In. x 3/16 in. front panel, suitable for attaching yoor own
handles.
01879·2
Section n
Paragraphs 2-1 to 2-16
Mode113OC
SECTION II
INSTALLATION
2-1. INCOMING INSPECTION.
2- 2. MECHANICAL CHECK. When the Model 130C
is received, verify that the package contents are
complete and as ordered. Inspect the instrument for
any physical damage suchas a scratched panel surface
broken knob, or connector, etc., incurred in Shipping.
Remove the instrument covers and visually check
inside for loose or damaged components. To facilitate
possible reshipment, keep the original packing if
recommended for reuse (see Paragraph 2-12) until
a satisfactory inspection of the instrument is completed. H damage is found, file a claim with the responsible carrier or insurance company and refer to
the warranty page in this marnal.
2-3. PERFORMANCE CHECK. TheModel13OC may
be checked for electrical operation within the specifications of Table 1-1 by following the procedures of
Paragraph 5-3. These procedures allow a complete
performance check with no internal connections or
adjustments.
If instrument does not operate as
specified, refer to the warranty page of this manual.
2-4. RACK INSTALLATION.
2-5. The Model 130C is shipped from the factory
ready for use as a bench instrument The hardware
necessary to rack-mount the instrument is packaged
with the instrument 1) Remove tilt stand and plastic
feet, 2) Remove adhesive-backed trim strip from
sides, 3) Attach filter strip along bottom of front
panel, 4) Attach mounting flanges to sides with larger
notch toward bottom of instrument.
2-6. COOLING.
2-'7. Leave at least two inches clearance aroond the
instrument for free circulation of air. In enclosed rack
installations, be sure that the recirculation of warm
air does not result in a high ambient temperature.
2-8. POWER REQUIREMENT.
2-9.
The Model l30C operates on 115 or 230 volts
±1O'%, 50 to 1000 cps, single phase. The power reqUired is approximately 90 watts. Before connecting
the instrument to the power source, be sure that the
115-230 switch on the rear panel is in the proper
position for the power source to be used. The line
fuse is mounted behind the rear panel, and is accessible by removing the top cover. The 2 ampere fuse
supplied is for either 115 or 230 volt operation.
2-10. INSTRUMENT GROUND.
2-11. To protect operating personnel, the National
Electrical MalWfacturer's Association recommends
that the instrument panel and cabinet be grounded.
The Model 130C is equipped with a three-conductor
power cable which grounds the instrument when an
appropriate outlet is used. The round pin on the
power cable is the ground pin connection. To retain
018'79-2
the protection feature when operating the instrument
from a two.-contact outlet, use a three-conductor to
two-conductor adapter and connect the adapter wire
to a suitable ground.
2-12. REPACKAGING FOR SHIPMENT.
2-13. SUGGESTED PACKING MATERIAlS. To package an instrument for shipment, some types of original
packing materials may be reused, or your hp sales
Engineer will help in getting suitable packaging. The
types of original packing materials which may generally be reused are: (1) foam which encloses the instrument, (2) cardboard layers separated by foam supiX'rts,
and (3) laminated cardboard cut to desired packing
shape. Original packing materials which are a cardboard "accordion-like" filler are not recommended
for shipment since the cushioning qualities areusually
gone alter one use. Upacking materials recommended
above are not available, first protect the instrumeht
surfaces with heavy paper or sheets of cardboard
flat against the instrument. Then place instrumentin
a durable carton. pad all sides with approximately
4 inches of new material designed specifically for
package cushioning, mark carton clearly for proper
handling, and insure adequately before Shipping.
2-14. SIDPMENT FOR SERVICE OR REPAIR. Han
instrument is being returned to Hewlett-Packard
Company for servicing or repair, attach a tag to the
instrument specifying owner, desired action. model
number, and serial number. Ship the instrwnent to
the nearest hp Sales/service Office (addresses atrear
of this manual). All correspondence should refer to
an instrument by Model number and the full (eight-digit)
serial number.
2-15. INSTALLATION OF AMBER FILTER.
2-16. An amber filter (hp Part No. 120A-83A) is
supplied with the Model 13OC, Option 0'7. This filter
may be used to improve the long persistence characteristics desired for observing single-shot or very
low frequency displays. To install the filter remove
CRT bezel and proceed as follows:
a. Set filter into bezel, aligning the large rectangular slots in the filter edge with guides in the bezel
casting and sliding the filter down into the casting.
b. Loosen the clamp at the CRT socket. Carefully
p,lsh the CRT toward the rear of the instrument to
proVide clearance for the thickness of the filter
(approximately 1/8 inch).
c. Re-install the bezel and slide CRT forward until
light mask on front of CRT Just touches filter.
d. Tighten clamp to keep CRT from rotating.
Note: Over-tightening clamp may damage CRT.
e. Check alignment of trace with graticule. U
necessary adjust R329 Trace Align (rear panel).
2-1
Section m
Figure 3-1
Modell30C
13
12
.~
@
4
~ @ t~~·,
--iI:j iii- -~-11]" ..
$
(@ @ @~"'-.c@ @)
2
3
1
1.
Power on indicator. Glows when AC )))wer is
switched on.
8.
INPUT AC-DC. Selects direct or capacitive
coupling of the input signal (see Paragraph
3-31).
2.
BEAM FINDER. RebJrns oft-screen trace to
screen and intensifies trace (see paragraph
3-14).
9.
AMPUFlER AC-DC. Selects internal direct
or capacitive coupling on 7 highest sensitivity ranges (see Paragraph 3--31).
3.
FOCUS. Adjusts trace sharpness.
4.
INTENSITY. Adjusts trace brightness. When
rotated fully counterclockwise, turns power off.
5.
CALIBRATOR. Provides 500 mv p-p square
wave for compensating probes or for use in
external circuitry (Zsource '" 10 KO).
6.
7.
Vertical -input terminal. Negative-going sIgnals applied to this terminal cause upward
defiection of the trace.
Vertical +input terminal. Positive-going signals applied to this terminal cause upward
deflection of the trace.
10. Vertical DC BALANCE.
Adjusts internal
DC levels to minimize trace shift when changing sensitivity ranges (or using VERNlER).
11. Vertical POSITION.
Moves trace vertically.
12. Vertical SENSITMTY. Sets the deflection
sensitivity of the trace. Calibrated SENSITIVITY when VERNIER is Cully cw (detented
position).
13. VERNIER. Variable portion reduces deflection sensitivity for range selected. Allows
contirRlOus adjustment between ranges; extends minimum sensitivity to 50 V/CM. Calibrated SENSITIVITY wben set to CAL.
Figure 3-1. Controls and Terminals (Vertical, CRT Display and Power)
3-0
01879-1
Section m
Paragraphs 3-1 to 3-11
Model13OC
SECTION III
OPERATION
3-1. INTRODUCTION.
3- 2. The Model l30C may be used in either of two
buic mode. of operation: (1) external signal to vertical
input with internal horizontal sweep or (2) external
81gnala: lnto both horIzOntal and vertical inputs. The
deflection .ensitivity and bandwidth of the two amplifiers is indentical and the input to eachampltner may
be easily changed to allow either single-ended inputs
or balanced 1npUts. A choice of either AC or DC
coupling, at the input and internally in the ampWler,
is provided for both horizontal and vertical circuits.
The internal borizontalsweep baB 21 callbratedsweep
times from II!Mc/cm to 5 sec/cm with a vernier [or
continuous coverage which can extend the slowest
lIWeep speed to 12.5 .ec/cm. Each sweep time may
be magn1f1ed by choosing either X2, XS, XlO, X20,
or X50 rqe. The sweep can be triggered internally
from the vertical deflection signal or the Une frequency; external trl.g:ers can also be used, either
AC or DC coupled to the sweep circuit See Paragraph S0016 [or a brief operational check.
3-3. fRONT AND RIAR PANEL
fAMILIARIZATION.
3-4. FRONT PANEL. Figures 3-1 and 3-2 identify
and briefly describe the Model 130C front panei controls, connectors, ete. To aid in proper operation,
Paragrapba: 3-6 through 3-15provideamore extensive
description of 80me front panel controls. Note that
controls for vertical and horl.zontallnputs are identical
in function and appearance except that the oorlzontal
SENSITMTY has six internal sweep positions.
3-5. REAR PANEL.
The power cord connector,
line fuse, and 115-230 volt switch are described in
Paragraph 2-8.
TRACE Al.JGN is a screwdriver
adjustment to align the CRT trace with the graticule.
Relocating or reorienting the instrument within a
magnetic field such as the earth's tleld may require
adju8trnent of tblB control to maintain exact alignment
The Z AXIS [NPUT allows trace intensity modulation
by applylng a modulating signal with the shorting link.
removed.
At normal trace intensity (set on front
panel), a +20 volt pulse will blank the trace. H not
usIng the Z AXIS INPUT terminals, be sure the
shorting link is in place.
S006.
SENSITMTY.
3-1. SENSITIVITY control (vertical or horizontal)
seta the deflection sensitivity of the display In mllU·
volts per centimeter or volts per centimeter, When
VERNIER is in CAL. position. In BAL position of
the SENSITMTY switch, the ampWier lnp.lt I.s
grounded. and the input terminals are opened, to
faclitate setting of the ampllfler DC balance (see
Paragraph Sooe and Figure 3-3). IntheCAL. position.
an internal callbrator signal is applied to the ampllfler
inp.lt and the calibration accuracy can be checked by
noting the defiection on the CRT as follows: (I) with
01819-1
no vertical 1npJt, when HORIZONTAL SENSITIVITY
and VERNIER are set to CAL, a horizontal line 5 cm
long should be diBplayed (if not the probable cause 18
m1aad~stment of the horizontal gain; see Section V),
(2) with no horizontal1qlut, when VERTICAL SENSITIVITY is set to CAL, a verticalllne 5 cm long abwld
be diBpiayed (ll not, the probable eatUle 18 mlsadfuStment of the vertical gain; see Section V); if an internal
lIJWeep time is used a 5 cm p-p square wave 8boU1d be
displayed.
The INTERNAL SWEEP positions of
HORlZONTAL SENSITIVITY can beused to effectively
expand a trace from two screen diameters In X2 to
fifty screen diameters in X50.
3-8.
DC BALANCE.
3-9. The DC BALANCE control bas a range of about
40 screen diameters, i.e. it can effectively move
the trace about 400 cm. Its purpose 18 to set internal
ampllf1er Operating coDdiUons such that there is a
mJn1m.un trace 8h1tt as SENSITIVITY is switched
from range to range, or when VERNIER 18 used.
This is especlally important at the more sensttive
ranges (toward 0.2 MY/CM) when the AMPLIFIER
switch is set for DC coupIJ..na. Fleure 3-3 provides
the procedure tor setting vertical and horizontal DC
BALANCE properly. The setting may change during
warmup or extended periods of operation and require
periodic readjustment when the instrument is used
DC coupled at high sensitivities.
Note
DC BALANCE is a "fine" controlandshould
additional range be requtred to balance the
ampillier a coarse DC balance ad)U8trnent
is located within the instrument (see Section
V for proce4'lre).
3-10. LEVEL.
S0011. Through its variable range, LEVEL control
determines the point on the triggering-source waveform at which the sweep starts. This trigger level
is variable whether using external, internal, or line
for the trigger 8OUrce. By proper setting of LEVEL
the sweep may be started at any point on a vertical
deflection waveform (deflecUon> 0.5 cm) when triggering internally or at a point between +lOv to -lOv
on an external trigger signal.
The + or - on the
LEVEL control refers to the direction the trigerlng
point MOVetI on a waveform, regardless of theSWPE
setting (for ezample, turning LEVEL ccw moves
trtggering level toward a more negative point on the
trl.g:ering waveform). When LEVEL is Bet fully
counterc1ockwl8e to AUTO (detented positionJ, tbe
lIWeep will free run at a low repetition rate provtd1ng
a bueUne in the absence of a triggering Itgnal and
then provide automatic triggering of the sweep when
a signal within apecW.cat1ons I.s applied.. In AUTO an
external trigger is always AC coupled. When LEVEL
is set fully clockw18eto FREERUN (deteDtedposition),
3-1
Section m
Figure 3-2
Modell3OC
-.-.
KJ m::J
__
~@@).@"
1.
AMPLIFIER AC-DC. Selects internal direct
or capacitive coupling on 7 highest sensitivity
ranges (see Paragraph 3-31).
vertical signal; LINE triggers on power Ilne
waveform; EXT. triggeu on signal at trigger
input terminal.
2.
Horizontal ... inp.1t terminal. Positive-goinK
signals applled to this terminal cause the trace
to deflect to the right.
10. ARMED. Indicator gloWs when sweep is ready
for trigger in SINGLE lJWeep operation.
3.
Horizontal -input terminal. Negative-going
signals appUed to this terminal cause the
trace to defied to the right.
11. SWEEP TIME. Selects time unit per centimeter of sweep.
Calibrated sweep time
when VERNIER is fully cw (detented poaltion).
4.
INPUT AC-DC. Selects direct or capacitive
coupling 01 the lnp.1t signal (see Paragraph
3-31).
12. VERNIER.
Variable portion reduces sweep
time per centimeter for selected range. Allows
continuous adjustment betweEl1 ~es; extends
slowest sweep speed to 12.5 sec/em. Cali·
brated sweep when set to CAL.
5.
Trigger Input Terminal.
trigger signal.
13. Horizontal POSITION.
ontally.
6.
Trigger Input AC-DC. Selects direct or capacitive coupling 01 external trigger signal (always AC coupled When LEVEL set to AUTO).
7.
NORMAL-SINGLE. selecta nonnal sweep or
single sweep operation (see paragraph 3-12).
Accepts external
Moves trace bortz-
14. Horizontal SENSITMTY. sets the deflection
serudttvity of the trace and selects internal
sweep. Calibrated SENSITIVITY when VERNIER I.s tully cw (detented position).
8.
LEVEL. Selecta free-running, automatietrlggering, or variable ampl1tude triggering (see
Paragraph 3-10).
15. VERNIER. Varlable portion reduces defiec·
tion sensitivity for range selected. Allows
continuous adjustment between ranges; extends minimum senSitivity to 50 V/CM. Calibrated SENSITIVITY when set to CAL.
Q.
TRIGGER SOURCE-SLOPE. Selecta source
of sweep trigger signal and slope on which
trigger occurs. INT. triggers with internal
16. Horizontal DC BALANCE. Adjusts internal
DC levels to mln1mize trace shUt when changing sensitivity ranges (or using VERNIER).
Figure 3-2. Controls and Termtnals (Horizontal. Sweep, and Triggering)
3-2
0187Q·1
Section m
Paragraphs 3-12 to 3-25
ModellSOC
the horizontal sweep is free running at a rate determined by the sweep time setting, and cannot be controlled by a triggering signal.
3-12. NORMAL-SINGLE.
3-13. When NORMAL-SINGLE is set to NORMAL, the
horizontal sweep operates recurrently as determined
by the triggering signal. In SINGLE position, the
sweep can be triggered only once, after which it is
locked out until armed by switching to NORMAL and
back to SINGLE. The ARMED light is on in SINGLE
position when the sweep is armed and ready to be
triggered. To use the singlesweepoperation, LEVEL
must be set anywhere in its variable range, I.e. not
in AUTO or FREE RUN. See also paragraph 3-24.
b. Set all VERNIERs to CAL.
c. Set horizontal and vertical AMPLIFIER and
INPUT to AC.
d. Set vertical SENSITIVITY to CAL.
e. Set the horizontal SENSITMTY to tNTERNAL
SWEEP Xl and setSWEEPTIME lo 1 MILLISECONDS/
eM.
f. Set TRIGGER SOURCE-SLOPE to INT. +. LEVEL
to AUTO, and NORMAL-SINGLE to NORMAL.
g. Adjust both POSITION controls to center display.
Adjust FOCUS for sharp, dear trace.
h. The height of the square wave displayed
be 5 cm.
~uld
3-14. BEAM FINDER.
3-15. This paragraph will explain operation and
function of the BEAM FINDER and also discuss some
causes of no CRT display. The BEAM FINDER pushbutton is useful for locating a display which is not
visible on the CRT for these common reasons: 1) DC
unbalance in amplifier at high sensitivities, (and
AMPLIF1ER DC coupling), 2) amplifier being overloaded at input, or 3) intensity set too low. Depressing
the BEAM FINDER defocuses and intensUies the CRT
trace (or spot), and reduces the sensitivity of both
horizontal and vertical ampilliers so the trace appears
on-screen regardless of INTENSITY, DC BALANCE,
and POSITION settings. The beam finder reduces
amplifier gain enough to overcome the eUective positioning range of tbe DC BALANCE controls, which
amounts to as much as 40 screen diameters (I.e.
400 cm) at tbe highest amplifier sensitivity, as compared to only 2 screen diameters (20 cm) range for
POSITION control. Because of the desensitization
required to overcome DC BALANCE range, the POSITION controls are essentially inoperative when the
BEAM FlNDER is depressed. Therefore, alWays set
POSITION to approximately "120'clock" before using
the beam finder. To get maximum usefulness from
tbe BEAM FINDER, the selected ampl1fler sensitivity
and coupling should also be considered. At higher
amplifier sensitivities (i.e. toward 0.2 MY/CM), if
AMPLIF1ER 18 set to AC, a DC unbalance in the
amplUier cannot cause an oU-screen deflection. Instead, the most probable cause is amplifier overload
by the input signal or intensity may be set too low. At
higher sensitivities with amplifier DC coupling, and
trace not on screen, switch AMPLiFIER to AC and if
trace now appears on-screen then a DC Unbalance
exists (to make DC BALANCE setting see Figure3-3).
At lower amplifier sensitivities, DC unbalance is
eliminated as a cause tor oU-screen trace. Another
cause of no display is non-triggering sweep and this
can be checked by noting if trace appears when the
automatic triggering mode is used. (see Table 1-1 tor
specifications).
3-16. OPERATIONAL CHECK.
3-17. This procedure may befollowedtocheckoperation of most controls and circuits of the Model 130C.
a. Turn INTENSITY to about 12 o'clock position
(bJrns AC power on). Allow severalrninuteswarmup.
01879-1
3-18. OPERATING PROCEDURES.
3-19. ParagraphS 3-20 through 3-29. and the figures
referenced, describe procedures for various operating modes and applicationsoftheModel13OC. Before
operating the Oscilloscope and following these procedures. it is recommended that Paragraphs 3-3
through 3-15 be read to become completely familiar
with front panel controls. Also, Paragraphs 3-31 and
3-33 describe considerations which are important in
most measurements with the Model 130C
3-20. INTERNALLY TRIGGERED SWEEP
OPERATION.
3- 21. In lh1s type operation, the sweep is triggered
internally from the vertical signal or Une frequency
and the signal to be observed is applied to the vertical
input; Figure 3-4 provides a step by step procedure.
Witb TRIGGER SOURCE-SLOPE set to INT. + or -,
the sweep is triggered when the vertical signal input
causes a vertical deflection of 0.5 cm or more. With
TRIGGER SOURCE-SLOPE set to LINE + or -, the
sweep is triggered from the AC power line waveform.
Function of LEVEL control is described in Paragraph 3-10.
3-22. EXTERNALLY TRIGGERED SWEEP
OPERATION.
3-23. In this type operation the sweep is triggered
from an externally applied signal and the signal to be
observed is applied to tbe vertical input; Figure 3- 5
provides the step by step procedure. With TRIGGER
SOURCE-SLOPE set to EXT. + or ., the horizontal
sweep is triggered by a signal of 0.5V p-p or more.
applied to the trigger input terminals. Figure 3-5
explains use and specWcations for AC or DC trigger
input coupling; if LEVEL is sct to AUTO, the external
trigger signal 18 always AC coupled. Function of
LEVEL control 18 explained in Paragraph 3-10.
3-24. SINGLE SWEEP OPERATION.
3- 25. A step by step procedure for obtaining single
sweep operation is contained in Figure 3-6. This
method is useful for observing single shot phenomena
or random events. With single sweep operation, the
sweep occurs lUst once and cannot be retriggereduntil
manually rearmed. See also Paragraph 3-12 for
explanation of the SINGLE-NORMAL switch.
3-3
Modell3OC
Section m
Paragraphs 3·26 to 3--32
x-x OPERATION,
3-26. DIFFERENTIAL INPUT OPERATION.
3.28.
3-27. Balanced inputs are provided on all SENSITIVITY rang811 of both horizontal and vertical deDection ampl1t1ers which allows meaaurement of the
dltterence between two sl.gna1a. Thi8 18 called differential input operation and in thi8 mode the two
81gIuW1 are wbtracted algebraically and the difference 18 diBplayed as a Bingle trace. This type of
operation ellm1nateB 8tgnal8whicb are com.mon to both
lnpuu (referred to as the common mode signal) and
displays signals pecullar to only one inprt. Figure
3-7 prov1d.88 a step by step procedure fordWerential
operation of the Model 13OC. Common mode rejection
ezpreued in decibels reprceents the alaUty of the
amplllier to attenuate the common mode signal and
this 18 summarized in Table 3.1 along withtbe maximum allowable peak-to-peak common mode signal to
maintain these rejection ratios.
3-29. In the X-Y mode of operation the lnternal sweep
18 disabled and external signals are applied to both
the horizontal and vertical amplifiers. Figure 3-8
provides an operating procedure for obtainlng Lissajous patterns or X-X plots. Tbe X·Y display is a
graph of tbe vertical .tgnal va. the horizontal s1gnal.
and laUlJeful tor d18playing plots ofvo1tagevs. current.
byBteresis 100118. preesure VB. Btra1n (using strain
gages), etc. Anotber important appllcation for X-X
operation is to make phaae shift measurements. Tbe
vertical and horizontal ampllfienll ban identical
characteristics and less than :1:1° relative pbue shift
from DC to 100 kc when VERNIERs are set to CAL.
and amplifier SENSITIVITY settings are equal. $
Application Note 29 describes a convenient method
tor measuring pbUe sb1tt. When meaaur1ng pbaae
sbitt at very low frequencies, use both AMPLlF1ER
DC and INPUT DC to eliminate phaae dU!erences
contributed by the AC coupling capacitors.
Table 3·1. Common Mode Rejection
Ma:.mwm
Peak·to-Peak:
SENSITIVITY
In",t
Minimum
Common Mode
Rejection
(DC to 50 kc)
0.2 mV/CM thru
0.2 VOLTS/CM
4 volu
40 db
0.5 VOLTS/CM
thru 2 VOLTS/CM
40 volts
30 db
5 VOLTS/CM thru
20 VOLTS/CM
400 volts
30 db
3.30. OPERATING CONSIDERATIONS.
3-31. USE OF AMPLIFIER AND ffiPUT AC-DC.
S.32. DUterent combinations of AMPLIFIER and INPUT coupling will provide various advantages in tbe
characterlBUC8 of operation depending on the waveform to be displayed. Table 3-2 summarizes the
typical low·frequency 3 db cutoff point with different
SENSlTMTY and coupll..ng settingS; typical appllcationa are a.1Io given. The b.1gh frequency 3 db cutoff
point 1JI 500 kc in all cases. For SENSITIVITY settings
from 50 mV/CM througb 20 VOLTS/CM,AMPLlF1ER
Table S· 2. CharacterlBtics and Appllcations for AMPLIFlER and INPUT Coupling Comb1nations
SEN&MnNTrY(mV/CM)
AMPLIFIER INPUT .2
AC
DC
2.
••
10
•
I
2
•
2•• I
10
20 50mV to 20 VOLTS/CM
••
.2'
DC
For observIng the DC component of waveforms;
typical drift 0.3 mVper
half hour.
cps cps cps cps cps cps cps
AC
AC
2.
I ' II
cps cps cps
DC
DC
3-4
AC
DC
•
•
•
10 cps
10 cps
DC
APPLICATIONS
•
For observing small, lowfrequency components of
waveforms without drift
(AMPUFIER SWitch has no
effect on V/CM ranges)
•
For general·purpose
measurement of AC waveforms; blocks DC components; maximum input Is
600 volts peak (AC + DC)
•
For obeerv1ng very low
frequency components at
bilh sensitivities when
large DC level 18 preseDt.
(Note maximum lnprt ltm1t)
01879--1
Modell30C
coupling switch bas no effect; coupling is always DC
for these ranges. WIlen using ampUfier AC coupling
in the moat sensitive range of 0.2 mV/CM at low
ambient temperatures the amplifier sensitivity is
reduced slightly. The reduction is noticeable only at
temperatures below 2~C and reaches a maximum of
approximately S% at O"C.
3-33. APPLYING INPUT SIGNALS.
3-34. For measuremenu at high amplifier sensitivities and high impedance levels a shielded inp.tt
01879-1
Section m
Paragraphs 3-33 to 3-34
connection to the OscUloscope is desirable. The 4j
Model 1011lA Adapter provides a shielded banana
post to female BNC connector. Two adapters can be
used to provide shielded connections for differential
input operation.
Frequency compensated divider
probes (liSted in Table 1-2) can be used to provide
a higher inprt impedance and thus reduce loading
eUects on the circuit where measuremenu are made.
The 500 mV CALIBRATOR output on the Model l30C
front panel may beusedfor probe compensation adjustment (described in the Operating Note for the probe).
The Model 10InA Adapter is necessary for COMecting
the divider probes to the Model 130C input terminals.
3-5
Modell30C
Section III
Figure 3-3
4
5
.•.
t~~;,
-~--_ .... .
~
II]
2.
Note
steps 2 through 6 are for both horizontal
and vertical controls.
Set INTENSITY to mId-range.
set AMPUF1ER and INPUT to AC.
3.
Set DC BALANCE and POSITION to mId-range.
4.
5.
Set SENSITMTY to BAL.
Set VERNIER to CAL.
6.
Center spot w~th POSITION.
7.
Set verUcal AMPLIFIER to DC.
8.
Center spot with vertical DC BALANCE. If
spot ~s not on CRT, depress BEAM FINDER,
and set DC BALANCE 80 spot ~s about centered
on CRT. Release BEAM FINDER andUnecessary, refine DC BALANCE setting 80 spot Is
centered on CRT (spot will always travel up
and down near the vertical center gratlcule
line). Vertical ampWier ~s now DC BalanCed.
1.
Note
If spot cannot be centered with DC BALANCE at about ~ts mId-range. check the
coarse balance adjustment (internal) according to Section V procedure.
9.
To balance the hor~:wntal amplifier first set
vertical AMPUF1ER to AC and hor~:wntal
AMPUFIER to DC.
10. Center spot with horizontal DC BALANCE.
If spot is not on CRT, depress BEAM FINDER, and set DC BALANCE 80 spot ~s about
centered on CRT. Release BEAM FlNDER
and if necessary, refine DC BALANCE setting 80 spot Is centered on CRT (spot will
always travel across CRT near the horlzontal
center gratlcule line). Horizontal amplU~er
Is now DC balanCed. see note following step 8,
this procedure.
Figure 3-3. DC BALANCE Procedure
3-6
01879-1
Section m
Figure 3~4
Mode1130C
4
3
9
8
-_...
;....
.
- ...
-
5
_.~_
-
\
--
'@~
,
'
10
8
1
1.
Connect vertical signal to input.
ential input see Figure S- '1.
2.
Set SENSITIVITY for desired vertical deflect:ioo.
3.
Set VERNIER to CAL for cal1brated sensitivity.
4.
Set SENSITIVITY to INTERNAL SWEEP Xl.
5.
Bet TmGGER SOURCE~SLOPE to !NT + or
INT -. To trigger on power line waveforms
set TRIGGER SOURCE~SLOPE to LINE +
or L1NE~.
6.
Set LEVEL to AUTO.
'1.
Set NORMAL-SINGLE to NORMAL.
8.
Set SWEEP TIME for desired presentation of
waveform.
9.
Set VERNIER to CAL for calibrated sweep
lime.
For differ-
10. Adjust LEVEL to trigger at a desired point
on trlggerlng waveform.
Figure 3-4. Internal Sweep with Internal Trigger
018'1'9~1
3-'
Sect10n m
Figure 3-5
Mode11SOC
2
3
@
.@
@
-
@
'"
@
5
IMe-"'-.
8
1.
Connect vertical 8ignal to input.
2.
Set SENSITIVITY for desired vertical deflection.
3.
Set VERNIER to CAL for callbrated. 8enBitivtty.
4.
Set SENSITIVITY to INTERNAL SWEEP Xl.
5.
Set TRIGGER SOURCE.SLOPE to EXT + or
EXT -.
6.
Set AC-DC to either AC or DC for trigger
signal above 20 cps; set to DC for trigger
signal from DC to 20 cps.
7.
Connect trigger signal to input.
8.
Set NORMAL-SINGLE to NORMAL.
9.
AdjuSt LEVEL to obtain a diaplay On CRT.
Do not use AUTO for trigger below 50 cps.
10. Set SWEEP TIME for desired presentation of
waveform.
11. Set VERNIER to CAL for calibrated sweep
time.
12. Ad)U8t LEVEL to trigger at desired point on
triggering waveform.
Figure 3-5. Internal Sweep with External Trigger
...8
01879-1
Section m
Figure 3-6
Model13OC
4
-
.-
@
4
5
1.
Set SENSITIVITY and SWEEPTIMEasdesired.
2.
Set TRIGGER SOURCE-SLOPE for internal or
external triggering as required.
3.
Set LEVEL to proper triggering point. Do
not use AUTO or FREE RUN (see Paragraph
3-12).
4.
Set NORMAL-SINGLE to SINGLE.
indicator should glow.
5.
Apply vertical signal.
6.
Apply trigger signal if required (i.e. if using
external trigger; otherwise sweep will trigger
internally from vertical circuits).
7.
6
ARMED
To re-arm sweep, switch to NORMAL and
ARMED lndicator wID
glow when sweep ls armed and ready to be
triggered.
back to SINGLE.
Figure 3-6. Single Sweep Operation
01879-1
3-9
Mode11SOC
Beetion m
Figure 8-7
(§)
(§)
-.,.. .,.. -@"'
__ .._r
1
1.
Disconnect grounding link from center input
terminal.
2.
Connect
poSitive-going
Signal to left-hand
terminal.
3.
Connect negative-going Signal to center terminal.
4.
Set SENSITIVITY tor desired vertical defiection.
When using high sensitivities (i.e.
toward 0.2 MY/CM) and internal DC coupling,
check tor DC BALANCE (Figure 3-3) U
necessary.
5.
Bet VERNIER to CALforeallbratedSen8itivity.
6.
Follow the procedure above U d1tferential
oorizontal iDpUt is desired.
Figure 3-7. Differential Operation
3-10
01879-1
Section III
Figure 3-8
Model 130C
SWEEP
1.
Connect Y signal to vertical input.
2.
Connect X signal to horizontal input.
3.
Set SENSITIVITY for desired deflection.
4.
Set VERNIER to CAL for calibrated sensitivity.
5.
Adjust POSITION for desired vertical position.
6.
Set SENSITIVITY for desired deflection.
7.
Set VERNIER to CAL for calibrated sensitivity.
8.
Adjust POSITION for desired horizontal position.
Figure 3-8. X- Y Operation
01879-1
3-11
Sectloo IV
Figure 4-1
Modell30C
,o I INPUT Ac-eci
/ P IAMPLIFIER AC-DCI
, / ,/ ,0 (SENSITIVITYI
// // / P IVERNIERI
/ "/ / ' / , D IDC BALANCE I
/
,0 IBEAIIl flNDERI
/ / / / , ' , OIPOSITIONI
,
-------------~~---------------------~
,,
/
+
VERTICAL
INPUT
TRIGGER
INPUT
/
/
TO CRT
VERTICAL
DEFLECTION
PLATES
VERTICAL
AfIlPUFIER
___ 0 ITRIGGER SOURCE-SLOPEI
-- __ -0 (TRIGGER LEVELl
------0 (SWEEP TIMEI
-----0 IVERNIERI
SWEEP
GENERATOR
:::---0
---'0
HORIZONTAL
INPUT
I
I
INORMAL-SINGLEI
lAC-DC I
I
I
I
, , ~------------------
+
I
I
I
I
-----------------------1
TO
HORIZONTAl
AMPLIFIER
CRT
HORIZONTAL
DEfLECTION
PLATES
-
, , , , " OIPOSITlON]
, , ',',',,0 loc BALANCEI
',', ',',',
',',',
, , ,0
',', b
" ,b
IVERNIERI
TO
CRT
ISENSlTIVITYI
CATHOC<
IAIIlPLIFIER AC-DCI
o I INpuT AC-DCI
I~ONVI
>-----1 CALIBRATOR
LOW
VOLTAGE
POWER
SUPPLIES
........
HIGH
VOLTAGE
:8~i~
~"';:':';';"';:''-.J
----0
JFocusl
~--o
.~I~N~TE~NS~'!TY!l1
- __
:.:::...'POWER]
Figure 4·1. Model130C Overall Functional Block D1agra.m
4-0
,)OC_~_,
Section IV
Paragraphs 4-1 to 4-13
Modell30C
SECTION IV
PRINCIPLES OF OPERATION
4-1. INTRODUCTION.
4-2. As shown in the block diagram. Figure 4-1, the
Model 130C consists of five major sections: lowvollage
p:lwer supply. high voitage p:lwer supply, vertical
ampWier, horizontal amplifier and sweep generator.
4-3. The paragraphs of this section diSCUSll the
circuit details of the major secllonsoftheModel 130C.
Since the vertical and horizontal ampl1flers are nearly
identical. the horizontal amplifier is described where
it differs from the vertical amplifier.
4-4. LOW VOLTAGE POWER SUPPLY.
4-5. The low voltagep:lwer supply provides operating
voltages for the amplifiers and for the sweep generator
circuits with outp.tts of -100V, +12.5V, +100V. and
+250V. The regulated +12.5 volt suPPlY provides filament voltage for the vertical and horizontal inp.tt stages
and a current source for the trace alignment coli.
4-6.
-100 VOLT SUPPLY.
4- 7. The -100 volt supply provides regulated voltages
for the ampUller and sweep circuits, and also provides
a reference voltage for the +100 volt and +250 volt
suppUes. Refer to Figure 4-2. DifferentlalAmplifier
Q463/Q464 compares the reference voltage from
Reference Tube V461 against the output voltage sample
obtained by voltage divider R467/R469. The difference voltage is amplified and appUed to Driver Q462
and Series Regulator Q461. The voltage applied to
Series Regulator Q461 is out of phase, i.e., when the
outp.tt voltage of the supply rises, the voltage applied
to Q461 causes the series voltage drop to increase,
returning the supply voltage to its original level. In
this way, any variations in output voltage due to load
change or Une voltage change are sensed by the differential amplifier and corrected by the series regulator.
Potentiometer R468 adjusts the output voltage to
exactly -100 volts.
4-8.
4-12. HIGH VOLTAGE POWER SUPPLY.
4-13. The high voltage p:lwer supply provides the
voltages necessary for the operation of the cathode
ray tube. Refer to Figure 4-3 for the following explanation. Tube v301 is operating in a Hartley oscillator circuit, oscillating at approximately 70 kc.
The oscillator voltage is aPPlied to the primary of
high voltage transformer T30l. The primary vOltage
is stepped up by the transformer and rectified by
V304 and V305. The outp.ttoftherectifiers is filtered
and applied to the CRT cathode and grid. The CRT
cathode voltage is compared to the +250V supply by
voltage dividers R311 through R318 and. applied to
Control Amplifier V302. Stnce the cathode of v302 is
J
RECTIfiER
+250V
DIIVEI
.m
!
fiLTER
l
....
A.PUfIER
om
$(RIES
RECULATOI
0421
-.J
lIECTlflElI
DRIVEl
0442
flLTEI
L.
+10010'
....
AIlPUflElI
0443
--0
!
SOlES
RECUlATOR
q441
-IOOV
~
+100 and +250 VOLT SUPPLIES.
4-9. The +100 and +250 volt suppUes operate in the
same manner as the -100 volt supply. A sample of
the output voltage is compared to a reference voltage
(the -100 volt supply) andthedifterencevoltageamplifled and. applied to a series regulator. Tbe series
regulator corrects for the variations illoutp.tt voltage.
The +250 volt is "stacked" on the +lOOV supply and
the two are interdependent.
4-10. +12.5 VOLT SUPPLY.
4-11. The +12.5 volt supply is dependent only on the
-lOOV supply and uses a single series regulator Q481
with a Zener diode reference CR482. Any variation
in supply voltage is coupled through the reference
diode. This results lnabasecurrentchange for Q481,
which is amplified and. acts to vary the supply load
current. providing the supply regulation.
01879-1
SERIES
c-' REGULATOR
O4tl
T
RECTIfiER
flUEI
-
DIIYER
0462
....
DlffEflEinU
AIIPllflEll
OU3,G464
--0
T
RHUEItE
W4t1
I
'30(-1-'
Figure 4-2. LV Power Supply Block Diagram
4-1
Section IV
Paragraphs
Mod.ell3OC
to 4-18
4~14
+2S0v
+zsov
AJI'UFIli
0
+
+I
e-
tied to a regulated VOltage (.100 volts) any variation
~
nOl
-
~
-IOOV
IFOCUS)
+IOOV
+
IQ,
IINT£NSIn
0..
\. /
,-+--
'.
:4
~
in b1gh voltage is seen by V302 as a change in grldeatbode voltage. Th1.s grid-cathode voltage change fa
amplifled and applied to the screen grid ofOscWator
V301 to control theoutputampUb.lde of the osc1llator.
The change 1s always in the proper direction to correct for change in high voltage.
4-14. INTENSITY control R308 varies the CRT cathode voltage, varying the inten.sity of the spot or trace
on the CRT screen. FOCUS control R31'7 varies the
focus grid voltage Cor trace focus. Astigmatism
adjustment R319 varies the voltage on the accelerator
to adjust beam geometry for a round sp>t.
4-15.
~
OSCllUTDI
UO!
I-
-4
"
Tlusr.un
utI
-4
".
Kenna
,
l'
tECTlflEl
Y3D5
~
-
UNBLANKING
GATE FROM
I
SWEEP
GENERATOR
'JOC-.-.
Figure 4-3. H V Power Supply Block Diagram
swnp
GENERATOR.
4·16. Refer to Figure 4-4 for a block diagram of the
sweep generator circuitry. The trigger generator
produces sl.gnals which synchronize the sweep with
internal signals from the vertical ampUfter or power
line, or With external trigger s1gnal&. In Figure 4-4
circuits represented In bloclta to the right of the Trigger Generator produce a linear sweep voltage (saw.
tooth wave shape) which is amplified by thehorlzontal
arnpwter and applied to the CRT deflection plates.
4·1'7. TRIGGER GENERATOR.
4·18. The trigger generator consists ofd1Uerential
amplifier VIOl and Schmitt trigger V102. Thetrlgger
GATE
IIUTI'IIT
CA11lO1JO
FOLLOIER
llO'A
TO HVPS
SI"
ISWEEple..
1'....
5101
INT [RNAL
TR IGGEfI
FR OM
VER T. AMP.
rD ITRIGGER SOURCE-SlDPEI
L/
~
UNBLANKING
I
TIME
I
SI02
I
I
I
r-----r-QILEVELI
I
I
I
rnF ENTIAL
Affi'FIEil f--o
EX'
TRIGGER >--0
lIOI
1NPV1'
TIlIGGER
GENERATOfl
liD!
SlEEP
Dlsall!ECT
DIODE
I
VIDSA
I
I
I!
GATE
GENERATOR
lIOlA. ~D'B
I
~81
HOLD'OFF
CATHODE
FOLLDIER
lI03B
lDCl·DUT
0101
DIODE
CLAMP
lI09B
HOLD-OFF
CAPACITOR
-
,,
k
,,
•
TIMING
RESISTOR
INTEGRATOR
lIOiA
TIMING
CAPACITOR
SlEEP
OUTPUT
Co\11lODE
FOLUlIER
,5104
D
VI06B
INORMAL-I
SINGLE
HOIHFF
DIODE
lIDBC
,
-v
:I
lJOl:_c.,z
SWEEP
,.J<P\IT
'0
HOAIZONTAL
AMPLIflER
___________ _________ J
Figure 4-4. SWeep Generator Functional Block Diagram
4-2
018'7&-1
Model13OC
signal, whether power line, internal, or external, is
applied to one grid of VIOl as determined by setting
of the trigger slope control (S101). The other grid 1&
connected to LEVEL control R1l6 through 5101. The
setting of Rl16 determines the DC level on one ha.U
of VIOl, and tlJ.1s the point at which the trigger signal
will cause VIOl to conduct The outp.Jt of VIOIB
drives trigger generator VI02 wbich provides the
waveform to drive the gate generator. When 5102 1&
in FREE RUN no trigger 18 needed to switch the gate
generator to start a new sweep; see Paragraph 4--26.
When 5102 is in AUTO, trigger generator Vl02 1&
converted to a free-nmning mJ.1tivibrator (R124 1&
placed in circuit by Sl02C), with a repetition rate of
40 to 50 cps. Switch section S102B grounds one grid
of VIOl (depending on slope selected by 5101) and
AC-couples the trigger signal through Cll3 to VI02A.
This arrangement allows the trigger to be generated
at the approximate zero crossing of the inp.1t Signal.
4-19. GATE GENERATOR.
4-20. The &quare wave generated by V102 is differentiated by C1l5 and RlSO, and the positive spike is
clipped by CRlll. Gate Generator Vl03A and Vl04B
operates as a Schmitt Trigger circuit with wide
hysteresis limits. The negative spike, through C1l6
to the grid of VI03A, causes the gate generator to
change states, starting the sweep. As the gate generator switches states, the positive ootput at Vl03A
plate goes to cathode J:lllower VlO4A which provides
the unblanldng Signal to the CRT (through the HV }X)wer
supply).
4-21. INTEGRATOR.
4-22. As the gate generator changes states (on Signal
from the trigger generator), the negative gate voltage
at VI04B takes diodes VI09A and VI09B out of conThis allows the timing capacitor (C175
duction.
~rough C18l, depending on sweep time set) to charge
m a negative direction, since it is connected through
the sweep time resistors to-lOOvolts. The integrator
Vl06A amplifies and Inverts this negative-going voltage at its grid (pin 2) to prod.lce a large, positivegoing OUtplt at the plate. Th1.8 positive-going voltage
is fed. back to VI06A grid through cathode follower
VI06B and the timing capacitor and this feedback
keeps the integrator inp.1t voltage almost constant.
Thus the voltage across the sweep timing resistor
also remalns nearly constant to prodUce a corresponding nearly constant current The current charges
the sweep capacitor at a linear rate to produce a
linear sweep outp.1t. The sweep output is routed
through switch 5202 to the horizontal amplWer and
then to the CRT deflection plates.
4-23. The slope of the sweep outp.1t waveforms is
determined. by the RC time constant of resistors
(R175 to R186) and capacitors (C175 to C18!) used on
a selected SWEEP TIME range. VERNIER control
Rl79 provides a fine adjustment of sweep time by
altering the DC voltage to which the timing resistor
is returned.. Neon lamp Vl07 is used to reduce the
average level of the sawtooth swing to a less positive
value &0 the lower end of the sweep may be clamped
to zero volts.
01879-2
section IV
Paragraphs 4-19 to 4--27
4-24. SWEEP TERMINATION AND HOLD-OFF.
4-25. Termination of a sweep is accomplished by
feeding back the positive-going sweep voltage to the
input of the gate generator. The feedback path is
through hold-off diode VlOOC (which conducts during
the sweep) and hold-off cathode follower vl03B. The
feedback voltage on VI03B grid causes the cathode
voltage to cross the upper hysteresis limit ofthe gate
generator. The time requlred for this feedback to
reach the upper hysteres1.8 limit is determined by the
sawtooth slope, twa setting the time between sweeps.
The gate generator changes state to produce a negative voltage step at the plate of Vl03A and a positive
voltage step at the plate of VI04B. The negative voltage step is fed through gate outpJt cathode follower
VlOtA to the higb-voltage power supply. blanking the
CRT beam unW a new sweep begins. The positive
voltage step at the plateofVI04B causes diodes Vl09A
and VI09B to conduct The sweep t1m1ng capacitor
discharges quickly through the clamp diode VI09B,
clamping the sweep outpJ.t to a constant level and
procl1cing the retrace portion of the sweep waveform.
The two diodes return the sweep outp.1t to the same
reference level as the gridofintegratorVI06A. Holdoff dJode VlO9C 1.8 cut aU by the fast negative drop of
the retrace (i.e., as tlming capacitor discharges), rot
instead of a rapid decrease in voltage at the grid of
VI03B, the voltage here starts decaying at a rate
determined by RI48 and the valueofhold-offcapacitor
used on a given sweep range. The catoode of Vl03B
follows this decay rate and VI03A grid VQltageis kept
high enough for a sufficient time to allow sweep circuit
recovery. When the hold-aU level fromVl03Bdecays
enough, a negative trigger at V103A grid can reach
the lower hysteresis limit and begin a new sweep cycle.
Stability adjustment, R15l, sets the DC level (tust
above lower hysteresis limit) at which VI03B cathode
quits following the hold-aU decay voltage on the grid
(this circuit is changed in free run operation; see
Paragraph 4-26). An incoming trigger which reaches
below this DC level to the lower hysteresis limit,
starts the new sweep.
Note
The hold-off capacitor for agivensweeptime
setting is the same capacitor which is used.
as the timing capacitor in another sweep
range (except that stray capacitance is used
for hold-off p.1rposes in the three fastest
sweep speeds). Fbr example, C176 is the
hold-off capacitor in 0.1 through 5 SECOND/
CM settings, but then C176 becomes the
timing capacitor in 10, 20, and 50 MILLISECONDS/CM settings (and Cl77 becomes
the hold-off capacitor).
4-26. FREE RUN CIRCUIT OPERATION.
4- 27. When LEVEL control is set to FREE RUN the
gate generator and other sweep circuits operate..rlthout a trigger from VI02. This 1& accomplished by
allowing the hold-off decay at VIOSB cathode to cross
the lower hysteresis limit (rather than a trigger
crossing as explained in Paragraph 4-24) of the gate
generator which initiates a new sweep cycle. The
stabUity adjustment is switched out of the clrcuit by
S102E which applies -100 volts directly to Rl52tn the
4-3
Modell3OC
Sectton IV
Paragraphs 4-28 to 4-38
cathode circuit of Vl03B. Tbl.e shifts the DC level
at which VlOOB cathode quits following the grid boldott voltage to a level below the lower hysteresis
limit.
Now as the bold-oU decay wltage crosses
the hysteresis l1.m1t it starts the sweep again.
4-28. SINGLE SWEEP CIRCUIT.
4-29. In single sweep operation the sweep istriggered
on the first trigger received after mamla] arming,
and fUrther triggers are ineffective until the circuit
is re-armed. Th1B sequence is accomplished in the
Modell3OC by preventing the retracefromoccurrlng.
In NORMAL operation, switch SiMA reb.lrna QlOl
emitter to ground through R150 and the transistor is
inoperative. In SINGLE operation. however, Sl04A
connects R150 to -100 volts. This still biases Q101
off, but allows conduction when the base voltage becomes more positive during the sweep. In the SINGLE
position, 8lO4B connects +lOOv to neon indicator
DS10I. Because the sweep level 18 at zero volts be-fore the sweep waveform begtn.a, there is auUicient
voltage across the neon to CauBe it to light (ARMED).
ABsuming that SlO4 baa lUst been switched to SINGLE
position. the first trigger to arrive at the gate generator st&rta a sweep in the usual way. As the sweep
output voltage mes, the voltage across DSlOl decreases unW the Ught goes out. The positive-going
sweep wltage is also applied by voltage divider Rl43
and Rl44 to the base of Q10l, br1ng1ng the transistor
into conduction and eventually driving it into saturation. As in NORMAL operation. the sweep voltage is
fed back through the bold-ott circuit to s.iteh the gate
generator back to its pre-sweep condition (V103A on,
V104B off). With VlO4B cutoU, the saturation current
of QlOl flowing through R13? is Iltill enough to keep
IINPUT AC-DC
diodes Vl09A and Vl09B btaBed off. IntegratorVl06A
ta tbuB allowed to contlroe integrating WlW it reaches
saturation. The sweep output waveform rounds and
levels au, remainIng at thiB b1gb positive level until
the circuit is maml3Uy re-armed. Since th1B positive
wltage is fed back through the hold-oU circult to the
inp.1t of the gate generator, triggers generated by
Vl02 are unable to overcome this wltage and operate
the gate. To re-arm the circult. SlO4 1a switched
back to NORMAL. This cuts aU Q10l. which allows
V109A and Vl09B to conduct and return the integrator
to its pre-sweep condition. Setting switch SlO4 back
to SINGLE will repeat the single sweep operation.
4-30. VERTICAL AMPLIfiER.
4-31. The vertical amplWer, as shown in the block
diagram of Figure 4-5, consists of three baBtc sectiona: (1) input atterwators, (2) differential feedback
ampliller. and (3) output differential amplifier. These
circuits are explained in detail in Paragraphs 4-32,
4-34, and 4-36.
4-32. INPUT ATTENUATOR
4-33. The tnp.1t atteoo.ator consists of two identical
frequency-compensated voltage dividers which provide a constant inp.1t impedance of 1 megohm slwnted
by 45 plon all rangesofSENsrnvtTYfor both + andinp.1ts. Switch S2 selects either capacitive (AC) or
direct (DC) coupling from the 1npJt terminals to the
attenuator. Capacitors C2l and C22 areusedto adjust
input capacitance to 45 pf on SENSITIVITY ranges
0.2 MILLIVOLTS/eM to 0.2 VOLTs/eM. A division
I SENSITIVITY I
I
,..---
o,
_____ i
I
I
+INPUT
i
J
DIffERENTIAL
FEEDBACK
AMPLIFIER
VI~OI,03
I
IAM:C~~EA IQ,
,
I
I
I
I
OUTPU T
~TPUT
,
I
I
I
I
I
I VERNIER I Q
~
\
-
TO
DlfF RENTIAL
AMPlIFIER
V1A
VERTIC AL
DEFLECT ION
PLATE S
o I POSITION J
\
\
\
,
,,,
~
lmE'"
SOOR<:E
V3
0
I
-INPUT
,I
01 fFEllERTIAl
FEEIl8AtK
AMPLIfiER
m,Ol,04
OUTPUT
DIFFEREllTIAI.
AMPLIfIER
Vli
OUTPU T
TO
VERTIC AL
OEFLECT ION
PLATE S
1IOt_....
Figure 4-5. Vertical Ampl1f1er Functional Block Diagram
4-4
OUI79-l
.-40
Section IV
ParagraphS 4-34 to
Model13OC
ratio of 100: 1 on the three least sensitive ranges
(5 VOLTS/CM to 20 VOLTS/CM) is provided by
Rll/R13 and Rl2/R14 on the two inPlts. Capacitors
Cll and C12 maintain the ratio at high frequencies
by capacitive division. Capacitors C13 and C14 are
adjusted for 45 pi input capacitance on the three least
sensitive ranges. A division ratio of 10;1 on the next
three ranges (0.5 VOLTS/CM to 2 VOLTS/CM) Is
provided by R15/R17 and R16/R18 on the two inputs.
Capacitors C17 and C18 maintain tb1s ratio at high
frequencies and C19 and C20 are adjUSted to keep
input capacttance at 45 pI on these three ranges. In
the CAL. position of the SENSITIVITY switch, input
termJnals are opened and a 5 mlllivolt, :t3%, 350 cps
square wave is applied to the input of tube VIA to
check amplifier calibration. Sensitivity of the ampl1tier in the CAL. JX)sttion ts 1 mv/cm. In BAL. JX)sttion, the inp.lt terminals are opened and the grid
circuits of VI are grounded to allow accurate balancing of DC voltages in the amplifier.
4-34. DIFFERENTIAL FEEDBACK AMPLIFIER.
4-35. From the input attell.lator, a signal is fed to
the inp.lt of the differential feedback ampli.f1er, i.e.
grids of VI. Resistors R41 and R42 provide inp.lt
overload protection.
The gain of this amplifier
(consisting of VI, and Q1 through Q4) is effectively
controlled by the interstage attenuator which inserts
feedback resistance (determined by Sl setting) between the emitters of Q3 and Q4. Gain is proportional to the ratio of the th1rd-stage (Q3 and Q4) collector load to feedback resLstance. The interstage
attenuator al1d the inp.lt attenuator give the overall
control of deflection sensitivity. ThemainDCcurrent
path for both VI andVernierBaladjUSbnentts through
the feedback paths, R49-R50 or R48, to the -100 volt
supply at the collectors of Q3 and Q4. The JX)sitive
voltage supply with high value resistors (compared
to feedback resistance) used for Vernier Bal, minimizes the effect of balance adjustments on gain.
Vernier Bal is adjusted to offset any unbalance at the
outPJt stage plates resulting from the change tn resistance between the cathodes of V2A and V2B when
VERNIER is rotated out of CAL position. DC BALANCE, R49, and Coarse DC Bal, R48, adjustments
are used to equalize the voltage on either side of the
feedback resistance. When the voltages arebalanced,
the feedback resistors have no DC flowing through
them and thus changing their values has no effect on
amplifier balance. Variable resistor R59 sets Q3/Q4
collector voltages for anaverageof-15 volts, ensuring
linear operation of the output differential amplifier.
The AMPLIFIER AC-DC switch allows capacitive
coupling of the interstage attenuator on the seven most
sensitive ranges, m1ntmtzlng the eUect of dc drift by
preventing DC current now in the feedback resistors.
The result is the same as iftheampl1.fler is balanced.
Gain adjustment R69 functions in the same manner as
VERNIER control R"lO, by inserting resistance which
acts as degenerative feedback. TbJs the gain may be
controlled in order to bring the sensitivity calibration
into agreement with a voltage standardortoset intermediate sensitivities. The output of the differential
feedback amplifier at Q3 and Q4 collectors drives the
outPJt differential amplUier, V2A and V2B.
01879-2
4-36. OUTPUT AMPLlFlER.
4-37. The outpJt d1tferential amplifier, V2A and
V2B, provides the voltage swing necessary to drive
the deflection plates of the CRT. Cross-neutraltz:atton
of the outp.Jt stages is accomplished by adjustable
capacitors C48 and C49 (stw.nted by C53). which
couple in-phase signals from the plates of the tubes
to the opposite grids. A voltage divider conaisting
of R75 and R77 in the plate circuit of V2A divides
the outp.Jt signal. for use as an internal synchronizing
signal for the sweep generator. Constant current
source v3 is an active impedance, functioning as a
high common cathode impedance to ach1eve high
dtHerential gain without the use of a large cathode
resistor and negative supply. Resistor R83 sets the
bias on V3, hence the current totheoutpllt differential
amplifier. The setting of R83 interacts with R59.
There are two front panel variable controls in the
outp.d amplUier: SENSITIVITY VERNIER and POSITION. When rotated ccw VERNIER, R70, decreases
the gain (i.e. rewces sensitivity) of the amplifier by
introducing degeneration in the cathodes of V2. Vertical movement of the trace is accomplished by POSITION, R78, which feeds back diHerential currents
through R73 and R74. This results in a dtHerential
change in Q3 and Q4 collector currents and a different1&! voltage change at the grids of V2. Resistors
R79 and R80 ensure that regardless of the POSITION
setting, no DC voltage change occurs at the catb:xtes
of V2 as VERNIER is moved. Ttms, pQsition of the
trace is not affected by changes in the SENSITIVITY
VERNIER.
4-38. BEAM FINDER switch 54 inserts R85 in the
cathode of V3, redJcing the current available to the
outpJt stage. This redJces the voltage swing of V2
and reduces the CRT defiection plate VOltage swing,
which brings the trace on screen regardless of signal
amplitude.
4-39. HORiZONTAL AMPLIfiER.
4-40. The horizontal amplifier circuit operation is
identical to that of the vertical amplifier except for
the internal sweep positions of the SENSITIVITY
switch, and the POSmON control R22lA/B. In the
nITERNAL SWEEP positions, Xl through X50, the
sawtooth voltage outpJt from the sweep generator is
coupled into the amplifier inp.lt at V201A. The sweep
signal gain 18 then controlled by the tnterstage attenuator (see F1gure 5-16) and applied to the CRT deflection plates. To allow viewing of any portion of an
expanded. waveform, a greater range for POSITION
control is obtained by varying the DC level at the
amplifier inPJt where the sweep is awUed. For internal sweep, R221B is switched out of the circuit
and replaced by two fixed resistors, R273 and R274;
VERNIER R264 is also shorted out leaving V202
cathodes tied together. Resistor R22lA (and its
voltage divider circuit) becomes the POSITION control
and changes the DC level at which the sweep waveform is applied to the amplilier. Then as amplif1er
gatn is increased by the interstage attenuator section
of S202, the sweep 18 expanded and the effective
positioning range is increased at the same time.
4-5
Model 130C
Section V
Table 1
Table 5-1. Required Test Equipment
Item
Instrument
Type
Required
Characteristics
Measurement/Adjustment
Ref
Para
Recommended
Instruments
1
Voltmeter
Calibrator
Output: O. 002 to
300V p-p
Vert. Sensitivity
Ext. Calibrator
Vert. Calibrator
Horiz. Sensitivity
Horiz. Calibrator
Vert. Gain
Horiz. Gain
5-7
5-8
5-9
5-12
5-13
5-75
5-75
rfjJ Model 738AR
(CAQI-738-A*)
2
Oscillator
Frequency: 10
cps to 500 kc
Vert. Bandwidth
Vert. Common
Mode Rej.
Horiz. Bandwidth
Horiz. Common
Mode Rej.
Phase Shift
Triggering
Trigger Point
Intensity Mod.
Horiz. Neut
Input Cap and Freq. Compo
Sweep Length
5-10
rfjJ Model 200CD
(AN/URM-127*)
5-15
5-16
5-17
5-18
5-22
5-76
5-77
5-85
Vert. Bandwidth
Horiz. Bandwidth
Phase Shift
5-10
5-14
5-16
rfjJModel350D
3
Attenuator
o to 110 db
attenuation
5-11
5-14
4
AC Voltmeter
Range: 3 mv f.s.
Vert. Bandwidth
Horiz. Bandwidth
5-10
5-14
rfjJModel400D
5
Time Mark
Generator
Marker Internal:
1 usec to 5 sec in
1,2,5, 10
sequence
Output: greater
than 0.1 mv p-p
Sweep Calib.
Sweep Magnifier
Sweep Time Calib.
5-19
5-21
5-86
Tektronix Type 180A
(AN/USM-l08*)
6
DC Voltmeter
Range: 0 to 300v
f. s.
Accuracy: ± 1%
LV Power Supply
Vert. Output Stage Current
Horiz. Output Stage Current
Sweep Stability
5-65
5-74
5-74
5-84
rfjJ Model 412A
(CAQI-412*)
7
HVDC
Voltmeter
Range: 0 to 3 kv
f.s.
Accuracy: ± 3%
HV Power Supply
5-67
rfjJ Model 11044A
Voltage Divider
with rfjJ Model 410B/C
(AN/USM-116*),
adjusted to ± 3%
accuracy
8
Square Wave
Generator
Frequency: 10 kc
and 50 kc
Output: 0 to 55V
p-p
Vert. Neut.
Vert. Atten. Compo
Horiz. Neut.
Horiz. Atten. Compo
5-76
5-77
5-76
5-77
rfjJModel211A
(TS-583B/U*)
9
L-C Meter
or
Alignment
Attenuator
Range: 40 to
50 pf
Vert. Input Cap.
Horiz. Input Cap.
5-77
5-77
Tektronix Type 130
(AN/URM-90*) or
rfjJ Model 10403A
* Designation for Military Preferred Instrument
5-0
01879-1
Model 130C
Section V
Paragraphs 5- 9 to 5-13
c. Adjust Vertical VERNIER for exactly 10 cm
deflection.
d. Disconnect Voltmeter Calibrator and apply signal from 500 MV CALIBRATOR to vertical input.
e. Deflection should be between 9.8 and 10.2 cm.
f. Disconnect the calibrator signal.
d. Connect a short jumper between the left-hand
terminal and the ground terminal.
e. Set Oscillator frequency to 50 kc.
f. Adjust Oscillator amplitude for 10 cm deflection.
g. Short center and left-hand terminals with the
jumper.
h. Set vertical SENSITIVITY to 20 MV/CM.
i. The deflection should be 1 cm or less.
5-9. VERTICAL CALIBRATOR.
a. Set: Vertical SENSITIVITY· . . . . 1 MV/CM
Voltmeter Calibrator output· . 5 mv p-p
b. Adjust vertical VERNIER for exactly 4 cm
deflection.
c. Set vertical SENSITIVITY to CAL.
d. The deflection should be between 3.88 and
4.12 cm.
e. Disconnect the Voltmeter Calibrator.
j. Set vertical SENSITIVITY to 1 VOLTS/CM.
k. Reconnect jumper between left-hand terminal
and ground terminal.
m. Adjust Oscillator amplitude for 10 cm deflection;
n. Short center and left-hand terminals with the
jumper.
p. Set vertical SENSITIVITY to O. 5 VOLTS/CM.
q. The deflection should be 0.6 cm or less.
r. Reconnect jumper between left-hand terminal
and ground terminal
s. Set vertical SENSITIVITY to 10 VOLTS/CM.
5-10. VERTICAL BANDWIDTH.
t. Adjust Oscilloscope amplitude for 5cm deflection.
a. Set: Vertical SENSITIVITY, . . . . 1 MV/CM
Vertical VERNIER·· . . . . . . . CAL
u. Short center and left-hand terminals with the
jumper.
b. Connect the Oscillator to the vertical input.
v. Set vertical SENSITIVITY to 5 VOLTS/CM.
w. The deflection should be O. 3 cm or less.
Note
External attenuation of the Oscillator signal
is required for this check. Use a r$fJ Model
350D Attenuator Set or load the Oscillator
output with a 50 ohm resistor.
c. Set Oscillator frequency to 5 kc.
d. Adjus t Oscillator amplitude for 10 cm deflection.
e. Connect the AC Voltmeter in parallel with the
vertical input.
x. Disconnect the Oscillator. Reconnect the grounding link.
5-12. HORIZONTAL SENSITIVITY.
a. Apply a 1 volt p-p signal from the Voltmeter
Calibrator to the horizontal input.
b. Set: Horizontal INPUT . . . . . . . . .. DC
Horizontal SENSITIVITY' O. 1 VOLTS/CM
Horizontal VERNIER
CAL
c. Horizontal deflection should be between 9.7 and
10.3 cm.
f. Note reading of AC Voltmeter.
g. Change Oscillator frequency to 500kc. Readjust
amplitude for AC Voltmeter reading noted in step f,
if necessary.
h. The deflection should be 7. 1 cm or greater.
i. Disconnect the Oscillator and AC Voltmeter.
d. Check all other SENSITIVITY ranges in the same
manner as above, using the values shown in Table
5-2. The deflection in each case should be between
9. 7 and 10. 3 cm.
5-13. HORIZONTAL CALIBRATOR.
a. Set: Horizontal SENSITIVITY . . . 1 MV/CM
Voltmeter Calibrator output . . 5 mv p-p
5-11. VERTICAL COMMON MODE REJECTION.
a. Set: Vertical SENSITIVITY' . 0.2 VOLTS/CM
Vertical VERNIER· . . . . . . . . . CAL
b. Adjust horizontal VERNIER for exactly 4 cm
deflection.
c. Set horizontal SENSITIVITY to CAL.
b. Disconnect the grounding link from the center
vertical input terminal.
c. Connect the Oscillator between the center terminal and the ground terminal.
5-2
d. The deflection should be between 3. 88 and
4.12 cm.
e. Disconnect the Voltmeter Calibrator.
01879-3
Model 130C
Section V
Paragraphs 5-14 to 5-17
5-14. HORIZONTAL BANDWIDTH.
a. Set:
Horizontal SENSITIVITY " " 1 MV/CM
Horizontal VERNIER
" " "CAL
w. The deflection should be 0.3 cm or less.
x. Disconnect the Oscillator.
b. Connect the Oscillator to the horizontal input.
Note
External attenuation of the Oscillator signal
is required for this check. Use a ~ Model
350D Attenuator Set or load the Oscillator
output with a 50 ohm resistor.
5-16. PHASE SHIFT.
a. Set: Horizontal
• " . .
Horizontal
Horizontal
Horizontal
and Vertical SENSITIVITY
. • " 10 VOLTS/CM
and Vertical VERNIER" CAL
and Vertical AMPLIFIER DC
and Vertical INPUT" " "DC
c. Set Oscillator frequency to 5 kc.
d. Adjust Oscillator amplitude for 10 cm deflection.
e. Connect the AC Voltmeter in parallel with the
horizontal input.
f. Note reading of AC Voltmeter.
g. Change Oscillator frequency to 500 kc. Readjust amplitude for AC Voltmeter reading noted in
step f, if necessary.
h. The deflection should be 7.1 cm or greater.
1.
Disconnect the Oscillator and AC Voltmeter.
b. Connect the Oscillator to both horizontal and
vertical input terminals.
c. Set Oscillator frequency to 100 kc.
d. Adjust Oscillator amplitude for 5 cm vertical
and horizontal deflection.
e. The minor diameter of the ellipse should be
less than 0.1 cm.
f. Check all other SENSITIVITY ranges, keeping
deflection constant at 5 cm. The minor diameter of
the ellipse should be less than 0.1 cm in each case.
Note
5-15. HORIZONTAL COMMON MODE REJECTION.
a. Set: Horizontal SENSITIVITY· 0.2 VOLTS/CM
Horizontal VERNIER" " " " " • CAL
b. Disconnect the grounding link from the center
horizontal input terminal.
c. Connect the Oscillator between the center terminal and the ground terminal.
d. Connect a short jumper between the left-hand
terminal and the ground terminal.
e. Set Oscillator frequency to 50 kc.
f. Adjust Oscillator amplitude for 10 cm deflection.
g. Short center and left-hand terminals with the
jumper.
h. Set horizontal SENSITIVITY to 20 MV/CM.
1. The deflection should be 1 cm or less.
j. Set horizontal SENSITIVITY to 1 VOLTS/CM.
On the highest SENSITIVITY ranges, external
attenuation of the Oscillator signal will be
necessary. Use a ~ Model 350D Attenuator
Set or load the Oscillator output with a 50
ohm resistor.
g. Disconnect the Oscillator.
5-17. TRIGGERING.
a. Set: Vertical SENSITIVITY· . 20 VOLTS/CM
Horizontal SENSITIVITY • • " . " "
" " " " • • • INTERNAL SWEEP Xl
SWEEP TIME
• 1 MlLLISECONDS/CM
TRIGGER SOURCE-SLOPE • • . EXT+
LEVEL' " . " " • • • • 'AUTO
b. A baseline should be displayed with no signal
applied.
k. Reconnect jumper between left-hand terminal
and ground terminal.
c. Apply a 500 kc signal from the Oscillator to
the vertical input.
m. Adjust Oscillator amplitude for 10 cm deflection.
d. Set: TRIGGER SOURCE-SLOPE
. INT+
SWEEP TIME
1 /LSECONDS/CM
n. Short center and left-hand terminals with the
jumper.
e. Adjust Oscillator amplitude for 0.5 cmdeflection.
p. Set horizontal SENSITIVITY to 0.5 VOLTS/CM.
q. The deflection should be 0.6 cm or less.
r. Reconnect jumper between left-hand terminal
and ground terminal.
s. Set horizontal SENSITIVITY to 10 VOLTS/CM.
t. Adjust Oscillator amplitude for 5 cm deflection.
u. Short center and left-hand terminals with the
jumper.
v. Set horizontal SENSITIVITY to 5 VOLTS/CM.
01879-1
f. Vary Oscillator frequency from 500 kc to 50
cps, keeping amplitude constant at 0.5 cm. Stable
triggering shOUld occur over the entire range.
g. Set LEVEL to +.
h. Vary Oscillator frequency from 10 cps to 500 kc,
keeping amplitude constant at 0.5 cm. Stable triggering should occur over the entire range. Note:
some adjustment of LEVEL may be necessary at
the high frequency end of the range.
1. Apply a 500 kc signal from the Oscillator to
the vertical input and the external trigger input.
5-3
Section V
Paragraphs 5-18 to 5-22
Model 130C
. AUTO
j. Set: LEVEL .
External trigger input·
• DC
TRIGGER SOURCE-SLOPE
. EXT+
Vertical SENSITIVITY
1 VOLTS/CM
Vertical VERNIER •
CAL
SWEEP TIME··
l/lSECONDS/CM
k. Vary Oscillator frequency from 500 kc to 50 cps,
keeping amplitude constant at 0.5 cm. Stable triggering should occur over the entire range.
5-21. SWEEP MAGNIFlER.
m. Set TRIGGER LEVEL to +.
n. Vary Oscillator frequency from 5 cps to 500 kc,
keeping deflection constant at 0.5 cm. Stable triggering should occur over the entire range.
p. Set external trigger input to AC
q. Vary Oscillator frequency from 500 kc to 20 cps,
keeping amplitude constant a 0.5 p-p. Stable triggering should occur over the entire range.
r. Disconnect the Oscillator.
s. Set: TRIGGER SOURCE-SLOPE
LEVEL
LINE+
AUTO
t. Observe a power-line frequency waveform. The
display should be synchronized.
5-18. TRIGGER POINT AND SLOPE.
a. Apply a 100 cps signal from the Oscillator to
both the vertical input and the external trigger input.
b. Set: Vertical SENSITIVITY· . 2 VOLTS/CM
TRIGGER SOURCE-SLOPE . . . INT+
LEVEL·
• • AUTO
SWEEP TIME·
2 MILLISECONDS/CM
c. Adjust Oscillator amplitude for 10 cm deflection.
d. The sweep should trigger on the positive-going
part of the waveform.
a. Set: SWEEP TIME·
1 MILLISECONDS/CM
SWEEP VERNIER
CAL
Horizontal SENSITIVITY . • . • • .
• • • • • • • INTERNAL SWEEP X2
TRIGGER SOURCE-SLOPE • • . INT+
LEVEL • • • • • • • .
+
b. Apply a signal from the Time Mark Generator
to the vertical input. Set the output of the Time
Mark Generator to 1 millisecond.
c. Adjust horizontal POSITION so that the first
marker coincides with the left graticule edge. The
fifth marker should occur within 0.5 cm of the right
hand graticule edge.
d. Check the remaining magnifier ranges, using
the values shown in Table 5-4. The fifth, eleventh,
or the 21st marker should occur within 0.5 cm of
the right hand graticule edge.
5-22. INTENSITY MODULATION.
a. Set: Vertical SENSITIVITY·
10 VOLTS/CM
. • CAL
Vertical VERNIER • •
Horizontal SENSITIVITY
• INTERNAL SWEEP Xl
SWEEP TIME· • • 10/lSECONDS/CM
e. Check INT-, EXT+, and EXT- positions. The
sweep should trigger on the proper slope for each
position.
f. Vary LEVEL throughout its range. The starting
point of the sweep should vary along all points on the
10 cm waveform.
5-19. SWEEP CALIBRATION.
2 VOLTS/CM
a. Set: Vertical SENSITIVITY·
Horizontal SENSITIVITY
INTERNAL SWEEP Xl
TRIGGER SOURCE-SLOPE·
INT+
LEVEL·
+
SWEEP TIME· . • . 1 /lSECONDS/CM
SWEEP VERNIER •
CAL
b. Apply the output of the Time Mark Generator to
the vertical input. Set the output of the Time Mark
Generator to 1 microsecond.
c. Adjust horizontal POSITION so that the first
marker coincides with the left graticule edge.
d. The 11th marker (or the 21st marker) should
occur within 0.3 cm of the right graticule edge.
e. Check all the remaining SWEEP TIME ranges,
using the values shown in Table 5-3.
f. Disconnect the Time Mark Generator.
5-4
Table 5-3. Sweep Calibration
Time Mark
Generator
1 /lsec
1 /lsec
5 /lsec
10 /lsec
10 /lsec
50 /lsec
100 /lsec
100 /lsec
500 /lsec
1 msec
1 msec
5 msec
10 msec
10 msec
50 msec
100 msec
100 msec
500 msec
1 sec
1 sec
5 sec
SWEEP TIME
Setting
1 /lSECONDS/CM
2 /lSECONDS/CM
5 /lSECONDS/CM
10 /lSECONDS/CM
20 /lSECONDS/CM
50 /lSECONDS/CM
. 1 MILLISECONDS/CM
.2 MILLISECONDS/CM
. 5 MILLISECONDS/CM
1 MILLISECONDS/CM
2 MILLISECONDS/CM
5 MILLISECONDS/CM
10 MILLISECONDS/CM
20 MILLISECONDS/CM
50 MILLISECONDS/CM
.1 SECONDS/CM
.2 SECONDS/CM
.5 SECONDS/CM
1 SECONDS/CM
2 SECONDS/CM
5 SECONDS/CM
Time Mark
/10 cm
10
20
10
10
20
10
10
20
10
10
20
10
10
20
10
10
20
10
20
20
10
01879-4
Section V
Paragraph 5-23 to 5-36
Model 130C
Table 5-4. Sweep Magnifier Calibration
(Sweep Time at 1 msec/cm)
Time Mark
Generator Output
Magnifier
Time Marks/
10 cm
1 msec
X2
5
100 jJ.sec
X5
20
100 jJ.sec
X10
10
100 jJ.sec
X20
5
10
X50
20
b. Apply a 100 kc signal from the Oscillator to
the vertical input. Adjust Oscillator amplitude for
2 cm deflection.
c. Remove grounding link from Z AXIS INPUT
(rear panel) and connect signal from Oscillator to
Z AXIS INPUT.
d. At normal intensity, the top of the sine wave
should be extinguished.
5-23, SINGLE SWEEP.
a. Set: SWEEP TIME. • 10 MILLISECONDS/CM
NORMAL-SINGLE • • • • • NORMAL
LEVEL· • • • • • • • •
b. Switch from NORMAL to SINGLE. The ARMED
light should come on.
c. Set LEVEL to AUTO. A single sweep should
occur, and the ARMED light should go out.
5-24. TROUBLESHOOTING.
5- 25. The following paragraphs outline procedures
for Ibcating and eliminating malfunctions. Be sure
that the trouble cannot be eliminated by making an
adjustment, but do not make arbitrary adjustment
settings; always follow the procedures given in
Paragraph 5-58. To locate assemblies and other
circuit components refer to Figure 5-1 and 5-2; also
refer to Paragraph 5-87. Schematic diagrams for
all circuits are shown in Figures 5-7, 5-11, 5-13,
5-16, 5-18, and 5-20.
5-26. ISOLATING TROUBLES TO A MAJOR
SECTION.
5-27. The following checks should be performed
whenever a malfunction is suspected.
5-28. POWER SUPPLIES.
a. Set: Vertical and Horizontal SENSITIVITY· •
• • • • • • • • • • 20 VOLTS/CM
Vertical and Horizontal VERNIER' CAL
b. Depress BEAM FINDER.
A defocused spot
should appear on the screen if the power supplies
are operating properly.
01879-1
5-29. AMPLIFIERS.
a. Set: Vertical and Horizontal SENSITIVITY' •
• • • • • • • • • • • • • CAL
Vertical and Horizontal AMPLIFIER' AC
b. A trace tilted at 4~ and having 5 cm vertical
and horizontal deflection should appear if the amplifiers are operating properly.
5-30. SWEEP GENERATOR.
a. Set: Horizontal SENSITIVITY • • • • • •
INTERNAL SWEEP Xl
LEVEL. • • • • • • • • • AUTO
TRIGGER SOURCE-SLOPE' • • INT+
SWEEP TIME
1 MILLISECONDS/CM
VERNIER • • • • • • • • • CAL
Vertical SENSITIVITY· • • • • CAL
b. A synchronized square wave, 5 cm in amplitude,
should be observed if the sweep generator is operating
properly.
Note
If the horizontal amplifier is not operating
properly, the sweep operation will also be
affected.
5-31. LOW VOLTAGE POWER SUPPLY
TROUBLESHOOTING.
5-32. The two common troubles in the low voltage
supplies are loss of regulation and excessive ripple.
The follOWing paragraphs outline procedures for
isolating faulty components.
5-33. EXCESSIVE RIPPLE.
5-34. Excessive ripple in any of the supplies may
usually be traced to two sources: defective filter
capacitors or defective transistors. The ripple at
the output of each supply and at the input to each
regulator is given in Table 5-5. If the ripple at the
output of any of the supplies is excessive, check the
-100 volt supply first. If its output is normal, then
check the ripple at the regulator input of the supply
in question. If the ripple of the unregulated supply
is excessive, check the filter capacitors and the
rectifier diodes. If the ripple of the unregulated
supply is normal, check for defective transistors in
the amplifier series and regulator stages.
5-35. LOSS OF REGULATION.
5-36. The failure of any of the supplies is usually
due to transistor failure. Table 5-6 provides a systematic procedure for troubleshooting each of the
Table 5-5. Ripple Measurements
Supply
Unregulated
Ripple
Output
Ripple
-100
7 v p-p
4 mv p-p
+ 12.5
4 v p-p
15 mv p-p
+ 100
10 v p-p
4 mvp-p
+250
5 v p-p
7 mv p-p
5-5
Section V
Figure 5-1
.....- H. V.
•
Model 130C
POWER SUP PL Y
/
A301
-T----;:======;------,.--FiF=Pi-T-------i'"1
0=::::0
FUSE
HIGH
VOLTAGE
R312
2A
ADJ
r-
~~/INTENSITY
LIMIT
'r
R307
~~IGMATISM
I
POWER
TRANSFORMER
T401
~".,-- R319
v302
12AU7
I[
V301
6CW5
[
o
--- ,,
,,
,
\
I
I
I
,
, . _-~",'
I
I
I
I
I
,
,,
I
,
C24
:
~
~,/
V461
5651
L.V. SUPPLY
'--A401
SWEEP
f---GEN ERA TOR r--A101Vl06
6SL8
1
,'-- ...... , \
'I
~\I'....
,, "'--' "
,
\
~
"
Vl09
6SC7
1
~C238
I
I
-
10 fLSEC
1 /-LSEC
SWEEP TIME
130C- 6-8
Figure 5-1. Model 130C Top View (Cover Removed)
5-6
01879-2
Section V
Figure 5-2
Model 130C
TTL.V.
SUPPLY
.1 I_r--l
SERIES
REGULATORS"I'I
~I 1
r--l I 1.c::=:::::L.
LOW VOLTAGE
POWER SUPPLY
A401
' ' - - - -...H ...~I
POWER
TRANSFORMER
T401
-::;;J
-
d
">6
HORIZONTAL
AMPLIFIER
A201
Vl04
60J8
I
01
,
.. ~
,
,,
,,
,
I
000
000
\0 0
I
8
C241
1:1
}
I
NEUTRALIZING
I
VIOl
\
_
I
....
'
---J
,
STAGE
f
.L__ ~_~:. .~_ . . _/·
-INPUT
CAPACI~
C222
~
f
W
Ul
w
~
~g
JV20>~
I :
.
Cl
00(
[ :
C~~~:+V .~~= ~I( ~
--1-'-_~~ ~
~
Z
1 §~
C.~U:-:R~R=E7N:-::T:i_...............
/?)..
~~
~U
R8 3l<::~~):=I_n........../
~
GAIN R6S ~
r-
-
~
-
ON
~
~J
0
"~= ~~
~
-:::L-f:
V2
60J8
OUTPU,T
Z
00(
~'=~ Cl
N
~~
~
~~
~
00(
>
V3
7586
~=\..
_
I
~
U
~-
,
GAIN R26r
•..,.--_...... --...............,
o
o
o
000
I
\
I I
60J8
~
I
,
,
-
~Vl02
-
I
I
r-::-.l
-
,
,
STAGE
n==it2g~#CURRENTR276
F
'~
'2/"0\-'6
I
'-nr--;:~~~C240
r ~ OUTPUT
I I
I"::SM
-
:
I
V202
60J8
R151
STABILITY
I
't.. .,f:..'t, ,~'--~"-.lt
I
I
7586~ -
6BL8
I
I
V203
Vl03
:
5642
:
L---" V3 0 5 V30 4 ~~."-':.)
I
,
I
I
H.V
TRANSFORMER
A302
:
:
,
'-.::: '/
L.I
:
I
!
I
I
1-[... ------....
---1__,
,
R402
CALIBRATOR
6BC7
A LIGN
TRAC;32 S
I
:
,._
~~~~
Vl06
6BL8
Vl0S
--
!
R447
+100 • ..J2?.
R468 ~
-100.-..iAi i'I
SWEEP
LENGTH
~_R146
o
:
I
,
SWEEP GENERATOR
•
AIOl
I
I
I
_....!!.....LIII_-J..
-
~
U
\
=
= ~ ~=
(/)Q:J
~ Q:
r Ie:~f [
-INPUT
CAPACITY
;::0....:::'
r
c~~;r~ ~ ~~~~.~=
--1_ _.u....J..u~~~J
-zQ:
-Q:
Q:
Q:
W
W
>
Z
t30C-B-7
>
~ ~
UCl
Woo(
~~
~ ~
00
U>
Figure 5-2. Model 130C Bottom View (Cover Removed)
01879-2
5-7
Model 130C
Section V
Table 5-6
Table 5-6. Low Voltage Supply Troubleshooting
Supply
Symptom
Procedure
Result
-100V
High Output
Disconnect base lead of Q461 (WHT/
GRN/VIO lead connecting to edge of
board near top of instrument).
Output remains high
Q461 shorted
Output drops
Q461 good
Output remains high
Q462 shorted
Output drops
Q464 open or Q463
Same as output
Q463 shorted
Less than output
Q464 open
o volts
CR462 shorted
o volts
CR462 good
Output remains low
Q461 open
Output rises
Q461 good
Output remains low
Q462 open
Output rises
Q463 open or
Q464 shorted
Output remains low
Q464 shorted
Output rises
Either abnormal
Q463 open
-100 and/or
12.5 supply
Both normal
+ 100 supply
Reconnect base lead. Short emitter
to collector of Q464
Measure voltage across R465
Low Output
Measure voltage across CR462
Short collector to emitter of Q462
Short collector to emitter of Q463
+ 100V
High or
Low Output
Short emitter to base of Q464
Check output of -100 supply
and/or 12.5 supply
High Output
Low Output
Disconnect base lead of Q441 (WHT/
RED/GRN lead connecting to edge of
board near rear of instrument).
Output remains high
Q441 shorted
Output drops
Q441 good
Short emitter to collector of Q443
Output remains high
Q442 open
Output drops
Q443 open
Output rises
Q443 shorted
Output remains low
Q442 shorted or
Q4410pen
o volts
Q442 shorted
greater than 2 volts
Q441 open
Normal
+ 250 supply
Abnormal
-100 or + 100
supplies
Disconnect base lead of Q421 (GRN
lead connecting to edge of board
near back of instrument
Output remains high
Q421 shorted
Output drops
Q421 good
Short emitter to base of Q422
Output remains high
Q422 shorted
Output drops
Q423 shorted
Short emitter to base of Q442
Measure voltage between emitter and
collector of Q442
+ 250V
High or
Low Output
High Output
5-8
Conclusion
Check -100 and + 100 supplies
01879-3
Model 130C
Section V
Paragraphs 5-37 to 5-52
Table 5-6. Low Voltage Supply Troubleshooting (Cont'd)
Supply
Symptom
Low Output
Procedure
Measure voltage across CR422
Short emitter to collector of Q422
Short emitter to collector of Q423
low voltage power supplies. The transistors associated with the low voltage supplies are located on the
low voltage power supply circuit board and at the
rear of the instrument. For the location of the circuit
board, refer to Figure 5-1.
5-37. Resistors R421, R441, R461, and R481 protect
the series regulator transistors in eachofthe supplies.
If the output of one of the supplies is accidentally
shorted, the resistor in series with the series regulator will dissipate excessive power and fail. Check
each of the series resistors (located near the filter
capacitors; note silkscreen identifiers) when a malfunction of the low voltage supplies is suspected.
5-38. HIGH VOLTAGE POWER SUPPLY
TROUBLESHOOTING.
5-39. Waveforms and DC voltages which will aid in
troubleshooting are shown on the schematic diagram.
5-40. Troubles in the high voltage power supply can
best be isolated by DC voltage measurements. Any
decrease in the regulated high voltage is amplified
and inverted by V302 and applied to V301. The screen
voltage of V301 controls the amplitude of the oscillator output, and thus the high voltage.
Conclusion
Result
o Volts
CR422 shorted
+ 6 volts
CR422 good
Output remains low
Q4210pen
Output rises
Q422 or Q423 open
Output rises
Q423 open
Output remains low
Q422 open
f. Connect ground lead of ohmmeter to chassis.
g. Compare resistance readings at corresponding
points in both halves of the amplifier. Unsymmetrical
readings will indicate a source of unbalance.
h. If resistance readings do not point out the source
of the unbalance, proceed to step 1.
1. Turn instrument on, switch AMPLIFIER to
AC and set SENSITIVITY to BAL position.
j. Measure DC voltages at corresponding points
in both halves of the amplifier.
k. SWitch AMPLIFIER to DC.
m. Repeat voltage measurements made in step j.
Compare readings made in steps j and m with voltages
shown on schematics. Any significant deviation Should
indicate location of the trouble.
5-45. GAIN.
5-46. If the gain of the amplifier cannot be set properly with Gain adjustment (R69 in vert, R263 in
horiz.), try the next higher sensitivity range. If the
gain cannot be set on this range, change V2 in vertical
amplifier or V202 in horizontal amplifier, and check
the high voltage output (ref. Paragraph 5-67).
5-41. AMPLIFIER TROUBLESHOOTING.
5-47. LOW-FREQUENCY NOISE.
5-42. Since the vertical and horizontal amplifiers
are nearly identical; a single troubleshooting procedure may be used for both amplifiers.
5-48. If low-frequency noise is visible on the trace,
try changing the input tube (VI in vert, V201 in horiz.).
If this does not cure the trOUble, change the second
stage transistors (Ql, 2 in vert. Q201, 202 in horiz.).
5-43. UNBALANCE.
5-44. If the trace cannot be brought on screen with
the DC BALANCE control, try adjusting R48 in the
vertical amplifier or R234 in the horizontal amplifier.
If the trace is still off-screen, use the following
procedure to localize the unbalance.
a. Set POSITION to midrange.
5-49. COMPRESSION.
5-50. If the signal waveform is compressed inamplitude when the trace is moved to the top or bottom of
the screen, check that the output stage current is
adjusted properly (ref. Paragraph 5-74), then try
changing the output tube.
b. Short grids of output tubes together (V2 in
vertical, V202 in horizontal).
c. If trace remains off-screen, trouble is in output
stage. If trace returns, proceed to step d.
d. Turn the instrument off.
e. Switch AMPLIFIER to DC.
01879-3
5-51. SWEEP GENERATOR
TROUBLESHOOTING.
5-52. If the horizontal amplifier is not operating
properly, the sweep operation (not sweep cirCUit) will
also be affected. If a sweep malfunction is observed,
first check the horizontal amplifier. If the horizontal
5-9
Section V
Paragraphs 5-53 to 5-59
Model 130C
amplifier is operating properly check typical waveforms shown in Figure 5-8 (located near schematic)
proceed to the steps below.
a. Set LEVEL to FREE RUN. If the sweep operates,
check V101, V102, and CRlll. If the sweep does
not operate, proceed to step b.
b. Check DC voltage in each of the states shown
in Table 5-7. A 10 to 15% deviation from the values
shown in the table can be expected; larger deviations
indicate a source of trouble.
5-53. REPAIR AND REPLACEMENT.
5-54. Circuit boards used in the Model 130C have
components on one side of the board and a plated
conductive metal layer through component holes.
When removing or replacing etched circuit components
the important steps and considerations are (!€I; Service
Note M-20D also contains useful information on etched
circuit repair):
a. Use a low heat (37 to 47.5 watts, less than 800"F
idling temperature), slightly bend chisel tip (1/16 to
1/8 inch diameter) soldering iron, and a small diameter, high tin content solder. If a rosin solder is
used, clean the area thoroughly after soldering.
b. Components may be removed by placing the
soldering iron on the component lead on either side of
the board, and pulling up on the lead. If heat is applied
to the component side of the board, greater care is
required to avoid damage to the component (especially
true for diodes). If heat damage may occur, grip the
lead with a pair of pliers to provide a heat sink between the soldering iron and component.
c. If a component is obviously damaged or faulty,
clip the leads close to the component and then unsolder
the leads from the board.
d. Large components such as potentiometers and
tube sockets may be removed by rotating the soldering
iron from lead to lead and applying steady pressure
to lift the part free (the alternative is to clip the
leads of a damaged part).
e. Since the conductor part of the etched circuit
board is a metal plated surface, covered with solder,
use care to avoid overheating and lifting the conductor
from the board. A conductor may be cemented back
in place with a quick-drying acetate base cement (use
sparingly) haVing good insulating properties. Another method for repair is to solder a section of good
conducting wire along the damaged area.
f. Clear the solder from the circuit board hole
before inserting a new component lead. Heat the
solder in the hole, remove the iron, and quickly
insert a pointed non-metallic object, such as a
toothpick.
g. Shape the new component leads and clip to
proper length. Insert the leads in the holes and apply
heat and solder, preferably on the conductor side.
5-55. Most of the wire leads to the etched circuit
boards have edge-on connectors. When removing
or replacing these connectors, be sure they are
properly aligned with the guide slot in the board edge.
Applying force with the connector mis-aligned will
spring the contacts and result in a faulty electrical
connection.
5-56. CATHODE RAY TUBE REPLACEMENT.
5-57. To replace the cathode ray tube, use the
following procedure:
WARNING
Serious injury may result if the cathode ray
tube is dropped. Handle the tube carefully.
a. Remove the bezel.
Table 5-7. Sweep Generator Troubleshooting
c. Remove the tube socket from the clamp. It may
be necessary to carefully loosen socket from clamp
with a narrow-blade screwdriver.
Test
Point
Sweep
Completed*
V103 Pin 2
-100 volts
o volts
Pin 6
92 volts
48 volts
Pin 7
-44 volts
-1 volts
V104 Pin 7
-45 volts
-57 volts
Pin 6
-4.9 volts
-2.4 volts
V106 Pin 2
4.7 volts
-.15 volts
Pin 6
195 volts
2.3 volts
Pin 8
195 volts
16 volts
Pin 9
195 volts
2.3 volts
1. Check Vertical Gain (ref.
V109 Pin 8
-9.5 volts
-74 volts
j. Check Horizontal Gain (ref. Paragraph 5-75).
Pin 9
-9.6 volts
-74 volts
Reset**
*Sweep Completed: Connect Pin 2 of V103
to -100 volts (VIO wire).
**Reset: Connect Pin 2 of V103 to ground.
5-10
b. Loosen the clamp at the CRT socket.
d. Slide the tube out of the instrument.
e. Install the new CRT, reversing previous steps.
Note: over-tightening the clamp at the CRT socket
may damage the tube.
f. Check alignment of trace with graticule. If
trace is misaligned, bring into alignment with R329,
TRACE ALIGN (rear panel).
g. Check Astigmatism (ref. Paragraph 5-68).
h. Check Intensity Limit (ref. Paragraph 5-69).
Paragraph 5-75).
5-58. ADJUSTMENTS.
5-59. The adjustment procedures are divided into
three groups. Group I adjustments include procedures
of Paragraphs 5-64 through 5-69; these procedures
set the power supply outputs and optimize front panel
01879-3
Section V
Paragraphs 5-60 to 5-74
Model 130C
controls for CRT display. Group II adjustments are
in the procedures of Paragraphs 5-70 through 5-80;
these procedures are for adjustments which are made
the same way in both vertical and horizontal circuits.
Group III adjustments are in the procedures of Paragraphs 5-81 through 5-86; these procedures adjust
the calibrator output and the sweep generator circuit,
and depend on an accurate calibration of the vertical
and horizontal circuits. Refer to Figures 5-1 and
5-2 to locate adjustable components. Always make
the preliminary settings of Paragraph 5-62 before
following any adjustment paragraph procedure.
5-60. REQUIRED TEST EQUIPMENT.
5-61. Refer to Table 5-1 for information on instruments required for the adjustment procedures. Substitute instruments should have the characteristics
described in the table.
5-63. The following settings must be made prior to
following any adjustment paragraph procedure. If a
setting is different from these preliminary settings,
the procedure for the adjustment will specify so.
LEVEL' . • . . . . • . • . . . . . . . . . . • . . . AUTO
TRIGGER SOURCE-SLOPE . . . . . . . . . • INT+
ALL VERNIERS . . . . . . . . . • . . . . . . .. CAL
ALL AC-DC .. . . . . . . . . . . . . • . . . . .
AC
Grounding links . . . . . . . . . . . . . ., connected
NORMAL-SINGLE . . . . . • . . . . . . . NORMAL
5-64. GROUP I ADJUSTMENTS.
5-65. LOW VOLTAGE POWER SUPPLY.
5-66. Use a DC Voltmeter to measure the output, with
respect to chassis ground, of the low voltage power
supplies and make adjustment or check tolerance as
Shown in Table 5-8. Thevoltagemeasurement can be
made at any wire coded with the colors specified in
Table 5-8.
5-67. HIGH VOLTAGE POWER SUPPLY.
a. Connect the Model 11044A 100: 1 Voltage Divider
to the DC probe of the Model 410B Voltmeter.
b. Set Voltmeter to 3-volt-DC range, and polarity
to -.
c. Set the Voltmeter Calibrator for -300 volts DC
output, and connect divider tip to the output.
d. Set the gain adjustment of the Model 410B
(located at the rear of the instrument) for a reading
of exactly 3 volts.
e. Set the Voltmeter to the 30-volt range, and
measure the high voltage supply output at pin 8 of
transformer T401.
Table 5-8. Low Voltage Power Supply Adjustment
Tolerance
-100V
+100V
+250V
+12.5V
Violet
White/Red
+250±7V
Red
+12.5±lV White/Black/Red
01879-2
Wire Color
g. Recalibrate the Voltmeter.
5- 68. ASTIGMATISM.
a. Set both horizontal and vertical SENSITIVITY
to 20 VOLTS/CM.
b. With POSITION controls, center a low intensity
spot on the CRT.
c. Alternately adjust FOCUS control and Astigmatism adjustment R319, for the smallest, sharply
focused round spot.
5-69. INTENSITY LIMIT.
a. Center a defocused spot on the CRT.
b. Set INTENSITY control to "ten o'clock" position.
5-62. PRELIMINARY SETTINGS.
Supply
f. If necessary, set R312, High Voltage Adj., for
a Voltmeter reading of -28.5±1.0 volts; this corresponds to -2850 volts at the high voltage output.
Adjustment
R468
R477
none
none
c. Adjust R307, Intensity Limit, to just extinguish
the spot.
5-70. GROUP II ADJUSTMENTS.
5-71. The procedures of Paragraphs 5-72 through
5-80 may be followed to calibrate either the vertical
or horizontal circuits. The Preliminary settings of
Paragraph 5-62 must be made first. Unless the procedure states otherwise, make only the setting or
connection for the circuit being calibrated, that is,
for either vertical or horizontal.
The reference
designator for the vertical adjustment is given first,
followed by the corresponding horizontal adjustment,
e.g. R47/R238.
5-72. VERNIER BALANCE.
a. Set SENSITIVITY to 20 MV/CM.
b. Center spot with POSITION control.
c. Switch VERNIER out of CAL position.
d. Adjust R47/R238 for minimum shift of spot
when VERNIER is rotated.
5-73. COARSE DC BALANCE.
a. Set: DC BALANCE • . . . . . . . . .. mid-range
SENSITIVITY . . . . . . . . . • . . . . . BAL
VERNIER . . . . . . . . . . • • . • . . • CAL
b. Center spot with POSITION control.
c. Switch AMPLIFIER coupling to DC.
d. Adjust R48/R234, Coarse Bal, to center the
spot on CRT.
5-74. OUTPUT STAGE CURRENT.
a. Set: POSITION • . . . . . . . . . . to center spot
SENSITIVITY . . . . . . . . • 20 VOLTS/CM
b. Measure the collector voltage of transistors Q3
and Q4. Adjust R59/R228 so the average of the two
voltages is -15 volts.
c. With
deflection
amplifier
of the two
a DC Voltmeter, measure and note the
plate voltages (Green and White wires on
board). Adjust R83/R276 so the average
voltages is +140 volts.
5-11
Section V
Paragraphs 5-75 to 5-79
d. Repeat steps band c to obtain specified voltages.
e. This step applies only to the horizontal amplifier
adjustment and should be performed only when a more
accurate calibration is needed for useofthe 10 USECONDS/CM, INTERNAL SWEEP X50 combination
setting. When more accurate calibration is desired
for this one sweep combination, make same settings
as in step a and proceed as follows:
(1) Connect a shorting wire between the green
and white wires (deflection plate leads) on the
horizontal ampliier circuit board.
(2) Clip the probe of a r$p! Model 428A/B DC Milliammeter around the black lead from the horizontal POSITION control, R221B, to the amplifier board.
(3) Adjust R276 for a Milliammeter reading of
15 mao
(4) Disconnect Milliammeter and remove shorting
wire.
5-75. GAIN.
a. Connect the Voltmeter Calibrator to the amplifier
input terminals (shorting bar in place).
b. Set SENSITIVITY to 0.1 VOLTS/CM.
c. Set output of Voltmeter Calibrator to 1 volt p-p.
d. Set R69/R263, Gain, for exactly 10 cm deflection
on the CRT.
5-76. NEUTRAUZATION.
a. Connect the 750 output of the Square Wave
Generator to the Model 130C amplifier input terminals
(connect between left terminal and center terminal
with grounding link in place).
b. For vertical neutralization adjustment, proceed
to step c (1). For horizontal neutralization adjustment
only, connect the Oscillator output to the Model 130C
vertical input and to the external sync input of the
Square Wave Generator; proceed to step c (2).
c. Make appropriate settings as follows:
(1) For vertical neutralization only, set
SWEEP TIME
5 /LSECONDS/CM
Horiz. SENSITIVITY • INTERNAL SWEEP Xl
Vertical SENSITIVITY0.2 VOLTS/CM
(2) For horizontal neutralization only set
Vertical SENSITIVITY
5 VOLTS/CM
Horizontal SENSITIVITY· . 0.2 VOLTS/CM
d. Set Square Wave Generator frequency to 50 kc.
For horizontal neutralization, also set Oscillator
frequency to 25 kc.
e. Obtain CRT display as follows:
(1) For vertical adjustment only, set Square Wave
Generator output for about 8 cm deflection.
(2) For horizontal adjustment only, set both signal
source amplitudes for about 8 centimeters
deflection, horizontally and vertically. Adjust
Oscillator frequency until two distinct square
waves are displayed as in Figure 5-3.
5-12
Model 130C
f. Alternately adjust C48/C240 and C49/C241 for
best rise time with no overshoot. Figure 5-3 illustrates the waveforms for the horizontal neutralization
adjustment.
Note
A step input signal with a risetime much
faster than the Oscilloscope risetime, such
as the r$p! Model 211A signal, may cause a
noticeable preshoot on the trace. This does
not affect the accuracy of the adjustment
and does not occur for signals within the
specified risetime of the Model 130C.
g. Disconnect shorting link from center input
terminal and connect Square Wave Generator between center and ground (black) terminals.
h. Connect a short jumper wire from the left
input terminal to the ground terminal.
i. Note the square wave response. A slight
rounding on the leading edge is permissible. If
desired, a compromise adjustment of C48/C240 and
C49/C241 can be made with Square Wave Generator
signal applied alternately to the left terminal (With
center terminal grounded) and to the center terminal
(with left terminal grounded).
5-77. INPUT CAPACITANCE AND ATTENUATOR
FREQUENCY COMPENSATION.
5-78. There are two methods for adjusting input
capacitance. One method requires a capacitance
meter or bridge and the other method requires an
alignment attenuator previously set (by L-C Meter
or capacitance bridge) for a specific value (see item
9 in Table 5-1). Paragraphs 5-79 and 5-80 provide
the procedures for these two methods.
5-79. PROCEDURE USING CAPACITANCE METER.
a. Set amplifier SENSITIVITY to 0.2 VOLTS/CM.
b. Disconnect the ground link from the center
terminal of the Model 130C amplifier input.
c. Connect the L-C Meter between the left (+ input) and right (ground) terminals.
d. Adjust C21/C221, + Input
reading of 45 pf on the L-C Meter.
Capacity, for a
Note
For Model 130C instruments with Option 06
(see Paragraph 1-9), change all references
in this procedure from "45 pf" to "85 pf".
This is necessary because of input capacitance added by the cabling to the rear panel
connectors.
e. Connect the L-C Meter between the center
(- input) and right (ground) terminals.
f. Adjust C22/C222, -Input Capacity, for a reading
of 45 pf on the L-C Meter.
g. Disconnect the L-C Meter.
h. Connect the signal lead of the Square Wave
Generator 6000 output to the left terminal (+ input)
of the amplifier input. Connect a short wire from
01879-2
Section V
Paragraphs 5-79(Con't)
Modell3OC
I
(0)
( bl
(c
OPT! MUM
AOJUSTMENT
ROUNOING,
UNDERCOMPENSATEO
OVERSHOOT.
OVERCOMPENSATED
IaOC-"'-9
Figure 5-3. Horizontal Neutralization Adjustment Waveforms
(0 )
( b)
(c)
OPTIMUM
ADJUSTMENT
ROUNDING.
UNDERCOMPENSATED
OVERSHOOT,
OVERCOMPENSATED
ISOC- "'-10
Figure 5-4. Horizontal Attenuator Compensation Waveforms
the right terminal to the ground side of the signal
source. Also be sure the ground side of the signal
input connector goes to the center terminal.
(2) For horizontal adjustment only.
Vertical SENSI'I1VITY •
5 VOLTS/CM
Horizontal SENSITIVITY .
2VOLTS/CM
1. For vertical capacitance and compensation adjUstment, proceed to step j (1). For horizontal ad-
k. Set Square Wave Generator frequency to 10 te.
For horizontal adjustment, also set Oscillator freQuency to 5 kc.
justment only, connect the Oscillator output to the
Model l30C vertical input terminals and to the external
sync input of the Square Wave Generator; proceed to
step j (2).
j. Make settings
as follows:
(1) For vertical adjustment only.
SWEEP TIME
Horizontal SENSITIVITY
Vertical SENSITIVITY·
01879-1
20 j.LSECONDS/CM
INTERNALSWEEPXI
2 VOLTS/CM
m. Obtain CRT display as follows:
(I) For vertical adjustment, set Square Wave
Generator output for about 8 cm deflection.
(2) For horizontal adjustment, set both signal
source amplitudes for alxlut 8 cm deflection,
horizontally and vertically. Adjust Oscillator
frequency until two distinct square waves are
displayed (see Figure 5-4).
5-13
Model 130C
Section V
Paragraphs 5-80 to 5-82
n. Adjust C17/C217, 2V Atten. Comp, for best
square wave. Figure 5-4 illustrates the waveforms
for the horizontal compensation adjustment.
p. Set SENSITIVITY to 5 VOLTS/CM. Adjust
Square Wave Generator amplitude for about 8 cm
deflection.
q. Adjust Cll/C215, 20V Atten. Comp, for best
square wave. Note that this adjustment is for the
5, 10, and 20 volt ranges.
r. Change Square Wave Generator signal lead to
the center terminal of the input. Connect a short
lead between the left and right terminals (lead still
connected from Oscilloscope ground terminal to
ground side of signal source).
s. Adjust C12/C216, 20V Atten. Comp, for best
square wave. Note that this adjustment is for 5, 10,
and 20 volt ranges.
t. Change SENSITIVITY to 2 VOLTS/CM. Adjust
Square Wave Generator output for about 8 cm
deflection.
u. Adjust C18/C218, 2V Atten. Comp, for best
square wave.
v. Use appropriate procedure following:
(1) If using an L-C Meter for capacity adjustments,
disconnect the Square Wave Generator and
jumper wires. Refer to Table 5-9 and make
L-C Meter connections, SENSITIVITY settings,
and adjustments as specified.
(2) If using the alternate method of Paragraph 5- 80,
retain the same instrument setup of step u in
Paragraph 5-79. Change the Square Wave Generator frequency to 1 kc. For the vertical
adjustment, change SWEEP TIME to 0.2
MILLISECONDS/CM, or for the horizontal
adjustment, change Oscillator frequency to
500 cps. Refer to Table 5-9 and connect the
square wave through the Alignment Attenuator
to the specified terminals (unused red input
terminal should always be connected to Oscilloscope ground). At each SEN:SITIVITY setting
adjust signal amplitude for about 8 cm deflection
and make the adjustment shown in the table.
5-80. ALTERNATE METHOD USING ALIGNMENT
ATTENUATOR.
Note
If the Alignment Attenuator has been pre-
viously adjusted to match a 45 pf input
capacity, steps band h may be omitted.
a. Disconnect ground link from amplifier input
center terminal.
b. Set SENSITIVITY to 0.2 VOLTS/CM and measure
input capacity (between left and right terminals) with
an L-C Meter or capacitance bridge. Adjust C21/
C221 for a reading of 45 pf.
c. Connect the 6000 output of the Square Wave
Generator through the Alignment Attenuator to the
left (+ input) and right (ground) terminals of the input.
Ground center terminal.
d. For vertical circuit adjustment, proceed to
step e (1). For horizontal circuit only connect the
Oscillator output to the Model 130C vertical input
terminals and to the external sync input of the Square
Wave Generator; proceed to step e (2).
e. Make Model 130C setting as follows:
(1) For vertical adjustment only,
SWEEP TIME'
0.2 MILLISECONDS/CM
INTERNAL SWEEP Xl
Horiz. SENSITIVITY'
Vertical SENSITIVITY • • • 0.2 VOLTS/CM
(2) For horizontal adjustment only,
Vertical SENSITIVITY
5 VOLTS/CM
0.2 VOLTS/CM
Horizontal SENSITIVITY· •
f. Set Square Wave Generator frequency to 1 kc.
For horizontal adjustment, also set Oscillator frequency to 500 cps.
g. Obtain CRT display as follows:
(1) For vertical adjustment, set Square Wave
Generator output for about 8 cm deflection.
(2) For horizontal adjustment, set both signal
source amplitudes for about 8 cm deflection,
horizontally and vertically. Adjust Oscillator
frequency until two distinct square waves are
displayed.
h. Set adjustment on Alignment Attenuator for best
square wave response; it is now adjusted for 45 pf
inputs.
Table 5-9.
Amplifier
Input
Connections
left and right
terminals
left and right
terminals
center and right
terminals
center and right
terminals
5-14
Input Capacity Adjustment
SENSITIVITY
Setting
Adjust for 45 pf
or best
Square Wave
2 VOLTS/CM
C19/C213
5 VOLTS/CM
C13/C211
5 VOLTS/CM
C14/C212
2 VOLTS/CM
C20/C214
1. Adjust C21/C221, + Input Capacity, for best
square wave.
j. Change square wave signal lead through Alignment Attenuator to the input center terminal. Ground
left terminal.
k. Adjust C22/C222, - Input Capacity, for best
square wave.
m. Disconnect Alignment Attenuator andOscillator.
Proceed to Paragraph 5-79, step h, and complete the
adjustment procedure there. In step v (2), use Alignment Attenuator as explained.
5-81. GROUP III ADJUSTMENTS.
5-82. The procedures of Paragraph 5-83 through
5-86 allow proper adjustment of the Calibrator circuit
01879-1
Section V
Parauranhs 5-83 to 5~88
ana 0 me sweep c rcult.
horizontal
calibrated.
amplifier
or me L;a.Jtrlrator aaJUS _
must
first
be accu;ately
5-83. CALIBRATOR.
a. Check adjustment of the vertical amplifier gain
as set in Paragraph 5-75.
.<Vertical
.'"
"',
"n~
SENSITIVITY • • •
50 MV ICM
Vertical INPUT • • • • • • • • • DC
Horiz. SENSITIVITY· INTERNAL SWEEP Xl
.~~r
.u~
,-.,.
I R TI N.
a. Check ad ustment of horizontal am lifier
as set in paragraph 5-75.
ain
b. Set Modell30C as follows:
LEVEL • • • • • • . • • mid-range
Horizontal SENSITIVITY' INTERNAL SWEEP Xl
Vertical SENSITIVITY . • • 1 VOLTS/CM
c. Connect Time Mark Generator to the Model
130C vertical input.
adiust comoonent for one time mark Der centimeter.
...•
:w~e
.,weep
-~v.
SCHEMATIC DIAGRAM NOTES
..4UUra Ion
J.~me
1.
c. Connect a short lead from 500MVCALIBRATOR
output to the vertical amplifier input terminal.
SWEEP TIME
setting
Time Mark
Generator
Adjustment
d. Adjust R402, Calib, for exactly 10 cmdeflection.
1 j.tSECONDS/CM
1 j.tsec
a. Set Model 130C as follows:
LEVEL' . • • • • •
••
.on
just out of AUTO
1 MILLISECONDS
• 20 VOLTS/CM
.1 SECONDS/CM
u.
Vertical SENSITIVITY·
eM
1 msec
R177
'"
"'"
R175
100 meec
Vertical Amplifier and Horizontal Amplifier
b. Sweep Generator
5-87. COMPONENT LOCATION.
c. Rotate R151, stability, counter clockwise until
~h~ trace just disappears. (If no trace was present
5-88. Figures 5-1 and 5-2 indicate the location of
most tubes. ass~m~.~~es, and adjustments. ComJ)).n~
~{fp1ca.J!y
aoou
(1) TRIGGER SOURCE-SLOPE. • • . . . . . . • . . . . ..
~:>:>
'" ".
5-85. SWEEP LENGTH.
a. Connect the OscUlator to the vertical input
terminals.
D. ~M Moae, l;:)UL; as OllOWS:
WlnCUH W
see.
~iWl{;Cn
comJ))nen s
corresponding sche:::atlc .fu,,;ram. Ref" ro the Lie'
of Illustrations at the front of this manual for
page references to these comJ))nent location figures.
Note
Component location is identical for
assemblies with different hp part
numbers as listed below
r
rence designator.
~~c~~
c. Set Oscillator frequency to 500 kc and adjust
amplitude for a 6 em display on CRT.
d. Observe end of sweep and adjust LEVEL control
for shortest sweep.
A101
AI02
A175
A201
A202
A205
: "':
-~~~
. . • 13OC:~65C and
••. 130C-19D and
•.• 130C-19C and
130C-65B and
13OC-19B and.
•.. 13OC-65F and
130C-65J
130C-19H
13OC-19G
13OC-65H
13OC-19F
130C-65M
..n, ...
Schematic Diagram Notes Fold-out
•
5-15
''''"'
",",~_~",,_.nn
Xl
.
atltust LEVEL control for 0 volts readinl>'.
5.
SUK screemng S
INT+
(2) HORIZONTAL SENSITIVITY. . . • . . . . . . . • . • .
screened referen e d ,sil>'natnr T' ....nnl m t thi
figures are included near the corresoondiM circuit
e. Set R151 slightly ccw for a voltage reading of
2 volts less negative than noted in step d.
01879-4
Titles enclosed in boxes indicate front-panel engraving.
Solid weighted lines indicate signal paths. Broken weighted lines indicate
Ieeaoack paws.
(l) Follow steps 1 through 10 of Figure 3-3.
b. Set DC Voltmeter range to -100V and check
voltage at pin 2 of tube VI03.
a..!~OUl u ..... VOnage reamng
2.
3.
c181
.n
-n.
Unless otherwise indicated: resistance is in Ohms, inductance is in micrOhenries,
and capacitance is in picofarads.
6.
Sweep Generator Waveforms - see Figure 5-lJ and schematic,
gure -.1.1.
*=
."
Factory selected part, may have been omitted; average value shown.
instrument chassis ground.
....... Il~
'" ""
-
".
:
...
. .
:8
:
L1
'" '"
P1pNI
1·1.
~1.
V.rUa.I
Ai_. .u,
~
• 001
1Mllt_
0"'0S1~[
I
VI
f
:
-""~
..
..
~
C,
It~.
~
:""'\..
.
l
~I
lilt
'
-."""5
..
'ri-I-l
011
l
'~ '"I
ClI~ Q'-11..- - c.":P •
lUI
:-'"I
,.,
eo
'"!
,".
IHI
..
~~
4~ ~ ~J
"6. ~ "'1
O.
""
lIa
.-c_a_It
SlO( 0# _1lO
I
.....,
Model130C
r---- ---------------------------,.. ----------
,,
,
,COAl(
• :Io,~r"
r~:J
LSEtOSITIVIT!..J SI@
!
01 FFERENTIAL
FEEDBACK
AMPLIFIER
Sil.
II
Section V
Figure 5-7
--------.,----------~-
,
1....
,~6k.1
__ ........
''''''
'" ':r'
I
-f-[}
v
;~
I~V
OC
'"Y€i.
IA~AI<ICE
~EFE~E"CE
OESIG""'TO~S
DIFFERENTIAL. 7'.r.r:,11
lOOK
,
r-----~--+---,
\lIHT/~EO/O~N~~
r:::)
TOV2lPlN2
i
1
'
C..3
:
,
~~
,,~.~
+
II.U
~43
1-0'
1-0:
~,
C4~
QI}.~-:~7
\
[ill
:
,
,
ISIF
"
51-4
\
W. .
I~U
I
v"'Th
C~2
\
100
r--<>OO
rOW
f-oLJ,J
1--00
,f.ih
.~
~
-INPUT
I
0'"
I
w..
....l
COA~ l.!2J
SID
_
'"
nOK
f.~"
~.22UF
..
0
~2 8"
{l#,
I
ill
~2T
I
[j2]
I
I
W
.J '£)GAltO
I
~
::::
'"
'"
I
CU~AEtOT
o
1_
!'IS!
\.:Jtl
'f.8~F-----18
10K
I
i
WHTI~EO/GAAAMPI.
ro'WI~~271
~
'~TOIWPS
S"
YEL
11300
lORN
'"'
::::: WHTI:~:I: :::::
0NEUT~""'llEII
OHLECTION
PLATE
V30l> PIN8
Fi""'r 5-7. Vertical Attenuator and
Am lifierSchematic
01879-5
5-17
.-- ....
~.
"""'l "V'vI
- -
_.-
_...
W !'\/'vi
"'lc.n..J'f
li'd1..J11
W'I...Jl....,of
WIl""'I
=::
.JlJ'=::
Ii' .JlJ'=::
W 'y'\.,I
'<7
..Jl....J'=:
''0'" c..IL.J'==
Ii'
h
.
AI02
I
h I--J-....
.-'~
'0' " " "-:::
Ii'
'0'
L/l.../' =:
L/l.../'=::
'0' L/l.../'=-:
'0' "-.C::J =:
-_
_ _- -
_ _ _ _ 0 .... 1
_
:==.::::-:::.::trZ..
..
__-_
_--_
~
tn'IS..
•
•
•
•
•
• Eft••
• _
........•
•••••••
...
__
.....
CA.I.
_.. __
.-_~_a-
_ __..... _.......
Section V
Model 130C
Figure 5-11
--~
I
JIOI
@!I
~
!
I"
.81~
AIOI
CIIO-I22
I
GATE OUTPUT
j'
SWEEP
OUTPUT
CATHODE
!
I
-IOOVlA)
FRO,+AIOI
!
ITI[
OWL
RIII-IS8
5101-104
VIOt-109
TRIGGER~
JI02 ...
,
CIIl
,oIUF
1
R326
RI33
'"
IWHT/REO
CWJ.R1l6
SI7SA
ISWEEPl
RI79 I
TO
L.....
",IOOV(A)
r----
I
FREERUN
::-.
Rte4
4.114M
t
-IOOV!A)
"'TO
51028 0
0-----/'\....-0
FROM VERT AMP
(THRU CSI) ---+
~
I
J\.
~~I~
0-
---c
' - --0
t
114__
1Ctl2
'1':
l"""":"'"
I lIfT I
A101 SWEEP
GENERATOR ASSY
L...=...J
j'~'i
I
5102C
---,....
I ITRIGG~~O~~URCE I @
,,
-'-
WHT/REO/GR~_
'\77 "'-l~
I
V
'I -4-
I~g
+3.IV
""
r----,
RIS6l
-IOOV(B)
~;.-
-BRN
~
h.
:~~~
DIODE
27K
C/ ~~t~ E:,r~~
',.",0 ~"9
t
ST:5K -IOOlA)
""-.0121
'"
r),
CI22J.L- __
...
-~-!If~
,00oTI
RI47......."..,
UK
\17/
-IOOVlAI
FOLLOWER
tl!03B
-IOOV(A)
0
RI1I9
ISOk
RI28
RI27
-100VlAJ!
i~
R219
IVI09C
0 ~~
+IOOV(A)
,
r---Yior'=lo-lAil -IOOVIAI
RI1I7
'"
CI80
f';-411
I
,I :~~ I
!
0101
~
\SlU
I
_/
"', ..,,,,
RI38
' ...,
, ___ ,v,
RI311
2611K
...;_.:.:';,;;"'::.I_V~ Ur~~~T\.:IT
I'-
'"
,
+911;: 6
~~S~
S2
VI0260J8
R130
~/'V
".;:;
L
CI19---
TRIGGER
GENERATOR
C~':
YIO'!
:,1
I
~o:
+lOOVlAI
,
i'
I
VI03A.VI04S
~
WHT/GftNNlO
+9!1V
I'
GATE
GENERATOR
UIIOV(A)
!FREERUN!
-------
BRN
!VIO
,I
0
STABIL.ITY~ ~~II~
BRN
VEl
." ,
51048 1
Tm
i
=
~~
....DOVIA)
5WE P
E
WITCH
---
~
6,3VAC
01879-3
5-19
Model 130C
Section V
Figure 5-12
RIB6
RIBS
CI79
l3OC-A-11!I
Figure 5-12. Sweep TIme Switch, A1'l5, Component Location
5-20
01879-1
INTEGRATOR GRID
VI06A.PI/f 2
CATHODE FOLLO'ilYER
VI068,PIN8
TO $202
TllRU R219
CATHOOE FOLLOWER
VIO)8, PIN'
:----------------------~~----:------l--~'-------Tf'---l---~t---~~;.
REFERENCE
~
S115A
i
$1758 1
WilT/VI
ISI7SC
-
[SI7SD
5175E:
517SF!~
~
?
VERNIER
@
f----o
--c-~~
PARTOFAIOI
SWEEP GEN. ASS;--'
1-0
RIBO
~
~
0-
--<>
0-
0-
--<>
f----o
f----o
r>-
r>-
---<>
0-
0-
----<>
0-
0-
--<>
..,
~U?-
RIS'I
'1.5'1101
0-
'"
I
I SECONOS/CM I
!ill
G!J
--0
-0
~
~
--<>
f----o
1m
1-0
[ID
wt
~
'"
••
,~~ w,r'~
n
@
RI?6
IW"
-m
'"
m
~
~E'--
no
r>-
-0
-0
0-
0-
--<>
--<>
0-
0-
--<>
--<>
l.!.J
0-
0-
0-
0-
m
m
C>-
O--
0-
0-
00-
0-
Swl~EUpS~?ME--o
---<I---0
@
RI77
m
8IU
I,OMILU$EC
SWEEP TIME
n
011
--I-<'
I WHT
'"
"""
W",
m
2SI<
t=
----<>
--<
--<>
,
--<>
I VIO
-f----o
--f----o
--<>
--<>
--<>
--<>
-0
-0
--<>
--<>
o-~--<>
--<>
1m
--<>
!ill
CI78
~
"
-±ClJ
I
v
-V
USECONDS/CM
I
L.!..J
2':
~
I?>
--------'
~
~
Figure 5-13. Sweep Time Schematic
5-21
u••-,.-.
...... ",,,
I
IIU'
u-'::t
au
~"'J
- .
"24,)
"" ~I
=::1
;0'02
~
•
"'"
ItU8 AlS<'
... v(
•
1((", OMlff[O.
-a-'ll
000 ~ Ml(
0
0# 10&lIO
I
• I
% ~~
I..•~ '" •
Q)O
I
• • '-'ClOlIl 5f1,.U:UO ..... f .......
I
~f/IVS
""
,""
IU'U
,,~
""
~
ctQ
..
C •..
::
au
1
--1-
1lt5'-1tZr.t
--.J""
IIlM
Ittf7
"
t:J a
'120".0
~.
~ till: lUH
-~;
.n,
J
_-.-11
Flgul'<lo-16
"',,-"'"
""
~ ~
Itt:: ";/
,"0'"
IEID'
HT.''''."
Wi
0
I
\
.'"
-"OAT"OD.C"Orv>O':
CURRENT
"N"/" ",\'1
",,,_10\''''
.'C;V
1"'"''''''
1-11-,.
/ \
'o"o"W'
FlgureS-t6. Horl.z.ontaiAttenuator
mp er
S<:hemallc
=~"
...
..
"
I -~~I
\::)18-', ':..
-~4;,
1~2§
..
. . .....~ H'I
,., ::
.-, i ... !..
I
~-
_.-
. . ."
-.,.. .
..
'"
'"
..,.,.
'w.
~
C :l ;:
_......._-_.-
.
.......-'-
_.. _---,..
__.
.........
_..... _--- --
Model 130C
Section VI
Figure 6-1
780-6-A-2
Index No.
hp Part No.
Description
1
Panel: front
1
2
130C-2B
Panel: rear
1
3
5000-0743
Cover: side
2
4
5060-0734
Casting: frame side
2
5
130C-44A-l
Cover: top
1
6
5060-0761
Cover: bottom
1
7
5060-0767
Foot: plastic
5
8
1490-0030
Stand: tilt
1
9
5060-0763
Handle: side
2
10
5060-0765
Retainer: handle
2
11
5000-0052
Plate: trim adhesive back
2
12
5060-0776
Kit: rack mount
1
Figure 6-1. Modular Cabinet Replaceable Parts
6-0
TQ
130C-2A
Section VI
Paragraphs 6-1 to 6-7
Model 130C
SECTION VI
REPLACEABLE PARTS
6-1. INTRODUCTION.
6-4. ORDERING INFORMATION.
6-2. This section contains information for ordering
replaceable parts for the Model 130C. Table 6-1 lists
reference designators and abbreviations that are used
in the Table 6-2 component descriptions. Table 6-2
lists the parts in alpha-numerical order of their reference designations and provides the following information for each item:
6-5. To order replacement parts from the HewlettPackard Company, address the order or inquiry to
the nearest hp Sales/Service Office (see list of
addresses at rear of this manual) and supply the following information:
a. The hp part number of item(s).
b. Model number and eight-digit serial number of
the instrument.
a. The hp part number.
b. Total quantity (TQ) used in the instrument; given
only first time the part number is listed.
6-6. To order a part not listed in Table 6-2, provide
the following information:
c. Description of part (refer to Table 6-1).
a. Model number and eight-digit serial number of
the instrument.
d. Typical manufacturer of the part in a five-digit
code, except for Hewlett-Packard Company; see code
list of manufacturers, Table 6-3, for name.
b. Description of part including function
location.
e. Manufacturer's part number.
6-3. Parts not identified by a reference designation
are listedatthe end of Table 6-2, under miscellaneous.
Cabinet parts and the rack mounting kit for the instrument are illustrated and listed in Figure 6-1.
Table 6-1. List of Reference
and
6-7. To order a part from a manufacturer other than
the Hewlett-Packard Company, provide the complete
part description and the manufacturer's part number
from Table 6-2.
Desig_na_t;;;;o;:;r.:;s;.;;;an;.;.d:::..:.A.;:b::.:b:::r.:;e;.:V1.:;·=at;;,:i;;;:;o~no:;;s
_
REFERENCE DESIGNATORS
A
B
C
CP
CR
DL
DS
assembly
motor
capacitor
coupling
diode
delay line
device signaling (lamp)
E
F
FL
J
K
L
M
MP
P
misc electronic part
fuse
filter
jack
relay
inductor
meter
Q
R
RT
S
T
mechanical part
plug
transistor
resistor
thermistor
SWitch
transformer
Y
terminal board
test point
vacuum tube, neon
bulb, photocell, etc
cable
socket
crystal
RMO
RMS
rack mount only
root-mean-square
TB
TP
V
W
X
ABBREVIATIONS
N/c
A
A.F.C
AMPL
amperes
automatic frequency control
amplifier
GE
GL
GRD
germanium
glass
ground(ed)
B.F.O.
BE CU
BH
BP
BRS
BWO
beat frequency oscll1ator
beryllium copper
binder head
bandpass
H
HEX
HG
HR
henries
hexagonal
mercury
hour(s)
IF
IMPG
INeD
INCL
INS
INT
intermediate freq
Impregnated
incandescent
include(s)
insulation(ed)
internal
NSR
K
kilo; 1000
P
PC
PF
CCW
CER
CMO
COEF
COM
COMP
CONN
CP
CRT
br~ss
backward wave oscillator
counter-clockwise
ceramic
cabinet mount only
coefficient
NE
NI PL
Nlo
NPO
NRFR
080
OH
OX
normally closed
neon
nickel plate
normally open
negative positive zero
(zero temperature
coefficient)
not recommended for
field replacement
not separately
replaceable
order by description
oval head
oxide
slow-blow
S-B
screw
SCR
selenium
SE
section(s)
SECT
SEMICON ; semiconductor
SI
SIL
SL
SPL
SST
SR
STL
silicon
silver
slide
special
stalnless steel
split ring
steel
common
CW
composition
connector
cadmium plate
cathode-ray tube
clockwise
DEPC
DR
deposited carbon
drive
ELECT
ENCAP
EXT
electrolytic
encapsulated
external
F
FH
FlLH
FXD
farads
flat head
filliste r head
fixed
linear taper
LIN
LK WASH = lock washer
logarithmic taper
LOG
low pass filter
LPF·
mll1i; 10- 3
M
meg; 106
MEG
METFLM ; metal film
MFR
manufacturer
MINAT
miniature
MOM
momentary
MTG
mounting
MY
"mylar'"
N
nano (10- 9)
PHL
PIV
P/O
POLY
PORe
PQS
POT
PP
PT
RECT
RF
RH
TA
Phillips
TRIM
peak inverse voltage
part of
polystyrene
porcelaln
position(s)
potentiometer
peak-to-peak
point
rectifier
radio frequency
round head
TWT
tantalum
time delay
toggle
titanium
tolerance
trimmer
traveling wave tube
U
micro; 10- 6
peak
printed circuit
picofarads ;
10- 12 farads
PH BRZ = phosphor bronze
TD
TGL
TI
TOL
VAR
variable
VDCW; dc working volts
wi
W
WW
WIO
with
watts
wirewound
without
01194-10
01879-4
6-1
Model 130C
Section VI
Table 6-2
Table 6-2.
Ref
Desig
hp Part No.
Description
(See Table 6-1. )
RS TQ
1
1
3
2
2
Replaceable Parts
A:
A:
A:
A:
A:
vertical amplifier circuit board (includes A5)
vertical attenuator switch
s slide dual dpdt
r fxd comp 2500-4000-250 ohms 30% 1/4w
amplifier input circuit board (includes R43, R44,
XVI)
Mfr
hp
hp
42190
hp
Al
A2
A3
A4
A5
130C-65G
130C-19E
3101-0040
2100-0432
130C-65M
A6
A7AI00
AI0l
AI02
0121-0111
2
A: c var 0.7-3.0 pf dual
hp
130C-65J
130C-19H
1
1
Not assigned
A: sweep generator circuit board
A: trigger source switch
hp
hp
AI03
AI04
AI05 A174
A175
3101-0040
2100-0347
1
A: s slide dual dpdt
A: r var comp 4 x 25k ohms 30% 1/4w
130C-19G
1
Not assigned
A: sweep time switch
A176 A200
A201
A202
A203
130C-65H
130C-19F
3101-0040
1
1
A204
A205
2100-0432
130C-65M
A206
A207 A300
0121-0111
A301
A302
A303
A304 A400
130C-65L
130C-11A
2100-0378
A401
A402
C9
CI0
C11
130C-65K
2100-0377
0160-0917
1
1
2
0130-0003
8
C12
C13
C14
C15
C16
0130-0003
0130-0001
0130-0001
0140-0090
0140-0090
C17
C18
C19
C20
C21
0130-0003
0130-0003
0130-0001
0130-0001
0130-0006
C22
C23
C24
C25
6-2
Not assigned
A: horizontal amplifier circuit board (includes A205)
A: horizontal attenuator switch
A: s slide dual dpdt
A: r fxd comp 2500-4000-250 ohms 30% 1/4w
A: amplifier input circuit board (includes R231, R232,
XV201)
A: c var 0.7-3.0 pf dual
Mfr Part No.
6603JM SPEC
hp
42190
hp
6603JM SPEC
hp
hp
hp
42190
6603JM SPEC
hp
hp
hp
Not assigned
1
1
1
A: hvps circuit board
A: rectifier (includes C311, T301, V304, V305)
A: r var comp IM-500k-200k ohms 30% 1/4w
hp
hp
hp
Not assigned
A: lvps circuit board
A: r var comp 500k-5k-3k ohms 30% 1/4w
C: fxd my O. 1 }J.f 20% 600 vdcw matched pair
NSR: p/o C9
C: var cer 1. 5-7 pf 500vdcw'
C:
C:
C:
C:
C:
var cer 1. 5-7 pf 500vdcw
var cer 7-45 pf 500vdcw
var cer 7-45 pf 500vdcw
fxd mica 200 pf 5% 500vdcw
fxd mica 200 pf 5% 500vdcw
5
C:
C:
C:
C:
C:
var
var
var
var
var
0130-0006
0160-0194
1
C: var cer 5-20 pf 500vdcw
C: fxd my O. 015 ~f 10% 200vdcw
0180-0314
0150-0084
2
4
C: fxd elect 2000 }J.f 10vdcw
C: fxd cer 0.1 Ilf -20% +80% 50vdcw
9
4
cer
cer
cer
cer
cer
1. 5-7 pf 500vdcw
1. 5-7 pf 500vdcw
7-45 pf 500vdcw
7-45 pf 500vdcw
5-20 pf 500vdcw
hp
hp
hp
hp
hp
hp
hp
00853
00853
RCM15E201J
RCM15E201J
hp
hp
hp
hp
hp
hp
hp
56289
56289
D393306447
33C41
01879-5
Section VI
Table 6-2
Model 130C
Table 6-2.
Ref
Desig
C26
C27
C28C40
C41
C42
C43
C44
C45
C46
C47
hp Part No.
De sc ription
(See Table 6-1. )
HE TQ
0140-0039
0160-0155
2
1
0150-0012
0150-0012
0150-0035
0150-0035
0150-0069
0150-0069
0160-2056
16
Replaceable Parts (Cont'd)
C: fxd mica 47 pf 5% 500vdcw
C: fxd my 3300 pf 10% 200vdcw
Mfr
Mfr Part No.
hp
hp
2
Not assigned
C: fxd cer 0.01 >J.f 20% 1000vdcw
C: fxd cer 0.01 >J.f 20% 1000vdcw
C: fxd cer 20 pf 10% 600vdcw
C: fxd cer 20 pf 10% 600vdcw
C: fxd cer 1000 pf -20% +100% 500vdcw
C: fxd cer 1000 pf -20% +100% 500vdcw
C: fxd my 0.22 J.Lf 20% 200vdcw
56289
56289
71590
71590
72982
72982
56289
29C214A3
29C214A3
DD200
DD200
801010X5G0102Z
801010X5G0102Z
224P22402
0150-0012
0150-0052
0140-0041
7
2
NSR: plo A6
NSR: plo A6
C: fxd cer 0.01 J.Lf 20% 1000vdcw
C: fxd cer 0.05 J.Lf 20% 400vdcw
C: fxd mica 100 pf 5% 500vdcw
56289
56289
00853
29C214A3
33C17A
RCM15E101J
C53
C54 C109
CllO
Cll1
0150-0058
1
C: fxd cer 2.2 pf ±O. 25 pf 600vdcw
72982
301 000 COJO 229C
Not assigned
C: fxd cer 0.01 J.Lf 20% 1000vdcw
C: fxd cer 0.01 J.Lf 20% 1000vdcw
56289
56289
29C214A3
29C214A3
C1l2
C1l3
C1l4
C1l5
C1l6
0150-0050
0150-0012
0150-0115
0140-0005
0140-0146
4
C:
C:
C:
C:
C:
fxd
fxd
fxd
fxd
fxd
cer 1000 pf 600vdcw
cer 0.01 J.Lf 20% 1000vdcw
cer 27 pf 10% 500vdcw
mica 27 pf 10% 500vdcw
mica 82 pf 5% 300vdcw
84411
56289
71590
00853
04062
TypeE
29C214A3
CC20 TCN 27
RCM15E270K
RDM15F820J
C1l7
C1l8
C1l9
C120
C121
0150-0074
0150-0050
0150-0052
0150-0052
0150-0052
1
C:
C:
C:
C:
C:
fxd
fxd
fxd
fxd
fxd
cer
cer
cer
cer
cer
72982
84411
56289
56289
56289
301 000 COHO 709D
Type E
33C17A
33C17A
33C17A
C122
C123C174
C175
C176
0150-0069
C: fxd cer 1000 pf -20% +100% 500vdcw
72982
801010X5G0102Z
0170-0018
0170-0019
1
1
Not assigned
C: fxd my 1 J.Lf 5% 200vdcw
C: fxd myO. 1 J.Lf 5% 200vdcw
84411
hp
Type 621M 10552
Cl77
C178
C179
C180
C181
0160-0314
0140-0018
0140-0006
0130-0001
0130-0006
1
1
1
01281
00853
hp
hp
hp
Type 663UW
RCM20E102J
C182 C208
C209
C210
C2ll
0160-0917
0130-0001
Not assigned
C: fxd my O. 1 J.Lf 20% 600vdcw matched pair
NSR: plo C209
C: var cer 7-45 pf 500vdcw
C212
C213
C214
C215
C216
0130-0001
0130-0001
0130-0001
0130-0003
0130-0003
C:
C:
C:
C:
C:
C48
C49
C50
C51
C52
01879-5
4
6
0150-0012
0150-0012
1
1
1
C:
C:
C:
C:
C:
fxd
fxd
fxd
var
var
var
var
var
var
var
7 pf ±O. 5 pf 500vdcw
1000 pf 600 vdcw
0.05 J.Lf 20% 400vdcw
0.05 J.Lf 20% 400vdcw
0.05 J.Lf 20% 400vdcw
my 0.01 J.Lf 5% 400vdcw
mica 1000 pf 5% 500vdcw
mica 82 pf 10% 500vdcw
cer 7-45 pf 500vdcw
cer 5-20 pf 500vdcw
cer
cer
cer
cer
cer
7-45 pf 500vdcw
7-45 pf 500vdcw
7-45 pf 500vdcw
1. 5-7 pf 500vdcw
1. 5-7 pf 500vdcw
hp
hp
hp
hp
hp
hp
hp
6-3
Model 130C
Section VI
Table 6-2
Table 6-2. Replaceable Parts (Cont'd)
Ref
Desig
hp Part No.
Description
(See Table 6-1. )
RS TQ
var cer 1. 5-7 pf 500vdcw
var cer 1. 5-7 pf 500vdcw
fxd mica 200 pf 5% 500vdcw
fxd mica 200 pf 5% 500vdcw
var cer 5-20 pf 500vdcw
Mfr
Mfr Part No.
hp
hp
00853 RCM15E201J
00853 RCM15E201J
hp
C217
C218
C219
C220
C221
0130-0003
0130-0003
0140-0090
0140-0090
0130-0006
C:
C:
C:
C:
C:
C222
C223
C224
C225 C230
0130-0006
0150-0012
0150-0012
C: var cer 5-20 pf 500vdcw
C: fxd cer 0.01 J.1.f 20% 1000vdcw
C: fxd cer 0.01 J.1.f 20% 1000vdcw
C231
C232
C233
C234
C235
0150-0035
0150-0035
0150-0069
0150-0069
0160-2056
C236
C237
C238
C239
C240
C241
0160-0157
0160-0163
0180-0314
0140-0041
1 C: fxd my 4700 pf 10% 200vdcw
1 C: fxd my 0.033;J.f 10% 200vdcw
C: fxd elect 2000 J.1.f 10vdcw
C: fxd mica 100 pf 5% 500vdcw
NSR: pia A206
NSR: pia A206
C242
C243
C244 C299
C300
0150-0012
0140-0039
C: fxd cer 0.01 J.1.f 20% 1000vdcw
C: fxd mica 47 pf 5% 500vdcw
0150-0012
Not assigned
C: fxd cer 0.01
C301
C302
C303
C304
C305
0150-0023
0150-0012
0160-0013
0150-0052
0160-0151
1 C:
C:
2 C:
C:
8 C:
fxd
fxd
fxd
fxd
fxd
cer 200 pf 20% 1000vdcw
cer 0.01 J.1.f 20% 1000vdcw
my 0.1 J.1.f 10% 400vdcw
cer 0.05 J.1.f 20% 400vdcw
cer 4700 pf -20% +80% 4000vdcw
84411
56289
56289
56289
71590
Type 126
29C214A3
lOOP 10494
33C17A.
DA172-097CB
C306
C307
C308
C309
C310
0150-0012
0160-0013
0150-0050
0160-0151
0160-0151
C:
C:
C:
C:
C:
fxd
fxd
fxd
fxd
fxd
cer 0.01 J.1.f 20% 1000vdcw
my 0.1 J.1.f 10% 400vdcw
cer 100 pf 600vdcw
cer 4700 pf -20% +80% 4000vdcw
cer 4700 pf -20% +80% 4000vdcw
56289
56289
84411
71590
71590
29C214A3
160P10494
TypeE
DA172-097CB
DA172-097CB
C311
C312
C313
C314
C315
0160-0018
0160-0151
0150-0069
0160-0151
0160-0151
1 C:
C:
C:
C:
C:
fxd
fxd
fxd
fxd
fxd
my 0.22 J.1.f
cer 4700 pf
cer 1000 pf
cer 4700 pf
cer 4700 pf
56289
71590
72982
71590
71590
160P22494
DA172-097CB
801010X5G0102Z
DA172-097CB
DA172-097CB
C316
C317
C318
C319 C400
0160-0151
0160-0151
0150-0050
C401
C402 C420
0160-0007
1 C: fxd my 2200 pf 10% 600vdcw
C~21
0180-0147
0150-0084
Not assigne d
1 C: fxd elect 150J.1.f -10% +50% 250vdcw
C: fxd cer 0.1 J.1.f -20% +80% 50vdcw
C422
6-4
hp
56289 29C214A3
56289 29C214A3
Not assigned
C:
C:
C:
C:
C:
fxd
fxd
fxd
fxd
fxd
cer 20 pf 10% 600vdcw
cer 20 pf 10% 600vdcw
cer 1000 pf -20% +100% 500vdcw
cer 1000 pf -20% +100% 500vdcw
my 0.22 J.1.f 20% 200vdcw
J.1.f
20% 1000vdcw
10% 400vdcw
-20% +80% 4000vdcw
-20% +100% 500vdcw
-20% +80% 4000vdcw
-20% +80% 4000vdcw
C: fxd cer 4700 pf -20% +80% 4000vdcw
C: fxd cer 4700 pf -20% +80% 4000vdcw
C: fxd cer 100 pf 600vdcw
71590
71590
72982
72982
56289
DD200
DD200
801010X5G0102Z
801010X5G0102Z
224P22402
hp
hp
56289 D393306447
00853 RCM15E101J
56289
29C214A3
hp
56289 29C214A3
71590 DA172-097CB
71590 DA172-097CB
84411 TypeE
Not assigned
hp
00853 PLI
56289 33C41
01879-5
Section VI
Table 6-2
Model 130C
Table 6-2.
Ref
Desig
hp Part No.
0150-0052
0180-0012
0150-0012
C441
C442
C443
C444
C445C460
C461
C462
C463
C464
C465
0180-0398
0150-0012
0150-0012
0150-0084
1
0180-0398
0150-0052
0180-0059
0180-0132
0150-0084
1
C466
C467C480
C481
CR1
0150-0012
CR2
CR3CR110
CRill
CR112
CR113CR200
1901-0040
CR201
CR202
CR203CR420
CR421
Description
(See Table 6-1. )
Mfr
fxd cer 0.05 jJ.f 20% 400vdcw
fxd elect 2x20 jJ.f 450vdcw
fxd cer 0.01 jJ.f 20% 1000vdcw
56289
56289
56289
33C17A
D32440
29C214A3
elect 150 pf -10% +50% 200vdcw
cer 0.01 jJ.f 20% 1000vdcw
cer 0.01 jJ.f 20% 1000vdcw
cer 0.1 jJ.f -20% +80% 50vdcw
56289
56289
56289
56289
D40728-DFP
29CZl4A3
29C214A3
33C41
Not assigned
C: fxd elect 150jJ.f -10% +50% 200vdcw
C: fxd cer 0.05 jJ.f 20% 400vdcw
C: fxd elect 10jJ.f -10% +100% 25vdcw
C: fxd elect 60 jJ.f -10% +100% 200vdcw
C: fxd cer 0.1 jJ.f -20% +80% 50vdcw
56289
56289
56289
00853
56289
D40728-DFP
33C17A
30Dl06G025BB4
PLI
33C41
C: fxd cer 0.01 jJ.f 20% 1000vdcw
56289
29C214A3
Not assigned
C: fxd elect 1000jJ.f 50vdcw
CR: si
56289
hp
D32429
RS TQ
C423
C424
C425
C426C440
C
C
C
1
Replaceable Parts (Cont'd)
Not assigned
0180-0056
1901-0040
1910-0016
1901-0044
I
1
1
1
4
C:
C:
C:
C:
fxd
fxd
fxd
fxd
CR: si
1
1
Not assigned
CR: ge
CR: si
hp
93332
hp
1901-0040
1901-0040
CR: si
CR: si
hp
hp
1
Not assigned
CR: si
hp
CR422
CR423
CR424CR440
CR441
CR442
CR443
CR444CR460
1902-0034
1902-3385
2
1
CR: avalanche 5.76 v
CR: avalanche 69.8 v
hp
hp
1901-0028
2
hp
1902-3354
1
Not assigned
CR: si
Not assigned
CR: avalanche 54.9 v
CR461
CR462
CR463CR480
CR481
1901-0028
1902-0034
F401
J1
J2
J3
J4J100
01879-5
D2361
Not assigned
1901-0029
CR482
DS101
DS102DS400
DS401
Mfr Part No.
hp
Not assigned
CR: si
CR: avalanche 5. 76 v
hp
hp
hp
1901-0045
1
Not assigned
CR: si
1902-0113
2140-0018
1
1
CR: avalanche 11. 9 v
DS: NE-2E neon glow
hp
24455
NE-2E
Not assigned
DS: indicator red
08717
858R
F:
J:
J:
J:
75915
hp
hp
hp
312.002
1450-0048
2110-0002
1510-0010
1510-0010
5060-0627
1
5
2
cartridge 2 amp 250 v
red binding post
red binding post
black with shorting clip
Not assigned
6-5
Model 130C
Section VI
Table 6-2
Table 6-2.
Ref
Desig
hp Part No.
1510-0010
Not assigned
J: red binding post
hp
1510-0010
5060-0627
J: red binding post
J: black with shorting clip
hp
J202
J203
J204 J400
J401
L213 L301
L302
P401
P402
Mfr
hp
hp
1510-0010
1510-0011
L111
L112L210
L211
L212
De sc ription
(See Table 6-1. )
TQ
J: red binding post
J: black binding post
J101
J102
J103 J200
J201
J402
J403
L11
L12
L13 L110
RS
Replaceable Parts (Cont'd)
1
1251-0148
1
1251-0202
9140-0157
9140-0157
1
4
hp
Not assigned
J: ac power receptacle
60427
H106lG-3L
Not assigned
J: banana jack black
L: fxd rf 680 Ilh
L: fxd rf 680 Ilh
83330
hp
hp
221B
Not assigned
9140-0022
1
9140-0157
9140-0157
5060-0408
1
Q1
Q2
Q3
Q4
Q5 Q100
1853-0030
1853-0030
1853-0036
1853-0036
4
Q101
Q102 Q200
Q201
Q202
1854-0003
4
L: fxd rf 500 Ilh
hp
Not assigned
L: fxd rf 680 Ilh
L: fxd rf 680 Ilh
hp
hp
Not assigned
L: alignment
NSR: p/o W401
NSR: p/o W401
Q: si pnp
Q: si pnp
Q: si pnp 2N3906
Q: si pnp 2N3906
hp
hp
hp
04713
04713
1
hp
1853-0030
1853-0030
Not assigned
Q: si pnp
Q: si pnp
hp
Q203
Q204
Q205 Q420
Q421
1853-0036
1853-0036
Q: si pnp 2N3906
Q: si pnp 2N3906
5080-0427
3
Not assigned
Q: ge pnp (selected)
Q422
Q423
Q424 Q440
Q441
1851-0017
1850-0062
2
5
Q: ge npn 2N1304
Q: ge pnp
6-6
2N3906
2N3906
Not assigned
Q: si npn
Q442
Q443
Q444 Q460
Q461
Mfr Part No.
5080-0427
Not assigned
Q: ge pnp (selected)
1850-0062
1851-0017
Q: ge pnp
Q: ge npn 2N1304
5080-0427
Not assigned
Q: ge pnp (selected)
hp
04713
04713
2N3906
2N3906
hp
01295
hp
2N1304
hp
hp
01295
2N1304
hp
01879-5
Section VI
Table 6-2
Model 130C
Table 6-2.
Ref
Desig
hp Part No.
Replaceable Parts (Cont'd)
De sc ription
(See Table 6-1. )
RS TQ
1850-0062
1850-0062
1850-0062
Q481
R9
RIO
R11
R12
1850-0038
0687-2211
0687-2211
0727-0269
0727-0269
1
6
R13
R14
R15
R16
R17
0727-0158
0727-0158
0727-0259
0727-0259
0727-0210
4
R18
R19
R20
R21
R22
0727-0210
0727-0274
0727-0274
0727-0435
0727-0365
R23
R24
R25
R26
R27
Not assigned
hp
Q:
R:
R:
R:
R:
ge pnp
fxd comp 220 ohms
fxd comp 220 ohms
fxd depc 990k ohms
fxd depc 990k ohms
R:
R:
R:
R:
R:
fxd
fxd
fxd
fxd
fxd
depc
depc
depc
depc
depc
10. 1k ohms 1% 1/2w
10.1k ohms 1% 1/2w
990k ohms 1% 1/2w
990k ohms 1% 1/2w
111k ohms 1% 1/2w
hp
fxd
fxd
fxd
fxd
fxd
depc
depc
depc
depc
depc
111k ohms 1% 1/2w
1 megohm 1% 1/2w
1 megohm 1% 1/2w
13. 47k ohms 1% 1/2w
5770 ohms 1/2% 1/2w
hP
hP
1
1
R:
R:
R:
R:
R:
0727-0431
0727-0101
0727-0437
0727-0432
0727-0436
1
1
1
1
1
R:
R:
R:
R:
R:
fxd
fxd
fxd
fxd
fxd
depc
depc
depc
depc
depc
2690 ohms 1% 1/2w
1030 ohms 1% 1/2w
509 ohms 1% 1/2w
253 ohms 1% 1/2w
101 ohms 1% 1/2w
R28
R29
R30
R31 R39
0727-0433
0727-0434
0727-0900
1
1
1
R: fxd depc 50.4 ohms 1% 1/2w
R: fxd depc 25.2 ohms 1% 1/2w
R: fxd depc 9.76 ohms 1% 1/2w
R40
R41
R42
R43
R44
0813-0017
0687-1041
0687-1041
0683-4715
0683-4715
R45
R46
R47
R48
R49
R50
0757-0977
0757-0977
4
2100-0138
0687-1011
2
16
R51
R52
R53
R54
R55
0757-0370
0757-0370
0686-3635
0686-3635
0758-0048
4
R56
R57
R58
R59
R60
0686-1035
0683-1545
0683-1545
01879-5
Mfr Part No.
hp
hp
hp
Q: ge pnp
Q: ge pnp
Q: ge pnp
Q462
Q463
Q464
Q465 Q480
Mfr
4
5
4
5
10% 1/2w
10% 1/2w
1% 1/2w
1% 1/2w
01121
01121
EB 2211
EB 2211
hp
hp
hp
hp
hP
hP
hp
hp
hP
hP
hp
hP
hP
hP
hP
hP
hp
Not assigned
1
7
4
4
2
2
4
R:
R:
R:
R:
R:
fxd
fxd
fxd
fxd
fxd
ww 5 ohms 5% 5w
comp lOOk ohms 10% 1/2w
comp lOOk ohms 10% 1/2w
comp 470 ohms 5% 1/4w
comp 470 ohms 5% 1/4w
R: fxd metflm 45. 3k ohms 1% 1/2w
R: fxd metflm 45. 3k ohms 1% 1/2w
NSR: p/o A4
NSR: p/o A4
R: var comp 50 ohms 10% 2w
R: fxd comp 100 ohms 10% 1/2w
R:
R:
R:
R:
R:
fxd
fxd
fxd
fxd
fxd
metflm 49.9k ohms 1% 1/2w
metflm 49.9k ohms 1% 1/2w
comp 36k ohms 5% 1/2w
comp 36k ohms 5% 1/2w
metflm 8200 ohms 5% 1/2w
R: fxd comp 10k ohms 5% 1/2w
R: fxd comp 150k ohms 5% 1/4w
R: fxd comp 150k ohms 5% 1/4w
NSR: p/o A4
Not assigned
hP
01121
01121
01121
01121
EB 1041
EB 1041
CB 4715
CB4715
hp
hP
hp
01121
EB 1011
hp
hP
01121
01121
EB 3635
EB 3635
hp
01121
01121
01121
EB 1035
CB 1545
CB 1545
6-7
Model 130C
Section VI
Table 6-2
Table 6-2.
Ref
Desig
hp Part No.
Replaceable Parts (Cont'd)
Description
(See Table 6-1. )
RS TQ
Mfr
01121
01121
R61
R62
R63
R64
R65
0686-1045
0686-1045
0727-0186
0727-0186
0727-0205
4 R:
R:
4 R:
R:
4 R:
fxd
fxd
fxd
fxd
fxd
R66
R67
R68
R69
R70
0727-0205
0686-4335
0686-4335
2100-0382
2100-0373
R:
4 R:
R:
2 R:
2 R:
fxd depc 92. 6k ohms 1% 1/2w
fxd comp 43k ohms 5% 1/2w
fxd comp 43k ohms 5% 1/2w
var comp 500k ohms 30% 1/4w
var comp 2500 ohms 10% 1/2w
R71
R72
R73
R74
R75
0687-1011
0687-1011
0727-0374
0727-0374
0686-2025
R:
R:
4 R:
R:
1 R:
fxd
fxd
fxd
fxd
fxd
R76
R77
R78
R79
R80
0767-0017
0767-0010
2100-0375
0727-0109
0727-0109
3
1
1
4
R:
R:
R:
R:
R:
fxd metflm 17k ohms 5% 3w
fxd metflm 15k ohms 5% 3w
var comp 7500 ohms 20% 1/2w
fxd depc 1470 ohms 1% 1/2w
fxd depc 1470 ohms 1% 1/2w
hp
R81
R82
R83
R84
R85
0687-8231
0687-5621
2100-0379
0687-8211
0687-1031
2
2
2
2
4
R:
R:
R:
R:
R:
fxd comp 82k ohms 10% 1/2w
fxd comp 5600 ohms 10% 1/2w
var comp 10k ohms 30% 1/4w
fxd comp 820 ohms 10% 1/2w
fxd comp 10k ohms 10% 1/2w
01121
01121
R86
R87
R88 R110
R111
0687-1011
0687-1231
comp lOOk ohms 5% 1/2w
comp lOOk ohms 5% 1/2w
depc 33.2k ohms 1% 1/2w
depc 33.2k ohms 1% 1/2w
depc 92. 6k ohms 1% 1/2w
comp 100 ohms 10% 1/2w
comp 100 ohms 10% 1/2w
depc 33k ohms 1% 1/2w
depc 33k ohms 1% 1/2w
comp 2000 ohms 5% 1/2w
Mfr Part No.
EB 1045
EB 1045
hp
hp
hp
hp
01121
01121
hp
EB 4335
EB 4335
hp
01121
01121
EB 1011
EB 1011
hp
hp
01121
EB 2025
hp
hp
hp
hp
EB 8231
EB 5621
hp
01121
01121
EB 8211
EB 1031
R: fxd comp 100 ohms 10% 1/2w
2 R: fxd comp 12k ohms 10% 1/2w
01121
01121
EB 1011
EB 1231
0687-1051
Not assigned
2 R: fxd comp 1 megohm 10% 1/2w
01121
EB 1051
R112
R113
R114
R115
R116
0687-1041
0686-1055
0687-3341
0687-2251
2100-0189
R: fxd comp lOOk ohms 10% 1/2w
1 R: fxd comp 1 megohm 5% 1/2w
1 R: fxd comp 330k ohms 10% 1/2w
1 R: fxd comp 2.2 megohms 10% 1/2w
R: var comp 1 megohm 30% 1/4w
01121
01121
01121
01121
hp
EB
EB
EB
EB
1041
1055
3341
2251
R117
R118
R119
R120
R121
0687-4711
0687-4711
0687-1041
0690-3331
0687-2731
2 R:
R:
R:
1 R:
3 R:
fxd
fxd
fxd
fxd
fxd
comp
comp
comp
comp
comp
01121
01121
01121
01121
01121
EB
EB
EB
GB
EB
4711
4711
1041
3331
2731
R122
R123
R124
R125
R126
0687-1011
0687-2751
0687-6811
0687-2721
0727-0237
3
1
1
2
R:
R:
R:
R:
R:
fxd
fxd
fxd
fxd
fxd
comp 100 ohms 10% 1/2w
comp 2.7 megohms 10% 1/2w
comp 680 ohms 10% 1/2w
comp 2700 ohms 10% 1/2w
depc 376k ohms 1% 1/2w
01121
01121
01121
01121
hp
EB
EB
EB
EB
1011
2751
6811
2721
R127
R128
R129
R130
R131
0727-0244
0690-2231
0687-4721
0687-1031
0727-0183
1 R: fxd depc 500k ohms 1% 1/2w
1 R: fxd comp 22k ohms 10% 1w
1 R: fxd comp 4700 ohms 10% 1/2w
R: fxd comp 10k ohms 10% 1/2w
1 R: fxd depc 26.7k ohms 1% 1/2w
6-8
470 ohms 10% 1/2w
470 ohms 10% 1/2w
lOOk ohms 10% 1/2w
33k ohms 10% 1w
27k ohms 10% 1/2w
hp
01121
01121
01121
hp
GB 2231
EB4721
EB 1031
01879-3
Section VI
Table 6-2
Model 130C
Table 6-2.
Ref
Desig
hp Part No.
Replaceable Parts (Cont'd)
De sc ription
(See Table 6-1. )
RS TQ
Mfr
01121
01121
hp
hp
01121
EB 1011
1500 ohms 10% 1/2w
15k ohms 10% 1/2w
120k ohms 10% 1w
56k ohms 10% 1/2w
820k ohms 10% 1/2w
01121
01121
01121
01121
01121
EB
EB
GB
EB
EB
1521
1531
1241
5631
8241
R:
R:
R:
R:
R:
fxd comp 100 ohms 10% 1/2w
fxd comp 240k ohms 5% 1/2w
fxd comp 220k ohms 5% 1/2w
fxd comp 27k ohms 10% 1w
var comp 5000 ohms 30% 1/4w
01121
01121
01121
01121
EB
EB
EB
GB
1011
2445
2245
2731
2
1
1
1
1
R:
R:
R:
R:
R:
fxd comp 8200 ohms 10% 1/2w
fxd comp 4.7 megohms 10% 1/2w
fxd comp 7500 ohms 5% 1/2w
fxd comp 18k ohms 5% 1w
var comp 25k ohms 30% 1/4w
01121
01121
01121
01121
hp
EB
EB
EB
GB
8221
4751
7525
1835
0686-2735
0686-4735
0687-3301
0687-2711
0687-2711
1
1
2
4
R:
R:
R:
R:
R:
fxd
fxd
fxd
fxd
fxd
01121
01121
01121
01121
01121
EB
EB
EB
EB
EB
2735
4735
3301
2711
2711
0686-4715
0687-1011
0687-1841
1 R: fxd comp 470 ohms 5% 1/2w
R: fxd comp 100 ohms 10% 1/2w
1 R: fxd comp 180k ohms 10% 1/2w
01121
01121
01121
EB4715
EB 1011
EB 1841
hp
01121
EB 2231
R132
R133
R134
R135
R136
0687-1011
0690-4731
0727-0249
0727-0229
0687-1011
R: fxd comp 100 ohms
1 R: fxd comp 47k ohms
1 R: fxd depc 667k ohms
1 R: fxd depc 265k ohms
R: fxd comp 100 ohms
R137
R138
R139
R140
R141
0687-1521
0687-1531
0690-1241
0687-5631
0687-8241
1
2
1
2
1
R: fxd
R: fxd
R: fxd
R: fxd
R: fxd
R142
R143
R144
R145
R146
0687-1011
0686-2445
0686-2245
0690-2731
2100-0383
1
1
1
1
R147
R148
R149
R150
R151
0687-8221
0687-4751
0686-7525
0689-1835
2100-0381
R152
R153
R154
R155
R156
R157
R158
R159
R160R174
comp
comp
comp
comp
comp
comp
comp
comp
comp
comp
10% 1/2w
10% 1w
1% 1/2w
1% 1/2w
10% 1/2w
27k ohms 5% 1/2w
47k ohms 5% 1/2w
33 ohms 10% 1/2w
270 ohms 10% 1/2w
270 ohms 10% 1/2w
EB 1011
GB 4731
hp
Not assigned
R175
R176
Rl77
R178
R179
R180
2100-0107
0687-2231
NSR: p/o A104
NSR: p/o A104
NSR: p/o A104
NSR: p/o A104
1 R: var comp 50k ohms 30% 1/3w
4 R: fxd comp 22k ohms 10% 1/2w
R181
R182
R183
R184
R185
0730-0138
0733-0009
0730-0138
0730-0162
0727-0391
2 R: fxd
1 R: fxd
R: fxd
1 R: fxd
1 R: fxd
R186
R187 R208
R209
R210
0727-0259
R: fxd depc 900k ohms 1% 1/2w
hp
0687-2211
0687-2211
Not assigned
R: fxd comp 220 ohms 10% 1/2w
R: fxd comp 220 ohms 10% 1/2w
01121
01121
R211
R212
R213
R214
R215
0727-0269
0727-0269
0727-0259
0727-0259
0727-0158
R:
R:
R:
R:
R:
01879- 3
Mfr Part No.
fxd
fxd
fxd
fxd
fxd
depc
depc
depc
depc
depc
depc
depc
depc
depc
depc
9 megohms 1% 1w
36 megohms 1% 2w
9 megohms 1% 1w
4.54 megohms 1% 1w
1. 81 megohms 1% 1/2w
990k ohms 1% 1/2w
990k ohms 1% 1/2w
900k ohms 1% 1/2w
900k ohms 1% 1/2w
10.lk ohms 1% 1/2w
hp
hp
hp
hp
hp
EB 2211
EB 2211
hp
hp
hp
hp
hp
6-9
Model 130C
Section VI
Table 6-2
Table 6-2.
Ref
Desig
hp Part No.
Replaceable Parts (Cont'd)
Description
(See Table 6-1. )
RS TQ
R:
R:
R:
R:
R:
fxd
fxd
fxd
fxd
fxd
depc
depc
depc
depc
depc
10. 1k ohms 1% 1/2w
111k ohms 1% 1/2w
111k ohms 1% 1/2w
376k ohms 1% 1/2w
284k ohms 1% 1/2w
R:
R:
R:
R:
R:
var comp 50k ohms 20% 1/2w
fxd comp 33k ohms 10% 1/2w
fxd depc 3895 ohms 1/2% 1/2w
fxd depc 1 megohm 1% 1/2w
fxd depc 1 megohm 1% 1/2w
Mfr
hp
hp
hp
hp
hp
R216
R217
R218
R219
R220
0727-0158
0727-0210
0727-0210
0727-0237
0727-0230
R221
R222
R223
R224
R225
2100-0376
0687-3331
0727-0130
0727-0274
0727-0274
R226
R227
R228
R229
R230
0687-1041
0687-1041
R231
R232
R233
R234
R235
0683-4715
0683-4715
2100-0138
R236
R237
R238
R239
R240
0757-0977
0687-1011
0758-0048
0686-1035
R: fxd metflm 45.3k ohms 1% 1/2w
R: fxd comp 100 ohms 10% 1/2w
NSR: p/o A204
R: fxd metflm 8200 ohms 5% 1/2w
R: fxd comp 10k ohms 5% 1/2w
R241
R242
R243
R244
R245
0757-0370
0757-0370
0686-3635
0686-3635
0686-1045
R:
R:
R:
R:
R:
fxd
fxd
fxd
fxd
fxd
metflm 49.9k ohms 1% 1/2w
metflm 49. 9k ohms 1% 1/2w
comp 36k ohms 5% 1/2w
comp 36k ohms 5% 1/2w
comp lOOk ohms 5% 1/2w
R246
R247
R248
R249
R250
0686-1045
0727-0186
0727-0186
0727-0205
0727-0205
R:
R:
R:
R:
R:
fxd
fxd
fxd
fxd
fxd
comp lOOk ohms 5% 1/2w
depc 33. 2k ohms 1% 1/2w
depc 33. 2k ohms 1% 1/2w
depc 92. 6k ohms 1% 1/2w
depc 92.6k ohms 1% 1/2w
R251
R252
R253
R254
R255
0727-0371
0727-0429
0727-0428
0727-0427
0727-0426
1
1
1
1
1
R:
R:
R:
R:
R:
fxd
fxd
fxd
fxd
fxd
depc
depc
depc
depc
depc
9760 ohms 1/2% 1/2w
4347 ohms 1% 1/2w
2060 ohms 1% 1/2w
798 ohms 1% 1/2w
395 ohms 1% 1/2w
hp
R256
R257
R258
R259
R260
0727-0425
0727-0424
0727-0423
0727-0422
0727-0705
1
1
1
1
1
R:
R:
R:
R:
fxd
fxd
fxd
fxd
~: fxd
depc
depc
depc
depc
depc
196.5 ohms 1% 1/2w
78.4 ohms 1% 1/2w
39.2 ohms 1% 1/2w
19.5 ohms 1% 1/2w
7.50 ohms 1% 1/2w
hp
hp
hp
hp
hp
R261
R262
R263
R264
R265
0686-4335
0686-4335
2100-0382
2100-0373
0687-1011
6-10
1
1
1
1
R: fxd comp lOOk ohms
R: fxd comp lOOk ohms
NSR: p/o A204
R: fxd comp 150k ohms
R: fxd comp 150k ohms
0683-1545
0683-1545
R:
R:
R:
R:
R:
hp
01121
EB 3331
hp
hp
hp
10% 1/2w
10% 1/2w
01121
01121
EB 1041
EB 1041
5% 1/4w
5% 1/4w
01121
01121
CB 1545
CB 1545
R: fxd comp 470 ohms 5% 1/4w
R: fxd comp 470 ohms 5~ 1/4w
R: var comp 50 ohms 10 0 2w
NSR: p/o A204
R: fxd metflm 45.3k ohms 1% 1/2w
0757-0977
Mfr Part No.
fxd comp 43k ohms 5% 1/2w
fxd comp 43k ohms 5% 1/2w
var comp 500k ohms 30% 1/4w
var comp 2500 ohms 10% 1/2w
fxd comp 100 ohms 10% 1/2w
hp
hp
hp
hp
hp
01121
EB 1011
hp
01121
EB 1035
hp
hp
01121
01121
01121
EB 3635
EB 3635
EB 1045
01121
EB 1045
hp
hp
hp
hp
hp
hp
hp
hp
01121
01121
EB 4335
EB 4335
hp
hp
01121
EB 1011
01879-5
Section VI
Table 6-2
Model 130C
Table 6-2.
Ref
Desig
hp Part No.
Replaceable Parts (Cont'd)
Description
(See Table 6-1. )
RS TQ
Mfr Part No;
Mfr
R266
R267
R268
R269
R270
0687-1011
0727-0374
0727-0374
0767-0017
0767-0017
R:
R:
R:
R:
R:
fxd
fxd
fxd
fxd
fxd
comp 100 ohms 10% 1/2w
depc 33k ohms 1% 1/2w
depc 33k ohms 1% 1/2w
metflm 17k ohms 5% 3w
metflm 17k ohms 5% 3w
01121
hp
hp
hp
hp
EB 1011
R271
R272
R273
R274
R275
0727-0109
0727-0109
0686-3625
0686-3625
0687-8231
R:
R:
2 R:
R:
R:
fxd
fxd
fxd
fxd
fxd
depc 1470 ohms 1% 1/2w
depc 1470 ohms 1% 1/2w
comp 3600 ohms 5% 1/2w
comp 3600 ohms 5% 1/2w
comp 82k ohms 10% 1/2w
hp
hp
01121
01121
01121
EB 3625
EB 3625
EB 8231
R276
R277
R278
R279
R280
2100-0379
0687-5621
0687-8211
0687-1011
0687-1231
R:
R:
R:
R:
R:
var comp 10k ohms 30% 1/4w
fxd comp 5600 ohms 10% 1/2w
fxd comp 820 ohms 10% 1/2w
fxd comp 100 ohms 10% 1/2w
fxd comp 12k ohms 10% 1/2w
hp
01121
01121
01121
01121
EB
EB
EB
EB
R281
R299
R300
R301
R302
0687-1531
0687-1021
0687-4741
Not assigned
R: fxd comp 15k ohms 10% 1/2w
R: fxd comp 1000 ohms 10% 1/2w
1 R: fxd comp 470k ohms 10% 1/2w
01121
01121
01121
EB 1531
EB 1021
EB 4741
5621
8211
1011
1231
R303
R304
R305
R306
R307
0687-1011
0687-2711
0693-4731
0687-1041
R: fxd comp 100 ohms 10% 1/2w
R: fxd comp 270 ohms 10% 1/2w
1 R: fxd comp 47k ohms 10% 2w
R: fxd comp lOOk ohms 10% 1/2w
NSR: p/o A303
01121
01121
01121
01121
EB 1011
EB2711
HB 4731
EB 1041
R308
R309
R310
R311
R312
2100-0171
0687-1031
0687-1031
0686-3055
1 R: var comp 200k ohms 20% 1/4w (includes S401)
R: fxd comp 10k ohms 10% 1/2w
R: fxd comp 10k ohms 10% 1/2w
1 F: fxd comp 3 megohms 5% 1/2w
NSR: p/o A303
hp
01121
01121
01121
EB 1031
EB 1031
EB 3055
R313
R314
R315
R316
R317
0693-4751
0693-4751
0693-5651
0693-5651
2100-0374
2 R:
R:
2 R:
R:
1 R:
R318
R319
R320
R321
R322
0687-2241
01121
01121
01121
01121
hp
HB
HB
HB
HB
01121
EB 2241
0687-4731
0687-1051
0687-2731
1 R: fxd comp 220k ohms 10% 1/2w
NSR: p/o A303
4 R: fxd comp 47k ohms 10% 1/2w
R: fxd comp 1 megohm 10% 1/2w
R: fxd comp 27k ohms 10% 1/2w
01121
01121
01121
EB 4731
EB 1051
EB 2731
R323
R324
R325
R326
R327
0836-0003
0687-2751
0687-2231
0687-2231
0687-2751
1 R:
R:
R:
R:
R:
77764
01121
01121
01121
01121
Type BBF
EB 2751
EB 2231
EB 2231
EB 2751
R328
R329
R330
R331
R400
R401
0687-2711
2100-0445
0687-1011
R: fxd comp 270 ohms 10% 1/2w
1 R: var comp 2 x 2000 ohms 30%
R: fxd comp 100 ohms 10% 1/2w
01121
hp
01121
EB2711
0687-5631
Not assigned
R: fxd comp 56k ohms 10% 1/2w
01121
EB 5631
01879-3
fxd comp 4.7 megohms 10% 2w
fxd comp 4.7 megohms 10% 2w
fxd comp 5.6 megohms 10% 2w
fxd comp 5.6 megohms 10% 2w
var comp 5 megohms 30% 1/2w
fxd
fxd
fxd
fxd
fxd
depc 29 megohms 10% 1w
comp 2.7 megohms 10% 1/2w
comp 22k ohms 10% 1/2w
comp 22k ohms 10% 1/2w
comp 2.7 megohms 10% 1/2w
4751
4751
5651
5651
EB 1011
6-11
Model 130C
Section VI
Table 6-2
Table 6-2.
Ref
Desig
R402
R403
R404
R405
R406
hp Part No.
De scription
RS TQ
0727-0284
0666-2055
0698-5150
0698-5150
1
1
2
R407
R406
R409
R420
R421
0757-0178
0757-0178
2
R422
R423
R424
R425
R426
Replaceable Parts (Cont'd)
(See Table 6-1. )
NSR: p/o A402
R: fxd depc 1. 75 megohms 1% 1/2w
R: fxd comp 2 megohms 5% 1/2w
R: fxd metflm 9900 ohms 1% 1/4w
R: fxd metflm 9900 ohms 1% 1/4w
R: fxd metflm 100 ohms 1% 1/4w
R: fxd metflm 100 ohms 1% 1/4w
Mfr
Mfr Part No.
hp
01121
hp
EB 2055
hp
hp
hp
Not assigned
R: fxd comp 33 ohms 10% 1/2w
01121
EB 3301
0693-2221
0693-2231
0761-0006
0687-1021
0687-4731
1 R: fxd comp 2200 ohms 10% 2w
01121
01121
HB 2221
HB 2231
R427
R428
R429
R430
R431
0730-0052
0730-0056
0687-1011
0687-2211
0687 -3311
1 R: fxd
1 R: fxd
R: fxd
R: fxd
2 R: fxd
R432
R440
R441
R442
R443
0687-2701
0767-0002
0687-4731
0687-3301
R:
R:
R:
R:
fxd
fxd
fxd
fxd
comp 22k ohms 10% 2w
metflm 10k ohms 5% 1w
comp 1000 ohms 10% 1/2w
comp 47k ohms 10% 1/2w
01121
01121
depc 51. 6k ohms 1% 1w
depc 68. 3Sk ohms 1% 1w
comp 100 ohms 10% 1/2w
comp 220 ohms 10% 1/2w
comp 330 ohms 10% 1/2w
hp
01121
01121
01121
Not assigned
2 R: fxd comp 27 ohms 10% 1/2w
1 R: fxd metflm 560 ohms 5% 3w
R: fxd comp 47k ohms 10% 1/2w
01121
hp
01121
EB 2701
01121
01121
hp
EB 1511
EB 4731
01121
01121
01121
EB 2211
EB 3311
EB 1021
01121
EB 2701
1
2
3
R444
R445
R446
R447
R448
0687 -1511
0687-4731
0758-0020
0758-0020
1 R: fxd comp 150 ohms 10% 1/2w
R: fxd comp 47k ohms 10% 1/2w
2 R: fxd metflm 22k ohms 5% 1/2w
NSR: p/o A402
R: fxd metflm 22k ohms 5% 1/2w
R449
R450
R451
R452
R460
0687-2211
0687-3311
0687-1021
R: fxd comp 220 ohms 10% 1/2w
R: fxd comp 330 ohms 10% 1/2w
R: fxd comp 1000 ohms 10% 1/2w
R461
R462
R463
R464
R465
0687-2701
0764-0023
0687-2731
0727-0137
0687-3931
R:
'I R:
R:
1 R:
1 R:
R466
R467
R468
R469
R470
0687-8221
0758-0020
0727-0115
0687 -3311
R: fxd comp 8200 ohms 10% 1/2w
R: fxd metflm 22k ohms 5% 1/2w
NSR: p/o A402
1 R: fxd depc 2000 ohms 1% 1/2w
R: fxd comp 330 ohms 10% 1/2w
0699-0006
0761-0006
Not assigned
1 R: fxd comp 4.7 ohms 10% 1w
R: fxd metflm 10k ohms 5% 1w
R471 R480
R481
R482
6-12
hp
EB 1021
EB 4731
hp
EB 1011
EB 2211
EB 3311
EB 4731
hp
Not assigned
fxd
fxd
fxd
fxd
fxd
comp 27 ohms 10% 1/2w
metflm 910 ohms 5% 2w
comp 27k ohms 10% 1/2w
depc 5180 ohms 1% 1/2w
comp 39k ohms 10% 1/2w
hp
01121
hp
01121
EB 2731
01121
EB 8221
EB 3931
hp
hp
01121
EB 3311
01121
hp
GB 47G1
01879-4
8ection VI
Table 6-2
Model 130C
Table 6-2.
Ref
Desig
81
82
83
84
85 8100
hp Part No.
Replaceable Parts (Cont'd)
Description
(8ee Table 6-1. )
RS TQ
N8R: plo A2
N8R: plo A3
N8R: plo A3
1 8: pushbutton spdt
Mfr
Mfr Part No.
82389
48-1106
3101-0033
Not assigned
N8R: plo R308
1 8: slide c1pdt
42190
4633
130C-11A-1
1 T: high voltage
hp
9100-0241
0360-0104
Not assigned
1 T: power (low voltage)
1 TB: terminal (z axis input)
71785
VI
V2
V3
V4 VlOO
5080-0424
1932-0035
1921-0017
2 V: 6DJ8 dual triode (aged)
2 V: 6DJ8 dual triode (special)
2 V: 7586 nuvistor
13396
86684
6DJ8
7586
VlOl
V102
V103
V104
V105
1932-0022
1932-0022
1933-0008
1932-0022
2140-0008
3 V:
V:
2 V:
V:
3 V:
6DJ8 dual triode
6DJ8 dual triode
6BL8 triode pentode
6DJ8 dual triode
NE2 neon glow
73445
73445
73445
73445
24455
6DJ8/ECC88
6DJ8/ECC88
6BL8/ECF80
6DJ8/ECC88
NE2
V106
V107
V108
V109
V110V200
1933-0008
2140-0084
2140-0008
1939-0002
V:
1 V:
V:
1 V:
6BL8 triode pentode
glow lamp aged
NE2 neon glow
6BC7 triple diode
73445
74276
24455
93332
6BL8/ECF80
A092
NE2
6BC7
V201
V202
V203
V204 V300
5080-0424
1932-0035
1921-0017
hp
13396
86684
6DJ8
7586
V301
V302
V303
V304
V305
1923-0044
1932-0029
2140-0008
1920-0001
1920-0001
73445
12859
24455
93332
93332
6CW5/EL86
12AU7
NE2
5642
5642
3101-0014
Not assigned
8101
8102
8103
8104
8105 8174
N8R:
N8R:
N8R:
N8R:
T301
T302 T400
T401
TB301
01879-5
A102
A102
A103
A103
Not assigned
N8R: plo A175
8175
8176 8200
8201
8202
8203
8204 8400
8401
8402
plo
plo
plo
plo
Not assigned
N8R: plo A203
N8R: plo A202
N8R: plo A203
hp
321-11-02-036
hp
Not assigned
Not assigned
V: 6DJ8 dual triode (aged)
V: 6DJ8 dual triode (special)
V: 7586 nuvistor
Not assigned
1 V: 6CW5 pentode
1 V: 12AU7 dual triode
V: NE2 neon glow
2 V: 5642 high voltage diode
V: 5642 high voltage diode
6-13
Section VI
Table 6-2
Model 130C
Table 6-2.
Ref
Desig
V306
hp Part No.
5083-0353
5083-0342
5083-0333
5083-0323
V307 V400
V:
V:
V:
V:
CRT
CRT
CRT
CRT
P31 phosphor
P11 phosphor
P7 phosphor
P2 phosphor
Mfr
Mfr Part No.
hp
hp
hp
hp
Not assigned
V: glow lamp aged
V: glow lamp aged
74276
74276
A091
A091
1
Not assigned
V: 5651A voltage reference
86684
5651A
1
4
W: ac power
XQ: 2 pin
70903
97464
KH4147
M7PB
1200-0044
Not assigned
XQ: 2 pin
97446
M7 PB
1200-0044
Not assigned
XQ: 2 pin
97446
M7 PB
97446
71785
71785
71785
M7 PB
121-51-11-060
121-51-11-060
133-65-10-009
XV: 9 pin miniature shield base
XV: 9 pin miniature
XV: 9 pin miniature
XV: 9 pin miniature
Not assigned
71785
71785
71785
71785
121-51-11-082
121-51-11-060
121-51-11-060
121-51-11-060
V401
V402
V403 V460
V461
2140-0083
2140-0083
2
1940-0001
W401
XQ421
XQ422 XQ440
XQ441
8120-0078
1200-0044
XQ442 XQ460
XQ461
XQ462 XQ480
De sc ription
(See Table 6-1. )
RS TQ
1
Replaceable Parts (Cont'd)
Not assigned
XQ481
XVI
XV2
XV3
XV4 XVI00
1200-0044
1200-0062
1200-0062
1200-0086
XVI0l
XVI02
XVI03
XVI04
XVI05
1200-0059
1200-0062
1200-0062
1200-0062
XVI06
XVI07 &
XVI08
XVI09
XVII0 XV200
1200-0062
XV: 9 pin miniature
71785
121-51-11-060
1200-0062
Not assigned
XV: 9 pin miniature
71785
121-51-11-060
XV201
XV202
XV203
XV204 XV300
1200-0062
1200-0062
1200-0086
71785
71785
71785
121-51-11-060
121-51-11-060
133-65-10-009
XV301
XV302
XV303 XV305
XV306
1200-0062
1200-0062
XV: 9 pin miniature
XV: 9 pin miniature
71785
71785
121-51-11-060
121-51-11-060
1200-0037
1200-0050
1200-0192
1
10
1
Not assigned
XV: CRT consists of:
Socket body
Pin
Cover Plate
72825
72825
72825
9709-4
9553
9709-7
1200-0053
1
Not assigned
XV: 7 pin miniature
71785
111-51-11-069
XV307 XV460
XV461
6-14
11
2
XQ:
XV:
XV:
XV:
2 pin
9 pin miniature
9 pin miniature
5 pin nuvistor
Not assigned
1
Not assigned
XV: 9 pin miniature
XV: 9 pin miniature
XV: 5 pin nuvistor
Not assigned
01879-4
Section VI
Table 6-2
Model 130C
Table 6-2.
Ref
Desig
hp Part No.
Replaceable Parts (Cont'd)
Description
(See Table 6-1. )
RS TQ
Mfr
Mfr Part No.
MISCELLANEOUS
01879-4
hp
hp
120A-11A-1
120A-20A
130C-1A
130C-5A
130C-5B
1
1
1
1
1
Strap: copper (for hv transformer)
Bezel: crt
Deck: main
Rail: center divider
Bracket: switch support
130C-6A
130C-6B
130C-6C
130C-6D
130C-6E
1
1
1
1
1
Shield:
Shield:
Cover:
Cover:
Cover:
switch (sweep and horizontal ampl)
hv compartment
top hv compartment
bottom hv compartment
power transistors
130C-6F
130C-6G
130C-6H
130C-6J
130C-6K
1
2
1
1
1
Shield:
Shield:
Shield:
Shield:
Shield:
switch (sync and sweep)
amplifier circuit board
intensity pot
calibrator jack
assembly (crt)
130C-16R
130C-16S
130C-61A
1
1
1
Cable: gate
Cable: main harness (includes XV306)
Holder: neon bulb (armed)
0340-0086
2
Insulator: binding post (for J1/J2 and J201/J202)
0340-0089
0340-0090
0340-0091
0370-0026
0370-0037
1
1
2
2
3
Insulator: binding post (J101)
Insulator: captive 2 hole (for J101/J102)
Insulator: captive 3 hole (for vert and horiz inputs)
Knob: black (position)
Knob: black bar (sensitivity, time)
hp
hp
hp
hp
0370-0062
0370-0084
0370-0113
0370-0114
0905-0016
2
4
1
1
1
Knob: red (vernier)
Knob: black (focus, intensity, balance)
Knob: black bar (trigger source)
Knob: red (level)
Gasket: felt crt
hp
hp
1200-0043
1220-0009
1251-0207
4320-0007
5000-0408
4
1
32
7"
3
Insulator: transistor socket
Shield: tube (VIOl)
Connector: edge-on (Plo main cable harness)
Extrusion: rubber crt clamp
Bracket: coil trace align
5040-0401
5040-0417
5040-0421
5040-0466
1
1
1
1
Support: capacitor (hv circuit board)
Holder: tube socket
Insulator: focus pot
Retainer: crt shield
hp
hp
hp
hp
hp
hp
hp
hp
hp
hp
hp
hp
hp
hp
hp
hp
hp
hp
hp
hp
hp
hp
76530
71785
00779
294457
151-11-23-012
42587-5
hp
hp
hp
hp
hp
hp
6-15
SectionVI
Table 6-3
Model 130C
Table 6-3. Code List of Manufacturers
The following code numbers are from the Federal Supply Code for Manufacturers Cataloging Handbooks H4-1
(Name to Code) and H4-2 (Code to Name) and their latest supplements. The date of revision and the date of the
supplements used appear at the bottom of each page. Alphabetical codes have been arbitrarily assigned to
suppliers not appearing in the H4 Handbooks.
Code
No.
00000
00136
00213
00287
00334
00348
00373
l0656
l0779
00781
00815
00853
00866
00891
00929
01009
01121
01255
01281
01295
01349
01589
01930
01961
02114
02286
02660
02735
02771
02777
03508
03705
03797
03877
03888
03954
04009
040t3
04222
04354
04404
04651
04713
04732
04773
04796
04811
04870
05006
05277
05347
05593
05616
05624
05728
Code
Manufacturer
Address
U.S.A. Common
Any suppl ier of U. S.
McCoy Electronics
Mount Holly Springs, Pa.
Sage Electronics Corp.
Rochester, N. Y.
Cemco Inc.
Denielson, Conn.
Humidial
Colton, Calif.
Microtron Co., Inc.
Valley Stream, N.Y.
Garlock Inc.,
Camden, N. J.
Electronics products Div.
Aerovox Corp.
New Bedford, Mass.
Amp. Inc.
Harrisburg, Pa.
Aircreft Radio Corp.
Boonton, N.J.
Northern Engineering Laboratories, Inc.
Burlington, Wis.
Sangamo Electric Co., Pickens Div.
Pickens, S. C.
Goe Engineering Co.
Los Angeles, Calif.
Carl E. Holmes Corp.
Los Angeles, Celif.
Microlab Inc.
Livingston, N. J.
Alden Products Co.
Brockton, Mass.
Allen Bradley Co.
Milwaukee, Wis.
Beverly Hills, Calif.
Litton Indust"es, Inc.
TRW Semiconductors, Inc.
Lawndale, Celif.
Texas Instruments, Inc.,
Transistor Products Div.
Dallas, Texas
The Alliance Mfg. Co.
Alliance, Ohio
Pecific Relays, Inc.
Van Nuys, Calif.
Amerock Corp.
Rockford, III.
Pulse Engineering Co.
Senta Clara, Calif.
Ferroxcube Corp. of America
Saugerties, N. Y.
Cole Rubber and Plastics Inc.
Sunnyvale, Calif.
Amphenol·Borg Electronics Corp.
Chicago, III.
Radio Corp. of America, Semiconductor
and Materrals Div.
Somerville, N. J.
Voceline Co. of America, Inc.
Old Saybrook, Conn.
Hopkins Engineering Co.
San Fernando, Celif.
G. E. Semiconductor Prod. Dept. Syracuse, N. Y.
Apex Mechine & Tool Co.
Dayton, Ohio
Eldema Corp.
Compton, Catif.
Transilron Electric Corp.
Wekefield, Mass.
Pyrofilm Resistor Co., Inc.
Cedar Knolls, N.J.
Singer Co., Diehl Div.
Finderne Plant
Sumerville, N. J.
Arrow, Hart and Hegeman Elect. Co.
Hartford, Conn.
Taurus Corp.
Lamber,tville, N. J.
Hi-Q Division of Aerovox
Myrtle Beach, S. C.
Precision Paper Tube Co.
Chicago, III.
Dymec Division of Hewlett-Packard Co.
Palo Alto, Calif.
Syivania Electric Products, Microwave
Device Div.
Mountain View, Calif.
Motorole, Inc., Semiconductor Prod. Div.
Phoenix, Arizona
Filtron Co., Inc. Western Div.
Culver City, Calif.
Automatic Electric Co.
Northlake, III.
Sequoia Wire Co.
Redwood City, Calif.
Precision Coil Spring Co.
EI Monte, Calif.
P.M. Motor Company
Westchester, III.
Twentieth Century Plastics, Inc.
Los Angeies, Calif.
Westinghouse Electric Corp.
Semi'Conductor Dept.
Youngwood, Pa.
Ultronix, Inc.
San Mateo, Calif.
Illumitronic Engineering Co.
Sunnyvale, Calif.
Cosmo Plastic
Cleveland, Ohio
(c/o Electrical Spec. Co.)
Barber Colman Co.
Rockford, III.
Tiffen Optical Co,
Roslyn Heights, Long ISland, N. Y.
No.
Manulocturer
05729
05783
05820
06004
06090
06175
06402
06540
Metro-Tel Corp.
Westbury, N. Y.
Stewart Engineering Co.
Santa Cruz, Calif.
Wakefield Engineering Inc.
Wakefield, Mass.
Bassick Co., The
Bridgeport, Conn.
Raychem Corp.
Redwood City, Celif.
Bausch and Lomb Optical Co.
Rochester, N. Y.
E. T. A. products Co. of America
Chicego, III.
Amatom Electronic Hardware Co., Inc.
New Rochetle, N. Y.
Beede Electrical Instrument Co., Inc.
Penecook, N.H.
General Devices Co., Inc.
Indianapolis, Ind.
Semcor Div. Components Inc.
Phoenix, Ariz.
Torrington Mfg. Co., West Div.
Van Nuys, Calif.
Varian Assoc. Eimac Div.
San Carlos, Calif.
Kelvin Electric Co.
Van Nuys, Calif.
Diaitran Co.
Pasadena, Calif.
Transistor Electronics Coro.
Minneapolis, Minn.
Westinghouse Electric Corp.
Electronic Tube Div.
Elmira, N. Y.
Filmohm Corp.
New York, N. Y.
Cinch-Graphik Co.
City of industry, Calif.
Avnet COIP.
Cuiver City, Calif.
Fairchild Camere & Inst. Corp.
Semiconductor Div.
Mountain View, Calif.
Minnesota Rubber Co.
Minneapolis, Minn.
Birtcher Corp., The
Monterey Park, Calif.
Technical Wire Products Inc.
Cranford, N. J.
Continental Device Corp.
Hawthorne, Calif.
Raytheon Mfg. Co.,
Semiconductor Div.
Mountain View, Calif.
Shockley Semi-Conductor Laboratories
Palo Alto, Calif.
Hewlett·Packard Co., Boonton Redio Div.
Rockawey, N. J.
U. S. Engineering Co.
Los Angeles, Calif.
Blinn, Delbert Co.
Pomona, Calif.
Burgess Battery Co.
Niagera Falls, Ontario, Canade
Bristol Co., The
Waterbury, Conn.
Sloan Company
Sun Valley, Calif.
ITT Cannon Electric Inc. Phoenix Div.
Phoenix, Arizona
CBS Electronics Semiconductor
Operations, Div of C. B. S. Inc.
Lowell, Mass.
Mel-Rain
Indianapolis, Ind.
Babcock Relays Div.
Costa Mesa, Calif.
Texas Capacitor Co.
Houston, Texes
Atohm Electronics
Sun Valley, Celif.
Electro Assemblies, Inc.
Chicago, III.
Mallory Battery Co. of
Canada, Ltd.
Toronto, Ontario, Canada
General Transistor Western Corp.
Los Angeles, Calif.
Ti·Tal, Inc.
Berkeley, Calif.
Carborundum Co.
Niagara Falls, N. Y.
CTS of Berne, Inc.
Berne, Ind.
Chicago Telephone of California, Inc.
So. Pasadena, Calif.
Bay State Electronics Corp.
Waltham, Mass.
Teledyne Inc., Microwave Div. pelo Alto, Calif.
Duncan Electronics Inc.
Costa Mesa, Celif.
General Instrument Corp., Semiconductor
Div., Products Group
Newark, N. J.
Imperial Electronic, Inc.
Buena Park, Calif.
Melabs, Inc.
Palo Alto, Calif.
Philadelphia Handle Co.
Camden, N. J.
Clerostat Mfg. Co.
Dover, N. H.
Nippon Electric Co., Ltd.
Tokyo, Japan
06555
06666
0675t
06812
06980
07088
07126
07137
07138
07149
07233
07261
07263
07322
07387
07700
07910
07933
07966
07980
08145
08289
08358
08664
08717
08718
08792
08984
09026
09134
09145
09250
09569
10214
10411
10646
11236
11237
11242
11312
11534
11711
11717
1t870
12136
12697
12859
Address
Code
No. Manufacturer
12881
12930
12954
13103
t3396
13835
14099
14193
14298
14433
14493
14655
14674
14752
14960
15203
15291
15558
15566
15772
15818
15909
16037
16179
16352
16688
16758
17109
17474
17675
17745
18042
18476
18486
18583
18873
18911
19315
19500
t9644
19701
20183
21226
21335
21520
23783
24455
24655
26365
26462
26992
28480
33173
35434
36196
37942
39543
40920
42190
43990
Metex Electronics Corp.
Clark, N. J.
Delta Semiconductor Inc.
Newport Beech, Celif.
Dickson Electronics Corp.
Scottsdele, Arizooa
Thermolloy
Dallas, Texas
Telefunken (GmbH)
Haoover, Germany
Midlend·Wright Div. of Pacific Industries, Inc.
,
Kansas City, Kensas
Sem·Tech
Newbury park, Calif.
Calif. Resistor Corp.
Santa Monica, Calif.
American Components, Inc.
Conshohocken, Pa.
ITT Semiconductor, A Div. of Int. Telephone
& Telegraph Corp.
West Palm Beach, Fie.
Hewlett'Packard Company
Loveland, Colo.
Cornell Dublier Electric Corp.
Newark, N.J.
Corning Glass Works
Corning, N. Y.
Electro Cube Inc.
So. Pasadena, Calif.
Williams Mfg. Co.
San Jose, Celif.
Webster Electronics Co.
New York, N. Y.
Adjustable Bushing Co.
N. Hollywood, Calif.
Micron Electronics
Garden City, Long Islend, N. Y.
Amprobe Inst. Corp.
Lynbrook, N. Y.
Twentieth Century Coil Spring Co.
Santa Clara, Calif.
Amelco Inc.
Mt. View, Calif.
Daven Div. Thomas A. Edison Ind.
McGraw·Edison Co.
Long Island City, N. Y.
Spruce Pine Mica Co.
Spruce Pine, N. C.
Omni·Spectra Inc.
Detroit, III.
Computer Diode Corp.
Lodl, N. J.
Ideal Prec. Meter Co., Inc.
De Jur Meter Div.
Brooklyn, N. Y.
Delco Radio Div. of G.M. Corp.
Kokomo, Inc.
Thermonetics Inc.
Canoga Park, Calif.
Trenex Company
Mountain View, Calif.
Hamlin Metal Products Corp.
Akron, Ohio
Angstrohm Prec. Inc.
No. Hollywood, Celif.
power Design Pacific Inc.
Palo Alto, Calif.
Ty·Car Mfg. Co., Inc.
Holliston, Mass.
TRW Elect. Compo Div.
Des Plaines, III.
Curtis Instrument, Inc.
Mt. Kisco, N. Y.
E.I. DuPont and Co., Inc.
Wilmington, Del.
Durant Mfg. Co.
Milwaukee, Wis.
BendiX Corp., The
Eclipse·Poineer Div.
Teterboro, N. J.
Thomas A. Edison Industries, Div. of
McGraw· Edison Co.
West Orange, N. J.
LRC Electronics
Horseheads, N. Y.
Electra Mfg. Co.
Independence, Kenses
General Atronics Corp.
Philedelphie, Pa.
Executone. Inc.
Long Islend City, N. Y.
Fafnir Bearing Co., The
New Britain, Conn.
Fansteel Metallurgical Corp.
N. Chicago, III.
Brrtlsh Redio Electronics Ltd. Washington, D. C.
G. E. Lamp Division
Nela Park, Cleveland, Ohio
West Concord, Mass.
General Radio Co.
New Rochelle, N. Y.
Gries Reproducer Corp.
Grobet File Co. of America, Inc.
Carlstadt, N. J.
Hamilton Watch Co.
Lancaster, pa.
Hewlett·Packard Co.
Pelo Alto, Calif.
G. E. Receiving Tube Dept.
Owensboro, Ky.
Lectrohm Inc.
Chicago, III.
Stanwyck Coil Products Ltd.
Hawkesbury, Ontario, Cenada
P. R. Mallory & Co. Inc.
Indianapolis, Ind.
Mechanical Industries Prod. Co.
Akron, Ohio
Miniature Precision Bearings, Inc.
Keene, N. H.
Muter Co.
Chicago, III.
C. A. Norgren Co.
Englewood, Colo.
From:
00015- 42
Revised: July, 1966
6-16
Address
FSC.
H4-1
H4-2
Handbook Supplements
Deted JULY 1965
Dated NOV t962
01879-5
Model 130C
Section VI
Table 6-3
Table 6-3. Code List of Manufacturers (Cont'd)
Code
Code
Code
No.
Manufacturer
44655
46384
47904
48620
49956
52090
52983
54294
55026
55933
55938
56137
56289
59446
59730
60741
61775
62119
63743
64959
65092
66295
66346
70276
70318
70485
70563
70903
70998
71002
71041
71218
71286
71313
71400
71436
71447
71450
71468
71471
71482
71590
71616
71700
71707
71744
71753
71785
71984
72136
72354
72619
72656
72699
72765
72825
72928
No.
Manufacturer
72964
72982
73061
73076
73138
Robert M. Hadley Co.
Los Angeles, Cnlif.
Erie Technologicnl Products, Inc.
Erie, Pa.
Hnnsen Mfg. Co., Inc.
Princeton, Ind.
H. M. Hnrper Co.
Chicngo, III.
Helipot Div. of Beckmnn Inst., Inc.
Fullerton, Calif.
Hughes Products Division of Hughes
Aircraft Co.
Newport Beach, Calif.
Amperex Electronic Co., Div. of North Americnn
Phillips Co., Inc.
HiCksville, N. Y.
Brndley Semiconductor Corp.
New Hnven, Conn.
Carling Electric, Inc.
Hnrtford, Conn.
George K. Garrett Co., Div. MSL
Industries Inc.
Philndelphin, Pn.
Federnl Screw Products Inc.
Chicngn, III.
Fischer Specinl Mfg. Co.
Cincinnnti, Ohio
Genernl Industries Co., The
Elyrin, Ohio
Goshen Stnmping & Tool Co.
Goshen, Ind.
JFD Electronics Corp.
Brooklyn, N.Y.
Jennings Radio Mfg. Corp.
San Josn, Cnlif.
Signnlite Inc.
Neptune, N. J.
J. H. Winns, nnd Sons
Winchester, Mnss.
Industrial Condenser Corp.
Chicngo, III.
R. F. Products Division of Amphenol·Borg
Electronics Corp.
Danbury, Conn.
E. F. Johnson Co.
Wasecn, Minn.
Internntionnl Resistance Co.
Philndelphia, Pn.
CTS Knights Inc.
Snndwich, III.
Kulka Electric Corporation
MI. Vernon, N. Y.
Lenz Electric Mfg. Co.
Chicago, III.
Littlefuse, Inc.
Des Plaines, III.
Lord Mfg. Co.
Erie, Pn.
C. W. Marwedel
San Francisco, Cnlif.
James Millen Mfg. Co., Inc.
Malden, Mass.
J. W. Miller Co.
Los Angeles, Calif.
Cinch·Monndnock, ·Div. of United Carr
Fastener Corp.
Snn Leandro, Calif.
Mueller Electric Co.
Clevelnnd, Ohio
Nntionnl Union
Newnrk, N.J.
Oek Manufncturing Co.
Crystnl Lnke, III.
Bendix Corp., The
Bendix Pacific Div.
N. Hollywood, Cnllf.
Pncific Mntals Co.
Snn Frnncisco, Cnlif.
Phanostrnn Instrument and Electronic Co.
South Pnsndnna, Calif.
Philadelphia Steel and Wire Corp.
Philadelphin, Pn.
American Machine & Foundry Co. Potter
& Brumfield Div.
Princetnn, Ind.
TRW Electronic Components Div.
Camden, N.J.
General Instrument Corp., Rectifier Div.
Brooklyn, N. Y.
Resistance Products Co.
Hnrrisburg, Pa.
Rubbercrafl Corp. of Cnlif.
Torrnnce, Calif.
Shakeproof Division of Illinois Tool Works
Elgin, III.
Sigrinl Indicntor Corp.
New York, N. Y.
Struthers· Dunn Inc.
Pitmnn, N. J.
Thompson-Bremer & Co.
Chicngo, III.
Ti Iley Mfg. Co.
Snn Frnncisco, Calif.
Sl.
Mnrys, Pn.
Stnckpole Cnrbon Co.
Wnlthnm, Mass.
Stnndnrd Thomson Corp.
Tinnermnn Products, Inc.
Cleveland, Ohio
Transformer Engineers
San Gabriel, Cnlif.
NewtonVille, Mass.
Ucinite Co.
Waldes Kohinoor Inc.
Long Island City, N.Y.
Hnrtford, Conn.
Veeder Root, Inc.
Wenco Mfg. Co.
Chicago, III.
Continentnl·Wirt Electronics Corp.
Philadelphia, Pa.
New Rochelle, N. Y.
Zierick Mfg. Corp.
Address
Address
Skokie, III.
0hmite Mfg. Co.
Doylestown, Pn.
Penn Eng. & Mfg. Corp.
Polaroid Corp.
Cnmbridge, MRSS.
Precision Thermometer & Inst. Co.
Southnmpton, Pn.
Micrownve & Power Tube Div.
Waltham, Mnss.
Rownn Controller Co.
Westminster, Md.
Snnborn Compnny
Wnlthnm, Mass.
Shnllcross Mfg. Co.
Selmn, N. C.
Simpson Electric Co.
Chicngo, III.
Sonotone Corp.
Elmsford, N. Y.
Rnytheon Co. Commercial Appnratus &
Systems Div.
So. Norwnlk, Conn.
Spaulding Fibre Co., Inc.
Tonnwnndn, N. Y.
Sprngun Electric Co.
North Adams, Mnss.
Telex, Inc.
SI. Pnul, Minn.
Thomns & Betts Co.
Elizabeth, N.J.
Bluffton, Ohio
Triplett Electricnl Insl. Co.
Union Switcb and Signal, Div. of
Westinghouse Air Brake Co.
Pittsburgh, Pn.
Universnl Electric Co.
Owosso, Mich.
Ward-Leonard Electric Co.
MI. Vernon, N. Y.
Western Electric Co., Inc.
New York, N. Y.
Weston Inst. Inc. Weston-Newnrk
Newark, N. J.
Wittek Mfg. Co.
Chicago, III.
Revere Wollnnsnk Div. Minn. Mining &
Mfg. Co.
SI. Pnul, Minn.
Allen Mfg. Co.
Harlford, Conn.
Allmetnl Screw Product Co., Inc.
Garden City, N. Y.
Atlantic India Rubber Works, Inc.
Chicngo, III.
Amperite Co., Inc.
Union City, N.J.
Belden Mfg. Co.
Chicago, III.
Bird Electronic Corp.
Cleveland, Ohio
Birnbach Radio Co.
New York, N. Y.
Boston Gear Works Div. of Murray Co.
of Texns
Quincy, Mass.
Bud Radio, Inc.
Willoughby, Ohio
Camloc Fastener Corp.
Pnramus, N. J.
Cardwell Condenser Corp.
Lindenhurst L.I., N. Y.
Bussmann Mfg. D,v. of McGraw· Edison Co.
SI. Louis, Mo.
Chicago Condenser Corp.
Chicngo, III.
Cnlif. Spring Co., Inc.
Pico-Rivera, Calif.
CTS Corp.
Elkhart, Ind.
ITT Cannon Electric Inc.
Los Angeles, Calif.
Cinema Plant, Hi-Q Div. Aerovox Corp.
Burbnnk, Calif.
Chicago, III.
C.P. Clare & Co.
Centrnlnb Div. of Globe Union Inc.
Milwaukee, Wis.
Commercial Plastics Co.
Chicngo, III.
Cornish Wire Co., The
New York, N. Y.
Providence, R.1.
Coto Coil Co., Inc.
Chicngo, III.
Chicngo Mininture Lamp Works
A. O. Smith Corp., Crowley Div.
West Orange, N. J.
Cinch Mfg. Co., Hownrd B. Jones Div.
Cbicngo, III.
Dow Corning Corp.
Midlnnd, Mich.
Electro Motive Mfg. Co., Inc. Willimantic, Conn.
John E. Fast Co., Div. Victoreen Instr. Co.
Chicngo, III.
Dialight Corp.
Brooklyn, N. Y.
Indinnn Genernl Corp., Electronics Div.
Kensby, N.J.
General Instrument Corp. , Cnp. Div. Newark, N.J.
Drake Mfg. Co.
Chicngo, III.
Philndelphin, Pa.
Hugh H. Eby Inc.
Chicago, III.
Gudeman Co.
73293
73445
73506
73559
73682
73734
73743
73793
73846
73899
73905
74276
74455
74861
74868
74970
75042
75378
75382
75818
75915
76005
76210
76487
76493
76530
76545
76703
76854
77068
77075
77221
77252
77342
77630
77638
77764
77969
78189
78283
78290
78452
78471
78488
78493
78553
78790
78947
79136
79142
79251
79727
79963
No.
Address
Manufacturer
80031 Mepco Division of Sessions Clock Co.
Morristown, N. J.
80120 Schnitzer Alloy Products Co.
Elizabeth, N. J.
80130 Times Telephoto Equipment
New York, N. Y.
80131 Electronic Industries Associntlon. Any brand
Tube meeting EIA Standards-Wnshington, DC.
80207 Unimnx SWitch, Div. Mnxon Electronics Corp.
80223
80248
80294
80411
80486
80509
80583
80640
81030
81073
81095
81312
81349
81483
81541
81860
82042
82047
82142
82170
82209
82219
82376
82389
82647
82768
82866
82877
82893
83053
83058
83086
83125
83148
83186
83298
83315
83330
83385
83501
83594
83740
83777
83821
83942
84171
84396
84411
84970
85454
Wnllingford, Conn.
United Transformer Corp.
New York, N. Y.
Oxford Electric Corp.
ChiCago, III.
Bourns Inc.
Riverside, Calif.
Acro Div. of Robertshaw Controls Co.
Columbus, Ohio
All Stnr Products Inc.
Definnce, Ohio
Avery Adhesive Label Corp.
Monrovin, Cnlif.
Hammnrlund Co., Inc.
New York, N. Y.
Stevens, Arnold, Co., Inc.
Boston, Mnss.
Internntional Instruments Inc.
Orange, Conn.
Grnyhill Co.
LnGrange, III.
Trind Trnnsformer Corp.
Venice, Calif.
Winchester Elec. Div. Litton Ind., Inc.
Oakville, Conn.
Military Specification
Internntional Rectifie, Corp.
EI Segundo, Calif.
Airpnx Electronics, Inc.
Cnmbridge, Mnss.
Barry Cont,ols, Div. Barry Wright Corp.
Watertown, Mnss.
Skokie, III.
Cnrter Precision Electric Co.
Sperti Fnrnday Inc., Copper Hewitt
Electric Div.
Hoboken, N. J.
Jeffers Electronics Division of Speer
Carbon Co.
Du Bois, Pn.
Fairchild Cnmera & Inst. Corp.,
Clifton, N. J.
Defense Prod. Division
Greenwich, Conn.
Maguire Industries, Inc.
Sylvnnia Electric Prod. Inc.
Electronic Tube Division
Emporium, Pa.
Astron Corp.
East Newnrk, Hnrrison, N, J,
SWitchcraft, Inc.
Chicngo, III.
Metnls & Controls Inc. Spencer Products
Attleboro, Mnss.
Phillips-Advnnce Control Co.
Joliet, III.
Mndison, Wis.
Resenrch Products Corp.
Woodstock, N. Y.
Rotron Mfg. Co., Inc.
Vector Electronic Co.
Glendnle, Calif.
Los Angeles, Cnlif.
Western Washer Mfg. Co.
Cnmbridge, Mnss.
Cnrr Fastener Co.
New Hampshire Ball Bearing, Inc.
Peterborough, N. H.
General Instrument Corp., Cnpacitor Div.
Dnrlington, S. C.
Los Angeles, Cnlif.
ITT Wire and Cable Div.
Victory Engineering Corp.
Springfield, N. J.
Red Bnnk, N. J.
Bendix Corp., Red Bank Div.
Mundelein, III.
Hubbell Corp.
Brooklyn, N. Y.
Smith, Herman H., Inc.
Chicagn, III.
Central Screw Co.
Gavitt Wire and Cable Co.
Div. of Amerace Corp.
Brookfield, Mnss.
Burroughs Corp. Electronic Tube Div.
Plninfield, N. J.
Union Carbide Corp. Consumer Prod. Div.
New York, N. Y.
Huntington, Ind.
Model Eng. and Mfg., Inc.
Festus, Mo.
Loyd Scruggs Co.
Lodi, N. J.
Aeronnuticnl Inst. & Radio Co.
Arco Electronics Inc.
Great Neck, N. Y.
Snn Frnncisco, Calif.
A. J. Glesener Co" Inc.
Ogallnla, Neb.
TRW Capacitor Div.
Bloomington, Ind.
Sarkes Tnrzian, Inc.
Boonton, N.J.
Boonton Molding Company
From: FSC.
00015-42
H4-1
H4-2
Handbook Supplements
Dated JULY 1965
Dated NOV. 1962
Revised: July, 1966
01879-4
6-17
Section VI
Table 6-3
Model 130C
Table 6-3. Code List of Manufacturers (Cont'd)
Code
Code
No.
Code
No.
MlWlufacturer
85471
85474
85660
85911
86197
San Francisco, Calif.
A. B. Boyd Co.
San Francisco, Calif.
R. M. Bracamonte & Co.
Hamden, Conn.
Koiled Kords, Inc.
Chicago, III.
Seamless Rubber Co.
Clifton Precision Products Co., Inc.
Clifton Heights, Pa.
Dayton, Ohio
Precision Rubber Products Corp.
Radio Corp. of America, Electronic
Compo & Devices oiv.
Harrison, N. J.
Anaheim, Calif.
Marco Industries
Philco Corporation (Lansdale Division)
Lansdale, Pa.
Western Fibrous Glass Products Co.
San Francisco, Calif.
San Francisco, Calif.
Van Waters & Rogers Inc.
PrOVidence, R.I.
Tower Mfg. Corp.
Lincoln, III.
Cutler-Hammer, Inc.
St. Paul, Minn.
Gould·National Batteries, Inc.
Clifton, N. J.
Federal Telephone & Radio Corp.
Buffelo, N. Y.
General Mills, Inc.
Oakland, Calif.
Graybar Electric Co.
Chicago, III.
United Trensformer Co.
US Rubber Co., Consumer Ind. & Plastics
Passaic,
N.J.
Prod. oiv.
San Francisco, Calif.
Bearing Engineering Co.
San Francisco, Calif.
Connor Spring Mfg. Co.
Ei Monte, Calif.
Miller Dial & Nameplate Co.
Chicago, III.
Radio Meterials Co.
Attleboro, Mass.
Augat Inc.
COlumbus, Nebr.
Dale Electronics, inc.
Willow Grove, Pa.
Eico Corp.
Wakefield,
Mass.
Gremar Mfg. Co., Inc.
Redwood City, Calif.
K F Development Co.
Honeywell Inc., Micro Switch oiv.
Freeport, IIi.
Oakland, Calif.
Nahm-Bros. Spring Co.
Peabody, Mass.
Tru-Con nector Corp.
Rochester, N. Y.
Eigeet Optical Co. Inc.
Universal Industries, Inc. City of Industry, Calif.
Tensolite Insulated Wire Co., Inc.
Tarrytown, N. Y.
Syivania Eiectric Prod. Inc.
Woburn, Mass.
Semiconductor oiv.
New York, N.Y.
Robbins and Myers, Inc.
Mansfield, Ohio
Stevens Mfg. Co., Inc.
Livingston, N.J.
G. V. Controls
86579
86684
87034
87216
87473
87664
87930
88140
88220
88421
88698
89231
89665
90179
90970
91260
91345
91418
91506
91637
91662
91737
91827
91929
91961
92180
92367
92196
92607
93332
93369
93410
93919
Address
MlWlufacturer
Address
Bayonne, N. J.
94137 General Cable Corp.
94144 Raytheon Co., Compo oiv., Ind.
Compo Operations
No.
Address
MlWlufaclurer
Burbank, Calif.
98376 Zero Mfg. Co.
98731 General Mills Inc., Electronics oiv.
Minneapolis, Minn.
Quincy, Mass.
94148 Scientific Electronics Products, Inc.
98734 Paeco oiv. of Hewlett-Packard Co.
Loveland, Colo.
Palo Alto, Calif.
Newark, N. J.
94154 Tung-Sol Electric, Inc.
94197 Curtiss-Wright Corp. Electronics oiv.
Glen Cove, N. Y.
98821 North Hills Electronics, Inc.
98978 International Electronic Research Corp.
East Paterson, N. J.
Huntington, Ind.
Bellwood, III.
99109
99313
99378
99515
Worcester, Mass.
99707
Chester, Pa.
94222 South Chester Corp.
94310 Tru-ohm Products Memcor Components oiv.
94330 Wire Cloth Products, Inc.
94682 Worcester Pressed Aluminum Corp.
Chicago, III.
94696 Magnecraft Electric Co.
95023 George A. Philbrick Researchers, Inc.
95236
95238
95263
95264
95265
95275
95348
95354
95712
95984
95987
96067
96095
96256
96296
96330
96341
96501
97464
97539
97979
97983
98141
98159
98220
98278
98291
Boston, Mass.
Miami, Fla.
Allies Products Corp.
Woodside, N. Y.
Continental Connector Corp.
Long Island, N. Y.
Leecraft Mfg. Co., Inc.
Burbank, Calif.
Lerco Electronics, Inc.
Nationai Coil Co.
Sheridan, Wyo.
Bridgeport, Conn.
Vitramon, Inc.
Bloomfield,
N. J.
Gordos Corp.
Chicago, III.
Methode Mfg. Co.
Franklin, Ind.
oage Electric Co. , Inc.
Wayne, III.
Siemon Mfg. Co.
Chicago, III.
Weckesser Co.
Sunnyvele, Calif.
Huggins Laboratories
Olean, N. Y.
Hi-Q oiv. of Aerovox Corp.
Mt. Carmel, III.
Thordarson-Meissner Inc.
Los Angeles, Calif.
Solar Manufacturing Co.
Chicago, III.
Carlton Screw Co.
Burlington, Mass.
Microwave Associates, Inc.
Excel Transformer Co.
oakland, Calif.
Irvington, N. J.
Industrial Retaining Ring Co.
Englewood, N. J.
Automatic & Precision Mfg.
Reon Resistor Corp.
Yonkers, N. Y.
Litton System Inc., Adler-Westrex
New Rochelle, N. Y.
Commun. oiv.
Jamaica, N. Y.
R· Troncis, Inc.
Gardene, Calif.
Rubber Teck, Inc.
Hewlett-peckard Co., Moseley oiv.
pasadena, Calif.
So. Pasadena, Calif.
Microdot, Inc.
Mamaroneck, N. Y.
Sealectro Corp.
99800
99848
99934
99942
99957
Burbank, Calif.
New York, N. Y.
Columbia Technical Corp.
Palo Alto, Calif.
Varian Associates
Winchester, Mass.
Allee Corp.
Marshall Ind. Elect. Products oiv.
San Marino, Calif.
Control Switch Division, Controls Co.
EI Segundo, Calif.
of America
East Aurora, N. Y.
Delevan Electronics Corp.
Indianapolis, Ind.
Wilco Corporation
Boston, Mass.
Renbrandt, Inc.
Hoffman Electronics Corp.
EI
Monte, Calif.
Semiconductor oiv.
Technology Instrument Corp. of Calif.
Newbury Park, Calif.
THE FOLLOWING HP VENDORS HAVE NO NUMBER
ASSIGN ED IN TH E LA TEST SU PPLEMENT TO TH E
FEDERAL SUPPLY CODE FOR MANUFACTURERS
HANDBOOK.
OOOOF
OOOOM
OOOOZ
OOOAA
OOOAB
OOOBB
OOOMM
OOONN
OOOQQ
OOOWW
OOOYY
Los Angeles, Calif.
Malco Tool and Die
Western Coil oiv. of Autometic Ind., Inc.
Redweod City, Calif.
Newark, N. J.
Willow Leather Products Corp.
British Radio Electronics Ltd.
Washington, o. C.
England
ETA
Precision Instrument Components Co.
Van Nuys, Calif.
Hayward, Calif.
Rubber Eng. & Development
San Jose, Calif.
A "N" 0 Mfg. Co.
Oakland, Calif.
Cooltron
Burlington, Calif.
California Eastern Lab.
Los
Angeles, Calif.
S. K. Smith Co.
From: FSC.
00015-41
H4-1
H4-2
Handbook Supplement!
Dated JU LY 1965
Dated NOV. 1962
Revised; July, 1966
6-18
01879-1
Appendix I
Model 130C
APPENDIX 1
MANUAL CHANGES
This appendix contains information on changes required
to adapt this manual to an instrument with a serial
prefix listed in the table below. Check for your instrument serial prefix and make numbered changes indicated. Note that these changes adapt the manual to
cover a particular instrument as manufactured and
therefore will not apply to an instrument subsequently
modified in the field. Refer back to Section I for information on errata in this manual and on any other
instrument serialprefixnot covered in this appendix.
Instrument
Serial Prefix
630627614548537503445438425344336335320-, 317312309-
Make Numbered
Changes
1
1,2
1 thru
1 thru
1 thru
1 thru
1 thru
1 thru
1 thru
1 thru
1 thru
1 thru
1 thru
1 thru
1 thru
Figure 5-20,
Change value of R405, R406 to 10k ohms.
Table 6-2,
Chal1iJl R405, R406 to hp Part No. 0727-0157;
R: fxd,depc,10k ohms, 1%,1!2w; Mfr hp.
Change R407, R408 to hp Part No. 0727-0043; R:
fxd,depc, 100 ohms,1%,1!2w; Mfr hp.
Note: If any of these resistors must be replaced, it is
recommended that all four be replaced with parts
presently listed in Table 6-2.
Figure 5-20 and Table 6-2,
Delete CR423 and CR443.
CHANGE3
Figure 5-11 and Table 6-2,
Delete CR112.
CHANGE4
Figure 5-7,
Change value of C23* to 6800 pf.
Delete C27*.
Figure 5-16,
Change value of C236* to 100 pf.
01879-5
Change value of C237* to .015 \1f.
Table 6-2,
Change C23 to hp Part No. 0160-0159; C: fxd,my,
6800pf,10%,20Ovdcw.
Delete C27.
Change C236 to hp Part No. 0160-0153; C: fxd,my
100 pf,10%,200vdcw.
Change C237 to hp Part No. 0160-0194; C: fxd,my,
.015 \1f,10%,20Ovdcw.
Change Q3, Q4, Q203, Q204 to hp Part No.
1850-0097; Q: ge pnp; Mfr hp.
CHANGES
3
4
5
6
7
8
9
10
11
12
13
14
15
CHANGE 1
CHANGE 2
CHANGE 4 (cont'd)
Figure 5-7,
Delete C26.
Figure 5-16,
Delete C243.
Table 6-2,
Delete C26 and C243.
CHANGE6
Figure 5-7,
Delete CR1 and CR2.
Figure 5-16,
Delete CR201 and CR202.
Table 6-2,
Delete CR1, CR2, CR201, and CR202.
CHANGE7
Figure 5-7,
Change value of C24 to 1000\1f.
Figure 5-16,
Change value of C238 to 100Q..Lf.
Table 6-2,
Change C24 and C238 to C: fxd, elect, 100Q.Lf,
+100%-10%, 10vdcw; hp Part No. 0180-0146,
Mfr 56289; Mfr Part No. D35387.
CHANGE 8
Table 1-1,
Change specification for Bandwidth, AC coupled
(input) to read "10 cps to 500 kc".
Figure 5-7,
Change C9 and C10 each to .022 \1f.
Figure 5-16,
Change C209 and C210 each to .022 \1f.
Table 6-2,
Change C9, C10, C209, C210 to C: fxd, my,
.002 \1f, 10% 600vdcw; hp Part No. 0160-0003;
Mfr 56289; Mfr Part No. 160P22396.
1-1
Model 130C
Appendix I
shipped. The edge-on connectors may be bent to
fit when matching old and new assemblies.
CHANGE9
Figure 5-20,
Change value of C444 and C465 to • 011J,f.
Table 6-2,
Change C444 and C465 to C: fxd, cer, .01IJ,f, 20%
100Ovdcw; hp Part No. 0150-0012; Mfr 56289;
Mfr Part No. H1038.
CHANGE 10
Figure 5-7,
Change value of R40 to 9 ohms.
Table 6-2,
Change R40 to R: fxd, ww, 9 ohms, 10%, 5w; hp
Part No. 0813-0016; Mfr 35434; Mfr Part No.
C-5-9.
CHANGE 11
Figure 5-7,
Change value of R30 to 9.76 ohms.
Figure 5-16,
Change value of R260 to 7. 50 ohms.
Table 6-2,
Change Q3, Q4, Q203, Q204 to Transistor: PNP
Ge; hp Part No. 1950-0097; Mfr 73445; Mfr
Part No. 2N2084.
Change R30toR: fxd, depc, 9.93 ohms, 1%, 1/2w,
hp Part No. 0727-0430; Mfr hp.
ChangeR260to R: fxd, depc, 7.68 ohms, 1%, 1/2w;
hp Part No. 0727-0421; Mfr 19701; Mfr Part
No. DC 1/2 AR5.
Note: Some instruments may have a shunt resistor
to obtain correct value for R30 and R260. For replacement, order by new stock number above.
Table 6-2,
Change assembly part numbers as follows:
A201
A202
A205
A301
A401
to
to
to
to
to
130C-65B
130C-19B
130C-65F
130C-65E
130C-65D
Note: This change involved a mechanical change
only, resulting in new PC board material and consequently different size edge-on connectors. When
old part numbers as listed above are ordered, new
part numbers as listed in Section VI will be
1-2
Figure 5-20,
Change value of R482 to 12K ohms.
Table 6-2,
Cha~e CR482 to hp Part No. 1902-0031.
Change R482 to R: fxd, comp, 12K ohms, 10%,
1w; hp Part No. 0690-1231; Mfr 01121; Mfr
Part No. GB 1231.
CHANGE 14
Figure 5-11,
Delete C122, 100(),J.f.
Figure 5-13,
Change value of R184 to 4.5 Ire gohms.
Change value of R185 to 1. 8 megohms.
Figure 5-18,
Change R329A/B each to 10K ohms.
Delete R330, 100 ohms.
Table 6-2,
Delete C122, hp Part No. 0150-0069.
Change L302, hp Part No. to 5060-0409.
Change R184 to R: fxd, depc, 4.5 megohms, 1%
1w; hp Part No. 0730-0157; Mfr 19701; Mfr
Part No. DC 1 R5.
Change R185 to R fxdc, depc, 1. 8 megohms, 1%,
1/2w; hp Part No. 0727-0285; Mfr 19701; Mfr
Part No. DC 1/2 CR5.
Change R329 to R: var, ganged, 10K ohms, 20%,
lin, 1/4w; hp Part No. 2100-0150; Mfr hp.
Delete R330, hp Part No. 0687-1011.
CHANGE 15
CHANGE 12
A1 to 130C-65A
A2 to 130C-19A
A5 to 130C-65F
A101 to 130C-65C
A102 to 130C-19D
A175 to 130C-19C
CHANGE 13
Figure 5-7,
Change wht lead from emitter of Q3 and junction
of R21-R22 to wht-gra.
Change wht-gra lead from emitter of Q4 and wiper
of SlF to wht.
Figure 5-16,
Add C243, .001IJ,f, in parallel with R258.
Lift "WHT-YEL" lead from fixed contacts of switch
S202H and reconnect it to R251-R252 junction.
Lift "WHT-GRA" lead from R259-R260 junction
and reconnect it to movable arm of switch S203.
Table 6-2,
Add C243, C: fxd, .001 IJ,f, 10%, hp Part No.
0160-0153; Mfr 56289; Mfr Part No.
192P10292.
01879-5
Appendix II
Model 130C
APPENDIX II
OPTIONS
OPTION 05
This option consists of an external graticule type CRT
instead of the internal graticule type normally installed
in the Oscilloscope. The graticule illuminating circuit
as .shown in Figure 11-1 is also included in this option,
whIle the TRACE ALIGN circuit (L302, R329A/B) has
been removed. Illumination of the external graticule
is controlled by the SCALE control that has been added
to the front panel in place of the TRACE ALIGN control. Refer to Table II-lforreplaceable parts for this
option.
Figure 11-2 for the connector wiring schematics.
Mating plugs (and cable clamps) for the three-pin connectors are also supplied with this option. Refer to
Table 11-1 for replaceable parts of this option. The
added vertical and horizontal input connectors cause
some increase of input capacitance; however, this
increase will not cause the input capacitance to exceed
100 pf.
JIOI ) ) - - - . . _ - - TO 5103
JI02
P/O
T401
~>---I-"""'---,
~
",
REAR
CONNECTOR")-1.--_....J
I
CR481
9':;----..--_---------+12.5V
TRIGGER INPUT
5
I
C481
~
J
470
C
_ -.........><l' 300
R481
TO Q481
-=
A
B
REAR
CONNECTOR
VERTICAL
INPUT
TO
R209
if
TOR9
J201
TO RIO
J202
A
TO
R210
C
-=
B
REAR
CONNECTOR
HORiZONTAL
INPUT
130C-A-27
Figure 11-2. Option 06 Schematic Diagram
130C-A-26
Figure 11-1. Option 05 Schematic Diagram
OPTION 06
This option consists of rear panel connectors wired in
parallel with the vertical, horizontal, and trigger inputs on the front panel of the Oscilloscope. Refer to
01879-1
OPTION 13
This option consists of a special front panel for the
Oscilloscope. The special panel is a 6-31/32 in. x
19 in. x3/16 in. rack-mount slab panel without handles.
Installation of this special panel necessitates the removal of some of the standard components and the addition of several special components, as listed in Table
11-1.
11-1
Model13OC
Appendix II
Table II-I
Table II-I. Replaceable Parts for Options
Ref
Desig
hp Part No.
De scription
(See Table 6-1. )
RS TQ
Mfr Part No.
Mfr
OPTION 05
120A-83C
120A-83C-1
120A-83A
120A-83B
120A-83G
0
0
0
0
0
0170-0084
0693-4711
1450-0154
2100-1838
2140-0057
0
1
1
1
4
5083-0310
5083-0320
5083-0330
5083-0340
5083-0350
0
0
0
0
0
Graticule: scribed
Graticule: unscribed
Filter: amber
Filter: blue
Filter: green
1
1
4
1
4
Knob: black (scale)
R: fxd comp 470 ohms 10% 2w
Lampholder: miniature
R: var comp 300 ohms 20% 1w with spst switch
DS: 6 volt incandescent
V:
V:
V:
V:
V:
crt
crt
crt
crt
crt
PI phosphor wlo internal graticule
P2 phosphor wlo internal graticule
P7 phosphor wlo internal graticule
Pll phosphor wlo internal graticule
P31 phosphor w10 internal graticule
hp
hp
hp
hp
hp
hp
hp
hp
hp
24455
1768
hp
hp
hp
hp
hp
OPTION 06
1250-0083
1251-0038
1251-0039
1251-0040
130C-16V
130C-16W
0
0
0
0
0
0
1
2
2
2
1
1
J: BNC (type UG-1094/U)
p:
female 3-pin (cable mount)
J: male 3-pin (bulkhead mount)
E: clamp cable
Cable: rear horiz and vert input
Cable: rear sync input
hp
CA310610SL-3S-A105
71469
71469 CA3102A10SL-3P-A105
AN3057-4
71469
hp
hp
OPTION 13
Delete the following standard components:
130C-2A
3101-0040
5060-0734
5060-0763
5060-0765
1
3
2
2
2
Panel: front
S: slide dual dpdt (A3, A103, and A203)
Casting: frame side
Handle: side
Retainer: handle
5060-0767
5060-0776
5000-0052
5
1
2
Foot: plastic
Kit: rack mount
Plate: trim adhesive back
Add the following special components:
130C-2E
120B-37A
120B-47A
120B-5B
3101-0928
II-2
0
0
0
0
1
1
2
2
2
3
Panel: front
Bar: panel mounting
Support: panel
Casting: frame side
S: slide dual dpdt (A3, A103, and A203)
hp
hp
hp
hp
42190
6603-A2 SPEC
01879-2
,
MANUAL CHANGES
MODEL 130C
OSCILLOSCOPE
Manual Serials Prefixed: 644Manual Printed: NOV 1966
Make all changes in this manual according to the Errata below. Also check the following table for your
instrument serial prefix (3 digits) and/or serial number (8 digits) and make any listed change(s) in the manual:
Serial Prefix or Number
Make Manual Changes
Serial Prefix or Number
Make Manual Changes
819-
1,2
833-
1 3
938-
1,3,4
ERRATA
Table 6-2,
0421,0441,0461: Change to hp Part No. 1850-0422; 0: Ge pnp; Mfr hp
(preferred replacement).
R15, R16: Change value to 900 k ohms.
Under Miscellaneous,
Add hp Part No. 5050-0440; Cover: CRT socket access; Mfr hp.
Appendix II, Table 11-1, Option 13,
Delete Entry for 120B-37A.
Add hp Part No. 130C-37A; Bar: panel mounting right; Mfr hp.
Add hp Part No. 130C-37B; Bar: panel mounting left; Mfr hp.
Change hp Part No. 120B-5B to 120B·5C.
CHANGE 1
Page 1-0, Table 1-1,
Change Vertical and Horizontal Amplifiers, Internal Calibrator specification
to read as follows:
"Line frequency square wave, 5 cm ±3%. Automatically connected ... to
CAL."
Change General, Calibrator specification to read as follows:
"Line frequency square wave, 500 mv ±2% available at front panel."
Page 3-3, Paragraph 3-17, step e,
Change SWEEP TIME setting to 10 MILLISECONDS/CM.
Page 4-5, paragraph 4·33, 7th line from bottom,
Change "350 cps" to "line frequency".
Page 5-15, Paragraph 5-83, step b,
Change SWEEP TIME setting to 10 MILLISECONDS/CM.
Table 6-2,
C401: Delete.
!J. Add C402: hp Part No. 0180-0376; C: fxd ta 0.47 uF 10% 35 vdcw; Mfr hp.
Add CR401: hp Part No. 1901·0040; CR: si; Mfr hp.
Add 0401: hp Part No. 1854-0215; 0: si npn; Mfr hp.
R403, R404: Delete.
Add R409: hp Part No. 0757-0449; R: fxd metflm 20 k ohms 1% 1/8w; Mfr hp.
Add R410: hp Part No. 0757-0765; R: fxd metflm 36.5 k ohms 1% 1/4w; Mfr hp.
Add R412: hp Part No. 0757-0438; R: fxd metflm 5110 ohms 1% 1/8w; Mfr hp.
Add R413: hp Part No. 0698-3132; R: fxd metflm 261 ohms 1% 1/8w; Mfr hp.
V401, V402: Delete.
9 January 1970
!J. = Latest additions to this chenge sheet.
This change sheet supersedes all prior change sheets for this manual.
Supplement A for
130C-905
Manual Changes Model 130C Page 2/3
Instrument Serial Prefix
t:,
Make Manual Change s
Instrument Serial Prefix'
Make Manual Changes
819-
1,2
833-
1,3
938-
1,3,4
CHANGE 2
Page 5-25, Figure 5-20,
Replace Calibrator portion of schematic with Figure 1 (cut out and permanently
attach in manual). Note: New calibrator components are located in same area
of LVPS circuit board, A401.
Table 6-2,
A401: Change to hp Part No. 130C-65N, Mfr hp.
Add R411: hp Part No. 0757-0441; R: fxd metflm 8250 ohms 1% 1/8w; Mfr hp.
Add R412: hp Part No. 0757-0438;R: fxd metflm 5110 ohms 1% 1/8w; Mfr hp.
CHANGE 3
Page 5-25, Figure 5-20,
Replace Calibrator portion of schematic with Figure 2 (cut out and permanently
attach in manual). Note: New calibrator components are located in same area
of LVPS circuit board, A401.
Table 6-2,
A401: Change to hp Part No. 130C-65P; Mfr hp.
A402: Change to hp Part No. 2100-2743 var 5000-5000-3000 ohms, 3%, 1/4w;
Mfr hp.
Add R411: hp Part No. 0757-0443 fxd metflm 11 k ohms 1% 1/8w; Mfr hp.
CHANGE 4
Page 5-25, Figure 5-20,
Add diodes CR424, CR444, and CR464, respsectively, between bases and emitters of
0421, 0441, and 0461, In each case connect the anodes of the diodes to the bases
of the transistors and the cathodes of the diodes to the emitters of the transistors.
Page 6-5, Table 6-2,
Add CR424, CR444, and CR464: hp Part No. 1901-0026.
Change Reference Designators not assigned to CR425-CR440, CR445-CR460,
and CR464-CR480.
Page 6-6, Table 6-2,
Change 0421, 0441, and 0461 to 0: si pnp 2N3792; no hp Part No.
9 January 1970
t:, = Latest additions to this change sheet.
Manual Changes Model 130C
Page 3
Figure 1.
+ 100V
t
CALIBRATOR
0401
FROM
T40l, _
PIN 3
R413
261
R409
20K
---i-~)II--'VII'v-.-.I~
~~C=l·
cr.4,?lUF
GRA
CR401
R405
9900
R406
9900
r
R407
100
R40B
100
WHTBLK
WHTBLKGRA
TO VERT
AMP.ATTEN
SWITCH
GRNGRA
Figure 2.
PIO A401 LVPS ASS'Y
R410
36.5K
CALIBRATOR
@
CALIBRATOR
0401
FROM
T401. _
PIN 3
R411
11K
R402
5000
R413
261
R409
20K
---i-~)II--'VII'v-~H
~~C=lcr.4,?lUF
GRA
0401
CR401
--~
TO HaRIZ
AMfI,ATTEN
SWITCH
R405
9900
R406
9900
WHT-
~~~-
I
I
R407
100
I
WHTBLK
r
R40B
100
-
WHTBLKGRA
GRNGRA
TO VERT
AMP.ATTEN
SWITCH
P R I N TED
I N
U. ·S . A .
HP Archive
This vintage Hewlett Packard document was
preserved and distributed by
www.hparchive.com
Please visit us on the web !
Prepared by on-line curator: Tony Gerbic
For FREE Distribution Only ***