1
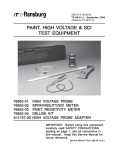
SERVICE MANUAL TE-98-01.7 (Replaces TE-98-01.6) JUNE - 2014 PAINT, HIGH VOLTAGE & SCI TEST EQUIPMENT MODEL: 76652-01 HIGH VOLTAGE PROBE 76652-02 SPRAYABILITY/SCI METER 76652-03 PAINT RESISTIVITY METER 76652-04 DELUXE KIT A11759-00 HIGH VOLTAGE PROBE ADAPTER IMPORTANT: Before using this equipment, carefully read SAFETY PRECAUTIONS, starting on page 1, and all instructions in this manual. Keep this Service Manual for future reference. Service Manual Price: $50.00 (U.S.) Paint, High Voltage & SCI Test Equipment NOTE:This manual has been changed from revision TE-98-01.6 to revision TE-98-01.7. Reasons for this change are noted under “Manual Change Summary” on page 23 of this manual. TE-98-01.7 Paint, High Voltage & SCI Test Equipment - Contents CONTENTS PAGE SAFETY: 1-5 SAFETY PRECAUTIONS .......................................................................................................1 HAZARDS / SAFEGUARDS .. .................................................................................................2-5 INTRODUCTION, OPERATION & MAINTENANCE: 6-17 MULTI-FUNCTION ELECTROSTATIC METER ..................................................................... 6 MULTI-FUNCTION METERS / KITS ...................................................................................... 7 SPRAYABILITY, SCI, AND RESISTANCE MEASUREMENT KIT .......................................... 8-12 PAINT RESISTANCE MEASUREMENT KIT...........................................................................13-14 HIGH VOLTAGE MEASUREMENT KIT...................................................................................14-16 GENERAL MAINTENANCE....................................................................................................17 WARRANTY: 18 WARRANTY POLICY .............................................................................................................18 APPENDIX: 19-79 PAINT AND SOLVENT SPECIFICATIONS .............................................................................19 VISCOSITY CONVERSION CHART.......................................................................................20-21 VOLUMETRIC CONTENT OF HOSE OR TUBE....................................................................22 TE-98-01.7 Paint, High Voltage & SCI Test Equipment - Safety SAFETY SAFETY PRECAUTIONS Before operating, maintaining or servicing any Ransburg electrostatic coating system, read and understand all of the technical and safety literature for your Ransburg products. This manual contains information that is important for you to know and understand. This information relates to USER SAFETY and PREVENTING EQUIPMENT PROBLEMS. To help you recognize this information, we use the following symbols. Please pay particular attention to these sections. A WARNING! states information to alert you to a situation that might cause serious injury if instructions are not followed. A CAUTION! states information that tells how to prevent damage to equipment or how to avoid a situation that might cause minor injury. A NOTE is information relevant to the procedure in progress. While this manual lists standard specifications and service procedures, some minor deviations may be found between this literature and your equipment. Differences in local codes and plant requirements, material delivery requirements, etc., make such variations inevitable. Compare this manual with your system installation drawings and appropriate Ransburg equipment manuals to reconcile such differences. ! WARNING The user MUST read and be familiar with the Safety Section in this manual and the Ransburg safety literature therein identified. This manual MUST be read and thoroughly understood by ALL personnel who operate, clean or maintain this equipment! Special care should be taken to ensure that the WARNINGS and safety requirements for operating and servicing the equipment are followed. The user should be aware of and adhere to ALL local building and fire codes and ordinances as well as NFPA-33 SAFETY STANDARD, LATEST EDITION, prior to installing, operating, and/or servicing this equipment. ! WARNING The hazards shown on the following pages may occur during the normal use of this equipment. Please read the hazard chart beginning on page 2. Careful study and continued use of this manual will provide a better understanding of the equipment and process, resulting in more efficient operation, longer trouble-free service and faster, easier troubleshooting. If you do not have the manuals and safety literature for your Ransburg system, contact your local Ransburg representative or Ransburg. TE-98-01.7 1 Paint, High Voltage & SCI Test Equipment - Safety AREA HAZARD Spray Area Fire Hazard Tells where hazards may occur. Tells what the hazard is. SAFEGUARDS Tells how to avoid the hazard. Improper or inadequate operation and maintenance procedures will cause a fire hazard. Fire extinguishing equipment must be present in the spray area and tested periodically. Protection against inadvertent arcing that is capable of causing fire or explosion is lost if any safety interlocks are disabled during operation. Frequent Power Supply or Controller shutdown indicates a problem in the system requiring correction. Smoking must never be allowed in the spray area. Spray areas must be kept clean to prevent the accumulation of combustible residues. The high voltage supplied to the atomizer must be turned off prior to cleaning, flushing or maintenance. When using solvents for cleaning: •• Those used for equipment flushing should have flash points equal to or higher than those of the coating material. •• Those solvents used for cleaning must have a flash point at minimum of 5°C (9°F) greater than the ambient temperature. It is the end users responsibility to insure this condition is met. Spray booth ventilation must be kept at the rates required by NFPA-33, OSHA, country, and local codes. In addition, ventilation must be maintained during cleaning operations using flammable or combustible solvents. Electrostatic arcing must be prevented. Safe sparking distance must be maintained between the parts being coated and the applicator. A distance of 1 inch for every 10KV of output voltage is required at all times. Test only in areas free of combustible material. Testing may require high voltage to be on, but only as instructed. Non-factory replacement parts or unauthorized equipment modifications may cause fire or injury. If used, the key switch bypass is intended for use only during setup operations. Production should never be done with safety interlocks disabled. Never use equipment intended for use in waterborne installations to spray solvent based materials. The paint process and equipment should be set up and operated in accordance with NFPA-33, NEC, OSHA, local, country, and European Health and Safety Norms. TE-98-01.7 2 Paint, High Voltage & SCI Test Equipment - Safety AREA Tells where hazards may occur. Spray Area HAZARD Tells what the hazard is. SAFEGUARDS Tells how to avoid the hazard. Explosion Hazard Improper or inadequate operation and maintenance procedures will cause a fire hazard. Protection against inadvertent arcing that is capable of causing fire or explosion is lost if any safety interlocks are disabled during operation. Frequent Power Supply or Controller shutdown indicates a problem in the system requiring correction. Electrostatic arcing must be prevented. Safe sparking distance must be maintained between the parts being coated and the applicator. A distance of 1 inch for every 10KV of output voltage is required at all times. Unless specifically approved for use in hazardous locations, all electrical equipment must be located outside Class I or II, Division 1 or 2 hazardous areas, in accordance with NFPA-33. Test only in areas free of flammable or combustible materials. The current overload sensitivity (if equipped) MUST be set as described in the corresponding section of the equipment manual. Protection against inadvertent arcing that is capable of causing fire or explosion is lost if the current overload sensitivity is not properly set. Frequent power supply shutdown indicates a problem in the system which requires correction. Always turn the control panel power off prior to flushing, cleaning, or working on spray system equipment. Before turning high voltage on, make sure no objects are within the safe sparking distance. Ensure that the control panel is interlocked with the ventilation system and conveyor in accordance with NFPA-33, EN 50176. Have fire extinguishing equipment readily available and tested periodically. General Use and Maintenance Improper operation or maintenance may create a hazard. Personnel must be given training in accordance with the requirements of NFPA-33, EN 60079-0. Personnel must be properly trained in the use of this equipment. Instructions and safety precautions must be read and understood prior to using this equipment. Comply with appropriate local, state, and national codes governing ventilation, fire protection, operation maintenance, and housekeeping. Reference OSHA, NFPA-33, EN Norms and your insurance company requirements. TE-98-01.7 3 Paint, High Voltage & SCI Test Equipment - Safety AREA Tells where hazards may occur. Spray Area / High Voltage Equipment HAZARD Tells what the hazard is. SAFEGUARDS Tells how to avoid the hazard. Electrical Discharge There is a high voltage device that can induce an electrical charge on ungrounded objects which is capable of igniting coating materials. Inadequate grounding will cause a spark hazard. A spark can ignite many coating materials and cause a fire or explosion. Parts being sprayed and operators in the spray area must be properly grounded. Parts being sprayed must be supported on conveyors or hangers that are properly grounded. The resistance between the part and earth ground must not exceed 1 meg ohm. (Refer to NFPA-33.) Operators must be grounded. Rubber soled insulating shoes should not be worn. Grounding straps on wrists or legs may be used to assure adequate ground contact. Operators must not be wearing or carrying any ungrounded metal objects. When using an electrostatic handgun, operators must assure contact with the handle of the applicator via conductive gloves or gloves with the palm section cut out. NOTE: REFER TO NFPA-33 OR SPECIFIC COUNTRY SAFETY CODES REGARDING PROPER OPERATOR GROUNDING. All electrically conductive objects in the spray area, with the exception of those objects required by the process to be at high voltage, must be grounded. Grounded conductive flooring must be provided in the spray area. Always turn off the power supply prior to flushing, cleaning, or working on spray system equipment. Unless specifically approved for use in hazardous locations, all electrical equipment must be located outside Class I or II, Division 1 or 2 hazardous areas, in accordance with NFPA-33. TE-98-01.7 4 Paint, High Voltage & SCI Test Equipment - Safety AREA Tells where hazards may occur. Electrical Equipment HAZARD Tells what the hazard is. Tells how to avoid the hazard. Electrical Discharge An electrical arc can ignite coating materials and cause a fire or explosion. Unless specifically approved for use in hazardous locations, the power supply, control cabinet, and all other electrical equipment must be located outside Class I or II, Division 1 and 2 hazardous areas in accordance with NFPA-33 and EN 50176. Turn the power supply OFF before working on the equipment. Test only in areas free of flammable or combustible material. Testing may require high voltage to be on, but only as instructed. Production should never be done with the safety circuits disabled. Before turning the high voltage on, make sure no objects are within the sparking distance. Certain material may be harmful if inhaled, or if there is contact with the skin. Follow the requirements of the Material Safety Data Sheet supplied by coating material manufacturer. High voltage equipment is utilized in the process. Arcing in the vicinity of flammable or combustible materials may occur. Personnel are exposed to high voltage during operation and maintenance. Protection against inadvertent arcing that may cause a fire or explosion is lost if safety circuits are disabled during operation. Frequent power supply shutdown indicates a problem in the system which requires correction. Toxic Substances SAFEGUARDS Adequate exhaust must be provided to keep the air free of accumulations of toxic materials. Use a mask or respirator whenever there is a chance of inhaling sprayed materials. The mask must be compatible with the material being sprayed and its concentration. Equipment must be as prescribed by an industrial hygienist or safety expert, and be NIOSH approved. Spray Area Explosion Hazard – Incompatible Materials Halogenated hydrocarbon solvents for example: methylene chloride and 1,1,1,-Trichloroethane are not chemically compatible with the aluminum that might be used in many system components. The chemical reaction caused by these solvents reacting with aluminum can become violent and lead to an equipment explosion. TE-98-01.7 Aluminum is widely used in other spray application equipment - such as material pumps, regulators, triggering valves, etc. Halogenated hydrocarbon solvents must never be used with aluminum equipment during spraying, flushing, or cleaning. Read the label or data sheet for the material you intend to spray. If in doubt as to whether or not a coating or cleaning material is compatible, contact your coating supplier. Any other type of solvent may be used with aluminum equipment. 5 Test Equipment - Introduction, Operation & Maintenance INTRODUCTION, OPERATION & MAINTENANCE MULTI-FUNCTION ELECTROSTATIC METER voltage. The meter is available in individual kits focused on each function or a deluxe kit, which includes accessories to perform all the functions listed above. The Ransburg Multi-Function Electrostatic Spray Meter uses one meter to serve multi-functions in electrostatic spray finishing. The meter can be used to measure conductivity, paint resistance, short circuit current, resistance, and high The Ransburg Multi-Function Electrostatic Spray Meter is powered by a single 9V alkaline battery. The solid state circuitry only requires 9V input to power the meter display and condition all the signals from the accessory items. KITS AND ADAPTERS Part # Description 76652-01 Kit for measuring high voltage. Includes 76634-00 Multi-Function Meter and 76667 High Voltage Probe Assembly. 76652-02 Kit for measuring short circuit current (SCI),resistance and spray-ability. Includes 76634-00 Multi-Function Meter and 76664-00 Test Lead Assembly. 76652-03 Kit for measuring paint resistivity. Includes 76634-00 Multi-Function Meter and 7922-00 Paint Probe Assembly. 76652-04 Deluxe Kit Performs all functions listed above. Includes 76634-00 Multi-Function Meter, 7922-00 Paint Probe Assem-bly, 76664-00 Test Lead Assembly, and 76667-00 High Voltage Probe Assembly. A11759-00 High Voltage Probe Adapter Adapter to measure the voltage coming from an individual probe (electrode) assembly on all RMA-MMA Indirect Charge Robot Mounted Rotary Applicator, Aerobell 2.5 Indirect Charge (A10924), and Aerobell II Indirect Charge (77603). Meter Scale Ranges:* kV: 0 to ±199.9 kVDC mA: 0 to ±1999 mA kW: 1 to 1999 kW (.001 to 1.999 MW) MW:00.1MW to 199.9 MW GW:.1GW to 19.99 GW * Note: For readings below 2 MW, more resolution can be obtained by using the kW scale. TE-98-01.7 6 Test Equipment - Introduction, Operation & Maintenance Figure 1A: Multi-Function Meter 7922-00 PAINT PROBE ASSEMBLY 76664-00 TEST LEAD ASSEMBLY 76634-00 MULTI-FUNCTION TESTER 20913-00 CONTACT ROD 3587-03 COMPRESSION NUT 76667 HIGH VOLTAGE PROBE ASSEMBLY Figure 1B: Multi-Function Meter Kit Parts TE-98-01.7 7 Test Equipment - Introduction, Operation & Maintenance SPRAYABILITY, SCI, AND RESISTANCE MEASUREMENT KIT Sprayability The Sprayability Meter measures whether materials normally considered being electrically non-conductive could be electrostatically sprayed or whether they need to be treated with solutions to make the surface conductive. The meter measures the surface resistance and indicates the degree of sprayability in MW or GW. The target being sprayed must be low enough in resistance to dissipate the electrostatic charge. In some cases the internal resistance of a target is lower than the surface resistance. This might allow a target that does not have a suitable surface resistance reading to be coated electrostatically without additional surface preparation. An example of this is certain types of wood which on the surface are not conductive but due to moisture content (12%-13%) may be sprayable. Since many non-conductive products must be pre-treated with a conductive solution to make them sprayable, the Ransburg Multi-Function Electrostatic Spray Meter is useful to monitor and maintain consistency in that application, once a suitable reading is determined. ! CAUTION Ensure that meter's scale is properly set for the function in which it is being used. Damage to equipment may result if improperly set. read zero, verify the continuity of the wire and re-perform the check. If the meter still does not read zero, consult the factory for repair of the meter. 2. With the metallic part of the meter probes pressed firmly and perpendicular against the surface of the article to be tested, the meter automatically reads the resistance of the part. Table 1 lists the readings from an 8333-00 meter and compares it to the readings of the Multi-Function Meter. Meter Readings 0W to 1.0GW - The article is suitable for spraying using the electrostatic process. 1.0GW to 1.5GW - The article is questionable for spraying using the electrostatic process. In such cases, paint a trial sample article to determine if a conductive primer or conductive solution for the part surface is required. 1.5GW to Infinity - The article is NOT suitable for spraying. A conductive primer or conductive solution is required to treat the surface of the part. OBJECT TO MEASURE Operation 1. Set the meter dial to the MW or GW scale (see Figure 2). Check the meter calibration by touching the metallic end of the two (2) probes on the meter to the stripped bare ends of a single 12" long wire (see Figure 2). (If desired the continuity of the wire may be verified by using a Volt-Ohm meter). If the meter reads zero, the meter is in calibration. If it does not TE-98-01.7 Figure 2: Sprayability Test Meter 8 Test Equipment - Introduction, Operation & Maintenance TABLE 1 - COMPARISON TO 8333-00 SPRAYABILITY METER WITH NEW MULTI-FUNCTION METER New 76652-01 Multi-Function Meter Reading 8333-00 Sprayability Meter Reading Spray Condition 1 MW155Suitable 2 MW150Suitable 3 MW147Suitable 4 MW145Suitable 14 MW140 Suitable 60 MW135 Suitable 190 MW or .1 GW130 Suitable 320 MW or .3 GW125 Suitable 410 MW or .4 GW120 Suitable 500 MW or .5 GW115 Suitable 600 MW or .6 GW110 Suitable 760 MW or .7 GW105 Suitable 1020 MW or 1.0 GW100 Suitable 1.1 GW 98 Test Sample Part 1.3 GW 95 Test Sample Part 1.5 GW 90 Test Sample Part 2.0 GW to Infinity 85 or less Requires Surface Prep TE-98-01.7 9 Test Equipment - Introduction, Operation & Maintenance Resistance/Testing Target/Product Ground The Ransburg Multi-Function Meter may be used to measure approximate resistance in kW, MW, or GW. Applications for the meter range from measuring the resistance of a 70430-XX resistor to measuring the resistance of a target to ground. ! CAUTION Ensure that meter's scale is properly set for the function in which it is being used. Damage to equipment may result if improperly set. NOTE When using the Multi-Function Meter test leads to measure resistance or current, ensure that the sprayability probes do not come into contact with any surface or the meter readings may be altered. Operation 1. Set the meter dial to the MW scale (see Figure 3). Plug the probe with two (2) alligator clamp leads into the side of the meter. Check the meter calibration by touching the metallic ends of the two (2) probes together. If the meter reads zero, the meter is in calibration. If it does not read zero, verify the continuity of the probe assembly and re-perform the check. If the meter still does not read zero, consult the factory for repair of the meter. 2. For ground checks, attach one alligator clip to a clean, non-treated surface of the target to be sprayed. Attach the other alligator clip to a known true earth ground. Set the dial to the MW scale. Read the resistance. If the resistance is greater than 1.0 MW the part is not adequately grounded (reference NFPA-77, NFPA-33). ! WARNING If the reading between true earth ground and the target is greater than 1.0 MW, then the hooks, racks, supports, etc. must be cleaned and eventually demonstrate a true earth ground resistance of 1.0 MW or lower. See NFPA-33 for further information. 3. For resistance checks, set the meter to MW scale (see Figure 4). Attach one alligator clip to the electrode wire of a 70430-XX screwed onto a needle shaft (or similar component). Attach the other lead to the shaft of the needle shaft (or other end of a similar component). The electrode reading should be approximately 14.5 MW to 19MW. Figure 3: Calibration Check Resistance TE-98-01.7 10 Test Equipment - Introduction, Operation & Maintenance ! WARNING Prior to starting the SCI tests, ensure the voltage at the power supply is turned off. Figure 4: Measuring Electrode Resistance Short Circuit Current-SCI (Power Supplies) 2. Place appropriate test resistor in the high voltage cable socket of the power supply. See appropriate power supply or applicator service manual. Be sure it is pushed clear to the bottom or proper contact will not be made. Attach one of the alligator clamps to the lead of the test resistor. Attach the other alligator clamp to a known true earth ground. Turn the power supply on. Then trigger H.V. by the air flow switch or jumper as required by gun model. (See appropriate service manual for further information.) Be sure that the power supply lights indicate that high voltage is being generated. Measure and record the short circuit current from the meter. This value should be compared to the value listed in the appropriate power supply service manual. The Ransburg Multi-Function Meter may be used to measure the short circuit current of an electrostatic product. The short circuit current measurement is important in troubleshooting problems with electrostatic power supplies and applicators. These tests should be performed when a noticeable decrease in transfer efficiency occurs. The measured short circuit current value should be compared to the value listed in the appropriate power supply or applicator manual. This comparison indicates if there are problems with the power source or the applicator. ! CAUTION Ensure that meter's scale is properly set for the function in which it is being used. Damage to equipment may result if improperly set. Figure 5: Testing SCI on Power Supplies Operation 1. Set the meter dial to the µA scale (see Figure 5). Plug the probe with two (2) alligator clamp leads into the side of the meter. Ensure the meter reads zero. If it does not read zero, consult the factory for repair of the meter. TE-98-01.7 11 Test Equipment - Introduction, Operation & Maintenance Short Circuit Current - SCI (Guns) The Ransburg Multi-Function Meter may be used to measure the short circuit current of an electrostatic applicator. The short circuit current measurement is important in troubleshooting problems with electrostatic power supplies and applicators. These tests should be performed when a noticeable decrease in transfer efficiency occurs. The measured short circuit current value should be compared to the value listed in the appropriate power supply or applicator manual. This comparison indicates if there are problems with the power source or the applicator. ! 2. Attach one of the alligator clamps to the electrode (brush on the #2 process bell). Be sure the clamp makes good contact with the electrode (small wires on the #2 brush). Attach the second alligator clamp to ground, preferably the handle or bracket. 3. Apply voltage to the gun from the power supply. The meter should read between the ranges indicated in the power supply and applicator manuals. CAUTION Ensure that meter's scale is properly set for the function in which it is being used. Damage to equipment may result if improperly set. Operation ! WARNING Prior to starting the SCI tests, ensure the voltage at the power supply is turned off. 1. Set the meter dial to the µA scale (see Figure 5). Plug the probe with two (2) alligator clamp leads into the side of the meter. Check the meter calibration by touching the metallic ends of the two (2) probes together. If the meter reads zero, the meter is in calibration. If it does not read zero, verify the continuity of the probe assembly and re-perform the check. If the meter still does not read zero, consult the factory for repair of the meter. TE-98-01.7 12 Test Equipment - Introduction, Operation & Maintenance PAINT RESISTANCE MEASUREMENT KIT Paint Resistivity ! CAUTION Ensure that meter's scale is properly set for the function in which it is being used. Damage to equipment may result if improperly set. The Ransburg Paint Resistance Measurement Kit using the multi-function meter is designed to provide measurement of the electrical resistance of paint formulations for all electrostatic applications. Once the resistance of a paint is determined and found to spray successfully, measuring resistivity with this meter provides a way to duplicate conditions. This is extremely important when troubleshooting problems with spray or rotational applicators. This meter has two (2) scales, MW and kW that may be used for measurement of the paint resistance. ! CAUTION Testing Metallic Paint In certain paint formulations where materials of appreciable content of metal flake or powder (i.e., aluminum, bronze, or metallic colors) are used, this method of testing resistance can be misleading or inconclusive. This paint tester will NOT indicate the metallic content of the formula. Whenusing the paint tester with metallic paints, the low voltage battery of the test probe may not be enough to influence the metal particles, therefore, their presence may go unrecog-nized by the meter. When such formulations are placed in electrostatic applicators and high voltage applied, the metal particles may become aligned by the electrical field. This may result in an appreciable increase of current flow to ground by way of the pain delivery system. While the flow of current poses no immediate dangerous condition, it may drain some or all of the voltage from the electrode and may reduce or eliminate electrostatic efficiency. TE-98-01.7 INSERT TO THIS DEPTH INTO PAINT Figure 6: Paint Tester Operation Operation 1. Set the meter dial to the MW scale (see Figure 6). Plug the paint probe into the side of the meter. 2. Immerse the probe vertically into a well-mixed representative sample of the subject paint until the holes at the bottom of the slots in the probe sleeve are submerged (see Figure 6). Take a reading within 5 to 10 seconds of submerging the probe. ! CAUTION Do not immerse the paint probe past the top of the sleeve. 13 Test Equipment - Introduction, Operation & Maintenance Meter Readings Table 4 lists the ranges of paint resistivity that work best for specific Ransburg applicators. TABLE 4 - PAINT RESISTIVITY RANGES* Applicator Paint Resistivity Range Rotary Atomizers 0.05 MW to 1.0MW #2 Process Handgun 0.1 MW to 1.0MW Handguns & Automatic Guns 0.1 MW to Infinity * Use this table as a guideline. Usually a trial for resistance above listed values is recommended. When resistance is below listed values, electrostatic effect will be reduced due to a higher current draw to ground. To spray this material may require other means of increasing distance to ground such as adding coiled fluid tubes. ! CAUTION NEVER soak the paint probe. There is no solvent seal at the point where the handle screws into the body of the probe. If solvent is allowed to enter at this point or where the cable enters at the top of the handle, the interior wiring will deteriorate and have to be replaced. MW - CM = MW reading X 132 (Ref. ASTM D5682) To obtain MW - CM from the resistance in MW from the meter, multiply by 132. Maintenance The test probe MUST be cleaned IMMEDIATELY after each use. Use a suitable solvent and clean cloth to thoroughly clean the probe assembly. 1. Remove the probe sleeve and clean it inside and out, removing all paint residues (it may be soaked while probe is cleaned). 2. Thoroughly clean the outside of the probe with the cloth and solvent. 3. Place the cleaned sleeve back on the probe. TE-98-01.7 HIGH VOLTAGE MEASUREMENT KIT High Voltage Measurement The Ransburg High Voltage Measurement Kit using the multi-function meter is designed to provide measurement of high voltage DC potential for all electrostatic applicators to 200kV. Having an accurate measurement of output voltage from an applicator is very important when trouble-shooting problems with an installation. The reading from this device indicates whether the applicator and power supply are operating correctly. This kit comes with the following accessories: 1. A high voltage probe assembly to measure DC voltage at a bell, disk or gun. 2. Five (5) feet of 3/8 inch diameter high voltage cable to measure DC voltage from power supplies of 90kV and higher. 3. Five (5) feet of 5/16 inch diameter high voltage cable to measure DC voltage from power supplies producing less than 90kV. ! CAUTION Ensure that meter's scale is properly set for the function in which it is being used. Damage to equipment may result if improperly set. Operation ! CAUTION DO NOT exceed 30 seconds of continuous use of the high voltage probe. The probe is designed for instant readings ! WARNING The ground clip MUST be connected to a proven true earth ground BEFORE any contact is made between the probe assembly and the asembly being tested. All personnel in the hazard (booth) area MUST be grounded. See Ransburg bulletin "Personnel Grounding". 14 Test Equipment - Introduction, Operation & Maintenance These operating instructions MUST be read and thoroughly understood by all personnel who use this equipment. Special care should be taken to ensure that all Warnings and Requirements for operating the equipment safely are followed. The user should be aware of and adhere to all relevant local and company safety and fire codes and ordinances and the Occupational Heath Act of 1970 (OSHA) prior to operating this equipment. 1. Set the meter dial to the kV scale (see Figure 7). Plug the high voltage probe into the side of the meter. ! WARNING To provide proper equipment to operator ground, the conductive handle of the probe MUST be held in the bare hand of the operator. To avoid a shock hazard, the meter should NEVER be disconnected fromthe probe during high voltage contact. 2. Attach ground clamp to a proven earth ground. For Guns 3. If measuring the voltage on an electrostatic gun, line up the hole in the test probe and the electrode. Slide the test probe straight over the electrode wire of the gun. Be sure to push the test probe tight against the nozzle to minimize any voltage that may leak into the air during the test. Figure 7: Measuring High Voltage On Electrostatic AIr Spray Gun TE-98-01.7 NOTE Make sure all grounded objects are at least 2 feet away. 4. Holding the metal part of the high voltage probe in your hand, trigger the gun so voltage exists at the electrode. 5. Read the voltage displayed on the meter in 30 seconds or less. 6. Turn the voltage to the gun OFF, and pull the test probe straight off the electrode. For Bells or Disks 7. Turn the high voltage power supply on. 8. Make and maintain sure contact between the test probe and the applicator (see Figure 8). ! CAUTION Ensure that the applicator is NOT rotating when contacting it with the probe. Also, to get proper readings on resistive applicators, the probe must be placed in contact with the atomizing edge of the bell or disk as shown in Figure 8. As this edge is sensitive to mechanical damage, use care when contacting it with the probe. Rough handling may cause damage to the applicator. Figure 8: Measuring High Voltage On Bells or Disks 15 Test Equipment - Introduction, Operation & Maintenance 9. Read the applicator high voltage displayed on the meter in 30 seconds or less. 26. Remove adapter from probe (electrode) assembly. 10.Disengage the test probe from the applicator. 27. Test other probe (electrode) assemblies or resume operation. 11.Resume operation. For Power Supply High Voltage Measurement 12.Remove the metal test rod by loosening the nut on the end of the wand. 13. Insert the proper diameter high voltage cable into the wand of the high voltage probe. 14.Tighten the nut as necessary. 15.Attach the ground clamp to a known true earth ground. ! WARNING The ground clip MUST be connected to a proven true earth ground BEFORE any contact is made between the probe assembly and the assembly being tested. Figure 9: Probe Assembly View 16. Insert the cable into the high voltage tube of the power supply, inserting it far enough to make contact with the contact spring at the bottom of the tube. 17. Turn the power supply on. 18. Read the voltage displayed on the meter, 30 seconds or less. 19. Turn the power supply off. 20. Disengage the probe cable from the power supply. 21. Restore the applicator connection to the power supply and resume operation. For Probe (Electrode) Assemblies 22. Turn on the high voltage power supply. 23. Place adapter on end of high voltage probe (see Figure 9). 24. Tighten thumb screw. 25. Place adapter over probe (electrode) assembly (see Figure 10). Figure 10: Electrode Test View Maintenance - Probe 1. Keep the test probe and the HV cables clean to prevent contamination of the probe sockets. Clean only with non-polar solvents. 2. Inspect the ground cable, its clamp and connections for breaks or poor connections. 3. Do not bend or stress the white kV probe assembly, as this may break the potted high voltage resistor. TE-98-01.7 16 Test Equipment - Introduction, Operation & Maintenance GENERAL MAINTENANCE Maintenance - Battery Replacement When required, the battery will need to be replaced. It may be purchased locally and is a standard alkaline type 9V battery. To replace the battery, perform the following steps (refer to Figure 11). 1. Remove the sliding back cover of the meter. 2. Remove the existing battery from the two (2) prong 9V connector. 3. Replace with new alkaline 9V battery. 4. Replace back cover. 5. Appropriately discard used battery. NOTE The screen will go blank when the battery needs to be replaced. Calibration The 76634-00 Multi-Function Meter is not field repairable. The meter should be returned to the factory for repair or recalibration. Ransburg recommends that the Multi-Function Meter and its associated equipment (Paint probe, kV Probe, and/or Test Leads) be sent in together for recalibration at least once per year. NOTE The best recalibration results the Multi-Function Meter and accesories (Paint probe, kV Probe, and/or Test Leads) should be sent in together for recalibration. When shipped from the factory, and after each calibration, the Multi-Function Meter will be sealed with a calibration sticker noting the next date when calibration expires. Removal of this seal will void calibration of the unit. A certificate of calibration will also be shipped with each calibrated unit. Figure 11: Battery Replacement TE-98-01.7 17 Paint, High Voltage & SCI Test Equipment - Warranty Policy WARRANTY POLICIES LIMITED WARRANTY Ransburg will replace or repair without charge any part and/or equipment that falls within the specified time (see below) because of faulty workmanship or material, provided that the equipment has been used and maintained in accordance with Ransburg's written safety and operating instructions, and has been used under normal operating conditions. Normal wear items are excluded. THE USE OF OTHER THAN RANSBURG APPROVED PARTS, VOID ALL WARRANTIES. SPARE PARTS: One hundred and eighty (180) days from date of purchase, except for rebuilt parts (any part number ending in "R") for which the warranty period is ninety (90) days. EQUIPMENT: When purchased as a complete unit, (i.e., guns, power supplies, control units, etc.), is one (1) year from date of purchase. WRAPPING THE APPLICATOR, ASSOCIATED VALVES AND TUBING, AND SUPPORTING HARDWARE IN PLASTIC, SHRINK-WRAP, OR ANY OTHER NON-APPROVED COVERING, WILL VOID THIS WARRANTY. RANSBURG'S ONLY OBLIGATION UNDER THIS WARRANTY IS TO REPLACE PARTS THAT HAVE FAILED BECAUSE OF FAULTY WORKMANSHIP OR MATERIALS. THERE ARE NO IMPLIED WARRANTIES NOR WARRANTIES OF EITHER MERCHANTABILITY OR FITNESS FOR A PARTICULAR PURPOSE. RANSBURG ASSUMES NO LIABILITY FOR INJURY, DAMAGE TO PROPERTY OR FOR CONSEQUENTIAL DAMAGES FOR LOSS OF GOODWILL OR PRODUCTION OR INCOME, WHICH RESULT FROM USE OR MISUSE OF THE EQUIPMENT BY PURCHASER OR OTHERS. EXCLUSIONS: If, in Ransburg's opinion the warranty item in question, or other items damaged by this part was improperly installed, operated or maintained, Ransburg will assume no responsibility for repair or replacement of the item or items. The purchaser, therefore will assume all responsibility for any cost of repair or replacement and service related costs if applicable. FLUID HANDLING: One (1) year from date of purchase (i.e., Totalizer, CCV Valves, etc.). AIR BEARING ROTATORS: Fifteen thousand (15,000) hours or three (3) years, whichever occurs first. Warranty period begins on the date of purchase. TE-98-01.7 18 Paint, High Voltage & SCI Test Equipment - Manual Changes MANUAL CHANGE SUMMARY This manual was published to replace Service Manual TE-98-01.6, Paint, High Voltage & SCI Test Equipment, to make the following changes: 1. Corrected "A11759-00 High Voltage Probe Adapter" part number on the "Front Cover. 2. Corrected "A11759-00 High Voltage Probe Adapter" part number in the "Multi-Function Electrostatic Meter" section. 3. Updated to new format products and pictures. 4. Deleted tables 2 and 3. Referred reader to appropriate power supply or applicator service manual. TE-98-01.7 23 Manufacturing 1910 North Wayne Street Angola, Indiana 46703-9100 Telephone: 260-665-8800 Fax: 260-665-8516 Technical Service — Assistance 320 Phillips Ave. Toledo, Ohio 43612-1493 Telephone (toll free): 800-233-3366 Fax: 419-470-2233 Technical Support Representative will direct you to the appropriate telephone number for ordering Spare Parts. © 2014 Finishing Brands, Inc. All rights reserved. Models and specifications subject to change without notice. Form No. TE-98-01.7 Litho in U.S.A. 6/14