1
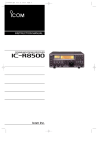
Replacing the Wide-FM filters of the Icom IC-R7100
(by Michele D’Amico IZ2EAS)
Introduction
The Icom IC-R7100 is a great receiver; unfortunately if you are interested in FM-DX
you will find the original WFM IF filters way too wide (230 kHz!). What I will
describe here is a simple procedure to replace the original WFM filters with
narrower ones. But first let me state it very clearly: do it at your own risk. I will
accept no liability for any damage you will do to your radio, to yourself or to this
sector of the Universe by following the procedure outlined in this document.
Old and new filters
The filters you want to remove are marked FI1 and FI2 in the schematic; they are
located on the “Main Unit” and they are identical (SFE10.7MMH-A).
Now the question is: which filters to choose for a replacement? It really depends on
how crowded is the FM band on your side of the planet and what are your
expectations. Let’s say that in principle you should use filters not wider than 110 kHz,
so one choice could be a couple of 110 kHz filters. But I live in Italy and here the FM
band is a jungle (i.e. great fun), so I decided to use a 110 kHz and a 80 kHz filter.
Someone suggested I could even use the couple 80/53 kHz, but I decided not to go
that far since I wanted to keep distortion at low levels.
With my choice (110/80) distortion can be hardly noticed, while the selectivity is still
very good. I used a couple of MuRata filters, marked 10.7HY (110 kHz) and E10.7T
(80 kHz).
The procedure
The tools: apart from the
usual set of screwdrivers, you
will need a soldering iron with
a small tip, and possibly a
desoldering pump.
(Note one of the small new
filters, circled in red…)
Unplug the
receiver.
Remove the top
cover only
(unscrew 8
screws)
Unplug the
speaker, so you
can get rid of the
top cover.
Unplug the
coaxial from the
converter board…
…unplugged…
Remove the 4 screws
that lock the REG unit,
then carefully move it
away !
(follow the instructions
at page 33 of the
instruction manual,
section 7
“Disassembling”)
The filters are in the
area circled in red
Zoom-in of the filters’
area. The filters you want
to remove are the two blue
components circled in red
I suggest to remove the 2 back-up
batteries for safety; note the
polarity ! (you will loose all your
memories, sorry).
Remove the screws that block the
MAIN unit, then carefully tilt it
upwards !
(to do this follow the instructions
at page 4-5 of the service manual,
section “mechanical parts &
disassembly”)
Remove the filters using
care… (FI1 shown here)
And install the new ones… (FI1
shown here; for this position I used
the 110 kHz filter.)
Repeat the procedure for FI2
(where I used the 80 kHz filter).
Now that the new filters are soldered in place, re-assemble your receiver following
your steps backwards (don’t forget to put the batteries back again, taking extra care
to the correct polarity).
There should be no need for calibration.
Please feel free to contact me if you want to exchange ideas at: [email protected].
Enjoy your Icom IC-R7100 !
Michele IZ2EAS
([email protected])