1
XEROX ® PHASER 3300
TONER CARTRIDGE REMANUFACTURING INSTRUCTIONS
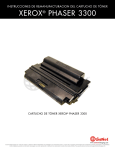
XEROX ® PHASER 3300 TONER CARTRIDGE
www.uninetimaging.com
© 2010 UniNet Imaging Inc. All trademark names and artwork are property of their respective owners. Product brand names mentioned are intended to show compatibility only.
UniNet Imaging does not warrant downloaded information. Unauthorized sale, reproduction or distribution of this article is prohibited. For additional support, please contact [email protected]
XEROX PHASER 3300 • TONER CARTRIDGE REMANUFACTURING INSTRUCTIONS
REMANUFACTURING THE XEROX
PHASER 3300 TONER CARTRIDGE
By Mike Josiah and the Technical Staff at UniNet
First released in August 2008, the Xerox Phaser 3300 MFP printers are based on a 30ppm, 1200dpi engine. The first page out
is rated at under 8.5 seconds and the monthly duty cycle is up to 25,000 pages. Both model printers are print, copy, scan, and
fax capable. Both machines come standard with 96MB of memory, which is upgradeable to 320MB. Both also come with
duplexing standard.
These cartridges do not have a drum cover, and come new with a piece of heavy paper with foam glued to it taped around the
cartridge.
There are both LY (4,000 pages) and HY (8,000 pages) cartridges available. Each version of cartridge has its own specific chip,
but the cartridges themselves are identical. The chip covers are held in place by plastic rivets. To replace the chip, the rivets need
to be cut off, holes carefully drilled (not too deep or the cartridge will leak), and screws installed.
An interesting note on these machines; according to the service manual, the transfer roller is rated for 70,000 pages which is
considered the lifetime of the machine. However the paper pick up rollers are rated for 150,000 pages and the fuser 80,000
pages so the lifetime statement is a bit confusing.
The printers as well as the cartridges are listed below:
LY CARTRIDGE
106R01411 (4,000 pages)
HY CARTRIDGE
106R01412 (8,000 pages)
PRINTER
Xerox Phaser 3300MFP
Xerox Phaser 3300MFP/X
Pictured are the HY and LY cartridges. As you can see, they are identical.
So if you install the correct chip and toner load, you can easily make a LY into a HY cartridge.
www.uninetimaging.com
© 2010 UniNet Imaging Inc. All trademark names and artwork are property of their respective owners. Product brand names mentioned are intended to show compatibility only.
UniNet Imaging does not warrant downloaded information. Unauthorized sale, reproduction or distribution of this article is prohibited. For additional support, please contact [email protected]
XEROX PHASER 3300 • TONER CARTRIDGE REMANUFACTURING INSTRUCTIONS
REQUIRED TOOLS
1. Toner approved vacuum
2. A small common screwdriver
3. A Phillips head screwdriver
4. Needle nose pliers
REQUIRED SUPPLIES
1. Xerox Phaser 3300 toner
2. Replacement chip (HY or LY)
3. Replacement drum
4. Replacement wiper blade
5. Conductive grease
6. Drum lubricating powder
1. Place the cartridge with the handle/supply chamber facing
you. Remove the three screws on the right end cap.
2. Gently pry off plastic drum axle bushing. Keep this bushing
with the appropriate end cap when removed. Each side is
different.
www.uninetimaging.com
© 2010 UniNet Imaging Inc. All trademark names and artwork are property of their respective owners. Product brand names mentioned are intended to show compatibility only.
UniNet Imaging does not warrant downloaded information. Unauthorized sale, reproduction or distribution of this article is prohibited. For additional support, please contact [email protected]
XEROX PHASER 3300 • TONER CARTRIDGE REMANUFACTURING INSTRUCTIONS
3. On the top edge of the end cap, there is a plastic tab.
Press in on the tab and remove the right end cap.
4. On the opposite side of the cartridge, remove the three
screws on the left end cap.
5. Gently pry off plastic drum axle bushing. Keep this bushing
with the appropriate end cap when removed.
www.uninetimaging.com
© 2010 UniNet Imaging Inc. All trademark names and artwork are property of their respective owners. Product brand names mentioned are intended to show compatibility only.
UniNet Imaging does not warrant downloaded information. Unauthorized sale, reproduction or distribution of this article is prohibited. For additional support, please contact [email protected]
XEROX PHASER 3300 • TONER CARTRIDGE REMANUFACTURING INSTRUCTIONS
6. On the top edge of the end cap, there is a plastic tab.
Press in on the tab and remove the left end cap.
7. Lift off the roller cover.
8. Carefully pry up the side plastic tab to release the waste
chamber.
www.uninetimaging.com
© 2010 UniNet Imaging Inc. All trademark names and artwork are property of their respective owners. Product brand names mentioned are intended to show compatibility only.
UniNet Imaging does not warrant downloaded information. Unauthorized sale, reproduction or distribution of this article is prohibited. For additional support, please contact [email protected]
XEROX PHASER 3300 • TONER CARTRIDGE REMANUFACTURING INSTRUCTIONS
9. Remove the waste chamber.
10. On the supply hopper, remove the fill plug and dump out
any remaining toner.
11. Remove the developer roller drive gear and place a strip of tape across the remaining gears.
They do not need to be removed, and the tape will help keep them in place.
www.uninetimaging.com
© 2010 UniNet Imaging Inc. All trademark names and artwork are property of their respective owners. Product brand names mentioned are intended to show compatibility only.
UniNet Imaging does not warrant downloaded information. Unauthorized sale, reproduction or distribution of this article is prohibited. For additional support, please contact [email protected]
XEROX PHASER 3300 • TONER CARTRIDGE REMANUFACTURING INSTRUCTIONS
12. On the fill plug side, press in on the plastic tab and remove the spring/plastic bushing assembly.
13. Remove the developer roller.
14. Remove the two screws on the doctor blade.
www.uninetimaging.com
© 2010 UniNet Imaging Inc. All trademark names and artwork are property of their respective owners. Product brand names mentioned are intended to show compatibility only.
UniNet Imaging does not warrant downloaded information. Unauthorized sale, reproduction or distribution of this article is prohibited. For additional support, please contact [email protected]
XEROX PHASER 3300 • TONER CARTRIDGE REMANUFACTURING INSTRUCTIONS
15. Carefully pry up the doctor blade. This blade has a very
tight fit, work it off carefully. Clean out any remaining toner
from the hopper.
16. Clean the doctor blade and foam seals. It is too early to say
exactly what chemical to use on the blade, but so far 99%
isopropyl alcohol seems to work.
17. Replace the doctor blade and two screws.
18. Clean and install the developer roller, long shaft side to
gear side first.
www.uninetimaging.com
© 2010 UniNet Imaging Inc. All trademark names and artwork are property of their respective owners. Product brand names mentioned are intended to show compatibility only.
UniNet Imaging does not warrant downloaded information. Unauthorized sale, reproduction or distribution of this article is prohibited. For additional support, please contact [email protected]
XEROX PHASER 3300 • TONER CARTRIDGE REMANUFACTURING INSTRUCTIONS
19. Snap the spring/plastic bushing assembly in place.
Make sure the tail of the spring is set properly.
20. Install the drive gear on the developer roller.
21. Fill the hopper with Phaser 3300 toner. Check for leaks.
www.uninetimaging.com
© 2010 UniNet Imaging Inc. All trademark names and artwork are property of their respective owners. Product brand names mentioned are intended to show compatibility only.
UniNet Imaging does not warrant downloaded information. Unauthorized sale, reproduction or distribution of this article is prohibited. For additional support, please contact [email protected]
XEROX PHASER 3300 • TONER CARTRIDGE REMANUFACTURING INSTRUCTIONS
22. On the waste hopper, remove the E-ring from the drum
axle.
23. Slide the drum axle out from the side opposite the E-ring.
24. Remove the OPC drum.
www.uninetimaging.com
© 2010 UniNet Imaging Inc. All trademark names and artwork are property of their respective owners. Product brand names mentioned are intended to show compatibility only.
UniNet Imaging does not warrant downloaded information. Unauthorized sale, reproduction or distribution of this article is prohibited. For additional support, please contact [email protected]
XEROX PHASER 3300 • TONER CARTRIDGE REMANUFACTURING INSTRUCTIONS
25. Slide the PCR to the non-contact side.
Remove the PCR.
26. Remove the two screws and the wiper blade. Clean out all
the toner from the hopper. It is interesting to note that on new
cartridges, some toner is in the waste hopper. Apparently
these cartridges are being tested before they are shipped, or
the drum was lubricated with toner.
27. Coat the new wiper blade with your preferred lubricant.
Install the new wiper blade and two screws. The tail of the
wiper blade should face up.
www.uninetimaging.com
© 2010 UniNet Imaging Inc. All trademark names and artwork are property of their respective owners. Product brand names mentioned are intended to show compatibility only.
UniNet Imaging does not warrant downloaded information. Unauthorized sale, reproduction or distribution of this article is prohibited. For additional support, please contact [email protected]
XEROX PHASER 3300 • TONER CARTRIDGE REMANUFACTURING INSTRUCTIONS
28. Clean the old conductive grease off the PCR shaft and
contact. Replace with new. Clean the PCR with your preferred
PCR cleaner. WARNING: Do not clean the OEM PCR with
alcohol, as this will remove the conductive coating from the
roller. If the PCR is an aftermarket, follow the cleaning
methods recommended by the manufacturer. If the PCR is an
OEM, we recommend it be cleaned with your standard PCR
cleaner.
29. Install the PCR by sliding the long shaft side through the
non-contact side. Bring it back to fit into the contact side.
30. Coat the OPC drum with your preferred lubricant and
install the drum.
www.uninetimaging.com
© 2010 UniNet Imaging Inc. All trademark names and artwork are property of their respective owners. Product brand names mentioned are intended to show compatibility only.
UniNet Imaging does not warrant downloaded information. Unauthorized sale, reproduction or distribution of this article is prohibited. For additional support, please contact [email protected]
XEROX PHASER 3300 • TONER CARTRIDGE REMANUFACTURING INSTRUCTIONS
31. Install the drum axle small drum gear side first.
Make sure that the E-ring groove ends up on the small drum gear side.
32. Install the E-ring.
33. Install the waste hopper on to the supply chamber.
Make sure that the tabs lock into place on the side wall.
www.uninetimaging.com
© 2010 UniNet Imaging Inc. All trademark names and artwork are property of their respective owners. Product brand names mentioned are intended to show compatibility only.
UniNet Imaging does not warrant downloaded information. Unauthorized sale, reproduction or distribution of this article is prohibited. For additional support, please contact [email protected]
XEROX PHASER 3300 • TONER CARTRIDGE REMANUFACTURING INSTRUCTIONS
34. Install the roller assembly.
35. Install the right side end cap and three screws.
Make sure the top rear tab locks in place.
www.uninetimaging.com
© 2010 UniNet Imaging Inc. All trademark names and artwork are property of their respective owners. Product brand names mentioned are intended to show compatibility only.
UniNet Imaging does not warrant downloaded information. Unauthorized sale, reproduction or distribution of this article is prohibited. For additional support, please contact [email protected]
XEROX PHASER 3300 • TONER CARTRIDGE REMANUFACTURING INSTRUCTIONS
36. Press the drum axle bushing in place. Set it so the small
tab is at the end of the groove; make sure it is fully seated. The
two small bushings are different. Make sure you have the
correct bushing for this side.
37. Remove the tape from the gears, and install the left side end cap and three screws.
Make sure the top rear tab locks in place.
www.uninetimaging.com
© 2010 UniNet Imaging Inc. All trademark names and artwork are property of their respective owners. Product brand names mentioned are intended to show compatibility only.
UniNet Imaging does not warrant downloaded information. Unauthorized sale, reproduction or distribution of this article is prohibited. For additional support, please contact [email protected]
XEROX PHASER 3300 • TONER CARTRIDGE REMANUFACTURING INSTRUCTIONS
38. Press the drum axle bushing in place. Set it so the small
tab is at the end of the groove and make sure it is fully seated.
The two small bushings are different. Make sure you have the
correct bushing for this side.
39. The chip is held in place by plastic rivets. It must be
replaced for the cartridge to work. It can be replaced by first
cutting the plastic rivets, then drilling two holes and setting two
self-tapping screws in place.
PRINTING TEST PAGES
As these machines are copiers, the easiest way is to just make a copy of a suitable test page.
REPETITIVE DEFECT CHART
Fuser pressure roller
101.3mm
Fuser heat roller
88.9mm
OPC Drum
75.5mm
Supply roller
53.2mm
Transfer Roller
47.1mm
PCR
37.7mm
Developer Roller
39.2mm
www.uninetimaging.com
© 2010 UniNet Imaging Inc. All trademark names and artwork are property of their respective owners. Product brand names mentioned are intended to show compatibility only.
UniNet Imaging does not warrant downloaded information. Unauthorized sale, reproduction or distribution of this article is prohibited. For additional support, please contact [email protected]