1
Part No. 12191SL
Service Manual
(Model 04358)
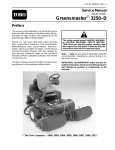
GreensmasterR 3150
Preface
The purpose of this publication is to provide the service
technician with information for troubleshooting, testing
and repair of major systems and components on the
Greensmaster 3150 (Model 04358).
REFER TO THE TRACTION UNIT AND CUTTING
UNIT OPERATOR’S MANUALS FOR OPERATING,
MAINTENANCE AND ADJUSTMENT INSTRUCTIONS. For reference, insert a copy of the Operator’s
Manuals and Parts Catalogs for your machine into
Chapter 2 of this service manual. Additional copies of
the Operator’s Manuals and Parts Catalog are available
on the internet at www.Toro.com.
The Toro Company reserves the right to change product
specifications or this publication without notice.
This safety symbol means DANGER, WARNING
or CAUTION, PERSONAL SAFETY INSTRUCTION. When you see this symbol, carefully read
the instructions that follow. Failure to obey the
instructions may result in personal injury.
NOTE: A NOTE will give general information about the
correct operation, maintenance, service, testing or repair of the machine.
IMPORTANT: The IMPORTANT notice will give important instructions which must be followed to prevent damage to systems or components on the
machine.
E The Toro Company - 2012
This page is intentionally blank.
Greensmaster 3150
Product Records . . . . . . . . . . . . . . . . . . . . . . . . . . .
Maintenance . . . . . . . . . . . . . . . . . . . . . . . . . . . . . . .
Equivalents and Conversions . . . . . . . . . . . . . . . .
Torque Specifications . . . . . . . . . . . . . . . . . . . . . . .
2 -2 -2 -2 --
1
1
2
3
Chapter 3 -- Engine
General Information . . . . . . . . . . . . . . . . . . . . . . . .
Specifications . . . . . . . . . . . . . . . . . . . . . . . . . . . . . .
Service and Repairs . . . . . . . . . . . . . . . . . . . . . . . .
BRIGGS & STRATTON VANGUARD V-TWIN
REPAIR MANUAL
3 -- 2
3 -- 3
3 -- 4
OHV
Chapter 4 -- Hydraulic System
Specifications . . . . . . . . . . . . . . . . . . . . . . . . . . . . . .
General Information . . . . . . . . . . . . . . . . . . . . . . . .
Special Tools . . . . . . . . . . . . . . . . . . . . . . . . . . . . . .
Service and Repairs . . . . . . . . . . . . . . . . . . . . . . . .
6
6
6
6
-----
2
3
3
4
Chapter 7 -- DPA Cutting Units
Specifications . . . . . . . . . . . . . . . . . . . . . . . . . . . . . . 7 -- 2
General Information . . . . . . . . . . . . . . . . . . . . . . . . 7 -- 3
Special Tools . . . . . . . . . . . . . . . . . . . . . . . . . . . . . . 7 -- 4
Factors That Can Affect Cutting Performance . . 7 -- 6
Set Up and Adjustments . . . . . . . . . . . . . . . . . . . . 7 -- 10
Service and Repairs . . . . . . . . . . . . . . . . . . . . . . . 7 -- 12
Chapter 8 -- Groomer
Specifications . . . . . . . . . . . . . . . . . . . . . . . . . . . . . .
General Information . . . . . . . . . . . . . . . . . . . . . . . .
Troubleshooting . . . . . . . . . . . . . . . . . . . . . . . . . . . .
Adjustments . . . . . . . . . . . . . . . . . . . . . . . . . . . . . . .
Service and Repairs . . . . . . . . . . . . . . . . . . . . . . . .
8 -8 -8 -8 -8 --
2
3
4
6
7
Chapter 9 -- Foldout Drawings
Hydraulic Schematic . . . . . . . . . . . . . . . . . . . . . . . . 9 -- 3
Electrical Schematic . . . . . . . . . . . . . . . . . . . . . . . . 9 -- 4
Electrical Circuit Diagrams . . . . . . . . . . . . . . . . . . . 9 -- 5
Wire Harness Drawings . . . . . . . . . . . . . . . . . . . . 9 -- 12
Foldout
Drawings
Groomer
Specifications . . . . . . . . . . . . . . . . . . . . . . . . . . . . . . 4 -- 2
General Information . . . . . . . . . . . . . . . . . . . . . . . . 4 -- 3
Hydraulic Schematic . . . . . . . . . . . . . . . . . . . . . . . . 4 -- 8
Hydraulic Flow Diagrams . . . . . . . . . . . . . . . . . . . 4 -- 10
Special Tools . . . . . . . . . . . . . . . . . . . . . . . . . . . . . 4 -- 18
Troubleshooting . . . . . . . . . . . . . . . . . . . . . . . . . . . 4 -- 21
Testing . . . . . . . . . . . . . . . . . . . . . . . . . . . . . . . . . . . 4 -- 26
Adjustments . . . . . . . . . . . . . . . . . . . . . . . . . . . . . . 4 -- 49
Service and Repairs . . . . . . . . . . . . . . . . . . . . . . . 4 -- 50
EATON, MEDIUM DUTY PISTON PUMP, REPAIR INFORMATION, MODEL 70160 VARIABLE DISPLACEMENT PISTON PUMP
PARKER TORQMOTORTM SERVICE PROCEDURE
(TC, TB, TE, TJ, TF, TG, TH and TL SERIES)
SAUER/DANFOSS STEERING UNIT TYPE OSPM
SERVICE MANUAL
Chapter 6 -- Chassis
Engine
Chapter 2 -- Product Records and Maintenance
Hydraulic
System
General Information . . . . . . . . . . . . . . . . . . . . . . . . 5 -- 2
Special Tools . . . . . . . . . . . . . . . . . . . . . . . . . . . . . . 5 -- 3
Turf Guardian Leak Detector
System Operation . . . . . . . . . . . . . . . . . . . . . . . . 5 -- 5
Troubleshooting . . . . . . . . . . . . . . . . . . . . . . . . . . . . 5 -- 6
Electrical System Quick Checks . . . . . . . . . . . . . 5 -- 11
Component Testing . . . . . . . . . . . . . . . . . . . . . . . . 5 -- 12
Service and Repairs . . . . . . . . . . . . . . . . . . . . . . . 5 -- 28
Electrical
System
Safety Instructions . . . . . . . . . . . . . . . . . . . . . . . . . . 1 -- 2
Jacking Instructions . . . . . . . . . . . . . . . . . . . . . . . . . 1 -- 5
Safety and Instruction Decals . . . . . . . . . . . . . . . . 1 -- 5
Chassis
Chapter 5 -- Electrical System
DPA Cutting
Units
Chapter 1 -- Safety
Product Records
and Maintenance
Safety
Table Of Contents
Greensmaster 3150
This page is intentionally blank.
Greensmaster 3150
Safety
Table of Contents
SAFETY INSTRUCTIONS . . . . . . . . . . . . . . . . . . . . . .
Before Operating . . . . . . . . . . . . . . . . . . . . . . . . . . . .
While Operating . . . . . . . . . . . . . . . . . . . . . . . . . . . .
Maintenance and Service . . . . . . . . . . . . . . . . . . . .
JACKING INSTRUCTIONS . . . . . . . . . . . . . . . . . . . . .
SAFETY AND INSTRUCTION DECALS . . . . . . . . . .
Greensmaster 3150
2
2
3
4
5
5
Page 1 -- 1
Safety
Safety
Chapter 1
Safety Instructions
The Greensmaster 3150 was tested and certified by
Toro for compliance with national and international standards as specified in the Operator’s Manual. Although
hazard control and accident prevention partially are dependent upon the design and configuration of the machine, these factors are also dependent upon the
awareness, concern and proper training of the personnel involved in the operation, transport, maintenance
and storage of the machine. Improper use or maintenance of the machine can result in injury or death.
WARNING
To reduce the potential for injury or death, comply
with the following safety instructions.
Before Operating
1. Read and understand the contents of the Operator’s
Manual before starting and operating the machine. Become familiar with all controls and know how to stop
quickly. Copies of the Operator’s Manual are available
on the internet at www.Toro.com.
2. Never allow children to operate the machine. Never
allow adults to operate it without proper instructions.
8. Do not carry passengers on the machine. Keep everyone, especially children and pets, away from the
areas of operation.
9. Gasoline (fuel) is highly flammable; handle it carefully.
3. Become familiar with the controls and know how to
stop the engine quickly.
4. Keep all shields, safety devices and decals in place.
If a shield, safety device or decal is defective, illegible or
damaged: repair or replace it before operating the machine.
5. Always wear substantial shoes. Do not operate machine while wearing sandals, tennis shoes or sneakers.
Do not wear loose fitting clothing which could get caught
in moving parts and cause personal injury.
6. Wearing safety glasses, safety shoes, long pants
and a helmet is advisable and required by some local
safety and insurance regulations.
7. Make sure work area is clear of objects which might
be picked up and thrown by the reels.
Safety
Page 1 -- 2
A. Store fuel in containers specifically designed for
this purpose.
B. Add fuel before starting the engine. Never remove the cap of the fuel tank or add fuel while the engine is running or when the engine is hot.
C. Refuel outdoors only and do not smoke while
refuelling.
D. Fill fuel tank to a level no higher than to the bottom
of fuel tank filler neck. Do not overfill.
E. Replace all fuel tanks and container caps securely.
F. If fuel is spilled, do not attempt to start the engine
but move the machine away from the area of spillage
and avoid creating any source of ignition until fuel vapors have dissipated.
G. Wipe up any spilled fuel.
Greensmaster 3150
1. Do not run the engine in a confined area without adequate ventilation. Exhaust fumes are hazardous and
could be deadly.
2. Sit on the seat when starting and operating the machine.
3. Check the safety interlock switch daily for proper operation; see Verify Interlock System Operation in Chapter 5 -- Electrical System. Replace any malfunctioning
switches before operating the machine.
4. To start the engine:
A. Sit on the seat, make sure cutting units are disengaged.
B. Verify that functional control lever is in neutral.
7. Wear appropriate clothing including substantial footwear, hard hat, safety glasses and ear protection.
8. Raise the cutting units when driving from one work
area to another.
9. Do not touch engine, muffler or exhaust pipe while
engine is running or soon after it is stopped because
these areas could be hot enough to cause burns.
10.If a cutting unit strikes a solid object or vibrates abnormally, stop immediately, turn engine off, wait for all
motion to stop and inspect for damage. A damaged reel
or bedknife must be repaired or replaced before operation is continued.
11. Before getting off the seat:
A. Make sure cutting units are disengaged.
C. Verify that parking brake is set.
B. Verify that functional control lever is in neutral.
D. Proceed to start engine.
C. Set the parking brake.
5. Using the machine demands attention. To prevent
loss of machine control:
A. Mow only in daylight or when there is good artificial light.
B. Watch for holes or other hidden hazards.
C. Do not drive close to sand traps, ditches, creeks
or other hazards.
D. Reduce speed when making sharp turns. Avoid
sudden stops and starts.
E. Before backing up, look to the rear to be sure no
one is behind the machine.
F. Watch out for traffic when near or crossing roads.
Always yield the right--of--way.
G. Apply the service brakes when going downhill to
keep forward speed slow and to maintain control of
the machine.
6. Keep hands, feet and clothing away from moving
parts and the reel discharge area. The grass baskets
must be in place during operation of the reels or thatchers for maximum safety. Shut the engine off before emptying the baskets.
Greensmaster 3150
D. Stop the engine and remove key from ignition
switch.
12.Traverse slopes carefully. Do not start or stop suddenly when traveling uphill or downhill.
13.Operator must be skilled and trained in how to drive
on hillsides. Avoid wet slopes. Failure to use caution on
slopes or hills may cause loss of control and vehicle to
tip or roll possibly resulting in personal injury or death.
14.If engine stalls or loses headway and cannot make
it to the top of a slope, do not turn machine around. Always back slowly straight down the slope.
15.DON’T TAKE AN INJURY RISK! When a person or
pet appears unexpectedly in or near the mowing area,
STOP MOWING. Careless operation, combined with
terrain angles, ricochets or improperly positioned
guards can lead to thrown object injuries. Do not resume
mowing until area is cleared.
16.Whenever machine is left unattended, make sure
cutting units are fully raised and reels are not spinning,
key is removed from ignition switch and parking brake
is set.
Page 1 -- 3
Safety
Safety
While Operating
Maintenance and Service
1. Before servicing or making adjustments to the machine, stop the engine, remove key from switch to prevent accidental starting of the engine.
2. Be sure entire machine is in good operating condition. Keep all nuts, bolts, screws and hydraulic fittings
tight.
3. Make sure all hydraulic line connectors are tight,and
all hydraulic hoses and lines are in good condition before applying pressure to the system.
9. Do not overspeed the engine by changing governor
settings. To assure safety and accuracy, have an Authorized Toro Distributor check maximum engine speed
with a tachometer. Maximum governed engine speed
should be 2850 + 50 RPM.
10.Engine must be shut off before checking oil or adding
oil to the crankcase.
11. If major repairs are ever needed or if assistance is
desired, contact your Authorized Toro Distributor.
4. Keep body and hands away from pin hole leaks or
nozzles that eject hydraulic fluid under high pressure.
Use paper or cardboard, not hands, to search for leaks.
Hydraulic fluid escaping under pressure can have sufficient force to penetrate skin and do serious damage. If
fluid is ejected into the skin it must be surgically removed
within a few hours by a doctor familiar with this form of
injury or gangrene may result.
12.At the time of manufacture, the machine conformed
to the safety standards for riding mowers. To assure optimum performance and continued safety certification of
the machine, use genuine Toro replacement parts and
accessories. Replacement parts and accessories made
by other manufacturers may result in non-conformance
with the safety standards and the warranty may be
voided.
5. Before disconnecting or performing any work on the
hydraulic system, all pressure in system must be relieved by stopping engine and lowering cutting units and
attachments to the ground.
13.When changing attachments, tires or performing
other service, use correct blocks, hoists and jacks.
Make sure machine is parked on a solid level surface
such as a concrete floor. Prior to raising the machine, remove any attachments that may interfere with the safe
and proper raising of the machine. Always chock or
block wheels. Use appropriate jack stands to support
the raised machine. If the machine is not properly supported by jack stands, the machine may move or fall,
which may result in personal injury.
6. To reduce potential fire hazard, keep the engine area
free of excessive grease, grass, leaves and accumulation of dirt. Never wash a warm engine or electrical connections with water.
7. Check all fuel lines for tightness and wear on a regular basis. Tighten or repair fuel lines as needed.
8. If the engine must be running to perform a maintenance adjustment, keep hands, feet, clothing and any
other parts of the body away from the cutting units, attachments and any moving parts. Keep everyone away.
Safety
Page 1 -- 4
Greensmaster 3150
Rear End Jacking
CAUTION
When changing attachments, tires or performing other service, use correct jacks and supports. Make sure machine is parked on a solid,
level surface such as a concrete floor. Prior to
raising machine, remove any attachments that
may interfere with the safe and proper raising of
the machine. Always chock or block wheels. Use
jack stands to support the raised machine. If the
machine is not properly supported by jack
stands, the machine may move or fall, which
may result in personal injury.
1. Apply parking brake and chock both front tires to prevent the machine from moving. Make sure that cutting
units are fully lowered.
2. Place jack securely below the rear castor fork.
3. Jack rear of machine off the ground.
4. Position appropriate jack stands under the frame to
support the machine.
Front End Jacking
1. Apply parking brake and chock rear tire to prevent
the machine from moving. Make sure that cutting units
are fully lowered.
2. Position jack securely under the frame jacking point:
A. The left side jacking point is the frame channel
under the step behind the LH front wheel.
1
Figure 1
1. ROPS support bracket
B. The right side jacking point is the ROPS support
bracket behind the RH front wheel (Fig. 1).
3. Jack front of machine off the ground.
4. Position appropriate jack stands under the frame as
close to the wheel as possible to support the machine.
Safety and Instruction Decals
Numerous safety and instruction decals are affixed to
the traction unit and the cutting units of the Greensmaster 3150. If any decal becomes illegible or damaged, install a new decal. Part numbers are listed in your Parts
Catalog and Operator’s Manual. Order replacement decals from your Authorized Toro Distributor.
Greensmaster 3150
Page 1 -- 5
Safety
Safety
Jacking Instructions
This page is intentionally blank.
Safety
Page 1 -- 6
Greensmaster 3150
Chapter 2
Product Records
and Maintenance
Product Records and Maintenance
Table of Contents
PRODUCT RECORDS . . . . . . . . . . . . . . . . . . . . . . . . .
MAINTENANCE . . . . . . . . . . . . . . . . . . . . . . . . . . . . . .
EQUIVALENTS AND CONVERSIONS . . . . . . . . . . .
Decimal and Millimeter Equivalents . . . . . . . . . . . .
U.S. to Metric Conversions . . . . . . . . . . . . . . . . . . .
TORQUE SPECIFICATIONS . . . . . . . . . . . . . . . . . . .
Fastener Identification . . . . . . . . . . . . . . . . . . . . . . .
Using a Torque Wrench with an Offset Wrench . .
Standard Torque for Dry, Zinc Plated and
Steel Fasteners (Inch Series). . . . . . . . . . . . . . . .
Standard Torque for Dry, Zinc Plated and
Steel Fasteners (Metric Fasteners). . . . . . . . . . .
Other Torque Specifications . . . . . . . . . . . . . . . . . .
Conversion Factors . . . . . . . . . . . . . . . . . . . . . . . . .
1
1
2
2
2
3
3
3
4
5
6
6
Product Records
Insert a copy of the Operator’s Manual and Parts Catalog for your Greensmaster 3150 at the end of this chapter. Additionally, if any optional equipment or
accessories have been installed to your machine, insert
the Installation Instructions, Operator’s Manuals and
Parts Catalogs for those options at the end of this chapter.
Maintenance
Maintenance procedures and recommended service intervals for the Greensmaster 3150 are covered in the
Traction Unit Operator’s Manual. Maintenance procedures and recommended service intervals for the
Greensmaster Cutting Units are covered in the Cutting
Unit Operator’s Manual. Refer to these publications
when performing regular equipment maintenance. Refer to the Engine Operator’s Manual for additional engine specific maintenance procedures.
Greensmaster 3150
Page 2 -- 1
Product Records and Maintenance
Equivalents and Conversions
0.09375
Product Records and Maintenance
Page 2 -- 2
Greensmaster 3150
Recommended fastener torque values are listed in the
following tables. For critical applications, as determined
by Toro, either the recommended torque or a torque that
is unique to the application is clearly identified and specified in this Service Manual.
These torque specifications for the installation and tightening of fasteners shall apply to all fasteners which do
not have a specific requirement identified in this Service
Manual. The following factors shall be considered when
applying torque: cleanliness of the fastener, use of a
thread sealant (e.g. Loctite), degree of lubrication on the
fastener, presence of a prevailing torque feature, hardness of the surface underneath the fastener’s head or
similar condition which affects the installation.
As noted in the following tables, torque values should be
reduced by 25% for lubricated fasteners to achieve
the similar stress as a dry fastener. Torque values may
also have to be reduced when the fastener is threaded
into aluminum or brass. The specific torque value
should be determined based on the aluminum or brass
material strength, fastener size, length of thread engagement, etc.
The standard method of verifying torque shall be performed by marking a line on the fastener (head or nut)
and mating part, then back off fastener 1/4 of a turn.
Measure the torque required to tighten the fastener until
the lines match up.
Fastener Identification
Grade 1
Grade 5
Grade 8
Class 8.8
Inch Series Bolts and Screws
Class 10.9
Metric Bolts and Screws
Figure 1
Figure 2
Using a Torque Wrench with an Offset Wrench
Use of an offset wrench (e.g. crowfoot wrench) will affect
torque wrench calibration due to the effective change of
torque wrench length. When using a torque wrench with
an offset wrench, multiply the listed torque recommendation by the calculated torque conversion factor (Fig.
3) to determine proper tightening torque. Tightening
torque when using a torque wrench with an offset
wrench will be lower than the listed torque recommendation.
If the listed torque recommendation for a fastener is
from 76 to 94 ft--lb, the proper torque when using this
torque wrench with an offset wrench would be from 72
to 89 ft--lb.
Offset wrench
Example: The measured effective length of the torque
wrench (distance from the center of the handle to the
center of the square drive) is 18”.
The measured effective length of the torque wrench with
the offset wrench installed (distance from the center of
the handle to the center of the offset wrench) is 19”.
The calculated torque conversion factor for this torque
wrench with this offset wrench would be 18 / 19 = 0.947.
Greensmaster 3150
Page 2 -- 3
(effective length of
torque wrench)
A
Torque wrench
B
(effective length of torque
wrench + offset wrench)
TORQUE CONVERSION FACTOR = A / B
Figure 3
Product Records and Maintenance
Product Records
and Maintenance
Torque Specifications
Standard Torque for Dry, Zinc Plated and Steel Fasteners (Inch Series)
Thread Size
# 6 -- 32 UNC
Grade 1, 5, &
8 with Thin
Height Nuts
SAE Grade 1 Bolts, Screws, Studs, &
Sems with Regular Height Nuts
(SAE J995 Grade 2 or Stronger Nuts)
in--lb
in--lb
N--cm
10 + 2
13 + 2
147 + 23
# 6 -- 40 UNF
# 8 -- 32 UNC
13 + 2
25 + 5
282 + 30
# 8 -- 36 UNF
# 10 -- 24 UNC
18 + 2
30 + 5
339 + 56
# 10 -- 32 UNF
SAE Grade 5 Bolts, Screws, Studs, &
Sems with Regular Height Nuts
(SAE J995 Grade 2 or Stronger Nuts)
SAE Grade 8 Bolts, Screws, Studs, &
Sems with Regular Height Nuts
(SAE J995 Grade 5 or Stronger Nuts)
in--lb
N--cm
in--lb
N--cm
15 + 2
170 + 20
23 + 2
260 + 20
17 + 2
190 + 20
25 + 2
280 + 20
29 + 3
330 + 30
41 + 4
460 + 45
31 + 3
350 + 30
43 + 4
485 + 45
42 + 4
475 + 45
60 + 6
675 + 70
48 + 4
540 + 45
68 + 6
765 + 70
1/4 -- 20 UNC
48 + 7
53 + 7
599 + 79
100 + 10
1125 + 100
140 + 15
1580 + 170
1/4 -- 28 UNF
53 + 7
65 + 10
734 + 113
115 + 10
1300 + 100
160 + 15
1800 + 170
5/16 -- 18 UNC
115 + 15
105 + 17
1186 + 169
200 + 25
2250 + 280
300 + 30
3390 + 340
5/16 -- 24 UNF
138 + 17
128 + 17
1446 + 192
225 + 25
2540 + 280
325 + 30
3670 + 340
ft--lb
ft--lb
N--m
ft--lb
N--m
ft--lb
N--m
3/8 -- 16 UNC
16 + 2
16 + 2
22 + 3
30 + 3
41 + 4
43 + 4
58 + 5
3/8 -- 24 UNF
17 + 2
18 + 2
24 + 3
35 + 3
47 + 4
50 + 4
68 + 5
7/16 -- 14 UNC
27 + 3
27 + 3
37 + 4
50 + 5
68 + 7
70 + 7
95 + 9
7/16 -- 20 UNF
29 + 3
29 + 3
39 + 4
55 + 5
75 + 7
77 + 7
104 + 9
1/2 -- 13 UNC
30 + 3
48 + 7
65 + 9
75 + 8
102 + 11
105 + 10
142 + 14
1/2 -- 20 UNF
32 + 3
53 + 7
72 + 9
85 + 8
115 + 11
120 + 10
163 + 14
5/8 -- 11 UNC
65 + 10
88 + 12
119 + 16
150 + 15
203 + 20
210 + 20
285 + 27
5/8 -- 18 UNF
75 + 10
95 + 15
129 + 20
170 + 15
230 + 20
240 + 20
325 + 27
3/4 -- 10 UNC
93 + 12
140 + 20
190 + 27
265 + 25
359 + 34
375 + 35
508 + 47
3/4 -- 16 UNF
115 + 15
165 + 25
224 + 34
300 + 25
407 + 34
420 + 35
569 + 47
7/8 -- 9 UNC
140 + 20
225 + 25
305 + 34
430 + 45
583 + 61
600 + 60
813 + 81
7/8 -- 14 UNF
155 + 25
260 + 30
353 + 41
475 + 45
644 + 61
660 + 60
895 + 81
NOTE: Reduce torque values listed in the table above
by 25% for lubricated fasteners. Lubricated fasteners
are defined as threads coated with a lubricant such as
oil, graphite or thread sealant such as Loctite.
NOTE: Torque values may have to be reduced when
installing fasteners into threaded aluminum or brass.
The specific torque value should be determined based
on the fastener size, the aluminum or base material
strength, length of thread engagement, etc.
Product Records and Maintenance
NOTE: The nominal torque values listed above for
Grade 5 and 8 fasteners are based on 75% of the minimum proof load specified in SAE J429. The tolerance is
approximately + 10% of the nominal torque value. Thin
height nuts include jam nuts.
Page 2 -- 4
Greensmaster 3150
Standard Torque for Dry, Zinc Plated and Steel Fasteners (Metric Fasteners)
Class 8.8 Bolts, Screws and Studs with
Regular Height Nuts
(Class 8 or Stronger Nuts)
Class 10.9 Bolts, Screws and Studs with
Regular Height Nuts
(Class 10 or Stronger Nuts)
M5 X 0.8
57 + 5 in--lb
640 + 60 N--cm
78 + 7 in--lb
885 + 80 N--cm
M6 X 1.0
96 + 9 in--lb
1018 + 100 N--cm
133 + 13 in--lb
1500 + 150 N--cm
M8 X 1.25
19 + 2 ft--lb
26 + 3 N--m
27 + 2 ft--lb
36 + 3 N--m
M10 X 1.5
38 + 4 ft--lb
52 + 5 N--m
53 + 5 ft--lb
72 + 7 N--m
M12 X 1.75
66 + 7 ft--lb
90 + 10 N--m
92 + 9 ft--lb
125 + 12 N--m
M16 X 2.0
166 + 15 ft--lb
225 + 20 N--m
229 + 22 ft--lb
310 + 30 N--m
M20 X 2.5
325 + 33 ft--lb
440 + 45 N--m
450 + 37 ft--lb
610 + 50 N--m
NOTE: Reduce torque values listed in the table above
by 25% for lubricated fasteners. Lubricated fasteners
are defined as threads coated with a lubricant such as
oil, graphite or thread sealant such as Loctite.
NOTE: The nominal torque values listed above are
based on 75% of the minimum proof load specified in
SAE J1199. The tolerance is approximately + 10% of the
nominal torque value.
NOTE: Torque values may have to be reduced when
installing fasteners into threaded aluminum or brass.
The specific torque value should be determined based
on the fastener size, the aluminum or base material
strength, length of thread engagement, etc.
Greensmaster 3150
Page 2 -- 5
Product Records and Maintenance
Product Records
and Maintenance
Thread Size
Other Torque Specifications
SAE Grade 8 Steel Set Screws
Wheel Bolts and Lug Nuts
Recommended Torque
Thread Size
Thread Size
Square Head
Hex Socket
1/4 -- 20 UNC
140 + 20 in--lb
73 + 12 in--lb
5/16 -- 18 UNC
215 + 35 in--lb
145 + 20 in--lb
3/8 -- 16 UNC
35 + 10 ft--lb
18 + 3 ft--lb
1/2 -- 13 UNC
75 + 15 ft--lb
50 + 10 ft--lb
Recommended Torque*
7/16 -- 20 UNF
Grade 5
65 + 10 ft--lb
88 + 14 N--m
1/2 -- 20 UNF
Grade 5
80 + 10 ft--lb
108 + 14 N--m
M12 X 1.25
Class 8.8
80 + 10 ft--lb
108 + 14 N--m
M12 X 1.5
Class 8.8
80 + 10 ft--lb
108 + 14 N--m
* For steel wheels and non--lubricated fasteners.
Thread Cutting Screws
(Zinc Plated Steel)
Type 1, Type 23 or Type F
Thread Size
Baseline Torque*
No. 6 -- 32 UNC
20 + 5 in--lb
No. 8 -- 32 UNC
Thread Cutting Screws
(Zinc Plated Steel)
Thread
Size
Threads per Inch
Baseline Torque**
Type A
Type B
No. 6
18
20
20 + 5 in--lb
30 + 5 in--lb
No. 8
15
18
30 + 5 in--lb
No. 10 -- 24 UNC
38 + 7 in--lb
No. 10
12
16
38 + 7 in--lb
1/4 -- 20 UNC
85 + 15 in--lb
No. 12
11
14
85 + 15 in--lb
5/16 -- 18 UNC
110 + 20 in--lb
3/8 -- 16 UNC
200 + 100 in--lb
** Hole size, material strength, material thickness & finish must be considered when determining specific
torque values. All torque values are based on non--lubricated fasteners.
Conversion Factors
in--lb X 11.2985 = N--cm
ft--lb X 1.3558 = N--m
Product Records and Maintenance
N--cm X 0.08851 = in--lb
N--m X 0.7376 = ft--lb
Page 2 -- 6
Greensmaster 3150
Chapter 3
Engine
Table of Contents
Greensmaster 3150
Page 3 -- 1
Engine
GENERAL INFORMATION . . . . . . . . . . . . . . . . . . . . . 2
Operator’s Manual . . . . . . . . . . . . . . . . . . . . . . . . . . 2
SPECIFICATIONS . . . . . . . . . . . . . . . . . . . . . . . . . . . . 3
SERVICE AND REPAIRS . . . . . . . . . . . . . . . . . . . . . . 4
Fuel Tank . . . . . . . . . . . . . . . . . . . . . . . . . . . . . . . . . . 4
Engine . . . . . . . . . . . . . . . . . . . . . . . . . . . . . . . . . . . . . 6
Engine Removal . . . . . . . . . . . . . . . . . . . . . . . . . . . 7
Engine Installation . . . . . . . . . . . . . . . . . . . . . . . . . 7
Fuel Evaporative Control System . . . . . . . . . . . . . 10
BRIGGS & STRATTON VANGUARD V--TWIN OHV REPAIR MANUAL
Engine
General Information
This Chapter gives information about specifications,
maintenance, troubleshooting, testing and repair of the
engine used in the Greensmaster 3150.
Most repairs and adjustments require tools which are
commonly available in many service shops. Special
tools are described in the Briggs & Stratton Vanguard
V-Twin OHV Repair Manual. The use of some specialized test equipment is explained. However, the cost of
the test equipment and the specialized nature of some
repairs may dictate that the work be done at an engine
repair facility.
Service and repair parts for Briggs & Stratton Vanguard
V-Twin OHV engines are supplied through your local local Toro distributor. If no parts list is available, be sure to
provide your distributor with the Toro model and serial
number along with the engine model and serial number.
Operator’s Manual
The Traction Unit Operator’s Manual provides information regarding the operation, general maintenance and
maintenance intervals for your Greensmaster 3150 machine. Refer to the Operator’s Manual for additional information when servicing the machine.
Engine
Page 3 -- 2
Greensmaster 3150
Specifications
Item
Description
Make / Designation
Briggs and Stratton, 4--cycle, V--Twin Cylinder,
OHV, Air Cooled, Gasoline Engine -- Model 356447
Bore x Stroke
2.83” x 2.76” (72 mm x 70 mm)
34.8 in3 (570 cc)
Total Displacement
Mechanical Governor
Carburetor
Float Feed
Fuel Pump
Pulsating Crankcase Vacuum
Fuel
Unleaded, regular grade gasoline
Fuel Tank Capacity
7.0 U.S. gallons (26.5 liters)
Low Idle (no load)
1650 + 100 RPM
High Idle (no load)
2850 + 50 RPM
Lubrication System
Pressure Lubrication, Gear Driven Geroter Oil Pump
Engine Oil
See Operator’s Manual
Crankcase Oil Capacity
1.75 U.S. quarts (1.65 liters) with new filter
Ignition System
Flywheel magneto, twin electronic armatures
Spark Plugs
Champion RC 14YC (or equivalent)
Spark Plug Gap
0.030” (0.76 mm)
Alternator
16 Amp
Dry Weight (approximate)
Greensmaster 3150
84 lb (38 kg)
Page 3 -- 3
Engine
Engine
Governor
Service and Repairs
Fuel Tank
13
4
20
21
22
5
2
14
2
1
18
3
12
15
6
16
17
16
7
6
8
7
9
9
10
6
11
7
18
8
RIGHT
FRONT
19
Antiseize
Lubricant
30 to 60 in--lb
(3.4 to 6.7 N--m)
Figure 1
1.
2.
3.
4.
5.
6.
7.
8.
Fuel filter
Hose clamp
Fuel hose (filter to engine)
Fuel cap
Fuel tank
Grommet (4 used)
Flat washer (4 used)
Hose support clamp
Engine
9.
10.
11.
12.
13.
14.
15.
Cap screw (4 used)
Cap screw
Hose support clamp
Vehicle frame
Fuel tank vent fitting
Fuel hose (shut--off valve to filter)
Fuel shut--off valve
Page 3 -- 4
16.
17.
18.
19.
20.
21.
22.
Hose clamp
Fuel hose (tank to shut--off valve)
Hose clamp
Spacer
Hose clamp
Fuel vent hose (fitting to cannister)
Grommet
Greensmaster 3150
Fuel Tank Removal (Fig. 1)
Fuel Tank installation (Fig. 1)
1. Park machine on a level surface, lower cutting units,
stop the engine, engage parking brake and remove the
key from the ignition switch.
IMPORTANT: After fuel tank is installed, make sure
that clearance between hydraulic reservoir and fuel
tank if from 0.125” to 0.375” (3.2 to 9.5 mm).
1. Position fuel tank on the vehicle frame.
CAUTION
The muffler and exhaust manifold may be hot.
Avoid possible burns, allow exhaust system to
cool before working on the engine.
B. Secure the fuel tank to the vehicle frame with four
(4) flat washers (item 7), grommets (item 6) and cap
screws (item 9). Make sure the grommets are
between the flat washers and the frame. Also, make
sure that fuel hose support clamps (item 8) are positioned correctly.
DANGER
Gasoline is flammable. Use caution when storing
or handling it. Do not smoke while filling the fuel
tank. Do not fill fuel tank while engine is running
or in an enclosed area. Always fill fuel tank outside and wipe up any spilled fuel before starting
the engine. Store fuel in a clean, safety--approved container and keep the cap in place. Use
gasoline for the engine only; not for any other
purpose.
C. Torque cap screws from 30 to 60 in--lb (3.4 to 6.7
N--m).
2. Connect vent hose (item 21) to fuel tank vent fitting
(item 13) on top of tank and secure with hose clamp.
Make sure that hose is not kinked or obstructed.
3. Connect fuel hose (item 14) to the fuel shut--off valve
(item 15) and secure with hose clamp.
4. Open fuel shut--off valve and fill fuel tank with fuel.
Check all fuel hoses and tank for leaks.
2. Drain fuel tank as follows:
A. Close fuel shut--off valve (item 15).
B. Disconnect fuel hose (item 14) at the fuel shut--off
valve and drain any fuel trapped in the fuel filter and
fuel hose into a suitable container.
C. Install one end of a spare length of fuel hose to the
fuel shut--off valve and place the other end of the
hose into a suitable container for draining the tank.
D. Drain fuel tank completely by opening the fuel
shut off valve.
E. Remove the spare length of fuel hose from the
fuel shut--off valve.
3. Disconnect vent hose (item 21) from fuel tank vent fitting (item 13) on top of tank.
4. Remove four (4) cap screws (item 9), grommets
(item 6) and flat washers (item 7) securing the fuel tank
to the vehicle frame. Remove the fuel tank from the vehicle frame.
Greensmaster 3150
Page 3 -- 5
Engine
Engine
A. Apply antiseize lubricant to the threads of the four
(4) cap screws (item 9).
Engine
24
1
1
2
3
39
40
29
170 to 200 in--lb
(20 to 22 N--m)
30
2
22
4
6
21
29
31
16
11
7
25
24 16
8
17
32
27
25 to 38 ft--lb
(34 to 51 N--m)
23
11
5
22
27
10
28
20
18 to 23 ft--lb
(25 to 31 N--m)
28
19
27
33
34
55
42
50
49
45
46
56
53
52
51
54
46
45
44
12
26
37
43
29
11
38
36 35 34
13
47
15
48
14
9
12
18
43
41
42
Antiseize
Lubricant
Loctite #242
90 to 110 in--lb
(10.2 to 12.4 N--m)
Figure 2
1.
2.
3.
4.
5.
6.
7.
8.
9.
10.
11.
12.
13.
14.
15.
16.
17.
18.
19.
Cap screw (3 used)
Flat washer (3 used)
Spacer (3 used)
Exhaust manifold
Regulator shield
Muffler clamp
Flange nut (3 used)
Engine assembly
Muffler
Muffler shield
Ground wires
Flat washer (8 used)
Muffler mount
Cap screw (4 used)
Flat washer (4 used)
Hex flange nut (10 used)
Lock washer
Cap screw (4 used)
Pump adapter
Engine
20.
21.
22.
23.
24.
25.
26.
27.
28.
29.
30.
31.
32.
33.
34.
35.
36.
37.
38.
Socket head screw (2 used)
Engine mount plate
Lock washer (4 used)
Cap screw (2 used)
Engine mount (3 used)
Cap screw (6 used)
Lock nut (4 used)
Spring washer (3 used)
Washer head screw (2 used)
Engine wire harness
Flange head screw (4 used)
Gasket (2 used)
Battery cable
Purge hose assy (to intake manifold)
Hose clamp (2 used)
Barbed fitting
Hose clamp
Hose (to air cleaner base)
Hex nut
Page 3 -- 6
39.
40.
41.
42.
43.
44.
45.
46.
47.
48.
49.
50.
51.
52.
53.
54.
55.
56.
Cap screw (2 used)
Spring bracket
Engine hub
Lock nut (4 used)
Coupling spacer (4 used)
Rubber coupling
Flat washer (4 used)
Cap screw (4 used)
Square head set screw (2 used)
Key
Cap screw
Spacer
Hardened washer (2 used)
Lock washer (2 used)
Cap screw (2 used)
Pump hub
Piston pump assembly
Key
Greensmaster 3150
Engine Removal (Fig. 2)
1. Park machine on a level surface, lower cutting units,
stop engine, engage parking brake and remove key
from the ignition switch.
11. Carefully move the engine away from the piston
pump until the crankshaft clears the engine hub. Remove the engine from the machine. Locate and retrieve
key (item 48) from crankshaft.
2
2. Disconnect negative (--) battery cable from battery.
3
CAUTION
4
1
5
The muffler and exhaust manifold may be hot.
Avoid possible burns, allow exhaust system to
cool before working on the engine.
6
Engine
7
DANGER
Gasoline is flammable. Use caution when storing
or handling it. Do not smoke while filling the fuel
tank. Do not fill fuel tank while engine is running
or in an enclosed area. Always fill fuel tank outside and wipe up any spilled fuel before starting
the engine. Store fuel in a clean, safety--approved container and keep the cap in place. Use
gasoline for the engine only; not for any other
purpose.
Figure 3
1.
2.
3.
4.
5. Hose clamp
6. Spacer screw
7. Washer
Engine assembly
Fuel supply hose
Cap screw
Support clamp
25 to 38 ft--lb
(34 to 51 N--m)
3. Close fuel shut--off valve on fuel tank.
4. Remove the fuel hose support clamp and disconnect
fuel hose at the fuel pump (Fig. 3). Drain any fuel trapped
in the fuel filter and fuel hose into a suitable container.
4
6
6. Disconnect the engine wiring harness (item 29), the
choke control cable, the throttle control cable and the
ground wires (item 11) at the engine.
7
1
7. Carefully disconnect extension spring on piston
pump control assembly from spring bracket that is attached to engine mount plate (Fig. 4).
9. Support the piston pump assembly and remove the
two (2) cap screws (item 53), lock washers (item 52) and
hardened washers (item 51) securing the pump to the
pump adapter (item 19). Do Not disconnect the hydraulic hoses or neutral control linkage from the pump.
10.Support the engine assembly and remove the three
(3) engine mount flange nuts (item 7), cap screws (item
1), flat washers (item 2) and spacers (item 3).
Greensmaster 3150
2
5
5. Disconnect the fuel evaporative control system
hoses from engine (see Fuel Evaporative Control System in this section).
8. Loosen the two (2) set screws (item 47) securing the
engine hub (item 41) to the engine shaft.
3
Figure 4
1.
2.
3.
4.
Engine mount plate
Spring bracket
Lock washer (2 used)
Cap screw (2 used)
5. Dampener hose
6. Extension spring
7. Piston pump assembly
Engine Installation (Fig. 2)
1. Make sure that all parts removed from the engine
during maintenance or rebuilding are installed to the engine.
2. Apply antiseize lubricant to bore of engine hub.
Place key (item 48) into slot on the engine crankshaft.
Page 3 -- 7
Engine
IMPORTANT: Make sure to not damage engine, fuel
hose, hydraulic hoses, electrical harness, control
cables or other parts while installing the engine.
Make sure engine hub is in position before installing
the engine mount cap screws.
3. Align the engine hub (item 41) with the engine shaft
and key (item 48). Slide crankshaft into hub and move
engine until the engine mount plate (item 21) is aligned
with the three (3) engine mounts (item 24). Take care to
not damage the rubber coupling (item 44) during engine
installation.
4. Install the three (3) engine mount cap screws (item
1), flat washers (item 2), spacers (item 3) and flange
nuts (item 7).
5. Position the piston pump assembly to the pump
adapter (item 19) and secure with two (2) cap screws
(item 53) lock washers (item 52) and hardened washers
(item 51).
6. Position engine hub on crankshaft to best align the
rubber coupling.
7. Apply Loctite #242 (or equivalent) to threads of engine hub set screws (item 47). Secure hub to crankshaft
with two (2) set screws. Torque set screws from 90 to
110 in--lb (10.2 to 12.4 N--m).
Engine
8. Carefully connect extension spring on piston pump
control assembly to spring bracket that is attached to engine mount plate (Fig. 4).
9. Connect the engine wiring harness (item 29) and
ground wires (item 11) to the engine.
10.Connect and adjust the choke and throttle control
cables.
11. Connect the fuel evaporative control system hoses
to engine (see Fuel Evaporative Control System in this
section).
12.Connect fuel hose to the fuel pump and secure with
hose clamp. Install the fuel hose support clamp.
13.Secure negative (--) battery cable to battery.
14.Open fuel shut--off valve on fuel tank. Check fuel
hose for leaks.
15.Check engine oil level and adjust if necessary.
16.Start the engine and check for proper engine operation.
Page 3 -- 8
Greensmaster 3150
Engine
This page is intentionally blank.
Greensmaster 3150
Page 3 -- 9
Engine
Fuel Evaporative Control System
CARBON
CANNISTER
CHECK
VALVE
TO INTAKE
MANIFOLD
FUEL
TANK
FRESH AIR
FILTER
CHECK
VALVE
TO AIR
CLEANER
ENGINE
Figure 5
Greensmaster 3150 machines are equipped with a fuel
evaporative control system designed to collect and
store evaporative emissions from the fuel tank. The
evaporate control system uses a carbon cannister to
collect these evaporative emissions. Fuel vapors from
the fuel tank are vented to the canister. Vapors from the
canister are consumed when the engine is running.
The carbon canister is mounted on the hydraulic leak
detector tank (Fig. 6). The evaporative system includes
two (2) connections to the engine: one to the intake manifold and the second to the air cleaner base. Venting
hose assemblies (purge hose assembly and t--hose assembly) include check valves in two (2) locations as
shown in Figure 5.
The fuel tank on Greensmaster 3150 machines uses a
non--vented fuel cap. To connect the tank to the evaporative control system, a fuel tank vent fitting is positioned
in the top of the tank that allows tank venting through the
carbon cannister.
NOTE: The purge hose assembly (item 5 in Fig. 6) and
tee hose assembly (item 10 in Fig. 6) both include a
check valve as a component of the hose assembly. The
check valve is not available as a separate part. To ensure proper operation of check valves, do not attempt to
remove them from the hose assembly. If either of these
hose assemblies is removed, make sure that they are
correctly installed to ensure proper operation of the
evaporative control system.
NOTE: If there is restriction in the carbon cannister or
the fuel tank vent fitting, the fuel tank may distort due to
venting issues. If the fuel tank returns to it’s normal
shape when the fuel cap is removed, restriction in the
evaporative control system is likely.
Engine
Page 3 -- 10
Greensmaster 3150
Disassembly (Fig. 6)
2
6
Gasoline is flammable. Use caution when storing
or handling it. Wipe up any spilled fuel before
starting the engine.
1
7
4
5
1. Inspect carbon cannister and attached hoses for
damage or obvious leaks. A damaged or leaking cannister should be replaced.
9
4
2. Remove components as needed using Figure 6 as
a guide.
A. If either purge hose assembly (item 5) or T--hose
assembly (item 10) is to be removed, label ends of
hose for assembly purposes. Both of these assemblies include a check valve so direction of installation
is important for correct operation of the evaporative
control system. The check valve is not available as a
separate part so hose assembly replacement is necessary if the check valve or hose is faulty. To ensure
proper operation of check valves, do not attempt to
remove them from the hose assembly.
8
8
12
10
4
4
Engine
DANGER
3
13
11
Figure 6
1.
2.
3.
4.
5.
6.
7.
Leak detector tank
Carbon cannister
Cable tie (2 used)
Hose clamp
Purge hose assembly
Hose clamp
Hose (to fuel tank vent)
8.
9.
10.
11.
12.
13.
Hose clamp
Hose (to t--fitting)
T--hose assembly
Fresh air filter
Hose (to air cleaner)
Barbed fitting
Assembly
1. Install all removed components using Figure 6 as a
guide.
A. If either purge hose assembly (item 5) or T--hose
assembly (item 10) was removed, make sure that
installation is correct.
B. Make sure that fuel hoses are not kinked after
installation. Also, secure all hoses with hose clamps.
Greensmaster 3150
Page 3 -- 11
Engine
This page is intentionally blank.
Engine
Page 3 -- 12
Greensmaster 3150
Chapter 4
Hydraulic System
SPECIFICATIONS . . . . . . . . . . . . . . . . . . . . . . . . . . . . 2
GENERAL INFORMATION . . . . . . . . . . . . . . . . . . . . . 3
Operator’s Manual . . . . . . . . . . . . . . . . . . . . . . . . . . . 3
Check Hydraulic System Fluid . . . . . . . . . . . . . . . . . 3
Towing Traction Unit . . . . . . . . . . . . . . . . . . . . . . . . . 4
Hydraulic Hoses . . . . . . . . . . . . . . . . . . . . . . . . . . . . . 4
Hydraulic Hose and Tube Installation (O--Ring
Face Seal Fitting) . . . . . . . . . . . . . . . . . . . . . . . . . . 5
Hydraulic Fitting Installation (SAE Straight Thread
O--Ring Fitting into Component Port) . . . . . . . . . 6
HYDRAULIC SCHEMATIC . . . . . . . . . . . . . . . . . . . . . 8
HYDRAULIC FLOW DIAGRAMS . . . . . . . . . . . . . . . 10
Traction Forward and Reverse . . . . . . . . . . . . . . . . 10
Raise and Lower Cutting Units . . . . . . . . . . . . . . . . 12
Mow and Backlap . . . . . . . . . . . . . . . . . . . . . . . . . . . 14
Right and Left Turn . . . . . . . . . . . . . . . . . . . . . . . . . 16
SPECIAL TOOLS . . . . . . . . . . . . . . . . . . . . . . . . . . . . 18
TROUBLESHOOTING . . . . . . . . . . . . . . . . . . . . . . . . 21
General Hydraulic System Problems . . . . . . . . . . 21
Traction Circuit Problems . . . . . . . . . . . . . . . . . . . 22
Mow Circuit Problems . . . . . . . . . . . . . . . . . . . . . . 23
Lift/Lower Circuit Problems . . . . . . . . . . . . . . . . . . 24
Steering Circuit Problems . . . . . . . . . . . . . . . . . . . 25
TESTING . . . . . . . . . . . . . . . . . . . . . . . . . . . . . . . . . . . 26
Precautions for Hydraulic Testing . . . . . . . . . . . . . 26
Charge Relief Valve Pressure Test . . . . . . . . . . . . 28
Wheel Motor Efficiency Test . . . . . . . . . . . . . . . . . . 30
Piston (Traction) Pump Flow Test . . . . . . . . . . . . . 32
Gear Pump (Rear Section) Flow Test . . . . . . . . . . 34
Implement Relief Valve Pressure Test . . . . . . . . . 36
Lower Cutting Units Relief Valve (R2)
Pressure Test . . . . . . . . . . . . . . . . . . . . . . . . . . . . . 38
Gear Pump (Front Section) Flow Test . . . . . . . . . 40
Mow Circuit Relief Valve (S1R1) Pressure Test . 42
Reel Motor Case Drain Flow Test . . . . . . . . . . . . . 44
Steering Control Valve Test . . . . . . . . . . . . . . . . . . 46
ADJUSTMENTS . . . . . . . . . . . . . . . . . . . . . . . . . . . . . 49
Adjust Manifold Relief Valves (R2) . . . . . . . . . . . . 49
Greensmaster 3150
SERVICE AND REPAIRS . . . . . . . . . . . . . . . . . . . . . 50
General Precautions for Removing and
Installing Hydraulic System Components . . . . . 50
Flush Hydraulic System . . . . . . . . . . . . . . . . . . . . . . 51
Filtering Closed--Loop Traction Circuit . . . . . . . . . 52
Hydraulic System Start--up . . . . . . . . . . . . . . . . . . . 53
Gear Pump . . . . . . . . . . . . . . . . . . . . . . . . . . . . . . . . 54
Gear Pump Service . . . . . . . . . . . . . . . . . . . . . . . . . 56
Piston (Traction) Pump . . . . . . . . . . . . . . . . . . . . . . 60
Piston (Traction) Pump Service . . . . . . . . . . . . . . . 64
Piston Pump Crush Ring Replacement . . . . . . . . 66
Front Wheel Motors . . . . . . . . . . . . . . . . . . . . . . . . . 68
Rear Wheel Motor (Optional 3WD) . . . . . . . . . . . . 70
Wheel Motor Service . . . . . . . . . . . . . . . . . . . . . . . . 72
Cutting Reel Motors . . . . . . . . . . . . . . . . . . . . . . . . . 74
Cutting Reel Motor Service . . . . . . . . . . . . . . . . . . . 78
Front Lift Cylinders . . . . . . . . . . . . . . . . . . . . . . . . . . 82
Center Lift Cylinder . . . . . . . . . . . . . . . . . . . . . . . . . 84
Lift Cylinder Service . . . . . . . . . . . . . . . . . . . . . . . . . 86
Hydraulic Manifold . . . . . . . . . . . . . . . . . . . . . . . . . . 88
Hydraulic Manifold Service . . . . . . . . . . . . . . . . . . . 90
Steering Control Valve . . . . . . . . . . . . . . . . . . . . . . . 94
Steering Control Valve Service . . . . . . . . . . . . . . . 96
Steering Cylinder . . . . . . . . . . . . . . . . . . . . . . . . . . . 98
Steering Cylinder Service . . . . . . . . . . . . . . . . . . . 100
Leak Detector . . . . . . . . . . . . . . . . . . . . . . . . . . . . . 102
Hydraulic Reservoir . . . . . . . . . . . . . . . . . . . . . . . . 106
EATON, MEDIUM DUTY PISTON PUMP, REPAIR
INFORMATION, MODEL 70160 VARIABLE DISPLACEMENT PISTON PUMP
PARKER TORQMOTORTM SERVICE PROCEDURE
(TC, TB, TE, TJ, TF, TG, TH and TL SERIES)
SAUER/DANFOSS STEERING UNIT TYPE OSPM
SERVICE MANUAL
Page 4 -- 1
Hydraulic System
Hydraulic
System
Table of Contents
Specifications
Item
Description
Piston (Traction) Pump
Maximum Pump Displacement (per revolution)
Charge Pressure
Variable displacement piston pump
1.24 in3 (20.3 cc)
110 to 150 PSI (8 to 10 bar)
Gear Pump
Front Section (cutting reels) Displacement (per revolution)
Rear Section (steering/lift) Displacement (per revolution)
2 section, positive displacement gear pump
0.58 in3 (9.5 cc)
0.33 in3 (5.4 cc)
Front Wheel Motors
Displacement (per revolution)
Orbital rotor motor
10.3 in3 (169 cc)
Rear Wheel Motor (Optional 3WD Kit)
Displacement (per revolution)
Orbital rotor motor
20.6 in3 (337 cc)
Cutting Reel Motor
Displacement (per revolution)
Gear motor
0.73 in3 (12 cc)
Steering Control Valve
Distributor valve with rotary meter
Implement (Steering and Lift) Relief Pressure
1160 PSI (80 bar) above Charge Pressure
Hydraulic Manifold Relief Valves
Mow Circuit (S1R1)
Cutting Unit Lower (R2)
3000 PSI (207 bar)
400 PSI (28 bar) above Charge Pressure
Hydraulic Filter
Spin--on cartridge type
Hydraulic Oil
See Operator’s Manual
Hydraulic Reservoir
Hydraulic System
Reservoir (with leak detector) capacity 8.5 gal. U.S. (32.2 L)
Page 4 -- 2
Greensmaster 3150
General Information
Operator’s Manual
The Operator’s Manual provides information regarding
the operation, general maintenance and maintenance
intervals for your Greensmaster 3150. Refer to that publication for additional information when servicing the
machine.
Check Hydraulic System Fluid
The hydraulic system on the Greensmaster 3150 is designed to operate on high quality hydraulic fluid. Refer
to the Operator’s Manual for hydraulic fluid recommendations.
2
Hydraulic
System
IMPORTANT: Check level of hydraulic fluid before
engine is first started and daily thereafter. Do not
overfill hydraulic reservoir.
NOTE: If changing from one type of hydraulic fluid to
another, be certain to remove all the old fluid from the
system, as some fluids are incompatible with others.
IMPORTANT: Use only types of hydraulic fluids
specified in the Operator’s Manual. Other fluids may
cause system damage.
1
Figure 1
1. Sight window
2. Hydraulic oil cap
NOTE: A red dye additive for the hydraulic system fluid
is available in 2/3 oz bottles. One bottle is sufficient for
4 to 6 gallons of hydraulic fluid. Order Part No. 44--2500
from your Authorized Toro Distributor.
Greensmaster 3150
Page 4 -- 3
Hydraulic System
Towing Traction Unit
In case of emergency, the Greensmaster 3150 can be
towed for a short distance. However, Toro does not recommend this as a standard practice.
1
IMPORTANT: Do not tow the machine faster than 2
to 3 mph because drive system may be damaged. If
machine must be moved a considerable distance,
transport it on a truck or trailer.
1. Locate by--pass valve on the rear side of the piston
pump. Rotate valve 90o so the slot in the valve is vertical.
2. Before starting engine, close by--pass valve by rotating it back 90o so the slot in the valve is horizontal. Do
not start engine when the valve is open.
2
Figure 2
1. Piston pump
2. By--pass valve
Hydraulic Hoses
Hydraulic hoses are subject to extreme conditions such
as pressure differentials during operation and exposure
to weather, sun, chemicals, very warm storage conditions or mishandling during operation and maintenance.
These conditions can cause hose damage and deterioration. Some hoses are more susceptible to these
conditions than others. Inspect all machine hydraulic
hoses frequently for signs of deterioration or damage:
Hard, cracked, cut, abraded, charred, leaking or
otherwise damaged hose.
Kinked, crushed, flattened or twisted hose.
Blistered, soft, degraded or loose hose cover.
Cracked, damaged or badly corroded hose fittings.
When replacing a hydraulic hose, be sure that the hose
is straight (not twisted) before tightening the fittings.
This can be done by observing the imprint (layline) on
the hose. Use two wrenches; hold the hose straight with
one wrench and tighten the hose swivel nut onto the fitting with the other wrench (see Hydraulic Hose and
Tube Installation in this section). If the hose has an elbow at one end, tighten the swivel nut on that end before
tightening the nut on the straight end of the hose.
WARNING
Before disconnecting or performing any work on
hydraulic system, relieve all pressure in system
(see Relieving Hydraulic System Pressure in this
section).
Keep body and hands away from pin hole leaks or
nozzles that eject hydraulic fluid under high
pressure. Use paper or cardboard, not hands, to
search for leaks. Hydraulic fluid escaping under
pressure can have sufficient force to penetrate
the skin and cause serious injury. If fluid is injected into the skin, it must be surgically removed within a few hours by a doctor familiar
with this type of injury. Gangrene may result from
such an injury.
For additional hydraulic hose information, refer to Toro
Service Training Book, Hydraulic Hose Servicing (Part
Number 94813SL).
Hydraulic System
Page 4 -- 4
Greensmaster 3150
Hydraulic Hose and Tube Installation (O--Ring Face Seal Fitting)
1. Make sure threads and sealing surfaces of the hose/
tube and the fitting are free of burrs, nicks, scratches or
any foreign material.
C. Use a second wrench to tighten the nut to the correct Flats From Wrench Resistance (F.F.W.R.). The
markings on the nut and fitting body will verify that the
connection has been properly tightened.
2. As a preventative measure against leakage, it is recommended that the face seal O--ring be replaced any
time the connection is opened. Make sure the O--ring is
installed and properly seated in the fitting groove. Lightly
lubricate the O--ring with clean hydraulic oil.
Size
4 (1/4 in. nominal hose or tubing)
6 (3/8 in.)
8 (1/2 in.)
10 (5/8 in.)
12 (3/4 in.)
16 (1 in.)
3. Place the hose/tube against the fitting body so that
the flat face of the hose/tube sleeve fully contacts the O-ring in the fitting.
Swivel Nut
Tube or Hose
Figure 3
5. If a torque wrench is not available or if space at the
swivel nut prevents use of a torque wrench, an alternate
method of assembly is the Flats From Wrench Resistance (F.F.W.R.) method (Fig. 2).
A. Using a wrench, tighten the swivel nut onto the fitting until light wrench resistance is reached (approximately 30 in--lb).
Fitting Body
O--ring
Hydraulic
System
4. Thread the swivel nut onto the fitting by hand. While
holding the hose/tube with a wrench, use a torque
wrench to tighten the swivel nut to the recommended
installation torque shown in Figure 5. This tightening
process will require the use of an offset wrench (e.g.
crowfoot wrench). Use of an offset wrench will affect
torque wrench calibration due to the effective length
change of the torque wrench. Tightening torque when
using a torque wrench with an offset wrench will be lower
than the listed installation torque (see Using a Torque
Wrench with an Offset Wrench in the Torque Specifications section of Chapter 2 -- Product Records and Maintenance).
F.F.W.R.
1/2 to 3/4
1/2 to 3/4
1/2 to 3/4
1/2 to 3/4
1/3 to 1/2
1/3 to 1/2
Mark Nut
and Fitting
Body
Final
Position
Initial
Position
Extend Line
AT WRENCH RESISTANCE
B. Mark the swivel nut and fitting body. Hold the
hose/tube with a wrench to prevent it from turning.
AFTER TIGHTENING
Figure 4
Fitting Dash Size
Hose/Tube Side Thread Size
Installation Torque
4
9/16 -- 18
18 to 22 ft--lb (25 to 29 N--m)
6
11/16 -- 16
27 to 33 ft--lb (37 to 44 N--m)
8
13/16 -- 16
37 to 47 ft--lb (51 to 63 N--m)
10
1 -- 14
60 to 74 ft--lb (82 to 100 N--m)
12
1 3/16 -- 12
85 to 105 ft--lb (116 to 142 N--m)
16
1 7/16 -- 12
110 to 136 ft--lb (150 to 184 N--m)
20
1 11/16 -- 12
140 to 172 ft--lb (190 to 233 N--m)
Figure 5
Greensmaster 3150
Page 4 -- 5
Hydraulic System
Hydraulic Fitting Installation (SAE Straight Thread O--Ring Fitting into Component Port)
Non--Adjustable Fitting (Fig. 6)
1. Make sure all threads and sealing surfaces of fitting
and component port are free of burrs, nicks, scratches
or any foreign material.
5. If a torque wrench is not available, or if space at the
port prevents use of a torque wrench, an alternate method of assembly is the Flats From Finger Tight (F.F.F.T.)
method.
2. As a preventative measure against leakage, it is recommended that the O--ring be replaced any time the
connection is opened.
3. Lightly lubricate the O--ring with clean hydraulic oil.
Fitting threads should be clean with no lubricant applied.
IMPORTANT: Before installing fitting into port, determine port material. If fitting is to be installed into
an aluminum port, installation torque is reduced.
4. Install the fitting into the port. Then, use a torque
wrench and socket to tighten the fitting to the recommended installation torque shown in Figure 7.
A. Install the fitting into the port and tighten it down
full length until finger tight.
B. If port material is steel, tighten the fitting to the
listed F.F.F.T. If port material is aluminum, tighten fitting to 60% of listed F.F.F.T.
Size
4 (1/4 in. nominal hose or tubing)
6 (3/8 in.)
8 (1/2 in.)
10 (5/8 in.)
12 (3/4 in.)
16 (1 in.)
NOTE: Use of an offset wrench (e.g. crowfoot wrench)
will affect torque wrench calibration due to the effective
length change of the torque wrench. Tightening torque
when using a torque wrench with an offset wrench will
be less than the recommended installation torque. See
Using a Torque Wrench with an Offset Wrench in the
Torque Specifications section of Chapter 2 -- Product
Records and Maintenance to determine necessary conversion information.
F.F.F.T.
1.00 + 0.25
1.50 + 0.25
1.50 + 0.25
1.50 + 0.25
1.50 + 0.25
1.50 + 0.25
Fitting
O--ring
Figure 6
Fitting
Dash Size
Fitting Port Side
Thread Size
Installation Torque Into
Steel Port
Installation Torque Into
Aluminum Port
4
7/16 -- 20
15 to 19 ft--lb (21 to 25 N--m)
9 to 11 ft--lb (13 to 15 N--m)
5
1/2 -- 20
18 to 22 ft--lb (25 to 29 N--m)
11 to 15 ft--lb (15 to 20 N--m)
6
9/16 -- 18
34 to 42 ft--lb (47 to 56 N--m)
20 to 26 ft--lb (28 to 35 N--m)
8
3/4 -- 16
58 to 72 ft--lb (79 to 97 N--m)
35 to 43 ft--lb (48 to 58 N--m)
10
7/8 -- 14
99 to 121 ft--lb (135 to 164 N--m)
60 to 74 ft--lb (82 to 100 N--m)
12
1 1/16 -- 12
134 to 164 ft--lb (182 to 222 N--m)
81 to 99 ft--lb (110 to 134 N--m)
14
1 3/16 -- 12
160 to 196 ft--lb (217 to 265 N--m)
96 to 118 ft--lb (131 to 160 N--m)
16
1 5/16 -- 12
202 to 248 ft--lb (274 to 336 N--m)
121 to 149 ft--lb (165 to 202 N--m)
20
1 5/8 -- 12
247 to 303 ft--lb (335 to 410 N--m)
149 to 183 ft--lb (202 to 248 N--m)
Figure 7
Hydraulic System
Page 4 -- 6
Greensmaster 3150
Adjustable Fitting (Fig. 8)
1. Make sure all threads and sealing surfaces of fitting
and component port are free of burrs, nicks, scratches
or any foreign material.
2. As a preventative measure against leakage, it is recommended that the O--ring be replaced any time the
connection is opened.
Lock Nut
3. Lightly lubricate the O--ring with clean hydraulic oil.
Fitting threads should be clean with no lubricant applied.
Back--up Washer
4. Turn back the lock nut as far as possible. Make sure
the back up washer is not loose and is pushed up as far
as possible (Step 1 in Figure 9).
O--ring
Figure 8
IMPORTANT: Before installing fitting into port, determine port material. If fitting is to be installed into
an aluminum port, installation torque is reduced.
6. To put the fitting in the desired position, unscrew it by
the required amount, but no more than one full turn
(Step 3).
7. Hold the fitting in the desired position with a wrench
and use a torque wrench to tighten the fitting to the recommended installation torque shown in Figure 7. This
tightening process will require the use of an offset
wrench (e.g. crowfoot wrench). Use of an offset wrench
will affect torque wrench calibration due to the effective
length change of the torque wrench. Tightening torque
when using a torque wrench with an offset wrench will
be lower than the listed installation torque (see Using a
Torque Wrench with an Offset Wrench in the Torque
Specifications section of Chapter 2 -- Product Records
and Maintenance).
Step 1
Step 3
Step 2
Step 4
Hydraulic
System
5. Install the fitting into the port and tighten finger tight
until the washer contacts the face of the port (Step 2).
Figure 9
8. If a torque wrench is not available, or if space at the
port prevents use of a torque wrench, an alternate method of assembly is the Flats From Finger Tight (F.F.F.T.)
method. Hold the fitting in the desired position with a
wrench and, if port material is steel, tighten the lock nut
with a second wrench to the listed F.F.F.T (Step 4). If port
material is aluminum, tighten fitting to 60% of listed
F.F.F.T.
Size
4 (1/4 in. nominal hose or tubing)
6 (3/8 in.)
8 (1/2 in.)
10 (5/8 in.)
12 (3/4 in.)
16 (1 in.)
Greensmaster 3150
F.F.F.T.
1.00 + 0.25
1.50 + 0.25
1.50 + 0.25
1.50 + 0.25
1.50 + 0.25
1.50 + 0.25
Page 4 -- 7
Hydraulic System
Hydraulic System
Page 4 -- 8
EXPANSION
TANK
BREATHER
OUT
LEAK
DETECTOR IN
VOLUME
LEAK DETECTOR
All solenoids are shown as
de--energized
Greensmaster 3150
Hydraulic Schematic
G1
BACKLAP
SWITCH
(SW)
MA
P1
FC1
MB
.73
S1R1
Center
Reel (#1)
FILTER
SUCTION
STRAINER
LC
T
OR1
0.013
PRV
550 PSI
.73
OPTIONAL
OIL COOLER
OR2
0.060
MR
Left Front
Reel (#2)
.73
Right Front
Reel (#3)
25 PSI
G2
0.055
L2B
CU #2
2.0” Bore
0.75” Rod
1.88” Stroke
L1B
S2
S3
GEAR
PUMP
.33
R2
400 PSI
FC2
7.0 GPM
P2
L2A
CU #1
1.50” Bore
0.75” Rod
3.38” Stroke
.58
L1A
4.0 GPM
PT
0.055
L3B
1.24
ST
Lower
Raise
110 to
150 PSI
TRACTION PUMP
S4
0.030
L3A
CU #3
2.0” Bore
0.75” Rod
1.88” Stroke
3000
PSI
3000
PSI
70 to
100 PSI
TRANSPORT = 14.1 GPM
ENGINE RPM
2850/1650
Left
Motor
E
R
1160 PSI
4.5
BYPASS
VALVE
BOTTOM
PORT
B
A
TOP
PORT
P
L
Steering Cylinder
1.5” Bore
0.75” Rod
6.19” Stroke
10.3
T
20.6
Right
Motor
OPTIONAL
3WD KIT
10.3
STEERING
VALVE
Hydraulic Schematic
Greensmaster 3150
Hydraulic
System
This page is intentionally blank.
Greensmaster 3150
Page 4 -- 9
Hydraulic System
Hydraulic System
Page 4 -- 10
EXPANSION
TANK
BREATHER
OUT
LEAK
DETECTOR IN
VOLUME
LEAK DETECTOR
High Pressure
Low Pressure (Charge)
Return or Suction
Flow
Greensmaster 3150
Traction Forward
G1
BACKLAP
SWITCH
(SW)
MA
P1
FC1
MB
.73
S1R1
Center
Reel (#1)
FILTER
LC
SUCTION
STRAINER
T
OR1
0.013
PRV
550 PSI
.73
OPTIONAL
OIL COOLER
OR2
0.060
MR
Left Front
Reel (#2)
.73
Right Front
Reel (#3)
25 PSI
G2
0.055
L2B
CU #2
2.0” Bore
0.75” Rod
1.88” Stroke
L1B
S2
S3
GEAR
PUMP
.33
R2
400 PSI
FC2
7.0 GPM
P2
L2A
CU #1
1.50” Bore
0.75” Rod
3.38” Stroke
.58
L1A
4.0 GPM
PT
0.055
L3B
CU #3
2.0” Bore
0.75” Rod
1.88” Stroke
1.24
ST
Lower
Raise
110 to
150 PSI
TRACTION PUMP
S4
0.030
L3A
All solenoids are shown as
de--energized.
3000
PSI
3000
PSI
70 to
100 PSI
TRANSPORT = 14.1 GPM
STEERING
VALVE
ENGINE RPM
2850/1650
Left
Motor
E
R
1160 PSI
4.5
BYPASS
VALVE
BOTTOM
PORT
B
A
TOP
PORT
P
L
Steering Cylinder
1.5” Bore
0.75” Rod
6.19” Stroke
10.3
20.6
T
Right
Motor
OPTIONAL
3WD KIT
10.3
Hydraulic Flow Diagrams
Greensmaster 3150
Traction Forward and Reverse
Forward
Reverse
The piston (traction) pump is driven directly by the engine. The traction circuit of the hydraulic system acts essentially as a closed loop. Taking its suction directly from
the return side of the wheel motors of the traction circuit,
the piston pump supplies oil flow to the wheel motors
through the supply side of the traction circuit.
The traction circuit operates essentially the same in reverse as it does in the forward direction. However, the
flow through the circuit is reversed.
Oil flowing out of the wheel motors returns to the bottom
port of the piston pump and is continuously pumped out
the top port as long as the traction pedal is pressed for
the forward direction.
Hydraulic oil is supplied to the traction charge circuit
from the rear gear pump section though the steering
valve, control manifold and back through the charge circuit check valves in the piston (traction) pump. This oil
replaces oil losses from flow through the internal case
drain, shuttle valve and small amounts of traction circuit
leakage. Charge circuit pressure is maintained by the
charge relief valve that is attached to the piston pump
back plate.
Oil flowing out of the wheel motors returns to the top port
of the piston pump and is continuously pumped out the
bottom port as long as the traction pedal is pressed for
the reverse direction.
The charge circuit functions the same in reverse as it
does in the forward direction.
Traction Circuit Cooling
The piston pump includes a shuttle valve that bleeds off
a small amount of hydraulic fluid for cooling of the closed
loop traction circuit. This valve allows a small amount of
hydraulic oil to pass from the low pressure side of the
traction circuit while operating the traction unit in either
direction. A relief valve in the piston pump back plate
prevents shuttle valve bleed off until the relief valve
opens (70 to 100 PSI / 5 to 7 bar). The charge circuit replenishes oil that is bled from the traction circuit by the
shuttle valve.
NOTE: The shuttle valve assembly is located in the piston pump back plate. Access to the shuttle valve requires removal of the back plate from the piston pump.
Greensmaster 3150
Page 4 -- 11
Hydraulic System
Hydraulic
System
With the engine running and traction pedal in the neutral
position, the piston pump supplies no flow to the wheel
motors. When the traction pedal is pressed to the forward position, the linkage from the pedal positions the
swash plate in the piston pump so oil flows out the top
port of the pump. Oil flow out of the top port goes to the
wheel motors and turns them in the forward direction.
With the engine running and traction pedal in the neutral
position, the piston pump supplies no flow to the wheel
motors. When the traction pedal is pressed to the reverse position, the linkage from the pedal positions the
swash plate in the piston pump so oil flows out the bottom port of the pump. Oil flow out of the bottom port goes
to the wheel motors and turns them in the reverse direction.
Hydraulic System
Page 4 -- 12
Greensmaster 3150
EXPANSION
TANK
BREATHER
OUT
LEAK
DETECTOR IN
VOLUME
LEAK DETECTOR
High Pressure
Low Pressure (Charge)
Return or Suction
Flow
Greensmaster 3150
Raise Cutting Units
G1
BACKLAP
SWITCH
(SW)
MA
P1
FC1
MB
S1R1
Center
Reel (#1)
FILTER
LC
SUCTION
STRAINER
T
OR1
0.013
PRV
550 PSI
.73
OPTIONAL
OIL COOLER
OR2
0.060
MR
Left Front
Reel (#2)
.73
.73
Right Front
Reel (#3)
25 PSI
G2
0.055
L2B
CU #2
2.0” Bore
0.75” Rod
1.88” Stroke
S2
GEAR
PUMP
7.0 GPM
P2
L1B
.33
R2
400 PSI
FC2
S3
L2A
CU #1
1.50” Bore
0.75” Rod
3.38” Stroke
.58
L1A
4.0 GPM
PT
0.055
L3B
1.24
ST
Lower
Raise
110 to
150 PSI
TRACTION PUMP
S4
0.030
L3A
CU #3
2.0” Bore
0.75” Rod
1.88” Stroke
3000
PSI
3000
PSI
70 to
100 PSI
TRANSPORT = 14.1 GPM
STEERING
VALVE
Left
Motor
10.3
20.6
E
R
1160 PSI
4.5
ENGINE RPM
2850/1650
L
Steering Cylinder
1.5” Bore
0.75” Rod
6.19” Stroke
BYPASS
VALVE
P
BOTTOM
PORT
B
A
TOP
PORT
Solenoids S2 and S3 are shown
in the energized position.
All other solenoids are shown
as de--energized.
Right
Motor
OPTIONAL
3WD KIT
10.3
T
Raise and Lower Cutting Units
During cutting unit hold (not raising or lowering) conditions, flow from the rear gear pump section is by--passed
through the steering valve and de--energized solenoid
valve (S2) in the hydraulic manifold directly to the traction charge circuit. Flow in excess of charge circuit requirements then returns to the gear pump inlet.
Raise Cutting Units
When the cutting units are to be raised, hydraulic manifold solenoid valve (S2) is energized and blocks flow directly to the traction charge circuit. Flow is directed to
energized solenoid valve (S3), which directs flow to de-energized solenoid valve (S4) and the lift cylinders. Hydraulic pressure against the cylinder pistons moves
their shafts causing the cutting units to raise. At the
same time, the pistons push the hydraulic fluid out of the
lift cylinders and back through energized solenoid valve
(S3) to the charge circuit. Raise speed for the front cutting units is controlled by a 0.055 orifice. A 0.030 orifice
in the return line for the center cutting unit allows a slight
delay in raising that cutting unit.
Lower Cutting Units
Circuit operation for lowering the lift cylinders is similar
to raising them. However, the solenoid valve (S3) remains de--energized and solenoid valve (S4) is energized. Flow is reversed to and from the lift cylinders,
lowering the cutting units.
When the cutting units are to be lowered, solenoid valve
(S2) is energized and blocks flow directly to the traction
charge circuit. Flow is directed to de--energized solenoid valve (S3), which directs flow to the lift cylinders.
Hydraulic pressure against the cylinder pistons moves
their shafts causing the cutting units to lower. At the
same time, the pistons push the hydraulic fluid out of the
lift cylinders to energized solenoid valve (S4). Flow continues back through solenoid valve (S3) to the charge
circuit. Lower speed for the front cutting units is controlled by the 0.055 orifice. A 0.030 orifice and adjustable flow control valve for the center cutting unit allows
a slight delay in lowering that cutting unit.
To control pressure while lowering the cutting units, the
system is equipped with adjustable relief valve (R2) in
the hydraulic manifold.
When solenoid valves (S2) and (S4) de--energize,
spring action returns the valves to their original position
and by--passes flow back to the traction charge circuit
stopping lift cylinder movement.
When solenoid valves (S2) and (S3) de--energize,
spring action returns the valves to their original position
and by--passes flow back to the traction charge circuit
stopping lift cylinder movement. The lift cylinder position
is locked in place since there is no complete circuit of
flow to and from the lift cylinders.
Greensmaster 3150
Page 4 -- 13
Hydraulic System
Hydraulic
System
The tandem gear pump is directly coupled to the piston
(traction) pump. The rear gear pump section supplies
hydraulic flow for the steering circuit (priority flow), for
raising and lowering the cutting units and for the traction
charge circuit. The gear pump takes its suction from the
hydraulic reservoir. Maximum circuit pressure of 1160
PSI (80 bar) is limited by the relief valve located in the
steering valve.
Hydraulic System
Page 4 -- 14
Greensmaster 3150
EXPANSION
TANK
BREATHER
OUT
LEAK
DETECTOR IN
VOLUME
LEAK DETECTOR
MA
G1
BACKLAP
SWITCH
(SW)
High Pressure
Low Pressure (Charge)
Return or Suction
Flow
Greensmaster 3150
Mow
P1
FC1
MB
.73
S1R1
Center
Reel (#1)
FILTER
LC
SUCTION
STRAINER
T
OR1
0.013
PRV
550 PSI
.73
OPTIONAL
OIL COOLER
OR2
0.060
MR
Left Front
Reel (#2)
.73
Right Front
Reel (#3)
25 PSI
G2
0.055
L2B
CU #2
2.0” Bore
0.75” Rod
1.88” Stroke
L1B
S2
S3
GEAR
PUMP
.33
R2
400 PSI
FC2
7.0 GPM
P2
L2A
CU #1
1.50” Bore
0.75” Rod
3.38” Stroke
.58
L1A
4.0 GPM
PT
0.055
L3B
1.24
ST
Lower
Raise
110 to
150 PSI
TRACTION PUMP
S4
0.030
L3A
CU #3
2.0” Bore
0.75” Rod
1.88” Stroke
Solenoid S1R1 is shown
in the energized position.
All other solenoids are shown
as de--energized.
3000
PSI
3000
PSI
70 to
100 PSI
TRANSPORT = 14.1 GPM
ENGINE RPM
2850/1650
Left
Motor
E
R
1160 PSI
4.5
BYPASS
VALVE
BOTTOM
PORT
B
A
TOP
PORT
P
L
Steering Cylinder
1.5” Bore
0.75” Rod
6.19” Stroke
10.3
T
20.6
Right
Motor
OPTIONAL
3WD KIT
10.3
STEERING
VALVE
Mow and Backlap
With the engine running and the functional control and
joystick levers positioned so the reels will not turn (see
Operator’s Manual), solenoid relief valve (S1R1) in the
hydraulic manifold is de--energized. The de--energized
(S1R1) by--passes flow from the front gear pump section to the oil filter and hydraulic reservoir. Additionally,
the manifold pressure reducing valve (PRV) will remain
seated to prevent the reel motors (and reels) from rotating.
Mow
With the engine running and the functional control and
joystick levers positioned so the reels will turn (see Operator’s Manual), solenoid relief valve (S1R1) is energized. In the energized position, this valve directs oil flow
to the reel motors and also functions as the mow circuit
relief valve.
Greensmaster 3150
Oil flow from manifold port (P1) flows through the reel
speed control valve (FC1). Flow across the speed control valve is pressure compensated by the logic cartridge
valve (LC). The logic cartridge valve maintains a pressure differential of 75 PSI (5.2 bar) across the speed
control valve. Any excess flow above the speed control
valve setting is by--passed to the reservoir through the
logic cartridge valve. With the backlap valve (MR) in the
mow position, oil flows through the backlap valve, out
manifold port (MA) and to the reel motors that are connected in series. Oil flows through the left front reel motor, right front motor and then center motor to turn the
reel motors in the mow direction.
When in the mow position, mow circuit pressure will
cause the hydraulic manifold pilot piston to shift and
open the pressure reducing valve (PRV). The shifted
pressure reducing valve allows circuit oil to return to the
reservoir through the manifold block, oil filter and oil
cooler (if equipped).
Backlap
Backlapping operation is the same as mowing operation, except for the position of the backlap valve (MR).
When the backlap valve (MR) is in the backlap position,
oil flows through the backlap valve, out manifold port
(MB) and to the reel motors that are connected in series.
Oil flows through the center reel motor, right front motor
and then left front motor as it turns the reel motors in the
backlap direction.
Page 4 -- 15
Hydraulic System
Hydraulic
System
The tandem gear pump is directly coupled to the piston
(traction) pump. The front gear pump section supplies
oil flow to the hydraulic manifold block and to the cutting
reel motors. The gear pump takes its suction directly
from the hydraulic reservoir. Maximum circuit pressure
is limited by solenoid relief valve (S1R1) which is located
in the hydraulic manifold.
Hydraulic System
Page 4 -- 16
Greensmaster 3150
EXPANSION
TANK
BREATHER
OUT
LEAK
DETECTOR IN
VOLUME
LEAK DETECTOR
MA
G1
BACKLAP
SWITCH
(SW)
High Pressure
Low Pressure (Charge)
Return or Suction
Flow
Greensmaster 3150
Right Turn
P1
FC1
MB
.73
S1R1
Center
Reel (#1)
FILTER
LC
SUCTION
STRAINER
T
OR1
0.013
PRV
550 PSI
.73
OPTIONAL
OIL COOLER
OR2
0.060
MR
Left Front
Reel (#2)
.73
Right Front
Reel (#3)
25 PSI
G2
0.055
L2B
CU #2
2.0” Bore
0.75” Rod
1.88” Stroke
L1B
S2
S3
GEAR
PUMP
.33
R2
400 PSI
FC2
7.0 GPM
P2
L2A
CU #1
1.50” Bore
0.75” Rod
3.38” Stroke
.58
L1A
4.0 GPM
PT
0.055
L3B
1.24
ST
Lower
Raise
110 to
150 PSI
TRACTION PUMP
S4
0.030
L3A
CU #3
2.0” Bore
0.75” Rod
1.88” Stroke
STEERING
VALVE
3000
PSI
3000
PSI
70 to
100 PSI
TRANSPORT = 14.1 GPM
All solenoids are shown
as de--energized.
Power steering valve is
positioned for a right turn.
ENGINE RPM
2850/1650
Left
Motor
E
R
1160 PSI
4.5
BYPASS
VALVE
BOTTOM
PORT
B
A
TOP
PORT
P
L
Steering Cylinder
1.5” Bore
0.75” Rod
6.19” Stroke
10.3
20.6
T
Right
Motor
OPTIONAL
3WD KIT
10.3
Right and Left Turn
With the steering wheel in the neutral position and the
engine running, the spool valve in the steering valve is
in the center position. Flow enters the steering control
valve at Port (P) and goes through the spool valve, by-passing the steering cylinder. Flow leaves the control
valve out port (E) to be available for the raise/lower and
traction charge circuits.
Right Turn
When a right turn is made with the engine running, the
turning of the steering wheel positions the spool valve in
the steering valve so that flow goes through the bottom
of the spool. Flow entering the steering valve at Port (P)
goes through the spool and is routed to two places. First,
most of the flow through the valve is by--passed out
steering valve port (E) and is available for raising and
lowering the cutting units and for the traction charge circuit. Second, the remainder of the flow is drawn through
the steering valve rotary meter and out steering valve
port (R). Pressure moves the steering cylinder piston to
extend the cylinder for a right turn. The rotary meter ensures that the oil flow to the cylinder is proportional to the
amount of turning on the steering wheel. Fluid leaving
the cylinder flows back through the spool valve then out
steering valve port (T) and then to the traction charge
circuit.
Left Turn
When a left turn is made with the engine running, the
turning of the steering wheel positions the spool valve in
the steering valve so that flow goes through the top of
the spool (Fig. 10). Flow entering the steering valve at
Port (P) goes through the spool and is routed to two
places. First, most of the flow through the valve is by-passed out steering valve port (E) and is available for
raising and lowering the cutting units and for the traction
charge circuit. Second, the remainder of the flow is
drawn through the steering valve rotary meter and out
steering valve port (L). Pressure moves the steering cylinder piston to retract the cylinder for a left turn. The
rotary meter ensures that the oil flow to the cylinder is
proportional to the amount of turning on the steering
wheel. Fluid leaving the cylinder flows back through the
spool valve then out steering valve port (T) and then to
the traction charge circuit.
The steering valve returns to the neutral position when
turning is complete.
The steering valve returns to the neutral position when
turning is complete.
Steering Cylinder
1.5” Bore
0.75” Rod
6.19” Stroke
L
R
4.5
1160 PSI
STEERING
VALVE
P
E
T
To Manifold
Port ST
To Manifold
Port P2
From Gear Pump
Figure 10
Greensmaster 3150
Page 4 -- 17
Hydraulic System
Hydraulic
System
The tandem gear pump is directly coupled to the piston
(traction) pump. The rear gear pump section supplies
hydraulic flow for the steering circuit (priority flow), for
raising and lowering the cutting units and for the traction
charge circuit. The gear pump takes its suction from the
hydraulic reservoir. Maximum circuit pressure of 1160
PSI (80 bar) is limited by the relief valve located in the
steering valve.
Special Tools
Order these special tools from your Toro Distributor.
Hydraulic Pressure Test Kit
Use to take various pressure readings for diagnostic
tests. Quick disconnect fittings provided attach directly
to mating fittings on machine test ports without tools. A
high pressure hose is provided for remote readings.
Contains one each: 1000 PSI (70 Bar), 5000 PSI (350
Bar) and 10000 PSI (700 Bar) gauges. Use gauges as
recommended in the Testing section of this chapter.
Toro Part Number: TOR47009
Figure 11
Hydraulic Tester (Pressure and Flow)
This tester requires O--ring Face Seal (ORFS) adapter
fittings for use on this machine (see Hydraulic Test Fitting Kit (TOR4079) in this section).
1. INLET HOSE: Hose connected from the system circuit to the inlet side of the hydraulic tester.
2. LOAD VALVE: A simulated working load is created
in the circuit by turning the valve to restrict flow.
3. PRESSURE GAUGE: 0 to 5000 PSI gauge to provide operating circuit pressure.
4. FLOW METER: This meter measures actual oil flow
in the operating circuit with a gauge rated at 15 GPM.
Figure 12
5. OUTLET HOSE: A hose from the outlet side of the
hydraulic tester connects to the hydraulic system circuit.
Toro Part Number: TOR214678
O--ring Kit
The O--ring kit includes O--rings in a variety of sizes for
face seal and port seal hydraulic connections. It is recommended that O--rings be replaced whenever a hydraulic connection is loosened.
Toro Part Number: 117--2727
Figure 13
Hydraulic System
Page 4 -- 18
Greensmaster 3150
High Flow Hydraulic Filter Kit
The high flow hydraulic filter kit is designed with large
flow (40 GPM/150 LPM) and high pressure (5000
PSI/345 bar) capabilities. This kit provides for bi--directional filtration which prevents filtered debris from being
allowed back into the circuit regardless of flow direction.
If a component failure occurs in the closed loop traction
circuit, contamination from the failed part will remain in
the circuit until removed. When connecting hydraulic
test gauges in order to test traction circuit components
or after replacing a failed traction circuit component (e.g.
piston (traction) pump or wheel motor), the high flow hydraulic filter can be installed in the traction circuit. The
filter will ensure that contaminates are removed from the
closed loop and thus, do not cause additional component damage.
Figure 14
Toro Part Number: TOR6011
Hydraulic
System
NOTE: This kit does not include hydraulic hoses (see
Hydraulic Hose Kit TOR6007 above).
NOTE: Replacement filter element is Toro part number
TOR6012. Filter element cannister tightening torque is
25 ft--lb (34 N--m).
Hydraulic Hose Kit
This kit includes hydraulic fittings and hoses needed to
connect 40 GPM hydraulic tester (AT40002) or high flow
hydraulic filter kit (TOR6011) to machine hydraulic traction system components.
Toro Part Number: TOR6007
Figure 15
Greensmaster 3150
Page 4 -- 19
Hydraulic System
Hydraulic Test Fitting Kit
This kit includes a variety of O--ring face seal fittings to
enable you to connect test gauges into the system.
TORO TEST FITTING KIT (NO. TOR4079)
The kit includes: tee’s, unions, reducers, plugs, caps
and male test fittings.
Toro Part Number: TOR4079
Figure 16
Measuring Container
Use this container for doing hydraulic motor efficiency
testing (motors with case drain lines only). Measure efficiency of a hydraulic motor by restricting the outlet flow
from the motor and measuring leakage from the case
drain line while the motor is pressurized by the hydraulic
system.
Toro Part Number: TOR4077
Figure 17
Wheel Hub Puller
The wheel hub puller allows safe removal of the wheel
hub from the shaft of wheel motors.
Toro Part Number: TOR4097
Figure 18
Hydraulic System
Page 4 -- 20
Greensmaster 3150
Troubleshooting
The charts that follow contain information to assist in
troubleshooting. There may possibly be more than one
cause for a machine malfunction.
Refer to the Testing section of this Chapter for precautions and specific test procedures.
General Hydraulic System Problems
Problem
Possible Cause
Hydraulic oil leaks from system.
Fitting(s), hose(s) or tube(s) are loose or damaged.
O--ring(s) or seal(s) are missing or damaged.
Hydraulic fluid foams.
Hydraulic reservoir oil level is low.
Hydraulic system has wrong type of oil.
The pump suction line has an air leak.
Hydraulic reservoir oil level is low.
Hydraulic
System
Hydraulic system operates hot.
Suction screen in reservoir is loose or clogged.
Oil is contaminated or too light.
Brakes are applied or are incorrectly adjusted.
Piston pump by--pass valve is open or defective.
Working load of machine (e.g. high ambient temperatures, use of
verticutter) may require use of oil cooler.
Oil cooler (if installed) is damaged or plugged. Cooler by--pass relief is stuck open or air flow is obstructed.
Charge pressure is low (see Charge Pressure Relief Valve Pressure Test in the Testing section of this chapter).
Wheel motor(s) or cutting reel motor(s) are worn or damaged (see
Wheel Motor Efficiency and Reel Motor Case Drain Flow Tests in
the Testing section of this chapter).
Piston (traction) pump is worn or damaged (see Piston (Traction)
Pump Flow Test in the Testing section of this chapter).
Greensmaster 3150
Page 4 -- 21
Hydraulic System
Traction Circuit Problems
Problem
Possible Cause
Neutral is difficult to find or machine
operates in one direction only.
External control linkage is misadjusted, disconnected, binding or
damaged.
Piston (traction) pump is worn or damaged (see Piston (Traction)
Pump Flow Test in the Testing section of this chapter).
Traction response is sluggish.
Hydraulic oil is very cold.
Brakes are applied or are incorrectly adjusted.
Piston pump by--pass valve is open or defective.
Charge pressure is low (see Charge Pressure Relief Valve Pressure Test in the Testing section of this chapter).
Piston (traction) pump relief valves are leaking or damaged.
Piston (traction) pump or wheel motor(s) are worn or damaged (see
Piston (Traction) Pump Flow and Wheel Motor Efficiency Tests in
the Testing section of this chapter).
No traction exists in either direction.
Brakes are applied or are incorrectly adjusted.
Hydraulic reservoir oil level is low (other hydraulic circuits affected
as well).
Piston pump by--pass valve is open.
Charge pressure is low (see Charge Pressure Relief Valve Pressure Test in the Testing section of this chapter).
Wheel motor(s) are worn or damaged (see Wheel Motor Efficiency
Test in the Testing section of this chapter).
Piston (traction) pump is worn or damaged (see Piston (Traction)
Pump Flow Test in the Testing section of this chapter).
Wheel motor will not turn.
Brakes are binding.
Key on wheel motor shaft is sheared or missing.
Wheel motor is damaged.
Wheel motor will not hold load in
neutral.
Make up fluid from charge pump is not available.
Piston (traction) pump relief valves are leaking or damaged.
NOTE: The piston (traction) pump used on Greensmaster 3150 machines is equipped with relief valves
for both the forward and reverse direction. Due to engine
output, it is unlikely that traction pressure will reach relief
valve settings. If, however, a piston pump relief valve is
leaking or otherwise faulty, traction performance would
be affected.
Hydraulic System
Page 4 -- 22
Greensmaster 3150
Mow Circuit Problems
Problem
Possible Cause
Gear pump is noisy (cavitation).
Hydraulic reservoir oil level is low (other hydraulic circuits affected
as well).
Hydraulic pump suction line is restricted.
Hydraulic pump suction line has an air leak.
Cutting reel motors will not turn.
Hydraulic manifold solenoid valve S1R1 is stuck open (not shifting
to its energized position).
An electrical problem exists (see Chapter 5 -- Electrical System).
FC1 logic valve in control manifold is stuck open.
PRV valve in control manifold is stuck closed.
Front section of gear pump is damaged (see Gear Pump (Front
Section) Flow Test in the Testing section of this chapter).
Cutting reel speed is erratic.
A cutting unit problem exists (see Chapter 7 -- DPA Cutting Units).
Hydraulic manifold reel circuit cartridge is leaking or damaged.
Hydraulic manifold orifice (OR1 or OR2) is plugged.
Cutting reel speed is low.
A cutting unit problem exists (see Chapter 7 -- DPA Cutting Units).
Hydraulic manifold reel circuit cartridge is leaking or damaged.
Excessive internal wear in reel motor exists (see Reel Motor Case
Drain Flow Test in the Testing section of this chapter).
Greensmaster 3150
Page 4 -- 23
Hydraulic System
Hydraulic
System
Pilot piston in control manifold is stuck or damaged.
Lift/Lower Circuit Problems
Problem
Possible Cause
Cutting units will not lift or lift slowly.
Engine speed is too low.
Hydraulic reservoir oil level is low.
Lift cylinder linkage is binding or broken.
Lift cylinder bushings are binding or worn.
Charge circuit pressure is low (see Charge Relief Valve Pressure
Test in the Testing section of this chapter).
Implement relief valve is leaking or damaged (see Implement Relief
Valve Pressure Test in the Testing section of this chapter).
Hydraulic manifold solenoid valve (S2) is leaking or damaged (not
shifting to its energized position).
Relief valve (R2) is leaking or damaged (see Lower Cutting Units
Relief Valve (R2) Pressure Test in the Testing section of this
chapter).
Lift cylinders leak internally.
Spool in steering control valve is hung up (see Steering Control
Valve Test in the Testing section of this chapter).
Gear pump (rear section) is worn or damaged (see Gear Pump
(Rear Section) Flow Test in the Testing section of this chapter).
Cutting units raise, but will not stay
up.
Hydraulic System
Hydraulic manifold solenoid valve (S4) leaks or is damaged.
Lift cylinders leak internally.
Page 4 -- 24
Greensmaster 3150
Steering Circuit Problems
Problem
Possible Cause
Steering wheel is hard to turn.
Oil supply to the steering control valve is insufficient (traction
charge and lift circuits affected as well).
Emergency steering ball in steering control valve is missing or
damaged.
Regular adjustments to steering
wheel are necessary because of difficulty of driving in a straight line.
Leaf springs in steering control valve are worn or broken.
Gear wheel set in steering control valve is worn.
Steering wheel will not return to the
neutral position.
Spool and sleeve are sticking to steering control housing assembly
(see Steering Control Valve Test in the Testing section of this
chapter).
Steering wheel can turn on its own.
Leaf springs in steering control valve are broken or stuck.
Spool and sleeve are sticking to steering control housing assembly
(see Steering Control Valve Test in the Testing section of this
chapter).
Backlash results when turning steering wheel.
Cardan shaft fork is worn or broken.
Rear wheel shimmies when the
steering wheel is turned.
Air is in the steering cylinder.
The steering wheel can be turned
without the rear wheel turning.
The steering cylinder is worn.
Steering response is too slow and
heavy when trying to turn quickly.
Oil supply to the steering control valve is insufficient (traction
charge and lift circuits affected as well).
Turning steering wheel turns machine in the opposite direction.
Hoses to the steering cylinder are reversed.
Steering force (possibly to one side
only) is insufficient.
Hydraulic flow to steering control valve is low (traction charge and
lift circuits affected as well).
Leaf springs in steering control valve are worn or broken.
Mechanical connections to the wheel or wheel bearing are worn.
The gear set in the steering control valve is worn.
Implement relief valve is leaking or damaged (see Implement Relief
Valve Pressure Test in the Testing section of this chapter).
Greensmaster 3150
Page 4 -- 25
Hydraulic System
Hydraulic
System
Steering cylinder is seized or its piston seals are worn (see Steering Control Valve Test in the Testing section of this chapter).
Testing
The most effective method for isolating problems in the
hydraulic system is by using hydraulic test equipment
such as pressure gauges and flow meters in the circuits
during various operational checks (see the Special
Tools section in this Chapter).
1. Clean machine thoroughly before disconnecting or
disassembling any hydraulic components. Always keep
in mind the need for cleanliness when working on hydraulic equipment. Contamination will cause excessive
wear of components.
Before Performing Hydraulic Tests
2. To prevent hydraulic system contamination, put metal caps or plugs on any hydraulic lines left open or exposed during testing or removal of components.
IMPORTANT: All obvious areas such as oil supply,
filter, binding linkages, loose fasteners, improper
adjustments, solenoid valve operation or electrical
connections/circuits must be checked before assuming that a hydraulic component is the source of
the problem.
Precautions for Hydraulic Testing
CAUTION
Failure to use gauges with recommended pressure (psi) rating as listed in test procedures
could result in damage to the gauge and possible
personal injury from leaking hot oil.
All testing should be performed by two (2)
people. One person should be in the seat to operate the machine and the other should read testing tools (e.g. pressure gauge) and record test
results.
Operate all hydraulic controls to relieve system
pressure and avoid injury from pressurized hydraulic oil. Controls must be operated with the
ignition switch in OFF. Remove key from the ignition switch.
WARNING
4. When using tester with pressure and flow capabilities, the inlet and the outlet hoses must be properly connected and not reversed to prevent damage to the
hydraulic tester or components.
5. When using tester with pressure and flow capabilities, completely open load valve in the hydraulic tester
to minimize the possibility of damaging components.
6. Install fittings finger tight and far enough to make
sure that they are not cross--threaded before tightening
them with a wrench.
7. Position tester hoses to prevent rotating machine
parts from contacting and damaging the hoses or tester.
8. Check oil level in the hydraulic reservoir. After connecting test equipment, make sure tank is full.
9. Check control linkages for improper adjustment,
binding,or broken parts.
10.All hydraulic tests should be made with the hydraulic
oil at normal operating temperature.
11. Record the results of all performed hydraulic tests.
Before disconnecting or performing any work on
the hydraulic system, all pressure in the system
must be relieved and all rotating machine parts
must be stopped. Stop engine; lower or support
attachments.
Keep body and hands away from pin hole leaks
or nozzles that eject hydraulic fluid under high
pressure. Do not use hands to search for leaks;
use paper or cardboard. Hydraulic fluid escaping under pressure can have sufficient force to
penetrate the skin and cause serious injury. If
fluid is injected into the skin, it must be surgically removed within a few hours by a doctor familiar with this type of injury. Gangrene may result
from such an injury.
Hydraulic System
3. The engine must be in good operating condition. Engine speed will affect test accuracy. Check pump speed
with a phototac when performing hydraulic tests.
Hydraulic Testing
1. Use the Hydraulic Schematic, Hydraulic Flow Diagrams and the Troubleshooting section found in this
Chapter to assist in problem identification and solution.
2. Hydraulic system problems (e.g. low hydraulic oil
level, contaminated oil, incorrect engine speed) will affect the entire hydraulic system.
3. For traction related problems (e.g. machine will not
go up an incline), consider performing the following hydraulic tests:
Charge Pressure Relief Valve Pressure Test
Wheel Motor Efficiency Test
Piston (Traction) Pump Flow Test
Page 4 -- 26
Greensmaster 3150
5. For issues with the cutting system, consider performing the following hydraulic tests:
Mow Circuit Relief Valve (S1R1) Pressure Test
Reel Motor Case Drain Flow Test
Gear Pump (Front Section) Flow Test
Hydraulic
System
4. For problems with steering or cutting unit lift/lower,
consider performing the following hydraulic tests:
Charge Pressure Relief Valve Pressure Test
Lower Cutting Units Relief Valve (R2) Pressure Test
Implement Relief Valve Pressure Test
Gear Pump (Rear Section) Flow Test
Steering Valve Test
Greensmaster 3150
Page 4 -- 27
Hydraulic System
Hydraulic System
Page 4 -- 28
EXPANSION
TANK
BREATHER
OUT
P1
FC1
MB
S1R1
FILTER
LC
SUCTION
STRAINER
T
OR1
0.013
PRV
550 PSI
Center
Reel (#1)
OPTIONAL
OIL COOLER
OR2
0.060
MR
.73
.73
25 PSI
G2
0.055
L2B
CU #2
2.0” Bore
0.75” Rod
1.88” Stroke
L1B
S2
S3
GEAR
PUMP
.33
R2
400 PSI
FC2
7.0 GPM
P2
L2A
CU #1
1.50” Bore
0.75” Rod
3.38” Stroke
.58
L1A
4.0 GPM
PT
0.055
L3B
1.24
ST
Lower
Raise
110 to
150 PSI
TRACTION PUMP
S4
0.030
L3A
CU #3
2.0” Bore
0.75” Rod
1.88” Stroke
3000
PSI
3000
PSI
70 to
100 PSI
TRANSPORT = 14.1 GPM
PRESSURE
GAUGE
LEAK
DETECTOR IN
VOLUME
LEAK DETECTOR
G1
BACKLAP
SWITCH
(SW)
MA
Left Front
Reel (#2)
.73
Right Front
Reel (#3)
ENGINE RPM
2850/1650
Left
Motor
E
R
1160 PSI
4.5
BYPASS
VALVE
BOTTOM
PORT
B
A
TOP
PORT
P
L
Steering Cylinder
1.5” Bore
0.75” Rod
6.19” Stroke
10.3
T
20.6
Right
Motor
OPTIONAL
3WD KIT
10.3
STEERING
VALVE
Charge Relief Valve Pressure Test (Using Pressure Gauge)
Greensmaster 3150
1. Make sure hydraulic oil is at normal operating temperature by operating the machine for approximately ten
(10) minutes.
2. Park machine on a level surface with the cutting units
lowered. Make sure engine is off and the parking brake
is engaged. Make sure the hydraulic reservoir is full.
CAUTION
Before continuing further, read and become familiar with Precautions for Hydraulic Testing.
3. Install 1000 PSI (70 bar) pressure gauge with hydraulic hose attached to test port in the tee fitting on the
bottom of the control manifold (Fig. 19).
4. Make sure that traction pedal, steering wheel and
joystick control are in the neutral position.
C. While monitoring the pressure gauge, push the
traction pedal to allow traction system load.
D. The charge pressure should drop no more than
20% from no--load charge pressure measured in
step 6 above (e.g. if charge pressure in step 6 is 125
PSI (9 bar), charge pressure in forward or reverse
under load should be more than 100 PSI (7 bar).
E. If charge pressure is good under no load, but
drops below specification when under traction load,
the piston (traction) pump and/or wheel motors
should be suspected of wear and inefficiency. When
the pump and/or traction motor(s) are worn or damaged, the charge pump is not able to keep up with internal leakage in traction circuit components. Further
testing of the traction circuit should be completed
(see Piston (Traction) Pump Flow and Wheel Motor
Efficiency Tests in this section).
10.When charge pressure testing is complete, disconnect pressure gauge from the test port and install dust
cap on test port.
5. Start engine and operate at high idle speed (2850 +
50 RPM).
6. Pressure gauge should read approximately 100 to
150 PSI (7 to 10 bar).
1
7. Shut off engine. Record test results.
8. If specification is not met, remove piston pump back
plate assembly that contains the charge relief valve (see
Piston (Traction) Pump Service in the Service and Repairs section of this chapter). Repair or replace relief
valve components as necessary.
9. A dynamic charge pressure test can be performed as
follows:
A. Position machine so that a load can be placed on
the traction system. For example, chain the machine
to an immovable object or chock all drive wheels to
prevent the machine from moving.
B. With pressure gauge still connected to control
manifold test port, sit in the operator seat, start the
engine and move throttle so engine is running at high
idle speed. Move functional control lever to the transport position.
Greensmaster 3150
2
Figure 19
1. Hydraulic manifold
Page 4 -- 29
2. Test port
Hydraulic System
Hydraulic
System
Procedure for Charge Relief Valve Pressure Test
Wheel Motor Efficiency Test (Using Tester with Flowmeter and Pressure Gauge)
PUMP
ASSEMBLY
UPPER FITTING
WHEEL MOTOR EFFICIENCY TEST FOR
LEFT FRONT WHEEL MOTOR SHOWN
TO STEERING
VALVE
TO MANIFOLD
PORT P1
FROM MANIFOLD
PORT PT
FRONT
HOSE
TRACTION PUMP
TESTER
TOP
PORT
TRANSPORT = 14.1 GPM
A
BYPASS
VALVE
3000
PSI
GEAR
.33
.58
Left
Motor
10.3
10.3
CAP
ENGINE RPM
3000
PSI
1.24
PUMP
Right
Motor
CAP
2850/1650
20.6
70 to
110 to
150 PSI
100 PSI
OPTIONAL
BOTTOM
PORT
FROM
RESERVOIR
Procedure for Wheel Motor Efficiency Test
NOTE: Over a period of time, a wheel motor can wear
internally. A worn motor may by--pass oil to its case drain
causing the motor to be less efficient. Eventually,
enough oil loss will cause the wheel motor to stall under
heavy load conditions. Continued operation with a worn,
inefficient motor can generate excessive heat, cause
damage to seals and other components in the hydraulic
system and affect overall machine performance.
1. Make sure hydraulic oil is at normal operating temperature by operating the machine for approximately ten
(10) minutes. Make sure the hydraulic tank is full.
2. Park machine on a level surface with the cutting units
lowered and off. Make sure engine is off.
Hydraulic System
B
3WD KIT
CAUTION
Before continuing further, read and become familiar with Precautions for Hydraulic Testing.
3. Make sure that traction pedal is adjusted to the neutral position (see Traction Unit Operator’s Manual).
4. Attach a heavy chain to the rear of the machine frame
and an immovable object to prevent the machine from
moving during testing.
5. If machine has 3 wheel drive, block up the rear wheel
off the ground to allow flow through the rear wheel motor.
Page 4 -- 30
Greensmaster 3150
6. Chock front wheel being tested to prevent rotation of
the wheel.
7. Thoroughly clean junction of hydraulic lines and fittings at the front wheel motor that is not being tested.
Disconnect hydraulic lines from front wheel motor that
is not being tested. Cap the disconnected hydraulic
lines and plug ports in wheel motor.
8. Thoroughly clean junction of hydraulic hose and hydraulic tube that connects to the upper hydraulic fitting
on the front side of the piston pump (Fig. 20). Disconnect
hose from the tube.
9. Install tester with pressure gauge and flow meter in
series with the pump and the disconnected hose (same
tester connections as Piston (Traction) Pump Flow
Test). Make sure the tester flow control valve is fully
open.
17.If machine has 3 wheel drive, test rear wheel motor:
A. Both front wheel motors should have hydraulic
lines connected. Block up both front wheels off the
ground to allow flow through the rear wheel motors.
B. Attach a heavy chain to the rear of the machine
frame and an immovable object to prevent the machine from moving during testing.
C. Position rear wheel on the ground and chock rear
wheel to prevent it from turning.
CAUTION
Use extreme caution when performing test. The
rear wheel will be trying to move the machine.
CAUTION
Use extreme caution when performing test. The
wheel being tested will be trying to move the machine.
18.When testing is complete, disconnect tester from hydraulic tube and hose. Reconnect hose to hydraulic
tube. Reconnect hydraulic lines to rear wheel motor.
10.Start engine and move throttle to high idle speed
(2850 + 50 RPM).
4
1
11. Slowly push traction pedal in forward direction until
1000 PSI (69 bar) is displayed on the tester pressure
gauge. Make sure that wheel does not rotate during test.
12.Wheel motor internal leakage will be shown on flow
meter in GPM. Flow should be less than 1.5 GPM for
the tested wheel motor.
13.Release traction pedal, rotate wheel being tested
and retest. Testing of wheel motor leakage in three (3)
different wheel positions will provide most accurate test
results.
FRONT
2
14.Release traction pedal and shut engine off. Record
results of flow test.
15.If specification is not met, the tested wheel motor
needs to be repaired or replaced as necessary.
3
Figure 20
1. Piston pump
2. Upper fitting
3. Hydraulic tube
4. Hydraulic hose
16.Test second front wheel motor. Reconnect hydraulic
lines to untested front wheel motor. Disconnect and cap
hydraulic lines to previously tested front wheel motor.
Complete steps 10 to 15 for the second front wheel motor.
Greensmaster 3150
Page 4 -- 31
Hydraulic System
Hydraulic
System
D. Complete steps 10 to 15 for rear wheel motor
testing.
Piston (Traction) Pump Flow Test (Using Tester with Flowmeter and Pressure Gauge)
PUMP
ASSEMBLY
UPPER FITTING
FRONT
HOSE
TO STEERING
VALVE
TO MANIFOLD
PORT P1
FROM MANIFOLD
PORT PT
TRACTION PUMP
TESTER
TOP
PORT
TRANSPORT = 14.1 GPM
A
BYPASS
VALVE
3000
PSI
GEAR
.33
.58
PUMP
10.3
10.3
ENGINE RPM
3000
PSI
1.24
Left
Motor
Right
Motor
2850/1650
20.6
70 to
110 to
150 PSI
100 PSI
B
OPTIONAL
BOTTOM
PORT
FROM
RESERVOIR
3WD KIT
Procedure for Piston (Traction) Pump Flow Test
This test measures piston (traction) pump output (flow).
During this test, pump load is created at the flowmeter
using the adjustable load valve on the tester.
1. Make sure hydraulic oil is at normal operating temperature by operating the machine for approximately ten
(10) minutes.
2. Park machine on a level surface with the cutting units
lowered and off. Make sure engine is off. Make sure the
hydraulic reservoir is full.
Hydraulic System
CAUTION
Before continuing further, read and become familiar with Precautions for Hydraulic Testing.
3. Make sure the traction assembly is adjusted to the
neutral position. Also, make sure that transport speed
adjustment allows the piston pump to reach full stroke
(refer to Traction Unit Operator’s manual).
Page 4 -- 32
Greensmaster 3150
4. Block up front wheels off the ground (also rear wheel
if machine is equipped with 3WD) to allow flow through
the traction circuit.
5. Disconnect hydraulic hose from the hydraulic tube
that connects to the upper hydraulic fitting on the front
side of the piston pump (Fig. 21).
6. Install tester in series with the pump and the disconnected hose. Make sure flow control valve on the
tester is fully open.
7. Start engine and move throttle to high idle speed
(2850 + 50 RPM) position.
8. Move functional control lever to the transport position.
CAUTION
13.If flow is less than 12.3 GPM (46.6 LPM), consider
the following:
A. The traction pedal and/or traction speed may
need adjustment (see the Traction Unit Operator’s
Manual).
B. The piston pump needs to be repaired or replaced as necessary.
C. Make necessary repairs before performing additional tests.
14.If piston pump flow test results are met and a traction
problem exists with machine, check wheel motor efficiency (see Wheel Motor Efficiency Test in this chapter).
15.If testing is complete, disconnect tester from hydraulic tube and hose. Reconnect hose to tube.
4
1
Hydraulic
System
The drive wheels will be off the ground and rotating during this test. Make sure machine is well
supported so it will not move and accidentally
fall to prevent injuring anyone near the machine.
9. Slowly push traction pedal into fully forward position.
10.Have second person carefully watch pressure gauge
on tester while slowly closing the flow control valve until
1000 PSI (69 bar) is obtained. Verify with a phototac that
the engine speed has not changed.
FRONT
NOTE: If engine speed drops, piston pump flow will decrease.
11. Observe flow gauge. If piston pump is in good condition, flow indication should be approximately 14.5 GPM
(54.9 LPM).
2
3
Figure 21
1. Piston pump
2. Upper fitting
3. Hydraulic tube
4. Hydraulic hose
12.Release traction pedal, open control valve on tester
and turn off engine.
Greensmaster 3150
Page 4 -- 33
Hydraulic System
Hydraulic System
Page 4 -- 34
EXPANSION
TANK
BREATHER
P1
FC1
MB
S1R1
FILTER
LC
SUCTION
STRAINER
T
OR1
0.013
PRV
550 PSI
Center
Reel (#1)
OPTIONAL
OIL COOLER
OR2
0.060
MR
.73
.73
25 PSI
G2
0.055
L2B
CU #2
2.0” Bore
0.75” Rod
1.88” Stroke
L1B
S2
S3
GEAR
PUMP
.33
R2
400 PSI
FC2
7.0 GPM
P2
L2A
CU #1
1.50” Bore
0.75” Rod
3.38” Stroke
TESTER
OUT
LEAK
DETECTOR IN
VOLUME
LEAK DETECTOR
G1
BACKLAP
SWITCH
(SW)
MA
Left Front
Reel (#2)
.73
Right Front
Reel (#3)
.58
L1A
4.0 GPM
PT
0.055
L3B
1.24
ST
Lower
Raise
110 to
150 PSI
TRACTION PUMP
S4
0.030
L3A
CU #3
2.0” Bore
0.75” Rod
1.88” Stroke
3000
PSI
3000
PSI
70 to
100 PSI
TRANSPORT = 14.1 GPM
ENGINE RPM
2850/1650
Left
Motor
E
R
1160 PSI
4.5
BYPASS
VALVE
BOTTOM
PORT
B
A
TOP
PORT
P
L
Steering Cylinder
1.5” Bore
0.75” Rod
6.19” Stroke
10.3
T
20.6
Right
Motor
OPTIONAL
3WD KIT
10.3
STEERING
VALVE
Gear Pump (Rear Section) Flow Test (Using Tester with Flowmeter and Pressure Gauge)
Greensmaster 3150
Procedure for Gear Pump (Rear Section) Flow Test
1. Make sure hydraulic oil is at normal operating temperature by operating the machine for approximately ten
(10) minutes.
2. Park machine on a level surface with the cutting units
lowered. Make sure engine is off and the parking brake
is engaged. Make sure the hydraulic tank is full.
CAUTION
Before continuing further, read and become familiar with Precautions for Hydraulic Testing.
3. Thoroughly clean junction of hydraulic hose and the
hydraulic fitting in the rear gear pump section (Fig. 22).
This hose leads to port P in the steering valve.
9. Flow gauge reading for a rear gear pump section in
good condition should be approximately 3.8 GPM (14.4
LPM). Record test results.
10.Open control valve on tester and shut off engine.
11. If flow was less than 3.3 GPM (12.5 LPM) or a pressure of 800 PSI (55 bar) cannot be obtained, check for
restriction in the pump intake line. If line is not restricted,
remove gear pump and repair or replace as necessary.
NOTE: Implement Relief Valve Pressure and Lower
Cutting Units Relief Valve (R2) Pressure can be measured with tester positioned as described in this check
(see Implement Relief Valve Pressure Test and Lower
Cutting Units Relief Valve (R2) Pressure Test in this section).
12.After testing is complete, disconnect tester from the
gear pump fitting and hose. Reconnect hose to the gear
pump fitting.
5. Install tester with pressure gauge and flow meter in
series with the gear pump fitting and the disconnected
hose. Make sure flow control valve on the tester is
fully open.
Hydraulic
System
4. Disconnect the hose from the fitting in the rear gear
pump section.
1
6. Make sure that traction pedal and joystick control are
in neutral and the parking brake is engaged.
7. Start engine and operate at high idle speed (2850 +
50 RPM).
IMPORTANT: Do not fully restrict oil flow through
tester. In this test, the flow tester is positioned before the circuit relief valve. Gear pump damage can
occur if the oil flow is fully restricted.
8. Watch flow and pressure gauge carefully while slowly closing the flow control valve on the tester until the
pressure gauge reads 800 PSI (55 bar).
Greensmaster 3150
2
Figure 22
1. Gear pump
Page 4 -- 35
2. Rear section fitting
Hydraulic System
Hydraulic System
Page 4 -- 36
EXPANSION
TANK
BREATHER
P1
FC1
MB
S1R1
FILTER
LC
SUCTION
STRAINER
T
OR1
0.013
PRV
550 PSI
Center
Reel (#1)
OPTIONAL
OIL COOLER
OR2
0.060
MR
.73
25 PSI
G2
0.055
L2B
CU #2
2.0” Bore
0.75” Rod
1.88” Stroke
L1B
S2
S3
GEAR
PUMP
.33
R2
400 PSI
FC2
7.0 GPM
P2
L2A
CU #1
1.50” Bore
0.75” Rod
3.38” Stroke
TESTER
OUT
LEAK
DETECTOR IN
VOLUME
LEAK DETECTOR
G1
BACKLAP
SWITCH
(SW)
MA
Left Front
Reel (#2)
.73
.73
Right Front
Reel (#3)
.58
L1A
4.0 GPM
PT
0.055
L3B
1.24
ST
Lower
Raise
110 to
150 PSI
TRACTION PUMP
S4
0.030
L3A
CU #3
2.0” Bore
0.75” Rod
1.88” Stroke
3000
PSI
3000
PSI
70 to
100 PSI
TRANSPORT = 14.1 GPM
4.5
ENGINE RPM
2850/1650
BYPASS
VALVE
Left
Motor
E
R
1160 PSI
BOTTOM
PORT
B
A
TOP
PORT
P
L
Steering Cylinder
1.5” Bore
0.75” Rod
6.19” Stroke
10.3
T
20.6
Right
Motor
OPTIONAL
3WD KIT
10.3
STEERING
VALVE
Implement Relief Valve Pressure Test (Using Tester with Flowmeter and Pressure
Gauge)
Greensmaster 3150
1. Make sure hydraulic oil is at normal operating temperature by operating the machine for approximately ten
(10) minutes.
2. Park machine on a level surface with the cutting units
lowered. Make sure engine is off. Make sure the hydraulic tank is full.
CAUTION
Before continuing further, read and become familiar with Precautions for Hydraulic Testing.
3. Measure and record charge relief valve pressure
(see Charge Relief Valve Pressure Test in this section).
4. Thoroughly clean junction of hydraulic hose and the
hydraulic fitting in the rear gear pump section (Fig. 23).
This hose leads to port P in the steering valve.
5. Disconnect the hose from the fitting in the rear gear
pump section.
6. Install tester with pressure gauge and flow meter in
series with the gear pump fitting and the disconnected
hose (same connections as Gear Pump (Rear Section)
Flow Test). Make sure flow control valve on the tester
is fully open.
10.Implement relief valve pressure should be 1050 to
1250 PSI (73 to 86 bar) higher than the charge relief
valve pressure (e.g. if the charge relief valve pressure
is 100 PSI (7 bar), the implement relief valve pressure
should be from 1150 to 1350 PSI (80 to 93 bar)).
IMPORTANT: Hold steering wheel at full lock only
long enough to get a system pressure reading.
11. The implement relief valve is also activated by the
steering system. With tester still connected to gear
pump outlet, start engine and watch the pressure
gauge. Turn the steering wheel completely in one direction and hold. Relief valve should open just after rear
wheel gets to the full lock position. Relief pressure measured with the steering system should be similar to results in step 10 above.
12.If implement relief valve pressure is incorrect, inspect relief valve located in the steering valve (see
Steering Valve Service in the Service and Repairs section of this Chapter). Clean relief valve or service steering valve as needed.
NOTE: Gear Pump (Rear Section) Flow Test and Lower Cutting Units Relief Valve Pressure can be measured
with tester positioned as described in this check (see
Gear Pump (Rear Section) Flow Test and Lower Cutting
Units Relief Valve Pressure Test in this section).
13.After testing is complete, remove tester from gear
pump fitting. Reconnect hose to the gear pump fitting.
7. Start and run engine at full speed (2850 + 50 RPM).
1
CAUTION
When performing test, do not allow system pressure to exceed 1400 PSI (83 bar).
8. Watch the pressure gauge on the tester and move
the joystick control to the raise position. Momentarily
hold the joystick with the cutting units fully raised causing the implement relief valve to open. Record pressure
at which the relief valve opens.
9. Release joystick to the neutral position and shut off
engine.
NOTE: The implement relief valve is in series with
charge relief valve. Charge relief pressure will affect the
implement relief pressure.
Greensmaster 3150
2
Figure 23
1. Gear pump
Page 4 -- 37
2. Rear section fitting
Hydraulic System
Hydraulic
System
Procedure for Implement Relief Valve Pressure Test
Hydraulic System
Page 4 -- 38
EXPANSION
TANK
BREATHER
P1
FC1
MB
S1R1
FILTER
LC
SUCTION
STRAINER
T
OR1
0.013
PRV
550 PSI
Center
Reel (#1)
OPTIONAL
OIL COOLER
OR2
0.060
MR
.73
25 PSI
G2
0.055
L2B
CU #2
2.0” Bore
0.75” Rod
1.88” Stroke
L1B
S2
S3
GEAR
PUMP
.33
R2
400 PSI
FC2
7.0 GPM
P2
L2A
CU #1
1.50” Bore
0.75” Rod
3.38” Stroke
TESTER
OUT
LEAK
DETECTOR IN
VOLUME
LEAK DETECTOR
G1
BACKLAP
SWITCH
(SW)
MA
Left Front
Reel (#2)
.73
.73
Right Front
Reel (#3)
.58
L1A
4.0 GPM
PT
0.055
L3B
1.24
ST
Lower
Raise
110 to
150 PSI
TRACTION PUMP
S4
0.030
L3A
CU #3
2.0” Bore
0.75” Rod
1.88” Stroke
3000
PSI
3000
PSI
70 to
100 PSI
TRANSPORT = 14.1 GPM
4.5
ENGINE RPM
2850/1650
BYPASS
VALVE
Left
Motor
E
R
1160 PSI
BOTTOM
PORT
B
A
TOP
PORT
P
L
Steering Cylinder
1.5” Bore
0.75” Rod
6.19” Stroke
10.3
T
20.6
Right
Motor
OPTIONAL
3WD KIT
10.3
STEERING
VALVE
Lower Cutting Units Relief Valve (R2) Pressure Test (Using Tester with Flowmeter and
Pressure Gauge)
Greensmaster 3150
Procedure for Lower Cutting Units Relief Valve (R2)
Pressure Test
1. Make sure hydraulic oil is at normal operating temperature by operating the machine for approximately ten
(10) minutes.
2. Park machine on a level surface with the cutting units
lowered. Make sure engine is off. Make sure the hydraulic tank is full.
CAUTION
Before continuing further, read and become familiar with Precautions for Hydraulic Testing.
10.If lower cutting units relief valve pressure is incorrect,
adjust control manifold relief valve (R2) (see Adjust
Manifold Relief Valves in the Adjustments section of this
Chapter). Retest relief valve pressure if adjustment is
performed.
NOTE: Gear Pump (Rear Section) Flow Test and Implement Relief Valve Pressure can be measured with
tester positioned as described in this check (see Gear
Pump (Rear Section) Flow Test and Implement Relief
Valve Pressure Test in this section).
11. After testing is complete, disconnect tester from gear
pump and hose. Reconnect hose to hydraulic fitting on
pump.
3. Measure and record charge relief valve pressure
(see Charge Relief Valve Pressure Test in this section).
1
Hydraulic
System
4. Thoroughly clean junction of hydraulic hose and the
hydraulic fitting in the rear gear pump section (Fig. 24).
This hose leads to port P in the steering valve.
5. Disconnect the hose from the fitting in the rear gear
pump section.
6. Install tester with pressure gauge and flow meter in
series with the gear pump fitting and the disconnected
hose (same connections as Gear Pump (Rear Section)
Flow Test). Make sure flow control valve on the tester
is fully open.
7. Start engine and move throttle to full speed (2850 +
50 RPM). Make sure that cutting units are fully lowered
and then engage the cutting units.
NOTE: The LOWER function is electrically timed and
automatically turns off after approximately six (6) seconds.
2
Figure 24
1. Gear pump
2. Rear section fitting
RELIEF
VALVE (R2)
S3
S1R1
8. Watch pressure gauge carefully while moving the
joystick control lever to the LOWER position and note
pressure that relief valve opens. Shut off engine and record test results.
NOTE: While performing this hydraulic test, if relief
pressure cannot be determined within the LOWER function six (6) second timeframe, repeat this test procedure.
NOTE: The lower cutting units relief valve is in series
with the charge relief valve. Charge relief pressure will
affect the lower cutting units relief pressure.
9. The lower cutting units relief valve pressure should
be approximately 400 PSI (28 bar) higher than charge
relief pressure (e.g. if charge relief valve pressure is
100 PSI (7 bar), the lower relief valve pressure should
be approximately 500 PSI (35 bar)).
Greensmaster 3150
Page 4 -- 39
FRONT
S4
S2
Figure 25
Hydraulic System
Hydraulic System
Page 4 -- 40
EXPANSION
TANK
BREATHER
P1
FC1
MB
S1R1
FILTER
LC
SUCTION
STRAINER
T
OR1
0.013
PRV
550 PSI
Center
Reel (#1)
OPTIONAL
OIL COOLER
OR2
0.060
MR
.73
25 PSI
G2
0.055
L2B
CU #2
2.0” Bore
0.75” Rod
1.88” Stroke
S2
S3
GEAR
PUMP
.33
R2
400 PSI
FC2
L1B
CU #1
1.50” Bore
0.75” Rod
3.38” Stroke
7.0 GPM
P2
L2A
TESTER
OUT
LEAK
DETECTOR IN
VOLUME
LEAK DETECTOR
G1
BACKLAP
SWITCH
(SW)
MA
Left Front
Reel (#2)
.73
.73
Right Front
Reel (#3)
.58
L1A
4.0 GPM
PT
0.055
L3B
1.24
ST
Lower
Raise
110 to
150 PSI
TRACTION PUMP
S4
0.030
L3A
CU #3
2.0” Bore
0.75” Rod
1.88” Stroke
3000
PSI
3000
PSI
70 to
100 PSI
TRANSPORT = 14.1 GPM
4.5
ENGINE RPM
2850/1650
BYPASS
VALVE
Left
Motor
E
R
1160 PSI
BOTTOM
PORT
B
A
TOP
PORT
P
L
Steering Cylinder
1.5” Bore
0.75” Rod
6.19” Stroke
10.3
T
20.6
Right
Motor
OPTIONAL
3WD KIT
10.3
STEERING
VALVE
Gear Pump (Front Section) Flow Test (Using Tester with Flowmeter and Pressure
Gauge)
Greensmaster 3150
1. Make sure hydraulic oil is at normal operating temperature by operating the machine for approximately ten
(10) minutes.
2. Park machine on a level surface with the cutting units
lowered. Make sure engine is off and the parking brake
is engaged. Make sure the hydraulic tank is full.
7. Watch pressure gauge carefully while slowly closing
the flow control valve on the tester until 2000 PSI (138
bar) is obtained.
8. Flow gauge reading for a gear pump section in good
condition should be approximately 6.7 GPM (25.3
LPM). Record test results.
9. Once gear pump flow is recorded, open control valve
on tester and shut off engine.
Before continuing further, read and become familiar with Precautions for Hydraulic Testing.
10.If flow was less than 5.7 GPM (21.6 LPM) or a pressure of 2000 PSI (138 bar) cannot be obtained, check
for restriction in the gear pump intake line. If line is not
restricted, remove gear pump and repair or replace as
necessary.
3. Disconnect the hose from the fitting in the front gear
pump section (Fig. 26). This hose leads to port P1 on the
hydraulic manifold.
11. When testing is complete, disconnect tester from
gear pump fitting and hydraulic hose. Connect hose to
pump fitting.
4. Install tester with pressure gauge and flow meter in
series with front gear pump section fitting and the disconnected hose. Make sure the flow control valve on
the tester is fully open.
12.Adjust reel speed knob on mow control manifold to
original setting.
CAUTION
5. Make sure that reel speed is set to highest speed setting (fully open) and that backlap knob on the hydraulic
manifold is in the mow position.
1
CAUTION
Do not engage the cutting units when performing
this test.
6. Start engine and operate at high idle speed (2850 +
50 RPM).
IMPORTANT: Do not fully restrict oil flow through
tester. In this test, the flow tester is positioned before the circuit relief valve. Gear pump damage can
occur if the oil flow is fully restricted.
Greensmaster 3150
2
Figure 26
1. Gear pump
Page 4 -- 41
2. Front section fitting
Hydraulic System
Hydraulic
System
Procedure for Gear Pump (Front Section) Flow Test
Hydraulic System
Page 4 -- 42
EXPANSION
TANK
TESTER
BREATHER
OUT
LEAK
DETECTOR IN
VOLUME
LEAK DETECTOR
G1
BACKLAP
SWITCH
(SW)
MA
P1
FC1
MB
S1R1
Center
Reel (#1)
FILTER
LC
SUCTION
STRAINER
T
OR1
0.013
PRV
550 PSI
.73
OPTIONAL
OIL COOLER
OR2
0.060
MR
Left Front
Reel (#2)
.73
.73
Right Front
Reel (#3)
25 PSI
G2
0.055
L2B
CU #2
2.0” Bore
0.75” Rod
1.88” Stroke
L1B
S2
S3
GEAR
PUMP
.33
R2
400 PSI
FC2
7.0 GPM
P2
L2A
CU #1
1.50” Bore
0.75” Rod
3.38” Stroke
.58
L1A
4.0 GPM
PT
0.055
L3B
1.24
ST
Lower
Raise
110 to
150 PSI
TRACTION PUMP
S4
0.030
L3A
CU #3
2.0” Bore
0.75” Rod
1.88” Stroke
3000
PSI
3000
PSI
70 to
100 PSI
TRANSPORT = 14.1 GPM
4.5
ENGINE RPM
2850/1650
BYPASS
VALVE
Left
Motor
E
R
1160 PSI
BOTTOM
PORT
B
A
TOP
PORT
P
L
Steering Cylinder
1.5” Bore
0.75” Rod
6.19” Stroke
10.3
T
20.6
Right
Motor
OPTIONAL
3WD KIT
10.3
STEERING
VALVE
Mow Circuit Relief Valve (S1R1) Pressure Test (Using Tester with Flowmeter and
Pressure Gauge)
Greensmaster 3150
Procedure for Mow Circuit Relief Valve (S1R1) Pressure Test
1. Make sure hydraulic oil is at normal operating temperature by operating the machine for approximately ten
(10) minutes.
B. If relief valve pressure is not correct, remove solenoid relief valve (S1R1) on hydraulic control manifold (Fig. 28). Clean or replace valve (see Hydraulic
Manifold Service in the Service and Repairs section
of this chapter). After valve service, retest relief valve
(S1R1) pressure.
2. Park machine on a level surface with the cutting units
lowered. Make sure engine is off. Make sure the hydraulic tank is full.
11. When testing is complete, disconnect tester from
reel motor fitting and hydraulic hose. Reconnect hose to
the front motor fitting.
12.Correctly adjust cutting unit bedknife.
Before continuing further, read and become familiar with Precautions for Hydraulic Testing.
LH REEL MOTOR
3. Disconnect hydraulic hose from the front fitting of the
left front cutting reel motor (Fig. 27).
FRONT
3
4. Install tester with pressure gauge and flow meter in
series with the disconnected hose and front reel motor
fitting. Make sure the flow control valve on the tester
is fully open.
5. To prevent reel damage, temporarily adjust bedknife
to allow clearance between bedknife and reel (no contact).
6. Make sure that reel speed is set to highest speed setting (fully open) and that backlap knob on the hydraulic
manifold is in the mow position.
2
Hydraulic
System
CAUTION
1
Figure 27
1. LH reel motor
2. Front fitting
FRONT
3. Hydraulic hose
S2
CAUTION
S3
S4
Keep away from reels during test to prevent personal injury from the rotating reel blades.
7. Start engine and move throttle to high idle speed
(2850 + 50 RPM). Engage the cutting units.
S1R1
8. Watch pressure gauge carefully while slowly closing
the flow control valve on the tester to fully closed.
9. System pressure should be from 2700 to 3300 PSI
(186 to 228 bar) as manifold relief valve (S1R1) opens.
Record test results.
R2
Figure 28
10.After recording mow circuit relief pressure, disengage cutting units. Open control valve on tester and shut
off engine.
A. If relief valve pressure is correct, go to step 11.
Greensmaster 3150
Page 4 -- 43
Hydraulic System
Reel Motor Case Drain Flow Test (Using Tester with Flowmeter and Pressure Gauge)
LH CASE
DRAIN
LH RETURN
FRONT
RH CASE
DRAIN
RH RETURN
CENTER
RETURN
CENTER
CASE
DRAIN
Right Front
Reel (#3)
TESTER
.73
PLUG
.73
MEASURING
CONTAINER
Center
Reel (#1)
.73
Left Front
Reel (#2)
CASE DRAIN FLOW TEST FOR
RIGHT FRONT REEL MOTOR SHOWN
FROM MANIFOLD
PORT MA
TO MANIFOLD
PORT MB
TO HYDRAULIC
RESERVOIR
Hydraulic System
Page 4 -- 44
Greensmaster 3150
Procedure for Reel Motor Case Drain Flow Test:
1. Make sure hydraulic oil is at normal operating temperature by operating the machine for approximately ten
(10) minutes. Make sure the hydraulic reservoir is full.
2. Park machine on a level surface with the cutting units
lowered. Make sure engine is off.
CAUTION
10.After achieving 1000 PSI (69 bar), place disconnected motor case drain hose into a container graduated in ounces or milliliters (Tool TOR4077: see
Special Tools) and collect hydraulic fluid for 15 seconds
(Fig. 29). After 15 seconds, remove hose end from container.
11. Disengage cutting units. Open control valve on tester and stop the engine.
12.Measure the amount of oil collected in the container.
Record test results.
3. For the suspected bad cutting reel motor, disconnect
return hose from the motor. The return hose connects to
the fitting at the rear of the motor.
4. Install tester in series with the reel motor and the disconnected return hose. Make sure the flow control
valve on the tester is fully open.
5. Make sure backlap knob on the hydraulic manifold is
in the mow position and reel speed is set to maximum.
13.If case drain flow was greater than 16.0 ounces (473
milliliters) (0.5 GPM/1.9 LPM) in 15 seconds, repair or
replace the reel motor as necessary.
14.When testing of the reel motor is completed, disconnect tester from reel motor and return hose. Reconnect
return hose to the motor.
15.Remove plug from bulkhead fitting. Reconnect case
drain hose to the bulkhead fitting.
16.Test other cutting reel motors as needed.
6. Disconnect hose from case drain of the motor to be
tested at the bulkhead fitting.
A. Plug the bulkhead port with a steel plug.
B. Leave the case drain hose from the motor open
and place open end of disconnected hose into a
drain pan.
7. One person should sit on the seat and operate the
machine while a second person reads the tester and
measures case drain leakage.
8. Make sure functional control lever is in NEUTRAL.
Start engine and move the throttle to high idle speed
(2850 + 50 RPM).
Figure 29
CAUTION
Keep away from reels during test to prevent personal injury from the rotating reel blades.
9. Move the functional control lever to the MOW position and engage the cutting reels with the joystick control. While watching pressure gauge, slowly close flow
control valve on the tester until a pressure of 1000 PSI
(69 bar) is obtained.
Greensmaster 3150
Page 4 -- 45
Figure 30
Hydraulic System
Hydraulic
System
Before continuing further, read and become familiar with Precautions for Hydraulic Testing.
Steering Control Valve Test
Steering Cylinder
(CYLINDER ROD
FULLY EXTENDED)
PLUG
L
R
TURNED FOR
RIGHT TURN
4.5
STEERING
VALVE
1160 PSI
P
E
T
TO CONTROL
MANIFOLD
PORT ST
TO CONTROL
MANIFOLD
PORT P2
FROM GEAR
PUMP
Procedure for Steering Control Valve Test:
B. Steering wheel movements should be followed
immediately by a corresponding rear wheel movement without the steering wheel continuing to turn.
1. Make sure the hydraulic reservoir is full.
2. Make sure hydraulic oil is at normal operating temperature by operating the machine for approximately ten
(10) minutes.
3. Drive machine slowly in a figure eight on a flat level
surface.
A. There should be no shaking or vibration in the
steering wheel or rear wheel.
Hydraulic System
4. Stop the machine with the engine running. Turn
steering wheel with small quick movements in both
directions. Let go of the steering wheel after each movement.
A. The steering wheel must go back immediately to
the neutral position.
B. The steering wheel should not continue to turn.
Page 4 -- 46
Greensmaster 3150
NOTE: The steering wheel must be able to turn with no
more than 45 in--lb (5.1 N--m) of torque.
5. Perform the Implement Relief Valve Pressure and
Gear Pump (Rear Section) Flow tests to make sure that
relief valve and gear pump are functioning correctly.
NOTE: This steering test procedure will be affected by
incorrect rear tire pressure, binding in the hydraulic
steering cylinder, extra weight on the vehicle and/or
binding of the steering fork assembly. Make sure that
these items are checked before proceeding with any hydraulic testing procedure.
3
6. If either of these performance tests indicate a steering problem, determine if the steering cylinder is faulty
using the following procedure.
A. Park machine on a level surface with the cutting
units lowered and off. Apply the parking brake.
4
Hydraulic
System
B. Turn the steering wheel all the way to the right
(clockwise) so the steering cylinder rod is fully extended.
C. Turn engine off.
1
CAUTION
2
FRONT
Before continuing further, read and become familiar with Precautions for Hydraulic Testing.
Figure 31
1. Steering cylinder
2. Hydraulic hose
D. Read Precautions for Hydraulic Testing.
3. Rod end
4. Castor fork
E. Remove hydraulic hose from the 90o fitting on the
rod end of the steering cylinder (Fig. 31). Install steel
plug in the end of the hose.
F. With the engine off, continue turning the steering
wheel to the right (clockwise) with the steering cylinder fully extended. Observe the open fitting on the
steering cylinder as the steering wheel is turned. If oil
comes out of the fitting while turning the steering
wheel to the right, the steering cylinder has internal
leakage and must be repaired or replaced.
G. Remove plug from the hydraulic hose. Reconnect hose to the steering cylinder fitting.
7. If steering problem exists and steering cylinder
tested acceptably, steering control valve requires service (see Steering Control Valve and Steering Control
Valve Service in the Service and Repairs section of this
chapter).
Greensmaster 3150
Page 4 -- 47
Hydraulic System
This page is intentionally blank.
Hydraulic System
Page 4 -- 48
Greensmaster 3150
Adjustments
Adjust Manifold Relief Valve (R2)
The hydraulic manifold includes an adjustable relief
valve in the lift circuit (Fig. 32). If adjustment to this valve
is necessary, follow the following procedure.
2
FRONT
NOTE: Do not remove relief valve from the hydraulic
manifold for adjustment.
WARNING
Never adjust the relief valve with the hydraulic
system pressurized. Hydraulic oil may spray out
of the valve with the cap off. Personal injury may
result. Always install the cap and tighten before
pressurizing the system.
Figure 32
1. Locate relief valve on control manifold.
2. Remove cap on relief valve with an allen wrench.
1. Hydraulic manifold
2. Relief valve (R2)
3. To increase pressure setting, turn the adjustment
socket on the valve in a clockwise direction. A 1/8 turn
on the socket will make a measurable change in relief
pressure.
4. To decrease pressure setting, turn the adjustment
socket on the valve in a counterclockwise direction. A
1/8 turn on the socket will make a measurable change
in relief pressure.
CAP
5. Install and tighten cap on relief valve.
6. Recheck relief pressure and readjust as needed.
ADJUSTMENT
HEX SOCKET
Figure 33
Greensmaster 3150
Page 4 -- 49
Hydraulic System
Hydraulic
System
1
Service and Repairs
General Precautions for Removing and Installing Hydraulic System Components
Before Repair or Replacement of Components
After Repair or Replacement of Components
1. Before removing any parts from the hydraulic system, park machine on a level surface, engage parking
brake, lower cutting units or attachments and stop engine. Remove key from the ignition switch
1. Check oil level in the hydraulic reservoir and add correct oil if necessary. Drain and refill hydraulic system
reservoir and change oil filter if component failure was
severe or system is contaminated (see Flush Hydraulic
System).
2. Clean machine before disconnecting, removing or
disassembling any hydraulic components. Make sure
hydraulic components, hoses connections and fittings
are cleaned thoroughly. Always keep in mind the need
for cleanliness when working on hydraulic equipment.
CAUTION
Operate all hydraulic controls to relieve system
pressure and avoid injury from pressurized hydraulic oil. Controls must be operated with the
ignition switch in RUN and the engine OFF. Make
sure all electrically operated control valves are
actuated. Return ignition switch to OFF when
pressure has been relieved. Remove key from
the ignition switch.
3. Put caps or plugs on any hydraulic lines, hydraulic fittings and components left open or exposed to prevent
contamination.
2. Lubricate O--rings and seals with clean hydraulic oil
before installing hydraulic components.
3. Make sure caps or plugs are removed from the hydraulic tubes, hydraulic fittings and components before
reconnecting.
4. Use proper tightening methods when installing hydraulic hoses and fittings (see Hydraulic Fitting Installation).
5. After repairs, check control linkages or cables for
proper adjustment, binding or broken parts.
6. After disconnecting or replacing any hydraulic components, operate machine functions slowly until air is
out of system (see Charge Hydraulic in this section).
7. Check for hydraulic oil leaks. Shut off engine and correct leaks if necessary. Check oil level in hydraulic reservoir and add correct oil if necessary.
4. Put labels on disconnected hydraulic lines and
hoses for proper installation after repairs are completed.
5. Note the position of hydraulic fittings (especially elbow fittings) on hydraulic components before removal.
Mark parts if necessary to make sure they will be aligned
properly when reinstalling hydraulic hoses and tubes.
Hydraulic System
Page 4 -- 50
Greensmaster 3150
Flush Hydraulic System
IMPORTANT: Flush the hydraulic system any time
there is a severe component failure or the system is
contaminated (oil appears milky or black or contains metal particles).
IMPORTANT: Flush hydraulic system when changIng from petroleum base hydraulic fluid. Operate
machine under normal operating conditions for at
least four (4) hours before draining.
1. Park the machine on a level surface, engage the
parking brake, lower the cutting units and stop the engine. Remove key from the ignition switch.
7. Disconnect both spark plug wires from spark plugs
to prevent the engine from starting.
8. Turn ignition key switch; engage starter for ten (10)
seconds to prime the hydraulic pumps. Allow the starter
to cool for one (1) minute and then repeat this step
again.
9. Reconnect both spark plug wires to spark plugs.
10.Start engine and let it idle at low speed for a minimum
of two (2) minutes. Increase engine speed to high idle for
minimum of one (1) minute under no load.
CAUTION
Before continuing further, read and become familiar with General Precautions for Removing
and Installing Hydraulic System Components.
2. Clean area around gear pump and pump inlet hose
(Fig. 34). Clamp pump inlet hose. Remove hose from
gear pump, release clamp and drain reservoir into a suitable container. Drain hydraulic system while making
sure lift cylinders, hydraulic hoses, hydraulic tubes and
all other components are drained from low points while
the system is warm.
3. Clean hydraulic oil filter mounting area. Remove filter and drain into a suitable container. Discard filter.
4. Inspect and clean hydraulic reservoir (see Hydraulic
Reservoir in the Service and Repairs section of this
chapter).
12.Shut off engine and check for hydraulic oil leaks.
Check oil level in hydraulic reservoir and add correct oil
if necessary.
13.Operate the machine for two (2) hours under normal
operating conditions.
14.Check condition of hydraulic oil. If the new hydraulic
oil shows any signs of contamination, or if you are
changing to biodegradable fluid, repeat steps 1 through
13 again.
15.Assume normal operation and follow recommended
maintenance intervals.
PUMP INLET HOSE
5. Make sure filter mounting surface is clean. Apply hydraulic oil to gasket on the new filter. Screw filter on until
gasket contacts mounting plate, then tighten filter 3/4
turn further.
NOTE: Use only hydraulic fluids (including biodegradable) specified in the Traction Unit Operator’s Manual.
Other fluids could cause system damage.
6. Reconnect all hydraulic hoses and lines that were
disconnected prior to draining. Fill hydraulic reservoir.
Greensmaster 3150
Page 4 -- 51
Figure 34
Hydraulic System
Hydraulic
System
11. Raise and lower cutting units several times. Rotate
steering wheel in both directions several times.
Filtering Closed--Loop Traction Circuit
Filtering of a closed--loop hydraulic system after a major
component failure (e.g. piston (traction) pump or wheel
motor) is a requirement to prevent debris from transmitting throughout the system. If a closed--loop hydraulic
system filtering tool is not used to ensure system cleanliness, repeat failures, as well as subsequent damage to
other hydraulic components in the affected system, will
occur. To effectively remove contamination from
closed--loop traction circuit, use of the Toro high flow hydraulic filter and hydraulic hose kits are recommended
(see Special Tools in this chapter).
1. Park machine on a level surface with engine stopped
and key removed from ignition switch.
2. Raise machine so all driven wheels are off the
ground. Support raised machine with appropriate jackstands.
NOTE: If wheel motor was replaced, install high flow filter to the inlet of new motor instead of to piston (traction)
pump fitting. This will prevent system contamination
from entering and damaging the new motor.
3. Thoroughly clean junction of hydraulic hose and
lower fitting on side of piston pump (Fig. 35). Disconnect
hose from lower pump fitting.
4. Connect Toro high flow hydraulic filter in series between lower piston pump fitting and disconnected hose.
Use hydraulic hose kit (see Special Tools in this chapter)
to connect filter to machine. Make sure that fitting and
hose connections are properly tightened.
IMPORTANT: Use only hydraulic fluids specified in
Traction Unit Operator’s Manual. Other fluids could
cause system damage.
IMPORTANT: While engaging the traction circuit,
monitor the indicator on the high flow hydraulic filter. If the indicator should show red, either reduce
pressure on the traction pedal or reduce engine
speed to decrease hydraulic flow through the filter.
7. With engine running at low idle speed, slowly move
the traction pedal to the forward direction to allow flow
through the traction circuit and high flow filter. Keep traction circuit engaged for five (5) minutes while gradually
increasing both forward pressure on traction pedal and
engine speed. Monitor filter indicator to make sure that
green color is showing during operation.
IMPORTANT: If using a filter that is not the bi--directional Toro high flow filter, do not press the traction
pedal in the reverse direction. If flow is reversed
when using a filter that is not bi--directional, debris
from the filter will re--enter the traction circuit.
8. With engine running at high idle speed, alternately
move traction pedal from forward to reverse. While monitoring filter indicator, continue this process for an additional five (5) minutes.
9. Shut engine off and remove key from ignition switch.
10.Remove high flow hydraulic filter and hydraulic hose
kit from machine. Connect hydraulic hose to lower piston pump fitting. Make sure to properly tighten hose (see
Hydraulic Hose and Tube Installation in the General Information section of this chapter).
11. Lower machine to ground.
12.Check oil level in hydraulic reservoir and add correct
oil if necessary.
5. After installing high flow filter to machine, check and
fill hydraulic reservoir with new hydraulic oil as required.
1
6. Start engine and run at idle speed. Check for any hydraulic leakage from filter and hose connections. Correct any leaks before proceeding.
CAUTION
All driven wheels will be off the ground and rotating during this operation. Make sure machine is
well supported so it will not move and accidentally fall.
2
Figure 35
1. Piston pump
Hydraulic System
Page 4 -- 52
2. Lower pump fitting
Greensmaster 3150
Hydraulic System Start--up
CAUTION
Be careful when operating the cutting unit reels.
Contact with the reel or other moving parts can
result in personal injury.
1. After the hydraulic system components have been
properly installed and if the traction pump was rebuilt or
replaced, make sure traction pump housing is at least
half full of clean hydraulic oil.
10.After the hydraulic system starts to show signs of fill,
accomplish the following:
2. Make sure all hydraulic connections and lines are secured tightly.
A. If a reel motor was replaced or rebuilt, run the cutting units at the minimum speed setting (under no
load) for ten (10) minutes in both directions.
3. Make sure hydraulic reservoir is full. Add correct oil
if necessary. Drain, flush and refill hydraulic system reservoir and change oil filter if component failure was severe or system is contaminated.
B. If the gear pump was replaced or rebuilt, run the
cutting units at the minimum speed setting (under no
load) for ten (10) minutes.
4. After repairs, check control linkage for proper adjustment, binding or broken parts.
C. If the piston pump or a wheel motor was replaced
or rebuilt, run the traction unit so the wheels turn
slowly for ten (10) minutes.
5. Make sure functional control lever is in neutral.
6. Disconnect both spark plug wires from spark plugs
to prevent the engine from starting.
7. Turn ignition key switch and engage starter for ten
(10) seconds to prime pump. Return ignition switch to off
and wait one (1) minute to allow starter to cool. Repeat
step a second time.
11. Operate the traction unit and cutting units by gradually increasing their work load to full over a ten (10) minute period.
12.Stop the machine. Check reservoir and fill if necessary. Check hydraulic components for leaks and tighten
any loose connections.
8. Reconnect spark plug wires to spark plugs.
9. Make sure functional control lever is in neutral and
cutting unit switch is off. Start engine and run at low idle
speed. The charge pump should pick up oil and fill the
hydraulic system. If there is no indication of fill in thirty
(30) seconds, stop the engine and determine the cause.
Greensmaster 3150
Page 4 -- 53
Hydraulic System
Hydraulic
System
NOTE: When initially starting the hydraulic system with
new or rebuilt components such as motors, pumps or lift
cylinders, it is important that this start--up procedure be
used. This procedure reduces the chance of damaging
the system or its components from not purging the system of air.
Gear Pump
7
1
7
16
17
13
14
2
12
11
8
5
3
4
RIGHT
FRONT
6
9
10
15
Figure 36
1.
2.
3.
4.
5.
6.
Pump inlet hose
Gear pump
Hydraulic fitting
Hydraulic fitting
O--ring
O--ring
Hydraulic System
7.
8.
9.
10.
11.
12.
Hose clamp (2 used)
O--ring
O--ring
Hydraulic hose
O--ring
Piston pump
Page 4 -- 54
13.
14.
15.
16.
17.
Socket head screw (2 used)
Flat washer (2 used)
Hydraulic hose
Hose connector
O--ring
Greensmaster 3150
Removal (Fig. 36)
4. Secure gear pump to the piston pump with two (2)
socket head screws and flat washers.
5. Inspect threads and sealing surfaces of hydraulic fittings and hydraulic hose connectors. Replace any damaged or worn fittings or hoses.
Before continuing further, read and become familiar with General Precautions for Removing
and Installing Hydraulic System Components.
1. Before removing any parts from the hydraulic system, park machine on a level surface, engage parking
brake, lower cutting units and stop engine. Remove key
from the ignition switch.
2. Label all hose connections for assembly purposes.
3. Clamp pump inlet hose to prevent draining the hydraulic reservoir.
4. Loosen hose clamp and remove pump inlet hose
from the gear pump. Allow clamped hose to drain into a
suitable container.
5. Disconnect hydraulic hoses from fittings on bottom
of the gear pump. Allow hoses to drain into a suitable
container. Plug hoses to prevent contamination.
IMPORTANT: Note position of hydraulic fittings for
assembly purposes.
6. Mark hydraulic fitting orientation to allow correct assembly. Remove hydraulic fittings and O--rings from
gear pump.
6. Lubricate and place new O--rings onto gear pump
hydraulic fittings. Install fittings into pump openings
making sure that fitting orientation is as noted during removal. Tighten fittings (see Hydraulic Fitting Installation
in the General Information section of this chapter).
7. Remove plugs that were placed during disassembly
from hydraulic hoses.
8. Using labels placed during gear pump removal, lubricate new O--rings and connect hydraulic hoses to lower
gear pump fittings. Tighten hose connections (see Hydraulic Hose and Tube Installation in the General Information section of this chapter).
9. Install pump inlet hose to the hose connector on gear
pump. Secure hose with hose clamp.
10.Remove clamp from pump inlet hose to allow hydraulic oil flow to the gear pump.
11. Check oil level in hydraulic reservoir and add correct
oil if necessary.
12.Follow Hydraulic System Start--up procedures (see
Hydraulic System Start--up in this section).
7. Support gear pump to prevent it from shifting. Separate gear pump from the piston pump by removing both
socket head screws and flat washers. Remove O--ring
from between the gear pump and piston pump.
Remove plugs
before installing
gear pump to
piston pump
2
NOTE: A case drain exists in the piston (traction) pump
and a suction port is near the input shaft of the gear
pump (Fig. 37). When the gear pump is removed from
the piston pump, plug piston pump case drain hole to
prevent draining the piston pump.
8. Discard all removed O--rings.
1
Installation (Fig. 36)
1. Make sure mounting and O--ring sealing surfaces on
the gear pump and piston pump are clean.
2. Lubricate and place new O--ring (item 11) on the gear
pump.
Figure 37
1. Piston pump case drain
2. Gear pump suction port
3. Position gear pump to the piston pump so that the
pump inlet is facing up.
Greensmaster 3150
Page 4 -- 55
Hydraulic System
Hydraulic
System
CAUTION
Gear Pump Service
19
12
11
15
16
18
9
8
6
2
17
13
7
1
3
4
4
3
14
13
21
22
20
14
10
33 ft--lb
(45 N--m)
5
Figure 38
1.
2.
3.
4.
5.
6.
7.
8.
O--ring
Front cover
Back--up seal
Pressure seal
Thrust plate
Drive shaft
Idler gear
Thrust plate
9.
10.
11.
12.
13.
14.
15.
16.
17.
18.
19.
20.
21.
22.
Dowel pin
O--ring
Housing
Coupler
Back--up seal
Pressure seal
Thrust plate
Drive gear
Idler gear
Thrust plate
O--ring
End cover
Socket head screw (4 used)
Washer (4 used)
Gear Pump Disassembly (Fig. 38)
NOTE: Disassemble gear pump for cleaning, inspection and seal replacement only. Individual gears, housings and thrust plates are not available separately. If
internal components are worn or damaged, the gear
pump must be replaced as a complete assembly.
MARKER LINES
IMPORTANT: Keep gears and thrust plates for each
pump section together; do not mix parts between
pump sections.
1. Plug pump ports and thoroughly clean exterior of
pump with cleaning solvent. Make sure work area is
clean.
2. Use a marker to make a “V” across the front cover,
housing and end cover for assembly purposes (Fig. 39).
IMPORTANT: Use caution when clamping gear
pump in a vise to avoid distorting any pump components. Also, use a vise with soft jaws.
3. Secure the front cover of the pump in a vise with soft
jaws with the drive shaft pointing down.
Hydraulic System
Figure 39
4. Loosen the four (4) socket head screws that secure
pump assembly.
5. Remove pump from vise and remove fasteners.
Page 4 -- 56
Greensmaster 3150
6. Support the pump assembly and gently tap the
pump housing with a soft face hammer to loosen the
pump sections. Be careful to not drop parts or disengage gear mesh.
Gear Pump Assembly (Fig. 38)
IMPORTANT: Mark the relative positions of the gear
teeth and the thrust plates so they can be assembled in the same position. Do not touch the gear
surfaces as residue on hands may be corrosive to
gear finish.
NOTE: Pressure and back--up seals fit in grooves machined into thrust plates. Body O--rings fit in grooves machined in housing.
7. Remove the thrust plates and seals from each pump
section. Before removing each gear set, apply marking
dye to mating teeth to retain ”timing”. Pump efficiency
may be affected if the teeth are not installed in the same
position during assembly. Keep the parts for each pump
section together; do not mix parts between sections.
8. Clean all parts. Check all components for burrs,
scoring, nicks and other damage.
1. Apply clean hydraulic oil to all parts before assembling.
2. Assemble pump sections starting at front cover end.
Apply grease or petroleum jelly to new section seals to
hold them in position during gear pump assembly.
3. After pump has been assembled, tighten socket
head screws by hand. Rotate the drive shaft to check for
binding. Protect the shaft if using a pliers to rotate shaft.
4. Tighten the socket head screws evenly in a crossing
pattern to a torque of 33 ft--lb (45 N--m).
Greensmaster 3150
Page 4 -- 57
Hydraulic
System
9. Replace the entire pump assembly if any pump components are excessively worn or scored.
Hydraulic System
Piston (Traction) Pump Neutral Assembly
28
24
8
7
25
25 to 38 ft--lb
(34 to 51 N--m)
32
33 18
22
25
13
38
21
12
35
19
1
28
20
36
15
6
5
14
4
30
18
34
29
18
Antiseize
Lubricant
26
2
34
RIGHT
FRONT
3
11
16
17
10
31
23
37
27
9
39
Figure 40
1.
2.
3.
4.
5.
6.
7.
8.
9.
10.
11.
12.
13.
Lock nut
Pivot tube
Cap screw
Damper lever
Pivot spacer
Pump lever
Flat washer
Cap screw
Cable support
Flat washer (2 used)
Neutral arm
Thrust washer
Traction stud
Hydraulic System
14.
15.
16.
17.
18.
19.
20.
21.
22.
23.
24.
25.
26.
Bearing spacer
Ball bearing
Extension spring
Cap screw (2 used)
Flange nut (3 used)
Cap screw
Cap screw
Lock washer (2 used)
Cable ball joint
Flange nut
Cap screw
Flat washer (2 used)
Dampener hose
Page 4 -- 58
27.
28.
29.
30.
31.
32.
33.
34.
35.
36.
37.
38.
39.
Traction control cable
Flat washer (2 used)
Pivot plate
Mount (3 used)
Cap screw (3 used)
Lock nut (3 used)
Washer (3 used)
Nylon washer (2 used)
Spring bracket
Mount plate
Piston pump assembly
Cap screw (2 used)
Key
Greensmaster 3150
Disassembly (Fig. 40)
4
1. Park machine on a level surface, engage parking
brake, lower cutting units and stop engine. Remove key
from the ignition switch.
3
6
CAUTION
The extension spring (item 16) is under tension
and may cause personal injury during removal.
Use caution when removing the spring from the
pump neutral assembly.
5
1
2. Remove components from traction neutral assembly
as needed using Figure 40 as a guide.
Figure 41
1. Piston pump
2. Neutral arm
3. Cap screw
Assembly (Fig. 40)
2
4. Pump lever
5. Cable support
6. Traction cable
Hydraulic
System
1. Install removed components to traction neutral assembly using Figure 40 as a guide along with the following:
CAUTION
The extension spring (item 16) is under tension
and may cause personal injury during installation. Use caution when installing the spring to
the pump neutral assembly.
A. If pivot plate (item 29) was removed from pump
trunnion shaft, make sure that both trunnion shaft
and plate bore are thoroughly cleaned before installing plate to shaft.
B. If damper lever (item 4) was removed, apply antiseize lubricant to pivot tube (item 2) before inserting
into the bore of cable support (item 9).
C. Make sure that ball bearing (item 15) on neutral
arm (item 11) is properly positioned in pump lever
(item 6) after assembly.
2. After traction neutral assembly has been installed,
make sure that the transmission is adjusted for the neutral position so that the machine does not move or creep
when the traction pedal is in neutral.
Greensmaster 3150
Page 4 -- 59
Hydraulic System
Piston (Traction) Pump
15
4
RIGHT
FRONT
26
15
3
37
27
5
30
25
36
35
Loctite #242
27 to 33 ft--lb
(37 to 44 N--m)
23
81 to 99 ft--lb
(110 to 134 N--m)
Loctite #242
90 to 110 in--lb
(10.2 to 12.4 N--m)
2
6
25
38
23
33
24
18
1
28
34
29
7
9
33
30
10
31
11
39
34
32
19
16
33
81 to 99 ft--lb
(110 to 134 N--m)
21
20
13
3
17
33
10
9
8
14
7
Antiseize
Lubricant
22
6
12
Figure 42
1.
2.
3.
4.
5.
6.
7.
8.
9.
10.
11.
12.
13.
Pump hub
Piston pump
Flat washer (4 used)
Pump inlet hose
Gear pump
Lock nut (4 used)
Coupling spacer (4 used)
Rubber coupling
Flat washer (4 used)
Cap screw (4 used)
Square head set screw (2 used)
Square key
Engine hub
14.
15.
16.
17.
18.
19.
20.
21.
22.
23.
24.
25.
26.
Flat washer
Hose clamp (2 used)
Lock washer (2 used)
Cap screw (2 used)
Hydraulic fitting
90o hydraulic fitting
Hydraulic tube
Support clamp
Cap screw
90o hydraulic fitting (2 used)
90o hydraulic fitting
O--ring
Socket head screw (2 used)
27.
28.
29.
30.
31.
32.
33.
34.
35.
36.
37.
38.
39.
Hose connector
Spacer
Cap screw
O--ring
Hydraulic hose
Hydraulic hose
O--ring
O--ring
O--ring
O--ring
Hydraulic hose
O--ring
Key
NOTE: The complete piston (traction) and gear pump
assembly can be removed from the machine with the
neutral assembly attached to the piston pump. See Piston (Traction) Pump Neutral Assembly in this section for
information regarding servicing the neutral assembly.
Hydraulic System
Page 4 -- 60
Greensmaster 3150
Piston Pump Removal (Fig. 42)
3
1. Park machine on a level surface, engage parking
brake, lower cutting units and stop engine. Remove key
from the ignition switch.
CAUTION
2
Before continuing further, read and become familiar with General Precautions for Removing
and Installing Hydraulic System Components.
2. Disconnect the traction control cable ball joint and
jam nuts from the neutral arm (Fig. 43). Position traction
cable away from the pump assembly.
1
4
Figure 43
1. Piston pump
2. Traction cable
3. Jam nut (2 used)
4. Cable ball joint
3
CAUTION
2
4. Remove two (2) cap screws (item 10), flat washers
(item 9), coupling spacers (item 7) and lock nuts (item
6) that secure pump hub to rubber coupling (item 8).
Hydraulic
System
1
The extension spring attached to the neutral arm
is under tension and may cause personal injury
during removal. Use caution when removing the
spring from the pump neutral arm.
3. Disconnect one end of the extension spring attached
to the neutral arm (Fig. 44).
4
5
Figure 44
1. Extension spring
2. Dampener hose
3. Spring bracket
4. Mount plate
5. Neutral arm
5. Thoroughly clean hydraulic hose ends and fittings on
gear and piston (traction) pumps to prevent hydraulic
system contamination.
2
6. Label all hydraulic hose connections on gear and
piston pumps for assembly purposes.
Remove plugs
before installing
gear pump to
piston pump
7. Clamp pump inlet hose (item 4) to prevent draining
the hydraulic reservoir.
8. Loosen hose clamp and remove inlet hose from the
gear pump.
9. Disconnect hydraulic hoses from fittings on pump
assembly. Allow hoses to drain into a suitable container.
Plug hoses and fittings to prevent contamination.
1
CAUTION
Support the pump assembly when removing its
supporting fasteners to prevent it from falling
and causing personal injury.
Figure 45
1. Piston pump case drain port
2. Gear pump suction port
10.Support pump assembly to prevent it from falling.
Greensmaster 3150
Page 4 -- 61
Hydraulic System
11. Remove two (2) cap screws (item 17), lock washers
(item 16) and flat washers (item 3) that secure pump assembly to pump adapter mounted to engine. Separate
pump assembly from the pump adapter and remove
from machine.
6. Lubricate and place new O--rings onto all removed
hydraulic fittings. Install fittings into pump openings
making sure that fitting orientation is as noted during removal. Tighten fittings (see Hydraulic Fitting Installation
in the General Information section of this chapter).
12.If necessary, remove pump hub (item 1) from pump
input shaft. Locate and retrieve key (item 39).
13.Separate gear pump from the piston pump (see Gear
Pump in this section).
7. Position pump assembly to pump adapter on engine
and align pump hub with rubber coupling (item 8). Secure pump assembly to pump adapter with two (2) cap
screws (item 17), lock washers (item 16) and flat washers (item 3).
IMPORTANT: If fittings are going to be removed
from piston pump, note position of fittings for assembly purposes.
8. Secure pump hub to rubber coupling (item 8) with
two (2) cap screws (item 10), flat washers (item 9), coupling spacers (item 7) and lock nuts (item 6).
14.If fitting removal from piston pump is necessary,
mark hydraulic fitting orientation to allow correct assembly. Remove hydraulic fittings and O--rings from piston
pump. Discard removed O--rings.
15.If necessary, remove the neutral assembly attached
to the piston pump (see Piston (Traction) Pump Neutral
Assembly in this section).
Piston Pump Installation (Fig. 42)
1. If any neutral assembly components were removed
from piston pump, install them to pump (see Piston
(Traction) Pump Neutral Assembly in this section).
2. Make sure the flange surfaces of the gear pump and
piston pump are thoroughly clean.
IMPORTANT: A case drain exists in the piston (traction) pump and a suction port is near the input shaft
of the gear pump (Fig. 45). Before the gear pump is
installed to the piston pump, make sure that plugs
placed in either of these ports are removed. Failure
to remove plugs will cause excessive pressure in
the piston pump and damage seals.
3. Install gear pump to the piston pump (see Gear
Pump in this section).
4. If removed, secure hub (item 1) to piston pump shaft:
A. Make sure that pump shaft and bore of hub are
thoroughly cleaned.
B. Position key (item 39) to pump shaft.
C. Apply Loctite #242 (or equivalent) to the threads
of the cap screw used to secure hub to pump shaft.
D. Slide hub onto pump shaft and secure with
spacer (item 28) and cap screw (item 29). Torque
cap screw from 27 to 33 ft--lb (37 to 44 N--m).
CAUTION
The neutral arm extension spring is under tension and may cause personal injury during
installation. Use caution when installing the
spring to the pump neutral arm.
9. Connect the extension spring to the neutral arm (Fig.
44).
10.Connect the traction control cable to the neutral arm
(Fig. 43):
A. Secure traction cable ball joint to neutral arm.
B. Secure control cable to neutral arm with cable
jam nuts. Make sure that a washer is positioned on
each side of the neutral arm.
11. Remove plugs from hydraulic fittings and hoses that
were placed during pump removal.
12.Using labels placed during pump removal, lubricate
new O--rings and connect hydraulic hoses to gear pump
and piston pump fittings. Tighten hose connections (see
Hydraulic Hose and Tube Installation in the General Information section of this chapter).
13.Make sure that gear pump inlet hose is installed to
pump fitting and secured with hose clamp. Remove
clamp from gear pump inlet hose.
14.Check oil level in hydraulic reservoir and add correct
oil if necessary.
15.Follow Hydraulic System Start--up procedures (see
Hydraulic System Start--up in this section).
16.Check neutral position of the traction pedal. If adjustment is required, see Adjust Transmission for Neutral in
the Traction Unit Owner’s Manual.
5. Inspect threads and sealing surfaces of hydraulic fittings and hydraulic hose connectors. Replace any damaged or worn fittings or connectors.
Hydraulic System
Page 4 -- 62
Greensmaster 3150
Hydraulic
System
This page is intentionally blank.
Greensmaster 3150
Page 4 -- 63
Hydraulic System
Piston (Traction) Pump Service
36
37
21
20
19
17
23
22
18
16
15
REAR
OF TRACTION UNIT
41
14
15
4
8
38
27
40
24
9
13
29
28
11
5
12
26
7
39
6
8
3
10
2
28
1
38
30
4
6
31
31
35
34
32
39
25
4
33 30
Figure 46
1.
2.
3.
4.
5.
6.
7.
8.
9.
10.
11.
12.
13.
14.
Key
Drive shaft
Bearing
Cap screw (3 used per plate)
Cover plate
O--ring
Shim kit (for crush ring replacement)
Bearing cone
Key
Swash plate
Rotating kit
Gasket
Valve plate
Bearing
Hydraulic System
15.
16.
17.
18.
19.
20.
21.
22.
23.
24.
25.
26.
27.
28.
Dowel pin
Back plate
O--ring
Forward relief valve
Bypass valve
O--ring
Cap screw (2 used)
Cap screw (2 used)
Coupler
Roll pin
Cover plate
Swash plate insert
Shaft seal
Washer
Page 4 -- 64
29.
30.
31.
32.
33.
34.
35.
36.
37.
38.
39.
40.
41.
Housing
Retaining ring
Bearing race
Thrust bearing
Washer
Shaft seal
Retaining ring
Retaining ring
Plug
Plug with O--ring (2 used)
Bearing cup
Shuttle relief valve with O--ring
Reverse relief valve
Greensmaster 3150
For repair of the piston pump, see Eaton, Medium Duty
Piston Pump, Repair Information, Model 70160 Variable
Displacement Piston Pump at the end of this chapter.
1
NOTE: The charge relief valve is attached to the piston
pump back plate (shown in Fig. 47). The back plate must
be removed to service the relief valve.
2
NOTE: The piston pump is equipped with relief valves
(items 18 and 41) for both the forward and reverse direction. Due to engine output, it is unlikely that traction pressure will reach relief valve settings. If, however, a piston
pump relief valve is leaking or otherwise faulty, traction
performance would be affected.
CHARGE RELIEF
VALVE
IMPORTANT: The shim kit (item 7) is used to replace
the original crush ring (not shown) in the cover plate
(item 25). If the swash plate (item 10), cover plate
(item 25) or housing (item 29) is replaced during servicing, the old crush ring must be replaced. For information on crush ring replacement, see Piston
Pump Crush Ring Replacement in this section in
conjunction with the piston pump service manual at
the end of this chapter.
3
4
6
5
Figure 47
1.
2.
3.
4.
Greensmaster 3150
7
Page 4 -- 65
Back plate
Charge relief valve
O--ring
Housing
5.
6.
7.
8.
Poppet
Spring
Washer
Retaining ring
Hydraulic System
Hydraulic
System
8
Piston Pump Crush Ring Replacement
4
5
8
7
29 ft--lb
(39 N--m)
2
v
3
9
10
6
1
Figure 48
1.
2.
3.
4.
Crush ring
Shims
Cover plate
Housing
5. Swash plate (control shaft)
6. Bearing cone
7. Bearing cup
NOTE: The shims replace the crush ring in the cover
plate. If the camplate, cover plate or housing is replaced
during servicing of the pump, the old crush ring can not
be used to make sure of proper preload.
1. Remove crush ring from the cover plate. Measure
thickness of crush ring.
2. Stack shims to the thickness of the crush ring.
3. Insert shims into the cover plate in the same location
that the crush ring was removed from.
4. Assemble housing sub assembly consisting of the
housing, camplate, bearing cone, bearing cup and cover plate (see Eaton, Medium Duty Piston Pump, Repair
Information, Model 70160 Variable Displacement Piston
Pump at the end of this chapter).
Hydraulic System
8. O--ring
9. Washer (3 used)
10. Cap screws (3 used)
5. Install washers and cap screws to the cover plate
and housing. Torque cap screws to 29 ft--lbs (39 N--m).
6. Check torque required to rotate control shaft. Torque
should be 5 to 15 in--lbs (0.6 to 1.7 N--m).
A. If torque is too low, add additional shims and repeat steps 3 through 6 until the specified torque is
achieved.
B. If torque is too high, remove shims and repeat
steps 3 through 6 until the specified torque is
achieved.
7. Complete assembly of the pump (see Eaton, Medium Duty Piston Pump, Repair Information, Model
70160 Variable Displacement Piston Pump at the end of
this chapter).
Page 4 -- 66
Greensmaster 3150
Hydraulic
System
This page is intentionally blank.
Greensmaster 3150
Page 4 -- 67
Hydraulic System
Front Wheel Motors
2
250 to 400 ft--lb
(339 to 542 N--m)
3
6
1
5
8
11
14
13
12
17
15
18
19
70 to 90 ft--lb
(95 to122 N--m)
7
9
16
21
10
4
23
RIGHT
24
25
26
FRONT
20
27
22
Figure 49
1.
2.
3.
4.
5.
6.
7.
8.
9.
Lug nut (4 per wheel)
Wheel assembly
Lock nut
Brake lever
Brake drum
Wheel hub
Drive stud (4 per hub)
Brake assembly
Brake cam
Hydraulic System
10.
11.
12.
13.
14.
15.
16.
17.
18.
Retaining ring
Cap screw (4 per brake)
Lock nut (4 per brake)
Woodruff key
Brake bracket
Hydraulic hose
Hydraulic hose
45o Hydraulic fitting (2 per motor)
O--ring
Page 4 -- 68
19.
20.
21.
22.
23.
24.
25.
26.
27.
O--ring
Hydraulic motor
Cap screw (4 per motor)
Lock nut (4 per motor)
Brake rod
Jam nut
Clevis pin
Swivel clevis
Cotter pin
Greensmaster 3150
Front Wheel Motor Removal (Fig. 49)
Front Wheel Motor Installation (Fig. 49)
1. Before removing any parts from the hydraulic system, park the machine on a level surface, engage the
parking brake, lower the cutting units and stop the engine.
1. Position hydraulic wheel motor and brake bracket
(item 14) to the frame. Make sure ports of motor face the
rear of the machine. Secure motor and brake bracket to
the frame with four (4) cap screws (item 21) and lock
nuts (item 22).
CAUTION
Before continuing further, read and become familiar with General Precautions for Removing
and Installing Hydraulic System Components.
2. Remove plugs from wheel motor ports. Lubricate
and place new O--rings onto fittings. Install fittings into
motor openings making sure that fitting orientation is as
noted during removal. Tighten fittings (see Hydraulic Fitting Installation in the General Information section of this
chapter).
3. Remove caps from disconnected hydraulic lines.
3. Label all wheel motor hydraulic connections for assembly purposes.
4. Lubricate and position new O--rings to fittings on
wheel motor. Use labels placed during the removal process to properly install hydraulic lines to wheel motor fittings (see Hydraulic Hose and Tube Installation in the
General Information section of this chapter).
4. Disconnect both hose assemblies and O--rings from
the hydraulic fittings on the wheel motor. Allow hoses to
drain into a suitable container. Discard removed O-rings.
5. Install brake assembly, brake drum assembly and
front wheel to machine (see Front Wheel and Brake in
the Service and Repairs section of Chapter 6 -- Chassis).
5. Mark wheel motor fitting orientation to allow correct
assembly. Remove hydraulic fittings and O--rings from
motor. Discard removed O--rings.
WARNING
6. Put caps or plugs on disconnected hoses and motor
port openings to prevent contamination.
Failure to maintain proper wheel lug nut and
wheel hub lock nut torque could result in failure
or loss of wheel and may result in personal injury.
7. Remove four (4) cap screws (item 21) and lock nuts
(item 22) that secure brake bracket (item 14) and hydraulic wheel motor to machine. Remove brake bracket
and motor from the frame.
6. Make sure to properly torque lock nut from 250 to
400 ft--lb (339 to 542 N--m) and wheel lug nuts from 70
to 90 ft--lb (95 to 122 N--m).
7. Check oil level in hydraulic reservoir and add correct
oil if necessary.
8. Follow Hydraulic System Start--up procedures (see
Hydraulic System Start--up in this section).
Greensmaster 3150
Page 4 -- 69
Hydraulic System
Hydraulic
System
2. Remove front wheel, brake drum assembly and
brake assembly from machine (see Front Wheel and
Brake in the Service and Repairs section of Chapter 6
-- Chassis).
Rear Wheel Motor (Optional 3WD)
6
100 ft--lb
(135 N--m)
4
1
7
5
16
22
3
30
21
5
17
26
2
20
9
31
29
25
19
27
8
14
12
23
11
18
15
40 ft--lb
(55 N--m)
24
13
28
70 to 90 ft--lb
(95 to122 N--m)
10
Loctite #242
80 to 100 in--lb
(9.0 to 11.3 N--m)
FRONT
RIGHT
Figure 50
1.
2.
3.
4.
5.
6.
7.
8.
9.
10.
11.
Lock nut (2 used)
Spacer (2 used)
Grommet (2 used)
Hydraulic hose assembly
Washer (4 used)
Castor fork
Mount spacer (2 used)
Grease fitting
Bearing flangette (lube)
Bearing
Bearing flangette
12.
13.
14.
15.
16.
17.
18.
19.
20.
21.
Cap screw (3 used)
Lock nut (2 used)
Wheel motor & hub assembly
Adapter (2 used)
Socket head screw (2 used)
Bulkhead bracket
Lug nut (4 used)
Hydraulic hose assembly
Hydraulic tube assembly
Washer (3 used)
22.
23.
24.
25.
26.
27.
28.
29.
30.
31.
Lock nut (3 used)
O--ring
O--ring
O--ring
O--ring
Set screw
Wheel assembly
Grease fitting
Hydraulic hose assembly
Washer head screw (2 used)
NOTE: For service of the hub and motor assembly
(item 14) on machines equipped with 3WD, see Rear
Wheel (Optional 3WD) and Rear Wheel Hub and Motor
Assembly (Optional 3WD) in the Service and Repairs
section of Chapter 6 -- Chassis.
Hydraulic System
Page 4 -- 70
Greensmaster 3150
Hydraulic
System
This page is intentionally blank.
Greensmaster 3150
Page 4 -- 71
Hydraulic System
Wheel Motor Service
13
12
11
10
3
1
2
4
5
6
7
8
9 8
14
15
16
17
24
5
23
5
22
5
19
18
20
21
5
Figure 51
1.
2.
3.
4.
5.
6.
7.
8.
Dirt seal
Bearing
Housing
Back--up washer
Seal ring
Back--up washer
Inner seal
Thrust washer
9.
10.
11.
12.
13.
14.
15.
16.
Thrust bearing
Bearing
Coupling shaft
Thrust bearing
Drive link
Cap screw
Commutator seal
Commutator
17.
18.
19.
20.
21.
22.
23.
24.
Woodruff key
Wear plate
Rotor
Vane
Stator
Manifold
Commutator ring
End cover
NOTE: For repair of the wheel motors, see the Parker
TorqmotorTM Service Procedure (TC, TB, TE, TJ, TF,
TG, TH and TL Series) at the end of this chapter.
Hydraulic System
Page 4 -- 72
Greensmaster 3150
Hydraulic
System
This page is intentionally blank.
Greensmaster 3150
Page 4 -- 73
Hydraulic System
Cutting Reel Motors
LH BULKHEAD
ASSEMBLY
35
18
19
16
RH BULKHEAD
ASSEMBLY
1
34
16
17
6
17
16 19
16
17
32
36
33
34
16
7
18
18
16 19
1
6
1
7
33
29
13
32
37
22
5
13
33
3
34
9
14
1
3
5
27
4
28
8
10
12
2
13
11
20
15
13
30
31
26
16
17
CENTER BULKHEAD
ASSEMBLY
FRONT
RIGHT
18
21
24
25
23
22
16
19
Figure 52
1.
2.
3.
4.
5.
6.
7.
8.
9.
10.
11.
12.
13.
Hydraulic hose (2 used)
Hydraulic hose
Hydraulic hose
Hydraulic tube
Hydraulic tube
Hydraulic hose
Hydraulic hose
Center reel motor
Hydraulic tube
Hydraulic hose
Hydraulic hose
Hydraulic hose
O--ring
Hydraulic System
14.
15.
16.
17.
18.
19.
20.
21.
22.
23.
24.
25.
LH reel motor
Bulkhead fitting
Washer
Spacer
Rubber grommet
Bulkhead nut
Bulkhead tee fitting
Bulkhead bracket
Bulkhead nut
Cap screw
Flat washer
Flange nut
Page 4 -- 74
26.
27.
28.
29.
30.
31.
32.
33.
34.
35.
36.
37.
Washer head screw
RH reel motor
Hydraulic manifold
Bulkhead bracket
O--ring
O--ring
Hydraulic tube
Hydraulic tube
Hydraulic tube
Washer
Bulkhead nut
Bulkhead tee fitting
Greensmaster 3150
Removal (Fig. 52)
2
1. Before removing any parts from the hydraulic system, park machine on a level surface, engage parking
brake, lower cutting units and stop engine.
1
CAUTION
Before continuing further, read and become familiar with General Precautions for Removing
and Installing Hydraulic System Components.
2. Label all hydraulic hose connections for assembly
purposes. Matchmark reel motor and all hydraulic fittings for assembly purposes.
3. Remove hose connections from the hydraulic fittings
on the reel motor. Allow hydraulic oil to drain from hoses
into a suitable container. Put caps or plugs on ends of
hoses to prevent contamination.
Figure 53
1. Cutting reel motor
2. Flange head screw
RH REEL MOTOR
6. Remove hydraulic fittings and O--rings from the reel
motor (Figs. 54, 55 and 56). Put caps or plugs in motor
openings to prevent contamination.
5
4
FRONT
3
4
2
3
1
2
Figure 54
1.
2.
3.
4.
RH cutting reel motor
O--ring
Hydraulic fitting
O--ring
5. O--ring
6. Hydraulic fitting
7. O--ring
LH REEL MOTOR
7
6
Installation (Fig. 52)
1. Inspect threads and sealing surfaces of fittings and
hydraulic hoses. Replace any worn or damaged fittings.
5
FRONT
2. If fittings were removed from reel motor, lubricate
and place new O--rings onto fittings. Install fittings into
motor ports using marks made during the removal process to properly orientate fittings (Figs. 54, 55 and 56).
Tighten fittings (see Hydraulic Fitting Installation in the
General Information section of this chapter).
3. Coat spline shaft of the reel motor with No. 2 multipurpose lithium base grease.
4. Install the flange head screws for the reel drive motor
into the cutting unit side plate and leave approximately
1/2 inch (13 mm) of threads exposed on each screw.
Greensmaster 3150
7
6
4. Loosen two (2) flange head screws that secure the
hydraulic reel motor to the cutting unit side plate (Fig.
53). Rotate motor clockwise and remove motor from cutting unit.
5. Inspect reel insert splines for wear. Replace if necessary (see Reel Assembly Removal and Installation in
the Service and Repairs section of Chapter 7 -- DPA Cutting Units).
3. Cutting unit
4
3
4
2
8
2
1
Figure 55
1.
2.
3.
4.
Page 4 -- 75
LH cutting reel motor
O--ring
Hydraulic fitting
O--ring
5.
6.
7.
8.
O--ring
Hydraulic fitting
O--ring
Hydraulic fitting
Hydraulic System
Hydraulic
System
NOTE: The position of hydraulic fittings on the reel motor is critical to properly connect hydraulic hoses to the
motors.
3
5. Rotate the motor clockwise so the motor flanges
clear the cap screws in the cutting unit side plates. Align
reel motor shaft splines with cutting reel insert splines.
Slide motor shaft into reel insert.
6. Rotate the motor counter--clockwise until the motor
flanges are encircling the cap screws. Tighten two (2)
flange head screws to secure reel motor to cutting unit.
CENTER REEL MOTOR
4
5
FRONT
3
8
2
4
7. Remove caps or plugs from hydraulic fittings and
hoses. Connect hydraulic hoses to reel motor (see Hydraulic Hose and Tube Installation in the General Information section of this chapter).
8. After assembly is completed, verify that hydraulic
hoses and fittings are not contacted by any moving components.
6
7
2
1
Figure 56
1.
2.
3.
4.
Center cutting reel motor
O--ring
Hydraulic fitting
O--ring
5.
6.
7.
8.
O--ring
Hydraulic fitting
O--ring
Hydraulic fitting
9. Check oil level in hydraulic reservoir and add correct
oil if necessary.
Hydraulic System
Page 4 -- 76
Greensmaster 3150
Hydraulic
System
This page is intentionally blank.
Greensmaster 3150
Page 4 -- 77
Hydraulic System
Cutting Reel Motor Service
10
215 to 280 in--lb
(24 to 32 N--m)
1
6
5
7
9
8
7
2
5
6
11
3
12
4
Figure 57
1.
2.
3.
4.
Rear cover
Drive gear
Seal
Tab washer
5.
6.
7.
8.
Pressure seal
Back--up ring
O--ring
Body
Disassembly
1. Plug motor ports and clean the outside of the motor
thoroughly. After cleaning, remove plugs and drain any
oil out of the motor.
9.
10.
11.
12.
Idler gear
Cap screw
Front flange
Washer (if equipped)
DIAGONAL MARK
2. Use a marker or scribe to make a diagonal mark
across the front flange, body and rear cover for reassembly purposes (Fig. 58).
Figure 58
Hydraulic System
Page 4 -- 78
Greensmaster 3150
IMPORTANT: Avoid using excessive clamping
pressure on the motor flange to prevent distorting
the casting.
1
3. Clamp mounting flange of motor in a vise with the
shaft end down.
4. Loosen cap screws on the rear cover.
5. Take motor from the vise and remove cap screws.
2
6. Remove front flange from the body, then remove rear
cover. Locate and remove dowel pins from body.
IMPORTANT: Mark the relative positions of the gear
teeth and the bearing blocks so they can be reassembled in the same position. Do not touch the
gear surfaces as residue on hands may be corrosive
to gear finish.
Figure 59
1. Motor body
2. Bearing block & gear set
Hydraulic
System
7. Place the motor on its side and push on the rear bearing block to remove the bearing block and gear set
(Fig. 59).
8. Carefully remove and discard O--rings, pressure
seals and back--up rings (Fig. 60) from motor. Do not
cause any damage to the machined grooves during the
removal process.
IMPORTANT: Make sure to not damage the counter
bore when removing the shaft seal from the front
plate.
9. Position front flange with seal side up. Remove shaft
seal.
Figure 60
Inspection
1. Remove any nicks and burrs from all motor components with emery cloth.
1
2
CAUTION
Use eye protection such as goggles when using
compressed air.
3
2. Clean all motor components with solvent. Dry all
parts with compressed air.
3
Figure 61
1. Drive gear
2. Idler gear
Greensmaster 3150
Page 4 -- 79
3. Bearing block
Hydraulic System
3. Inspect drive gear, idler gear and bearing blocks
(Fig. 61) for the following:
A. Gear shafts should be free of rough surfaces and
excessive wear at bushing points and sealing areas.
Scoring, rough surfaces or wear on gear shafts indicates need for replacement.
B. Gear teeth should be free of excessive scoring
and wear. Any broken or nicked gear teeth must be
replaced.
C. Inspect gear face edge for sharpness. Sharp
edges of gears will mill into bearing blocks and, thus,
must be replaced.
D. Bearing areas of bearing blocks should not have
excessive wear or scoring.
E. Face of bearing blocks that are in contact with
gears should be free of wear, roughness or scoring.
4. Inspect front flange and rear cover for damage or
wear.
Assembly
NOTE: When reassembling the motor, check the identification marks made during disassembly to make sure
the parts are properly aligned during reassembly.
1. Lubricate O--rings, pressure seals, back--up gaskets
and seal grooves with a thin coat of petroleum jelly. Lubricate all other internal parts freely with clean hydraulic
oil.
2. Install new shaft seal into front flange.
3. Install lubricated pressure seals into the grooves in
the front flange and rear cover. Follow by carefully placing the back--up rings into the grooves.
4. Install new O--rings to the body.
Hydraulic System
5. Lubricate gear faces and bearing surfaces of drive
gear, idler gear and bearing blocks. Carefully assemble
bearing blocks and gears noting identification marks
made during disassembly.
6. Position the motor body on its side. Carefully slide
bearing block and gear assembly into the body cavity
using identification marks made during disassembly.
7. Remove any excess lubrication from mating surfaces of body, rear cover and front flange. Make sure
that these surfaces are clean and dry.
8. Install dowel pins in body.
IMPORTANT: Do not dislodge O--rings, pressure
seals or back--up rings during final assembly.
9. Gently slide the rear cover onto the assembly using
marker or scribe mark for proper location. Firm hand
pressure should be sufficient to engage the dowel pins.
10.Position the motor with rear cover downwards. Carefully slide the front flange onto the assembly using marker or scribe mark for proper location.
11. Install the four (4) cap screws and hand tighten.
IMPORTANT: Avoid using excessive clamping
pressure on the motor housing to prevent distorting
the housing.
12.Place motor front flange in a vise and alternately
torque the cap screws from 215 to 280 in--lb (24 to 32
N--m).
13.Put a small amount of hydraulic oil in port on motor
and rotate driveshaft one revolution. Protect the shaft if
using a pliers. If drive shaft binds, disassemble motor
and repeat assembly process.
14.Remove motor from vise.
Page 4 -- 80
Greensmaster 3150
Hydraulic
System
This page is intentionally blank.
Greensmaster 3150
Page 4 -- 81
Hydraulic System
Front Lift Cylinders
13
16
3 22
5
3
2
4
14
2
4
12
9
10
21
3
1
12
8
6
7 20 6
19
7
14
4
15
2
2
3
4
16
13
9
10
11
8
7
18
17
6
18
20
7
6
RIGHT
FRONT
Figure 62
1.
2.
3.
4.
5.
6.
7.
8.
RH lift arm
Straight hydraulic fitting
O--ring
O--ring
Hydraulic hose
Cap screw
Washer
Pivot pin
Hydraulic System
9.
10.
11.
12.
13.
14.
15.
Cotter pin
Clevis pin
LH lift arm
Spacer
Spacer
Hydraulic cylinder
Hydraulic hose
Page 4 -- 82
16.
17.
18.
19.
20.
21.
22.
Grease fitting
LH torsion spring
Grease fitting
Hydraulic hose
Hinge pin
RH torsion spring
Hydraulic hose
Greensmaster 3150
Front Lift Cylinder Removal (Fig. 62)
Front Lift Cylinder Installation (Fig. 62)
1. Before removing any parts from the hydraulic system, park the machine on a level surface, engage the
parking brake, lower the cutting units and stop the engine.
1. If fittings were removed from lift cylinder, lubricate
and place new O--rings onto fittings. Install fittings into
lift cylinder ports. Tighten fittings (see Hydraulic Fitting
Installation in the General Information section of this
chapter).
CAUTION
2. Position lift cylinder to the machine.
2. Label all hydraulic connections for assembly purposes.
3. Disconnect hydraulic hoses and O--rings from the
hydraulic fittings at the lift cylinder. Allow hoses to drain
into a suitable container.
4. Remove cotter pin and clevis pin that secure the lift
cylinder clevis to the lift arm.
5. Support lift cylinder to prevent it from dropping.
A. Remove cap screw and washer from the pivot pin
(item 8).
3. Insert pivot pin (item 8) through the outer frame
bracket, thinner spacer, lift cylinder, thicker spacer and
inner frame bracket. Secure pin to frame with cap screw
and washer.
4. Position clevis of the lift cylinder to the lift arm. Secure lift cylinder clevis to the lift arm with clevis pin and
cotter pin.
5. Connect hydraulic hoses with new O--rings to the hydraulic fittings on the lift cylinder. Tighten hose connections (see Hydraulic Hose and Tube Installation in the
General Information section of this chapter).
6. Make sure that hydraulic reservoir is at correct level.
7. Start machine. Run machine at idle for several minutes to circulate hydraulic fluid and remove any air
trapped in the system. Stop machine and recheck hydraulic reservoir level.
B. Pull pivot pin from the frame, spacers and lift cylinder. Note that thicker spacer is toward the center of
the machine.
C. Remove hydraulic cylinder from the frame.
6. If necessary, remove hydraulic fittings from lift cylinder.
NOTE: See Lift Cylinder Service in this section for information on lift cylinder service.
Greensmaster 3150
Page 4 -- 83
Hydraulic System
Hydraulic
System
Before continuing further, read and become familiar with General Precautions for Removing
and Installing Hydraulic System Components.
Center Lift Cylinder
4
16
6
14
7
13
12
5
4
3
2
3
8
15
11
9
1
10
RIGHT
FRONT
Figure 63
1.
2.
3.
4.
5.
6.
Pull frame
Straight hydraulic fitting
O--ring
O--ring
Hydraulic hose
Cap screw
Hydraulic System
7.
8.
9.
10.
11.
Washer
Pivot pin
Lock nut
Lift arm
Hydraulic cylinder
Page 4 -- 84
12.
13.
14.
15.
16.
45o hydraulic fitting
Cotter pin
Clevis pin
Grease fitting
Hydraulic hose
Greensmaster 3150
Center Lift Cylinder Removal (Fig. 63)
Center Cylinder Installation (Fig. 63)
1. Before removing any parts from the hydraulic system, park the machine on a level surface, engage the
parking brake, lower the cutting units and stop the engine.
1. If fittings were removed from lift cylinder, lubricate
and place new O--rings onto fittings. Install fittings into
lift cylinder ports. Tighten fittings (see Hydraulic Fitting
Installation in the General Information section of this
chapter).
CAUTION
2. Position lift cylinder to the machine.
2. Label all hydraulic connections for assembly purposes.
3. Insert pivot pin (item 8) through the frame brackets
and lift cylinder. Secure pin to frame with cap screw,
washer and lock nut.
4. Position clevis of the lift cylinder to the lift arm. Secure lift cylinder clevis to the lift arm with clevis pin (item
14) and cotter pin.
3. Disconnect hose assemblies and O--rings from the
hydraulic fittings at the lift cylinder. Allow hoses to drain
into a suitable container.
5. Connect hydraulic hoses with new O--rings to the hydraulic fittings on the lift cylinder. Tighten hose connections (see Hydraulic Hose and Tube Installation in the
General Information section of this chapter).
4. Support lift cylinder to prevent it from dropping.
6. Make sure that hydraulic reservoir is at correct level.
A. Remove cap screw, washer and lock nut from the
pivot pin (item 8). Pull pivot pin from the frame and lift
cylinder.
B. Remove cotter pin from clevis pin (item 14). Slide
clevis pin from lift cylinder and lift arm.
7. Start machine. Run machine at idle for several minutes to circulate hydraulic fluid and remove any air
trapped in the system. Stop machine and recheck hydraulic reservoir level.
C. Separate hydraulic cylinder from the frame and
lift arm. Remove cylinder from machine.
5. If hydraulic fitting removal is necessary, matchmark
lift cylinder and 45o hydraulic fitting for assembly purposes. Remove hydraulic fittings from lift cylinder.
NOTE: See Lift Cylinder Service in this section for information on lift cylinder service.
Greensmaster 3150
Page 4 -- 85
Hydraulic System
Hydraulic
System
Before continuing further, read and become familiar with General Precautions for Removing
and Installing Hydraulic System Components.
Lift Cylinder Service
FRONT HYDRAULIC CYLINDER
1
2
3
4
5
6
16
7
15
8
9
10
14
60 to 75 ft--lb
(82 to 101 N--m)
13
12
11
Figure 64
1.
2.
3.
4.
5.
6.
7.
8.
9.
10.
11.
Seal kit
Wear ring
Seal with loader
O--ring
Back--up ring
O--ring
12.
13.
14.
15.
16.
Seal
Wiper
Jam nut
Rod clevis
Rod
Head
Retaining ring
Piston
Lock nut
Barrel
CENTER HYDRAULIC CYLINDER
1
2
3
4
5
6
14
7
13
8
12
11
60 to 75 ft--lb
(82 to 101 N--m)
10
9
Figure 65
1.
2.
3.
4.
5.
Seal kit
Wear ring
Seal with loader
O--ring
Back--up ring
Hydraulic System
6.
7.
8.
9.
10.
O--ring
Seal
Wiper
Head
Rod
11.
12.
13.
14.
Page 4 -- 86
Retaining ring
Piston
Lock nut
Barrel
Greensmaster 3150
Disassembly (Figs. 64 and 65)
Assembly (Figs. 64 and 65)
1. Remove the oil from the cylinder by slowly pumping
the cylinder shaft while holding the cylinder over a drain
pan. Plug both ports and clean the outside of the cylinder.
1. Make sure all parts are clean before reassembly.
2. Mount lift cylinder in a vise. Use of a vise with soft
jaws is recommended.
3. Using a spanner wrench, rotate head clockwise until
the edge of the retaining ring appears in the barrel opening. Insert a screwdriver under the beveled edge of the
retaining ring to start the retaining ring through the opening. Rotate the head counter--clockwise to remove retaining ring from barrel and head.
4. Extract shaft, head and piston by carefully twisting
and pulling on the shaft.
IMPORTANT: Do not clamp vise jaws against the
shaft surface. Protect shaft surface before mounting in a vise.
5. Mount shaft securely in a vise by clamping on the clevis or eye of the shaft. Remove lock nut and piston from
the shaft. Slide head off the shaft.
6. Remove wear ring and seal with loader from the piston. Remove O--ring, back--up ring, seal and wiper from
the head. Remove O--ring from rod.
A. Install wear ring and seal with loader on the piston.
B. Install O--ring, back--up ring and seal on the head.
C. Install O--ring to groove in rod.
IMPORTANT: Do not clamp vise jaws against the
shaft surface. Protect shaft surface before mounting in a vise.
3. Mount shaft securely in a vise by clamping on the clevis or eye of the shaft. Use of a vise with soft jaws is recommended.
A. Coat shaft with clean hydraulic oil.
B. Carefully slide head onto the shaft. Install wiper
onto shaft and into head.
C. Install piston and nut onto the shaft. Torque nut
from 60 to 75 ft--lb (82 to 101 N--m).
D. Remove shaft from the vise.
IMPORTANT: Prevent damage when clamping the
hydraulic cylinder into a vise; clamp on the cap end
only. Do not close vise enough to distort the barrel.
4. Mount barrel in a vise.
CAUTION
Use eye protection such as goggles when using
compressed air to dry cylinder parts.
7. Wash parts in clean solvent. Dry parts with compressed air. Do not wipe parts dry with paper towels or
cloth. Lint in a hydraulic system will cause damage.
5. Coat all internal parts with a light coat of clean hydraulic oil. Slide piston, shaft and head assembly into
the barrel being careful not to damage the seals.
6. Secure head in barrel by installing retaining ring.
Align retaining ring hole in the head with the access slot
in the barrel. Insert the retaining ring hook into the hole
and rotate head clockwise until the retaining ring is completely pulled into the barrel and the ring ends are covered.
8. Carefully inspect internal surface of barrel for damage (deep scratches, out--of--round, etc.). Inspect shaft,
head and piston for evidence of excessive scoring, pitting or wear. Replace entire cylinder if internal components are found to be worn or damaged.
Greensmaster 3150
Page 4 -- 87
Hydraulic System
Hydraulic
System
IMPORTANT: Prevent damage when clamping the
hydraulic cylinder into a vise; clamp on the cap end
only. Do not close vise enough to distort the barrel.
2. Coat new seal kit components with clean hydraulic
oil.
Hydraulic Manifold
16
1
5
5
17
31
17
32
12
33
5
23
38
10
22
30
36
18
17
1
15
17
39
37
55 to 65 ft--lb
(75 to 88 N--m)
7
8
14
5
37
6
21
5
23
28
35
26
4
25
11
17
29
34
9
22
27
13
10
3
28
20
FRONT
19
RIGHT
28
24
2
Figure 66
1.
2.
3.
4.
5.
6.
7.
8.
9.
10.
11.
12.
13.
90o hydraulic fitting (4 used)
Tee hydraulic fitting
Hydraulic test fitting
Dust cap
O--ring
90o hydraulic fitting
90o hydraulic fitting
90o hydraulic fitting
90o hydraulic fitting
Straight hydraulic fitting (2 used)
45o hydraulic fitting
Hydraulic manifold assembly
Cap screw (2 used)
14.
15.
16.
17.
18.
19.
20.
21.
22.
23.
24.
25.
26.
45o hydraulic fitting
Hydraulic tube
Straight hydraulic fitting
O--ring
Hydraulic tube
Hydraulic hose
O--ring
Hydraulic hose
O--ring
O--ring
Hydraulic hose
Hydraulic hose
Hydraulic hose
27.
28.
29.
30.
31.
32.
33.
34.
35.
36.
37.
38.
39.
Hydraulic tube
O--ring
O--ring
Hydraulic hose
Hydraulic hose
Hydraulic hose
Hydraulic hose
O--ring
O--ring
Hydraulic hose
O--ring
O--ring
O--ring
NOTE: The ports on the manifold are marked for easy
identification of components. Example: FC1 is the reel
circuit flow control valve and P1 is the gear pump connection port (see Hydraulic Schematic to identify the
function of the hydraulic lines and cartridge valves at
each port location).
Hydraulic System
Page 4 -- 88
Greensmaster 3150
Removal (Fig. 66)
Installation (Fig. 66)
1. Before removing any parts from the hydraulic system, park machine on a level surface, engage parking
brake, lower cutting units and stop the engine.
1. Install hydraulic fittings and their respective O--rings
to the manifold assembly and orient to position recorded
during removal. Torque fittings to the values identified in
Figure 66.
CAUTION
2. Position manifold assembly to the support frame.
Secure assembly to the frame with two (2) cap screws
(item 13).
2. Label all hydraulic connections and electrical connections for assembly.
3. Disconnect wire harness connectors from manifold
solenoid coils and backlap switch.
IMPORTANT: Before disconnecting any hydraulic
lines from the hydraulic fittings, make sure each line
is labeled to ensure it is reconnected to the correct
manifold fitting/port.
4. Disconnect hose and tube assemblies and remove
their respective O--rings from the hydraulic fittings. Allow hoses and tubes to drain into a suitable container.
3. Using labels placed during disassembly, connect hydraulic hoses and tubes and their respective O--rings to
correct hydraulic fittings.
A. When installing hydraulic tube (item 15) to 90o
hydraulic fitting in manifold port T, torque tube from
55 to 65 ft--lb (75 to 88 N--m).
4. Connect wire harness connectors to manifold solenoid coils and backlap switch.
5. Make sure that hydraulic reservoir is at correct level.
6. Start machine. Run machine at idle for several minutes to circulate hydraulic fluid and remove any air
trapped in the system. Stop machine and recheck hydraulic reservoir level.
5. Remove two (2) cap screws (item 13) from the hydraulic manifold. Remove manifold assembly from the
machine.
IMPORTANT: Before disconnecting any hydraulic
fittings from the hydraulic manifold block, make
sure the position of each fitting is observed and recorded to ensure proper installation.
IMPORTANT: A flow control orifice is located beneath the fitting in manifold port L1A. If this fitting
is removed from the manifold, make sure to remove
orifice and label its position for assembly purposes.
When installing the orifice in the manifold, make
sure that the orifice is flat in the base of the port.
Manifold damage is possible if the orifice is cocked
in the port.
6. If necessary, remove hydraulic fittings and O--rings
from the manifold.
Greensmaster 3150
Page 4 -- 89
Hydraulic System
Hydraulic
System
Before continuing further, read and become familiar with General Precautions for Removing
and Installing Hydraulic System Components.
Hydraulic Manifold Service
60 in--lb
(6.7 N--m)
25 ft--lb
(34 N--m)
26
18
60 in--lb
(6.7 N--m)
26
2
21
14
16
29
60 in--lb
(6.7 N--m)
29
21
20 ft--lb
(27 N--m)
20 ft--lb
(27 N--m)
25 ft--lb
(34 N--m)
15
13
11
2
10
17
12
6
7
20 ft--lb
(27 N--m)
7
4
40 ft--lb
(54 N--m)
25 ft--lb
(34 N--m)
1
9
50 ft--lb
(68 N--m)
VIEW FROM
BELOW
7
8
6
3
6
6
19
6
22
20
9
6
UP
24
5
1
23
20 ft--lb
(27 N--m)
6
20 ft--lb
(27 N--m)
6
8
8
4
7
PLUG TORQUE
25
27
SAE #4: 20 ft--lb (27 N--m)
7
Zero Leak #4: 20 ft--lb (27 N--m)
Zero Leak #6: 25 ft--lb (34 N--m)
Zero Leak #8: 50 ft--lb (68 N--m)
20 ft--lb
(27 N--m)
28
25 ft--lb
(34 N--m)
Figure 67
1.
2.
3.
4.
5.
6.
7.
8.
9.
10.
Manifold body
Solenoid coil
Flow control orifice (.060)
Orifice plug (.055) (2 used)
Flow control orifice (.013)
Plug (Zero Leak #4) (12 used)
Plug (Zero Leak #6) (5 used)
Plug (Zero Leak #8) (3 used)
Plug (SAE #4) (2 used)
Rotary cartridge valve (FC1)
Hydraulic System
11.
12.
13.
14.
15.
16.
17.
18.
19.
20.
Rotary handle assembly
Pilot piston
Relief cartridge valve (PRV)
Solenoid cartridge valve (S2)
Solenoid relief cartridge valve (S1R1)
Solenoid cartridge valve (S3)
Solenoid cartridge valve (S4)
Relief cartridge valve (R2)
Logic control cartridge valve (OR1)
Ball
Page 4 -- 90
21.
22.
23.
24.
25.
26.
27.
28.
29.
Solenoid coil
Dowel pin
Ball switch (N.O.)
O--ring
Flow control cartridge valve (FC2)
Nut
Flow control orifice (.025)
Hydraulic fitting
Nut
Greensmaster 3150
NOTE: The hydraulic manifold shown in Figure 67 uses
several zero leak plugs. These plugs have a tapered
sealing surface on the plug head that is designed to resist vibration induced plug loosening. The zero leak
plugs also have an O--ring to provide a secondary seal.
If zero leak plug removal is necessary, lightly rap the
plug head using a punch and hammer before using an
allen wrench to remove the plug: the impact will allow
plug removal with less chance of damage to the socket
head of the plug. When installing plugs into the manifold,
torque plugs to the values identified in Figure 67.
IMPORTANT: A flow control orifice (item 27) is located beneath the fitting in manifold port L1A. If this
fitting is removed from the manifold, make sure to
remove orifice and label its position for assembly
purposes. When installing the orifice in the manifold, make sure that the orifice is flat in the base of
the port. Manifold damage is possible if the orifice
is cocked in the port.
Solenoid Operated, Relief and Logic Control Cartridge Valves (Fig. 67)
1. Make sure the manifold is clean before removing the
cartridge valve and seal kit.
2. If solenoid valve is to be removed from manifold, remove nut securing solenoid to the cartridge valve. Carefully slide solenoid off the valve.
IMPORTANT: Use care when removing the cartridge
valve. Slight bending or distortion of the stem tube
can cause binding and malfunction. Make sure that
deep well socket fully engages the valve base.
3. Make sure manifold is clean before removing the
cartridge valve. Remove cartridge valve from manifold
with a deep well socket. Note location of O--rings and
backup rings on valve. Remove and discard removed
seal kit.
4. Visually inspect the manifold port and cartridge valve
for damage to sealing surfaces, damaged threads and
contamination.
A. Contamination may cause valves to stick or hang
up. Contamination can become lodged in small valve
orifices or seal areas causing valve malfunction.
CAUTION
Use eye protection such as goggles when using
compressed air.
5. Cleaning cartridge valves:
A. For non--solenoid operated valves:
Submerge valve in clean mineral spirits to flush out
contamination. If valve design allows, use a probe to
push the internal spool in and out 20 to 30 times to
flush out contamination. Particles as fine as talcum
powder can affect the operation of high pressure hydraulic valves. Clean and dry cartridge with compressed air.
B. For solenoid operated valves:
Temporarily install solenoid on cartridge valve and
connect a 12 volt power source to the solenoid. While
energized, flush out any contamination with a nonflammable aerosol brake cleaner. De-energize the
solenoid. Repeat the flush while energized procedure 5 or 6 times. Particles as fine as talcum powder
can affect the operation of high pressure hydraulic
valves. Remove solenoid from cartridge.
6. Reinstall the cartridge valve into the manifold:
A. Lubricate new O-rings and backup rings of seal
kit with clean hydraulic oil and install on cartridge.
The O-rings and backup rings must be arranged
properly on the cartridge valve for proper operation
and sealing.
IMPORTANT: Use care when installing the cartridge valve. Slight bending or distortion of the
stem tube can cause binding and malfunction.
Make sure that deep well socket fully engages
the valve base.
B. Lubricate threads on cartridge valve with clean
hydraulic oil. Thread cartridge valve carefully into
correct manifold port. The valve should go in easily
without binding.
C. Torque cartridge valve using a deep well socket
to specification shown in Figure 67.
7. For solenoid valve, slide solenoid coil onto the cartridge valve. Install and torque nut to 60 in--lb (6.7 N--m).
8. If problems still exist, remove valve and clean again
or replace valve.
B. If valve sealing surfaces appear pitted or damaged, the hydraulic system may be overheating or
there may be water in the system.
Greensmaster 3150
Page 4 -- 91
Hydraulic System
Hydraulic
System
NOTE: The ports on the hydraulic manifold are marked
for easy identification of components. Example: FC1 is
the flow control valve and P1 is the gear pump connection port (see Hydraulic Schematic to identify the function of the hydraulic lines and cartridge valves at each
port location).
Rotary Cartridge Valve
IMPORTANT: Use care when installing the rotary
cartridge valve. Slight bending or distortion of
the stem tube can cause binding and malfunction. Make sure that deep well socket fully engages the valve base.
1. Remove rotary handle from valve (Fig. 68):
A. Loosen two (2) set screws that secure handle
cap.
B. Lubricate threads on cartridge valve with clean
hydraulic oil. Thread rotary cartridge valve carefully
into the manifold port. The valve should go in easily
without binding. Torque valve to specification shown
in Figure 67.
B. Remove screw and then lift handle cap from
valve.
C. Locate and retrieve detent pin, compression
spring, bushing and lip seal. The sleeve bearing
should stay in the cap.
6. Install rotary handle (Fig. 68):
D. Loosen two (2) set screws that secure handle
base to flow control valve and remove base.
A. Place handle base on flow control valve and position alignment mark on base with number 1 on manifold. Secure base with two (2) set screws. Apply a
light coating of grease to chamfer on top of base to
ease seal installation.
IMPORTANT: Use care when removing the rotary
cartridge valve. Slight bending or distortion of the
stem tube can cause binding and malfunction. Make
sure that deep well socket fully engages the valve
base.
B. Make sure that sleeve bearing is in handle cap. If
necessary, press sleeve bearing into cap. Install lip
seal on cap with seal lip facing down.
2. Make sure manifold is clean before removing the
rotary cartridge valve. Remove cartridge valve from
manifold with a deep well socket. Note location of O-rings and backup rings on valve. Remove and discard
removed seal kit.
C. While pressing on the cap to keep the lip seal in
place, rotate cap in a clockwise direction until the arrow on the cap aligns with number 1 on the manifold.
By rotating the cap clockwise, the valve will remain
closed. Install screw to retain cap.
3. Visually inspect the manifold port and cartridge valve
for damage to sealing surfaces, damaged threads and
contamination.
D. Make sure that alignment marks on cap and base
are in line and that arrow on cap is pointing to number
1 on manifold. Tighten two (2) set screws to secure
handle cap.
A. Contamination may cause valves to stick or hang
up, it can become lodged in small valve orifices or
seal areas causing valve malfunction.
8
B. If sealing surfaces appear pitted or damaged, the
hydraulic system may be overheating or there may
be water in the system.
2
6
9
CAUTION
10
11
4
Use eye protection such as goggles when using
compressed air.
3
5
7
4. If necessary, clean cartridge valve using clean mineral spirits. Submerge valve in clean mineral spirits to
flush out contamination. Particles as fine as talcum powder can affect the operation of high pressure hydraulic
valves. Clean and dry with compressed air.
1
Figure 68
5. Reinstall rotary cartridge valve into manifold port:
A. Lubricate new O-rings and backup rings of seal
kit with clean hydraulic oil and install. The O-rings
and backup rings of seal kit must be arranged properly on the cartridge valve for proper operation and
sealing.
Hydraulic System
1.
2.
3.
4.
5.
6.
Page 4 -- 92
Handle Base
Handle Cap
Detent Pin
Compression Spring
Bushing
Set Screw (2 used)
7.
8.
9.
10.
11.
Set Screw (2 used)
Screw
Lip Seal
Sleeve Bearing
Flow Control Valve
Greensmaster 3150
Mow/Backlap Spool (Fig. 69)
1
1. Remove mow/backlap spool from manifold:
2
4
A. Remove backlap switch from manifold before removing mow/backlap spool. Remove dowel pin and
ball from manifold port after switch is removed. Remove and discard O--ring from switch.
Loctite #603
3
6
20 ft--lb
(27 N--m)
B. Remove lower retaining ring from mow/backlap
spool. Raise mow/backlap spool to allow access to
retaining ring on upper end of spool. Remove upper
retaining ring.
5
C. Push spool down until lower O--ring and back--up
ring are exposed on bottom of manifold. Remove
lower O--ring and back--up ring from spool.
D. Pull spool up and out of manifold. Remove O-rings and back--up ring from spool.
8
E. Discard removed O--rings and back--up rings.
2. Visually inspect the spool and manifold port for damage to the sealing surfaces and contamination.
4
7
3
3. Install mow/backlap spool into manifold:
1
9
A. Install O--rings and back--up ring to upper
grooves on spool. Apply a light coating of grease to
O--rings.
B. Carefully push spool down into manifold port until
lower O--ring and back--up ring groove is exposed on
bottom of manifold. Install lower O--ring and back--up
ring to spool. Apply a light coating of grease to O-ring.
Figure 69
1.
2.
3.
4.
5.
Retaining ring
O--ring
Back--up ring
O--ring
Spool handle
6.
7.
8.
9.
10.
Rotary spool
Ball
Dowel pin
O--ring
Backlap switch
C. Install lower retaining ring to spool.
D. Carefully raise mow/backlap spool until upper retaining ring groove on spool is exposed on top of
manifold. Install upper retaining ring.
E. If handle was removed from spool, position spool
so handle location of spool is between stop pins in
manifold. Apply Loctite #603 Retaining Compound
(or equivalent) to threads on handle and install handle into spool.
F. Place ball and dowel pin in backlap switch manifold port. Install new O--ring onto backlap switch.
Thread backlap switch into port and torque 20 ft--lb
(27 N--m).
Greensmaster 3150
Page 4 -- 93
Hydraulic System
Hydraulic
System
10
Steering Control Valve
4
3
5
6
8
2
15
10
7
11
1
9
21
27
28
19
18
24
23
20
12
20
29
17
14
16
20 to 26 ft--lb
(28 to 35 N--m)
13
25
22
30
29
28 27
26
31
RIGHT
32
FRONT
Figure 70
1.
2.
3.
4.
5.
6.
7.
8.
9.
10.
11.
Steering arm
Cap screw (2 used)
Cap screw
Set screw
Lever
Handle
Friction plate
Steering wheel
Hex nut
Screw
Steering wheel cover
Hydraulic System
12.
13.
14.
15.
16.
17.
18.
19.
20.
21.
22.
Cap screw (4 used)
Steering mount
Cap screw (6 used)
Flat washer
Lock nut (2 used)
Lock washer (2 used)
Flat washer (2 used)
Straight hydraulic fitting (2 used)
O--ring
O--ring
Steering valve
Page 4 -- 94
23.
24.
25.
26.
27.
28.
29.
30.
31.
32.
Straight hydraulic fitting (2 used)
O--ring
Panel nut (6 used)
Steering valve cover
Cap screw (2 used)
Flat washer (2 used)
Spacer (2 used)
Knob
Lock nut (2 used)
Hair pin
Greensmaster 3150
Removal (Fig. 70)
Installation (Fig. 70)
1. Before removing any parts from the hydraulic system, park the machine on a level surface, engage the
parking brake, lower the cutting units and stop the engine.
1. If fittings were removed from steering control valve,
lubricate and place new O--rings onto fittings. Install fittings into steering valve openings. Tighten fittings (see
Hydraulic Fitting Installation in the General Information
section of this chapter).
CAUTION
Before continuing further, read and become familiar with General Precautions for Removing
and Installing Hydraulic System Components.
3. Using labels placed during control valve removal, lubricate new O--rings and connect hydraulic hoses to
steering control valve. Tighten hose connections (see
Hydraulic Hose and Tube Installation in the General Information section of this chapter).
2. Remove screw (item 10) and steering wheel cover
(item 11) from the steering wheel.
4. Install any cable ties removed from the hose assemblies.
3. Remove steering wheel nut (item 9), flat washer
(item 15) and steering wheel from the steering valve
shaft.
5. Slide steering control valve (with hydraulic hoses attached) to steering mount. Secure steering valve to
mount with four (4) cap screws (item 12).
4. Remove screws (item 14) and remove the steering
valve cover (item 26).
6. Install steering valve cover (item 26) with cap screws
(item 14).
5. Remove cap screws (item 12) that secure steering
control valve to steering mount.
7. Install steering wheel, flat washer (item 15) and nut
(item 9). Torque nut from 20 to 26 ft--lb (28 to 35 N--m).
6. Lower steering control valve (with hydraulic hoses
attached) from steering mount.
8. Secure steering wheel cover (item 11) with screw
(item 10).
7. Label all hydraulic hoses connected to the steering
control valve for assembly purposes. Thoroughly clean
hydraulic hose ends.
2
3
1
8. Disconnect hydraulic hoses from fittings on the
steering control valve. Allow hoses to drain into a suitable container. Cap or plug hoses and control valve fittings to prevent contamination.
9. Remove steering control valve from machine.
10.If necessary, remove hydraulic fittings and O--rings
from steering control valve. Discard all removed O-rings.
5
Figure 71
1. T port
2. R port
3. E/Ls port
Greensmaster 3150
4
Page 4 -- 95
4. P port
5. L port
Hydraulic System
Hydraulic
System
2. Position steering control valve to steering mount.
Steering Control Valve Service
14
13
11
16
15
12
11
7
8
10
9
6
25
5
26
v
4
3
27
2
29
24
28
23
22
21
18
1
20
17
18
19
20 to 24 ft--lb
(27 to 33 N--m)
18
Figure 72
1.
2.
3.
4.
5.
6.
7.
8.
9.
10.
Plug
Plug
Spring
Relief valve
Dust seal
T port
Housing
R port
E port
Shaft seal
11.
12.
13.
14.
15.
16.
17.
18.
19.
20.
Thrust washer
Bearing
Cross pin
Ring
Sleeve
Spool
Cardan shaft
O--ring
Distribution plate
Outer gearwheel
21.
22.
23.
24.
25.
26.
27.
28.
29.
Inner gearwheel
End cover
O--ring (5 used)
Cap screw (5 used)
Spring set
Ball stop
Ball
P port
L port
NOTE: For service of the steering control valve shown
in Figure 72, see the Sauer/Danfoss Steering Unit Type
OSPM Service Manual at the end of this chapter.
Hydraulic System
Page 4 -- 96
Greensmaster 3150
Hydraulic
System
This page is intentionally blank.
Greensmaster 3150
Page 4 -- 97
Hydraulic System
Steering Cylinder
5
6
4
3
2
7
70 to 90 ft--lb
(95 to 122 N--m)
2
3
9
8
4
12
10
11
16
34
15
13
1
18
19
17
20
14
27
FRONT
32
31
30
22
23
20
19
18
24
25
33
RIGHT
21
29
28
26
65 to 85 ft--lb
(89 to 115 N--m)
16
Figure 73
1.
2.
3.
4.
5.
6.
7.
8.
9.
10.
11.
12.
Steering cylinder
Bearing cup (2 used)
Bearing cone (2 used)
Washer (4 used)
Slotted hex nut
Cotter pin
Grease fitting
Jam nut
Rod end
Dust seal
Lug nut (4 used)
Wheel assembly
Hydraulic System
13.
14.
15.
16.
17.
18.
19.
20.
21.
22.
23.
Washer
Lock nut
Cap screw (2 used)
Spacer (2 used)
Hub assembly
Seal (2 used)
Bearing cone (2 used)
Bearing cup (2 used)
Hub
Grease fitting
Drive stud (4 used)
Page 4 -- 98
24.
25.
26.
27.
28.
29.
30.
31.
32.
33.
34.
Castor fork
Flange head screw (3 used)
Lock nut
Castor bolt
Jam nut (2 used)
Flat washer
Adapter plate
Lock nut (2 used)
Lock nut (3 used)
Motor adapter plate
Grease fitting
Greensmaster 3150
Removal (Fig. 73)
Installation (Fig. 73)
1. Before removing any parts from the hydraulic system, park machine on a level surface, set brake, lower
cutting units and stop engine.
1. If rod end (item 9) was removed from cylinder rod, fully retract cylinder shaft and thread rod end onto shaft so
that distance is as measured during removal process
(Fig. 74). Tighten jam nut to retain rod end.
Before continuing further, read and become familiar with General Precautions for Removing
and Installing Hydraulic System Components.
2. Label all hose connections for assembly purposes
3. Remove hose assemblies and O--rings from hydraulic fittings at the steering cylinder. Allow hoses to drain
into a suitable container.
4. Remove lock nut and flat washer from barrel mounting stud. Remove steering cylinder from barrel stud.
5. Remove two (2) jam nuts and flat washer from cylinder rod end at rear wheel castor fork.
6. Remove steering cylinder from traction unit.
2. Install hydraulic fittings and O--rings to the steering
cylinder. Make sure that fittings are orientated as noted
during removal.
3. Thoroughly clean tapered surfaces of steering cylinder ball joint and cylinder attachment bore on castor
fork.
4. Secure cylinder rod end to the castor fork with two (2)
jam nuts and flat washer. Install first jam nut and torque
from 65 to 85 ft--lb (89 to 115 N--m). Then, while holding
first jam nut with wrench, tighten second jam nut and
torque from 65 to 85 ft--lb (89 to 115 N--m).
5. Install steering cylinder over barrel mounting stud
and secure with flat washer and lock nut.
6. Connect hydraulic hoses and O--rings to the hydraulic fittings. Tighten hose connections (see Hydraulic
Hose and Tube Installation in the General Information
section of this chapter).
7. Note fitting orientation on cylinder for assembly purposes. Remove fittings and O--rings from cylinder ports.
Discard O--rings.
8. If rod end (item 9) is to be removed from cylinder rod,
fully retract cylinder rod and measure distance from center of rod end to end of cylinder for assembly purposes
(Fig. 74). Record measured distance. Loosen jam nut
and then remove rod end and jam nut from cylinder rod.
MEASURE LENGTH
FOR ASSEMBLY PURPOSES
Figure 74
Greensmaster 3150
Page 4 -- 99
Hydraulic System
Hydraulic
System
CAUTION
Steering Cylinder Service
4
12
v
17
16
12
13
8
14
15
4
2
7
3
7
5
6
9
10
6
5
3
2
11
1
Figure 75
1.
2.
3.
4.
5.
6.
Seal kit
Rod wiper
Seal
Head
Back--up ring
O--ring
7.
8.
9.
10.
11.
12.
Wear ring
O--ring
Back--up ring
Seal
Wear ring
Retaining ring
13.
14.
15.
16.
17.
Piston
Retaining ring
Rod
Grease fitting
Barrel
NOTE: The steering cylinder design does not allow removal of the piston (item 13) from the rod. This cylinder
design prevents replacing the O--ring (item 8) or retaining ring (item 14) on the inside of the piston. If leakage
or damage exists at the piston O--ring, steering cylinder
replacement will be necessary.
Hydraulic System
Page 4 -- 100
Greensmaster 3150
Disassembly (Fig. 75)
Assembly (Fig. 75)
1. Pump oil out of cylinder into a drain pan by slowly
moving rod in and out of cylinder bore. Plug ports and
clean outside of cylinder.
1. Identify components from seal kit that are to be used
in cylinder repair. Put a coating of clean hydraulic oil on
all new seals, back--up rings and O--rings.
IMPORTANT: To prevent damage when clamping
cylinder barrel in a vise, clamp only on ball joint
location. Do not clamp the vise jaws against the cylinder barrel or rod surface.
2. Install new wear rings (item 7), seals (item 3), rod
wipers (item 2), back--up rings (item 5) and O--rings
(item 6) onto both heads (item 4). Position backup ring,
seal and wear ring to the piston (item 13).
2. Mount cylinder in a vise by clamping vise on barrel
ball joint location of cylinder. Use of a vise with soft jaws
is recommended.
IMPORTANT: During cylinder assembly, pay careful
attention to the retaining ring slots in the barrel to
insure that the piston and head seals do not lodge
in the slots.
A. Use a spanner wrench to rotate head clockwise
until the edge of the retaining ring appears in the barrel opening.
B. Insert a screwdriver under the beveled edge of
the retaining ring to start the retaining ring through
the opening. Rotate the head counter--clockwise to
remove retaining ring from barrel and head.
C. Slide head from cylinder barrel and rod.
4. Grasp end of rod and use a twisting and pulling motion to carefully extract rod assembly (with piston) from
cylinder barrel.
NOTE: Piston (item 13) is not removable from cylinder
rod.
5. Remove and discard rod wipers (item 2), seals (item
3), O--rings (item 6), back--up rings (item 5) and wear
rings (item 7) from both heads (item 4). Also, remove
seal (item10), back--up ring (item 9) and wear ring (item
11) from piston.
3. Coat all internal cylinder parts with a light coat of
clean hydraulic oil. Carefully slide rod assembly into the
barrel being careful to not damage seals on piston.
4. Lubricate head (item 4) assemblies with clean hydraulic oil and carefully slide them onto rod and into barrel.
5. Secure both heads to barrel:
A. Align retaining ring hole in the head with the access slot in the barrel.
B. Insert the retaining ring hook into the hole and rotate head clockwise until the retaining ring is completely pulled into the barrel and the ring ends are
covered.
C. Apply silicone sealer to barrel access slot.
CAUTION
Use eye protection such as goggles when using
compressed air to dry cylinder parts.
6. Wash cylinder parts in clean solvent. Dry parts with
compressed air. Do not wipe parts dry with paper or cloth
towels. Lint from towels in a hydraulic system will cause
damage.
7. Carefully inspect internal surface of barrel for damage (deep scratches, out--of--round, etc). Inspect rod,
both heads and piston for evidence of excessive scoring, pitting or wear. Replace entire steering cylinder if internal components are damaged.
Greensmaster 3150
Page 4 -- 101
Hydraulic System
Hydraulic
System
3. Remove both heads from the barrel:
Leak Detector
Antiseize
Lubricant
30 to 60 in--lb
(3.4 to 6.7 N--m)
RIGHT
19
FRONT
14
20
16
17
3
13
29
8
27
30
28
7
12
12
18
11
5
15
17 to 21 ft--lb
(23 to 28 N--m)
6
40 to 50 ft--lb
(55 to 67 N--m)
9
10
4
25
1
1 23
2
22
31
2
31
2
24
21
2
1
26
1
17 to 21 ft--lb
(23 to 28 N--m)
Figure 76
1.
2.
3.
4.
5.
6.
7.
8.
9.
10.
11.
Hose clamp (4 used)
O--ring
O--ring
Hydraulic reservoir
Hose (to tee fitting)
Straight barb fitting
Hose clamp
Canister bracket
Hose clamp (2 used)
Valve hose
Short spacer (2 used)
12.
13.
14.
15.
16.
17.
18.
19.
20.
21.
Neoprene washer (4 used)
Flat washer (2 used)
Cap screw (2 used)
Leak detector tank
Plug
Cap screw (2 used)
Long spacer (2 used)
Carbon canister
Cable tie (2 used)
90o barb fitting
22.
23.
24.
25.
26.
27.
28.
29.
30.
31.
Cap screw (2 used)
Lock washer (2 used)
Solenoid valve assembly
Overflow hose
Tank valve hose
Hose clamp
Purge hose assembly
Hose clamp
Vent hose (to fuel tank vent)
90o barb fitting (2 used)
NOTE: See Turf Guardiant Leak Detector System in
Chapter 5 -- Electrical System for leak detector operation information.
Hydraulic System
Page 4 -- 102
Greensmaster 3150
Removal (Fig. 76)
1. Before removing any parts from the hydraulic system, park machine on a level surface, set brake, lower
cutting units and stop engine.
PUMP INLET HOSE
CAUTION
Before continuing further, read and become familiar with General Precautions for Removing
and Installing Hydraulic System Components.
2. Place a clean container, large enough to collect 2
gallons (7.6 liters), under the hydraulic pump assembly
to collect hydraulic oil.
Figure 77
Loctite #242
4. Clamp pump inlet hose to prevent draining additional
hydraulic oil.
5. Unplug leak detector solenoid harness from the machine wire harness.
4
2
6
3
35 ft--lb
(47 N--m)
7. Carefully position carbon canister and bracket away
from leak detector tank.
9. Lift leak detector tank slightly, loosen hose clamp
(item 1) and disconnect valve hose (item 10) at barb fitting (item 31) on solenoid valve assembly. Remove leak
detector tank assembly.
5
1
6. Remove four (4) cap screws (items 14 and 17), flat
washers (item 13), neoprene washers (item 12) and
spacers (items 11 and 18).
8. Loosen either hose clamp (item 9) and disconnect
overflow hose (item 25).
10 in--lb
(1.1 N--m)
Hydraulic
System
3. Clamp pump inlet hose to control drainage. Remove
inlet hose from gear pump (Fig. 77). Release clamp from
hose and drain about 2 gallons (7.6 liters) from the hydraulic reservoir.
4
Figure 78
1. Manifold
2. Valve seal
3. Solenoid valve
4. O--ring
5. Solenoid coil
6. Nut
Installation (Fig. 76)
1. During assembly, coat all O--rings with clean hydraulic oil.
10.If necessary, remove solenoid valve assembly, fittings and hoses using Figure 76 as a guide.
2. If removed, assemble solenoid valve manifold (Fig
78):
11. If needed, disassemble solenoid valve manifold using Figure 78 as a guide.
A. When installing cartridge valve, torque valve 35
ft--lb (47 N--m).
12.Inspect leak detector components for the following:
B. When installing solenoid coil, apply a drop of Loctite #242 (or equivalent) to threads of valve and
torque nut 10 in--lb (1.1 N--m).
A. Leaking, cracked or damaged leak detector tank.
B. Worn or leaking hydraulic hoses. Replace if necessary.
C. If fittings were removed from manifold, torque fittings from 40 to 50 ft--lb (55 to 67 N--m).
C. Visibly worn or damaged parts.
Greensmaster 3150
Page 4 -- 103
Hydraulic System
3. If removed, install solenoid valve assembly, fittings
and hoses using Figure 76 as a guide.
8. Connect leak detector harness to main wire harness.
A. Torque fittings to values shown in Figure 76.
9. Connect pump inlet hose to gear pump and secure
with hose clamp (Fig. 77).
B. If solenoid valve manifold was removed from hydraulic reservoir, apply antiseize lubricant to threads
of cap screws (item 22). Torque screws from 30 to 60
in--lb (3.4 to 6.7 N--m).
NOTE: Monitor hydraulic fluid level in sight window on
leak detector tank. As air is removed from the hydraulic
circuit, fluid level may need to be topped off after initial
fill.
4. Position leak detector tank to hydraulic reservoir.
Connect valve hose (item 10) to solenoid valve fitting
and secure with hose clamp (item 1).
10.Remove cap from hydraulic reservoir and slowly fill
to the cold fill level mark.
5. Connect overflow hose (item 25) and secure with
hose clamp (item 9).
11. Check leak detector with ignition key switch in RUN
position. The leak detector alarm should sound when
leak detector test switch is held down for one (1) second.
6. Position carbon canister and bracket to the leak detector tank.
12.If the alarm fails to sound, check to see if all connections are secure.
IMPORTANT: Do not over tighten cap screws that
secure leak detector tank. Threads in hydraulic
reservoir may become damaged if screws are over
tightened.
13.Verify leak detector operation.
7. Secure leak detector tank to hydraulic reservoir:
A. Apply antiseize lubricant to threads of cap screws
(items 14 and 17) used to secure leak detector tank.
B. Install four (4) cap screws (items 14 and 17), flat
washers (item 13), neoprene washers (item 12) and
spacers (items 11 and 18).
C. Torque cap screws from 30 to 60 in--lb (3.4 to 6.7
N--m).
Hydraulic System
Page 4 -- 104
Greensmaster 3150
Hydraulic
System
This page is intentionally blank.
Greensmaster 3150
Page 4 -- 105
Hydraulic System
Hydraulic Reservoir
Antiseize
Lubricant
30 to 60 in--lb
(3.4 to 6.7 N--m)
14
19
RIGHT
16
17
3
FRONT
13
8
12
12
18
11
17 to 21 ft--lb
(23 to 28 N--m)
15
40 to 50 ft--lb
(55 to 67 N--m)
6
9
5
110 to 140 in--lb
(12.5 to 15.8 N--m)
10
4
1
1 23
25
2
31
2
31
32
22
17 to 21 ft--lb
(23 to 28 N--m)
2
20
24
21
2
2
1
33
34
26
35
1
38
17 to 21 ft--lb
(23 to 28 N--m)
41
37
36
27
7
40
39
30
28
29
70 to 80 ft--lb
(95 to 108 N--m)
70 to 80 ft--lb
(95 to 108 N--m)
Antiseize
Lubricant
30 to 60 in--lb
(3.4 to 6.7 N--m)
Figure 79
1.
2.
3.
4.
5.
6.
7.
8.
9.
10.
11.
12.
13.
14.
Hose clamp (4 used)
O--ring
O--ring
Hydraulic reservoir
Reservoir cap
Straight barb fitting
Strainer
Canister bracket
Hose clamp (2 used)
Valve hose
Short spacer (2 used)
Neoprene washer (4 used)
Flat washer (2 used)
Cap screw (2 used)
Hydraulic System
15.
16.
17.
18.
19.
20.
21.
22.
23.
24.
25.
26.
27.
28.
Leak detector tank
Plug
Cap screw (2 used)
Long spacer (2 used)
Carbon canister
Oil level sensor
90o barb fitting
Cap screw (2 used)
Lock washer (2 used)
Solenoid valve assembly
Overflow hose
Tank valve hose
Hose clamp
Barbed fitting
Page 4 -- 106
29.
30.
31.
32.
33.
34.
35.
36.
37.
38.
39.
40.
41.
Cap screw (3 used)
Flat washer (3 used)
90o barb fitting (2 used)
O--ring
Straight hydraulic fitting
O--ring
Hydraulic hose
Hydraulic hose
O--ring
O--ring
Hydraulic hose (pump inlet)
Hose clamp
Flange bushing (3 used)
v
Greensmaster 3150
Removing Hydraulic Reservoir (Fig. 79)
3. Position hydraulic reservoir onto the machine frame.
1. Before removing any parts from the hydraulic system, park machine on a level surface, set brake, lower
cutting units and stop engine.
IMPORTANT: After hydraulic reservoir is installed,
make sure that clearance between hydraulic reservoir and fuel tank if from 0.125” to 0.375” (3.2 to 9.5
mm).
Before continuing further, read and become familiar with General Precautions for Removing
and Installing Hydraulic System Components.
2. Remove leak detector assembly (see Leak Detector
in this section).
3. Drain remaining hydraulic oil from hydraulic reservoir through pump inlet hose into a suitable container.
4. Unplug wire harness connector from oil level sensor
(item 20).
5. Label all hydraulic reservoir hose connections for assembly purposes.
6. Remove hose assemblies from reservoir hydraulic
fittings. Allow hoses to drain into a suitable container.
4. Apply antiseize lubricant to threads of three (3) cap
screws (item 29). Secure hydraulic reservoir to the machine frame with three (3) cap screws, flat washers (item
30) and bushings (item 41). Torque cap screws from 30
to 60 in--lb (3.4 to 6.7 N--m).
5. Using notes taken during reservoir removal, connect
hydraulic hoses to the reservoir fittings. Tighten hose
connections (see Hydraulic Hose and Tube Installation
in the General Information section of this chapter).
6. Secure pump inlet hose to gear pump with hose
clamp (Fig. 80).
7. Connect wire harness connector to oil level sensor
(item 20).
8. Install leak detector assembly (see Leak Detector in
this section). Make sure that reservoir oil level is correct.
PUMP INLET HOSE
7. Remove three (3) cap screws (item 29), flat washers
(item 30) and bushings (41) securing the hydraulic
reservoir to the machine frame.
8. Remove hydraulic reservoir from machine.
9. Remove hydraulic fittings and oil level sensor from
hydraulic reservoir if necessary.
Inspecting Reservoir Parts (Fig. 79)
1. Clean reservoir and filler screen with solvent.
2. Inspect reservoir for leaks, cracks or other damage.
Figure 80
3. Replace hydraulic hoses if worn or leaking.
Installing Hydraulic Reservoir (Fig. 79)
2
1. Install all removed hydraulic fittings into hydraulic
reservoir ports. Torque fittings to values shown in Figure
79.
2. If oil level sensor was removed from reservoir, install
sensor in reservoir making sure that arrow on sensor is
pointing down (Fig. 81). Torque sensor nut from 110 to
140 in--lb (12.5 to 15.8 N--m).
1
Figure 81
1. Oil level sensor
Greensmaster 3150
Page 4 -- 107
2. Sensor arrow
Hydraulic System
Hydraulic
System
CAUTION
This page is intentionally blank.
Hydraulic System
Page 4 -- 108
Greensmaster 3150
Chapter 5
Electrical System
GENERAL INFORMATION . . . . . . . . . . . . . . . . . . . . . 2
Operator’s Manual . . . . . . . . . . . . . . . . . . . . . . . . . . 2
Electrical Drawings . . . . . . . . . . . . . . . . . . . . . . . . . . 2
SPECIAL TOOLS . . . . . . . . . . . . . . . . . . . . . . . . . . . . . 3
TURF GUARDIANt LEAK DETECTOR
SYSTEM OPERATION . . . . . . . . . . . . . . . . . . . . . . . 5
TROUBLESHOOTING . . . . . . . . . . . . . . . . . . . . . . . . . 6
Starting Problems . . . . . . . . . . . . . . . . . . . . . . . . . . . 6
General Run & Transport Problems . . . . . . . . . . . . 8
Cutting Unit Operating Problems . . . . . . . . . . . . . . 9
ELECTRICAL SYSTEM QUICK CHECKS . . . . . . . . 11
Battery Test (Open Circuit) . . . . . . . . . . . . . . . . . . . 11
Charging System Test . . . . . . . . . . . . . . . . . . . . . . . 11
COMPONENT TESTING . . . . . . . . . . . . . . . . . . . . . . 12
Ignition Switch . . . . . . . . . . . . . . . . . . . . . . . . . . . . . 12
Fuse Block . . . . . . . . . . . . . . . . . . . . . . . . . . . . . . . . 12
Hour Meter . . . . . . . . . . . . . . . . . . . . . . . . . . . . . . . . 13
Seat Switch . . . . . . . . . . . . . . . . . . . . . . . . . . . . . . . 13
Safety Relays . . . . . . . . . . . . . . . . . . . . . . . . . . . . . 14
Greensmaster 3150
Neutral and Mow Switches . . . . . . . . . . . . . . . . . .
Parking Brake Sensor . . . . . . . . . . . . . . . . . . . . . .
Joystick Raise and Lower Switches . . . . . . . . . . .
Lower Reels Time Delay . . . . . . . . . . . . . . . . . . . .
Starter Solenoid . . . . . . . . . . . . . . . . . . . . . . . . . . .
Solenoid Valve Coils . . . . . . . . . . . . . . . . . . . . . . . .
Backlap Switch . . . . . . . . . . . . . . . . . . . . . . . . . . . .
Diodes . . . . . . . . . . . . . . . . . . . . . . . . . . . . . . . . . . . .
Fusible Links . . . . . . . . . . . . . . . . . . . . . . . . . . . . . .
Leak Detector Test/Light Switch . . . . . . . . . . . . . .
Leak Detector Alarm and Delay Timer . . . . . . . .
Leak Detector Float Sensor . . . . . . . . . . . . . . . . .
Leak Detector Solenoid Valve . . . . . . . . . . . . . . . .
SERVICE AND REPAIRS . . . . . . . . . . . . . . . . . . . . .
Verify Interlock System Operation . . . . . . . . . . . .
Battery Care . . . . . . . . . . . . . . . . . . . . . . . . . . . . . . .
Battery Storage . . . . . . . . . . . . . . . . . . . . . . . . . . . .
Battery Service . . . . . . . . . . . . . . . . . . . . . . . . . . . .
Page 5 -- 1
15
16
17
18
19
20
21
22
23
24
25
26
27
28
28
29
29
30
Electrical System
Electrical
System
Table of Contents
General Information
Operator’s Manual
The Operator’s Manual provides information regarding
the operation, general maintenance and maintenance
intervals for your Greensmaster 3150. Refer to that publication for additional information when servicing the
machine.
Electrical Drawings
The electrical schematic and other electrical drawings
for the Greensmaster 3150 are located in Chapter 9 -Foldout Drawings.
Electrical System
Page 5 -- 2
Greensmaster 3150
Special Tools
Order special tools from your Toro Distributor. Some
tools may also be available from a local supplier.
Multimeter
The multimeter can test electrical components and circuits for current, resistance or voltage. Obtain this tool
locally.
NOTE: Toro recommends the use of a DIGITAL Volt-Ohm--Amp multimeter when testing electrical circuits.
The high impedance (internal resistance) of a digital meter in the voltage mode will make sure that excess current is not allowed through the meter. This excess
current can cause damage to circuits not designed to
carry it.
Figure 1
Skin--Over Grease
Electrical
System
Special non--conductive grease which forms a light protective skin which helps waterproof electrical switches
and contacts.
Toro Part Number: TOR50547
Figure 2
Battery Terminal Protector
Aerosol spray that should be used on battery terminals
to reduce corrosion problems. Apply terminal protector
after the battery cable has been secured to the battery
terminal.
Toro Part Number: 107--0392
Figure 3
Greensmaster 3150
Page 5 -- 3
Electrical System
Dielectric Lubricant/Sealant
Dielectric lubricant should be used to prevent corrosion
of connection terminals. To ensure complete coating of
terminals, liberally apply lubricant to both component
and wire harness connector, plug connector to component, unplug connector, reapply lubricant to both surfaces and reconnect harness connector to component.
Connectors should be thoroughly packed with lubricant
for effective results.
Toro Part Number: 107--0342
Figure 4
Battery Hydrometer
Use the Battery Hydrometer when measuring specific
gravity of battery electrolyte. Obtain this tool locally.
Figure 5
Electrical System
Page 5 -- 4
Greensmaster 3150
Turf Guardiant Leak Detector System Operation
Before Start-Up (Cold Oil)
With ignition switch in the OFF position, solenoid valve
is open. Before start-up, hydraulic fluid is at level mark
of sight gauge (oil cold). Float is in raised position, keeping alarm circuit open.
AUXILIARY
TANK
FLOAT SENSOR
(raised/open)
SIGHT
GAUGE
ALARM
(off)
SOLENOID
VALVE
(open)
MAIN HYDRAULIC TANK
Figure 6
Normal Operation (Warm Oil)
AUXILIARY
TANK
FLOAT SENSOR
(raised/open)
SIGHT
GAUGE
ALARM
(off)
SOLENOID
VALVE
(closed)
MAIN HYDRAULIC TANK
Figure 7
Leak Alert!
If hydraulic fluid leaks during operation, the fluid level in
the main hydraulic tank drops. This causes the float to
lower, closing the alarm circuit. The alarm will sound after a one second time delay.
NOTE: During normal operation, with cutting units lowered, approximately 5 oz (148 ml) of hydraulic fluid will
leak before the float closes the alarm circuit and activates the alarm.
AUXILIARY
TANK
FLOAT SENSOR
(lowered/closed)
SIGHT
GAUGE
ALARM
(off)
SOLENOID
VALVE
(closed)
MAIN HYDRAULIC TANK
Figure 8
Greensmaster 3150
Page 5 -- 5
Electrical System
Electrical
System
When ignition switch is turned to the RUN position, solenoid valve closes. During normal operation, hydraulic
fluid expands, causing it to overflow into auxiliary tank.
The float stays in the raised position keeping alarm circuit open.
Troubleshooting
For effective troubleshooting and repairs, you must
have a good understanding of the electrical circuits and
components used on this machine (see Chapter 9 -Foldout Drawings).
CAUTION
Remove all jewelry, especially rings and
watches, before doing any electrical troubleshooting or testing. Disconnect the battery
cables unless the test requires battery voltage.
If the machine has any interlock switches by--passed,
they must be reconnected for proper troubleshooting
and safety.
Starting Problems
Problem
Possible Causes
Starter solenoid clicks, but starter will not crank.
NOTE: If solenoid clicks, problem is not in safety
interlock system.
Battery charge is low.
Battery cables are loose or corroded.
Battery ground to frame is loose or corroded.
Wiring at starter is faulty.
Starter solenoid is faulty.
Starter mounting bolts are loose or not supplying a
sufficient ground for starter operation.
Starter is faulty.
Nothing happens when start attempt is made.
Functional control lever is not in the neutral position.
Battery cables are loose or corroded.
Battery ground to frame is loose or corroded.
Fuse F1 (20 amp) is loose or faulty.
Fuse F3 (10 amp) is loose or faulty.
Fusible link at starter solenoid (included in main wire
harness) is faulty.
Wiring to the start circuit components is loose,
corroded or damaged (see Electrical Schematic and
Circuit Diagrams in Chapter 9 -- Foldout Drawings).
Start safety relay (K2) is faulty.
Neutral switch is out of adjustment or faulty.
Starter solenoid fusible link is faulty.
Ignition switch is faulty.
Starter solenoid is faulty.
Fuse block is faulty.
Battery is faulty.
Electrical System
Page 5 -- 6
Greensmaster 3150
Starting Problems (continued)
Problem
Possible Causes
Engine cranks, but does not start.
Wiring to start circuits is loose, corroded or damaged
(see Electrical Schematic and Circuit Diagrams in
Chapter 9 -- Foldout Drawings).
Wiring to engine is is loose, corroded or damaged (see
Electrical Schematic and Circuit Diagrams in Chapter 9
-- Foldout Drawings).
Diode D1--A circuit is open.
Engine or fuel system is malfunctioning (see Chapter 3
-- Engine).
Kill relay (K1) is faulty.
Engine and fuel may be too cold.
Engine fuel solenoid is faulty.
Neutral switch is out of adjustment, faulty or short
circuited.
Electrical
System
Engine cranks (but should not) with the functional
control lever in the MOW or TRANSPORT position.
Greensmaster 3150
Page 5 -- 7
Electrical System
General Run and Transport Problems
Problem
Possible Causes
Engine kills when the functional control lever is in the
Operator is sitting too far forward on the seat (seat
MOW or TRANSPORT position with the operator in the switch not depressed).
seat.
Parking brake is set.
Parking brake sensor is faulty.
Seat switch is faulty.
Seat switch wiring is loose, corroded or damaged.
Battery does not charge.
Wiring to the charging circuit components is loose,
corroded or damaged (see Electrical Schematic and
Circuit Diagrams in Chapter 9 -- Foldout Drawings).
Voltage regulator is loose or not grounded to engine.
Voltage regulator is faulty.
Alternator stator (under engine flywheel) is faulty.
Alternator fusible link (included in engine wire harness)
is open.
Ignition switch is faulty.
Battery is faulty.
Engine kills during operation (operator sitting on seat).
Operator moved too far forward on the seat (seat
switch not depressed).
Wiring to the run circuits components are faulty or
disconnected (see Electrical Schematic and Circuit
Diagrams in Chapter 9 -- Foldout Drawings).
Engine or fuel system is malfunctioning (see Chapter 3
-- Engine).
Electrical System
Page 5 -- 8
Greensmaster 3150
Cutting Unit Operating Problems
Problem
Possible Causes
Cutting units run (but should not) when raised.
Joystick relay (K3) is faulty.
Mow relay (K4) is faulty.
Mow switch is out of adjustment or faulty.
A hydraulic problem exists (see Chapter 4 -- Hydraulic
System).
Cutting units do not run when lowered with the
functional control lever in the MOW position.
Wiring to run/mow/backlap circuits components is
loose, corroded or damaged (see Electrical Schematic
and Circuit Diagrams in Chapter 9 -- Foldout
Drawings).
Fuse block or fuse is faulty.
Solenoid coil S1R1 is faulty.
Mow switch and/or mow relay (K4) is faulty.
Raise or lower switch and/or joystick relay (K3) is
faulty.
Cutting units will not raise.
Wiring to raise circuit components is loose, corroded or
damaged (see Electrical Schematic and Circuit
Diagrams in Chapter 9 -- Foldout Drawings).
Fuse block or fuse is faulty.
Diode D3 is open.
Raise switch is faulty.
Raise relay (K6) is faulty.
Solenoid coil S3 and/or S2 is faulty.
A hydraulic problem exists (see Chapter 4 -- Hydraulic
System).
Greensmaster 3150
Page 5 -- 9
Electrical System
Electrical
System
A hydraulic problem exists (see Chapter 4 -- Hydraulic
System).
Cutting Unit Operating Problems (Continued)
Problem
Possible Causes
Cutting units will not lower.
Wiring to lower circuit components is loose, corroded
or damaged (see Electrical Schematic and Circuit
Diagrams in Chapter 9 -- Foldout Drawings).
Fuse block or fuse is faulty.
Diode D2 is open.
Raise switch is faulty.
Lower switch is faulty.
Joystick relay (K3) is faulty.
Lower relay (K5) is faulty.
6 second delay timer is faulty.
Solenoid coil S2 or S4 is faulty.
Electrical System
Page 5 -- 10
Greensmaster 3150
Electrical System Quick Checks
Battery Test
Use a multimeter to measure the voltage between the
battery terminals.
Voltage Measured
Battery Charge Level
12.68 V (or higher)
Fully charged (100%)
Set the multimeter to the DC volts setting. The battery
should be at a temperature of 60o to 100o F (16o to 38o
C). The ignition key should be off and all accessories
turned off. Connect the positive (+) meter lead to the
positive battery post and the negative (--) meter lead to
the negative battery post.
12.45 V
75% charged
12.24 V
50% charged
12.06 V
25% charged
11.89 V
0% charged
NOTE: This test provides a relative condition of the battery. Load testing of the battery will provide additional
and more accurate information.
This is a simple test used to determine if a charging system is functioning. It will tell you if the charging system
has an output, but not its capacity.
Start the engine and run at high idle (2850 RPM). Allow
the battery to charge for at least three (3) minutes. Record the battery voltage.
Use a digital multimeter set to DC volts. Connect the
positive (+) multimeter lead to the positive battery post
and the negative (--) multimeter lead to the negative battery post. Keep the test leads connected to the battery
posts and record the battery voltage.
After running the engine for at least three (3) minutes,
battery voltage should be at least 0.50 volt higher than
initial battery voltage.
NOTE: Upon starting the engine, the battery voltage
will drop and then should increase once the engine is
running.
NOTE: Depending upon the condition of the battery
charge and battery temperature, the battery voltage will
increase at different rates as the battery charges.
Greensmaster 3150
An example of a charging system that is functioning:
At least 0.50 volt over initial battery voltage.
Initial Battery Voltage
= 12.30 v
Battery Voltage after 3 Minute Charge
= 12.95 v
Difference
= +0.65 v
Page 5 -- 11
Electrical System
Electrical
System
Charging System Test
Component Testing
For accurate resistance and/or continuity checks, electrically disconnect the component being tested from the
circuit (e.g. unplug the ignition switch connector before
doing a continuity check on the switch).
CAUTION
When testing electrical components for continuity with a multimeter (ohms setting), make sure
that power to the circuit has been disconnected.
Ignition Switch
The ignition (key) switch has three (3) positions (OFF,
RUN and START). The terminals are marked as shown
in Figure 9. The circuitry of the ignition switch is shown
in the chart below. With the use of a multimeter (ohms
setting), the switch functions may be tested to determine
whether continuity exists between the various terminals
for each position. Verify continuity between switch terminals.
B
Y
CIRCUIT
POSITION
OFF
NONE
RUN
B + I + A, X + Y
START
A
S
X
I
B+I+S
Figure 9
Fuse Block
Fuses can be removed to check continuity. Use a multimeter to make sure that fuse resistance is less than 1
ohm.
F2 F1
F4 F3
Fuses supply power to the following (Fig. 10):
1. The 20 amp fuse (F1) supplies power to engine run
circuits and also to the hydraulic solenoid coils.
2. The 10 amp fuse (F2) supplies power to the light/test
switch and the optional light circuit.
3. The 10 amp fuse (F3) supplies power to the engine
run circuits and also to the hydraulic solenoid coils.
4. The 10 amp fuse (F4) supplies power to leak detector solenoid and the cutting unit control circuits.
Electrical System
Page 5 -- 12
Figure 10
Greensmaster 3150
Hour Meter
The hour meter is located on the control panel.
Testing
Hobbs
QUARTZ
1. Connect the positive (+) terminal of a 12 VDC source
to the positive terminal of the hour meter.
1
10
00001
HOURS
2. Connect the negative (--) terminal of the voltage
source to the other terminal of the hour meter.
+
3. The hour meter should move a 1/10 of an hour in six
(6) minutes.
4. Disconnect the voltage source from the hour meter.
5. Replace the hour meter if necessary.
BACK
Figure 11
Seat Switch
The seat switch is normally open and closes when the
operator is on the seat. If the functional control lever is
moved out of neutral (neutral switch opens) and the operator raises out of the seat, the engine magneto will
ground and the engine will stop. The switch and its electrical connector are located directly under the seat.
Electrical
System
2
Testing
3
1. Make sure the engine and ignition switch is OFF.
2. Remove seat from the support assembly by removing four (4) lock nuts from the seat bolts.
3. Disconnect electrical connector from the seat switch.
4. Check the continuity of the switch by connecting a
multimeter (ohms setting) across the connector terminals.
1
1
Figure 12
1. Seat bolts
2. Electrical connector
3. Seat switch
5. With no operator in the seat, there should be no continuity between the terminals.
6. Press directly onto the seat switch through the seat
cushion. There should be continuity as the seat cushion
approaches the bottom of its travel.
7. Connect switch electrical connector.
8. Secure seat to support assembly with removed fasteners.
Greensmaster 3150
Page 5 -- 13
Electrical System
Safety Relays
Several safety relays are used on Greensmaster 3150
machines. The safety relays are identical, five (5) terminal relays that are used for circuit control.
3. Disconnect wire harness connector from relay that is
to be tested. If desired, remove relay from machine for
testing.
Safety Relay Function
NOTE: Use illustration in Figure 13 to identify relay terminals.
The start safety relay ensures that the functional control
lever is in neutral before engine starting is allowed. The
start relay is located under the control panel on the left
side of the operator seat.
When energized, the kill relay provides a complete circuit to allow the starter solenoid to be energized. Also,
when de--energized, the kill relay provides a ground for
the engine magnetos which stops the engine. The kill
relay is located under the control panel on the left side
of the operator seat.
The charge circuit relay allows alternator output to reach
the machine electrical circuits as long as the engine is
running. The charge circuit relay is located under the operator seat.
When energized, the lower relay allows current flow to
hydraulic solenoid coils S2 and S4 causing the cutting
units to lower. The lower relay is located under the control panel on the left side of the operator seat.
4. Use a multimeter (ohms setting) to measure resistance between the following relay terminals:
A. There should be continuity between terminals
87A and 30
B. There should not be continuity between terminals
87 and 30.
C. Resistance between terminals 86 and 85 (relay
coil) should be from 80 to 90 ohms.
5. Connect multimeter (ohms setting) leads to relay terminals 30 and 87. Ground terminal 86 and apply +12
VDC to terminal 85. The relay should make and break
continuity between terminals 30 and 87 as 12 VDC is applied and removed from terminal 85.
6. Disconnect voltage from terminal 85 and multimeter
lead from terminal 87.
The joystick relay allows cutting unit operation when energized by the joystick lower switch. The joystick relay
is located under the control panel on the left side of the
operator seat.
7. Connect multimeter (ohms setting) leads to relay terminals 30 and 87A. Apply +12 VDC to terminal 85. The
relay should break and make continuity between terminals 30 and 87A as 12 VDC is applied and removed from
terminal 85.
The mow relay allows the reel engage solenoid coil
(S1R1) to be energized for cutting reel operation. The
mow relay is located under the control panel on the left
side of the operator seat.
8. Disconnect ground, voltage and multimeter leads
from relay terminals.
When energized, the raise relay allows current flow to
hydraulic solenoid coils S2 and S3 causing the cutting
units to raise. The raise relay is located under the control
panel on the left side of the operator seat.
9. Replace relay if testing determines that relay is
faulty.
10.When testing is complete, secure relay to machine
if it was removed. Connect wire harness connector to
relay.
When in backlap, the backlap relay prevents the cutting
reels from being engaged during engine cranking. The
backlap relay is located near the functional control lever.
NOTE: Refer to Circuit Diagrams in Chapter 9 -- Foldout Drawings for additional relay operation information.
86
87A
87
Relay Testing
1. Park machine on a level surface. Make sure the engine and ignition switch are OFF.
2. Locate relay that is to be tested.
Electrical System
85
30
Figure 13
Page 5 -- 14
Greensmaster 3150
Neutral and Mow Switches
The neutral and mow switches are used to determine
when the functional control lever is in the NEUTRAL or
MOW position. These switches are identical and are
normally open reed switches. They close when the actuator comes in close proximity to the switch. The
switches are attached to the functional control lever
bracket under the console panel (Fig. 14). The actuator
is attached to the functional control lever.
1
2
4
Testing
1. Park machine on a level surface. Make sure the engine and ignition switch are OFF.
3
2. Remove console from right side of operator seat.
3. Disconnect electrical connectors to both switches.
Check continuity of both switches by connecting a multimeter (ohms setting) across the connector terminals.
5. Place the functional control lever in the MOW position. The NEUTRAL switch should be open and the
MOW switch should be closed (continuity) (Fig. 14).
Figure 14
1. Functional control lever
2. Mow switch
0.725 to 0.775 inch
(18.4 to 19.7 mm)
6. The distance between the sensing end of each
switch and the traction bracket should be from 0.725 to
0.775 inch (18.4 to 19.7 mm) (Fig. 15).
7. To adjust or install actuator, place functional control
lever in the NEUTRAL position. Position actuator in lever until the NEUTRAL switch just closes and then rotate
actuator two (2) complete turns closer to the NEUTRAL
switch.
3. Neutral switch
4. Actuator
SWITCH
TRACTION BRACKET
LOCATION
8. When adjusting the switches or actuator, torque jam
nuts from 40 to 60 in--lb (4.5 to 6.7 N--m).
Electrical
System
4. Place the functional control lever in the NEUTRAL
position. The NEUTRAL switch should be closed (continuity) and the MOW switch should be open (Fig. 14).
SWITCH
CONNECTOR
Figure 15
9. After switch or actuator adjustment, check continuity
of both switches and interlock operation (See Verify Interlock System Operation in the Service and Repairs
section of this chapter). Readjust switch or actuator if
necessary.
10.Install console to right side of operator seat.
Greensmaster 3150
Page 5 -- 15
Electrical System
Parking Brake Sensor
The parking brake sensor is normally closed and opens
when the operator sets the parking brake. If the functional control lever is moved out of neutral (neutral switch
opens) and the parking brake is set, the engine magneto
will ground and the engine will stop. The sensor and its
electrical connector are located directly under the operator foot panel.
1
Testing
2
1. Park machine on a level surface. Make sure the engine and ignition switch are OFF. Set brake and block
front wheels.
3
2. Disconnect electrical connector from the parking
brake sensor.
3. Check the continuity of the sensor by connecting a
multimeter (ohms setting) across the connector terminals.
Figure 16
1. Mounting plate
2. Latch assembly
3. Parking brake sensor
4. With the parking brake set, there should be no continuity (open) across the sensor terminals.
5. Release the parking brake. There should be continuity (closed) across the sensor terminals.
6. Connect sensor electrical connector. Reset the parking brake.
Electrical System
Page 5 -- 16
Greensmaster 3150
Joystick Raise and Lower Switches
4
4
1
Testing
2
B. With the joystick in the raise position, continuity
should only exist between the common and NO terminals (blue and green/gray wires).
3. Check the continuity of the lower switch by connecting a multimeter (ohms setting) across the switch connector terminals as follows:
11
6
8
FRONT
9
10
13
Figure 17
1.
2.
3.
4.
5.
6.
7.
Cap screw
Flat washer
Spring washer (2 used)
Bushing (2 used)
Spacer
Joystick
Spring
8.
9.
10.
11.
12.
13.
Screw (4 used)
Raise switch
Speed nut (2 used)
Lower switch
Joystick bracket
Lock nut
1
A. With the joystick in the rest position, continuity
should only exist between the common and NC terminals (open terminal and green/black wires).
2
B. With the joystick in the lower position, continuity
should only exist between the common and NO terminals (green/black and gray/black wires).
3
4. After testing, connect the harness connectors to the
joystick switches and reinstall the plastic cover.
12
5
2. Check the continuity of the raise switch by connecting a multimeter (ohms setting) across the switch connector terminals as follows:
A. With the joystick in the rest position, continuity
should only exist between the common and NC terminals (blue and green/black wires).
3
3
1. Make sure the engine and ignition switch are OFF.
Remove the plastic cover and disconnect the harness
connectors from the joystick switches.
Greensmaster 3150
7
4
Figure 18
1. Common terminal
2. NO terminal
Page 5 -- 17
3. NC terminal
4. Switch lever
Electrical System
Electrical
System
The joystick raise and lower switches are located on the
lift control mechanism. The rear switch is used to lower
the reels and the front switch to raise them (Fig. 17). The
switches are identical and are shown in Figure 18.
Lower Reels Time Delay
The lower reels time delay is a solid state timer used to
energize the lower relay (K5) long enough to make sure
that the cutting units will lower fully when the joystick is
moved. When the lower relay is energized, hydraulic
manifold solenoid valves S2 and S4 are energized causing the cutting unit lift cylinders to retract and lower the
cutting units.
TIME
DELAY
Upon the application of electrical power to the time
delay, the load is energized and the time delay is started.
After six (6) seconds the load is de--energized.
Testing
1. Park machine on a level surface. Make sure the engine and ignition switch are OFF.
Figure 19
2. Raise seat to allow access to lower reels time delay
(Fig. 19).
+
3. Connect voltmeter across test load and test load to
timer. Connect 12VDC source to timer and load. Make
sure to observe polarity. After six (6) seconds, there
should be no voltage across the load.
--
INPUT VOLTAGE
4. After testing is complete, disconnect timer from
12VDC source and test load.
LOAD
5. Lower operator seat.
TIMING
RESISTOR
3
2
1
Figure 20
Electrical System
Page 5 -- 18
Greensmaster 3150
Starter Solenoid
The starter solenoid used on the Greensmaster 3150 allows current flow from the battery to the engine starter
motor when energized. The starter solenoid is attached
to the rear frame in front of the battery (Fig. 21).
3
Testing
4
1. Park machine on a level surface. Make sure the engine and ignition switch are OFF.
1
2. Disconnect negative (black) cable from battery and
then disconnect positive (red) cable (see Battery Service in the Service and Repairs section of this chapter).
2
3. Note wire locations on starter solenoid for assembly
purposes. Disconnect cables and wire harness connectors from solenoid.
NOTE: Prior to taking small resistance readings with a
digital multimeter, short the meter test leads together.
The meter will display a small resistance value (usually
0.5 ohms or less). This resistance is due to the internal
resistance of the meter and test leads. Subtract this value from the measured value of the component you are
testing.
Electrical
System
4. Apply 12 VDC directly across the solenoid coil posts.
The solenoid should click as the solenoid coil is energized. Make sure resistance across the main contact
posts is less than 1 ohm.
FRONT
Figure 21
1. Starter solenoid
2. Battery
5. Remove voltage from solenoid coil posts. The solenoid should click as the solenoid coil is de--energized.
Make sure resistance across the main contact posts is
infinite ohms.
3. Positive (+) cable
4. Negative (--) cable
2
1
6. When testing is complete, secure cables and wire
harness connections to solenoid. Torque nuts on solenoid coil posts from 15 to 20 in--lb (1.7 to 2.3 N--m) and
nuts on main contact posts from 50 to 60 in--lb (5.7 to
6.8 N--m).
1
2
WIRING
DIAGRAM
2
2
1
1
Figure 22
1. Main contact post
Greensmaster 3150
Page 5 -- 19
2. Solenoid coil post
Electrical System
Solenoid Valve Coils
The Greensmaster hydraulic control manifold uses several hydraulic solenoid valve coils for system control.
When the solenoid coils are energized, hydraulic valve
shift occurs to control hydraulic circuit flow. Testing of the
coils can be done with the coil installed on the hydraulic
valve.
3
1
4
Testing
1. Determine solenoid coil(s) that is to be tested and locate coil on hydraulic manifold (Fig. 23). Disconnect harness electrical connector from solenoid valve coil.
NOTE: Prior to taking small resistance readings with a
digital multimeter, short the meter test leads together.
The meter may display a small resistance value (usually
0.5 ohms or less). This resistance is due to the internal
resistance of the meter and test leads. Subtract this value from the measured value of the solenoid coil being
testing.
2
Figure 23
1. Solenoid S1R1 (7.1 ohm)
2. Solenoid S2 (8.6 ohm)
3. Solenoid S3 (7.1 ohm)
4. Solenoid S4 (8.6 ohm)
NOTE: Solenoid coil resistance should be measured
with solenoid at approximately 68oF (20oC). Resistance
may be slightly different than listed at different temperatures. Typically, a failed solenoid coil will either be
shorted (very low or no resistance) or open (infinite resistance).
2. Using a multimeter (ohms setting), measure resistance between the two (2) connector terminals on the
solenoid valve coil. The resistance for the solenoid coils
is identified below:
Solenoid Valve Coil
Resistance
S1R1 and S3
7.1 ohms
S2 and S4
8.6 ohms
3. If solenoid coil resistance is incorrect, replace solenoid coil (refer to control manifold service procedures in
the Service and Repairs section of Chapter 4 -- Hydraulic System).
NOTE: To assist in troubleshooting, identical solenoid
valve coils can be exchanged. If the problem follows the
exchanged coil, an electrical problem likely exists with
the coil. If the problem remains unchanged, something
other than the solenoid coil is the problem source (e.g.
switch, circuit wiring, hydraulic problem). The control
manifold S1R1 coil is the same as the manifold S3 coil.
The manifold S2 and S4 coils are identical.
4. After coil testing is completed, connect wire harness
electrical connector to the solenoid valve coil.
5. Secure all machine components that were removed
to access hydraulic manifold.
Electrical System
Page 5 -- 20
Greensmaster 3150
Backlap Switch
The backlap switch is a normally open ball switch that is
in the normal, open state when the backlap lever is in the
mow position. When the backlap lever is in the backlap
position, the switch closes. The backlap switch is attached to the front of the hydraulic control manifold located under the operator seat (Fig. 24).
Testing
2
20 ft--lb
(27 N--m)
1. Park machine on a level surface. Make sure the engine and ignition switch are OFF.
5
2. Raise operator seat to allow access to hydraulic control manifold. Locate the backlap switch on the front of
the manifold. Disconnect the wire harness electrical
connector from the backlap switch.
3
3. Check the continuity of the switch by connecting a
multimeter (ohms setting) across the switch connector
terminals.
4. With the ignition switch in the OFF position, turn the
backlap lever to the backlap position while watching the
multimeter. Continuity should be made as the switch closes.
1
1
4
Figure 24
1. Backlap switch
2. Backlap lever
3. Ball
4. Dowel
5. O--ring
Electrical
System
5. Turn the backlap lever to the mow position while
watching the multimeter. Continuity should be broken as
the switch opens.
6. If the backlap switch is faulty, replace switch. Make
sure that dowel and ball are placed in the manifold port
before installing new switch in manifold. Torque switch
to 20 ft--lb (27 N--m).
7. If the backlap switch tests correctly and a circuit
problem still exists, check wire harness (see Electrical
Schematic and Wire Harness Drawings in Chapter 9 -Foldout Drawings).
8. After testing is completed, connect wire harness
electrical connector to the backlap switch. Lower operator seat.
Greensmaster 3150
Page 5 -- 21
Electrical System
Diodes
The main wiring harness contains six (6) diodes. Diodes
D2 and D3 are connected to the harness at separate
locations. Diodes D1--A, D1--B, D1--C and D1--D are
connected to the main harness by a four (4) position circuit board located near the front of the left side control
panel. The diodes are used for circuit protection from inductive voltage spikes and for safety circuit logic.
DIODE
CIRCUIT
BOARD
PLUG-IN
DIODE
D1--D
1/A
D1--A
2/B
D1--C
D1--B
Apply dielectric grease (Toro part number 107--0342) to
circuit board contacts whenever the circuit board is
installed into the wire harness.
Figure 25
Diode D1--A
Allows the engine to start only with the functional control
lever in NEUTRAL (neutral switch closed). Also, it allows
the engine to continue to run with either the functional
control lever in NEUTRAL (neutral switch closed) or the
operator sitting in the seat (seat switch closed).
DIODE CIRCUIT BOARD
D1--A
D1--B
D1--C
D1--D
Diode D1--B
Prevents a negative spike from damaging the neutral
switch and seat switch by allowing a ground path for the
start safety relay (K2) when it de--energizes.
Figure 26
Type
Diode D1--C
Maintains current flow to the joystick relay (K3) after the
momentary lower switch of the joystick opens.
Diode D1--D
Prevents a negative spike from damaging the mow and
backlap switches by allowing a ground path for the mow
relay (K4) when it de--energizes.
Circuit
Board
Diode D2
This diode prevents current flow to solenoid S4 when solenoids S2 and S3 are energized through raise relay
(K6).
Plug-In
Red (+)
Black (--)
Continuity
H
A
YES
A
H
NO
G
B
YES
B
G
NO
F
C
YES
C
F
NO
E
D
YES
D
E
NO
1/A
2/B
YES
2/B
1/A
NO
Diode D3
This diode prevents current flow to solenoid S3 when solenoids S2 and S4 are energized through lower relay
(K5).
DIODE
CIRCUIT BOARD
Testing
The diodes can be individually tested using a digital
multimeter (ohms setting) and the table to the right.
Figure 27
Electrical System
Page 5 -- 22
Greensmaster 3150
Fusible Links
The electrical system on Greensmaster 3150 machines
includes two (2) fusible links for machine circuit protection.
One of these fusible links is included in the main wire
harness. This fusible link and the positive (+) battery
cable attach to one of the starter solenoid main contact
posts. The second fusible link is included in the engine
wire harness. This fusible link connects to the output
lead at the regulator/rectifier.
Make sure that ignition switch is OFF. Disconnect negative (--) battery cable from battery terminal and then disconnect positive (+) cable from battery (see Battery
Service in the Service and Repairs section of this chapter). Locate fusible link in wire harness. Use a multimeter
to make sure that continuity exists across the fusible
link. If a fusible link is open, replace the fusible link.
After testing is complete, make sure that all wire harness
connectors are secured. Connect positive (+) battery
cable to battery terminal first and then connect negative
(--) cable to battery.
Electrical
System
If either of these links should fail, current to the protected
circuit will cease. Refer to the electrical schematic and
wire harness drawings in Chapter 9 -- Foldout Drawings
for additional circuit information.
Testing
Greensmaster 3150
Page 5 -- 23
Electrical System
Leak Detector Test/Light Switch
The leak detector test/light switch is used to perform two
machine functions. When the switch is pressed to the
rearward, momentary position, the leak detector alarm
can be tested. The switch is also used to operate the optional lights by pressing the front of the switch. The leak
detector test/light switch is located on the control panel
(Fig. 28).
2
1
Testing
1. Park machine on a level surface. Make sure the engine and ignition switch are OFF.
2. Remove control panel shield to gain access to leak
detector test/light switch.
3. Make sure ignition switch is in the OFF position. Disconnect machine wire harness electrical connector from
the switch.
Figure 28
1. Control panel
4. The leak detector test/light switch terminals are identified in Figure 29 and the circuitry of the switch is shown
in Figure 30. With the use of a multimeter (ohms setting),
the switch functions may be tested to determine whether
continuity exists between the various terminals for each
switch position. Verify continuity between switch terminals.
BACK OF SWITCH
5. Replace leak detector test/light switch if testing determines that it is faulty.
6. If the leak detector test/light switch tests correctly
and a circuit problem still exists, check wire harness
(see Electrical Schematics and Wire Harness Drawings
in Chapter 9 -- Foldout Drawings).
7. After testing is complete, connect machine wire harness connector to leak detector test/light switch. Secure
control panel shield to machine with removed fasteners.
Electrical System
Page 5 -- 24
2. Leak test/light switch
Figure 29
SWITCH
POSITION
NORMAL
CIRCUITS
OTHER
CIRCUITS
RAISE
2+1
5+4
OFF
NONE
NONE
LOWER
2+3
5+6
Figure 30
Greensmaster 3150
Leak Detector Alarm and Delay Timer
The leak detector alarm is used to notify the operator
that a hydraulic leak has occurred. To prevent the leak
detector system from sounding false alarms during normal operation, the alarm circuit includes a one (1) second delay timer.
NOTE: For information on leak detector operation refer
to Turf Guardiant Leak Detector System Operation in
this chapter.
Testing
2
1
1. Park machine on a level surface. Make sure the engine and ignition switch are OFF.
2. Turn ignition switch to the RUN position (do not start
the engine), then move leak detector test switch rearward and hold. After a one (1) second time delay, the
alarm should sound.
Figure 31
2. Delay timer
Electrical
System
1. Alarm
Greensmaster 3150
Page 5 -- 25
Electrical System
Leak Detector Float Sensor
The leak detector float sensor closely monitors the hydraulic fluid level in the main hydraulic tank. The sensor
contacts are open when the float is in the raised position
and oil level in the hydraulic tank is correct. The sensor
closes when the float is in the lowered position caused
by a low oil level and potential oil leak.
1
NOTE: For information on leak detector operation refer
to Turf Guardiant Leak Detector System Operation in
this chapter.
Testing
1. If the float sensor is connected to the main harness,
remove hydraulic tank cap and screen from filler neck of
hydraulic tank. Turn ignition switch to the RUN position
(do not start the engine). Insert a clean rod or screw driver into filler neck and gently push down on sensor float
(Fig. 33). Alarm should sound after a one (1) second
time delay.
2. If the float sensor is removed or disconnected from
the main harness, connect a continuity tester across the
float sensor wire terminals. There should be continuity
across the terminals only when the float is pushed down.
There should be no continuity across the terminals
when the float is in the raised position.
3. If oil level sensor was removed from reservoir, install
oil level sensor into reservoir making sure that arrow on
sensor is pointing down (Fig. 34). Torque sensor nut
from 110 to 140 in--lb (12.5 to 15.8 N--m).
3
2
110 to 140 in--lb
(12.5 to 15.8 N--m)
Figure 32
1. Main hydraulic tank
2. Float sensor
3. O--ring
FLOAT SENSOR
(lowered/closed)
CLEAN ROD OR
SCREWDRIVER
ALARM
(on)
4. After testing, make sure that hydraulic oil level in reservoir is correct.
Figure 33
2
1
Figure 34
1. Oil level sensor
Electrical System
Page 5 -- 26
2. Sensor arrow
Greensmaster 3150
Leak Detector Solenoid Valve
The leak detector solenoid valve is a normally open
valve that allows hydraulic fluid to flow from the auxiliary
tank to the main hydraulic tank while the ignition is OFF.
This feature fills the main hydraulic tank with fluid from
the auxiliary tank prior to starting the machine. The valve
closes when the ignition switch is in the RUN position
and during machine operation.
2
3
4
NOTE: For information on leak detector operation refer
to Turf Guardiant Leak Detector System Operation in
this chapter.
1
Testing
1. Disconnect the wiring connector at the valve solenoid.
2. Connect 12VDC power across the solenoid terminals. The valve spool should retract completely.
3. If valve does not retract smoothly or does not retract
completely, replace the valve.
Electrical
System
4. To check the solenoid valve supply power, turn the
ignition switch to the RUN position (do not start the engine). Use a multimeter to make sure that the solenoid
valve wire harness connector has 12 volts present.
Figure 35
1. Main hydraulic tank
2. Valve body
Greensmaster 3150
Page 5 -- 27
3. Valve spool
4. Solenoid
Electrical System
Service and Repairs
Verify Interlock System Operation
CAUTION
The interlock switches are for the operator’s
protection; do not disconnect them. Check the
operation of the switches daily to assure the interlock system is operating. If a switch is defective, replace it before operating the machine.
The purposes of the interlock switches are to:
A. Prevent the engine from cranking or starting unless the functional control lever is in NEUTRAL.
B. Prevent operating the traction pedal with the
functional control lever in NEUTRAL.
C. Shut off the engine if the operator leaves the seat
without the functional control lever in NEUTRAL.
D. Shut off the reels if the functional control lever is
moved to NEUTRAL or TRANSPORT.
1. Sit on the seat, engage parking brake and move
functional control lever to NEUTRAL. Try to depress
traction pedal. If the pedal does not depress, the interlock system is operating correctly. Correct problem if not
operating properly.
Electrical System
2. Sit on the seat, engage parking brake, keep traction
pedal in neutral and place functional control lever in
MOW or TRANSPORT. Try to start the engine. If the engine does not crank, the interlock system is operating
correctly. Correct problem if not operating properly.
3. Sit on the seat and start engine. Move functional control lever to MOW. Raise off the seat. If the engine stops,
the interlock system is operating correctly. Correct problem if not operating properly.
4. Sit on the seat and start engine. Move functional control lever to TRANSPORT. Raise off the seat. If the engine stops, the interlock system is operating correctly.
Correct problem if not operating properly.
5. Sit on the seat, engage parking brake, keep traction
pedal in neutral and place functional control lever in
NEUTRAL. Start the engine. Move Raise / Lower -- Mow
Control Lever forward to lower the cutting units. If the
units do not start rotating, the interlock system is operating correctly. Correct problem if not operating properly.
6. Sit on the seat and set the parking brake. Start the
engine and move the functional control lever to MOW.
If the engine stops, the interlock system is operating correctly. Correct problem if not operating properly.
Page 5 -- 28
Greensmaster 3150
Battery Care
1. Battery electrolyte level must be properly maintained. The top of the battery must be kept clean. lf the
machine is stored in a location where temperatures are
extremely high, the battery will discharge more rapidly
than if the machine is stored in a location where temperatures are cool.
3. Battery cables must be tight on battery terminals to
provide good electrical contact.
WARNING
Connecting battery cables to the wrong battery
post could result in personal injury and/or damage to the electrical system.
Wear safety goggles and rubber gloves when
working with battery electrolyte. Charge battery
in a well ventilated place so gasses produced
while charging can dissipate. Since the gases
are explosive, keep open flames and electrical
sparks away from the battery; do not smoke.
Nausea may result if the gases are inhaled. Unplug charger from electrical outlet before connecting or disconnecting charger leads to or
from battery posts.
2. Keep top of battery clean by washing periodically
with a brush dipped in baking soda (sodium bicarbonate) solution. Flush top surface with water after cleaning. Do not remove the fill caps while cleaning.
4. If corrosion occurs at battery terminals, disconnect
battery cables. Always disconnect negative (--) cable
first. Clean cable clamps and terminals separately. Reconnect battery cables with positive (+) cable first. Coat
terminals with battery terminal protector (see Special
Tools in this chapter) or a light coat of grease to reduce
corrosion after connections are made.
5. Check battery electrolyte level every twenty five (25)
operating hours and every thirty (30) days if machine is
in storage.
6. Maintain battery cell level with distilled or demineralized water. Do not fill cells above the fill line.
Electrical
System
WARNING
Battery Storage
If the machine will be stored for more than thirty (30)
days:
3. Store battery in a cool atmosphere to avoid quick deterioration of the battery charge.
1. Make sure ignition switch is in the OFF position. Remove the battery and charge it fully (see Battery Service
in this section).
4. To help prevent the battery from freezing during storage, make sure it is fully charged (see Battery Service
in this section).
2. Either store battery on a shelf or on the machine.
Leave cables disconnected if the battery is stored on the
machine.
Greensmaster 3150
Page 5 -- 29
Electrical System
Battery Service
The battery is the heart of the electrical system. With
regular and proper service, battery life can be extended.
Additionally, battery and electrical component failure
can be prevented.
Battery Specifications
BCI Group Size U1
300 Amp Cranking Performance at 0oF (--18oC)
28 Minute Reserve Capacity at 80oF (27oC)
Electrolyte Specific Gravity (fully charged): from 1.250
to 1.280
Electrolyte Specific Gravity (discharged): 1.240
CAUTION
When working with batteries, use extreme caution to avoid splashing or spilling electrolyte.
Electrolyte can destroy clothing and burn skin or
eyes. Always wear safety goggles and a face
shield when working with batteries.
4. Place the battery into battery tray. Make sure battery
is level and flat. Push the positive (+) cable connector
onto positive battery post. Do not hammer as this will
damage the battery. Tighten cable clamp fasteners with
two (2) wrenches.
5. Install and secure battery hold down rod with two (2)
wing nuts. Do not overtighten to prevent cracking or distorting the battery case.
6. Connect a digital multimeter (set to amps) between
the negative battery post and the negative (--) cable connector. The reading should be less than 0.1 amp. If the
reading is 0.1 amp or more, the unit’s electrical system
should be tested and repaired.
7. Connect the negative (ground) cable connector to
the negative battery post. Tighten cable clamp fasteners
with two (2) wrenches.
8. Coat terminals with battery terminal protector (see
Special Tools in this chapter) or a light coat of grease to
reduce corrosion after connections are made.
Battery Removal (Fig. 36)
3
12
13
IMPORTANT: Be careful to not damage terminal
posts or cable connectors when removing the battery cables.
7
4
5
9
2
1. Disconnect the ground cable (--) first to prevent short
circuiting the battery, other components or the operators
hands. Then, disconnect the positive (+) cable.
8
1
2. Remove two (2) wing nuts and battery hold down rod.
10
3. Make sure that the battery filler caps are on tightly.
6
4. Remove battery from the battery compartment to a
service area. This will minimize possible battery damage and allow better access for inspection and service.
11
Battery Installation (Fig. 36)
IMPORTANT: To prevent possible electrical problems, install only a fully charged battery.
1. Make sure the ignition switch and all accessories are
off.
FRONT
2. Make sure the battery compartment is clean and repainted if necessary.
3. Make sure battery cables and battery retainer are in
good condition.
Electrical System
Figure 36
1.
2.
3.
4.
5.
6.
Page 5 -- 30
Battery
Negative (--) cable
Positive (+) cable
Hold down rod
Wing nut (2 used)
Battery post (2 used)
7.
8.
9.
10.
11.
Hex nut (2 used)
Cap screw (2 used)
O--ring (2 used)
Battery tray
Drain tube
Greensmaster 3150
1. Check for cracks caused by overly tight or loose hold
down rod. Replace battery if cracked or leaking.
2. Check battery terminal posts for corrosion. Use a terminal brush or steel wool to clean corrosion from the battery terminal posts.
IMPORTANT: Before cleaning the battery, tape or
block the vent holes to the filler caps and make sure
the caps are on tightly.
3. Check for signs of wetness or leakage on the top of
the battery which might indicate a loose or missing filler
cap, overcharging, loose terminal post or overfilling.
Clean the battery with a solution of baking soda and water, then rinse it with clean water.
IMPORTANT: Make sure the area around the cells is
clean before opening the battery caps.
4. Check the electrolyte level in each cell. If necessary,
fill all cells with distilled water to the bottom of the cap
tubes. Charge at 15 to 25 amps for fifteen (15) minutes
to allow sufficient mixing of the electrolyte.
2. Perform a high--discharge test with an adjustable
load tester.
This is one of the most reliable means of testing a battery
as it simulates the cold--cranking test. A commercial battery load tester is required to perform this test.
CAUTION
Follow the manufacturer’s instructions when using a battery tester.
A. Check the voltage across the battery terminals
prior to testing the battery. If the voltage is less than
12.0 VDC, recharge the battery.
B. If the battery has been charged, apply a 150 amp
load for fifteen (15) seconds to remove the surface
charge. Use a battery load tester following the
manufacturer’s instructions.
C. Make sure the battery terminals are free of corrosion.
Battery Testing
D. Measure the temperature of the center cell.
1. Conduct a hydrometer test of the battery electrolyte.
E. Connect a battery load tester to the battery terminals following the manufacturer’s instructions. Connect a digital multimeter to the battery terminals.
IMPORTANT: Make sure the area around the cells is
clean before opening the battery caps.
A. Measure the specific gravity of each cell with a
hydrometer. Draw electrolyte in and out of the
hydrometer barrel prior to taking a reading to warm-up the hydrometer. At the same time take the temperature of the cell.
B. Temperature correct each cell reading. For each
10oF (6oC) above 80oF (27oC) add 0.004 to the specific gravity reading. For each 10oF (6oC) below 80oF
(27oC) subtract 0.004 from the specific gravity reading.
Example:
Cell Temperature 100oF
Cell Gravity
ADD (20o above 80oF)
Correction to 80oF
G. Take a battery voltage reading at fifteen (15) seconds, then remove the load.
H. Using the table below, determine the minimum
voltage for the cell temperature reading.
Minimum
Voltage
1.245
0.008
1.253
C. If the difference between the highest and lowest
cell specific gravity is 0.050 or greater or the lowest
cell specific gravity is less than 1.225, charge the battery. Charge at the recommended rate and time (see
Battery Charging below) or until the specific gravity
of all cells is 1.225 or greater with the difference in
specific gravity between the highest and lowest cell
less than 0.050. If these charging conditions can not
be met, replace the battery.
Greensmaster 3150
F. Apply a test load of 270 amps (one half the battery
Cranking Performance Specification) to the battery
for fifteen (15) seconds.
Battery Electrolyte
Temperature
9.6
70oF (and up)
21oC (and up)
9.5
60oF
16oC
9.4
50oF
10oC
9.3
40oF
4oC
9.1
30oF
--1oC
8.9
20oF
--7oC
8.7
10oF
--12oC
8.5
0oF
--18oC
I. If the test voltage is below the minimum, replace
the battery. If the test voltage is at or above the minimum, return the battery to service.
Page 5 -- 31
Electrical System
Electrical
System
Battery Inspection and Maintenance
Battery Charging
To minimize possible damage to the battery and allow
the battery to be fully charged, the slow charging method is presented here. This charging method can be accomplished with a constant current battery charger
which is available in most shops.
CAUTION
Follow the manufacturer’s instructions when using a battery charger.
NOTE: Using specific gravity of the battery cells is the
most accurate method of determining battery condition.
1. Determine the battery charge level from either its
open specific gravity or circuit voltage.
Battery Charge
Level
Specific
Gravity
Open Circuit
Voltage
100%
1.265
12.68
75%
1.225
12.45
50%
1.190
12.24
25%
1.155
12.06
0%
1.120
11.89
2. Determine the charging time and rate using the
manufacturer’s battery charger instructions or the following table.
Battery
Reserve
Capacity
(Minutes)
CAUTION
Do not charge a frozen battery because it can explode and cause injury. Let the battery warm to
60oF (15oC) before connecting to a charger.
Charge the battery in a well--ventilated place to
dissipate gases produced from charging. These
gases are explosive; keep open flame and electrical spark away from the battery. Do not smoke.
Nausea may result if the gases are inhaled. Unplug the charger from the electrical outlet before
connecting or disconnecting the charger leads
from the battery posts.
3. Following the manufacturer’s instructions, connect
the charger cables to the battery. Make sure a good connection is made.
4. Charge the battery following the manufacturer’s
instructions.
5. Occasionally check the temperature of the battery
electrolyte. If the temperature exceeds 125oF (52oC) or
the electrolyte is violently gassing or spewing, the
charging rate must be lowered or temporarily stopped.
6. Three (3) hours prior to the end of the charging, measure the specific gravity of a battery cell once per hour.
The battery is fully charged when the cells are gassing
freely at a low charging rate and there is less than a
0.003 change in specific gravity for three (3) consecutive readings.
Battery Charge Level
(Percent of Fully Charged)
75%
50%
25%
0%
80 or
less
3.8 hrs
@
3 amps
7.5 hrs
@
3 amps
11.3 hrs
@
3 amps
15 hrs
@
3 amps
81 to 125
5.3 hrs
@
4 amps
10.5 hrs
@
4 amps
15.8 hrs
@
4 amps
21 hrs
@
4 amps
126 to
170
5.5 hrs
@
5 amps
11 hrs
@
5 amps
16.5 hrs
@
5 amps
22 hrs
@
5 amps
171 to
250
5.8 hrs
@
6 amps
11.5 hrs
@
6 amps
17.3 hrs
@
6 amps
23 hrs
@
6 amps
above
250
6 hrs
12 hrs
18 hrs
24 hrs
@
@
@
@
10 amps 10 amps 10 amps 10 amps
Electrical System
Page 5 -- 32
Greensmaster 3150
Chapter 6
Chassis
Table of Contents
Chassis
SPECIFICATIONS . . . . . . . . . . . . . . . . . . . . . . . . . . . . 2
GENERAL INFORMATION . . . . . . . . . . . . . . . . . . . . . 3
Operator’s Manual . . . . . . . . . . . . . . . . . . . . . . . . . . 3
SPECIAL TOOLS . . . . . . . . . . . . . . . . . . . . . . . . . . . . . 3
SERVICE AND REPAIRS . . . . . . . . . . . . . . . . . . . . . . 4
Front Wheel and Brakes . . . . . . . . . . . . . . . . . . . . . 4
Rear Wheel (2WD) . . . . . . . . . . . . . . . . . . . . . . . . . . 6
Rear Wheel (Optional 3WD) . . . . . . . . . . . . . . . . . . 8
Rear Wheel Hub and Motor Assembly
(Optional 3WD) . . . . . . . . . . . . . . . . . . . . . . . . . . 10
Rear Castor Fork . . . . . . . . . . . . . . . . . . . . . . . . . . 12
Cutting Unit Pull Frame . . . . . . . . . . . . . . . . . . . . . 14
Greensmaster 3150
Page 6 -- 1
Chassis
Specifications
Item
Description
Front tire pressure (18 x 9.50 x 8, 2 ply)
8 to 12 PSI (55 to 83 kPa)
Rear tire pressure (18 x 9.50 x 8, 2 ply)
8 to 15 PSI (55 to 103 kPa)
Wheel lug nut torque
Chassis
70 to 90 ft--lb (95 to 122 N--m)
Page 6 -- 2
Greensmaster 3150
General Information
Operator’s Manual
The Operator’s Manual provides information regarding
the operation, general maintenance and maintenance
intervals for your Greensmaster 3150. Refer to that publication for additional information when servicing the
machine.
Special Tools
Order this special tool from your Toro Distributor.
Wheel Hub Puller
The wheel hub puller allows safe removal of the wheel
hub from the shaft of wheel motors.
Toro part number: TOR4097
Greensmaster 3150
Page 6 -- 3
Chassis
Figure 1
Chassis
Service and Repairs
Front Wheel and Brakes
2
250 to 400 ft--lb
(339 to 542 N--m)
3
6
1
5
8
11
14
13
12
70 to 90 ft--lb
(95 to122 N--m)
7
17
19
15
18
9
16
21
10
4
RIGHT
23
24
25
26
FRONT
20
27
22
Figure 2
1.
2.
3.
4.
5.
6.
7.
8.
9.
Lug nut (4 per wheel)
Wheel assembly
Lock nut
Brake lever
Brake drum
Wheel hub
Drive stud (4 per hub)
Brake assembly
Brake cam
10.
11.
12.
13.
14.
15.
16.
17.
18.
Retaining ring
Cap screw (4 per brake)
Lock nut (4 per brake)
Woodruff key
Brake bracket
Hydraulic hose
Hydraulic hose
45o Hydraulic fitting (2 per motor)
O--ring
Removal (Fig. 2)
1. Park the machine on a level surface, engage the
parking brake, lower the cutting units and stop the engine. Remove key from the ignition switch.
2. Loosen, but do not remove, lug nuts (item 1) and lock
nut (item 3). Loosen lock nut at least two (2) turns.
3. Chock front and rear of wheels not being lifted to prevent the machine from moving. Lift front wheel off the
ground using a jack and place appropriate jackstands
beneath the frame to support the raised machine (see
Jacking Instructions in Chapter 1 -- Safety).
Chassis
19.
20.
21.
22.
23.
24.
25.
26.
27.
O--ring
Hydraulic motor
Cap screw (4 per motor)
Lock nut (4 per motor)
Brake rod
Jam nut
Clevis pin
Swivel clevis
Cotter pin
4. Remove lug nuts and wheel assembly from drive
studs.
IMPORTANT: DO NOT hit wheel hub (item 6) with a
hammer during removal or installation. Hammering
may cause damage to the hydraulic wheel motor.
NOTE: The brake drum assembly consists of the wheel
hub (item 6), brake drum (item 5) and drive studs (item
7).
5. Make sure that lock nut (item 3) on wheel motor shaft
is loosened at least two (2) turns. Use hub puller (see
Special Tools in this chapter) to loosen brake drum assembly from wheel motor.
Page 6 -- 4
Greensmaster 3150
6. Remove lock nut and brake drum assembly. Locate
and retrieve woodruff key (item 13).
7. Remove return springs from brake shoes (Fig. 3).
Remove brake shoes from backing plate.
8. Remove brake backing plate to machine if necessary:
A. Remove retaining clip (item 10) from the brake
cam (item 9). Separate brake lever (item 4) from
brake cam.
B. Remove four (4) cap screws (item 11), lock nuts
(item 12) and brake backing plate from the brake
bracket (item 14).
9. Brake parts should be clean and free of rust. Inspect
contact surfaces of brake shoes and brake drum for excessive wear. Replace any worn or damaged parts.
10.If wheel hub (item 6), brake drum (item 5) or drive
studs (item 7) need replacement, press four (4) drive
studs from wheel hub and separate hub from brake
drum.
4. Make sure that wheel hub bore and wheel motor
shaft are thoroughly cleaned. Install woodruff key (item
13) to the wheel motor shaft. Slide brake drum assembly
over shaft and key.
5. Secure brake drum assembly to motor shaft with lock
nut (item 3).
6. Install front wheel and secure with four (4) lug nuts.
Tighten lug nuts evenly in a crossing pattern.
WARNING
Failure to maintain proper wheel lug nut and
wheel hub lock nut torque could result in failure
or loss of wheel and may result in personal injury.
7. Lower machine to ground. Torque lock nut from 250
to 400 ft--lb (339 to 542 N--m) and wheel lug nuts from
70 to 90 ft--lb (95 to 122 N--m).
8. Check and adjust brakes.
Installation (Figs. 2 and 3)
3
1
1. If wheel hub was separated from brake drum, position hub to drum and secure by pressing four (4) drive
studs through hub. Make sure that studs are pressed fully into hub.
2. If brake backing plate was removed from machine:
Chassis
A. Secure backing plate to the brake bracket (item
14) with four (4) cap screws (item 11) and lock nuts
(item 12).
B. Install brake cam into backing plate if it was removed.
C. Apply antiseize lubricant to spline area of brake
cam. Slide brake lever (item 4) onto brake cam and
secure with retaining clip (10). Make sure that brake
lever pivot is inserted into machine frame during assembly.
3. Position both brake shoes on the backing plate (Fig.
3). Insert return springs into the holes of both brake
shoes.
Greensmaster 3150
2
2
1
Figure 3
1. Return spring
2. Brake shoe
Page 6 -- 5
3. Brake cam
Chassis
Rear Wheel (2WD)
5
6
4
3
2
7
70 to 90 ft--lb
(95 to 122 N--m)
2
3
9
8
4
10
12
11
16
34
15
13
1
18
19
17
20
14
27
FRONT
32
31
30
22
23
20
19
18
24
25
33
RIGHT
21
29
28
26
65 to 85 ft--lb
(89 to 115 N--m)
16
Figure 4
1.
2.
3.
4.
5.
6.
7.
8.
9.
10.
11.
12.
Steering cylinder
Bearing cup (2 used)
Bearing cone (2 used)
Washer (4 used)
Slotted hex nut
Cotter pin
Grease fitting
Jam nut
Rod end
Dust seal
Lug nut (4 used)
Wheel assembly
Chassis
13.
14.
15.
16.
17.
18.
19.
20.
21.
22.
23.
Washer
Lock nut
Cap screw (2 used)
Spacer (2 used)
Hub assembly
Seal (2 used)
Bearing cone (2 used)
Bearing cup (2 used)
Hub
Grease fitting
Drive stud (4 used)
Page 6 -- 6
24.
25.
26.
27.
28.
29.
30.
31.
32.
33.
34.
Castor fork
Flange head screw (3 used)
Lock nut
Castor bolt
Jam nut (2 used)
Flat washer
Adapter plate
Lock nut (2 used)
Lock nut (3 used)
Motor adapter plate
Grease fitting
Greensmaster 3150
Removal (Fig. 4)
3
1. Park the machine on a level surface, engage the
parking brake, lower the cutting units and stop the engine. Remove key from the ignition switch.
6
1
3
1
2. Chock both front wheels to prevent the machine from
moving.
3. Use a jack or hoist to lift rear wheel off the ground and
then place appropriate jackstands beneath the frame to
support the raised machine.
5. Remove wheel and hub assembly from the castor
fork.
6. If necessary, remove four (4) lug nuts (item 11) from
the drive studs (item 23). Separate wheel and hub assemblies.
NOTE: If castor fork removal is necessary, see Rear
Castor Fork in this section.
Wheel Hub Disassembly (Fig. 5)
NOTE: The wheel hub assembly consists of the wheel
hub, oil seals, bearing cones, bearing cups, grease fitting and drive studs (Fig. 5).
1. If drive studs are bent or damaged, press studs from
the wheel hub.
2. Pull oil seals, bearing cones and bearing cups from
the wheel hub.
5
2
4
Figure 5
1. Bearing cup (2 used)
2. Wheel hub
3. Bearing cone (2 used)
4. Shaft seal (2 used)
5. Drive stud (4 used)
6. Grease fitting
Installation (Fig. 4)
1. If wheel was removed from hub, slide wheel assembly onto the drive studs. Secure wheel to wheel hub assembly with four (4) lug nuts (item 11). Torque lug nuts
evenly in a crossing pattern to a torque from 70 to 90 ft-lb (95 to 122 N--m).
2. Install wheel and hub assembly into the castor fork.
Insert castor bolt (item 27) into motor adapter plate (item
33) mounting hole. Install a spindle spacer (item 16) and
slide bolt through the wheel and hub assembly.
3. Install second spindle spacer onto the bolt. Route the
bolt through the adapter plate (item 30) mounting hole.
4. Position bent lip of the bolt head under the bottom
edge of the motor adapter plate. Install and tighten lock
nut (item 26) to secure wheel to the castor fork. Do not
overtighten lock nut, the wheel must rotate freely.
5. Lower machine to ground.
Wheel Hub Assembly (Fig. 5)
1. Press new bearing cups into the wheel hub with the
thick edges towards the inside.
6. Clean grease fitting (item 22) on hub. Pump grease
into hub until grease is seen exiting at both hub seals
(item 18). Wipe up excess grease.
2. Pack new bearing cones with #2 multi--purpose lithium base grease.
3. Install new bearing cones into the wheel hub. Press
new oil seals into the hub with the lip of the seals facing
towards the inside.
4. If removed, press new drive studs into the wheel hub
fully to the shoulder of the stud flange.
Greensmaster 3150
Page 6 -- 7
Chassis
Chassis
4. Remove lock nut (item 26) from castor bolt (item 27).
Pull bolt from both adapter plates (items 30 and 33), two
(2) rear spindle spacers (item 16) and the wheel and hub
assembly.
4
Rear Wheel (Optional 3WD)
6
100 ft--lb
(135 N--m)
4
1
7
5
16
22
3
30
21
5
17
26
2
20
9
31
29
25
19
27
8
14
12
23
11
18
15
40 ft--lb
(55 N--m)
24
13
28
70 to 90 ft--lb
(95 to122 N--m)
10
Loctite #242
80 to 100 in--lb
(9.0 to 11.3 N--m)
FRONT
RIGHT
Figure 6
1.
2.
3.
4.
5.
6.
7.
8.
9.
10.
11.
Lock nut (2 used)
Spacer (2 used)
Grommet (2 used)
Hydraulic hose assembly
Washer (4 used)
Castor fork
Mount spacer (2 used)
Grease fitting
Bearing flangette (lube)
Bearing
Bearing flangette
Chassis
12.
13.
14.
15.
16.
17.
18.
19.
20.
21.
Cap screw (3 used)
Lock nut (2 used)
Wheel motor & hub assembly
Adapter (2 used)
Socket head screw (2 used)
Bulkhead bracket
Lug nut (4 used)
Hydraulic hose assembly
Hydraulic tube assembly
Washer (3 used)
Page 6 -- 8
22.
23.
24.
25.
26.
27.
28.
29.
30.
31.
Lock nut (3 used)
O--ring
O--ring
O--ring
O--ring
Set screw
Wheel assembly
Grease fitting
Hydraulic hose assembly
Washer head screw (2 used)
Greensmaster 3150
Removal (Fig. 6)
Installation (Fig. 6)
1. Park machine on a level surface. Make sure engine
is off. Set brake and block front wheels.
2. Loosen, but do not remove, lug nuts (item 18).
1. Secure wheel (item 28) to the drive studs of the hydraulic motor and hub assembly with four (4) lug nuts
(item 18). Torque nuts from 70 to 90 ft--lb (95 to 122
N--m).
3. Chock both front wheels to prevent the machine from
moving.
2. Reinstall grease fitting (item 8) into hydraulic motor
and hub assembly so it points away from the wheel.
4. Use a jack or hoist to lift rear wheel off the ground and
then place appropriate jackstands beneath the frame to
support the raised machine.
3. Install flangette (item 11), bearing (item 10) and relube flangette (item 9) onto the motor shaft.
Support wheel (item 28) and motor and hub assembly (item 14) to prevent dropping the assembly and causing personal injury.
5. Support rear wheel, hydraulic motor and hub assembly to prevent it from falling.
6. Remove wheel (item 28) and hydraulic motor and
hub assembly (item 14) from the castor fork (item 6) as
follows:
5. Loosely secure hydraulic motor and hub assembly to
the right inside of the castor fork with both socket head
screws (item 16) and lock nuts (item 13).
6. Position flangette grease fitting facing downward.
Then, loosely secure flangettes (items 9 and 11) and
bearing (item 10) to the left inside of the castor fork with
cap screws (item 12), mount spacers (item 7), washers
(item 21) and lock nuts (item 22).
7. Secure wheel (item 28) and hydraulic motor and hub
assembly (item 14) to the castor fork:
A. Remove cap screws (item 12), lock nuts (item 22)
and washers (item 21) securing flangettes (items 9
and 11) and mount spacers (item 7) to castor fork.
B. Remove both socket head screws (item 16) and
lock nuts (item 13) securing the hydraulic motor and
hub assembly to the castor fork.
C. Lower wheel and hydraulic motor and hub assembly from the castor fork.
7. Loosen set screw (item 27) on bearing (item 10). Pull
flangettes (items 9 and 11) and bearing from the hydraulic motor shaft.
A. Torque socket head screws (item 16) to 100 ft--lb
(135 N--m).
B. Torque cap screws (item 12) to 40 ft--lb (55 N--m).
8. Apply loctite to bearing set screw (item 27). Torque
set screw from 80 to 100 in--lb (9.0 to 11.3 N--m).
9. Lower machine to the ground. Check that lug nuts
are properly torqued from 70 to 90 ft--lb (95 to 122
N--m).
8. Remove grease fitting (item 8) from the hydraulic
motor and hub assembly. Remove four (4) lug nuts (item
18) and wheel (item 28) from the hub drive studs.
NOTE: If wheel hub and motor assembly need to be
serviced, see Rear Wheel Hub and Motor Assembly
(Optional 3WD) in this section. If castor fork removal is
necessary, see Rear Castor Fork in this section.
Greensmaster 3150
Page 6 -- 9
Chassis
Chassis
CAUTION
4. Position hydraulic motor and hub assembly, flangettes with bearing and wheel into the castor fork. Make
sure hose fittings on the motor face to the rear.
Rear Wheel Hub and Motor Assembly (Optional 3WD)
1
9
8
7
6
3
FREE
ROTATION
5
2
6
7
8
9
4
3
Figure 7
1. Hydraulic motor
2. Hub
3. Clutch roller bearing
4. Drive stud (4 used)
5. Grease fitting
6. Thrust washer
The following procedures assume the rear wheel hub
and motor assembly has been removed from the machine (see Rear Wheel (Optional 3WD) in this section).
Disassembly (Fig. 7)
CAUTION
Before continuing further, read and become familiar with General Precautions for Removing
and Installing Hydraulic System Components in
the Service and Repairs section of Chapter 4 -Hydraulic System.
7. Washer
8. Snap ring
9. Grease seal
3. Place rear wheel hub and motor assembly on a clean
workbench.
4. Remove grease seal (item 9) and snap ring (item 8)
from the long end of hub.
5. Remove washer (item 7), two (2) thrust washers
(item 6) and hub (item 2) from the hydraulic motor shaft.
Remove remaining two (2) thrust washers (item 6),
washer (item 7), snap ring (item 8) and grease seal (item
9) from the shaft.
6. If drive studs (item 4) are bent or damaged, press
studs from the wheel hub.
7. Press clutch roller bearings (item 3) from the hub.
1. Thoroughly clean junction of hydraulic hoses and fittings on hydraulic motor (Fig. 8).
2. Label hydraulic hoses that connect to rear wheel motor for assembly purposes. Remove hose assemblies
and O--rings from the hydraulic fittings on the hydraulic
motor. Allow hoses to drain into a suitable container.
Chassis
8. If rear wheel motor needs to be serviced, see Wheel
Motor Service in the Service and Repairs section of
Chapter 4 -- Hydraulic System.
Page 6 -- 10
Greensmaster 3150
Assembly (Fig. 7)
5
1. If drive studs (item 4) were removed, press new
studs fully to the shoulder of the wheel hub.
NOTE: Arrow on the side of the clutch roller bearings
(item 3) must point to the long side of the end of the hub.
3
2
6
4
2. Press clutch roller bearings (item 3) into the hub as
follows (Fig. 9):
3
2
A. Press three (3) roller bearings into flange end of
the hub. The outer edge of the third bearing must be
flush with the recessed edge within the hub.
B. Press final roller bearing into opposite end of hub.
The outer edge of the bearing must be flush with the
recessed edge within the hub.
C. The installed bearings must not interfere with
grease fitting hole in the hub.
4
1
Figure 8
1. Hub and motor assembly
2. O--ring
3. Adapter
3. Grease inner edge of the new grease seals (item 9)
with No. 2 multipurpose lithium base grease. Slide one
(1) seal onto motor shaft past groove closest to the motor. Install snap ring (item 8) into groove.
4. O--ring
5. Hydraulic hose
6. Hydraulic hose
OUTER BEARING EDGE
MUST BE FLUSH WITH EDGE
4. Slide flat washer (item 7) and two (2) thrust washers
(item 6) onto the motor shaft. Slide hub onto the shaft
with the short end first.
IMPORTANT: The hub should spin freely in the forward direction, but lock on the hydraulic motor
shaft when it is rotated in the reverse direction.
ARROWS ON BEARING
TOWARDS LONG END
Figure 9
Chassis
5. Slide remaining thrust washers (item 6) and flat
washer (item 7) onto the motor shaft. Install remaining
snap ring (item 8) into the shaft groove. Slide remaining
new grease seal (item 9) onto motor shaft.
6. Press grease seals (item 9) into the hub so they are
flush with the end of the hub.
7. Lubricate and position new O--rings to fittings on hydraulic motor. Use labels placed during the removal process to properly install hydraulic hoses to motor
adapters (see Hydraulic Hose and Tube Installation in
the General Information section of Chapter 4 -- Hydraulic System).
8. Install rear wheel hub and motor assembly to rear
castor fork of machine (see Rear Wheel (Optional 3WD)
in this section).
Greensmaster 3150
Page 6 -- 11
Chassis
Rear Castor Fork
5
6
4
3
2
7
70 to 90 ft--lb
(95 to 122 N--m)
2
3
9
8
4
10
12
11
16
34
15
13
1
18
19
17
20
14
27
FRONT
22
23
20
19
18
24
33
RIGHT
21
25
32
31
30
29
28
26
65 to 85 ft--lb
(89 to 115 N--m)
16
Figure 10
1.
2.
3.
4.
5.
6.
7.
8.
9.
10.
11.
12.
Steering cylinder
Bearing cup (2 used)
Bearing cone (2 used)
Washer (4 used)
Slotted hex nut
Cotter pin
Grease fitting
Jam nut
Rod end
Dust seal
Lug nut (4 used)
Wheel assembly
Chassis
13.
14.
15.
16.
17.
18.
19.
20.
21.
22.
23.
Washer
Lock nut
Cap screw (2 used)
Spacer (2 used)
Hub assembly
Seal (2 used)
Bearing cone (2 used)
Bearing cup (2 used)
Hub
Grease fitting
Drive stud (4 used)
Page 6 -- 12
24.
25.
26.
27.
28.
29.
30.
31.
32.
33.
34.
Castor fork
Flange head screw (3 used)
Lock nut
Castor bolt
Jam nut (2 used)
Flat washer
Adapter plate
Lock nut (2 used)
Lock nut (3 used)
Motor adapter plate
Grease fitting
Greensmaster 3150
Removal (Fig. 10)
Installation (Fig. 10)
1. Park machine on a level surface. Make sure engine
is off. Engage parking brake and block front wheels.
1. If bearing cups (item 2) were removed from frame,
press new cups into the castor fork pivot housing with
the thick side of the cups facing each other. Make sure
that cups are pressed fully to shoulder of frame housing.
3. Remove rear wheel assembly from the castor fork
(see Rear Wheel (2WD) or Rear Wheel (Optional 3WD)
in this section).
4. Remove fuel tank from machine to allow access to
castor fork (see Fuel Tank in the Service and Repairs
section of Chapter 3 -- Engine).
5. Remove both jam nuts (item 28) and flat washer
(item 29) securing the steering cylinder ball joint (item 9)
to the castor fork. Separate ball joint from castor fork.
CAUTION
Support castor fork while removing the slotted
hex nut (item 5) to prevent the fork from dropping
and causing personal injury.
6. Support the castor fork to prevent it from falling.
7. Remove cotter pin (item 6) and slotted hex nut (item
5) from the castor fork shaft. Lower castor fork from
frame.
8. Remove bearing cones (item 3) and washers (item
4) from the castor fork and frame. Note location of washers for assembly purposes.
9. Inspect upper and lower bearing cups (item 2) in
frame for damage and replace if necessary.
Greensmaster 3150
2. Pack both bearing cones (item 3) with #2 multi-purpose lithium base grease.
3. Place two (2) washers (item 4) onto the castor fork
shaft. Place lower bearing cone on top of washers with
the thick edge touching the washers.
4. Insert castor fork shaft up through the frame pivot
housing and bearing cups.
5. Place upper bearing cone on the castor fork shaft
with the wide edge up. Place two (2) washers on top of
the bearing cone.
6. Thread slotted hex nut (item 5) onto castor fork shaft
until drag is felt while rotating the castor fork. Back--off
hex nut to align shaft hole with a slot in the nut. Install
and secure new cotter pin (item 6) to the shaft.
7. Secure steering cylinder ball joint (item 9) to the castor fork with flat washer (item 29) and both jam nuts (item
28). Torque jam nuts from 65 to 85 ft--lbs (89 to 115
N--m).
8. Install fuel tank to the machine (see Fuel Tank in the
Service and Repairs section of Chapter 3 -- Engine).
9. Install rear wheel to castor fork (see Rear Wheel
(2WD) or Rear Wheel (Optional 3WD) in this section).
10.Lower machine to the ground.
11. Clean grease fitting (item 7) on frame pivot housing.
Pump grease into pivot housing until grease is seen exiting at both ends of the housing. Wipe up excess grease.
Page 6 -- 13
Chassis
Chassis
2. Jack up and secure the rear wheel off the ground.
Cutting Unit Pull Frame
29
28 35 36 13
31
37
9
35
28
37
5
10
11
7
6
38
34
30
8
12
18
15
16
38
1
27
19
3
38
20
16
4
39
15
2
27
40
24
6
41
27
17
14
26
25
32
42
23
RIGHT
16
38
38
33
22
20
21
42
FRONT
19
1
27
Figure 11
1.
2.
3.
4.
5.
6.
7.
8.
9.
10.
11.
12.
13.
14.
Roller shaft screw (2 used)
Nut (2 used)
Grease fitting
Ball joint receiver (2 used)
Hydraulic lift cylinder
Flat washer (3 used)
Cap screw (3 used)
Hinge pin
Pivot pin
Clevis pin
Cotter pin
Lift arm
Grease fitting
Grease fitting
Chassis
15.
16.
17.
18.
19.
20.
21.
22.
23.
24.
25.
26.
27.
28.
Shim washer (as needed)
Thrust washer (6 used)
Pivot hinge
Pull frame (RH shown)
Lock washer (2 used)
Flat washer (2 used)
Pull arm
Roller
Spring washer (2 used)
Pivot pin
Pull arm
Roller shaft
Grease fitting
Hydraulic fitting (2 used)
Page 6 -- 14
29.
30.
31.
32.
33.
34.
35.
36.
37.
38.
39.
40.
41.
42.
Spacer
Spacer
Hydraulic hose
Bumper (2 used)
Washer head screw (2 used)
Torsion spring
O--ring
Hydraulic hose
O--ring
Bushing
Ball joint sleeve (2 used)
Ball bearing (2 used)
Oil seal (2 used)
Flange bushing (2 per pull arm)
Greensmaster 3150
NOTE: The pull frame assemblies used on Greensmaster 3150 machines are slightly different depending
on location (right front, left front and center positions).
Service of the pull frame assembly is similar regardless
of position on the machine. The right front pull frame assembly is shown in Figure 11.
1
Disassembly (Fig. 11)
1. Park machine on a level surface with cutting units
lowered to the ground. Make sure engine is off. Engage
parking brake.
2
NOTE: Depending on service that is required, it might
be easier to remove cutting unit from pull frame.
2. Remove cutting unit pull frame components from
machine as required using Figure 11 as a guide.
Assembly (Fig. 11)
3
Figure 12
1. Pull frame
2. Pull arm
3. Cutting unit ball stud
1. Install all removed cutting unit pull frame components to machine using Figure 11 as a guide.
A. If bushings (item 38) in lift arm or pivot hinge are
being replaced, install new bushing so that grease
groove opening is orientated inward. The bushing
with grease groove is shown in Figure 13.
B. If pivot hinge (item 17) was removed, make sure
that side play clearance of pivot hinge is less than
0.060” (1.5 mm). Adjust clearance with shims (item
15) and thrust washers (item 16) as required.
2
Figure 13
1. Bushing
2. Grease groove
Chassis
C. If roller assembly was disassembled, install oil
seal with seal lip toward end of roller (Fig. 14). Also,
ball bearing should be installed with seal toward end
of roller.
1
1
3
2
Figure 14
1. Roller
2. Oil seal
Greensmaster 3150
Page 6 -- 15
3. Ball bearing
Chassis
This page is intentionally blank.
Chassis
Page 6 -- 16
Greensmaster 3150
Chapter 7
DPA Cutting Units
Table of Contents
DPA Cutting
Units
SPECIFICATIONS . . . . . . . . . . . . . . . . . . . . . . . . . . . . 2
GENERAL INFORMATION . . . . . . . . . . . . . . . . . . . . . 3
Cutting Unit Operator’s Manual . . . . . . . . . . . . . . . 3
Supporting Cutting Unit when Servicing . . . . . . . . 3
SPECIAL TOOLS . . . . . . . . . . . . . . . . . . . . . . . . . . . . . 4
FACTORS THAT CAN AFFECT CUTTING
PERFORMANCE . . . . . . . . . . . . . . . . . . . . . . . . . . . 6
SET UP AND ADJUSTMENTS . . . . . . . . . . . . . . . . . 10
Characteristics . . . . . . . . . . . . . . . . . . . . . . . . . . . . . 10
Leveling Rear Roller . . . . . . . . . . . . . . . . . . . . . . . . . 11
SERVICE AND REPAIRS . . . . . . . . . . . . . . . . . . . . . 12
Backlapping . . . . . . . . . . . . . . . . . . . . . . . . . . . . . . . 12
Bedbar Assembly . . . . . . . . . . . . . . . . . . . . . . . . . . 14
Bedbar Adjuster Service . . . . . . . . . . . . . . . . . . . . 16
Bedknife Replacement and Grinding . . . . . . . . . . 18
Reel Assembly Removal and Installation . . . . . . 20
Reel Assembly Removal . . . . . . . . . . . . . . . . . . 21
Reel Assembly Installation . . . . . . . . . . . . . . . . 21
Reel Assembly Service . . . . . . . . . . . . . . . . . . . . . 24
Preparing Reel for Grinding . . . . . . . . . . . . . . . . . 26
Front Roller . . . . . . . . . . . . . . . . . . . . . . . . . . . . . . . 28
Rear Roller . . . . . . . . . . . . . . . . . . . . . . . . . . . . . . . . 29
Roller Service . . . . . . . . . . . . . . . . . . . . . . . . . . . . . 30
Rear Roller Brush (Optional) . . . . . . . . . . . . . . . . . 32
Greensmaster 3150
Page 7 -- 1
DPA Cutting Units
Specifications
Figure 1
Frame Construction: Precision machined die cast aluminum cross member with two (2) bolt--on cast aluminum side plates.
Bedknife Adjustment: Dual screw adjustment to the
reel; detents corresponding to 0.0007 inch (0.018 mm)
bedknife movement for each indexed position.
Reel Construction: Reels are 21 inches (53.3 cm) in
length and 5 inch (12.7 cm) in diameter. High strength,
low alloy steel blades are thru hardened and impact resistant. Reels are available in 8, 11 and 14 blade configurations.
Front and Rear Rollers: Greaseless through--shaft
front and rear rollers are used with the Greensmaster
3150 DPA cutting units. All greens rollers use the same
heavy duty ball bearing and seal package.
Reel Bearings: Two (2) sealed stainless steel, deep
groove ball bearings support the reel shaft with inboard
seal for protection.
Reel Drive: The reel weldment shaft is a 1.350 inch
(34.3 mm) diameter tube with a drive insert threaded
into the right end. The reel drive insert has an internal
eight (8) tooth spline.
Height--of--Cut (HOC): Cutting height is adjusted on
the front roller by two (2) vertical screws. Effective HOC
may vary depending on turf conditions, type of bedknife,
roller type and installed attachments.
Counterbalance Weight: A cast iron weight mounted
opposite to the hydraulic reel motor balances the cutting
unit.
Cutting Unit Weight (Approximate):
8 Blade
65 lb (30 kg)
11 Blade
68 lb (31 kg)
14 Blade
71 lb (32 kg)
Options:
Refer to Cutting Unit Operator’s Manual for available options for your Greensmaster 3150 DPA cutting unit.
Bedknife: Replaceable, single edged, high carbon
steel bedknife is fastened to a machined cast iron bedbar with thirteen (13) screws. Optional bedknives are
available.
DPA Cutting Units
Page 7 -- 2
Greensmaster 3150
General Information
Cutting Unit Operator’s Manual
The Cutting Unit Operator’s Manual provides information regarding the operation, general maintenance and
maintenance intervals for the DPA cutting units on your
Greensmaster 3150 machine. Additionally, if optional
kits have been installed on the cutting units (e.g. rear
roller brush), the installation instructions for the kit includes set--up and operation information. Refer to those
publications for additional information when servicing
the cutting units.
Supporting Cutting Unit when Servicing
Whenever the cutting unit has to be tipped to expose the
bedknife or cutting reel, support the rear of the cutting
unit to make sure the lock nuts on the back of the bedbar
adjuster screws are not resting on the work surface.
1
2
1
Figure 2
2. Support
DPA Cutting
Units
1. Lock nut
Greensmaster 3150
Page 7 -- 3
DPA Cutting Units
Special Tools
Special tools for servicing Toro Commercial Products
are available from your Toro Distributor. Some of these
tools may have been supplied with your machine or are
available as Toro parts.
Gauge Bar Assembly
Use gauge bar to verify height--of--cut adjustment.
Toro Part Number: 108--6715
Used for Height--of-Cut adjustment
Figure 3
Bedknife Screw Tool
This screwdriver--type bit is made to fit Toro bedknife attaching screws. Use this bit with a torque wrench to secure the bedknife to the bedbar.
IMPORTANT: To prevent damage to the bedbar, DO
NOT use an air or manual impact wrench with this
tool.
Toro Part Number: TOR510880
Figure 4
Handle Assembly
For applying lapping compound to cutting units while
keeping hands a safe distance from the rotating reel.
Toro Part Number: 29--9100
Components for the handle assembly are available individually as follows:
Brush
36--4310
Handle
29--9080
Handle cap 2410--18
DPA Cutting Units
Figure 5
Page 7 -- 4
Greensmaster 3150
Roller Bearing Installation Tools
Washers and spacer used to install bearings and seals
into front and rear rollers (Fig. 6).
Seal installation washer:
107--8133
Seal installation spacer:
107--3505
Bearing installation washer: 104--6126
As an alternative to using washers and spacers listed
above, a special tool set is available that can be used for
roller bearing and seal installation (Fig. 7).
Seal Installation
Washer
(black)
Seal Installation
Spacer
Bearing Installation
Washer
(yellow)
Figure 6
Toro Part Number: TOR4105
Figure 7
Diameter/Circumference Measuring Tape
Spring steel measuring tape for accurately measuring
the circumference and outside diameter of cutting reel
and other spherical components. Tape calibration is in
fixed inch readings (no adjustments).
Toro Part Number: TOR6023
DPA Cutting
Units
Figure 8
Turf Evaluator Tool
Many turf discrepancies are subtle and require closer
examination. In these instances, the Turf Evaluator
grass viewing tool is helpful. It can assist turf managers
and service technicians in determining causes for poor
reel mower performance and in comparing the effective
height--of--cut of one mowed surface to another. This
tool should be used with the Toro Guide to Evaluation
Reel Mower Performance and Using the TurfEvaluator
(Toro part no. 97931SL).
Toro Model Number: 04399
Figure 9
Greensmaster 3150
Page 7 -- 5
DPA Cutting Units
Factors That Can Affect Cutting Performance
There are a number of factors that can contribute to unsatisfactory quality of cut, some of which may be turf
conditions. Turf conditions such as excessive thatch,
“sponginess” or attempting to cut off too much grass
height may not always be overcome by adjusting the
cutting unit. It is important to remember that the lower
the height--of--cut, the more critical these factors are.
Refer to the Cutting Unit’s Operator’s Manual for detailed cutting unit adjustment procedures. For cutting
unit repair information, refer to the Service and Repairs
section of this chapter.
NOTE: For additional information regarding cutting unit
troubleshooting, see Aftercut Appearance Troubleshooting Aid (Toro part no. 00076SL).
Factor
Possible Problem/Correction
Tire pressure
Check tire pressure of all traction unit tires. Adjust tire
pressure as necessary.
See the Traction Unit Operator’s manual.
Governed engine speed
For best cutting performance and appearance, engine
should be run at maximum governed speed during
machine operation. Check maximum governed engine
speed. Adjust engine to specifications if necessary.
See Chapter 3 -- Engine.
Reel speed
All cutting reels must rotate at the same speed (within
100 rpm) (see Troubleshooting in Chapter 4 -Hydraulic System).
All cutting units must have equal bedknife to reel and
height--of--cut adjustments.
Make sure that reel speed selection is correct (see
Reel Speed Chart in Traction Unit Operator’s Manual).
Reel bearing condition
Check reel bearings for wear and replace if necessary.
See Reel Assembly Service in the Service and Repairs
section of this chapter.
Bedknife to reel adjustment
DPA Cutting Units
Check bedknife to reel contact daily. The bedknife
must have light contact across the entire reel. No
contact will dull the cutting edges. Excessive contact
accelerates wear of both edges. Quality of cut is
adversely affected by both conditions (see Bedknife to
Reel Adjustment in the Cutting Unit Operator’s
Manual).
Page 7 -- 6
Greensmaster 3150
Factor
Possible Problem/Correction
Reel and bedknife sharpness
A reel and/or bedknife that has rounded cutting edges
or “rifling” (grooved or wavy appearance) cannot be
corrected by tightening the bedknife to reel contact.
Grind cutting reel to remove taper and/or rifling. Grind
bedknife to sharpen and/or remove rifling.
The most common cause of rifling is bedknife to reel
contact that is too tight.
Dull cutting edges must be corrected by grinding the
bedknife and cutting reel (see Preparing Reel for
Grinding in the Service and Repairs section of this
chapter).
A new bedknife must be ground flat (within 0.002”)
after installation to the bedbar. Backlapping may
be required to properly mate the reel and bedknife
after installation into the cutting unit.
NOTE: On cutting units equipped with optional
bedknives, slightly dull cutting edges may be corrected
by backlapping (see Backlapping in the Service and
Repairs section of this chapter).
Rear roller adjustment
Adjust the rear roller brackets to correct position
depending on the height--of--cut range desired.
See Rear Roller Adjustment in the Cutting Unit
Operator’s Manual.
Height--of--cut
“Effective” or actual height--of--cut depends on the
cutting unit weight and turf conditions. Effective
height--of--cut will be different from the bench set
height--of--cut.
See Height--of--Cut Adjustment in the Cutting Unit
Operator’s Manual.
If the bedknife is incorrect for effective height--of--cut,
poor quality of cut will result.
See Cutting Unit Operator’s Manual for bedknife
options.
Stability of bedbar
Make sure bedbar pivot bolts are seated securely.
Check condition of the bushings in the side plates.
See Bedbar Removal and Installation in the Service
and Repairs section of this chapter.
Number of reel blades
Greensmaster 3150
Use correct number of reel blades for clip frequency
and optimum height--of--cut range.
Page 7 -- 7
DPA Cutting Units
DPA Cutting
Units
Proper bedknife selection for height--of--cut desired
Factor
Possible Problem/Correction
Roller condition and roller type
Make sure rollers rotate freely. Repair roller bearings
as necessary.
See Roller Service in the Service and Repairs section
of this chapter.
Refer to Cutting Unit Operator’s Manual for roller
options.
Cutting unit accessories
DPA Cutting Units
A variety of cutting unit accessories are available that
can be used to enhance aftercut appearance. Refer to
Operator’s Manual for a listing of available
accessories.
Page 7 -- 8
Greensmaster 3150
DPA Cutting
Units
This page is intentionally blank.
Greensmaster 3150
Page 7 -- 9
DPA Cutting Units
Set Up and Adjustments
Characteristics
If a cutting unit is determined to be out of adjustment,
complete the following procedures in the specified order
to adjust the cutting unit properly.
CAUTION
Never install or work on the cutting units or cutting unit suspension with the engine running. Always stop engine and remove key first.
The dual knob bedknife--to--reel adjustment system incorporated in this cutting unit simplifies the adjustment
procedure needed to deliver optimum mowing performance. The precise adjustment possible with this design gives the necessary control to provide a continual
self--sharpening action. This feature maintains sharp
cutting edges, assures good quality of cut and greatly
reduces the need for routine backlapping.
1. Adjust the bedknife parallel to the reel.
2. Determine desired height--of--cut range and install
rear roller mounting shim(s) accordingly.
3. Adjust the height--of--cut.
See Cutting Unit Operator’s Manual for cutting unit adjustment procedures for your Greensmaster 3150 machine.
In addition, the rear roller positioning system allows for
various height-of-cut ranges and aggressiveness of cut
selections.
DPA Cutting Units
Page 7 -- 10
Greensmaster 3150
Leveling Rear Roller
The precision machined components of the cutting unit
frame keep the rear roller and cutting reel in alignment
(parallel). If the side plates are disassembled or as the
cutting reel wears, a limited amount of side plate adjustment is possible to make sure that the cutting unit is
properly aligned.
2
2
1
1. Place the assembled cutting unit on a surface plate.
2. Make sure that bedknife is properly adjusted to cutting reel.
3. Using the surface plate, check if rear roller is level to
cutting reel by using a 0.005” (0.13 mm) shim at each
end of rear roller. If the shim will pass under the roller at
one end but not the other, a frame adjustment should be
made.
4. Loosen, but do not remove, the two (2) shoulder
bolts that secure the side plate to the frame opposite the
side that is not level (Fig. 10).
3
Figure 10
1. Side plate
2. Shoulder bolt
3. Rear roller
5. Adjust the position of the side plate to parallel the
rear roller and cutting reel. Then, tighten the shoulder
bolts to a torque from 210 to 240 in--lb (24 to 27 N--m).
6. After tightening the side plate, recheck the rear roller.
If necessary, loosen and adjust second side plate.
DPA Cutting
Units
7. After leveling rear roller, complete cutting unit set--up
and adjustment sequence.
Greensmaster 3150
Page 7 -- 11
DPA Cutting Units
Service and Repairs
Backlapping
DANGER
2
TO AVOID PERSONAL INJURY OR DEATH:
D Never place hands or feet in the reel area
while the engine is running.
D When backlapping, run engine at idle speed
only.
D While backlapping, the reels may stall and
then restart.
D Do not attempt to restart reels by hand or foot.
D Do not adjust reels while the engine is
running.
D If a reel stalls, stop engine before attempting
to clear the reel.
D Reel motors are connected in series: rotating
one motor causes rotation in other motors.
1
3
Figure 11
1. Hydraulic manifold
2. Reel speed control
3. Backlap lever
NOTE: Additional instructions and procedures on
backlapping are available in the Toro General Service
Training Book, Reel Mower Basics (part no. 09168SL).
1. Position the machine on a level surface, lower the
cutting units, stop the engine and engage the parking
brake.
2. Raise the operator seat to access hydraulic mow
manifold.
1
3. Locate the reel speed control and backlap lever on
the hydraulic mow manifold (Fig. 11). Rotate the reel
speed control to position “1” and the backlap lever to the
R (backlap) position.
Figure 12
1. Long Handle Brush
4. Make initial reel to bedknife adjustments appropriate
for backlapping on all cutting units which are to be backlapped.
5. Start engine and run at low idle speed.
6. Use joystick on the control console to engage the
cutting units.
IMPORTANT: To prevent damage to the reel, do not
rotate the backlap lever from the backlap position to
the mow position while the engine is running.
7. Apply lapping compound to cutting unit blades with
a long handle brush (see Special Tools in this chapter)
(Fig. 12). Never use a short handled brush to apply lapping compound.
DPA Cutting Units
DANGER
Reels may stall while backlapping. Do not
attempt to restart reels by hand or touch reels
while backlapping. Stop engine and turn reel
speed adjustment knob one position toward
”9.”
8. If reels stall or become erratic while backlapping,
stop backlapping by disengaging the PTO with the joystick. Once the reels have stopped, move the reel speed
selector knob one position closer to “9.” Resume backlapping by engaging the PTO with the joystick.
Page 7 -- 12
Greensmaster 3150
9. To make an adjustment to the cutting units while
backlapping, disengage the PTO with the joystick and
turn the engine OFF. Wait for all machine movement to
stop. After adjustments have been completed, repeat
steps 5 through 8.
10.When the backlapping operation is completed, stop
the engine and remove the key from the ignition switch.
Run a file across the front face of the bedknife. This will
remove any burrs or rough edges that may have built up
on the cutting edge.
Top Face
Relief Angle
Remove
Burr
Front
Face
Front Angle
Figure 13
11. Repeat procedure for all cutting units to be backlapped.
12.When backlap operation has been completed, return
the backlap lever to the F (mow) position, set reel speed
control to desired speed, lower operator seat and wash
all lapping compound off cutting units. Adjust cutting unit
reel to bedknife as needed.
DPA Cutting
Units
NOTE: If the backlap lever is not returned to the F
(mow) position after backlapping, the cutting units will
not function properly.
Greensmaster 3150
Page 7 -- 13
DPA Cutting Units
Bedbar Assembly
200 to 250 in--lb
(23 to 28 N--m)
1
17
16
2
3
190 to 240 in--lb
(22 to 27 N--m)
6
13
7
12
11
Antiseize
Lubricant
4
9
8
15
RIGHT
14
FRONT
18
16
5
17
10
Figure 14
1.
2.
3.
4.
5.
6.
Bedbar
Bedknife
Screw (13 used)
Bedbar adjuster screw (2 used)
Bedbar adjuster shaft (2 used)
Cap screw (2 used)
7.
8.
9.
10.
11.
12.
Detent (2 used)
Wave washer (2 used)
Retaining ring (2 used)
Lock nut (2 used)
Washer (2 used)
Compression spring (2 used)
Bedbar Removal (Fig. 14)
1. Position machine on a clean and level surface, lower
cutting units, stop engine, engage parking brake and remove key from the ignition switch.
2. Remove the cutting unit from the machine and place
cutting unit on a flat work area.
3. Tip the cutting unit to expose the bedknife. Support
the rear of the cutting unit (see Supporting Cutting Unit
when Servicing in the General Information section of
this chapter).
DPA Cutting Units
13.
14.
15.
16.
17.
18.
Lock nut (2 used)
Rubber bushing (2 used)
Nylon bushing (2 used)
Plastic washer (4 used)
Metal washer (4 used)
Bedbar pivot bolt (2 used)
4. Loosen the lock nuts (item 13) on the end of each
bedbar adjuster assembly until washer (item 11) is
loose.
5. Loosen the lock nuts (item 10) on each bedbar pivot
bolt (item 18).
6. Remove two (2) bedbar pivot bolts (item 18), four (4)
metal washers (item 17) and four (4) plastic washers
(item 16) from the cutting unit side plates.
Page 7 -- 14
Greensmaster 3150
6. Position one (1) metal washer (item 17) and one (1)
plastic washer (item 16) between bedbar and each cutting unit side plate (Fig. 15).
CAUTION
Contact with the reel, bedknife or other cutting
unit parts can result in personal injury. Use
heavy gloves when handling the bedbar.
7. Remove bedbar assembly from cutting unit.
8. Inspect nylon bushings (item 15) and rubber bushings (item 14) in side plates for wear or damage. Remove bushings and replace if necessary.
Bedbar Installation (Fig. 14)
1. If rubber bushing was removed from either cutting
unit side plate, apply grease to outside surface of new
bushing and install into side plate. The bushing should
be installed flush with the inside of the side plate (Fig.
15).
2. If removed, install the nylon bushings (item 15) with
flange facing outward. Apply antiseize lubricant to inside
of flange bushing.
7. Install the bedbar pivot bolt assemblies. Make sure
that plastic washers are not caught on the threads of the
pivot bolts. Torque each bedbar pivot bolt from 190 to
240 in--lb (22 to 27 N--m).
8. Tighten both lock nuts (item 10) until outside washers do not have any endplay but still can be rotated. Do
not over tighten the lock nuts as this can distort the side
plates and affect reel bearing adjustment. When the lock
nut is correctly tightened, there may be a gap at the inside washers.
9. Tighten the lock nut (item 13) on each bedbar adjuster assembly until the adjuster spring is fully compressed, then loosen lock nut 1/2 turn.
10.Adjust cutting unit (see Cutting Unit Operator’s
Manual).
11. Install cutting unit to machine.
Antiseize
Lubricant
3. Apply antiseize lubricant to the bedbar threads and
the shoulder area of each bedbar pivot bolt (Fig. 15).
1
8
7
IMPORTANT: When installing washers (items 16
and 17), make sure that plastic washers are positioned on either side of the cutting unit sideplate
(Fig. 15).
4. Slide one (1) metal washer (item 17) and then one (1)
plastic washer (item 16) onto each bedbar pivot bolt.
CAUTION
3
5. Position bedbar into cutting unit. Make sure that the
top of each bedbar arm is between washer (item 11) and
adjuster screw flange (item 4).
Greensmaster 3150
6
5
4
2
4
5
Figure 15
1.
2.
3.
4.
Page 7 -- 15
Cutting unit sideplate
Rubber bushing
Nylon bushing
Plastic washer
5.
6.
7.
8.
Metal washer
Bedbar
Bedbar pivot bolt
Lock nut
DPA Cutting Units
DPA Cutting
Units
Contact with the reel, bedknife or other cutting
unit parts can result in personal injury. Use
heavy gloves when handling the bedbar.
Bedbar Adjuster Service
1
Antiseize
Lubricant
3
2
11
6
7
10
9
8
5
RIGHT
5
FRONT
4
Figure 16
1.
2.
3.
4.
Bedbar assembly
Compression spring
Lock nut
Bedbar adjuster shaft
DPA Cutting Units
5.
6.
7.
8.
Flange bushing
Cap screw
Detent
Wave washer
Page 7 -- 16
9. Retaining ring
10. Bedbar adjuster screw
11. Washer
Greensmaster 3150
Removal (Fig. 16)
Installation (Fig. 16)
1. Remove lock nut (item 3), compression spring (item
2) and washer (item 11) from bedbar adjuster screw.
1. If detent (item 7) was removed, secure detent to cutting unit side plate with cap screw.
2. Remove bedbar (see Bedbar Removal in this section).
2. If flange bushings (item 5) were removed, align key
on bushing to slot in frame and install bushings.
NOTE: Bedbar adjuster shaft (item 4) has left--hand
threads.
3. Slide adjuster shaft (item 4) into flange bushings in
cutting unit side plate. Secure adjuster shaft with wave
washer (item 8) and retaining ring (item 9).
3. Unscrew bedbar adjuster shaft (item 4) from the bedbar adjuster screw (item 10).
4. Remove retaining ring (item 9) and wave washer
(item 8) from adjuster shaft and remove adjuster shaft
from cutting unit frame.
5. Inspect flange bushings (item 5) in cutting unit side
plate and remove if necessary.
6. If detent (item 7) is damaged, remove it from cutting
unit side plate by removing the cap screw (item 6).
NOTE: Bedbar adjuster shaft (item 4) has left--hand
threads.
4. Apply antiseize lubricant to threads of bedbar adjuster screw that fit into adjuster shaft. Thread bedbar adjuster screw (item 10) into adjuster shaft.
5. Install bedbar (see Bedbar Installation in this section).
6. Install washer (item 11), spring (item 2) and lock nut
(item 3) onto adjuster screw. Tighten the lock nut on
each bedbar adjuster assembly until the compression
spring is fully compressed, then loosen lock nut 1/2 turn.
DPA Cutting
Units
7. Adjust cutting unit (see Cutting Unit Operator’s
Manual).
Greensmaster 3150
Page 7 -- 17
DPA Cutting Units
Bedknife Replacement and Grinding
2
Lightly Oil
Bedbar Surface
v
3
Antiseize Lubricant
200 to 250 in--lb
(23 to 28 N--m)
1
Figure 17
1. Screw (13 used)
2. Bedbar
3. Bedknife
Bedknife Removal (Fig. 17)
1. Remove bedbar from cutting unit (see Bedbar Removal in this section).
2. Remove screws from bedbar using a socket wrench
and bedknife screw tool (see Special Tools in this chapter). Discard screws. Remove bedknife from the bedbar.
Bedknife Installation (Fig. 17)
1. Use scraper to remove all rust, scale and corrosion
from bedbar surface. Lightly oil bedbar surface before
installing bedknife.
2. Make sure that screw threads in bedbar
(5/16--18UNC--2A) are clean. If necessary, use tap to
clean threads.
DPA Cutting Units
3. Apply antiseize lubricant to the threads of new
screws. Take care to keep antiseize lubricant from taper
on screw heads.
IMPORTANT: Do not use an impact wrench to tighten screws into the bedbar.
4. Use new screws to secure bedknife to bedbar. Install
all screws but do not tighten fully. Then, using a torque
wrench and bedknife screw tool, torque screws from
200 to 250 in--lb (23 to 28 N--m). Use a torquing pattern
working from the center toward each end of the bedknife
(Fig. 18).
5. After installing bedknife to bedbar, grind bedknife.
Page 7 -- 18
Greensmaster 3150
Bedknife Grinding
Since there can be variations in the mounting surface of
the bedbar, a new bedknife will not be perfectly flat after
it is installed to the bedbar. Because of this, it is necessary to grind a new bedknife after installing it to the bedbar. Follow the existing angle that was ground into the
bedknife and grind only enough to make sure the top
surface of the bedknife is true and perfectly flat (Fig. 19).
# TOR510880
NOTE: When grinding the bedknife, be careful to not
overheat the bedknife. Remove small amounts of material with each pass of the grinder. Also, clean and dress
grinding stone often during the grinding process.
13 11
9
7
1. Use Toro General Service Training Book, Reel Mower Basics (part no. 09168SL) and grinder manufacturer’s instructions for bedknife grinding information.
5
3
1
2
4
6
8
10 12
Figure 18
2. After bedknife grinding is complete, install bedbar to
cutting unit (see Bedbar Installation in this section).
Remove
Burr
Top Face
Relief Angle
Front
Face
Front Angle
Figure 19
Bedknife Grinding Specifications (see Fig. 19)
Standard bedknife relief angle
3o (see Fig. 20)
Fairway bedknife relief angle
3o (see Fig. 20)
Extended bedknife relief angle
7o (see Fig. 20)
Front Angle (all bedknife types)
13o
Standard Bedknife
1.689” (42.9 mm)
Fairway Bedknife
1.708” (43.4 mm)
Extended Bedknife
1.876” (47.7 mm)
Figure 20
Greensmaster 3150
Page 7 -- 19
DPA Cutting Units
DPA Cutting
Units
13o to 17o
Front Angle Range
Reel Assembly Removal and Installation
210 to 240 in--lb
(24 to 27 N--m)
16
4
3
9
13
15
210 to 240 in--lb
(24 to 27 N--m)
5
7
11
1
5
5
5
2
4
Grease OD
surface
12
6
RIGHT
Grease OD
surface
14
11
FRONT
17
10
8
Figure 21
1.
2.
3.
4.
5.
6.
Crossmember
LH side plate
Flange head screw (2 used)
Shoulder bolt (2 used per side plate)
Flange nut (2 used per side plate)
Cutting reel assembly
7.
8.
9.
10.
11.
12.
NOTE: This section provides the procedure for removing and installing the cutting reel assembly (cutting reel,
flocked seals, reel bearings, bearing lock screw and reel
nut) from the cutting unit. Refer to Reel Assembly Service later in this section for information on servicing the
cutting reel assembly.
DPA Cutting Units
13.
14.
15.
16.
17.
O--ring
Cap screw (2 used)
RH side plate
Weight
Hex nut (4 used)
O--ring
Grass shield
Flat wire spring
Reel motor adapter
Socket head screw (2 used)
Expansion plug
NOTE: Removal of the cutting reel requires removal of
the LH side plate from the cutting unit crossmember.
The RH side plate does not have to be removed from the
frame when using the following procedure.
Page 7 -- 20
Greensmaster 3150
Reel Assembly Removal (Fig. 21)
5
CAUTION
90 to 110 ft--lb
(123 to 149 N--m)
(Right Hand Threads)
90 to 110 ft--lb
(123 to 149 N--m)
(Left Hand Threads)
Contact with the reel, bedknife or other cutting
unit parts can result in personal injury. Use
heavy gloves when removing the cutting reel.
3
1. Position machine on a clean and level surface, lower
cutting units, stop engine, engage parking brake and remove key from the ignition switch.
2
6
1
7
2. Remove the cutting unit from the machine and place
cutting unit on a flat work area.
4. Remove two (2) cap screws and nuts that secure
weight (item 10) to the LH side plate. Remove weight
from the cutting unit. Remove and discard O--ring from
weight.
NOTE: The reel nut on the left end of the cutting reel
has a black finish and has LH threads. The left end of the
cutting reel shaft is identified with a groove that is just inside of the reel spider (Fig. 22).
5. If bearings or seals are to be removed from cutting
reel, put a block of wood between the cutting reel blades
to prevent the reel from rotating. Loosen reel nuts to allow easier removal after reel assembly is removed from
cutting unit (Fig. 22).
6. Remove the bedbar pivot bolt and washers from the
LH side plate. Note location of plastic and steel washers
for assembly purposes (see Bedbar Removal in this
section).
7. Loosen fasteners that secure front and rear rollers to
LH side plate (see Front Roller Removal and Rear Roller
Removal in this section).
8. Support cutting reel to prevent it from shifting or falling.
9. Remove shoulder bolts (item 4) and flange nuts (item
5) that secure the LH side plate to the cutting unit crossmember. Remove the LH side plate from the reel shaft,
rollers, bedbar and cutting unit crossmember.
10.Carefully slide the cutting reel assembly (with
flocked seals, reel bearings and reel nuts) from the RH
side plate.
Greensmaster 3150
3
4
Figure 22
1.
2.
3.
4.
Cutting reel
Flocked seal (2 used)
Bearing (2 used)
Plug (2 used)
5. Bearing lock screw
6. Reel nut (LH threads)
7. Reel groove location
Reel Assembly Installation (Fig. 21)
1. Thoroughly clean side plates and other cutting unit
components. Inspect side plates for wear or damage
and replace components if needed.
2. Make sure that flocked seals, reel bearings and reel
nuts are properly positioned on cutting reel (see Reel
Assembly Service in this section). Apply thin coat of
grease to outside of bearings on cutting reel to ease reel
installation.
CAUTION
Contact with the reel, bedknife or other cutting
unit parts can result in personal injury. Use
heavy gloves when installing the cutting reel.
3. Position the cutting unit on a flat work area. The rollers, bedbar and cutting unit crossmember should be attached to RH side plate.
4. Carefully slide the cutting reel assembly (with
flocked seals, reel bearings and reel nuts) into the RH
side plate. Make sure that bearing is fully seated into
side plate.
5. Place flat wire spring (item 14) into bearing bore of
LH side plate. Carefully slide the LH side plate onto the
cutting reel assembly, front roller and rear roller. Make
sure that side plate is fully seated onto bearing on reel
shaft.
Page 7 -- 21
DPA Cutting Units
DPA Cutting
Units
3. If cutting unit is equipped with an optional groomer or
rear roller brush, remove drive components for those
options from cutting unit. See Service and Repairs section of Chapter 8 -- Groomer for information on groomer.
See Rear Roller Brush in this section for information on
rear roller brush.
2
6. Install shoulder bolts (item 4) and flange nuts (item
5) to secure the LH side plate to the crossmember.
Torque the shoulder bolts from 210 to 240 in--lb (24 to
27 N--m).
NOTE: The reel nut on the left end of the cutting reel
has a black finish and has LH threads. The left end of the
cutting reel shaft is identified with a groove that is just inside of the reel spider (Fig. 22).
7. If reel nuts were loosened during cutting reel service,
put a block of wood between the cutting reel blades to
prevent the reel from rotating. Torque reel nuts from 90
to 110 ft--lb (123 to 149 N--m) (Fig. 22).
8. Thoroughly fill spline area of reel nuts with grease.
9. Secure the bedbar assembly to LH side plate (see
Bedbar Installation in this section). Make sure that plastic and steel washers are properly positioned.
10.Secure front and rear rollers to LH side plate (see
Front Roller Installation and Rear Roller Installation in
this section).
DPA Cutting Units
11. Adjust cutting unit (see Cutting Unit Operator’s
Manual).
NOTE: The parallel position of the rear roller to the cutting reel is controlled by the precision machined crossmember and side plates of the cutting unit. If necessary,
the cutting unit side plates can be loosened and a slight
adjustment can be made to parallel the rear roller with
the cutting reel (see Leveling Rear Roller in the Set--Up
and Adjustments section of this Chapter).
12.Install new O--ring (item 12) on weight (item 10). Secure weight to LH side plate with two (2) cap screws and
nuts.
13.If cutting unit is equipped with optional groomer or
rear roller brush, install components for those options to
cutting unit. See Service and Repairs section of Chapter
8 -- Groomer for information on groomer. See Rear Roller Brush in this section for information on rear roller
brush.
14.Install cutting unit to the machine.
Page 7 -- 22
Greensmaster 3150
DPA Cutting
Units
This page is intentionally blank.
Greensmaster 3150
Page 7 -- 23
DPA Cutting Units
Reel Assembly Service
4
3
2
5
90 to 110 ft--lb
(123 to 149 N--m)
(Right Hand Threads)
2
3
4
1
RIGHT
FRONT
90 to 110 ft--lb
(123 to 149 N--m)
(Left Hand Threads)
6
Figure 23
1. Cutting reel
2. Flocked seal (2 used)
3. Bearing (2 used)
4. Plug (2 used)
5. Reel nut (RH thread)
6. Reel nut (LH thread)
NOTE: The reel nuts (items 5 and 6) are different. The
reel nut with left hand threads (item 6) has a black finish
and has notches on the head. The reel nut with right
hand threads (item 5) has a zinc finish and does not
have notches on the head.
DPA Cutting Units
Page 7 -- 24
Greensmaster 3150
Disassembly of Cutting Reel (Fig. 23)
1. Remove reel nuts (items 5 and 6) from cutting reel.
The black reel nut (item 6) has LH threads and is
installed in end of reel shaft identified with a groove that
is just inside of reel spider (Fig. 24).
3
1
2. Slide bearings from reel shaft.
3. Note orientation of flocked seals for assembly purposes. Remove seals from reel shaft.
2
Inspection of Cutting Reel (Fig. 23)
Figure 24
1. Inspect reel bearings to insure that they spin freely
and have minimal axial play.
1. LH threads
2. Groove
3. RH threads
2. Inspect the reel shaft as follows. If reel damage is detected, replace reel.
A. Check the reel shaft for bending and distortion by
placing the shaft ends in V--blocks.
B. Check the reel blades for bending or cracking.
C. Check the service limit of the reel diameter (see
Preparing a Reel for Grinding in this section).
D. Check threads in ends of reel shaft.
3. Check the splines in the reel nuts (items 5 and 6) for
excessive wear or distortion. Replace reel nuts if damage is evident.
Assembly of Cutting Reel (Fig. 23)
1. If bearings and/or flocked seals were removed from
reel shaft, discard removed components and replace.
IMPORTANT: The flocked seal should be installed
so the flocked side of the seal is toward the bearing
location.
DPA Cutting
Units
2. Slide flocked seals (flocked side orientated toward
bearing location) and bearings fully onto reel shaft.
Bearings and seals should bottom on reel shaft shoulder.
3. Install reel nuts (items 5 and 6) into reel shaft to secure bearings. Black reel nut (item 6) has LH threads
and should be installed in end of reel shaft identified with
a groove that is just inside of reel spider (Fig. 24).
NOTE: Installation torque for reel nuts is from 90 to 110
ft--lb (123 to 149 N--m). It is easiest to torque these
items after the cutting reel is installed in the cutting unit
frame (see Reel Assembly Removal and Installation in
this section).
4. Thoroughly fill spline area of reel nuts with grease.
Greensmaster 3150
Page 7 -- 25
DPA Cutting Units
Preparing Reel for Grinding
NOTE: Before grinding a cutting reel, make sure that all
cutting unit components are in good condition. Depending on type of grinder used, faulty cutting unit components can affect grinding results.
Reel Grinding Specifications
NOTE: When grinding, be careful to not overheat the
cutting reel blades. Remove small amounts of material
with each pass of the grinder.
1. Follow reel grinder manufacturer’s instructions to
grind cutting reel to Toro specifications (see Reel Grinding Specifications chart to the right). Additional reel
grinding information can be found in the Toro General
Service Training Book, Reel Mower Basics (part no.
09168SL).
Reel Diameter (New)
5.06 in (128.5 mm)
Service Limit - Reel
Diameter
4.50 in (114.3 mm)
Reel Shaft Diameter (OD)
1.375 in (34.9 mm)
30o
Blade Relief Angle
28o to 32o
Blade Relief Angle Range
Blade Land Width
Blade Land Width Range
0.040 in (1.0 mm)
0.030 to 0.050 in (0.8 to 1.2 mm)
Service Limit Reel Diameter Taper
0.010 in (0.25 mm)
2. After completing the reel grinding process, adjust
cutting unit (see Cutting Unit Operator’s Manual).
Blade Relief Angle
Rotation
Reel Diameter
Blade Land
Width
D1
D2
Reel Diameter Taper = D1 -- D2
Figure 25
DPA Cutting Units
Page 7 -- 26
Greensmaster 3150
DPA Cutting
Units
This page is intentionally blank.
Greensmaster 3150
Page 7 -- 27
DPA Cutting Units
Front Roller
Removal (Fig. 26)
1. Position machine on a clean and level surface, lower
cutting units, stop engine, engage parking brake and remove key from the ignition switch.
2. Remove the cutting unit from the machine and place
on a level working surface. Use appropriate support to
raise front roller from work surface.
Antiseize
Lubricant
4
3. Loosen cap screw (item 1) that secures the front roller shaft to each front height--of--cut arm.
4. On one of the height--of--cut arms, remove HOC nut
(item 7), HOC washer (item 6) and plow bolt (item 4) that
secure HOC arm to the cutting unit side plate. Remove
the HOC arm from the cutting unit.
5
6
3
7
5. Slide the front roller assembly from the remaining
HOC arm on the cutting unit.
6. If necessary, remove the second HOC arm from the
cutting unit.
Installation (Fig. 26)
1
2
8
Figure 26
1.
2.
3.
4.
Cap screw
HOC arm
Front roller assembly
Plow bolt
5.
6.
7.
8.
HOC screw
HOC washer
HOC nut
Ball stud
1. Place cutting unit on a level working surface and use
appropriate support to support front of cutting unit.
2. Inspect condition of HOC screws (item 5) in both
HOC arms. If necessary, apply antiseize lubricant to
threads of new HOC screw. Thread new HOC screw into
HOC arm.
3
4
NOTE: When assembling HOC arms to side plates,
make sure that ring on HOC screw fits into the notch on
the side plate.
3. If both HOC arms were removed from cutting unit
side plate, position one of the arms to side plate. Secure
arm to side plate with plow bolt (item 4), HOC washer
(item 6) and HOC nut (item 7). Tab on HOC washer
should be positioned into HOC arm slot and orientated
down toward the roller.
4. Slide front roller shaft into arm attached to the cutting
unit. Slide second HOC arm onto the other end of roller
shaft. Secure second arm to cutting unit side plate with
plow bolt (item 4), HOC washer (item 6) and HOC nut
(item 7).
1
2
Figure 27
1. Front roller assembly
2. HOC arm
3. HOC screw
4. HOC washer & nut
5. Center front roller to the cutting reel and secure to
HOC arms with cap screws (item 1).
6. Adjust cutting unit (see Cutting Unit Operator’s
Manual).
DPA Cutting Units
Page 7 -- 28
Greensmaster 3150
Rear Roller
Removal (Fig. 28)
1. Position machine on a clean and level surface, lower
cutting units, stop engine, engage parking brake and remove key from the ignition switch.
4
5
2. Remove the cutting unit from the machine and place
on a level working surface. Place support blocks under
bedbar to raise rear roller from work surface.
3. Loosen two (2) flange nuts that secure the rear roller
shaft to each rear roller shaft retainer.
2
4. On one of the rear roller shaft retainer assemblies:
NOTE: On cutting units equipped with optional High
Height of Cut Kit, there will be additional roller shims
installed between roller height spacer and cutting unit
side plate.
1
A. Note quantity and location of roller shims for assembly purposes.
1. Rear roller assembly
2. Roller height spacer
3. Socket head screw
B. Remove flange nuts and socket head screws that
secure shaft retainer, roller height spacer and roller
shims to the cutting unit side plate.
C. Remove the shaft retainer, height spacer and roller shims from the rear roller and cutting unit.
5. Slide the rear roller assembly from the remaining
rear roller retainer assembly on the cutting unit.
6. If necessary, remove the second rear roller retainer
assembly from the cutting unit.
6
3
Figure 28
4. Flange nut
5. Roller shim
6. Shaft retainer
3. Slide rear roller shaft into the retainer assembly attached to the cutting unit. Slide second rear roller shaft
retainer, roller height spacer and roller shims onto the
other end of roller shaft. Secure second retainer assembly to cutting unit side plate with two (2) carriage screws
and flange nuts. Do not fully tighten flange nuts.
4. Center rear roller to the cutting reel and secure in
place by tightening four (4) flange nuts.
5. Adjust cutting unit (see Cutting Unit Operator’s
Manual).
Installation (Fig. 28)
1. Place cutting unit on a level working surface.
DPA Cutting
Units
NOTE: Refer to Cutting Unit Operator’s Manual for
number of roller shims required for various height of cut
settings.
2. If both rear roller retainer assemblies were removed
from cutting unit, position shaft retainer, roller height
spacer and roller shims to one of the side plates. Install
two (2) carriage screws and flange nuts to retain assembly in position but do not fully tighten flange nuts.
Greensmaster 3150
Page 7 -- 29
DPA Cutting Units
Roller Service
1
7
6
5
4
25 to 30 ft--lb
(34 to 41 N--m)
2
5
4
25 to 30 ft--lb
(34 to 41 N--m)
6
7
3
Figure 29
1. Wiehle roller
2. Smooth roller
3. Roller shaft
4. Ball bearing
5. Seal
6. V--ring
7. Bearing lock nut
Disassembly
1
1. To hold roller shaft for bearing lock nut removal,
install a 3/8--24 UNF 2B screw into threaded end of roller
shaft and secure screw in place with jam nut. While retaining shaft, remove bearing lock nut from each end of
roller shaft.
2
3
4
5
6
2. Remove V--ring from each end of roller.
3. Carefully inspect seating surface and threads of
bearing lock nuts. Replace lock nut if any damage is
found.
4. Loosely secure roller assembly in bench vise and
lightly tap one end of roller shaft until seal and bearing
are removed from roller cavity. Remove second seal and
bearing from roller cavity by tapping on shaft.
Figure 30
1. Roller
2. Ball bearing
3. Seal
5. Clean bearing cavity in roller and remove any rust
with crocus cloth.
4. V--ring
5. Bearing lock nut
6. Roller shaft
3
1
2
Assembly
1. Place roller shaft into roller.
NOTE: If bearing lock nuts are being replaced, use
original lock nuts for assembly purposes, if possible.
This will preserve the patch lock feature in the new lock
nuts. Use the new nuts only after new bearings and
seals have been installed.
DPA Cutting Units
Figure 31
1. Bearing lock nut
2. Black assembly washer
Page 7 -- 30
3. Bearing
Greensmaster 3150
NOTE: Special tool TOR4105 (see Special Tools) can
be used instead of washers and spacer when installing
bearings and seals in roller.
2
3
1
4
2. Position a new bearing, black assembly washer (see
Special Tools) and original lock nut onto each end of the
roller shaft (Fig. 31).
3. Tighten nuts until the bearings are seated into each
end of the roller.
4. Remove nut and black assembly washer from each
end of the roller.
IMPORTANT: Failure to grease bearing lock nut before seal installation may result in seal damage.
Figure 32
1. Bearing lock nut
2. Seal
3. Grease nut surface
4. Pack with grease
5. Apply a coating of grease to the nut surface to prevent seal damage during seal installation (Fig. 32).
1
2
6. Carefully install seals onto bearing lock nuts. Pack
the back of the seal 75 to 90% full with #2 grease (Fig.
32).
7. Install a nut with seal onto each end of the roller shaft.
Tighten nuts until they bottom against bearings (Fig. 33).
Remove nuts from roller shaft.
8. Position an assembly spacer and yellow assembly
washer (see Special Tools) on each end of roller shaft
(Fig. 34). Thread nut onto each end of shaft.
Figure 33
1. Bearing lock nut
2. Seal
9. Tighten each nut until the yellow assembly washers
bottom out against the roller housing. Remove nuts, assembly washers and assembly spacers from roller
shaft.
3
4
2
1
10.Lubricate lips of installed seals with #2 grease.
11. Carefully slide a dry V--ring onto each bearing lock
nut. The V--rings should be installed without any lubrication.
Figure 34
1. Bearing lock nut
2. Yellow assembly washer
3. Assembly spacer
4. Seal
12.Install bearing lock nut with V--ring onto each end of
the roller shaft. Torque lock nuts from 25 to 30 ft--lb (34
to 41 N--m).
Greensmaster 3150
Page 7 -- 31
DPA Cutting Units
DPA Cutting
Units
NOTE: If original bearing lock nut(s) are being used,
apply Loctite #242 (or equivalent) to threads of lock
nut(s).
Rear Roller Brush (Optional)
14
15
8
13
16
17
130 to 140 in--lb
(15 to 16 N--m)
13
9
14
100 ft--lb
(136 N--m)
8
11
23
10
12
22
4
18
7
20
19
12
3 6
5
2
12
Antiseize
Lubricant
70 to 80 in--lb
(8 to 9 N--m)
RIGHT
FRONT
1
24
25
21
Figure 35
1.
2.
3.
4.
5.
6.
7.
8.
9.
Cover
Drive belt
Drive pulley
Pulley driver
Cap screw
Idler pulley assembly
Cover plate
Flange nut (5 used)
Drive plate
10.
11.
12.
13.
14.
15.
16.
17.
Driven pulley
Square key
Threadlock screw (4 used)
Roller bearing assembly (2 used)
Grease fitting (2 used)
RH brush support
Flange head screw (4 used)
Brush assembly
NOTE: Drive components for the rear roller brush are
located on the left side of the cutting unit (opposite from
the hydraulic cutting reel motor).
DPA Cutting Units
18.
19.
20.
21.
22.
23.
24.
25.
O--ring
Flat washer
Bearing spacer
Cap screw (2 used)
Cap screw
Bearing spacer
Hex nut (2 used)
Weight
NOTE: The Installation Instructions for the rear roller
brush kit has detailed information regarding assembly
and adjustment. Use those Instructions along with this
Service Manual when servicing the rear roller brush.
Page 7 -- 32
Greensmaster 3150
Disassembly (Fig. 35)
1. Position machine on a clean and level surface, lower
cutting units, stop engine, engage parking brake and remove key from the ignition switch.
20 to 25 in--lb
(2.3 to 2.8 N--m)
4
2. To remove roller brush from brush shaft:
1
A. Loosen set screw in the bearing locking collar on
right side of brush shaft.
3
B. Using blind hole in bearing locking collar as an impact point, unlock collar by striking it with a punch in
the opposite direction of brush rotation.
D. Remove lock nut and J--bolt from both ends of the
brush (Fig. 36).
E. While rotating brush, slide brush from the shaft.
CAUTION
Contact with the reel or other cutting unit parts
can result in personal injury. Use heavy gloves
when handling the cutting reel.
3. To remove roller brush drive belt (item 2):
A. Remove cover (item 1).
B. Loosen cap screw (item 22) and flange nut (item
8) that secure idler pulley assembly (item 6) to drive
plate.
C. Move idler pulley to loosen drive belt.
D. Carefully remove drive belt from drive, driven and
idler pulleys.
4. Disassemble roller brush components as necessary
using Figure 35 as a guide.
Assembly (Fig. 35)
1. If roller brush was removed from brush shaft, slide
brush onto shaft while rotating brush. Secure brush to
shaft with two (2) J--bolts and lock nuts. Make sure that
the J--bolts are installed with the threaded portion on the
outside of the brush (Fig. 36). Torque lock nuts from 20
to 25 in--lb (2.3 to 2.8 N--m).
Figure 36
1. Roller brush shaft
2. J--bolt
3. Roller brush
4. Lock nut
2. Assemble roller brush components using Figure 35
as a guide and the following assembly notes:
A. The screws (item 12) that are used to secure the
cover (item 1), driven pulley (item 10) and drive plate
(item 9) have a threadlock feature to prevent the
screws from loosening. If original screws are being
re--used during assembly, apply Loctite #242 (or
equivalent) to threads of screws.
B. .Apply a light coating of grease to O--ring (item
18) before installing on drive plate flange. Make sure
that O--ring is correctly positioned in groove in
flange.
C. Apply antiseize lubricant to threads of cap screw
(item 5) that retains drive pulley (item 3). Torque cap
screw from 70 to 80 in--lb (8 to 9 N--m) to secure
drive pulley to pulley driver.
D. Secure driven pulley (item 10) to brush shaft with
threadlock screw (item 12). Torque screw from 130
to 140 in--lb (15 to 16 N--m).
E. Secure pulley driver (item 4) and drive pulley
(item 3) to cutting reel shaft with cap screw (item 5).
Torque screw to 100 ft--lb (136 N--m).
3. If either of the bearing locking collars was loosened,
tighten locking collar onto brush shaft:
A. Slide locking collar outward on brush shaft onto
the bearing collar. Rotate locking collar by hand in
the direction of normal brush rotation until the collar
is tight on the shaft.
B. Using blind hole in bearing locking collar as an impact point, lock collar by striking it with a punch in the
normal direction of brush rotation.
C. Tighten set screw in locking collar to secure the
bearing assembly to the brush shaft.
Greensmaster 3150
Page 7 -- 33
DPA Cutting Units
DPA Cutting
Units
C. Remove the RH brush support (item 15), bearing
and locking collar from brush shaft and cutting unit.
2
IMPORTANT: The brush drive belt may fail prematurely if the pulleys are not properly aligned.
4. Check alignment of pulleys with a straight edge
placed along the outer face of the pulleys (Fig. 37). The
outer faces of the drive, driven and idler pulleys should
be aligned. If necessary to align pulleys, loosen locking
collars on brush bearings and move brush assembly until pulleys are aligned. Once pulleys are aligned, secure
brush with bearing locking collars.
1
3
IMPORTANT: Make sure that idler pulley is loosened before installing brush drive belt.
2
5. To install brush drive belt (item 2):
A. Make sure that idler pulley (item 6) is loose on
drive plate.
B. Carefully install drive belt around drive, driven
and idler pulleys.
Figure 37
1. Drive pulley
2. Driven pulley
C. After belt installation, make sure that belt and
pulley grooves are aligned and that belt is centered in
pulleys.
3. Idler pulley
1
6. To tension the drive belt:
2
A. Push down on the idler pulley and secure with cap
screw (item 22) and flange nut (item 8). Make sure
that cover plate (item 7) is covering the slot in the
drive plate to prevent debris from entering the brush
drive area.
B. After idler pulley is secured, check that drive belt
has approximately 1/4” (6 mm) deflection at the center of the belt with 2 lb (1 kg) of force applied to the
belt (Fig. 38).
Figure 38
1. 2 lb (1 kg) of force
2. 1/4” (6 mm) deflection
7. Check that roller brush is parallel to rear roller with
0.010” (0.25 mm) clearance to light contact with roller.
If contact is incorrect, brush operation will be adversely
affected.
8. Lubricate grease fittings on brush support and drive
plate until grease is visible. Wipe up excess grease.
DPA Cutting Units
Page 7 -- 34
Greensmaster 3150
Chapter 8
Groomer
Table of Contents
Groomer
SPECIFICATIONS . . . . . . . . . . . . . . . . . . . . . . . . . . . . 2
GENERAL INFORMATION . . . . . . . . . . . . . . . . . . . . . 3
Installation Instructions . . . . . . . . . . . . . . . . . . . . . . 3
TROUBLESHOOTING . . . . . . . . . . . . . . . . . . . . . . . . . 4
Factors Affecting Grooming . . . . . . . . . . . . . . . . . . 4
Grooming Reel Mechanical Problems . . . . . . . . . . 5
ADJUSTMENTS . . . . . . . . . . . . . . . . . . . . . . . . . . . . . . 6
Height/Depth of Groomer Adjustment . . . . . . . . . . 6
SERVICE AND REPAIRS . . . . . . . . . . . . . . . . . . . . . . 7
Groomer Belt Replacement . . . . . . . . . . . . . . . . . . . 7
Grooming Reel . . . . . . . . . . . . . . . . . . . . . . . . . . . . . 8
Grooming Reel Service . . . . . . . . . . . . . . . . . . . . . . 11
Grooming Reel Bearing Replacement . . . . . . . . . 12
Idler Assembly . . . . . . . . . . . . . . . . . . . . . . . . . . . . . 14
Lift Arm Assembly . . . . . . . . . . . . . . . . . . . . . . . . . . 16
Groomer Brush . . . . . . . . . . . . . . . . . . . . . . . . . . . . 18
Greensmaster 3150
Page 8 -- 1
Groomer
Specifications
MOUNTING: The groomer is mounted to the DPA cutting unit side plates. The drive assembly for the grooming reel is located on the opposite side of the cutting unit
from the hydraulic cutting reel motor.
GROOMING REEL CONSTRUCTION: 2.375 inch (6
cm) diameter, 41 steel blades with 1/2 inch blade spacing. Blade spacing can be adjusted to 1/4 inch or 3/4 inch
by altering the number and position of blade spacers on
the groomer. Groomer brush can be installed in place of
grooming reel.
Groomer
GROOMER HEIGHT SETTING: From 0.030 to 0.620
inch (0.8 to 15.7 mm) at mowing HOC range of 0.060 to
0.750 inch (1.5 to 19.1 mm).
WIDTH--OF--GROOMER: 19.380 inches (49.2 cm).
HEIGHT ADJUSTMENT KNOB: Allows a 0.003 inch
(0.08 mm) increment of height adjustment for each click
of the adjuster.
UP--DOWN FEATURE: Allows grooming reel to be
raised above the height/depth adjustment for no grooming reel action while cutting.
Page 8 -- 2
Greensmaster 3150
General Information
Installation Instructions
Groomer
The Installation Instructions for the groomer provide information regarding the operation, general maintenance procedures and maintenance intervals for the
groomer assembly on your Greensmaster 3150 machine. Refer to this publication for additional information
when servicing the groomer assembly.
Greensmaster 3150
Page 8 -- 3
Groomer
Troubleshooting
Factors Affecting Grooming
There are a number of factors that can affect the performance of grooming. These factors vary for different golf
courses and from green to green. It is important to inspect the turf frequently and vary the grooming practice
with turf needs.
It is important to remember that factors affecting quality
of cut also affect grooming performance.
IMPORTANT: Improper or overaggressive use of
the grooming reel, such as too deep or frequent
grooming, may cause unnecessary stress on the
turf leading to severe turf damage. Use the groomer
carefully. READ AND UNDERSTAND THE GROOMER INSTALLATION INSTRUCTIONS BEFORE OPERATING OR TESTING GROOMER PERFORMANCE.
Variables That Affect the Use and Performance of Grooming Reels:
1. The growing season and weather conditions.
8. The amount of time that a grooming reel has been in
use on a particular turf area.
2. General turf conditions.
3. The frequency of grooming/cutting -- number of cuttings per week and how many passes per cutting.
4. The blade spacing on the grooming reel.
5. The height--of--cut.
6. The grooming depth.
9. The amount of traffic on the turf.
10.The overall turf management program (e.g. irrigation, fertilizing, weed control, coring, overseeding, disease control, sand dressing and pest control).
11. Stress periods for turf (e.g. high temperatures, high
humidity, unusually high traffic).
7. The type of grass on the green.
Groomer
Page 8 -- 4
Greensmaster 3150
Grooming Reel Mechanical Problems
Problem
Possible Causes
Correction
The grooming reel rotates when it is The grooming reel should rotate
in the raised, transport position.
whenever the cutting reel is engaged.
Normal operation.
No rotation of the grooming reel.
Seized grooming reel or idler bearing(s) in groomer side plate(s).
Identify and replace faulty bearing(s).
Broken or damaged drive belt idler
spring.
Replace idler spring.
The groomer drive belt is worn, bro- If the belt slips, it probably is worn
ken or damaged.
and must be replaced.
Repair or replace belt if necessary.
A broken or worn belt could be the
result of improper belt routing or
seized bearings in groomer assembly.
The groomer is set too aggressively.
Refer to groomer Installation Instructions for groomer set--up information.
The grooming reel blades are bent,
damaged or missing.
Repair or replace blades if necessary.
The grooming reel shaft is bent or
damaged.
Replace grooming reel shaft.
Grooming depth is not equal on
both ends of grooming reel.
Adjust depth if necessary. Check
and adjust cutting unit set up (level
bedknife to reel, level rear roller to
reel, set height--of--cut, etc.).
Groomer
The turf is damaged or has uneven
grooming.
Greensmaster 3150
Page 8 -- 5
Groomer
Adjustments
CAUTION
Never work on the cutting unit with the engine
running. Always stop the engine and remove the
key from the ignition switch before working on
the mower.
NOTE: See the Groomer Installation Instructions for
adjustment procedures for the groomer on your
Greensmaster.
Height/Depth of Groomer Adjustment
NOTE: Grooming is performed above the soil level.
When adjusting groomer height/depth, groomer blades
should never penetrate the soil.
1. Park machine on a clean and level surface, lower
cutting units completely to the ground, stop engine, engage parking brake and remove key from the ignition
switch.
2. Make sure rollers are clean and cutting reel is set to
the desired height--of--cut (see Cutting Unit Operator’s
Manual for cutting unit adjustment procedures).
3. Position the grooming reel to the lowered, grooming
position (Fig. 1).
NOTE: Improper or over--aggressive use of the grooming reel (i.e. too deep or too frequent grooming) may
cause unnecessary stress on the turf leading to severe
greens damage. Use the groomer cautiously.
2
1
Figure 1
1. Height adjustment knob
2. Lock screw
4. On one end of the grooming reel, measure the distance from the lowest tip of the groomer blade to the
working surface. Lift and turn height adjustment knob to
raise or lower the blade tip (Fig. 1). Each notch on the
adjustment knob changes the groomer height approximately 0.003 inch (0.08 mm).
5. Repeat step 4 on the opposite end of the groomer.
Then, recheck setting on the first side of groomer.
Height setting on both ends of groomer should be identical.
Groomer
Page 8 -- 6
Greensmaster 3150
Service and Repairs
Groomer Belt Replacement
1. Park machine on a clean and level surface, lower
cutting units completely to the ground, stop engine, engage parking brake and remove key from the ignition
switch.
1
2. If equipped, remove rear roller brush from cutting
unit (see Rear Roller Brush Removal in the Service and
Repairs section of Chapter 7 -- DPA Cutting Units).
3. Remove three (3) lock nuts that secure groomer
drive cover, then remove cover (Fig. 2).
4. Pivot idler pulley by placing a 12mm wrench on
pulley nut and rotating idler bracket to relax belt tension.
Slip groomer drive belt off pulleys (Fig. 3). Carefully release idler bracket.
2
Figure 2
1. Groomer drive cover
IMPORTANT: Make sure that the drive belt is centered on the pulleys and correctly aligned with
pulley grooves after installation.
3
2. Lock nut (3 used)
2
5
1
5. Install new drive belt to drive pulley, idler pulley and
driven pulley observing correct belt routing (Fig. 3).
6. Secure belt cover to machine with three (3) lock nuts
(Fig. 2).
7. If equipped, install rear roller brush to cutting unit
(see Rear Roller Brush Installation in the Service and
Repairs section of Chapter 7 -- DPA Cutting Units).
4
Figure 3
4. Driven pulley
5. Groomer drive belt
Groomer
1. Drive pulley
2. Idler pulley
3. Idler pulley nut
Greensmaster 3150
Page 8 -- 7
Groomer
Grooming Reel
21
16
14
9
20
17
100 ft--lb
(135 N--m)
22
11
10
23
22
20
18
12
13
26
8
Antiseize
Lubricant
7
24
6
5
4
3
13
12
11
16
19
1
RIGHT
2
15
FRONT
10
25
21
1
17 to 21 ft--lb
(24 to 28 N--m)
Figure 4
1.
2.
3.
4.
5.
6.
7.
8.
9.
Lock nut (4 used)
Drive cover
Groomer drive belt
Drive pulley
Shoulder bolt (2 used)
Spring
Drive plate assembly
Groomer shim
RH groomer arm assembly
10.
11.
12.
13.
14.
15.
16.
17.
18.
Cap screw (2 used)
Bushing (2 used)
Spring washer (2 used)
Lock nut (2 used)
Support plate
LH groomer arm assembly
HOC washer (2 used)
RH cutting unit sideplate
LH cutting unit sideplate
Remove the grooming reel to replace individual blades,
to replace worn groomer components, to reverse the
blades on the shaft or to replace the grooming shaft.
NOTE: The drive assembly for the grooming reel is located on the left side of the cutting unit (opposite from
the hydraulic cutting reel motor).
Groomer
19.
20.
21.
22.
23.
24.
25.
26.
Driven pulley
HOC screw (2 used)
HOC nut (2 used)
Plow bolt (2 used)
Grooming reel assembly
Front roller assembly
Ball stud (2 used per roller)
O--ring
Removal (Fig. 4)
1. Park machine on a clean and level surface, lower
cutting units completely to the ground, stop engine, engage parking brake and remove key from the ignition
switch.
2. Remove the cutting unit from the machine and place
cutting unit on a flat work area.
Page 8 -- 8
Greensmaster 3150
3. If equipped, remove rear roller brush from cutting
unit (see Rear Roller Brush Removal in the Service and
Repairs section of Chapter 7 -- DPA Cutting Units).
5
2
4. Remove groomer drive cover (item 2) and groomer
drive belt (item 3) from groomer drive (see Groomer Belt
Replacement in this section).
5. Loosen cap screws (item 10) that secure front roller
shaft to groomer arms.
6. Remove lock nut (item 13) and spring washer (item
12) that secure LH groomer arm lift rod to drive plate assembly (shown in Fig. 5).
7. Remove HOC nut (item 21), HOC washer (item 16)
and plow bolt (item 22) that secure LH groomer arm assembly to drive plate assembly. Do not change height-of--cut screw adjustment. Remove LH groomer arm
assembly from cutting unit.
1
4
3
Figure 5
1. Roller cap screw
2. Grooming reel assembly
3. Lock nut
8. Remove front roller assembly from cutting unit.
2
NOTE: To prevent grooming reel shaft from turning
when removing driven pulley, use wrench on shaft flats
to hold shaft.
4. Spring washer
5. Groomer arm lift rod
4
5
1
9. Remove the lock nut (item 1) that secures driven
pulley (item 19) to grooming reel shaft. Remove driven
pulley from shaft.
NOTE: To prevent cutting reel from turning when removing drive pulley, block reel with piece of wood.
11. Remove two (2) shoulder bolts (item 5) that secure
the drive plate assembly (item 7) to the cutting unit
frame. Remove the groomer drive plate assembly from
grooming shaft and cutting unit. Locate and retrieve
groomer shim (item 8).
12.Carefully pull the grooming reel from the support
plate on the right side of the cutting unit.
13.Inspect seals, bushings and bearings in drive side
plate, support plate and groomer arms for wear or damage. Replace components as needed.
Installation (Fig. 4)
1. Apply a light coating of grease to ends of grooming
shaft and also to seal lips in drive and support plates.
Make sure that all bearings, bushings and seals are
properly installed.
2. Make sure that O--ring (item 26) is installed on
grooming shaft. Apply light coating of grease to O--ring.
Greensmaster 3150
Figure 6
1. Drive pulley
2. Idler pulley
3. Driven pulley
4. Drive plate assembly
5. Groomer drive belt
3. Carefully place grooming reel assembly into the support plate taking care to not damage seal in support plate
or O--ring on shaft.
4. Apply light coating of grease to O--ring on drive plate
assembly pivot hub and pilot bore of cutting unit side
plate.
5. Position groomer shim (item 8) to drive plate assembly.
6. Carefully place drive plate assembly onto groomer
shaft taking care not to damage seals in drive plate.
Position drive plate to the cutting unit frame and secure
with two (2) shoulder bolts (item 5). Make sure that drive
plate rotates freely after installation.
7. Apply light coating of grease to hub on driven pulley
(item 19) taking care to not get grease on belt surface of
pulley. Slide driven pulley onto the grooming reel shaft
taking care to not damage seal in drive plate.
Page 8 -- 9
Groomer
Groomer
10.Loosen and remove drive pulley (item 4) from the
cutting reel shaft.
3
NOTE: To prevent grooming reel shaft from turning
when installing driven pulley, use wrench on shaft flats
to hold shaft.
8. Secure driven pulley to grooming reel shaft with lock
nut (item 1). Torque lock nut from 17 to 21 ft--lb (24 to
28 N--m).
NOTE: To prevent cutting reel from turning when installing drive pulley, block reel with piece of wood.
9. Secure drive pulley (item 4) to cutting reel shaft.
Torque pulley to 100 ft--lb (135 N--m).
10.Insert front roller into RH groomer arm assembly.
11. Make sure that bushing (item 11) is installed in drive
plate assembly.
14.Secure LH groomer arm assembly to drive plate with
spring washer (item 12) and lock nut (item 13).
15.Center front roller to cutting unit and tighten cap
screws (item 10) to secure roller.
16.Install groomer drive belt (item 3) and groomer drive
cover (item 2) to drive plate (see Groomer Belt Replacement in this section).
17.If equipped, install rear roller brush to cutting unit
(see Rear Roller Brush Installation in the Service and
Repairs section of Chapter 7 -- DPA Cutting Units).
18.Check grooming reel height and mower height--of-cut settings. Adjust as needed.
19.Install cutting unit to the machine.
12.Apply antiseize lubricant to threads of LH groomer
arm lift rod.
20.Lubricate groomer bearings (see Groomer Installation Instructions).
13.Position LH groomer arm assembly to front roller,
groomer drive plate and cutting unit frame. Secure
groomer arm to cutting unit with plow bolt (item 22), HOC
washer (item 16) and HOC nut (item 21).
NOTE: After greasing groomer bearings, operate
groomer for 30 seconds, stop machine and wipe excess
grease from groomer shaft and seals.
Groomer
Page 8 -- 10
Greensmaster 3150
Grooming Reel Service
Inspect grooming reel blades frequently for damage and
wear. Straighten bent blades with a pliers. Replace
blades that are worn or damaged.
200 to 250 in--lb
(23 to 28 N--m)
6
Grooming blades (Fig. 8) should be replaced if worn or
damaged. Blades that are rounded to the midpoint of the
blade tip can be reversed on the grooming shaft to extend the life of the blade.
2
1
4
Disassembly (Fig. 7)
5
3
1. Remove grooming reel from cutting unit (see Grooming Reel Removal in this section).
2. Remove lock nut from either end of the shaft (Fig. 7).
Figure 7
1. Grooming reel shaft
2. Groomer blade
3. Blade spacer
4. Thick spacer (2 used)
5. Lock nut (2 used)
6. O--ring
3. Remove spacers and blades from groomer shaft as
necessary.
2
Assembly (Fig. 7)
3
1
1. Start by placing thick spacer against the lock nut
installed on one end of groomer shaft. Then, place first
blade against installed spacer (Fig. 7).
2. For 1/2 inch (1.3 cm) blade spacing, make sure there
are two (2) blade spacers between blades (Fig. 7).
3. When all blades have been installed, place second
thick spacer on shaft and then thread second lock nut
onto the shaft.
4. Position lock nuts to allow blades and spacers to be
centered on the shaft (Fig. 9). Torque lock nuts from 200
to 250 in--lb (23 to 28 N--m) so spacers are not free to
rotate.
ROTATION
Figure 8
1. Grooming blade
2. Sharp edge
1
3. Dull (rounded) edge
CENTER BLADES ON SHAFT
2
5. Install grooming reel back onto cutting unit (see
Grooming Reel Installation in this section).
Figure 9
2. Grooming shaft
Groomer
1. Lock nut
Greensmaster 3150
Page 8 -- 11
Groomer
Grooming Reel Bearing Replacement
16
15
6
7
5
8
9
4
10
Seal lip
(toward center of
cutting unit)
3
2
10
9
Seal lip
(toward center of
cutting unit)
1
9
10
RIGHT
Seal lip
(toward center of
cutting unit)
FRONT
11
13
14
12
Figure 10
1.
2.
3.
4.
5.
6.
Pivot hub
Spacer
Idler bracket
Spacer
Drive plate (cutting unit LH side)
O--ring
7.
8.
9.
10.
11.
Retaining ring
Grease fitting
Bearing
Seal
Idler pulley
NOTE: The groomer reel drive is located on the left side
of the cutting unit, opposite from the hydraulic cutting
reel motor.
Bearing Removal
1. Remove the cutting unit from the machine and place
cutting unit on a flat work area.
2. Remove front roller, grooming reel and drive plate
assembly from left side of cutting unit (see Grooming
Reel Removal in this section).
Groomer
12.
13.
14.
15.
16.
Lock nut
Bearing
Retaining ring
Support plate (cutting unit RH side)
Plug
3. Remove groomer support plate assembly from the
right side of cutting unit:
A. Remove two (2) socket head screws and lock
nuts that secure motor mount to cutting unit (Fig. 11).
Remove motor mount from cutting unit.
B. Remove lock nut and spring washer that secure
RH groomer arm lift rod to support plate (Fig. 12). Remove support plate from cutting unit.
Page 8 -- 12
Greensmaster 3150
4. Remove grooming reel bearings and seals from
drive plate and support plate assemblies (Fig. 10):
4
5
A. Remove seals from groomer plates. Discard removed seals.
B. Press bearings out of side plate housings. Discard removed bearings.
Bearing Installation
IMPORTANT: Bearings should be installed with extended inner races toward center of housing. Also,
apply pressure equally to inner and outer bearing
races when installing bearings.
A. Press new outer bearing fully to shoulder of drive
plate bore. Then, install new inner bearing until inner
race contacts outer bearing race.
3
2
1. Install new grooming reel bearings and seals into
drive plate and support plate assemblies (Fig. 13):
1
1
Figure 11
1. Socket head screw
2. Motor mount
3. Groomer side plate (RH)
4. Cutting unit
5. Lock nut (2 used)
5
B. Press new bearing into support plate until it is
flush with shoulder of bearing bore.
2
C. Install new seals into side plates. NOTE: Seals
should be installed so the lip side of the seal will face
the center of the cutting reel. When bearings are
greased, grease will purge from inner seals.
2. Install support plate to right side of cutting unit:
A. Apply antiseize lubricant to threads of RH groomer arm lift rod.
B. Position support plate to cutting unit making sure
that RH groomer arm lift rod is positioned through
bushing in support plate.
4
1
3
Figure 12
1. Front roller cap screw
2. Grooming reel assembly
3. Lock nut
C. Place spring washer and lock nut on lift rod
threads (Fig. 12). Tighten lock nut.
1
4. Spring washer
5. Groomer arm lift rod
2
3
D. Position motor mount to groomer support plate
(Fig. 11). Secure motor mount and support plate to
cutting unit with two (2) socket head screws and lock
nuts.
6
5
4
4. Check and adjust grooming reel height and mower
height--of--cut settings.
5
5. Install cutting unit to the machine.
5
8
7
6. Lubricate groomer bearings.
Figure 13
NOTE: After greasing groomer bearings, operate
groomer for 30 seconds, stop machine and wipe any excess grease from groomer shaft and seals.
Greensmaster 3150
Groomer
3. Install grooming reel, front roller and drive plate to left
side of cutting unit (see Grooming Reel Installation in
this section).
1.
2.
3.
4.
Page 8 -- 13
Outer bearing
Drive plate shoulder
Inner bearing
Inner race
5.
6.
7.
8.
Seal lip
Support plate bearing
Drive plate
Support plate
Groomer
Idler Assembly
6
7
5
8
3
2
1
4
11
9
10
12
Figure 14
1.
2.
3.
4.
Pivot hub
Spacer
Idler bracket
Spacer
Groomer
5.
6.
7.
8.
Drive plate assembly
O--ring
Retaining ring
Grease fitting
Page 8 -- 14
9.
10.
11.
12.
Bearing (2 used)
Retaining ring
Idler pulley
Lock nut
Greensmaster 3150
The groomer drive side plate assembly incorporates the
idler system for tensioning the groomer drive belt. The
idler system uses a spring to maintain proper belt tension.
3
2
5
1
Removal
1. Remove groomer belt cover, drive belt and drive
pulley from groomer drive side of cutting unit (see
Grooming Reel Removal in this section).
2. Using Figures 14 and 15 as guides, remove idler
bracket, idler pulley and/or idler bearings as needed.
3. If idler bracket (item 3 in Figure 14) needs to be removed, remove drive plate from cutting unit (see
Grooming Reel in this section). Remove idler bracket
from drive plate using Figure 14 as a guide.
4
Figure 15
1. Drive pulley
2. Idler pulley assembly
3. Driven pulley
4. Drive plate assembly
5. Groomer drive belt
Installation
1. Assemble components using Figures 14 and 15 as
guides.
NOTE: When properly installed, the idler pulley should
move freely from side to side on the idler bracket pin.
2. If idler bracket (item 3 in Figure 14) was removed, install drive plate to cutting unit (see Grooming Reel in this
section).
3. Install drive pulley, drive belt and belt cover to left
side of cutting unit (see Grooming Reel Installation in
this section).
Groomer
4. Check and adjust grooming reel height and mower
height--of--cut settings.
Greensmaster 3150
Page 8 -- 15
Groomer
Lift Arm Assembly
1
14
2
13
11
15
7
12
16
10
8
Antiseize
Lubricant
9
7
3
6
4
17
Antiseize
Lubricant
18
5
Antiseize
Lubricant
Figure 16
1.
2.
3.
4.
5.
6.
HOC groomer arm (LH shown)
Flange nut
Grooved pin
E--ring
Groomer lift rod
Lock screw
Groomer
7.
8.
9.
10.
11.
12.
Bushing
Lift arm assembly (LH shown)
Detent spring
Spring washer
Cap screw
Bushing
Page 8 -- 16
13.
14.
15.
16.
17.
18.
Wave washer
Groomer adjuster
Side plate (LH shown)
Lock nut
Spring washer
Bushing
Greensmaster 3150
Disassembly (Fig. 16)
Assembly (Fig. 16)
1. Remove flange nut (item 2) that secures lift arm to
HOC groomer arm. Remove lock nut (item 16) and
spring washer (item 17) that secure lift arm to side plate.
Loosen lock screw (item 6) completely.
1. Assemble lift arm using Figure 16 as a guide.
2. Remove lift arm from cutting unit.
3. Install lift arm onto cutting unit. Secure with flange nut
(item 2) and lock nut (item 16) with spring washer (item
17).
3. Disassemble lift arm using Figure 16 as a guide.
NOTE: Right and left side HOC groomer arms (item 1)
and lift arm assemblies (item 8) are different; other components shown in Figure 16 are the same on both sides
of cutting unit.
4. Secure groomer in raised or lowered position with
lock screw (item 6).
5. Check and adjust grooming reel height and mower
height--of--cut settings.
Groomer
NOTE: Grooved pin (item 3) is used to retain lock screw
(item 6) to lift arm assembly.
2. Apply antiseize lubricant to threads of groomer lift
rod (item 5) and lift arm assembly stud (item 8).
Greensmaster 3150
Page 8 -- 17
Groomer
Groomer Brush
3
1
2
5
20 to 25 in--lb
(2.3 to 2.8 N--m)
3
20 to 25 in--lb
(2.3 to 2.8 N--m)
4
2
Figure 17
1. Groomer brush shaft
2. Lock nut
3. J--bolt
4. Groomer brush
5. O--ring
The groomer brush attaches to the groomer drive in
place of the grooming reel. Removal and installation of
the groomer brush uses the same procedure as removal
and installation of the grooming reel (see Grooming
Reel in this section).
To remove the groomer brush from the shaft, remove the
lock nut and J--bolt from both ends of the brush and slide
the brush from the shaft. When assembling the brush to
the shaft, secure the assembly with J--bolts and lock
nuts. Make sure that the J--bolts are installed with the
threaded portion on the outside of the brush (Fig. 18).
Torque lock nuts from 20 to 25 in--lb (2.3 to 2.8 N--m).
Groomer
1
2
Figure 18
1. J--bolt
Page 8 -- 18
2. Lock nut
Greensmaster 3150
Chapter 9
Foldout Drawings
Table of Contents
Foldout
Drawings
HYDRAULIC SCHEMATIC . . . . . . . . . . . . . . . . . . . . . 3
ELECTRICAL SCHEMATIC . . . . . . . . . . . . . . . . . . . . 4
ELECTRICAL CIRCUIT DIAGRAMS . . . . . . . . . . . . . 5
Crank Circuits . . . . . . . . . . . . . . . . . . . . . . . . . . . . . . 5
Run Circuits . . . . . . . . . . . . . . . . . . . . . . . . . . . . . . . . 6
Raise Reels Circuits . . . . . . . . . . . . . . . . . . . . . . . . . 7
Lower Reels (6 Seconds) Circuits . . . . . . . . . . . . . 8
Mow Circuits . . . . . . . . . . . . . . . . . . . . . . . . . . . . . . . 9
Backlap Circuits . . . . . . . . . . . . . . . . . . . . . . . . . . . 10
WIRE HARNESS DRAWINGS . . . . . . . . . . . . . . . . . 12
Wire Harness Drawing . . . . . . . . . . . . . . . . . . . . . . 12
Wire Harness Diagram . . . . . . . . . . . . . . . . . . . . . . 13
Engine Wire Harness Drawing . . . . . . . . . . . . . . . 14
Greensmaster 3150
Page 9 -- 1
Foldout Drawings
This page is intentionally blank.
Foldout Drawings
Page 9 -- 2
Greensmaster 3150
Steering Cylinder
1.5” Bore
0.75” Rod
6.19” Stroke
RIGHT FRONT
REEL (#3)
.73
.73
CU #2
2.0” Bore
0.75” Rod
1.88” Stroke
CENTER
REEL (#1)
.73
CU #1
1.50” Bore
0.75” Rod
3.38” Stroke
CU #3
2.0” Bore
0.75” Rod
1.88” Stroke
L
Raise
LEFT FRONT
REEL (#2)
R
Lower
MA
MB
L2B
L2A
L1B
L1A
FC2
0.055
L3A
0.030
L3B
BACKLAP
SWITCH
(SW)
STEERING
VALVE
0.055
MR
4.5
550 PSI
PRV
R2
400 PSI
1160 PSI
S4
OR1
0.013
FC1
OR2
0.060
P
E
T
S3
ST
LC
S2
G1
S1R1
P1
T
G2
P2
PT
4.0 GPM
7.0 GPM
TRACTION PUMP
TRANSPORT = 14.1 GPM
FILTER
25 PSI
TOP
PORT
A
BYPASS
VALVE
LEAK DETECTOR
3000 PSI
LEAK
DETECTOR
VOLUME
OPTIONAL
OIL COOLER
IN
GEAR
PUMP
.33
.58
LEFT 10.3
MOTOR
10.3 RIGHT
MOTOR
ENGINE RPM
2850/1650
1.24
3000 PSI
OUT
20.6
110 to 150
PSI
EXPANSION
TANK
70 to 100
PSI
B
BOTTOM
PORT
OPTIONAL
3WD KIT
BREATHER
SUCTION
STRAINER
Greensmaster 3150
Hydraulic Schematic
Page 9 -- 3
(IN NEUTRAL)
(NOT OCCUPIED)
Greensmaster 3150
Electrical Schematic
All relays and solenoids
are shown as de-- energized.
Page 9 -- 4
(IN NEUTRAL)
(ENERGIZED)
(ENERGIZED)
(ENERGIZED)
(ENERGIZED)
(NOT OCCUPIED)
(ENERGIZED)
Greensmaster 3150
Crank Circuits
Power Current
Control Current
Indication Current
Page 9 -- 5
(NOT IN NEUTRAL)
(ENERGIZED)
(OCCUPIED)
(ENERGIZED)
Greensmaster 3150
Run Circuits
Power Current
Control Current
Indication Current
Page 9 -- 6
(OFF POSITION)
(NOT IN NEUTRAL)
(OFF POSITION)
(ENERGIZED)
(OCCUPIED)
(ENERGIZED)
(ENERGIZED)
Greensmaster 3150
Raise Reels Circuits
Power Current
Control Current
Indication Current
Page 9 -- 7
(NOT IN NEUTRAL)
(OCCUPIED)
(OFF POSITION)
(ENERGIZED)
(ENERGIZED)
NOTE: TIME DELAY KEEPS THE LOWER
RELAY ENERGIZED FOR SIX (6) SECONDS
(ENERGIZED)
(ENERGIZED)
Greensmaster 3150
Lower Reels (6 Seconds) Circuits
Power Current
Control Current
Indication Current
Page 9 -- 8
(NOT IN NEUTRAL)
(OCCUPIED)
(OFF POSITION)
NOTE: JOYSTICK RELAY INITIALLY ENERGIZED
WHEN JOYSTICK IS MOVED TO LOWER
(ENERGIZED)
(MOW POSITION)
(ENERGIZED)
(ENERGIZED)
NOTE: DIODE D1-- C ALLOWS
CURRENT FLOW TO KEEP
JOYSTICK RELAY ENERGIZED
AFTER JOYSTICK IS
RELEASED FROM LOWER
(ENERGIZED)
Greensmaster 3150
Mow Circuits
Power Current
Control Current
Indication Current
Page 9 -- 9
(IN NEUTRAL)
(BACKLAP
POSITION)
(NOT OCCUPIED)
(ON POSITION)
NOTE: JOYSTICK RELAY INITIALLY ENERGIZED
WHEN JOYSTICK IS MOVED TO LOWER
(ENERGIZED)
(ENERGIZED)
(ENERGIZED)
Greensmaster 3150
Backlap Circuits
Power Current
Control Current
Indication Current
Page 9 -- 10
(ENERGIZED)
NOTE: DIODE D1-- C ALLOWS
CURRENT FLOW TO KEEP
JOYSTICK RELAY ENERGIZED
AFTER JOYSTICK IS
RELEASED FROM LOWER
This page is intentionally blank.
Page 9 -- 11
SEAT WIRE
HARNESS
Greensmaster 3150
Wire Harness Drawing
Page 9 -- 12
VIOLET
ORANGE
BLUE/RED
WHITE/BLACK
YELLOW
BLACK
BLACK
YELLOW
BLUE/BLACK
ORANGE/BLACK
GREEN/BLACK
GRAY/BLACK
VIOLET
BLACK
BLACK
BLACK
GRAY
SEAT WIRE
HARNESS
BLUE/BLACK
ORANGE/BLACK
GRAY/BLACK
GREEN/BLACK
WHITE/BLACK
VIOLET/BLACK
VIOLET
VIOLET
BLUE/RED
VIOLET/BLACK
ORANGE/BLACK
PINK
BLUE/RED
GREEN
PINK/BLACK
BLUE
GREEN/GRAY
GREEN/RED
GREEN/BLACK
BLACK
YELLOW
GREEN/GRAY
WHITE
GREEN/BLACK
BLACK
BLACK
GREEN/BLACK
WHITE/BLUE
GRAY/BLACK
BLUE/BLACK
BLACK
BLACK
BLACK
BLUE/BLACK
BLACK
WHITE/BLUE
YELLOW
BLACK
WHITE/BLUE
BLACK
PINK/BLUE
BLACK
BLACK
BLACK
WHITE
BLACK
BLACK
BLACK
FUSIBLE LINK
BLACK
BLUE
BLACK
BLACK
YELLOW
BLACK
WHITE/BLUE
VIOLET
RED
PINK
WHITE
PINK
TAN
ORANGE/BLACK
YELLOW
ORANGE
YELLOW
GREEN
BLUE/BLACK
BLUE
BLUE
WHITE
YELLOW
GRAY
GRAY
(TO SEAT HARNESS)
(TO SEAT HARNESS)
BLUE
BLUE
YELLOW
BLUE
WHITE
(TO ENGINE HARNESS)
GRAY/BLACK
WHITE
WHITE
Greensmaster 3150
Wire Harness Diagram
Page 9 -- 13
YELLOW
VIOLET
WHITE
BLACK
Greensmaster 3150
Engine Wire Harness Drawing
Page 9 -- 14
FUSIBLE LINK