1
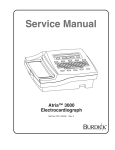
SERVICE MANUAL
ATRIA 3100
ATRIA 6100
PART NUMBER 70-00083-01 A
Copyright © 2007 Cardiac Science Corporation. All rights reserved.
This document contains instructions for both the Atria 3100 and Atria 6100.
TO RESPONSIBLE SERVICE PERSONNEL:
The contents of this document are not binding. If any significant differences between the product
and this document are encountered regarding service work, contact Cardiac Science Corporation
for more information.
Cardiac Science Corporation recommends the use of authorized Cardiac Science Corporation
personnel for the maintenance and repair of all Burdick equipment. Cardiac Science Corporation
cannot warrant the operation of the equipment if other than Burdick genuine replacement or
exchange parts are used in the service or repair of this equipment, and if such service or repair is
performed by non-authorized personnel.
This product has been carefully designed to provide a high degree of safety and dependability.
However, we can not guarantee against the deterioration of components due to aging and normal
wear.
CAUTION — The Atria electrocardiograph is a restricted device. Federal law restricts the sale,
distribution, or use of this device to, by, or on the lawful order of a health professional.
DANGER — Explosion hazard. Do not use this device in the presence of flammable anesthetics.
Cardiac Science Corporation
3303 Monte Villa Parkway
Bothell, WA 98021, USA
Toll Free: +1.800.426.0337
Telephone: +1.425.402.2000
Email: [email protected]
Website: www.cardiacscience.com
1-2
70-00083-01 A
(& 5(3
MDSS GmbH
Schiffgraben 41
D-30175 Hannover
Germany
Tel: +49 511 62 62 86 30
Fax: +49 511 62 62 86 33
Atria 3100/6100
Contents
Chapter 1: General Information
About the Atria Electrocardiographs .......................................... 1-1
System Description ..................................................................... 1-1
Technical Specifications.............................................................. 1-2
Chapter 2: Service & Maintenance
When to Perform Service Procedures .......................................... 2-1
Functional Checkout .................................................................. 2-2
Required Equipment............................................................. 2-2
Functional Checkout Procedure............................................ 2-2
Calibration Pulse Check Procedure....................................... 2-4
Electrical Leakage Current Tests ................................................ 2-4
Required Equipment............................................................. 2-4
Patient Leakage Current Procedure ...................................... 2-5
Patient Sink Current Procedure ............................................ 2-5
Queue Sensor Calibration........................................................... 2-6
Calibration Procedure .......................................................... 2-6
Chapter 3: Troubleshooting
Preliminary Checks..................................................................... 3-1
Troubleshooting Chart ............................................................... 3-2
Chapter 4: Component Replacement
Parts List .................................................................................... 4-1
Component Replacement ........................................................... 4-6
Replace the Top Cover Assembly ......................................... 4-6
Replace the Paper Drive Assembly........................................ 4-7
Replace the Atria 3100 Mainboard (including Modem) ....... 4-8
Replace the Atria 6100 Mainboard
(including Video Adapter Board and Modem) .................. 4-9
Replace the Power Supply Board ........................................ 4-10
Replace the External Power Supply .................................... 4-11
70-00083-01 A
Atria 3100/6100
1
Disassembly ............................................................................. 4-12
Remove the Battery Pack.................................................... 4-12
Remove the Atria 3100 Top Cover Assembly..................... 4-14
Remove the Atria 6100 Top Cover Assembly..................... 4-15
Remove the Paper Drive Assembly ..................................... 4-17
Remove Atria 3100 Mainboard Assembly.......................... 4-18
Remove Atria 6100 Mainboard Assembly.......................... 4-20
Remove Power Supply Board ............................................. 4-22
Remove the Paper Door ..................................................... 4-23
2
Atria 3100/6100
70-00083-01 A
1
General Information
What’s in this chapter
◆
About the Atria Electrocardiographs
1-1
◆
System Description
1-1
◆
Technical Specifications
1-2
About the Atria Electrocardiographs
The Atria electrocardiograph is a multichannel electrocardiograph with a
thermal printer. Options may include ECG interpretation and modem or
network connectivity.
System Description
The Atria has the following main subsystems:
◆
Mainboard contains the host and front end. The video adapter board (Atria
6100 only) and optional modem plug directly into the mainboard.
◆
Power Supply Board: Receives input power from the external power supply
or battery pack, supplies power to the Atria, and recharges the battery pack
when connected to external power.
◆
Paper Drive Assembly: Includes the printhead, queue sensor to correctly
position the paper, and the paper drive motor to feed the paper.
◆
The Top Cover Assembly: Contains the keyboard and video display.
Atria 3100/6100
70-00083-01 A
1-1
Paper Tray Assembly
Printhead
Queue Motor
Sensor
100 - 240 VAC In
Power
External
Power
Supply
J4
24 VDC
Battery Pack
JP3
Top Cover Assembly
(Atria 3100)
Display
Video
Display Keyboard
Character Display Keyboard
Display
Interface
(Power &
Digital Control)
Digital
Interface
J3
Top Cover Assembly
Backlight
GND J2
J6
Power
Supply
Board
P1
JP23
Video Adapter Board
J7
Backlight
Video Adapter Board
(Atria 3100)
Mainboard
J2
Mainboard
JP409
J412
JP412
JP409
Modem (Optional)
Modem (Optional)
Equipotential
Ground
Figure 1: Atria Subsystems
Technical Specifications
Specification
Dimensions
15.0" x 13.125" x 5.5"
(381mm x 334mm x 140mm)
Weight (unit only)
11 lbs (5 kg) (including external power supply)
Display
Atria 3100: 2 x 40 character backlit LCD screen
Atria 6100: 640 x 480 backlit color LCD screen
Keyboard
Full alphanumeric keypad plus designated quick keys
Data Storage
Atria 3100: 50 records standard
Atria 6100: 150 records standard, optional upgrade to 300
Input Power
AC Operation 100-240 VAC ± 10%, 50-60 Hz ± 3 Hz
Battery duration
55 minutes continuous printing
Printout
1-2
Printout device
216 mm thermal dot array
Paper dimension
8.5" x 11" (US letter)
210mm x 300mm (A4)
Paper type
Thermal sensitive (Burdick Assurance® or HeartLine™ paper
recommended)
Chart speeds
12.5, 25, 50 mm/sec
70-00083-01 A
Atria 3100/6100
Specification
Gain
5, 10, 20 mm/mV Chest or Limb (may be split)
Printout formats
3, 4, 6 or 12 channels; additional rhythm formats
Acquisition
Lead selection
I, II, III, aVR, aVL, aVF, V1, V2, V3, V4, V5, V6 and Alternate
Chest Lead (chest lead selection V2R through V9R, V7, V8,
and V9)
Modes
Automatic, automatic rhythm, or manual rhythm
Frequency response
Meets or exceeds ANSI/AAMI EC11-1991 and IEC 60601-251 standards
Input impedance
Meets or exceeds ANSI/AAMI EC11-1991 and IEC 60601-251 standards
Electrode offset tolerance
±300 mV
Sampling
8000 Samples/Sec. 2.5μV LSB
Artifact filter response
40 Hz, -3db
Storage
500 samples/second, 2.5μV LSB
Pacemaker display capability
Meets or exceeds ANSI/AAMI EC11-1991 standard and IEC
60601-2-51
Interpretation (optional)
Diagnosis, measurements, reasons statements based on five
demographic criteria
Environmental
Operating temperature
50°F to 104°F (10°C to 40°C)
Operating relative humidity
20% to 75% non-condensing
Operating atmospheric pressure 1060 hPa to 700 hPa (-500 ft to 10,000 ft reference to sea
level)
Storage temperature
-4°F to 113°F (-20°C to 45°C)
Storage relative humidity
10% to 90% non-condensing
Storage atmospheric pressure
1060 hPa to 190 hPa (-500 ft to 40,000 ft reference to sea
level)
Harmful Ingress of Water
Normal
Input/Output
(Units with communications)
Ethernet (RJ45)
USB type A
Standard RS-232 (9 pin D)
Atria 3100/6100
70-00083-01 A
1-3
Specification
Analog output (3.5 mm phono plug)
Optional Upgrades
802.11
Bluetooth
Telephone line interface (RJ11)
Conforms to Standards
CAN/CSA-C22.2 No. 0-M91
CAN/CSA-C22.2 No. 601.1-M90
CAN/CSA-C22.2 No. 601.1S1
CSA C22.2 No. 601.2.25
UL 60601
EN 60601-1
EN 60601-2-25 & Amend. 1
EN 60601-1-2
AZ/NZS 2064.1/2
ANSI/AAMI EC11 - 1991
EN 60601-2-51
Safety
Leakage current
patient <10 μA, chassis <100 μA
Defibrillation protection
to 5000V, 360J
Equipment Type
Degree of protection from
electric shock
IEC 60601-1 Class II, Type CF - Defibrillator Proof
Mode of operation
Continuous
Schematics
Available on request
Warranty
1-4
Class IIa (Council Directive 93/42/EEC, MDD)
70-00083-01 A
3 years with return of warranty card
Atria 3100/6100
2
Service & Maintenance
What’s in this chapter
◆
When to Perform Service Procedures
2-1
◆
Functional Checkout
2-2
◆
Electrical Leakage Current Tests
2-4
◆
Queue Sensor Calibration
2-6
When to Perform Service Procedures
Perform the following procedures as indicated:
◆
Functional Checkout on page 2-2: Used to verify normal operation. Must be
performed before returning the Atria to the user.
◆
Electrical Leakage Current Tests on page 2-4: Used to verify Atria electrical
safety. Must be performed after any internal repair (i.e., the case is opened),
or to check for possible damage (e.g., the Atria is dropped).
◆
Queue Sensor Calibration on page 2-6: Used to ensure paper feeds correctly.
Must be performed if:
• The paper tray assembly is removed or replaced
• The queue sensor board is replaced
• The power supply board is replaced
• The mainboard is replaced.
Atria 3100/6100
70-00083-01 A
2-1
Functional Checkout
Use this procedure to verify normal operation before returning the Atria to the
user.
Required Equipment
◆
Patient Simulator
Functional Checkout Procedure
If necessary, turn off the Atria and disconnect the AC power cord.
1. Plug the AC power cord into a wall outlet. Wait until PRESS ON/STBY to
power on the unit displays on the Battery Charging screen.
2. Press the ON/STBY key to power on the Atria. Verify the Atria boots up to
the Home screen without errors.
3. Remove any paper, if installed, and note the printhead resistance in the
battery compartment.
4. Select Setup | Service Functions | Printhead Resistance and verify the
resistance matches the printhead resistance label in the battery compartment.
Note: If the mainboard is replaced, the printhead resistance must be reentered.
If the paper tray assembly is replaced, a new printhead resistance must be
entered and the label in the battery compartment must be changed (both
should match the printhead resistance written on the printhead).
5. Reinstall the paper and verify the paper type matches the type selected in
Setup | System | Paper Type.
6. Select Setup | Service Functions | Printer Test Sequence. The Atria prints 3
pages of test characters. Verify all characters print evenly across the page.
Note: The test characters may appear lighter or darker, depending on the
type of paper used, but the printing should still be clear and even across the
page.
7. Press the HOME key.
8. Turn on the patient simulator.
2-2
70-00083-01 A
Atria 3100/6100
9. Connect the patient simulator to the Atria.
On the Home screen, verify:
• The patient name and ID number or No Name, (No Id) display
Note: The patient name and ID number display when patient demographic
information has already been entered.
• For the Atria 3100: FAIL, DRIFT, or NOISE messages do not display
For the Atria 6100: SENSORS OK message displays
• AC displays
10. Disconnect the AC power cord for 1 minute and verify the Atria continues to
operate normally (AC will change to BAT).
Note: If the Atria shuts down immediately after disconnecting the AC
power, ensure the battery is installed and securely connected.
11. Reconnect the power cord and verify BAT changes back to AC.
12. Press the ECG key to acquire and print out an Auto ECG.
The printout will consist of a 12 lead formatted ECG. Verify the following:
• Correct printing of the lead waveforms.
• Stat ID number entered in the ID field.
• Correct date and time when the ECG was acquired.
• Interpretation indicates Normal ECG.
13. Press the HOME key.
14. Press the DIRECTORY key to verify the ECG is saved in the patient
directory.
15. Press the HOME key.
16. Disconnect the patient simulator.
Atria 3100/6100
70-00083-01 A
2-3
Calibration Pulse Check Procedure
To perform the calibration pulse check (if necessary, refer to the Operating
Instructions), apply a cal pulse individually to Leads I, II, and V1-V6 (C1-C6)
and verify they reproduce a 1 mV signal referred to input within a tolerance of +/
-5%.
This can be accomplished by one of the following methods:
◆
Using a Calibrated ECG simulator with a 1 mV CAL pulse with rise time of
not greater than 5mS.
Verify each lead by connecting the lead to be tested to the input of the
appropriate cal pulse connector while all other leads are connected to their
appropriate connection points.
◆
Using AAMI EC11 Fig. 3 test circuits with a calibrated source:
a. Create 1 mV Cal pulse by setting the signal source in Fig. 3 to 1 volt +/-
1% with a rise time no greater than 5mS and ensure S5 is open while S1
and S2 are closed. Also ensure S3 is set to position “a”.
b. Verify each lead by connecting the lead to be tested to the P1 input of the
test circuit while all other leads are connected to P2.
Electrical Leakage Current Tests
Use these tests to verify Atria electrical safety. All leakage tests must be
performed after any internal repair (i.e., the case is opened), or to check for
possible damage (e.g., the Atria is dropped).
Required Equipment
◆
Dynatech Nevada 235A Safety Analyzer
Note: The Dynatech Safety Analyzer is recommended for this procedure, if a
different safety analyzer is used, consult the user manual for proper setup and
testing procedures.
2-4
70-00083-01 A
Atria 3100/6100
Patient Leakage Current Procedure
Note: Ensure that the Kelvin cable is not connected.
1. Plug the safety analyzer into the 264 VAC line voltage.
2. Plug the Atria power cable into the test receptacle on top of the safety
analyzer.
3. Connect a patient cable between patient input connector on the Atria and the
appropriate patient terminals on the top of the safety analyzer.
4. Press the ENABLE button for the ECG LEADS group on the safety analyzer.
5. Turn the SELECT knob to select ALL.
6. Verify the leakage current is less than 10 μA for these conditions:
• Polarity Normal, Atria power on
• Polarity Normal, Open Ground, Atria power on
• Polarity Normal, Open Neutral, Atria power on
• Polarity Reversed, Atria power on
• Polarity Reversed, Open Ground, Atria power on
• Polarity Reversed, Open Neutral, Atria power on
Patient Sink Current Procedure
!
WARNING! Shock hazard.
This test applies AC Line Voltage to the patient cable.
Note: Ensure that the Kelvin cable is not connected.
1. Turn the SELECT knob to select ISOLATION in the ECG LEADS group and
wait for the numbers to display.
2. Press the ISO TEST button and verify that the highest measured value is less
than 50 μA.
Atria 3100/6100
70-00083-01 A
2-5
Queue Sensor Calibration
Used to measure and record queue sensor voltages based on queue sensor
characteristics and internal physical alignment. Required for the following
conditions:
◆
The paper tray assembly is removed or replaced
◆
The queue sensor board is replaced
◆
The power supply board is replaced
◆
The mainboard is replaced
Note: This procedure is not required if the paper door is replaced or after minor
adjustments.
If this calibration fails twice, contact Technical Support.
Calibration Procedure
!
Caution: Equipment damage.
Use only Assurance® or Heartline™ standard paper. Using any other paper may
damage the Atria and void the warranty.
1. Insert paper into the paper drive so that the print head is approximately half-
way between the perforations of the paper.
2. Power on the Atria and verify the ECG screen is displayed (press the HOME
key.
3. Select Setup | Service Functions | Queue Sensor Calibration and press the
ENTER key.
4. Press HOME.
5. Press the FORM FEED key and verify the paper queues correctly.
6. Select Setup | Waveform Preferences | Speed | 12.5mm/s.
7. Press the MANUAL RHYTHM key and print 3 pages of ECG data.
Verify additional headers are not printed on the pages.
8. Press STOP.
Verify the paper queues correctly.
9. Select AUTO RHYTHM.
Verify a one page report prints and the paper correctly queues.
10. Repeat for waveform speeds of 25 mm/s and 50 mm/s.
2-6
70-00083-01 A
Atria 3100/6100
3
Troubleshooting
What’s in this chapter
◆
Preliminary Checks
3-1
◆
Troubleshooting Chart
3-2
Preliminary Checks
Before using the troubleshooting chart below, check the following:
1. Ensure users are correctly following instructions listed in the Operating
Instructions. Verify proper skin preparation, lead placement, lead integrity,
etc.
2. Check the Atria settings (Setup | Print Setup Report) to ensure the Atria is
configured as expected.
3. Verify external cables are undamaged and securely connected. Swap out the
power cable, external transformer, and patient cable with known good
cables.
4. Check for any other visible damage such as cracks in the case, broken or
cracked cable connectors, or rattling when the Atria is moved.
Atria 3100/6100
70-00083-01 A
3-1
Troubleshooting Chart
Problem
Solution
Artifacts or noise on ECG trace
Check the following for general problems (refer to the Operating
Instructions Troubleshooting section for specific problems and
solutions).:
• Try to prevent unnecessary patient movement.
• Ensure all leads are clean, secure, and properly placed.
• Ensure the skin is properly prepared and unbroken.
• Ensure all cables are securely connected.
• Check cables for damage, including nicks, cuts, wear, or
bulging.
• Position the Atria as far from other electronic equipment as
possible.
Message Waiting for Data is
displayed
This message is normally displayed for about 15 seconds after
beginning an ECG acquisition. If it does not go away after about 15
seconds:
• Check the screen for a lead fail indication, and then fix that
lead.
• Check all the ECG leads.
• Troubleshoot for noise (see Artifacts or noise on ECG trace).
• Refer to the Operating Instructions for additional
troubleshooting information.
AC power indicator is off
(Green LED on back panel)
• Ensure both ends of the power cord are securely connected.
• Ensure green LED on external power supply is on.
• Ensure the power outlet is working.
• Replace power cord.
• Replace the external power supply.
These solutions must be performed by qualified service
personnel:
• Replace power supply board.
Atria unexpectedly reboots
(crashes)
The Atria will shut off if both AC and battery power are interrupted at
the same time. The Atria must have a battery installed during normal
operation.
• If operating from the battery, ensure the battery is charged
and the cable securely connected.
• If operating from AC power, ensure the battery is installed
and AC power is available
• After a crash, insert a USB flash drive and select Setup |
Service Functions | Copy crash dump to USB. A text file is
created that can be sent to Technical Support for analysis.
3-2
70-00083-01 A
Atria 3100/6100
Problem
Solution
Video Display
• Ensure a battery is installed and check the green power LED
• No display
• Display is too dark or too light
• Display is unstable
on the back panel to verify AC power is available.
• Try adjusting the brightness (SHIFT + NEXT or
SHIFT + PREVIOUS).
• Press and hold the ON/STBY key for 8 seconds to power off
and then press ON/STBY again to restart the Atria.
These solutions must be performed by qualified service
personnel:
• Ensure keyboard cable is securely connected.
• Atria 6100 only: Ensure the display and backlight cables are
securely connected. The graphic below shows the Video
Display cable improperly connected--the cable is not fully
inserted into the jack and the right tab is not fully engaged to
lock in the cable.
Figure 2: Incorrect Video Cable Installation
• Replace the top cover assembly.
• Replace the power supply board.
• Replace the mainboard.
Keyboard
• No response from one or more
keys
• Key sticks
Select Setup | Service Functions | Keyboard Test to verify
keyboard operation.
• If ON/STBY key does not work, ensure the battery is installed
and check the green power LED on the back panel to verify
AC power is available.
• Restart the Atria.
• Clean the outside surface keyboard with isopropyl alcohol.
These solutions must be performed by qualified service
personnel:
• Verify the keyboard cable is securely connected.
• Clean the underside of the keypad and the keypad contacts
with isopropyl alcohol.
• Replace the keyboard cable.
• Replace the top cover assembly.
• Replace the mainboard.
Atria 3100/6100
70-00083-01 A
3-3
Problem
Solution
Printing
• Paper does not feed
Select Setup | Service Functions | Printer Test Sequence to
verify printer operation.
• Paper feeds but does not print
• Ensure Burdick paper is used (Assurance® or Heartline™).
• Printing too light or too dark
• Verify paper type in System Settings matches the paper
• Out of Paper message in error
installed.
• Check paper door gear for damage and then ensure paper
door is properly seated.
• Take paper out and reinstall. Follow paper installation
instructions in the Operating Instructions.
• Clean queue sensor. See illustration below. Paper dust may
collect on the sensor--clean the queue sensor by wiping with
a soft cloth.
Figure 3: Queue sensor
These solutions must be performed by qualified service
personnel:
• Verify the printhead resistance entered (Setup | Service
Functions | Printhead Resistance) matches the resistance
entered on the printhead.
• Ensure cables from the paper tray assembly to the power
supply board are securely connected.
• Replace cables from the paper tray assembly to the power
supply board.
• Replace queue sensor.
• Replace paper tray assembly.
• Replace power supply board.
3-4
70-00083-01 A
Atria 3100/6100
Problem
Solution
Battery
Normal battery life is about 3 hours depending on how the Atria
is used (if the battery lasts less than half that time or is more
than two or three years old, it should be replaced). To conserve
Battery life, do not turn on the Atria until the patient is prepared
and the leads are connected.
Atria will not operate when
disconnected from AC power or
only operates for a short time.
• Ensure green LED on external power supply is on.
• Check the green power LED on the back panel to verify
power is available when charging the battery.
• Ensure the battery is installed and the battery cable is
securely connected.
• Ensure the battery has been charged for at least four hours.
• If the Atria has not been used for an extended period (several
months), the battery may be fully discharged and will only
accept a minimal charge. Try disconnecting AC power and
then charge the battery again.
These solutions must be performed by qualified service
personnel:
• Replace the battery.
• Replace the power supply board.
Additional patients cannot be
added to the patient directory
Normally, when the directory reaches the maximum number of
patients, the oldest records will be deleted as new records are
added. However, this only happens if the records have been
printed or sent. If none of the records have been printed or sent,
additional patients cannot be added to the directory.
• Print or send old records.
Date and time inconsistent or
cannot be set
These solutions must be performed by qualified service
personnel:
• Replace 3V button cell on mainboard
• Replace mainboard assembly
Communications Errors
See the Communications Troubleshooting Help pages (ALT + H)
for a list of specific errors. General checks include:
• Ensure the serial, phone, network, or USB cables are securely
connected to the correct jack.
• Check the communications settings.
• For network problems, check with the network administrator
to ensure the destination is available (to display the IP
Address of the Atria, select Setup | Service Functions | Get
IP Address).
Atria 3100/6100
70-00083-01 A
3-5
3-6
70-00083-01 A
Atria 3100/6100
4
Component Replacement
What’s in this chapter
◆
Parts List
4-1
◆
Component Replacement
4-6
◆
Disassembly
4-12
This section contains instructions for removing, ordering, and replacing the Atria
subassemblies.
Parts List
To locate components, refer to Disassembly on page 4-12 and to this parts list:
Part
Description and Location
Part #
Mainboard
671-1299-00
1. Video Adapter Board
(Atria 6100 only)
671-1301-00
2. Modem (w/ nylon standoff)
671-0001-00
3. Battery, CR2032
146-0052-00
Note: Mainboard includes
CR2032 Battery.
Atria 6100: The video adapter
board and modem must be
ordered separately.
Atria 3100/6100
70-00083-01 A
4-1
Part
4-2
70-00083-01 A
Description and Location
Part #
Power Supply Board
671-1300-01
Atria 3100 Top Cover Assembly
651-1503-01
Atria 3100/6100
Part
Description and Location
Part #
Atria 6100 Top Cover Assembly
(with Video Display)
651-1429-00
Atria 6100 Top Cover Assembly
(without Video Display)
651-0002-00
Paper Tray Assembly
10-00040-01S
Queue Sensor
30-00005-01S
Paper Tray Assembly
Queue Sensor
Atria 3100/6100
70-00083-01 A
4-3
Part
4-4
70-00083-01 A
Description and Location
Part #
Paper Door
10-00041-01S
Atria 3100 Battery Access Cover
671-0003-01
Atria 6100 Battery Access Cover
671-0002-01
Atria 3100 Battery Pack, 14.4V,
NiMH, 1500mAH
146-0131-00
Atria 3100 Battery Pack, Ferrite
for the power brick.
276-0280-00
Atria 6100 Battery Pack, 14.4V,
NiMH, High Capacity
146-0127-00
Mainboard to Power Supply
Board Cable
175-1607-00
Atria 3100/6100
Part
Not Pictured
Description and Location
Part #
Atria 3100 Keyboard with Card
Edge Connector
60-00040-01
Atria 3100 LCD 14 pin Ribbon
Cable
60-00041-01
Atria 6100 Keyboard Cable
60-00039-01
Plastite Screw (4 x 5/16)
211-0466-00
Note: Do not use non-Plastite
screws. Other types of screws may
damage the case.
Not Pictured
Screw (M4 X 0.7 X 8)
215-0223-00
Not Pictured
External Power Supply
(Brick)
010-1684-00
Not Pictured
Screw M3 x 6
701950
Not Pictured
Screw 6-32x3/8 Pan PH
50-00046-01
Not Pictured
Screw 6-32x1/4 Flat (100º) PH
50-00045-01
Not Pictured
Screw M4x16 Pan PH
017439-065
Not Pictured
Screw 4-40x3/19 Flat (100º) PH
50-00047-01
Atria 3100/6100
70-00083-01 A
4-5
Component Replacement
!
!
!
WARNING! Shock hazard.
Before opening the case, ensure the Atria is unplugged and the battery pack is
removed. If power must be applied while the case is open, ensure all personnel and
equipment are clear of any energized components.
Caution: Static electricity.
Several Atria components are extremely sensitive to static electricity. Always use an
anti-static mat and wrist grounding strap when working on internal components.
Caution: Burn hazard.
Components inside the unit may be hot after use. Use caution when working on
internal components.
The following section lists the steps to replace each Atria component.
Replace the Top Cover Assembly
The top cover assembly includes the top cover (with labels for either Burdick or
Quinton), keyboard assembly, and the video display.
Note: For the Atria 6100: The top cover assembly may be ordered without a
video display.
1. Remove the battery pack (see Remove the Battery Pack on page 4-12).
2. Remove the top cover assembly (see Remove the Atria 3100 Top Cover
Assembly on page 4-14 or Remove the Atria 6100 Top Cover Assembly on
page 4-15).
3. For the Atria 6100:
a. Remove the paper drive assembly (see Remove the Paper Drive
Assembly on page 4-17).
b. Disconnect the video display cables (see Figure 5 on page 4-20, a and b).
c. Connect the new video display cables.
d. Re-install the paper drive assembly.
4. Install the new top cover assembly.
5. Re-install the battery pack.
6. Apply the Burdick or Quinton label (the new label must be the same as the
label on the old top cover).
7. Perform the following tests before returning the Atria to service:
• Functional Checkout on page 2-2
• Electrical Leakage Current Tests on page 2-4
• Queue Sensor Calibration on page 2-6
4-6
70-00083-01 A
Atria 3100/6100
Replace the Paper Drive Assembly
1. Remove the battery pack (see Remove the Battery Pack on page 4-12).
2. Remove the top cover assembly (see Remove the Atria 3100 Top Cover
Assembly on page 4-14 or Remove the Atria 6100 Top Cover Assembly on
page 4-15).
3. Remove the paper drive assembly (see Remove the Paper Drive Assembly on
page 4-17).
4. Install the new paper drive assembly.
Note: Ensure the cables to the power supply board stay securely connected
while installing the paper drive assembly.
5. Write the printhead resistance (written on the top of the printhead) onto the
printhead resistance label.
6. Attach the printhead resistance label onto the enclosure bottom in the
battery compartment.
7. Re-install the top cover assembly.
8. Re-install the battery pack.
9. Perform the following tests before returning the Atria to service:
• Functional Checkout on page 2-2
• Electrical Leakage Current Tests on page 2-4
• Queue Sensor Calibration on page 2-6
Atria 3100/6100
70-00083-01 A
4-7
Replace the Atria 3100 Mainboard (including Modem)
If the modem must be replaced, disassembly is the same to the mainboard.
1. Remove the battery pack (see Remove the Battery Pack on page 4-12).
2. Remove the top cover assembly (see Remove the Atria 3100 Top Cover
Assembly on page 4-14).
3. Remove the paper drive assembly, (see Remove the Paper Drive Assembly on
page 4-17).
4. Remove the modem, if not replacing, and then the mainboard (see Remove
Atria 3100 Mainboard Assembly on page 4-18).
5. Install the new mainboard.
6. Re-install the modem.
7. Re-install the paper drive assembly.
Note: Ensure the cables to the power supply board stay securely connected
while installing the paper drive assembly.
8. Re-install the top cover assembly.
9. Re-install the battery pack.
10. Perform the following tests before returning the Atria to service:
• Functional Checkout on page 2-2
• Electrical Leakage Current Tests on page 2-4
• Queue Sensor Calibration on page 2-6
4-8
70-00083-01 A
Atria 3100/6100
Replace the Atria 6100 Mainboard
(including Video Adapter Board and Modem)
The mainboard includes the CR2032 battery, but not the video adapter board or
the modem.
If the video adapter board or modem must be replaced, disassembly is the same
to the mainboard, except do not disconnect the video display cables to replace
the modem.
1. Remove the battery pack (see Remove the Battery Pack on page 4-12).
2. Remove the top cover assembly (see Remove the Atria 6100 Top Cover
Assembly on page 4-15).
3. Remove the paper drive assembly (see Remove the Paper Drive Assembly on
page 4-17).
4. Remove the video adapter board, modem and then the mainboard (see
Remove Atria 6100 Mainboard Assembly on page 4-20).
5. Install the new mainboard.
6. Re-install the video adapter board.
7. Re-install the modem.
8. Re-install the paper drive assembly.
Note: Ensure the cables to the power supply board stay securely connected
while installing the paper drive assembly.
9. Re-install the top cover assembly.
10. Re-install the battery pack.
11. Perform the following tests before returning the Atria to service:
• Functional Checkout on page 2-2
• Electrical Leakage Current Tests on page 2-4
• Queue Sensor Calibration on page 2-6
Atria 3100/6100
70-00083-01 A
4-9
Replace the Power Supply Board
1. Remove the battery pack (see Remove the Battery Pack on page 4-12).
2. Remove the top cover assembly (see Remove the Atria 3100 Top Cover
Assembly on page 4-14 or Remove the Atria 6100 Top Cover Assembly on
page 4-15).
3. Remove the paper drive assembly (see Remove the Paper Drive Assembly on
page 4-17).
4. Remove the power supply board (see Remove Power Supply Board on
page 4-22).
5. Replace the power supply board.
Note: A rubber spacer must be installed under the screw hole near P1 (see
the board detail on Figure 7 on page 4-22). Ensure the other rubber spacer to
the right of P1 is left intact. The spacer may adhere to the power supply
board or bottom assembly when the board is removed and is easily lost.
When reinstalling the power supply board, ensure the spacer is in place to
prevent the board from warping when the screw is tightened.
6. Re-install the paper drive assembly.
Note: Ensure the cables to the power supply board stay securely connected
while installing the paper drive assembly.
7. Re-install the top cover assembly.
8. Re-install the battery pack.
9. Perform the following tests before returning the Atria to service:
• Functional Checkout on page 2-2
• Electrical Leakage Current Tests on page 2-4
• Queue Sensor Calibration on page 2-6
4-10
70-00083-01 A
Atria 3100/6100
Replace the External Power Supply
1. Power down the Atria and disconnect external power.
2. Remove the ferrite from the old external power supply cable by unsnapping
fasteners.
3. Place the ferrite around the new power supply cable 2 inches (+/- 1/2 inch),
from the 5 pin din connector.
4. Re-install the power supply cable.
Atria 3100/6100
70-00083-01 A
4-11
Disassembly
The procedures in this section detail removing Atria components.
Remove the Battery Pack
!
!
!
WARNING! Fire, explosion, or contamination hazard.
Properly dispose of batteries in accordance with local regulations. Burning, heating,
or improper disposal may cause explosion, fire, or contamination.
Caution: Loss of data.
The battery pack must be installed at all times for proper operation. Operating
without a battery pack may result in lost or unsaved waveform data.
Caution: Patient injury.
Do not remove the battery pack within the patient vicinity.
1. Disconnect external power.
!
WARNING! Shock hazard.
Verify the external power cord is disconnected before removing or replacing battery
pack. A blank display is not a reliable indication of disconnected external power.
2. Pull out the paper door and remove the paper.
4-12
70-00083-01 A
Atria 3100/6100
3. Remove the battery access cover.
a. Slide the plate toward the front of the Atria.
b. Lift up the back end of the plate to remove.
4. Remove battery pack:
a. Slide the battery pack out of the battery compartment.
!
Caution: Equipment damage.
Do not pull on the wires to disconnect the battery pack connector. This may cause the
connector to fail. Only pull on the connector to disconnect the battery pack.
b. Disconnect the battery pack connector.
5. For the Atria 3100 only:
a. Remove the ferrite from the old battery pack by unsnapping fasteners.
b. Place the ferrite around the new battery pack cable approximately in the
middle of the cable.
Atria 3100/6100
70-00083-01 A
4-13
Remove the Atria 3100 Top Cover Assembly
!
Caution: Burn hazard.
Components inside the unit may be hot after use. Use caution when working on
internal components.
To remove the top cover assembly:
1. Turn the electrocardiograph over and remove the two bottom assembly
screws.
2. Carefully turn the electrocardiograph back over.
3. Remove the paper door and the paper, (see Remove the Paper Door on
page 4-23).
4. Remove the two screws and the paper door rails from the paper well.
5. Lift the top cover assembly and disconnect the keyboard cable and the video
cable.
4-14
70-00083-01 A
Atria 3100/6100
Remove the Atria 6100 Top Cover Assembly
!
Caution: Burn hazard.
Components inside the unit may be hot after use. Use caution when working on
internal components.
To remove the top cover assembly:
1. Turn the electrocardiograph over and remove the two bottom assembly
screws.
2. Carefully turn the electrocardiograph back over.
3. Remove the paper door and the paper, (see Remove the Paper Door on
page 4-23).
4. Remove the two screws and the paper door rails from the paper well.
Atria 3100/6100
70-00083-01 A
4-15
5. Lift the top cover assembly and disconnect the keyboard cable.
6. Remove the top cover assembly and set upright behind the Atria.
Note: The two video display cables will still be connected.
4-16
70-00083-01 A
Atria 3100/6100
Remove the Paper Drive Assembly
To remove the paper drive assembly:
1. Remove the printer assembly screws (1 and 2).
1
3
2
2. Lift out the paper drive assembly and rotate clockwise 180° to set aside.
Note: When reinstalling the paper drive assembly, be sure to push the paper
cover fully to the position pins on the print head bracket (3) before
tightening the screw.
Note: The paper drive assembly power cables remain connected to the
power supply board.
Atria 3100/6100
70-00083-01 A
4-17
2
3
4
1
3. Disconnect the cable connectors from J3 (2), J4 (1), J6 (3), and J7 (4) on the
power supply board.
Remove Atria 3100 Mainboard Assembly
The mainboard assembly includes an optional modem board (B).
Note: The modem is connected to the mainboard with four multi-pin
connectors (one in each corner) and a nylon standoff.
When removing the modem, the standoff may need to be clipped for easier
removal (a new standoff is included with a new modem or new mainboard).
When installing the modem, check for bent pins and seat the modem carefully
ensure all the pins line up.
4-18
70-00083-01 A
Atria 3100/6100
Figure 4: Mainboard Removal
1. Disconnect the keyboard cable connector from JP409 (labeled d in Figure 4).
2. Disconnect the power supply board cable from J412 (c).
3. Disconnect the LCD Display cable from JP23 located just above the
keyboard connector JP409.
Atria 3100/6100
70-00083-01 A
4-19
Remove Atria 6100 Mainboard Assembly
The mainboard assembly includes the video adapter board (A, in the figure
below) and an optional modem board (B).
Note: The modem is connected to the mainboard with four multi-pin
connectors (one in each corner) and a nylon standoff.
When removing the modem, the standoff may need to be clipped for easier
removal (a new standoff is included with a new modem or new mainboard).
When installing the modem, check for bent pins and seat the modem carefully
ensure all the pins line up.
Figure 5: Mainboard Removal
4-20
70-00083-01 A
Atria 3100/6100
1. Disconnect the keyboard cable connector from JP409 (labeled d in Figure 5).
2. Disconnect the power supply board cable from J412 (c).
3. Disconnect the video display cable and ground (a) and backlight cable (b)
from the video adapter board connectors.
Note: When reinstalling the video cable, ensure the connector is fully
inserted and the side clips are completely engaged. The figure below shows
an incorrectly installed cable:
Figure 6: Incorrect Video Cable Installation
4. Remove the 7 screws (labeled 1-7 with black arrows on Figure 5).
Atria 3100/6100
70-00083-01 A
4-21
Remove Power Supply Board
Figure 7: Power supply board removal
1. Disconnect the ground connector to P1 (2).
2. Disconnect the cable to the mainboard (1).
3. Remove the 4 screws (one in each corner).
Note: A rubber spacer must be installed under the screw hole near P1 (see
the board detail on Figure 8). Ensure the other rubber spacer to the right of
P1 is left intact. The spacer may adhere to the power supply board or bottom
assembly when the board is removed and is easily lost. When reinstalling the
power supply board, ensure the spacer is in place to prevent the board from
warping when the screw is tightened.
Figure 8: Power supply board detail
4-22
70-00083-01 A
Atria 3100/6100
Remove the Paper Door
To remove the paper door:
◆
Atria 3100/6100
Pull the door out and lift the door through the side rail at the back of the
unit.
70-00083-01 A
4-23
4-24
70-00083-01 A
Atria 3100/6100
Toll Free: +1.800.426.0337
Telephone: +1.425.402.2000
Website: www.cardiacscience.com
Email: [email protected]
Cardiac Science Corporation
3303 Monte Villa Parkway
Bothell, WA 98021, USA
70-00083-01 A