1
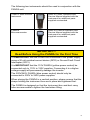
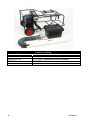
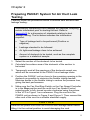
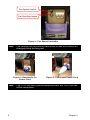
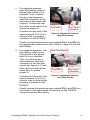
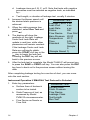
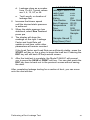
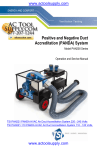
Chapter 2 Preparing PAN341 System for Air Duct Leak Testing Carefully follow the procedures below to achieve safe and accurate leakage testing: Successfully completing a duct leakage test requires compiling certain information prior to starting the test. Refer to Appendix B for a discussion of standards relating to duct leakage testing. The list below indicates the information required: Type of leakage test to be performed (Positive or negative). Leakage standard to be followed. Air tightness/leakage class to be achieved Amount of ductwork to be tested, such as the complete system or a statistical sample. 1. Select the section of the ductwork to be tested. 2. Calculate the surface area of the ductwork of the section to be tested. 3. Temporarily seal all the openings of the ductwork except one, which will be connected to the PAN341 duct leakage tester. 4. Position the PAN341 unit as close to the remaining opening in the ductwork as possible to minimize the flexible tubing needed. Minimize bends in the flexible tubing to reduce the pressure loss, giving the best performance. 5. Make sure the Fan Run/Stop Switch on the Fan Speed Controller is in the Stop position and the multi-turn Fan Speed Control potentiometer is fully turned counter-clockwise using the picture of the VFD in Figure 1 as a reference. Plug the cord into the PANDA unit as shown in Figure 2 and Figure 3. Then connect the other end of the cord to a suitable electrical supply. CAUTION Remove the power cord from the PANDA duct leakage tester before tilting it to the vertical position to avoid damaging the cord. 5