1
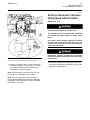
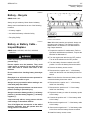
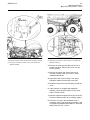
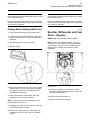
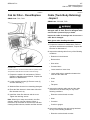
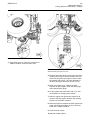
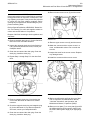
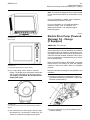
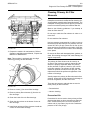
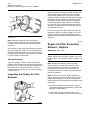
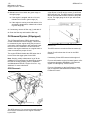
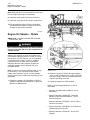
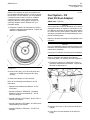
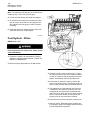
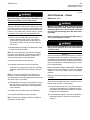
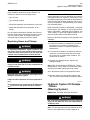
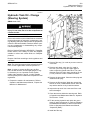
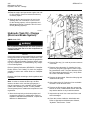
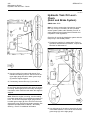
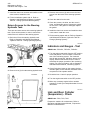
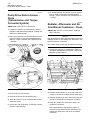
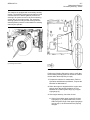
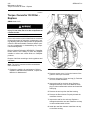
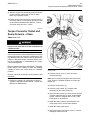
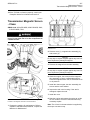
SEBU8417-01
139
Maintenance Section
Belts - Inspect/Replace
Alternator
Illustration 147
g01993454
(3) Belt Guard
Inspection
1. Remove the belt guard.
2. Inspect the belt for the following conditions:
cracks, wear, stretch, frayed areas, and missing
pieces. Replace the belt, if necessary.
3. Check the belt tension. This engine is equipped
with a belt tensioner that automatically adjusts
the belt to the correct tension. Make sure that the
belt tensioner is between the stops in order to
allow proper tension on the belt. If the tensioner is
against one of the stops, replace the belt.
Note: The tensioner for the belt cannot be adjusted.
4. If replacement of the belt is not necessary, install
the belt guard.
Replacement
1. Remove the belt guard.
Illustration 148
g01993457
2. In order to release the tension on the belt, Insert a
12.7 mm (0.50 inch) ratchet into square hole (4)
in the belt tensioner, and pry the belt tensioner
in a clockwise direction.
3. Remove the old belt and install the new belt.
Remove the tooling.
4. The belt tensioner should be between the stops in
order to allow proper tension on the belt.
Note: If the belt has been replaced and the belt
tensioner is against one of the stops, the belt
tensioner may need to be replaced.
5. Check the belt tension on a new belt after 30
minutes of operation.
Note: The break-in period for the belt is considered
to be 30 minutes.
6. Install the belt guard.
Refer to Disassembly and Assembly, KENR8384,
“797F Engine Supplement”, “Belt Tightener - Remove
and Install” for more information on replacement of
the belt tensioner.