1
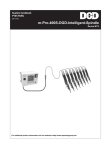
Service Manual
P2079WA/EN
2010-11
DGD-Intelligente-Spindel
BTSE Series
For additional product information visit our website at http://www.apextoolgroup.com
About this service manual
This service manual is the – translation of the original service manual – and provides important information
on safe and correct installation.
Secondary information
P2086MA
Assembly Instruction DGD-Intelligent Spindle
P1919E
Assembly instructions Supply module CPS3
P1908E
Assembly instructions
Tightening Torques – Assembly of Components (Built-in Nutrunner)
P2078MA
Assembly instructions TSE/TUSE tightening module
P2075EL
Data sheet Transducer
P2074BA
Instruction manual Telemetrie system
PL12EN-1004
Quick Start mPro400GC
P2076EL
Spare parts sheet Attachment
P1913E
Spare parts sheet Gearing
P1914E
Spare parts sheet Motor
P2085EL
Spare parts sheet Tightening module TSE/TUSE
P2080EL
Spare parts sheet Transducer
P2077SB
System handbook
Modular fastening system mPro400GC-DGD-Intelligente-Spindel
PL12EN-1001
System manual nutsetter control unit mPro400GC
Symbols in text
➔
Identifies instructions to be followed.
•
Identifies lists.
Abbreviations
mPro400GC
Nutsetter control
PDB-CPS…
Power distribution box
TSE/TUSE
Tightening module
CPS3
Supply module
DGD-IS
DGD intelligent spindles
Symbols in graphics:
Identifies movement in a direction.
Identifies function and force.
Disclaimer:
DGD reserves the right to modify, supplement or improve this document or the product without prior notice.
This document may not be reproduced in whole or in part in any way, shape or form, or copied to another
natural or machine-readable language or to a data carrier, whether electronic, mechanical, optical or otherwise, without the express permission of DGD.
DGD and Cooper Power Tools GmnH & Co. OHG are trademarks and plant names of the Apex Tool Group
Division.
2
P2079WA/EN 2010-11
79a_Deckbl_bedingt-en.fm, 10.12.2010
Inhalt
1
Safety
5
2
Service schedule
6
2.1
Lubrication ............................................................................................ 6
3
Removing the DGD-IS
3.1
3.2
Dismantling the DGD-IS into components ............................................ 7
Removing the gearing from the DGD-IS............................................... 7
4
Installing the DGD-IS
4.1
4.2
Tightening torques lock nut................................................................... 8
Tightening torques Gearing / Motor ...................................................... 9
5
Recalibrating the nutsetter data
9
6
Disposal
9
P2079WA-EN_2010-11_Wartung_DGD-IS_BTSEIVZ.fm, 10.12.2010
P2079WA/EN 2010-11
7
8
3
4
P2079WA/EN 2010-11
P2079WA-EN_2010-11_Wartung_DGD-IS_BTSEIVZ.fm, 10.12.2010
Safety
1
Safety
CAUTION!
This document is only valid in conjunction with the assembly instructions for the DGD intelligent spindle.
➔
Read the chapter on safety!
DANGER! High leakage current –
Fatal electric shock could occur!
➔
Always disconnect the power supply before performing maintenance work on the DGD-IS and thePDBCPS….
➔
Always disconnect the system cable, motor or motor cable from the
PDB-CPS… or DGD-IS before making throughput, resistance and short circuit measurements.
➔
Do not attempt to repair possible faults on the fastening system by yourself if you do not have the required knowledge! Inform the local repair center or your Sales & Service Center.
WARNING!
High temperature –
the motor on the DGD-IS may heat up and cause burns during removal.
(max. engine temperature 90 °C). Wear gloves.
21b_Sicherheit_bedingt-en.fm, 10.12.2010
P2079WA/EN 2010-11
5
1
2
Service schedule
2
Service schedule
Only trained personnel are permitted to perform maintenance. Regular maintenance reduces operating
faults, repair costs and downtime. In addition to the following service plan, implement a safety-related maintenance program that takes the local regulations for repair and maintenance for all operating phases of the
tool into account.
After
… fastening cycles1))
500.000
Actions
Only for 4B(U)TSE-4B…A-4M…B-4WM…B:
➔
700.000
Send DGD-IS for examination and recalibration to Sales & Service Center.
Only for 3B(U)TSE-3B300A-3M2B-3WM2B and 2B(U)TSE-2B200A-…-2WM3B:
➔
1 million
Send DGD-IS for examination and recalibration to Sales & Service Center.
Optical control: Check DGD-IS for liquid tightness.
➔
Check DGD-IS for tight fit.
➔
Check tool connector and fixing of the tool plate for tight fit.
➔
Use grease-dissolving agent to clean the gearing components and then
regrease, see Grease lubricants according to DIN51502/ISO3498, Seite 6.
Amount of grease:
• Size 1: 7 cm³
• Size 2: 18 cm³
• Size 3: 28 cm
• Size 4: 35 cm³
➔
Recommendation: Recalibrate tool, see 12.1 Recalibration, Seite 76.
At …BUTSE…:
3 million
➔
Check tooth belt and ball bearing for wear and replace if necessary.
➔
General overhaul. Send it to Sales & Service Center.
1) For the number of fastening cycles, refer to the counter display in 7.3.4 Administration submenu, Seite 27
2.1
Lubrication
In order to ensure faultless functioning and a long service life, it is absolutely necessary to use the right type
of oil according to the table.
Grease lubricants according to DIN51502/ISO3498
Lubrication
point
Part
no.
Pack.
Unit
[kg]
DIN /
ISO
912554
15
G-POH
933027
1
KP1K
Aralub
FD00
Energrease
HTO
GA 0
EP
Expa 0
Special
Gearing
H
Mobilplex 44
Microlube1)
GL 261
1) Initial lubrication Cooper Power Tools GmnH & Co. OHG
6
P2079WA/EN 2010-11
21b_Sicherheit_bedingt-en.fm, 10.12.2010
Removing the DGD-IS
3
Removing the DGD-IS
➔
➔
➔
➔
➔
3.1
Loosen and remove plug connectors.
Remove the complete DGD-IS from the fastening station.
Secure the spanner contact surfaces on the nutsetter spindle or component in a vice.
Place in position, do not tighten!
Turn the cap nut counterclockwise. Hook wrench, see table Seite 8.
Loosen the components.
Dismantling the DGD-IS into components
.1
3.2
2
3
Removing the gearing from the DGD-IS
1
21b_Sicherheit_bedingt-en.fm, 10.12.2010
P2079WA/EN 2010-11
7
3
4
Installing the DGD-IS
4
Installing the DGD-IS
NOTE
Before replacing a component
➔
always carry out a machine capability study (MFU).
After assembly
➔
check the calibration of the torque transducer.
➔
check the function of the angle encoder.
We recommend servicing by Sales & Service Center.
If space is confined by positioning multiple DGD-IS, you can
• Turn size 1 in 15° increments.
• Turn sizes 4 to 2 in 10° increments.
➔ Position the DGD-IS components together via flat toothed interfaces. Place in position, do not tighten!
siehe 4.2 Tightening
torques Gearing / Motor,
page 9
2
.1
3
4.1
Tightening torques lock nut
Assemble the components in reverse order to the removal sequence.
CAUTION!
Risk of flying parts.
Components of the DGD-IS may rotate, come loose and cause injury.
Observe the tightening torque of the cap nuts. The tightening torque is the same for all sizes.
Size
Tightening torque
tightening torque
Tightening torque
adjustment1)
Hook wrench
Order no.
Nm ±5 %
Nm ±5 %
1
50
43
933336
2
85
73
933337
3
85
73
933338
4
110
92
933339
9 × 12
Torque
wrench
Order no.
933340
1) Different setting due to leverage effect of the hook wrench
8
P2079WA/EN 2010-11
21b_Anzugsmomente_bedingt-en.fm, 10.12.2010
Recalibrating the nutsetter data
4.2
Tightening torques Gearing / Motor
Size
Tightening torque
Order no.
Size
913947
3
920533
5
Nm
5
1
2.6 – 3.2
2
2.9 – 3.2
3
9 – 11
4
9 – 11
Recalibrating the nutsetter data
The nutsetter data is stored in the service memory. The service memory is located in the transducer components …M…B, offset attachment …VM…B and angle head attachment …WM…B in the DGD-IS.
NOTE
Only trained personnel are permitted to replace these components. Otherwise there is a risk that data without a system reference is stored in the service memory of a transducer (e.g. incorrect nutsetter type and
serial number, incorrect fastening count, incorrect repair data, etc.).
NOTE
The service memory of new components …M…B, …VM…B, …WM…B does not contain nutsetter data
(installation possible in different types of DGD-IS). As a spare part, the transducer is not configured for selfidentification via the nutsetter control unit PDB-CPS….
In this case, the nutsetter data must be entered in the service memory manually using the nutsetter control
unit.
No limits are imposed on the torque measuring functions.
➔ To
recalibrate the type-specific nutsetter data, please send the DGD-IS to Sales & Service Center.
Only this will ensure that after the service work, any required nutsetter data update is carried out
properly.
6
Disposal
CAUTION!
Injuries and environmental damage from improper disposal.
Components of the DGD-IS pose risks to the health and the environment.
➔ The DGD-IS contains components that can be reused as well as components
that require special disposal. Separate the components and dispose of them by segregating them
clearly.
➔ Catch auxiliary materials (oils, greases) when drained and dispose of them properly.
➔ Separate the components of the packing and dispose of them by segregating them clearly.
➔ Follow the locally applicable regulations.
Observe generally valid disposal guidelines such as, in Germany, the Electrical and Electronic Equipment
Act (ElektroG):
➔ Hand in the DGD-IS at your company collection point or return to Sales & Service Center.
21b_Anzugsmomente_bedingt-en.fm, 10.12.2010
P2079WA/EN 2010-11
9
5
Sales & Service Centers
Note: All locations may not service all products. Please contact the nearest Sales & Service Center for
the appropriate facility to handle your service requirements.
Dallas, TX
Apex Tool Group
Sales & Service Center
1470 Post & Paddock
Grand Prairie, TX 75050
Tel: 972-641-9563
Fax: 972-641-9674
Detroit, MI
Apex Tool Group
Sales & Service Center
2630 Superior Court
Auburn Hills, MI 48326
Tel: 248-391-3700
Fax: 248-391-7824
Houston, TX
Apex Tool Group
Sales & Service Center
6550 West Sam Houston
Parkway North, Suite 200
Houston, TX 77041
Tel: 713-849-2364
Fax: 713-849-2047
Lexington, SC
Apex Tool Group
670 Industrial Drive
Lexington, SC 29072
Tel: 800-845-5629
Tel: 803-359-1200
Fax: 803-358-7681
Los Angeles, CA
Apex Tool Group
Sales & Service Center
15503 Blackburn Avenue
Norwalk, CA 90650
Tel: 562-926-0810
Fax: 562-802-1718
Seattle, WA
Apex Tool Group
Sales & Service Center
2865 152nd Avenue N.E.
Redmond, WA 98052
Tel: 425-497-0476
Fax: 425-497-0496
York, PA
Apex Tool Group
Sales & Service Center
3990 East Market Street
York, PA 17402
Tel: 717-755-2933
Fax: 717-757-5063
Canada
Apex Tool Group
Sales & Service Center
5925 McLaughlin Road
Mississauga, Ont. L5R 1B8
Canada
Tel: 905-501-4785
Fax: 905-501-4786
Germany
Cooper Power Tools
GmbH & Co. OHG
a company of
Apex Tool Group, LLC
Postfach 30
D-73461 Westhausen
Germany
Tel: +49 (0) 73 63/ 81-0
Fax: +49 (0) 73 63/ 81-222
England
Cooper Power Tools
a company of
Apex Tool Group, LLC
Unit G Quinn Close
Seven Stars Industrial Estate
Whitlet
Coventry CV3 4LH
England
Tel: +44-2476-3089 60
Fax: +44-2476-3089 69
France
Cooper Power Tools SAS
a company of
Apex Tool Group, LLC
Zone Industrielle
BP 28
Avenue Maurice Chevalier
77831 Ozoir-la-Ferrière Cedex
France
Tel: (011) 33 1 64 43 22 00
Fax: (011) 33 1 64 40 17 17
China
Cooper (China) Co., Ltd.
a company of
Apex Tool Group, LLC
955 Sheng Li Road,
Heqing Pudong, Shanghai
China 201201
Tel: +86-21-28994176
Fax: +86-21-51118446
Mexico
Cooper Tools
de México S.A. de C.V.
a company of
Apex Tool Group, LLC
Vialidad El Pueblito #103
Parque Industrial Querétaro
Querétaro, QRO 76220
Tel: +52 (442) 211-3800
Fax: +52 (442) 103-0443
Brazil
Cooper Tools Industrial Ltda.
a company of
Apex Tool Group, LLC
Av. Liberdade, 4055
Zona Industrial - Iporanga
18087-170 Sorocaba, SP Brazil
Tel: (011) 55 15 238 3929
Fax: (011) 55 15 228 3260
Apex Tool Group, LLC
1000 Lufkin Road
Apex, NC 27539
Phone: 919-387-0099
Fax:
919-387-2614
www.apextoolgroup.com
PLxx-xxxx/Printed in USA 00/2010/Copyright © Apex Tool Group, LLC