1
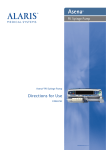
GH Asena® GH Syringe Pump with Guardrails® Safety Software Directions for Use ENGLISH 1000PB01453 Issue 1 Contents Page Introduction 2 Features of the Asena® GH Syringe Pump 3 Operating Precautions 5 Getting Started 6 Basic Features 8 Alarms and Warnings 10 Configured Options 11 Specifications 14 Compatible Accessories 15 Maintenance 17 Occlusion Pressure Limits 18 Trumpet Curves & Start-up Curves 19 IrDA, RS232 and Nursecall Specification 20 Service Contacts 21 Document History 21 Warranty 22 Pumps, Accessories and Spare Parts 23 1000PB01453 Iss. 1 1/24 Introduction The Asena® GH Syringe Pump is a fully featured syringe pump suitable for critical care and general infusion applications. The Asena® GH Syringe Pump functions with a wide range of standard, single-use, disposable Luer-lock syringes. It accepts syringe sizes from 5ml to 50ml. A full list of compatible syringes can be found in the Compatible Accessories section. The Guardrails® Safety Software for the Asena® GH Syringe Pump brings a new level of medication error prevention to the point of patient care. The Guardrails® Safety Software allows the hospital to develop a best-practice Data Set of IV medication dosing guidelines for patient-specific care areas, referred to as profiles. Each profile contains a specific library of drugs, as well as pump configurations appropriate for the care area. A profile also contains either Guardrails® Hard Limits that cannot be overridden during infusion programming, or Guardrails® Soft Alerts that can be overridden, based on clinical requirements. The hospital defined Data Set is developed and approved through pharmacy and clinical input, and then configured into the Asena® GH Syringe Pump with Guardrails® Safety Software by qualified technical personnel. The Asena® GH Syringe Pump with Guardrails® Safety Software, with a Data Set loaded, provides automatic alerts when a dosing limit, bolus limit, or weight limit has been exceeded. These safety alerts are provided without the need for the pump to be connected to a PC or network. Creating a Data Set To use the Asena® GH Syringe Pump with Guardrails® Safety Software a Data Set will need to be developed, reviewed, approved, released, uploaded and verified according to the following process. Refer to the Guardrails® Editor Directions For Use (1000PB01398) for further details and operating precautions. 1. Create Master Lists (Using Guardrails® Editor) Master Drugs* A list of drug names and standard concentrations. The Software can store an unlimited number of entries depending on disk space. Asena® Syringe Library Configure syringes enabled for use. 2. Create Care Area Profiles (Using Guardrails® Editor) Drug Library* Drugs and concentrations for this Profile with minimum & maximum limits and occlusion alarm level. Up to 100 drug set-ups can be entered for each of the 10 Profiles. Configuration** Pump configuration settings, General Options and Units for Dosing Only. 3. Review, Approve and Release Data Set (Using Guardrails® Editor) Review and Approve Entire Data Set Report to be printed, reviewed and signed as proof of approval by an authorised person, according to Hospital protocol. Signed printout to be kept safe for use during verification procedure. Release Data Set status to be promoted to Released (Password is required). 4. Upload Data Set to Asena® GH Syringe Pump with Guardrails® Safety Software enabled (Using Guardrails® Editor Transfer Tool) Data Set transfers should only be performed by qualified technical personnel. 5. Verify Data Set Upload First or Individual Pump Verification On completion of upload record CRC number shown on the Asena® GH Syringe Pump. Download the Data Set from the pump using the Guardrails® Verification Tool. Compare Data Set downloaded with approved signed Data Set printout. Reviewer should sign the printout and also record the CRC number on the printout as record. Subsequent Pumps Verification On subsequent uploads of the Data Set compare CRC number on pump with CRC number recorded in First Pump Verification. * Note: Drug parameters have to be in accordance to local regulation and prescribed information. ** See important note in Configured Options section. 1000PB01453 Iss. 1 2/24 Features of the Asena® GH Syringe Pump - Front View ON/OFF RUN Release lever for MDI Display High visibility Alarm Indicator PURGE/ BOLUS MUTE PRESSURE OPTION Finger Grips IV Infusion set hook HOLD Shelf for chevron keys and softkeys Syringe Clamp Positive Plunger Grippers Controls a b h c i ON/OFF - Press once to switch the pump ON. Press and hold down for 3 seconds to switch the pump OFF. RUN - Press to start the infusion. The green LED will flash during infusion. HOLD - Press to put the infusion on hold. The amber LED will be lit while on hold. MUTE - Press to silence alarm for 2 minutes (configurable). Press and hold until 3 beeps are heard for 15 minutes silence. PURGE/BOLUS - Press to access PURGE or BOLUS soft keys. Press and hold down soft key to operate. PURGE the extension set during set up. Pump on hold, extension set not connected to patient, Volume Infused (VI) not added. BOLUS delivered at an accelerated rate. Pump infusing, extension set connected to patient, VI added. 1000PB01453 Iss. 1 d e OPTION - Press to access optional features (see Basic Features). PRESSURE - Use this button to display the pumping pressure trend display and alarm level. f g CHEVRONS - Double or single for faster/slower increase or decrease of values shown on display. BLANK SOFTKEYS - Use in conjunction with the prompts shown on the display. 3/24 Features of the Asena® GH Syringe Pump - Rear View Medical Device Interface (MDI) Rating Plate (see Symbol Definitions rotating cam to lock on to horizontal for an explanation of rectangular bars. the symbols used) Release lever for MDI IR Comms port Folded Potential Pole Clamp Equalisation (PE) connector Carrying Handle Indicators j BATTERY - When illuminated the pump is running on the internal battery. When flashing the battery power is low with less than 30 minutes of use remaining. k l AC POWER - When illuminated the pump is connected to an AC power supply and the battery is being charged. TIME REMAINING DISPLAY - Indicates time before syringe will require replacing. N BATTERY ICON - Indicates battery charge level to highlight when the battery will require recharging. Guardrails® SOFT ALERT - Indicates the pump is running at a rate above (pointing up) or below (pointing down) a Guardrails® Soft Alert. (Number of arrows vary depending on drug name length) Guardrails® LIMIT WARNING - Indicates the setting entered is under or exceeds a Guardrails® Soft Alert or setting entered is not permitted as it exceeds a Guardrails® Hard Limit. 1000PB01453 Iss. 1 RS232 Connector (optional) IV Infusion set hook Symbol Definitions w x y k Attention (Consult accompanying documents) Potential Equalisation (PE) Connector RS232/Nursecall Connector (Optional) Type CF Equipment (Degree of protection against electrical shock) O Protected against vertically falling drops of water r Alternating Current s t Device complies with the requirements of the EC Directive 93/42/EEC. Registered with the CE Mark. Date of Manufacture 4/24 Operating Precautions m n o G H I This Asena® Syringe Pump has been calibrated for use with single-use disposable syringes. To ensure correct and accurate operation, only use 3 piece Luer-Lock versions of the syringe make specified on the pump or described in this manual. Use of non-specified syringes or administration sets may impair the operation of the pump and the accuracy of the infusion. Uncontrolled flow or syphoning may result if the syringe is located incorrectly in the pump, or if it is removed from the pump before the extension line is properly isolated from the patient. Isolation may include closing a tap in the patient line or activating a flow stop clamp. When combining several apparatus and/or pumps with administration sets and other tubing, for example via a 3 way tap, the performance of the pump may be impacted and should be monitored closely. The pump must be mounted within 1.0m above or below the patient’s heart. The most accurate pressure monitoring in the IV infusion set is achieved when the pump is positioned close to the patients heart level. Do not mount the pump in a vertical position with the syringe pointing upwards as this could lead to an infusion of air which may be in the syringe. To protect against the introduction of air the user should regularly monitor the progress of the infusion, syringe, extension line and patient connections and follow the priming procedure specified herein. The pumping pressure alarm system is not designed to provide protection against, or detection of, infiltration conditions which can occur at low pressures. M This pump emits a certain level of electromagnetic radiation which is within the levels specified by IEC60601-2-24 and IEC60601-1-2:1993. If however the pump interacts with other equipment, measures should be taken to minimise the effects, for instance by repositioning or relocation. Secure the infusion line to the pump using the infusion set hook at the rear of the pump. This provides protection against accidental dislodging of the syringe from the pump. This is a positive pressure pump designed to achieve very accurate fluid administration by automatically compensating for resistance encountered in the infusion system. J K Several alarm conditions detected by this pump will stop the infusion and generate audible alarms and lights. Users must perform regular checks to ensure that the infusion is progressing correctly and no alarms are operating. This pump is protected against the effects of external interference, including high energy radio frequency emissions, magnetic fields and electrostatic discharge (for example, as generated by electrosurgical and cauterising equipment, large motors, portable radios, cellular telephones etc.). When using any infusion device in conjunction with other instruments requiring vascular access, extra care is advised. Adverse delivery of medication or fluids can be caused by the substantial variation in pressures created within the local vascular system by such instruments. Typical examples of those instruments are used during dialysis, bypass or cardiac assist applications. 1000PB01453 Iss. 1 In some circumstances the pump may be affected by an electrostatic discharge through air at levels close to or above 15kv; or by radio frequency radiation close to or above 10v/m. If the pump is affected by this external interference the pump will fail safe or reset (after which a call back alarm will occur). Should false alarm conditions be encountered, either remove the source of the interference, or regulate the infusion by another appropriate means. L B A If this pump is dropped, subjected to excessive moisture, fluid spillage, humidity or high temperature, or otherwise suspected to have been damaged, remove it from service for inspection by a qualified service engineer. When transporting or storing the pump, use original packaging where possible, and adhere to temperature, humidity and pressure ranges stated in the Specifications section and on the outer packaging. An explosion hazard exists if the pump is used in the presence of flammable anaesthetics. Exercise care to locate the pump away from any such hazardous sources. An electrical shock hazard exists if the pump’s casing is opened or removed. Refer all servicing to qualified service personnel. When connected to an external power source, a three-wire (Live, Neutral, Earth) supply must be used. If the integrity of the external protective conductor in the installation or its arrangement is in doubt, the pump should be operated from the battery. A comprehensive Technical Service Manual is available for this pump. (1000SM00001) All illustrations used in this manual show typical settings and values which may be used in setting up the functions of the pump. These settings and values are for illustrative use only. Where stated, a minimum infusion rate refers to a nominal rate of 1.0ml/h, and an intermediate infusion rate refers to a nominal rate of 5.0ml/h. The complete range of infusion rates, settings and values are shown in the Specifications section. The Guardrails® Safety Software incorporates dosing limits and pump configuration parameters based on hospital protocol. The software adds a test of reasonableness to drug programming based on the limits defined by the hospital. Qualified personnel must ensure the appropriateness of the drug dosing limits, the compatibility of the drugs, and the performance of each pump, as part of the overall infusion. Potential hazards include drug interactions, and inappropriate delivery rates and pressure alarms. When loading a Data Set with the Guardrails® Safety Software, ensure the correct profile (for patient care area) is selected prior to starting an infusion. Failure to use the appropriate profile could cause serious consequences. 5/24 Getting Started Front Panel and Main Display Pump Status Syringe type / Profile / Drug name Infusion Rate Time Remaining Icon Volume Infused Option Installation Volume Infused Check that the pump is complete, undamaged and that the voltage rating specified on the label is compatible with your AC power supply. Items supplied with this Asena® Syringe Pump are: Directions For Use AC Power Cable (as requested) Protective Packaging Connect the pump to the AC power supply for 2½ hours to ensure that the internal battery is fully charged prior to use. On initial start-up the pump will display the Select Language screen. Select the required language from the list displayed using the f keys. Press the OK softkey to confirm your selection. Should the pump fail to perform correctly, replace in its original protective packaging and contact a qualified service engineer for investigation. Pressure Information VTBI Option Battery Icon An approved Guardrails® Safety Software Data Set must be uploaded to the Asena® GH Syringe Pump prior to use. Guardrails® Editor PC Software is available seperately. A pole clamp is fitted to the rear of the pump and will provide secure fixing to vertical I.V. poles of a diameter between 15 and 40 mm. It should be folded away when not in use. There is a Medical Device Interface (MDI) at the rear of the pump used for mounting the pump onto horizontal rectangular bars, for instance the Asena® Docking Station. Holding the pump horizontally push the pump firmly on to the bar. Ensure that the pump clicks securely into position on the bar. To release, push the release lever and pull the pump forward. Important: Do not mount the pump with the AC power inlet or the syringe pointing upward. This could affect the electrical safety in the event of a fluid spill or lead to the infusion of air which may be in the syringe. The pump will automatically operate from its internal battery if the pump is switched on without being connected to the AC power supply. Loading a Syringe Place the pump on a stable horizontal surface or secure as described above. Prepare, load and prime the single-use disposable syringe and extension line using standard aseptic techniques. Important: Ensure that both plunger grippers are fully locked onto the plunger flange and the upper finger grip has returned to its original position. 3 Important: Only use a syringe of the type stated on the pump or in this manual. Using an incorrect syringe could adversely affect the accuracy of the infusion and the performance of the pump. When initially loading the syringe, allow for the volume of fluid contained in the extension line and retained in the syringe at the end of infusion as this “dead-space” will not be infused. 1. Squeeze the finger grips together on the plunger holder and slide the mechanism to the right. Pull the syringe clamp forward and down. Important : To ensure the syringe is loaded correctly, place the barrel flange in the space between the syringe clamp and the syringe flange clamp. This is correct if the syringe remains in position before the syringe clamp is closed. 2. Insert the syringe ensuring that the finger flanges are located in the slots on the syringe holder. 3. Lift the syringe clamp until it locks against the syringe barrel. 4. Squeeze the finger grips on the plunger holder and slide the mechanism to the left until it reaches the plunger end. 5. Release the finger grips. Ensure that the plunger grippers are securing the plunger in place and the finger grip returns to its original position. Important: Secure the IV infusion set using the IV infusion set hook at the rear of the pump. This provides protection against accidental dislodging of the syringe from the pump. 1000PB01453 Iss. 1 2 Barrel Flange Syringe Clamp Syringe Flange Clamp 6/24 Getting Started (Continued) Starting the Pump 1. Connect the pump to an AC power supply using the AC power cable. Press the a button. The pump will run a short self-test. Ensure that two beeps are activated during this test. Check the display test pattern and ensure that no rows are missing. Check that the displayed time and date are correct. Finally check display shows the Data Set name, Version number and Released date and time. Note: A warning - REPAIRING LOGS, may be displayed if event log information was not completely stored at the previous power down. 2. CONFIRM PROFILE? - Answering NO will display SELECT PROFILE screen, select profile and OK. YES will display DRUG SELECT screen. Go to step 3. 3. DRUG SELECT? - Select one of the following: ml/h allows infusions to be given in ml/h only, after selecting OK to confirm. Go to step 6. DOSING ONLY enables the pump to be set-up with a dosing protocol, after selecting OK to confirm. Go to step 4. Important Note: No drug-specific Guardrails® Limits are used when ml/h or DOSING ONLY modes are selected. DRUG NAME select a drug name from Data Set profile, after selecting OK to confirm. Go to step 5. Note: Drugs are listed in alphabetical groups as follows: A-F, G-M, N-S and T-Z. Select group containing the drug name required and then the required drug and all other drugs can be seen. 4. DOSING ONLY a) Select Dosing unit and OK to confirm. b) Select Concentration Amount and OK to confirm. (Use Units softkey to change concentration units) c) Select Diluent Volume and OK to confirm. d) Adjust Weight and OK to confirm. (If required) e) Press OK to confirm dosing information. Go to step 6. 5. DRUG NAME a) Select Concentration required and OK to confirm. (Only required if more than one concentration for Drug selected is available.) b) OK to confirm Concentration or MODIFY to change Drug amount and diluent volume. (MODIFY only available if concentration limits allow.) c) Adjust Weight and OK to confirm. (If required) d) Press OK to confirm setup. Go to step 6. 6. LOAD SYRINGE - Load the syringe according to the procedure in this manual. 7. CONFIRM SYRINGE - Check that the syringe type and size being used matches the display. If required, the make of syringe can be changed by pressing the TYPE button. Press CONFIRM when the correct type and size are shown. Note: If the PURGE SYRINGE option has been enabled then the prompt to purge screen is displayed and the IV infusion set can be purged as required. 1000PB01453 Iss. 1 8. PURGE (if required) - Press the i button and then press and hold the PURGE softkey until fluid flows and the purging of the IV infusion set is complete. Release the softkey. The volume used during purging will be displayed. 9. INFUSION RATE - Check the rate shown if set and change the rate if necessary using the f keys. If the infusion rate exceeds or is under the Guardrails® Soft Alerts or exceeds the Guardrails® Hard Limit then a warning will display. If an attempt is made to set the infusion rate above the Guardrails® Hard Limit then the display will show DOSE NOT PERMITTED. 10.CONNECT TO PATIENT - Connect the extension set to the patient access device. 11. START - Press b to commence operation. INFUSING will be displayed. If the infusion settings are within the Guardrails® Soft Alerts then the AMBER STOP light will be replaced by the flashing GREEN START light to indicate that the pump is in operation. If infusion rate exceeds or is under the Guardrails® Soft Alerts then check infusion setting, to continue with infusion at set rate press b and then confirm OVERRIDE LIMIT by pressing YES. If OVERRIDE LIMIT is not required press NO and adjust rate to be within the Guardrails® Soft Alerts. Note: If infusion rate running exceeds or is under the Guardrails® Soft Alerts then the display will cycle between Drug Name, Profile name and Up or Down arrows. 12.STOP - Press h to halt the operation. ON HOLD will be displayed. The AMBER STOP light will replace the GREEN START light. 7/24 Basic Features Purge Bolus Infusion The i button allows the delivery of a limited volume of fluid in order to purge the extension line prior to being connected to a patient or after changing a syringe. The bolus feature can be configured to one of three modes: a) Disabled b) Hands On c) Hands On & Hands Free Bolus can be used at the start of an infusion or during an infusion. Important: If the Hands Free bolus option is configured, then this feature will be cancelled following any interruption in delivery, even if the bolus delivery is incomplete. If the bolus volume reaches the set limit the bolus will stop and the pump will revert to infuse at the set rate. 1. Press the i button when the pump is not infusing. 2. Press and hold the PURGE softkey until fluid flows and the purging of the IV infusion set is complete. The volume used during purging will be displayed, but it is not added to the volume infused. 3. When purging is complete release the PURGE softkey. Press the QUIT softkey to exit back to the main display. Important: The pump will not purge if the rate lock has been enabled. During PURGE the pressure limit alarms are temporarily increased to their maximum level. e Pressure Level 1. To check and adjust the pressure level press the e button. A bar graph will be displayed showing the pressure alarm level and the current pressure level. 2. Press the f keys to increase or decrease the alarm level. The new level will be indicated on the display. 3. Press QUIT to exit the screen. 1000PB01453 Iss. 1 1. During infusion press the i button once to display the bolus screen (Hands On) or the Hands Free bolus selection screen (Hands On & Hands Free). If configured to Disabled then pressing the i button will not activate a Bolus and pump will continue to infusion at set rate. 2. Hands Free: Press the YES softkey to go to Hands Free bolus screen, press the HANDSON softkey for Hands On bolus. 3. Use the f keys to set the bolus rate required (Hands On) or to set the bolus dose/volume required (Hands Free). Hands Free only; If necessary press the RATE softkey to adjust the bolus delivery rate. 4. To deliver the bolus press and hold the BOLUS softkey (Hands On) or press the BOLUS softkey once to begin the delivery of the bolus (Hands Free). 5a.Hands On: During the bolus the volume being infused is displayed. When the desired bolus has been delivered, release the softkey. The bolus volume is added to the total volume infused. 5b.Hands Free: The display will show the bolus being delivered, the bolus counts down on the screen and will count down to zero upon completion of the bolus. On completion of the bolus the pump will automatically revert to the set infusion rate. 6. Hands Free: To terminate a bolus being delivered either press the h button or press the i button and press the STOP softkey. This will stop the bolus and continue infusing at the set rate. Important: A Hands On bolus and Hands Free bolus cannot be administered if the rate lock is enabled or if the feature is disabled for the selected Profile. During BOLUS the pressure limit alarms are temporarily increased to their maximum level. If the volume to be infused is reached during a bolus, the volume to be infused (VTBI) complete alarm will sound and the pump will revert to its previous state. Press c to stop the alarm or CANCEL to acknowledge the alarm and continue normal rate infusion. Any Hands Free Bolus dose setting which exceeds or is under a Guardrails® Soft Alert must be confirmed before operation can be continued. 8/24 Basic Features (Continued) ? Dosing Summary To review currently selected dosing information: 1. Press the d button to first access the options menu. 2. Select DOSING SUMMARY. 3. Review the information and then press the QUIT softkey. ? Set VTBI over Time This option allows you to specify a VTBI and delivery time. The rate necessary to deliver the required volume within the specified time is calculated and displayed. 1. Stop the infusion. Press the d button to access the options menu. 2. Select the SET VTBI OVER TIME option using the f keys and press the OK softkey. 3. Adjust the volume to be infused using the f keys. When the desired volume has been reached press the OK softkey. 4. Enter the time over which the volume is to be infused. The infusion rate will automatically be calculated. Press the OK softkey to enter the value. 5. Select the rate at VTBI end from the list using the f keys and press the OK softkey. The default is STOP. ? 24 Hour Log This option allows the 24 hour log of volume infused to be reviewed. 1. Press the d button to access the options menu. 2. Select the 24H LOG option using the f keys and press the OK softkey. The display shows the hourly volume infused. The volume infused shown in brackets is the total volume infused since the volume was last cleared. See example below: 07:48 - 08:00 4.34ml (4.34ml) 08:00 - 09:00 2.10ml (6.44ml) 09:00 - 10:00 2.10ml (8.54ml) VOLUME CLEARED 3. Press the QUIT softkey to exit the log. Volume to be Infused (VTBI) This option allows you to set a specific volume to be infused. Rate at the end of this VTBI can also be set, selecting from stop, KVO, or continuous infusion at the set rate. 1. Press the VTBI softkey to select the volume to be infused option. 2. Enter the volume to be infused using the f keys and press the OK softkey. 3. Select the rate at the end of the VTBI using the f keys to scroll through the on-screen choices. The default is stop. 4. Press the OK softkey to enter the rate and exit the VTBI menu. Clear Volume This option enables the volume infused to be cleared. 1. Press the VOLUME softkey to display the CLEAR VOLUME option. 2. Press the YES softkey to clear the volume. Press the NO softkey to retain the volume. Resets the volume infused in the 24H LOG option. Rate Titration If Rate Titration is enabled the rate can be adjusted while infusing: 1. Select the new rate using the f keys. The message < START TO CONFIRM > will flash on screen and pump continues to infuse at the original rate. 2. Press the b button to confirm the new infusion rate and resume infusion. If the new infusion rate setting exceeds or is under a Guardrails® Soft Alert confirmation is required before infusion can resume. If Rate Titration is disabled the rate can only be adjusted whilst on hold: 1. Press the h button to put the pump on hold. 2. Select the new rate using the f keys. 3. Press the b button to start infusing at the new rate. ? Event Log This option allows the event log to be reviewed. It can be enabled/disabled. 1. Press the d button to access the options menu. 2. Select the EVENT LOG option using the f keys and press the OK softkey. 3. Scroll through the log using the f keys. Press the QUIT softkey to exit the log. ? Data Set Details To review currently selected Data Set information: 1. Press the d button to access the options menu. 2. Select DATA SET DETAILS. 3. Review the information and then press the QUIT softkey. Rate Lock If Rate Lock is enabled, when the infusion rate has been set and the infusion started (or following a bolus infusion) the rate lock prompt will appear on the main display. 1. To select the rate lock function press the YES softkey. Press the NO softkey if the rate lock is not required. When rate lock is enabled, the following are unavailable: Changing the infusion rate / titration Bolus / purge Switching the pump off VTBI over time infusions. To disable the rate lock if selected: 1. Press the d button to access the options menu. To change Infusion Setup 2. Select the UNLOCK RATE option using the f keys and press the OK softkey. To enable the rate lock if not selected: 1. Press the d button to access the options menu. 2. Select Infusion Setup. 1. Press the d button to access the options menu. 2. Select RATE LOCK and press the OK softkey. ? Infusion Setup 3. Select Infusion Setup required and press the OK softkey. 1000PB01453 Iss. 1 9/24 Alarms and Warnings Alarms are indicated by a combination of an audible alarm, flashing alarm indicator and a descriptive message in the display. 1. First press the c button to silence the alarm for a maximum of 2 minutes*, then check the display for an alarm message. Press CANCEL to cancel the alarm message. 2. If the infusion has stopped, rectify the cause of the alarm then press the b button to resume the infusion. Display Description and Troubleshooting Guide DRIVE DISENGAGED The drive system has been disengaged during operation. Check the finger grips and the position of the syringe. OCCLUSION Pumping pressure has reached the alarm limit. Squeeze the finger grips on the plunger holder to release the drive mechanism and relieve any excessive pressure in the syringe and IV Infusion set. Identify and remove the cause of the blockage in the drive, syringe, or administration system before restarting the infusion. CHECK SYRINGE Incorrect size of syringe has been fitted, the syringe has not been positioned correctly or has been disturbed during operation. Check the syringe location and the position. BATTERY LOW Battery charge low with 30 minutes operation remaining. Battery indicator will flash and after 30 minutes a continuous audible alarm will indicate that the battery is exhausted. Reconnect to the AC power supply to continue operation and charge the internal battery. BATTERY EMPTY NEAR END OF INFUSION The internal battery is exhausted. Connect the pump to the AC power supply. The pump is nearing the end of the infusion.This value can be configured. END OF INFUSION The pump has reached the end of the infusion. A pre-set volume will remain in the syringe to minimise the risk of the infusion of air bubbles into the set. This value can be configured. TITRATION NOT CONFIRMED The infusion rate has been changed, but has not been confirmed and 2 minutes has expired without any operation. Press the c button to silence the alarm, then press the CANCEL softkey to clear this message and silence the alarm. Check infusion rate and confirm by pressing the b button or press the h button to revert to the previous rate. Press the b button to start infusion. (This alarm only occurs if rate titration is enabled). VTBI DONE AC POWER FAIL The pre-set Volume To Be Infused is complete. AC Power has been disconnected and the pump is operating on battery power. (Infusion continues) Reconnect AC power supply or press the c button to silence the alarm and continue with battery operation. The alarm will automatically cancel if the AC power supply is reconnected. Error Code and Message The alarm system has detected an internal malfunction. Note the malfunction code. Remove pump from service for examination by a qualified service engineer. ATTENTION (with “3 Beeps”) Three beeps will sound if the pump has been left ON for more than 2 minutes* (referred to as CALLBACK in the log) without starting the operation. Press the c button to silence the alarm for a further 2 minutes*. Alternatively press and hold down the c button and wait for 3 beeps in succession, this will put the warning alarm on standby for 15 minutes. DOSE WOULD EXCEED The infusion rate has been set to a value which exceeds a Guardrails® Soft Alert. Check infusion setting, to continue with infusion at set rate press the b button and then confirm OVERRIDE LIMIT by pressing the YES softkey. If OVERRIDE LIMIT is not required press the NO softkey and adjust rate below Guardrails® Soft Alert. DOSE UNDER The infusion rate has been set to a value which is under a Guardrails® Soft Alert. Check infusion setting, to continue with infusion at set rate press the b button and then confirm OVERRIDE LIMIT by pressing the YES softkey. If OVERRIDE LIMIT is not required press the NO softkey and adjust rate above Guardrails® Soft Alert. DOSE NOT PERMITTED The infusion rate has been set or has attempted to be set above a Guardrails® Hard Limit. Check infusion setting and adjust rate to appropriate required rate. Alarm Indicator Colour AMBER RED Alarms indicated AC POWER FAIL; NEAR END OF INFUSION; VTBI DONE (KVO or CONTINUE), ATTENTION; TITRATION NOT CONFIRMED; BATTERY LOW. All others. *Configurable option. 1000PB01453 Iss. 1 10/24 Configured Options This section comprises of a list of options which are configurable. Some can be entered via the pump configuration menu (available in Technician Mode) and others through the Guardrails® Editor Software. Enter the access code on Asena® GH Syringe Pump for Configured Options, see the Technical Service Manual for details. Important: Access codes should only be entered by qualified technical personnel. Use Guardrails® Editor to configure general options, drug library and units enabled for each profile and to configure Syringe Brands and Models to be enabled. Contrast Clock Set 1. Select CLOCK SET from the Configured Options menu using the f keys and press the OK softkey. 2. Use the f keys to adjust the date displayed, pressing the NEXT softkey to access the next field. 3. When the correct time and date are displayed press the OK softkey to return to the Configured Options menu. This option is used to set the contrast on the pump display. 1. Select CONTRAST from the Configured Options menu using the f keys and press the OK softkey. 2. Use the f keys to select a contrast ratio value. The contrast of the display will change when scrolling through the numbers. 3. When the desired value has been reached press the OK softkey to return to the Configured Options menu. Language This option is used to set the language of messages shown on the pump display. 1. Select LANGUAGE from the Configured Options menu using the f keys and press the OK softkey. 2. Use the f keys to select the language. 3. When the desired language has been selected press OK to return to the Configured Options menu. Asena® GH Syringe Pump General Options 1. Select GENERAL OPTIONS from the Configured Options menu using the f keys and press the OK softkey. 2. Select the option you wish to enable/disable or adjust and press the MODIFY softkey. 3. When all the desired modifications have been carried out press the OK softkey. 4. Either select the next configuration option from the menu or turn the pump OFF, returning it to operation as required. NURSE CALL FITTED Enables Nurse Call and allows RS232 selection. (hardware option). NURSE CALL INVERT When enabled, the nursecall output is inverted. RS232 SELECTED Sets the pumps communications to use RS232 (hardware option). Guardrails® Editor Software Profile Configuration The following options are only configurable via the Guardrails® Editor Software (PC based), see Guardrails® Editor Directions For Use (1000PB01398) for details on how to configure Profile Configurations. Quiet Mode Mode to silence key press tones and power down sequence. Audio Volume The audio alarm volume of the pump (high, medium or low). Auto Night Mode Main Display (Backlight) dims between hours 21:00 and 06:00. AC Fail The AC Power Failure Alarm can be set to sound or be silent if the AC power is disconnected. Auto Save Feature to retain previous settings when pump is switched on. Event Log The event log can be set to be displayed or not on main display. Events still recorded in event log if disabled. Battery Icon Indicator displaying the remaining estimated battery capacity. Callback Time Adjusts the length of time before the pump sounds the call back alarm. Drug Override Mode Always - Any changes made to the dose rate that are outside of the Guardrails® Soft Alerts will require confirmation before starting infusion. Smart - Confirmation of setting will be required on first dose rate set outside of the Guardrails® Soft Alert. Any subsequent changes will not require confirmation until after the dose rate has been confirmed inside the Guardrails® Soft Alert limits. Additionally any changes in dose rate from above a Soft Alert Max to below a Soft Alert Min or from below a Soft Alert Min to above a Soft Alert Max will also need to be confirmed. 1000PB01453 Iss. 1 11/24 Configured Options (Continued) Guardrails® Editor Software Profile Configuration (Continued) Maximum Pressure The maximum occlusion pressure alarm level that can be selected during an infusion. Back Off An automatic feature which is activated following an occlusion. The pump action reverses and pumps backwards to release the pressure which has built up in the infusion system, this minimises the post occlusion bolus. Pressure Display Sets whether the Pressure Information is available on the main display. Default Weight The default patient weight in kg. Maximum Weight The maximum patient weight in kg. This is a Guardrails® Soft Alert and can be overridden. Minimum Weight The minimum patient weight in kg. This is a Guardrails® Soft Alert and can be overridden. Rate Lock Anti-tamper feature which prevents rate changes, bolus operations and powering pump down. Rate Titration Feature to adjust the infusion rate while the pump is infusing, without putting the pump on hold. Cap Rate The maximum value for infusion rate. Cap Bolus Rate The maximum value for bolus rate. Purge Rate The rate used during purge operation. Purge Volume Limit The maximum permissible purge volume. Purge Syringe Feature which prompts the user to purge the extension set prior to the start of the infusion. Manual Bolus Bolus delivered by manually moving the plunger mechanism during an infusion or while on hold. Volume infused displayed will be increased accordingly. KVO Sets the Keep Vein Open (KVO) rate at which the pump will operate when End of Infusion (EOI) is reached. Also allows KVO at EOI to be disabled. Near End of Infusion Point Sets the Near End Of Infusion warning time, as time left to End Of Infusion. End of Infusion % Sets the End Of Infusion point, as a percentage of syringe volume. VTBI Clear Rate Infusion rate will be set to zero when VTBI has been completed. The following configurations are only used when the Asena® GH Syringe Pump is being used in ml/h or Dosing Only modes. (If a drug is selected then the drug's own configuration settings are used.) Bolus Bolus feature can be set to OFF, HANDS ON or HANDS ON & HANDS FREE. Default Bolus Rate The default value for bolus rates. Max Bolus Volume The maximum permissible bolus volume. Occlusion Alarm Pressure The default occlusion pressure alarm level. Units Enabled for Dosing Only Dosing only mode on an Asena® Syringe Pump allows the pump to be set-up with a dosing protocol with no drug selected. Only the dosing units selected in Units Enabled for Dosing Only will be available for selection when the Asena® Syringe Pump is in Dosing Only mode. Important information: The approved Data Set contains configurable option values per profile. The originator and approvers of the Data Set should be aware that, unless a rationale for safety is provided, it is not recommended to set the callback time to a value greater than the default setting of 2 minutes since doing so would not be in compliance with EN60601-2-24:1998 standard. 1000PB01453 Iss. 1 12/24 Configured Options (Continued) Guardrails® Editor Software Profile Drug library The following drug parameters are only configurable via the Guardrails® Editor Software (PC Based), see Guardrails® Editor Directions For Use (1000PB01398) for details on how to configure Profile Drug Library, and are used when the Asena® GH Syringe Pump is being used with a drug name selected. Concentration Limits (Min & Max) These define the range over which the drug concentration can be modified during programming of the Asena® GH Syringe Pump. Continuous Dose Rate Units The continuous dose rate units. Can be based on patient weight. Hard Limit Max The maximum allowed continuous dose rate. Soft Alert Max The continuous dose rate value above which override confirmation is required. Soft Alert Min The continuous dose rate value below which override confirmation is required. Default The default continuous dose rate offered when the drug is selected. Bolus Bolus feature can be set to OFF, HANDS ON or HANDS ON & HANDS FREE. Bolus Dose Units The bolus dose units. Can be based on patient weight. Hard Limit Max The maximum allowed bolus dose. Soft Alert Max (HANDS FREE only) The bolus dose value above which override confirmation is required. Soft Alert Min (HANDS FREE only) The bolus dose value below which override confirmation is required. Default (HANDS FREE only) The default bolus dose offered. Bolus Rate Default Occlusion Alarm Pressure The default value for bolus rate in ml/h. The default occlusion alarm pressure level. 1000PB01453 Iss. 1 13/24 Specifications Infusion Specifications Maximum infusion rate can be set as part of the configuration. 0.1 ml/h - 150ml/h 5 ml syringes 0.1 ml/h - 300 ml/h 10 ml syringes 0.1 ml/h - 600 ml/h 20 ml syringes 0.1 ml/h - 900 ml/h 30 ml syringes 0.1 ml/h - 1200 ml/h 50 ml syringes The Volume Infused range is 0.0 ml - 9990 ml. Bolus Specifications Maximum Bolus rates can be set as part of the configuration. Bolus rates are user adjustable. 10 ml/h - 150 ml/h 5 ml syringes 10 ml/h - 300 ml/h 10 ml syringes 10 ml/h - 600 ml/h 20 ml syringes 10 ml/h - 900 ml/h 30 ml syringes 10 ml/h - 1200 ml/h 50 ml syringes The bolus volume limit can be set as part of the configuration. Minimum: 0.5 ml; maximum 25.0 ml Increments of 0.1 ml; default 5.0 ml During BOLUS the pressure limit alarms are temporarily increased to their maximum level. Critical Volume The bolus which can occur in the event of a single internal fault condition with a 50 ml syringe is: Maximum Overinfusion - 0.25 ml Purge Specifications The purge rate is limited to the maximum rate for the syringe and can be set as part of the configuration: 100 ml/h - 500 ml/h. The purge volume range is 0.5 ml - 5 ml. During PURGE the pressure limit alarms are temporarily increased to their maximum level. Keep Vein Open (KVO) Rate 0.1 ml/h - 2.5 ml/h End Of Syringe Rate Stop, KVO (0.1 ml/h to 2.5 ml/h), or set rate if lower than KVO. Volume To Be Infused (VTBI) 0.1 ml - 100 ml, 1 min - 24 h VTBI Done Rate Stop, KVO (0.1 ml/h to 2.5 ml/h), set rate if lower than KVO or continue at set rate. Near End Of Infusion Alarm 1 min - 15 min to end of infusion, or 10% of syringe volume, whichever is smaller. End Of Infusion (EOI) Alarm 0.1% - 5% of syringe volume Electrical Classification Class I product. Continuous Mode Operation, Transportable Maximum Pumping Pressure Limit Highest alarm level 1000 mmHg (nominal at L-10). Occlusion Accuracy (% of full scale) - Temp. 23°C L-0 approx. 50 mmHg ±18%* Pressure mmHg L-3 L-5 L-10 approx. approx. approx. 300 mmHg 500 mmHg 1000 mmHg ±21%* ±23%* ±28%* System Accuracy Volumetric Mean +/- 2% (nominal). Derating Temperature +/- 0.5% (5 - 40ºC) High Rates +/- 2.0% (rates > syringe volume/h eg. > 50 ml/h in a 50 ml syringe.) Important: System accuracy is +/-2% typical by volume as measured using the trumpet curve test method defined in IEC60601-2-24 at rates of 1.0 ml/h (23ºC) and above when the pump is used with the recommended syringes. Differences in factors such as size and plunger force in compatible syringes can cause variations in accuracy and trumpet curves. See also trumpet curves section in this manual. Battery Specifications Rechargeable sealed NiMH. Automatically charges when the pump is connected to AC power. Battery life is typically 4h from fully charged @ 5.0 ml/h & 20ºC under normal conditions. Charging takes 2½ hours from discharge to 90% charge. Memory Retention The electronic memory of the pump will be retained for more than 6 months when not powered up. Fuse Type 2 x T 1.25A, slow blowing. AC Power Supply 115/230VAC, 50/60 Hz, 20VA (nominal). Case Material GE Cycolac S157 (fire retardant to UL94-V2) Dimensions 310 mm (w) x 121 mm (h) x 200 mm (d). Weight: 2.5 kg (excluding power cable). Alarm Conditions Drive Disengaged Occlusion Check Syringe Battery Low / Battery Empty Near End Of Infusion End of Infusion VTBI Done AC Power Failure Internal Malfunction Attention (Nurse Callback) Titration not confirmed Dose Would Exceed Dose not Permitted Dose Under Environmental Specifications Operating Temperature +5°C - +40°C Operating Relative Humidity 20% - 90% Operating Atmospheric Pressure 700 mbar - 1060 mbar Transport Temperature -30°C - +50°C Transport Relative Humidity 10% - 95% Transport Atmospheric Pressure 500 mbar - 1060 mbar Electrical/Mechanical Safety Complies with IEC60601-1 (EN60601-1) and IEC60601-2-24 (EN60601-2-24). EMC Complies with EN 60601-1-2:1993 and EN60601-2-24. Data Set Specification A maximum of 10 profiles can be set with a maximum of 100 drugs per profile. See Guardrails® Editor DFU (1000PB01398) for more details. * Using most common 50ml syringes under normal conditions (95% confidence / 95% of pumps). 1000PB01453 Iss. 1 14/24 Compatible Accessories The pump is calibrated and labelled for use with single-use disposable Luer-lock syringes. Only use the size and type of syringe specified on the pump display. The full list of permitted syringe models is dependent on the software version of the pump. IVAC® Syringe AstraZeneca B Braun Omnifix B Braun Perfusor BD Plastipak BD Perfusor BD Precise Codan Codan Perfusion Fresenius Injectomat Nipro Pentaferte Rapiject* Monoject** Terumo 5ml 10ml 20ml 30ml 9 9 9 9 9 9 9 9 9 9 9 9 9 9 9 9 9 9 9 9 9 9 9 9 9 9 9 9 50ml 9 9 9 9 9 9 9 9 9 9 9 9 9 9 9 * - The Rapiject 50ml syringe is a specialised syringe with a large diameter barrel. To provide protection against accidental dislodging always ensure the infusion line is secured using the infusion set hook - see Loading a Syringe section. ** - TYCO / Healthcare KENDALL - MONOJECT. Recommended Accessory - Asena® Docking Station Recommended accessory to use in conjunction with the Asena® GH Syringe Pump is: The Asena® DS Docking Station 1000PB01453 Iss. 1 15/24 Compatible Accessories - Extension Sets The pump uses standard, single-use, disposable extension sets and syringes with Luer-lock connectors. The user is responsible for verifying the suitability of a product used if it is not ALARIS recommended. G40015 Standard PVC Syringe Extension Set (150 cm). Priming Volume: 2.6ml G40020B Standard PVC Syringe Extension Set (200 cm). Priming Volume: 1.5ml Opaque Sets G40215 Opaque Amber PVC Syringe Extension Set (150 cm). Priming Volume: 1.2ml G40320 Opaque White PVC Syringe Extension Set (200 cm). Priming Volume: 3.6ml Low Sorbing Sets G40615 Polyethylene Syringe Extension Set (150 cm). Priming Volume: 1.5ml G40620 Polyethylene Syringe Extension Set (200 cm). Priming Volume: 1.6ml G40720 Polyethylene Lined Syringe Extension Set with clamp. (200 cm). Priming Volume: 1.5ml Patient Controlled Analgesia (PCA) Sets 30822 PVC Syringe Extension Set with clamp (152 cm). Priming Volume: 0.5ml 30832 PVC ‘Y’ Syringe Extension Set with back check valve and 2 clamps (178 cm). Priming Volume: 1.5ml 30842 PVC Syringe Extension Set with back check valve, ‘Y’ Site and clamp (32 cm). Priming Volume: 1.2ml 30852 PVC ‘Y’ Syringe Extension Set with anti-siphon valve, back check valve and 2 clamps (183 cm). Priming Volume: 1.8ml 30862 PVC Syringe Extension Set with anti-siphon valve and clamp (156 cm). Priming Volume: 0.6ml For extension set replacement interval, refer to facility protocol and/or government standards (such as, CDC guidelines in the United States). Carefully read the Directions For Use supplied with the extension set prior to use. Please note these drawings are not to scale. 1000PB01453 Iss. 1 16/24 Maintenance Routine Maintenance Procedures Replacing the AC Fuses To ensure that this pump remains in good operating condition, it is important to keep it clean and carry out the routine maintenance procedures described below. All servicing should only be performed by a qualified service engineer with reference to the Technical Service Manual (1000SM00001) for this product. If the pump continually illuminates the battery symbol and the AC power indicator light does not illuminate when the pump is connected to the AC power supply and switched ON, suspect that either the power supply fuse in the AC plug or the internal fuses have blown. Refer to the Technical Service Manual for the access code for technical service features. Interval Routine Maintenance Procedure As required Thoroughly clean external surfaces of the pump before and after prolonged period of storage. First check the power supply fuse in the AC mains plug. If the AC power indicator light does not illuminate remove the pump from service. It is recommended that only a qualified service engineer replaces the AC fuses. For further information regarding the replacement of internal AC fuses refer to the Technical Service Manual. At least once 1. Inspect AC power supply plug and cable for per year damage. 2. Perform functional tests as outlined in the Technical Service Manual. Battery Operation 3. Operate the pump on battery power until the battery low alarm then charge the battery to confirm battery operation and charging. The internal rechargeable battery allows continued operation when the AC power is unavailable, for example during patient transfer or AC power failure. A fully charged battery will provide over 4 hours of operation at typical infusion rates. From the battery low alarm it will take about 2 hours to fully recharge when reconnected to the AC power supply, whether the pump is in use or not. Cleaning and Storage Before the transfer of the pump to a new patient and periodically during the use, clean the pump by wiping over with a lint-free cloth lightly dampened with warm water and a standard disinfectant / detergent solution. Disinfectants which are known to be corrosive to metals must not be used. These include the following disinfectant types: NaDcc (such as Presept), The battery is maintenance free, sealed Nickel Metal Hydride and requires no routine servicing. However, to achieve optimum operation, ensure that the battery is fully recharged after full discharge, before storage, and at regular 3 month intervals during storage. Charge retention will eventually degrade. Where retention is critical the internal battery should be replaced every 3 years. Hypochlorites (such as Chlorasol), Aldehydes (such as Cidex), Cationic Surfactants (such as Benzalkonium Chloride). It is recommended that only a qualified service engineer replaces the battery. For further information regarding the replacement of batteries refer to the Technical Service Manual. Use of Iodine (such as Betadine) will cause surface discoloration. Concentrated Isopropyl alcohol based cleaners will degrade plastic parts. Disposal Recommended cleaners are: Brand Concentration Hibiscrub 20% (v/v) Virkon 1% (w/v) The syringe and extension lines are disposable single use items and should be discarded after use according to their manufacturers’ instructions. The pump should be disposed of taking environmental factors into consideration. To ensure no risk or hazard remove the internal rechargeable battery and the Nickel Metal Hydride battery from the control board and dispose of as outlined by the local country regulations. Do not send back to the manufacturer. All other components can be safely disposed of in the normal manner. If the pump is to be stored for an extended period it should be first cleaned and the internal battery fully charged. Store in a clean, dry atmosphere at room temperature and, if available, employ the original packaging for protection. Once every 3 months during storage, carry out functional tests as described in the Technical Service Manual and ensure that the internal battery is fully charged. Important: Before cleaning always switch OFF and disconnect from the AC power supply. Never allow liquid to enter the casing and avoid excess fluid build up on the pump. Do not use aggressive cleaning agents as these may damage the exterior surface of the pump. Do not steam autoclave, ethylene oxide sterilise or immerse this pump in any fluid. 1000PB01453 Iss. 1 Test Routines The test routines are designed to allow confirmation of many of the pump functions, defaults and calibrations without requiring internal inspection. They do not represent a full calibration check. Important: See the Technical Service Manual for a complete list of the test procedures, access codes and calibration procedures. 17/24 Occlusion Pressure Limits Time to alarm following occlusion is achieved in less than 30 minutes at rates of 1 ml/h and higher by the appropriate selection of occlusion levels. The following graphs show the typical values for time to alarm and bolus volume that can be expected in the event of an occlusion when the BD Plastipak 50 ml syringe is selected with a G40020B standard extension set. Time to alarm - 5.0 ml/h Time to alarm - 1.0 ml/h typical hr:min:sec hr:min:sec typical Occlusion Level Occlusion Level Bolus Volume with back off Bolus Volume without back off typical ml ml typical Occlusion Level Occlusion Level Tests at low alarm levels may alarm immediately - the force at these levels is commonly less than the friction in the syringe (with no additional fluid pressure). The result is that the pressure relating to the low forces will be less than the nominal quoted occlusion pressure. Bolus volume following occlusion will be minimised by the back off feature if enabled. The back off will reduce the line pressure by removing the volume stored in the occluded line and deducting this volume from the volume infused. 1000PB01453 Iss. 1 18/24 Start-up Curves & Trumpet Curves In this pump, as with all infusion systems, the action of the pumping mechanism and variations in individual syringes cause short-term fluctuations in rate accuracy. The following curves show typical performance of the system in two ways: 1) the delay in onset of fluid flow when infusion commences (start-up curves)., and 2) the accuracy of fluid delivery over various time periods is measured (trumpet curves). The start-up curves represent continuous flow versus operating time from the start of the infusion. They exhibit the delay in onset of delivery due to mechanical compliance and provide a visual representation of uniformity. Trumpet curves are derived from the second hour of this data. Tests performed per IEC60601-2-24 standard. Trumpet curves are named for their characteristic shape. They display discrete data averaged over particular time periods or 'observation windows', not continuous data versus operating time. Over long observation windows, short term fluctuations have little effect on accuracy as represented by the flat part of the curve. As the observation window is reduced, short term fluctuations have greater effects as represented by the "mouth" of the trumpet. Knowledge of system accuracy over various observation windows may be of interest when certain drugs are being administered. Short term fluctuations in rate accuracy may have clinical impact depending on the half-life of the drug being infused, therefore the clinical effect cannot be determined from the trumpet curves alone. Important: Start-up and trumpet curves may not be indicative of operation under negative pressure. Differences in factors such as size and plunger force in compatible syringes produced by other manufacturers can cause variations in accuracy and trumpet curves as compared to those represented. Additional curves for compatible syringes are available upon written request. For applications where flow uniformity is a concern, rates of 1.0 ml/hr or above are recommended. Trumpet Curve. BD Plastipak 50ml @ 0.1ml/h (Initial Period) Error (%) Rate (ml/h) Start-up Trend. BD Plastipak 50ml @ 0.1ml/h Time (mins) Observation Window (mins) Trumpet Curve. BD Plastipak 50 ml @ 1.0 ml/h (Initial Period) Error (%) Rate (ml/h) Start-up Trend. BD Plastipak 50 ml @ 1.0 ml/h Observation Window (mins) Time (mins) Trumpet Curve. BD Plastipak 50 ml @ 5.0 ml/h (Initial Period) Error (%) Rate (ml/h) Start-up Trend. BD Plastipak 50 ml @ 5.0 ml/h Observation Window (mins) Time (mins) 1000PB01453 Iss. 1 19/24 IrDA, RS232 and Nursecall Specification IrDA / RS232 / Nursecall Feature The IrDA (or RS232 / Nursecall optional feature) is a feature on Asena® Syringe Pumps that allows the pump to be connected to a PC or other Asena® Syringe Pumps. This allows data to be transfered between the Asena® Syringe Pump and a PC or another Asena® Syringe Pumps, (e.g. Data Sets to be uploaded to the pump, Event Reports to be downloaded from the pump and the pump to be monitored remotely via a suitable central monitoring or computer system). Important: The nursecall interface provides a remote backup to the internal audible alarm. It should not be relied upon to replace monitoring of the internal alarm. Refer to the Technical Service Manual for further information regarding the RS232 interface. RS232 / Nursecall Connection Data Nursecall Specification Connector D Type - 9 Pin TXD/RXD EIA RS232-C Standard TXD Output Voltage Range Minimum: -5V (mark), +5V (space) Typical: -7V (mark), +7V (space) with 3K load to ground RXD Input Voltage Range -30V - +30V max. RXD Input Thresholds Low: 0.6V minimum / High: 3.0V maximum RXD Input Resistance 3K minimum Enable Active, Low:-7V to -12V Active, High:+7V to +12V, powers up the isolated RS232 circuitry The assessment for the suitability of any software used in the clinical environment to receive data from the pump lies with the user of the equipment. This software should include detection of the disconnection or other failure of the RS232 cable. The protocol is detailed in the Technical Service Manual and is for general information only. Any connected analogue and digital components are required to meet EN60950 for data processing and EN60601 for medical devices. Anyone connecting additional devices to the signal input or output is a system configurator and responsible for meeting the requirements of the system standard EN60601-1-1. Inactive: Floating/open circuit, allows isolated RS232 circuitry to power down. Isolation Socket/Pump 1.5kV (dc, or ac peak) Baud Rate 38.4 kBaud Start Bits 1 Start Bit Data Bits 8 Data Bits Parity Odd Parity / No Parity Stop Bits 1 stop bit Nurse Call Relay Contacts Pins 1, 8 + 9, 30V dc, 1A rating Typical Connection Data 1 Nursecall (Relay) Normally Closed (NCC) 2 Transmit Data (TXD) Output 3 Received Data (RXD) Input 4 Power Input (DSR) 5 Ground (GND) 6 Not used 7 Power Input (CTS) IrDA 8 Nursecall (Relay) Normally open (NCO) Baud Rate 38.4 kBaud 1000PB01453 Iss. 1 9 Nursecall (Relay) Common (NC COM) 20/24 Service Contacts For service contact your local ALARIS Medical Systems® Affiliate Office or Distributor. ALARIS Medical Systems® Service Centre Addresses: AE DE IT US ALARIS Medical Systems Middle East Office, PO Box 5527, Dubai, United Arab Emirates. Tel: (971) 4 28 22 842 Fax: (971) 4 28 22 914 ALARIS Medical Deutschland, GmbH, Pascalstr. 2, 52499 Baesweiler, Deutschland. Tel: (49) 2401 604 0 Fax: (49) 2401 604 121 ALARIS Medical Italia S.P.A. Via Ticino 4, 50019 Sesto Fiorentino, Firenze, Italia. Tél: (39) 055 34 00 23 Fax: (39) 055 34 00 24 ALARIS Medical Systems, Inc. 10221 Wateridge Circle, San Diego, CA 92121, USA. Tel: (1) 800 854 7128 Fax: (1) 858 458 6179 AU ES NL ZA ALARIS Medical Holland, B.V., Kantorenpand “Hoefse Wing”, Printerweg, 11, 3821 AP Amersfoort, Nederland. Tel: (31) 33 455 51 00 Fax: (31) 33 455 51 01 ALARIS Medical S.A. (Pty) Ltd, Unit 2 Oude Molen Business Park, Oude Molen Road, Ndabeni, Cape Town 7405, South Africa. Tel: (27) (0) 860 597 572 Tel: (27) 21 510 7562 Fax: (27) 21 5107567 ALARIS Medical Australia Pty Ltd, ALARIS Medical Espãna, S.L., Avenida Valdeparra 27, 8/167 Prospect Highway, Edificio Alcor, Seven Hills, NSW 2147, 28108 - Alcobendas, Madrid, Australia. España. Tel: (61) 2 9838 0255 Tel: (34) 91 657 20 31 Fax: (61) 2 9674 4444 Fax: (34) 91 657 20 42 Fax: (61) 2 9624 9030 BE FR NO ALARIS Medical Belgium B.V., Otto De Mentockplein 19, 1853 Strombeek - Bever, Belgium. Tel: (32) 2 267 38 99 Fax: (32) 2 267 99 21 ALARIS Medical France, S.A., 95, rue Péreire, 78105 St Germain en Laye Cedex. France. Tél: (33) 0 820 821 123 Fax: (33) 1 30 61 22 23 ALARIS Medical Norway A/S Solbråveien 10 A, 1383 ASKER, Norge. Tel: (47) 66 98 76 00 Fax: (47) 66 98 76 01 CA GB - Manufacturer’s Address: NZ ALARIS Medical Canada, Ltd, 235 Shields Court, Markham, Ontario L3R 8V2, Canada. Tel: (1) 905-752-3000 Tel: 800-908-9918 Fax: (1) 905-752-3304 ALARIS Medical UK Ltd, The Crescent, Jays Close, Basingstoke, Hampshire, RG22 4BS, United Kingdom. Tel: (44) 0800 389 6972 Fax: (44) 1256 388 411 ALARIS Medical NZ Ltd, Unit 14, 13 Highbrook Drive, East Tamaki, Auckland, New Zealand. Tel: (64) 9 273 3901 Fax: (64) 9 273 3098 HU CN ALARIS Medical Hungary Döbrentei tér 1, H-1013 Budapest, Magyar. Tel: (36) 14 88 0232 Tel: (36) 14 88 0233 Fax: (36) 12 01 5987 ALARIS Medical Nordic, AB Hammarbacken 4B, 191 46 Sollentuna, Sverige. Tel: (46) 8 544 43 200 Fax: (46) 8 544 43 225 ALARIS Medical Systems, Shanghai Representative Office, Suite 9B, Century Ba-Shi Building, 398 Huai Hai Rd(M.), Shanghai 200020, China. Tel: (56) 8621-63844603 Tel: (56) 8621-63844493 Fax: (56) 8621-6384-4025 SE Document History Revision CO Number Date Description of Change/Changed by Software Revision (Pump) 1 4774 01/01/04 Initial release - Ian Tyler V3.1.x 1000PB01453 Iss. 1 21/24 Warranty ALARIS Medical Systems, Inc. (herein after referred to as "ALARIS Medical Systems") warrants that: (A) Each new infusion instrument (pump, controller or peripheral instrument) is free from defects in material and workmanship under normal use and service for a period of two (2) years from the date of delivery by ALARIS Medical Systems to the original purchaser. (B) Each new accessory is free from defects in material and workmanship under normal use and service for a period of ninety (90) days from the date of delivery by ALARIS Medical Systems to the original purchaser. (C) Each Mains Cable, Battery, Flow Sensor (ECD) and non-disposable probe is free from defects in material and workmanship under normal use and service for a period of ninety (90) days from the date of delivery by ALARIS Medical Systems to the original purchaser. (D) Each new Thermometer is free from defects in material and workmanship under normal use and service for a period of one (1) year from the date of delivery by ALARIS Medical Systems to the original purchaser. If any product requires repair during the applicable warranty period, the purchaser should communicate directly with its local ALARIS Medical Systems® service centre to determine the appropriate service facility. Except as provided otherwise in this warranty, repair or replacement will be carried out at ALARIS Medical Systems' expense. The product requiring service should be returned promptly, properly packaged, and postage prepaid by purchaser. Loss or damage in return shipment to ALARIS Medical Systems shall be at purchaser's risk. In no event shall ALARIS Medical Systems be liable for any incidental, indirect or consequential damages in connection with the purchase or use of any ALARIS Medical Systems® product. This warranty shall apply solely to the original purchaser. This warranty shall not apply to any subsequent owner or holder of the product. Furthermore, this warranty shall not apply to, and ALARIS Medical Systems shall not be responsible for, any loss or damage arising in connection with the purchase or use of any ALARIS Medical Systems® product which has been: (A) repaired by anyone other than an authorised ALARIS Medical Systems® service representative; (B) altered in any way so as to affect, in ALARIS Medical Systems' judgement the stability or reliability of the product or has had the product's serial or lot number altered, effaced or removed; (C) subjected to misuse or negligence or accident; or (D) improperly maintained or used in any manner other than in accordance with the written instructions furnished by ALARIS Medical Systems. This warranty is in lieu of all other warranties, express or implied, and of all other obligations or liabilities of ALARIS Medical Systems, and ALARIS Medical Systems neither assumes nor authorises any representative or other person to assume for it any other liability in connection with the sale of ALARIS Medical Systems® products. ALARIS MEDICAL SYSTEMS DISCLAIMS ALL OTHER WARRANTIES, EXPRESS OR IMPLIED, INCLUDING ANY WARRANTY OF MERCHANTABILITY OR FITNESS FOR A PARTICULAR PURPOSE. (1000PB01391 Iss 2) 1000PB01453 Iss. 1 22/24 Pumps, Accessories and Spare Parts Please complete the details below and either fax or post this form to ALARIS Medical Systems or your nearest authorised distributor (see Service Contacts section). Syringes and Extension Sets Asena® Infusion System The complete range of syringe pump products in the Infusion System product family are: Part Number Description Asena® Quantity The Asena® GH Syringe Pump uses standard, single-use, disposable extension lines and syringes with Luer-lock connectors, of type designed for use on syringe pumps. Part Number Description 80013UN00* Asena® GS Syringe Pump 80023UN00* Asena® GH Syringe Pump 80033UND0* Asena® CC Syringe Pump 80043UN00* Asena® TIVA Syringe Pump G40020B 80083UN00 Asena® DS Docking Station G40215 80093UN00 Asena® IDS Docking Station 274 Asena® Transporter 80033UND1-G Asena® CC Syringe Pump with Guardrails® Safety Software (with RS232 fitted) 80023UN01-G Asena® GH Syringe Pump with Guardrails® Safety Software (with RS232 fitted) 30602N G40320 G40615 G40620 G40720 This Asena® GH Syringe Pump has been designed to allow simple and low cost servicing. Standard components are employed where possible so that no special test or calibration tools are required. However, the following items may be useful for general servicing. Description Standard PVC Syringe Extension Set (150 cm). Standard PVC Syringe Extension Set (200 cm). Opaque Amber PVC Syringe Extension Set (150 cm). Opaque White PVC Syringe Extension Set (200 cm). Polyethylene Syringe Extension Set (150 cm). Polyethylene Syringe Extension Set (200 cm). Polyethylene Lined Syringe Extension Set with clamp (200 cm). Spare Parts Service Equipment Part Number IVAC® 50ml Luer-lock Syringe G40015 * All Asena® Syringe Pumps are also available with a RS232 option fitted. Quantity Quantity A comprehensive list of spare parts for this pump is included within the Technical Service Manual. For the part number please refer to summary parts list below: Part Number Description 1000SM00001 0000TG00020** Occlusion Test Gear Quantity Technical Service Manual Asena® Syringe Pumps 1000SP01122 Internal Battery Pack 0000TG00080** Linear Speed Test Gear 0000JG00047 Cradle, Support (front) 0000TG00095** 1000SP00065 1001FAOPT91 AC Power Lead - UK 1001FAOPT92 AC Power Lead - European Asena® Syringe Pump, Calibration tool Calibration tools kit ** Included in the calibrations tools kit (1000SP00065), which also includes other additional test equipment. Guardrails® Safety Software The following item may be useful when using the Asena® GH Syringe Pump with Guardrails® Safety Software. Part Number Description 1000SP00562 Guardrails® Quantity Editor PC Software Kit Name: . . . . . . . . . . . . . . . . . . . . . . . . . . . . . . . Company Name: . . . . . . . . . . . . . . . . . . . . . . . . . . . . . . . . . . . . . . . . . . . . . . . . .............................................................................................. Address: . . . . . . . . . . . . . . . . . . . . . . . . . . . . . . . . . . . . . . . . . . . . . . . . . . . . . . . . . . . . . . . . . . . . . . . . . . . . . . . . . . . . . . . . . . . . . . .............................................................................................. ................................................................ Telephone: . . . . . . . . . . . . . . . . . . . . . . . . . . . . . . . . . . . Facsimile: ........................... Signature: . . . . . . . . . . . . . . . . . . . . . . . . . . . . . . . . . . . . Date: . . . . . . . . . . . . . . . . . . . . . . . . . . . . . . . . . . . . . . . . 1000PB01453 Iss. 1 Postcode: . . . . . . . . . . . . . . . . . . . 23/24 Page intentionally left blank. 1000PB01453 Iss. 1 24/24 Manufacturers Patent Notice This pump is designed and manufactured in the U.K. by ALARIS Medical UK Ltd. ALARIS Medical UK Ltd reserves the right to alter product specifications without notice. AU Patent No. 723,884; 144,125; 144,122; 144,123; CA Patented/Breveté 90,906; 91,584; EP0649316B1; FR Brevete No. 997,137; DE D.B.P. No. 49910883.3; IE Patent No. D13001; D13003; D13007; JP Patent No. 1,117,996 ; 1,117,997 ; 1,117,999 ; U.S. Patent No. 6,407,335. Other patents pending. ALARIS Medical Systems®, Asena® and Guardrails® are registered trademarks of ALARIS Medical Systems, Inc. All other trademarks belong to their respective owners. ©2003 ALARIS Medical UK Ltd. All rights reserved. This document contains proprietary information of ALARIS Medical Systems, and its receipt or possession does not convey any rights to reproduce its contents, or to manufacture or sell any product described. Reproduction, disclosure, or use other than for the intended purpose without specific written authorization of ALARIS Medical Systems is strictly forbidden. Visit our website: www.alarismed.com