1
English
Instruction Guide
7EN210101-1
2005-10-27
Nordic Caroli 101
Prod. no. 5011001
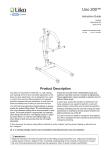
Nordic Caroli is an electrically-powered mobile lift,
designed to be used in most of the common lifting
situations, for example between the bed and a
wheelchair, to and from the toilet or bathtub and
lowering and raising patients from the floor.
Caroli can be adjusted to three different heights
to give you the most appropriate lifting range.
The mid-range is the standard position, while the
lower position may be the most suitable for lifting
children. The upper position may be needed for
higher lifts, for example to beds and gurneys that
cannot be adjusted in height.
”Caution!” triangles are used to warn of situations that demand extra care and attention.
In this document, the person being lifted is called the ”patient” and the person helping is called the ”caregiver”.
Table of contents
Safety Instructions ...................................................................................................................... 2
Product Description .................................................................................................................... 3
Assembly Instructions ............................................................................................................4-5
Charging the batteries ................................................................................................................ 5
User's Guide.............................................................................................................................. 6
Slings and accessories..........................................................................................................7-10
Simple troubleshooting ............................................................................................................. 11
Care and Maintenance ............................................................................................................. 12
Safety Instructions
Before use, make certain that:
• the lift is assembled according to the instructions
• lifting accessories are correctly applied to the lift
• the batteries have been charged for at least 10 hours
• you have read and understood the instruction guides for the lift and lifting accessories
• personnel using the equipment have received appropriate instructions and training
• you have selected the correct type, size, material, and design of slings and accessories to safely meet
the patient’s needs
Before lifting, always make certain that:
• the lifting accessories are not damaged
• the lifting accessory is correctly and securely applied to the patient, so that no personal injury can occur
• the lifting accessory is correctly applied to the lifting equipment
• the sling’s strap loops are correctly fastened to the slingbar hooks when the sling strap is extended, but before
the patient is lifted from the underlying surface
Nordic Caroli 101 is tested by an accredited testing institute and complies with the requirements of directives for
medical technical Class 1 products (MDD 93/42/EEC).
Nordic Caroli 101 complies with the requirements according to IEC 60601-1, EN 60601-1-2 and EN ISO 10535:1998.
The lift is not suitable for use in the presence of flammable mixtures.
Maximum load: 160 kg (350 lbs.)
!
Important!
Lifting and transferring a patient always involves a degree of
risk. Study the instruction guide for both lift systems and
accessories carefully. A complete understanding of the
contents of instructions is essential. Only trained personnel
should use the equipment.
Inspect the sling regularly, especially after laundering. Check
carefully for wear and damage to seams, fabric, straps and
strap loops.
Never use damaged accessories!
When in doubt, contact the manufacturer or supplier.
Make certain that the lift accessories are appropriate for the
lift you are using and for the lifting situation. Exercise caution
and care when using lift equipment and accessories.
Nordic Rehab has an agreement with Liko AB, which means
that many lift accessories from Liko can be used together
with Nordic Rehab’s lifts. Contact your distributor for more
information.
As a caregiver, you are responsible for the patient’s safety.
You must be well informed of the patient’s condition and
ability to manage the lifting situation.
Instruction guide Nordic Caroli 101 • 7EN210101-1
2
Nordic Rehab • w w w . nordicrehab.com
Product Description
1. Mast
2. Lift arm
2
14
3. Base
4. Handcontrol with cable
5. Control unit with battery, emergency stop and electrical
emergency lowering
15
7
1
6
8
6. Slingbar
13
9
4
7. Safety latch
5
8. Product decal
9. Motor/actuator for lift movement
10. Lever for base width adjustment
10
11. Rear wheel with brake
12. Front wheel
16
13. Handle
17
11
14. Flexlink
15. Emergency lowering (mechanical)
3
12
16. Locking handle
17. Charger (separate)
Lifting speed:
Batteries:
2.0 cm/s (0.8 inch./s) without load.
Two 12 V 2.9 Ah valve regulated
rechargeable gel-type leadacid
batteries.
New batteries are provided by the
supplier.
Charger:
Material:
Emergency
lowering:
Intermittent
operation:
External charger, 100-230 V, 50-60 Hz,
max 220 mA.
24 V, permanent magnetic motor
with mechanical safety mechanism.
Motor (mast):
Wheels:
Painted steel with lacquer top coat.
Mechanical (patented) and electrical.
Int. Op 10/90, active operation max 2 min.
Out of a time of 100, active must be less than 10,
however not more than 2 min.
Degree of protection:
IP X4
This device is built for indoor operation.
Standard front: 75 mm (2.95 inch.) dual.
Standard rear: 75 mm (2.95 inch.) with
brake single wheel.
Alt.: 100 mm (3.94 inch.) single wheel.
Type B according to the degree of protection against
electric chock.
Class ll equipment.
G
A
L
E
Caroli
A:
B:
Max. load
D
C
B1
F F1
B
Max.
L
A
Min. Max. Min.
B
B1
C
D
E
F
160
167
162
157
60
55
50
188
183
178
143
138
133
116
97
72-120 55-103 100-110 11/15
350
66
64
62
24
22
20
74
72
70
56
54
52
46
38
28-47 22-41
39-43
4/6
F1
G
3
76
1.2
30
Weight
Total Part
37 18
82
40
Turning
diameter
127
50
A: Capacity and weight in kg. Measures in cm.
B: Capacity and weight in lbs. Measures in inch.
* These measures depend on in which hole the mast is levelled and secured. See assembly instructions page 4.
** 11 cm (4 inch.) is standard. 15 cm (6 inch.) is valid when the wheel diameter is 100 mm (3.9 inch.).
Instruction guide Nordic Caroli 101 • 7EN210101-1
3
Nordic Rehab • w w w . nordicrehab.com
Assembly Instructions
Before assembling, check that you have the following parts:
• Lever for base width adjustment
• Mast with lift arm, lift motor, locking handles,
• Handcontrol with cable
flexlink, slingbar with safety latches and 2 pcs. of
• Bag containing instruction guide, charger,
screws (M6x12)
Allen wrench (4 mm) and label "Using the lift
• Control unit with rail
• Base
1. Remove the locking handles
from the base and place the
mast in the socket on the
base, as indicated in the
illustration.
2. Lifting height can be set at three different levels. Choose one of the three
holes, as in the illustration above. The
middle hole is recommended in most
cases. The lower hole is recommended
when extra high lifting height is desired,
and the upper hole is recommended for
lifting at a lower level. Holes are placed
at 50 mm (2 inch.) intervals.
See table on page 3.
3. Secure the mast in the desired position in the base with
the accompanying lockinghandles. Adjust the handles
so that they are vertically
aligned.
5. Affix the control unit on the mast with the screws that
were removed in step 4. Use the accompanying Allen
wrench.
4. Remove the screws (2 pcs.) placed on the mast
(see illustration). Place the control unit with the premounted rail on the mast, as shown in the illustration.
Using the lift
!
Read instruction guide!
Operation
The lift is operated up/down by
using the pushbuttons on the
handcontrol.
The base width is adjusted
manually with lever/pedal.
Emergency Lowering
- Mechanical
Turn the red emergency
lowering cylinder in
the direction shown by
the arrows.
Emergency Lowering
- Electrical
When necessary, press a narrow,
not too sharp object, in the hole
marked “down” on the electrical
power unit.
Emergency Stop
Push the red Emergency Stop
button on the control box. To
reset: Turn the button in the
direction of the arrows.
Charging the batteries
Locking the wheels
Locking the wheels can
affect stability negatively;
therefore, wheels should
only be locked during lifts
from the floor.
7EN190101-01 • © 2003 Liko AB
Charge every night after
use. Before charging, ensure
that the red Emergency Stop
button is not pushed in. Do
not charge in a wet area!
www.nordicrehab.com
7. Stick the label "Using the lift" (included in bag
containing instructions) on one side of the mast.
6. Connect cables as follows:
- Cable handcontrol to outlet 1
- Cable lift motor to outlet 2
Instruction guide Nordic Caroli 101 • 7EN210101-1
4
Nordic Rehab • w w w . nordicrehab.com
8. Mount lever for base-width adjustment:
9. Reset the emergency stop by turning the
button in the direction shown by the arrows.
• Press in the catch on the base with one finger.
• Slide lever into place.
• Turn the lever until it clicks securely in place on the base.
After assembly, check to ensure that:
• the indicator lamp on the front of the
control unit lights during charging
• that the screw and nut is securely fastened in
the bolt that holds the slingbar
• lift arm motions correspond with the
buttons on the handcontrol
• emergency lowering works properly
(mechanical and electrical)
• wheel brakes work properly
Charging the batteries
A B C
A display on the control unit indicates battery capacity. When the
handcontrol is activated, a diode/lamp lights, indicating battery capacity.
Green (A): min. 50%
Yellow (B): 25-50%
Yellow (C): 0-25%
Lamp lights for 10 seconds after activating.
Another lamp indicates that charging is in progress (D).
D
For maximum service life, it is important that batteries be
charged regularly. We recommend charging after use or each
night.
charged, the lamp shuts off. If the lamp continues to light
after 12 hours, the batteries probably need to be replaced.
Discontinue charging and replace batteries.
Maximum charge is reached after about 10 hours. When the
batteries are fully charged, the charger disconnects automatically. NOTE! An indicator lamp on the control unit lights
constantly during charging. When the batteries are fully
Never charge batteries in a wet area!
If the lift is not in daily use, we recommend that the emergency stop be pressed in after the lift has been used. This
breaks the current and conserves battery power.
Charging procedure
With external charger:
1
1. Connect charger cable to outlet for charger,
under the control unit.
2. Connect charger to power supply (100-230V~).
NOTE! The lift must not be used while connected to the
battery charger!
Old batteries are to be left to personnel authorized by Nordic Rehab,
or at the nearest station for environmental recycling.
Instruction guide Nordic Caroli 101 • 7EN210101-1
5
Nordic Rehab • w w w . nordicrehab.com
User's Guide
Operation
Caroli is operated by pressing the buttons on the handcontrol.
For raising and lowering the lift arm:
press
and
, respectively.
Directional arrows show the direction of movement.
Lifting motion stops as soon as the push-button is released.
If the battery needs charging, a lamp (A) is lit on the handcontrol.
There is, however, enough power left in the battery for several lifts.
Base width adjustment
The base width of Caroli is manually adjusted by a lever. The
lever can be placed in several different positions. Move the lever
backwards to unlock it, and then move it sideways to adjust the
width. The lever locks automatically when released.
Emergency Stop
For emergency stop: Press the red Emergency stop button.
To release/reset: Turn the button in the direction of the arrows.
Electrical emergency lowering
The lift arm is lowered electrically by pressing “down” (
the control unit.
) on
Mechanical Emergency Lowering
To use the Emergency Lowering:
Turn the red Emergency Lowering cylinder in the direction shown
by the arrows.
Locking the wheels
The rear wheels can be locked for rotation and lateral movement.
To lock the wheels, press the brake lever above the wheel down
with your foot.
Release the wheels by pressing the top side of the lever.
During lifting, wheels should remain unlocked so that the lift may
shift to the patient's center of gravity. The wheels should however
be locked if there is a risk for the lift moving into the patient, for
example when lifting from the floor.
Locked wheels during lifting increases the risk of the lift
tilting over.
Never pull the lift by the actuator! This may result in
damage to the lift and possible injury.
Instruction guide Nordic Caroli 101 • 7EN210101-1
6
Nordic Rehab • w w w . nordicrehab.com
Slings and accessories
We recommend Nordic Universal Sling and Nordic Hygiene Sling for use with Caroli.
Pages 8-10 in this instruction guide include a user description for Nordic Universal Sling and Nordic
Hygiene Sling.
An individual assessment, of slings and other accessories, is necessary for optimal function and security when
using the lift. As an alternative to the Nordic Slings, several slings from Liko can be used with Caroli.
Contact your Nordic Rehab representative or visit www.nordicrehab.com or www.liko.com for advice and
information.
Nordic Slings
Material: Polyester
Laundry instructions:
����� �
������� �
Always read the laundry instructions on the sling’s label before washing!
Nordic’s slings are approved for 160 kg (350 lbs.) maximum load, see product label.
The size of the sling can be found on the label. The colour of the central back strap is also indicating the size of
the sling, for example: yellow = medium, blue = large.
Remember!
• Determine, in each case, whether more than one caregiver is required to safely execute the lift.
• Plan the lift/transfer before starting, so that it can be executed as safely and efficiently as possible.
• Although Caroli’s slingbar is equipped with safety latches to prevent straps from accidentally unhooking,
particular attention is necessary: after tension has been applied to the straps, but before the patient has been
lifted, it is important to check that the straps are hooked correctly on the slingbar!
• Never lift a patient higher than necessary. Consider the patient’s individual needs and condition.
• Never leave a patient unattended during a lift/transfer.
• Ensure that wheels on wheelchairs, beds, gurneys, etc. are appropriately locked during the lift/transfer.
The handles on the sling are intended to steer with, not to lift with. Excessive force on the handles
can cause the sling to tear. Do not lift with the handles!
Class 1 medical-technical product
Nordic Universal Sling and Nordic Hygiene Sling comply with all requirements for MDD Class 1 products and the
harmonized EN ISO 10535 standard.
Instruction guide Nordic Caroli 101 • 7EN210101-1
7
Nordic Rehab • w w w . nordicrehab.com
Nordic Hygiene Sling
Nordic Universal Sling
Prod. no.
Size
Body weight*
Prod. no.
Size
Body weight*
5037105
5037106
M Medium
L Large
50-90 kg (110-198 lbs.)
80-120 kg (176-264 lbs.)
5037305
5037306
M Medium
L Large
40-90 kg (88-198 lbs.)
80-120 kg (176-264 lbs.)
*NOTE! Indicated patient weights are just guidelines.
Deviations may occur.
*NOTE! Indicated patient weights are just guidelines.
Deviations may occur.
If the sling is too large, the patient may risk slipping out
of it. A sling that is too small can be tight in the crotch
and cause discomfort.
If the patient has poor muscle tone and sinks down in Hygiene
Sling, try a smaller size.
2
1
1. Upper strap loop
2
1
2. Serial number
3. Center back strap/Size marking
4
4. Label
3
5
6
3 5
5. Handle
4
6
6. Lower edge
7. Leg support
8. Leg support loop
7
7
Nordic Universal Sling
Place the sling behind the
patient’s back with the label
facing out.
Fold the lower edge over your
fingertips to make it easier to
guide the sling into position.
Normally, one leg support
is passed through the
other before they are
hooked to the slingbar.
With the palm of your hand,
press the lower edge of the
sling down to the patient’s
tailbone. This is very
important. Correct positioning
is facilitated if the patient leans
forward somewhat.
Hang the upper strap
loops on the slingbar
first, then the leg support loops.
Make sure all strap loops are
of equal length, i.e., reach
the same height when they
are extended before lifting.
If not, adjust the position of
the sling.
Instruction guide Nordic Caroli 101 • 7EN210101-1
Pull the leg supports out
alongside the outside of the
thighs. Helpful hint: By
placing your palm between
the body and the sling, you
can guide the leg support’s
lower edge strap down to the
seat. At the same time, pull
the leg support forward with
your other hand to stretch it out.
8
Guide the sling’s leg
supports under each
thigh. Make sure the
fabric is smoothed out
under the thighs and
that it reaches properly
around the legs.
Alternative:
Overlapping under both legs.
This may be the most appropriate
method when lifting a leg
amputee.
Nordic Rehab • w w w . nordicrehab.com
Lifting from a horizontal position
Normally it is easiest to apply the sling if the patient is lying down. In some cases, however, it may be more
appropriate to apply the sling while the patient is sitting upright in the bed.
Lay the leg supports in place under the
thighs. This is easiest if the knees are
bent. Make sure the fabric is smoothed
out under the thighs and that it reaches
properly around the legs. The leg
supports can then be hooked to the
slingbar in different ways, as described
on the previous page.
Turn the patient towards you to prevent
him/her from falling out of the bed.
Place the lower edge of the sling as
far down under the patient as possible,
so that it is in level with the tailbone.
Bunch the sling together in a couple
of folds and lay it so that its “central
back strap” corresponds to the position
of the patient’s spine when he/she is
gently turned back. Carefully work the
sling out from the opposite side. Raise
the backrest of the bed if available.
Hang the upper strap loops to the
slingbar first, then the lower loops. Lift.
The patient is not properly positioned – what did we do wrong?
WRONG!
RIGHT!
The bottom is hanging down - risk for
slipping out of the sling. The sling may be
too large. Another reason may be that the
sling has not been pulled far enough down
the back during application.
Before lifting make sure that the sling has
been tightened about the buttocks (by
pulling on the leg supports).
The sling’s lower edge is in level
with the patient’s tailbone. Leg
supports are correctly positioned
under the legs.
Nordic Hygiene Sling
With Hygiene Sling, dressing and undressing can be done during the actual lifting operation, thanks to the large
opening around the seat of the sling.
Nordic Hygiene Sling is often the most appropriate alternative for patients with a certain degree of stiffness.
The patient should have relatively good torso stability to be able to sit comfortably and securely in Hygiene
Sling. For patients with poor muscle tone, we recommend a smaller size of Hygiene Sling.
The patient’s arms must be held outside Hygiene Sling during the entire lifting procedure, to prevent
the risk of sliding out of the sling.
Continued on next page
Instruction guide Nordic Caroli 101 • 7EN210101-1
9
Nordic Rehab • w w w . nordicrehab.com
Continuation of Nordic Hygiene Sling from previous page:
Advice for trial fitting
The position of the leg supports under the thighs is important in regard to the patient’s sitting posture.
On a patient with poor muscle tone, they should be placed high up against the crotch, so that he/she does not sink
too far down in the sling.
In most cases, and especially in the
case of patients with weak musculature, the leg supports should be
placed as close as possible to the
crotch.
On a patient with good muscle tone, the
leg supports can be placed closer to the
knees. This makes dressing and undressing easier and helps to ease spasticity.
A sunken and uncomfortable sitting
posture is either a result of the leg
supports being placed too close to the
knees and/or the sling being too
large. Try a smaller size.
Lifting from wheelchair to toilet
Prepare to undress the patient by first undoing buttons and opening zippers.
Place Hygiene Sling behind the patient, with the label facing out about halfway down the back. The soft-padded
upper edge should be just under the armpits.
Always keep the arms on the outside!
Place the leg supports under
the patient’s thighs. Cross the
leg supports by drawing one leg
support loop through the other.
Move the slingbar forward
and connect the upper end
loops first, then the legsupport loops.
Lift up. Pull the patient’s
pants down as far as
possible.
Return from toilet to wheelchair
Pull the trousers up as far as possible towards the crotch.
Place the leg supports under the
legs, but outside the trousers.
Arms on the outside!
Connect all the loops, and lift up.
Instruction guide Nordic Caroli 101 • 7EN210101-1
10
Lower to the toilet.
Move the leg supports
aside and lower the
patient’s pants even
further to enable better
access.
If a diaper is to be used, fit it in place
before the trousers are pulled all the
way up. Make the transfer and lower to
the chair.
Nordic Rehab • w w w . nordicrehab.com
Simple troubleshooting
The lift does not work up/down
1. Check that the emergency stop
button is not pushed in. (p. 6)
2. Check that the cables on the control
unit are connected correctly. (p. 4)
3. Check that the charging cable is not
connected to the wall socket.
4. Check that the battery is charged. (p. 5)
5. If the lift still does not work satisfactorily,
contact your Nordic Rehab distributor.
Battery charging does not
work
1.Check that the emergency stop button
is not pushed in. (p. 6)
2. If the lift still does not work satisfactorily,
contact your Nordic Rehab distributor.
The lift stops in the elevated
position
1. Check that the emergency stop button
is not pushed in. (p. 6)
2 Use the electrical emergencylowering device to safely lower the
patient. (p. 6)
3 Use the mechanical emergencylowering device to safely lower the
patient. (p. 6)
4. Check that the battery is charged. (p. 5)
5. If the lift still does not work satisfactorily,
contact your Nordic Rehab distributor.
If you hear unusual sounds
Contact your Nordic Rehab distributor.
Instruction guide Nordic Caroli 101 • 7EN210101-1
11
Nordic Rehab • w w w . nordicrehab.com
Care and Maintenance
For safe and trouble-free operation, a few routine procedures should be performed every day the lift is
used.
•
•
•
•
•
•
Visually inspect the patient lift and check for external damage or wear
Check that all screws and lock nuts on the slingbar are tight
Check that the safety latches on the slingbar work properly
Check the handcontrol and the lift and width movements
Check the emergency lowering function (both the electrical and the mechanical)
Charge the battery every day the lift is used, and check charger function
If When necessary, clean the lift with common surface cleaners or disinfectants and check to ensure
that the wheels are free of dirt and hair. NOTE! Avoid regular use of cleaning agents that contain
phenol or chlorine, since these can damage polyamide material.
IMPORTANT!
Repairs and maintenance may only be carried out by authorized Nordic Rehab service personnel
using original spare parts.
Transportation and storage
During transportation, or when the patient lift is not to be used for some time, the emergency stop
button should be pushed in. The environment in which the lift is transported and stored should have a
temperature of 10 to 40 degrees C, a relative humidity of 30 to 75 % and an atmospheric pressure of
700 to 1060 hPa.
We always try to improve our products. Naturally, this means changes from time to time.
Please contact your Nordic Rehab distributor for information and advice and to receive the latest
updates.
www.nordicrehab.com
Manufacturer:
Nordic Rehab AB
Nedre vägen 100
SE-975 92 Luleå, Sweden
Tel: +46 (0)920 24 75 90
Fax: +46 (0)920 24 75 91
[email protected]
Distributor:
© Copyright Liko AB 2005-10
Inspection
The lift must be thoroughly inspected at least once per year. Pay particular attention to parts that
show wear, for example, joints and bolts. Service must be carried out according to Nordic Rehab
service manual and by authorized staff.