1
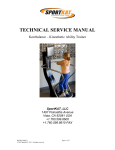
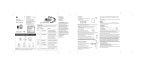
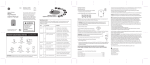
TECHNICAL SERVICE MANUAL SportKAT 4000 SportKAT 1700 SportKAT 650 SportKAT 550 SportKAT, LLC 1497 Poinsettia Avenue Vista, CA 92081 +1.760.599.8600 +1.760.599.8610 FAX SK07023 (07/07) © 2007 SportKAT, LLC. All rights reserved. Page 1 of 27 LIMITED WARRANTY Limited Warranty: SportKAT warrants to the original purchaser that its products and replacement parts shall be free from defects in material and workmanship for a period of one (1) year from date of delivery. SportKAT’s obligation under this warranty is expressly limited to supplying replacement parts and/or service for, or replacing, at its option, any product which is, in the sole discretion of SportKAT, found to be defective. THE FOREGOING WARRANTIES ARE EXCLUSIVE AND IN LIEU OF ALL OTHER EXPRESS WARRANTIES AND IMPLIED WARRANTIES, INCLUDING BUT NOT LIMITED TO, THE IMPLIED WARRANTIES OF MERCHANTABILITY AND FITNESS OF PURPOSE. SPORTKAT'S OBLIGATION UNDER THESE WARRANTIES SHALL NOT INCLUDE ANY LIABILITY FOR LOSS OF PROFITS, DIRECT, INDIRECT OR CONSEQUENTIAL DAMAGES OR DELAYS. Some states, provinces, or countries do not allow the exclusion or limitation of incidental or consequential damages, so the above exclusion or limitation may not apply. Any improper or negligent use, any alterations or repairs not in accordance with SportKAT’s manuals or performed by others in such manner as in SportKAT’s sole judgment affects the product materially and adversely, shall void these warranties. These warranties do not cover failures due to misuse, abuse, neglect, or lack of routine maintenance. No employee or representative of SportKAT is authorized to change these warranties in any way or grant any other warranty unless in writing and signed by a SportKAT officer. These warranties provide specific legal rights; but, there may be other available rights, which vary from state to state, province to province, or country to country. PLEASE Read this entire manual before operating the SportKAT Kinesthetic Ability Trainer. If you have any questions, please call: SportKAT, LLC 1497 Poinsettia Avenue Suite 157 Vista, CA 92024 USA 1.760.599.8600 Office 1.760.599.8610 FAX 1.800.743.0575 US Toll-Free [email protected] SK07023 (07/07) © 2007 SportKAT, LLC. All rights reserved. Page 2 of 27 TABLE OF CONTENTS This manual provides maintenance and service information for the SportKAT Kinesthetic ability Trainer. If replacement parts are required, contact SportKAT with the serial number of your unit to ensure accuracy of replacement parts. Description Page # Warranty ...................................................................... 2 Specifications............................................................... 4 Periodic Maintenance .................................................. 14 Service Bulletins ......................................................... 15 Wiring Harnesses......................................................... 19 Schematics ................................................................. 23 Troubleshooting ........................................................... 24 Parts List...................................................................... 27 Return Goods Statement ............................................. 27 SK07023 (07/07) © 2007 SportKAT, LLC. All rights reserved. Page 3 of 27 SPECIFICATIONS SportKAT 550 Portable unit with base stand, hand pump and analog pressure gauge. SportKAT 650 SportKAT 550 unit with the data system and software. SportKAT 1700 SportKAT system including data system and software (no computer, no long arm, no computer bracket). SportKAT 4000 Complete system including the Dell computer, software, long arm assembly, and anti-tip bar. SportKAT Width Depth Overall Height Maximum Tilt Angle Product Weight 550 650 1700 4000 23” (58.4cm) 23” (58.4cm) 4” (10.2cm) 20º 23” (58.4cm) 23” (58.4cm) 4” (10.2cm) 20º 38” (96.5cm) 38” (96.5cm) 45” (114.3cm) 20º 38” (96.5cm) 46” (116.8cm) 70” (177.8cm) 20º 22lbs (10Kg) 23lbs (10.5kg) 85lbs (38.7kg) 125lbs (56.7kg) Maximum Patient 500lbs (227kg) 500lbs (227kg) 500lbs (227kg) Weight 500lbs (227kg) SK07023 (07/07) © 2007 SportKAT, LLC. All rights reserved. Page 4 of 27 SPECIFICATIONS SportKAT (all models) - Top Plate SK07023 (07/07) © 2007 SportKAT, LLC. All rights reserved. Page 5 of 27 SPECIFICATIONS SportKAT (all models) - Decal Placement SK07023 (07/07) © 2007 SportKAT, LLC. All rights reserved. Page 6 of 27 SPECIFICATIONS SportKAT (all models) - Pivot Ball SK07023 (07/07) © 2007 SportKAT, LLC. All rights reserved. Page 7 of 27 SPECIFICATIONS SportKAT 1700 & 4000 - Grab Bars SK07023 (07/07) © 2007 SportKAT, LLC. All rights reserved. Page 8 of 27 SPECIFICATIONS SportKAT 4000 - Computer Long Arm SK07023 (07/07) © 2007 SportKAT, LLC. All rights reserved. Page 9 of 27 SPECIFICATIONS SportKAT 4000 - Anti-tip bar SK07023 (07/07) © 2007 SportKAT, LLC. All rights reserved. Page 10 of 27 SPECIFICATIONS SportKAT 1700 & 4000 – Switch panel control housing (top) SK07023 (07/07) © 2007 SportKAT, LLC. All rights reserved. Page 11 of 27 SPECIFICATIONS SportKAT 1700 & 4000 – Switch panel control housing (bottom) SK07023 (07/07) © 2007 SportKAT, LLC. All rights reserved. Page 12 of 27 SPECIFICATIONS SportKAT 4000 – Computer and Monitor mount SK07023 (07/07) © 2007 SportKAT, LLC. All rights reserved. Page 13 of 27 MAINTENANCE Performing a few simple preventative maintenance procedures will extend the life of your SportKAT and reduce the overall cost of ownership. Preventive Maintenance Annually, the entire SportKAT product should be checked to ensure all fasteners, stand-offs, and parts are in place and secure. Should the anti-slip pads become worn or detached, order new parts from SportKAT (see Parts List, page 27 for part numbers). Cleaning The SportKAT is essentially maintenance-free. The plastic housing and cables can be disinfected with common disinfectants. SK07023 (07/07) © 2007 SportKAT, LLC. All rights reserved. Page 14 of 27 SERVICE BULLETINS Re-installation of pump board assembly (for SportKAT units manufactured before 2004 only) This is a series of photos for re-installation of pump board assembly of the SportKAT Model 1250, 1750 or 4000. Contact SportKAT technical services if you are unable to make the proper connections. Step 1 Step 2 SK07023 (07/07) © 2007 SportKAT, LLC. All rights reserved. Page 15 of 27 SERVICE BULLETINS Bladder Repair Instructions Tools Needed: Bladder Repair Kit Wrench ¾” Scissors Lubricant (Optional) 1. Deflate Bladder to 0.0 psi 2. Unplug the KAT from the transformer 3. Tip the KAT backwards until the rails are on the ground and the bottom of the base is exposed. 4. Remove the Disc (the Platform the patients stand on when using the KAT): Using a ¾” wrench, socket, or Crescent wrench, unscrew the bolt from the bottom center of the Base. Grabbing the Disc with both hands, disengage the Disc from the Base lift it out and set it aside. Do not attempt to remove the Bladder at this time. 5. Remove the Bladder: a. b. c. d. e. f. g. Cut the old bladder tubing in half (about 5” from the hole in the base that leads to the old bladder). Connect the 2-foot extra piece of tubing with the black connector that is included with this Kit to the tube coming from the old Bladder. This tube is used to help feed the new Bladder tube through the hole in the Base. Carefully pull out the old bladder until the connector is out of the hole. DO NOT PULL FAR ENOUGH TO PULL THE CONNECTOR TUBE ALL THE WAY OUT. Remove the old Bladder tube connected to the feed tube connector and connect the new Bladder tube to the feed tube. Carefully feed the new bladder tube through the Base. Position the new Bladder over the Velcro pieces carefully, while keeping the Bladder centered in the Base. Make sure that there are no Kinks in the Tubing. Remove and discard the extra 2-foot piece of feed tubing and connector from the new bladder tube. Cut the new Bladder Tube to the proper length to attach to the old Tubing that connects to the Pump and the Center pole. SK07023 (07/07) © 2007 SportKAT, LLC. All rights reserved. Page 16 of 27 SERVICE BULLETINS h. With the 2nd black connector, Connect the new Bladder Tube to the old Tubing that connects to the Pump and the Center pole. Vaseline or other lubricant can be used to help the black connector slide more easily into the Tubing. 6. Reinstall the Disc: a. b. With the KAT in an upright position, orient the flat side of the pivot ball stem (located on the bottom side of the disc) with the flattened area on the inside of the hole located in the center of the Base. Then insert the stem into the hole. Be sure the Disc is oriented properly with the base so the Disc Guides will slip into the slots provided for them in the Base. Press down firmly on the Disc to seat the pivot ball stem until the top of the disc is level with the edge of the Base. Set the KAT on its side again and replace the bolt and washer. Tighten firmly with a ¾” wrench, socket or Crescent wrench and stand the KAT upright. SK07023 (07/07) © 2007 SportKAT, LLC. All rights reserved. Page 17 of 27 SERVICE BULLETINS Data Transfer from SportKAT to another computer The best way to transfer data is by using a FLASH MEMORY DRIVE or THUMB DRIVE with a USB port. STEP 1 With FLASH MEMORY DRIVE or THUMB DRIVE (device) in hand, plug it into the back of the LAPTOP USB port. It will look like this picture…then follow in next step (make sure the device is inserted securely). STEP 2 From the LAPTOP find the MY COMPUTER ICON Navigate by using your drop down arrow onto the C: directory and double click on PROGRAM FILES and then select SPORTKAT directory STEP 3 SELECT two (2) files to copy. They are as follows: PATIENTS TEST DATA Copy (by using the CTRL-C keys) and Paste (by using the CTRL-V keys) them onto the FLASH/THUMB DRIVE location, could be D: directory or E: directory or another letter directory STEP 4 Remove the FLASH/THUMB DRIVE from the LAPTOP and insert it into the DELL COMPUTER USB port. Then repeat Paste step only by navigating from D: directory or E: directory to the C: directory and paste onto PROGRAM FILES/SPORTKAT directory. SK07023 (07/07) © 2007 SportKAT, LLC. All rights reserved. Page 18 of 27 WIRING HARNESSES (for units produced after 2004 only) SportKAT – Upper Control Harness SK07023 (07/07) © 2007 SportKAT, LLC. All rights reserved. Page 19 of 27 WIRING HARNESSES (for units produced after 2004 only) SportKAT – Lower Control Harness SK07023 (07/07) © 2007 SportKAT, LLC. All rights reserved. Page 20 of 27 WIRING HARNESSES (for units produced after 2004 only) SportKAT – Motor Control Harness SK07023 (07/07) © 2007 SportKAT, LLC. All rights reserved. Page 21 of 27 WIRING HARNESSES (for units produced after 2004 only) SportKAT – Solenoid Harness SK07023 (07/07) © 2007 SportKAT, LLC. All rights reserved. Page 22 of 27 SCHEMATICS (for units produced after 2004 only) SportKAT – PCBA Pump 2 SK07023 (07/07) © 2007 SportKAT, LLC. All rights reserved. Page 23 of 27 TROUBLESHOOTING 1. The SportKAT™ is not holding air pressure (bladder leaking). How fast is it losing air? 2 PSI over 2hr. period is within normal range. Then, check to see that the Bladder hose is connected to the “T” connecter that connects the bladder with the Pump Assembly and the Center Pole tubing. • If the Bladder hose is not connected to “T” connecter, manually connect the Bladder hose to the “T” connecter by pushing it on by hand. • If the Bladder hose is connected to the “T” connecter and the air loss persists, then there is most probably a leak in the Bladder  Order a Bladder Repair Kit. 2. The SportKAT™ will not pump. A. Check to see that the SportKAT™ is PLUGGED IN. 1.) The adapter should be plugged into a live outlet (one that is putting out electricity. This can be checked by plugging in another appliance to see if that appliance is running.) 2.) Adapter wire should be plugged into the center pole of the KAT which is located at the front of the center pole about 6 “above the Base. Note: #3 & #4 apply to SportKAT units manufactured prior to 2004. 3.) Adapter MUST BE PLUGGED IN AT LEAST 2 HOURS. The Pump Assembly Battery has to be charged up for it to run effectively. 4.) Check to see if the Pump Board located INSIDE the Upper Rail Housing just below the Gauge is charging. Look through the slots in the front of the Upper Rail Housing. Face the front of the Upper Rail Housing and look through the slots from left to right. A yellow or orange light should be on. A flashing light means the Pump Battery is charged. A solid light means the Pump Battery is being charged. If the light is on, that means the Adapter is OK. If the light is not on it most likely means that the Adapter is bad. Order a new one. If all SK07023 (07/07) © 2007 SportKAT, LLC. All rights reserved. Page 24 of 27 TROUBLESHOOTING of the above is OK, Check the Wires at the base of the center pole for a fray or a short (as outlined in Paragraph B below.) B. Check to see that the Wires that come out of the center pole and connect to the Pump Assembly have not become cut or frayed during shipping or installation. • If the wires have been slightly frayed  they should be repaired by a qualified Biomedical Engineer with electrical tape. • If the wires have been cut, order a replacement center pole wire assembly. • If all of the above is OK, it indicates that there may be a problem with the pump switch. The pump switch is located just below the gauge on the upper rail housing. If one of the two switches is working (It will pump up but not down, or It will pump down but not up) and the other switch is not, the switch is bad. Send replacement switch and have them call for help in installing. (An Allen wrench will be required to remove the upper housing for installing the new switch.) • If all of the above is OK it indicates that there is probably a problem with the Pump Assembly. Order a new Pump Assembly. Have them call for help in installing, when they receive the new Pump Assembly. 3. The platform is tilted when no one is standing on it. This means that the Bladder has shifted in shipment. This will not effect the operation or accuracy of the KAT and can be ignored. However, it can be fixed by removing the Disk from the base and re-centering the bladder. If a shifted bladder is not the problem it may be the bladder covering has become unsown and will need to be replaced. 4. The cursor does not move all the way to the right or left, or does not move all the way up or down. Please get out of the program, shut down computer, unplug unit and disconnect all wires and re-plug. Re-Start computer go to calibration and re-calibrate 3 or 4 times. Get out of program again, go thru previous drill … re-calibrate 5 or 6 times, get out of program, re-start, go to calibrate, and the cursor should be re-installed. This is caused by the sensor losing communication with the computer. If SK07023 (07/07) © 2007 SportKAT, LLC. All rights reserved. Page 25 of 27 TROUBLESHOOTING after several recalibration attempts the problem continues, it means that the Tilt Sensor is defective. Order a replacement. 5. The pump is running but the gauge does not move. Check for a kink in the Tube that connects the Gauge to the pump and Bladder. Tilt the KAT over and look at the tube coming out of the center pole that connects to the Bladder and the Pump Assembly at the “T” connector. Check for any kinks or twist in the tube by gently pulling on it. If there is no kink that indicates that the Gauge is defective. Order a new gauge. 6. The pump is able to pump up but not down. The switch is malfunctioning. Order a new one. Have them call for help with installation. 7. The Cursor will not move. A. Check the Default screen at the start of the SportKAT™ program. The COM-port light should be green. If it is red, try selecting another COM-port. If the light turns green on one of the other COM-ports you tried, go to the calibration screen and check to see if the cursor is moving properly (To the edge of the circle both horizontally and vertically). If it does so then the proper COM-port has been selected and the program should run properly. B. If the COM-port light is “red” in all of the COM-port selections, then Check to see that data cable that runs from the Tilt Sensor to the Serial Port in the computer is plugged in all the way to the Tilt sensor and to the COM-port in the PC. Some times all that needs to be done is to plug the Tilt sensor and the COM-port if firmly. C. If plugging in firmly does not work, check the tilt sensor to see if the light on the tilt sensor is on. That light will go on if the Tilt sensor is receiving power. If it is not on then a new data cable may be required. D. If replacing the data cable does not solve the problem, then the tilt sensor needs to be replaced. E. Replacing the tilt sensor is expensive for the Customer. Check to see if the customer purchased our warranty. SK07023 (07/07) © 2007 SportKAT, LLC. All rights reserved. Page 26 of 27 PARTS LIST Part No. 000-0084 000-0087 010-1258 010-1260 020-2062 030-2021 010-1525 010-1037 030-1037 005-0303 001-0195 000-0395 010-1031 010-1394 030-2002 Inv No. 40550 53100 68560 53105 Part Description BLADDER REPAIR KIT FOR KAT 1250/1700/4000 BLADDER REPAIR KIT FOR KAT 550/650 TRANSFORMER 120V/12V, .8 ma, USA (Model 10-1025 Pump) TRANSFORMER 110V (Model 10-1025-01 or 10-1025-02) KAT DATA SYSTEM (Tilt Sensor) KAT SOFTWARE DISK REPLACEMENT Ver 3.0 SWITCH MEMBRANE (Switch Panel) RETRO PUMP KIT ASSEMBLY(RPK+PUMP ASSEMBLY & TRANSFORMER) SportKAT INSTRUCTION MANUAL Ver 5.0, replacement HAND PUMP REPLACEMENT KIT FOR KAT 550/650 NON-SKID PADS (Repair/Replacement Kit For Discs) NON-SKID PADS (Repair/Replacement Kit For Base) BASE ASSEMBLY (Base & Disc; 1 unit complete) RAIL ASSEMBLY KAT 4000 (Center Pole & Side Rails) LONG ARM FOR KAT 4000 Description MAINTENANCE AGREEMENT (3yr parts only) The following “On Site” Training and Service are available in the United States only. For all other countries, please contact SportKAT for additional information. SportKAT Installation and initial training Training-re-training with staff use & care of KAT Training-medical code with outside consultant Service call (Minimum 4 hours-west coast location) LIST PRICE $ 3,750.00 $ $ $ 1,500.00 3,000.00 750.00 $65 per hour (Minimum 8 hours for east coast ) Returned Goods (a) SportKAT will not accept goods for credit unless such return has been authorized by the SportKAT CEO, and the goods are received by SportKAT in stock condition, with original packaging. SportKAT retains the right at its sole discretion whether to accept the return of the goods. (b) All items returned to the vendor by prearrangement will be subject to a 25% restocking charge, providing the goods are in original stock condition. Any downward variation of this restocking charge shall be at the sole discretion of SportKAT, LLC. (c) No credit shall be allowed for goods until they have been received complete. SK07023 (07/07) © 2007 SportKAT, LLC. All rights reserved. Page 27 of 27