1
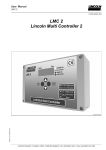
CENTRO-MATIC® Model 85520 Controller Series A April 1999 Form 422368 Section - C8 Page - 270 CENTRO-MATIC® Table of Contents Safety.........................................................................2 Controller Operation..................................................................2 Description..................................................................2 Field Connections..........................................................................3 Wiring Diagram..............................................................................3 Contoller Components and Setting the Controller....................4 Repair Parts List........................................................................4 Dimensions..............................................................5 Troubleshooting....................................................................6 Safety Read and carefully observe these operating instructions before unpacking and operating the controller! The controller must be operated, maintained and repaired exclusively by persons familiar with the operating instructions. Local safety regulations regarding installation, operation and maintenance must be followed. Operate this pump only after safety instructions and this service manual are fully understood. Setting the dipswitch to Memory Off will result in a lube cycle each time power is turned on to the controller. By setting the dipswitch to Memory On and if power has been off less than 2 hours, and then is reapplied, the lube cycle will continue from the point of interruption. Timer Mode When the dipswitch is set to the timer mode, amount of time that the pump is on will be determined by the setting of the dipswitch. Time will be either 30 seconds or 5 minutes. Controller Mode When the dipswitch is set to the controller mode, a pressure switch must be installed in the lube supply line. This will provide pressure-monitoring capabilities. The pressure switch will reset the controller when the set pressure is detected. The controller will initiate an alarm when the pump fails to develop sufficient pressure to actuate the pressure switch within the dipswitch setting of 30 seconds or 5 minutes. Description This symbol identifies the potential for a hazardous situation. If this warning is not followed, a serious injury could occur. Controller Operation The time between lube events is determined by the setting of the rotary switch, which selects the numeral setting, and the dipswitch, which selects the units in either minutes or hours. When used in the timer mode, the pump will remain on for the amount of time that was selected by the dipswitch. Time will be either 30 seconds or 5 minutes (see Timer Mode). When used in the controller mode, the amount of time that the pump is on is determined by the closing of a pressure switch in the lube supply line (see Controller Mode). Failure of the pressure switch to close within the time setting of the dipswitch, either 30 seconds or 5 minutes, will result in an alarm condition. No further lube cycles will take place. When the low-level switch closes, the alarm LED will turn on and the alarm contact will close. No further lube cycles will take place. Alarm condition will remain until low-level switch opens. General Description Model 85520 controller is used to program the cycle frequency of a lubrication pump. Lube cycles are determined by the setting of internal switches. The cycles times are selected to meet system requirements. During the ON time, the air to the pump solenoid or motor starter will be energized. Both are external devices. Appropriate Use Model 85520 is exclusively designed for use in a Centralized Lubrication System. The maximum ratings given should not be exceeded. Any other use not in accordance with the instructions will result in loss of claim for warranty and liability. Product Specification: Input Voltage: Current Consumption: Load Relay Contact: Alarm Relay Contact: Enclosure: Temperature Range Net Weight Off Time (adjustable) On Time Memory Retention Lubrication System 120 VAC 50/60 HZ 20 MA (less external load) 2 amps inductive load at 120 VAC 2 amps inductive load at 120 VAC NEMA 12 -10° F to 150° F (-23° C to 66° C) 4 lbs. 30 seconds minimum 30 hours maximum 30 seconds minimum 5 minutes maximum 2 hours Centro Matic Pressing the manual lube button on the enclosure cover will always initiate a lube event. Page Number - 2 Form 422368 CENTRO-MATIC® Field Connections Terminal Strip 1 through 8 - See Illustration 1 Terminals 1 & 2 -Incoming power 120 VAC 50/60 HZ. Terminals 3 & 4 -120 VAC source for external air to pump solenoid or motor starter coil. Terminals 5 & 6 -Alarm contact (contact closes on fault). Terminals 7 & 8 -Connection for grounding conductor. Terminal Strip 1 through 4 - See Illustration 1 Terminals 1 & 2 -Connection for Low Level Switch (alarms on closure of switch). Terminals 3 & 4 -Connection for Pressure Switch (only used in the controller mode). Pressure Switch Low Level Switch Illustration 1 Wiring Diagram 1. Incoming Power: 120 VAC 50/60 hz 2. 120 VAC Air Solenoid Valve or Motor Starter. 3. Optional Alarm wired by customer. 4. Keypad with indicator lights and manual lube push button. 5. Optional Low Level Switch wired by customer. 6. Pressure Switch wired by customer. Not needed if used in the timer mode. 7. Grounding Connection. Form 422368 Page Number - 3 CENTRO-MATIC® Off Time Switch - See Illustration 2 Using the Rotary Switch you can select .5, 1, 2, 4, 8, 15, 24 or 30. The units are either minutes or hours as determined by the dipswitch setting. Electrical Shock Hazzard. Turn off and lock out power before opening enclosure. Controller Components and Setting the Controller Enclosure Cover - See Illustration 2 Green LED Indicates that power is applied to the controller. Green LED Indicates that the pump is on. Red LED Indicates an alarm condition. Manual Lube - Pressing will initiate a lube cycle. Dipswitch Identification - See Illustration 2 30 seconds or 5 minutes - Select the maximum amount of On Time. Timer or Controller Select Timer Mode or Controller Mode. Hours or Minutes Select the unit for the Off Time Rotary Switch. Memory Off or Memory On - Select memory feature. Repair Parts List Item 1 2 1 Quan. 1 1 Description Timer Board Keypad Assy Part Number 249694 249695 2 Illustration 2 Page Number - 4 Form 422368 CENTRO-MATIC® 3 1/2 (89 mm) 5/16 (8 mm Dia. Mtg. Holes) (4 places) Conduit Plug Conduit Hole 7 - 1/2 (191 mm) 6 - 3/4 (171 mm) 2 (51 mm) 4 - 15/16 (125 mm) Dimensions Form 422368 Page Number - 5 CENTRO-MATIC® Condition Controller does not operate. Lube System without Alarm Monitoring PUMP ON L.E.D. lights, but load connected to terminals 3 & 4. DO NOT ENERGIZE. Load connected to terminals 3 & 4 energized, but PUMP ON L.E.D. does not light. Bearing points are over lubricated. Possible Cause No electric power to controller. Printed circuit board failure. Printed circuit board failure or keypad failure. Timer/Controller memory mode is set to off. Injector output adjustment setting too high. Bearing points are under lubricated. Timer/Controller cycle time setting too low. Injector output adjustment setting too low. Timer/Controller cycle timer setting does not deliver lubricant often enough. System too large for pump output. Lube Alarm L.E.D. turns on with each lube cycle, and pump will not initiate another lube cycle automatically. Corrective Action Turn on electric power to pump. Power L.E.D. should light, PUMP ON L.E.D. should light when MANUAL LUBE is pressed. Remove and replace. Remove and replace. Turn on memory mode of timer/controller. Readjust to lower setting. Set to longer cycle time or reevaluate lube requirements. Readjust to right setting. Set to shorter cycle time or reevaluate lube requirements. Calculate system requirements per planning manual. Timer/Controller set to Controller Connect a pressure switch into the supply line Mode without a pressure switch and connect to timer/controller or place mode switch in the supply line. in Timer mode. Low level switch wired Check low level switch wiring and correct if incorrectly. necessary. Contact closure must be on low level condition. Additional Troubleshooting when Alarm Monitoring is used Some, but not all, of the injectors are delivering lubricant. There is no alarm condition. Lube Alarm L.E.D. turns on with each lube cycle, and pump will not initiate another lube cycle automatically Page Number - 6 Timer/Controller is set to Timer Set Timer/Controller to Controller Mode. Pressure switch setting is too low. Adjust pressure setting to setting high enough for all injectors to cycle. Bad electrical connection between Check all wiring between Pressure Switch and Pressure Switch and Timer/ Timer/Controller. Controller. Pressure switch setting is too Adjust pressure switch to setting high enough for high. all injectors to cycle. Pressure Switch is defective. Repair or replace. Printed circuit board is defective. Replace printed circuit board. Low level switch wired incorrectly. Check low level switch wiring and correct if necessary. Contact closure must be on low level condition. Form 422368 CENTRO-MATIC® NOTES Form 422368 Page Number - 7 CENTRO-MATIC® Americas: One Lincoln Way St. Louis, MO 63120-1578 USA Phone +1.314.679.4200 Fax +1.800.424.5359 Page Number - 8 Europe/Africa: Heinrich-Hertz-Str 2-8 D-69183 Walldorf Germany Phone +49.6227.33.0 Fax +49.6227.33.259 Asia/Pacific: 25 Intl Business Park #01-65 German Centre Singapore 609916 Phone +65.562.7960 Fax +65.562.9967 © Copyright 1999 Printed in USA Web site: www.lincolnindustrial.com Form 422368