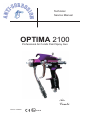
1
OPTIMA 2100
Technical
Service Manual
OPTIMA 2100
Professional Air Combi Paint Spray Gun
Air
Combi
Version 10/2008
II 2G X
Manufactured by Bersch & Fratscher GmbH
1
Service Manual
version 10/2008
OPTIMA 2100
Table of contents
1.
INTENDEND USE......................................................................................................................................................... 3
2.
SAFETY REFERENCES ............................................................................................................................................. 3
2.1.
SAFETY REFERENCES FOR THE OPERATOR ........................................................................................................... 3
2.1.1
Qualification of the personnel ................................................................................................................. 3
2.1.2
Security of the working environment..................................................................................................... 3
2.2
SAFETY REFERENCES FOR THE OPERATORS ......................................................................................................... 3
2.2.1
Safe handling of OPTIMA paint spray guns ......................................................................................... 4
2.2.2
Grounding .......................................................................................................................................................
2.2.3
Material-and air hoses ............................................................................................................................... 4
2.2.4
Cleaning ........................................................................................................................................................ 4
2.2.5
Handling liquids, lacquer and colors .......................................................................................................
2.3
ADHESION................................................................................................................................................................
3.
CONNECTED LOADS ................................................................................................................................................. 5
4.
MATERIAL CONSUMPTION AND THROUGHPUT VALUES .............................................................................. 5
5.
AIR CONSUMPTION ................................................................................................................................................... 5
6.
DESCRIPTION OF FUNCTION.................................................................................................................................. 6
7.
START-UP ..................................................................................................................................................................... 6
8.
OPERATION ................................................................................................................................................................. 6
8.1
8.2
8.3
8.4
8.5
8.6
8.7
8.8
8.8.1
8.8.2
8.9
8.10
9.
AIR CONNECTION .................................................................................................................................................... 6
PAINT CONNECTION ..................................................................................................................................................
OPERATION OF THE HIGH PRESSURE SPRAY GUN ....................................................................................................
FLAT JET REGULATION .......................................................................................................................................... 6
TRIGGER FORCES ....................................................................................................................................................
ROUND JET REGULATION ....................................................................................................................................... 7
ADJUSTMENT OF ATOMIZER AIR CAP ........................................................................................................................
PAINTING DISTANCE AND SPRAY GUN GUIDANCE .....................................................................................................
Atomizer air cap adjust.............................................................................................................................. 7
Spray gun guidance ................................................................................................................................... 7
FILTER SELECTION ................................................................................................................................................. 8
ADJUSTMENT OF PRE-AIR ...................................................................................................................................... 8
MAINTENANCE............................................................................................................................................................ 8
9.1
9.2
9.3
9.4
10.
10.1
10.2
10.3
10.4
10.5
CLEANING .............................................................................................................................................................. 8
CLEANING OF THE NOZZLE .................................................................................................................................... 8
CLEANING OF THE FILTER ...................................................................................................................................... 8
LUBRICATION ......................................................................................................................................................... 8
REPLACEMENT OF PARTS................................................................................................................................. 8
PAINT NEEDLE ....................................................................................................................................................... 8
NEEDLE SEAL- INVERTED CUP SEAL 1248-10 DEFECTIVELY ................................................................................ 9
VALVE SEAL........................................................................................................................................................... 9
CHANGE OF COMPLETE NOZZLE SET 001248-U8 ................................................................................................. 9
GASKET DEFECTIVELY – SEAL RETAINING SCREW 001248-U5 ............................................................................ 9
11.
POSITIVE PRESSURE........................................................................................................................................... 9
12.
WORKSTATION RELATED SOUND PRESSURE LEVEL .............................................................................. 9
13.
DISPOSAL ............................................................................................................................................................. 10
14.
TROUBLE POSSIBILITIES ................................................................................................................................. 10
15.
AVAILABLE ACCESSORIES ORDER NUMBER ........................................................................................... 10
16.
DECLARATION OF CONFORMITY................................................................................................................... 11
17.
DECLARATION OF GUARANTEE ........................................................................................................................
Manufactured by Bersch & Fratscher GmbH
2
Service Manual
OPTIMA 2100
version 10/2008
1.
Intended use
Pneumatically operated paint spray gun with pump support in the high pressure range (up to
max. 250 bar) for processing liquid, sprayable media with consideration of the manufacturer
references. The high pressure spray gun is led by hand and operated by the operator to coat
the work piece.
2.
Safety references
2.1.
Safety references for the operator
a) Read all safety references and instructions. Failure to adhere to the safety references and
instructions can lead to danger and/or cause serious injuries.
b) Save all safety references and instructions for the future and keep them at the operating
place available, so that they can be seen by the operator as well as the personnel.
c) Make sure that all local guidelines for the industrial safety and rules for the prevention
of accidents are followed at any time.
2.1.1
Qualification of the personnel
The equipment may only be set up, operated and repaired by qualified and trained
personnel.
2.1.2
Security of the working environment
a)
Ensure that the work area is always kept clean and well lit. Clutter or dim work areas can
lead to accidents.
b)
Ensure that the floor of the work area is antistatic, in accordance with EN50053 part of 1,
§ 7-2, measurement according to DIN 51953 and that all persons within the work area
wear antistatic shoes, e.g. shoes with leather soles.
c)
Ensure that the operators wear antistatic gloves for grounding over the handle of the
spray gun when painting.
d)
Obey all local regulations concerning the overspray exhaustion and make sure that they
exist at the operating place and that they are used properly.
e)
In addition the following components of a safe working environment must exist and/or be
available:
-
Make sure that for the high operating pressure there are appropriate material
and air hoses available and used.
-
Make sure that the personnel has personal protection equipment available and
uses it. Using personal protection equipment, such as breath and skin
protection, as well as if necessary. skid-proof safety shoos, reduce the risk of
injuries.
f)
Guarantee that no ignition sources such as open fire, spark, glowing wires
or hot surfaces are present in the work area and that there is no smoked in the
work area.
2.2
Safety refereces for the operators
Read the operating instructions completely and in detail before start-up of the spray gun. All
information in this manual is to be followed particularly the general safety references and the
warning references.
Local guidelines for industrial safety and rules for the prevention of accidents
are to be followed at all times.
Manufactured by Bersch & Fratscher GmbH
3
Service Manual
OPTIMA 2100
version 10/2008
2.2.1
Safe handling of Optima paint spray guns
a)
Examine before each start-up, in particular after maintenance and cleaning works the firm seat
of all screws and nuts/mothers.
b)
Attention: The spray jet is under pressure and can cause serious injuries.
c)
The following safety instructions should be followed at all times the spray gun is used:
-
Avoid in any case injection of colour or cleaning agents.
-
Never aim the spray gun to yourself, other persons or animals and never put your
hand or any other body parts into the spray jet.
-
Separate the energy and compressed air supply at all times before working on the
equipment, as well as work interruptions and malfunctions.
-
In case of work interruptions secure the spray gun against operation.
-
Relieve spray gun and equipment from pressure.
-
In case of malfunctions, please repair the error according to chapter. „ Trouble
shooting " page 10.
d) Danger of skin injuries:
Note in case of skin injuries by colour or cleaning agent, which colour and/or cleaning agent you
used and consult immediately a physician.
f)
Danger by recoil forces:
- In order to counter recoil forces, make sure that during operation you stand safely and change
your position regularly to avoid fatigue.
2.2.2
Grounding
Due to the high flow rate of the colour and air electrostatic loading of the equipment is possible.
When unloading these can cause sparks or flames.
- Make sure the equipment is grounded while operating and also ground the work pieces to be
coated.
- All persons within the work area should be grounded, e.g. by wearing antistatic shoes and when
operating the spray gun antistatic gloves should be word for grounding over the handle of the spray
gun.
2.2.3
Material- and air hoses
- Ensure that only material and air hoses are used which are laid out for the appropriate operating
pressures.
- Make sure that the material of the material hose is chemically steady against the sprayed
materials.
- Make sure that on the used high-pressure hose the manufacturer, the manufacturing date and
permissible operating pressure are recognizable.
Attention:
The electrical resistance of the complete high-pressure hose must be smaller than 1 MOhm.
2.2.4
Cleaning
- Decouple the equipment from the pneumatic inlet and relieve the pressure.
- Make sure that the ambient temperature is at least 5°C under the flash point of the used cleaning
agents.
- Use for cleaning only solvent-damp rags and brushes. Use in any case hard articles and never
spray apply cleaning agents with a spray gun.
Attention: In closed containers a combustible gas air mixture can form. Therefore never spray
during equipment cleaning with solvents into a closed container.
Manufactured by Bersch & Fratscher GmbH
4
Service Manual
OPTIMA 2100
version 10/2008
2.2.5
Handling liquids, lacquers and colours
Consider all handling specifications of the manufacturer’s of all used paints, solvents and cleaners
during the paint preparation, the paint application as well as the cleaning process.
Obey all prescribed preventive measures; carry an eye protector, protective clothing and - gloves
and use if necessary skin protection cream.
Always carry a protective mask and/or use a respirator when painting, as well as during preparation
and cleaning.
Operate the spray gun only in a spray booth or at a spray wall with operating ventilation (to exhaust
the overspray) in order to guarantee a sufficient health and environmental protection.
Carry when processing hot materials (max. 60°C) appropriate protective clothing.
2.3
Adhesion
Bersch & Fratscher declines any liability for damages, which result from not intended use. The
equipment may be used only for processing material recommended by Bersch & Fratscher. The
equipment may only be operated as a complete unit. Protection devices may not be disabled. Only
Bersch & Fratscher original spare parts and - accessories may be used. In case of self
disassembly the liability is void.
3.
Connected loads
A) Maximum permitted air pressure 8 bar, recommended operating pressure 1.5 - 3 bar.
Operating pressure depends on viscosity, nozzle size and kind of spray system (Airless - Air Combi).
B) Maximum permitted material temperature by operation without gloves is 40 degrees Celsius.
C) Maximum permitted material temperature by operation with gloves is 60 degrees Celsius
D) Maximum permitted material pressure 250 bar
4.
Material consumption and throughput values
a) Material consumption values – depending on nozzle bore and pump pressure.
b) Material throughput values
Measurement based on the following values:
Operating pressure:
Nozzle size:
Material viscosity:
Material throughput:
5.
100 bar
0.23 mm
45 seconds. DIN 4 mm/20 degrees Celsius
approx. 0.26 l/min.
Air consumption
Air consumption of the high pressure paint spray gun (total air regulating valve 1248 - to U6 adjusted fully on max.,
see description of function Table designation „B “,.)
Round jet
1,0 bar = 5,0 cbm/h = 84.0 l/min.
2,0 bar = 8.1 cbm/h = 136.0 l/ min.
3,0 bar =11,1 cbm/h = 185.0 l/ min.
Flat jet
1,0 bar = 4.3 cbm/h = 72.0 l/min.
2,0 bar = 6.9 cbm/h = 115.0 l/min.
3,0 bar = 9.2 cbm/h = 154.0 l/min.
These values can be reduced by operating the total air adjustment 1248-U6
by approx. 80% (i.e. values are than only approx. 20 %)
Manufactured by Bersch & Fratscher GmbH
5
Service Manual
OPTIMA 2100
version 10/2008
6.
Description of function
B
M
A
A
B
C
D
E
F
G
H
I
J
K
L
M
Description
Hook
Flat jet regulation
Round jet regulation
Spring pressure reinforcement
Swivelling air connection
Ball bearing material connection
Trigger
Trigger lock
Filter
Air cap
Nozzel carrier
Closing piece
Union nut
Order no.
1248-U6
1240-U5
1236-5
1133-U11
1248-U7
1248-U4
1237-3
1233-75
1248-U2
1248-U8
1240-7
1248-4
C
J
D
K
OPTIMA 2100
G
L
H
I
E
F
Table to illustration 1/ paint spray gun optima 2100
7.
Illustration 1/paint spray gun optima 2100
Start-up
Before the first use, flush the material supply inclusive nozzle with solvent resp. cleaning agent.
Material flow and spraying picture depend on the size of the spray nozzle, the material viscosity
and the material pressure. See nozzle selection table, page 12 – table 2 “trouble-shooting page 10”.
8.
Operation
8.1
Air connection
Swivelling air connection 1133-U11, connecting thread G ¼ “ Air supply for flat jet air cap and round jet air.
- clean and dry air increases your spraying quality and extends the life span of your high pressure spray gun.
8.2
Paint connection
(- Attention high pressure!! – Consider all safety regulations)
Swivelling material connection 1248-U7, Connecting thread NPSM ¼ “. Use only permissible high-pressure hose.
Take care of the right position of the ball-cone seal.
8.3
Operation of the high pressure spray gun
a)
b)
c)
d)
Turn trigger lock 1237 - 3
90 degrees downwards (Spray gun is now released)
Pull trigger 1248 - U4 up to the first pressure point (pre-air)
Pull trigger 1248 - U4 completely, high pressure colour jet starts
After ending the spraying procedure secure spray gun at all times
by turning the trigger lock 90 degrees upwards again (see illustration 1).
Note: In order to avoid a drop formation at the spray gun keep the pre air valve
1-2 sec. after spraying open.
8.4
Flat jet regulation
By means of the flat jet regulation 1248-U6 atomization air is added to the flat jet.
Clockwise rotation
Counter clockwise rotation
-
little air much air -
Manufactured by Bersch & Fratscher GmbH
little atomization
high atomization.
6
Service Manual
OPTIMA 2100
version 10/2008
8.5
Trigger forces
Trigger pressure adaptation according to the material pressure.
The spring force is adjustable from approx. 80 - 250 bar ( 1.138 - 3.557 PSI ).
250 bar
tighten screw 1236-5 completely.
80 bar
-unscrew screw 1236-5 to tappet.
For pressures in between 80 and 250 bar choose a correspondingly intermediate adjustment of the screw 1236-5
8.6
Round jet regulation
By means of the round jet regulation 1240-U5 atomization air is added to the flat jet cap from the sides.
Clockwise rotation
Counter clockwise rotation
8.7
little air much air -
little adjustment to round jet.
high adjustment to round jet.
Adjustment of atomization air cap
a.)
b.)
c.)
d.)
e.)
Put pump pressure at 0 , release trigger 1248-U4 completely - pressure of hose relieves.
Secure spray gun by a 90 ° clockwise rotation of the safety lever 1237-3.
Release lock nut 1248-4 by hand.
Put atomization cap 1248-U2 into required position.
Tighten lock nut 1248-4 well by hand.
(see illustration 1)
8.8
Painting distance and spray gun guidance
8.8.1
Adjustment of atomization air cap
The position of the atomization air cap and the spraying nozzle determines the direction of the spray jet.
Turn the atomisation cap according to the desired spray direction (the spraying nozzle turns with it)
Illustration 2: Air cap adjustment
8.8.2
Spray gun guidance
25-30 cm
OPTIMA 2100
Illustration 3: Spray gun guidance
The paint spray gun must always be held at a 90° angle to the painting surface.
Manufactured by Bersch & Fratscher GmbH
7
Service Manual
version 10/2008
8.9
OPTIMA 2100
Filter selection
The mesh size of the filter should not be bigger than the nozzle size!
8.10
Adjustment of pre-air
a.)
b.)
c.)
d.)
Unscrew breech ring cap 1240-7 and take out needle.
Release needle carrier 1248-13 with screw wrench SW 6, to counter hold the needle end 1248-14.
Adjust needle:
More pre-air
screw out needle
Less pre-air
screw in needle
Fixate needle, by tightening needle carrier 1248-13 to counter hold the needle end 1248-14.
(see illustration 4)
9.
Maintenance
9.1
Cleaning
Immediately after usage or longer interruptions the spray gun has to be scavenged with
the relevant thinner for the paint in question (cleaner).
In this case it is necessary to scavenge the spray gun with thinner with the assistance
of the feeding pump until the cleaner leaves the gun clear. Never immerse the paint
spray gun in the cleaning agent.
9.2
Cleaning of nozzle
a.)
b.)
c.)
d.)
e.)
f.)
9.3
Adjust the pump pressure at 0 bar, release trigger 1248-U4 completely - pressure of hose relieves.
Secure spray gun by a 90 ° clockwise rotation of the safety lever 1237-3
Remove the lock nut 1248-4 by hand
Take off nozzle set 1248-U2 and blow it through, from the front side
Insert nozzle set 1248-U2 and adjust it
Tighten lock nut 1248-4 by hand
(see illustration 1)
Cleaning of filter
We recommend to clean the filter (depending on the used paint) from time to time in order to avoid that the paint
residues get hard which could make the dismantling impossible.
a.)
Put pump into a pressure less condition.
b.)
Depending on the paint tube - see spare parts drawing -.
Release lower paint hose part 1248-U7 with a screw wrench SW17
(see illustration 1)
Attention !!
Make sure to support the upper paint hose part of the paint tube by clamping it with an additional screw
wrench SW 11.
c.)
Unscrew the filter downwards out of the paint tube.
d.)
Clean the filter with a brush (not a wire brush)
Mounting of the parts vice versa, please be thoroughly and take care of the right position
of o-ring 104-0022 in the upper paint hose part of the paint tube. Filter should jut out from paint tube
approx.. 4 mm.
9.4
Lubrication
O-ring, needle guidance, needle seal, as well as lever bearing need to be lubricated regularly with
silicone-free oil and/or silicone-free grease.
10.
Replacement of parts
In any case detach the gun from the pump!!!
10.1
Paint needle
a.)
b.)
c.)
Unscrew breech ring cap 1240-7
Take out needle with pressing disc and spring at its end backwards.
Insert new needle with pressing disc and spring. (see illustration 1)
Manufactured by Bersch & Fratscher GmbH
8
Service Manual
OPTIMA 2100
version 10/2008
10.2
Needle seal – inverted cup seal no. 1248 - 10 defectively
a.)
b.)
c.)
d.)
e.)
f.)
Dismantle needle according to point 10.1.
Dismantle trigger 1248-U4, by loosening trigger screw 1248-33; remove trigger axle 1248-17
Screw out tightening nut 1240-9
Pull out complete connection piece 1248-3 to the front
Attention!! Between connection piece 1248-3 and gun body there are for sealing purposes
one o-ring 104 – 0018 and two sealings 1240 – 63.
Unscrew packing gland 1248-12 , substitute distancing gland 1248-11 and
inverted cup seals 1248-10 with o-rings 104-0020.
Mount the parts vice versa - please take care that packing gland 1248-12 is not tightened to strong.
(see illustration 4).
10.3
Valve seal
a.)
b.)
c.)
d.)
e.)
10.4
Change of complete nozzle set no. 1248 – U8
a.)
b.)
c.)
d.)
e.)
e.)
g)
h)
10.5
Adjust the pump pressure at 0 bar, release trigger 1248-U4 completely - pressure of hose relieves.
Secure spray gun by a 90 ° clockwise rotation of the safety lever 1237-3
Remove the lock nut 1248-4 by hand.
Take off nozzle set 1248-U2 to the front side.
Push out nozzle carrier from nozzle set backwards.
Deposit nozzle carrier complete in cleaning fluid respectively install another nozzle carrier complete
according to these steps vice versa.
(Cleaning needle for nozzle order-number 00345-44)
Replace if necessary , seal 1240-58.
Assembly in reverse order
(see illustration 4)
Gesket devectively – sealing retaining screw complete no. 1248 – U5
a.)
b.)
c.)
d.)
e.)
f.)
g.)
h.)
11.
Dismantle lever according to point 10.2. b)
Turn out valve packing gland 1134-4 to the front
Pull out valve packing gland seal 1133-42 to the front
Insert new valve packing gland seal 1133-42
Mount the parts vice versa
(see illustration 4)
Adjust the pump pressure at 0 bar, release trigger 1248-U4 completely - pressure of hose relieves.
Secure spray gun by a 90 ° clockwise rotation of the safety lever 1237-3.
Remove the lock nut 1248-4 by hand.
Take off nozzle set 1248-U2 to the front side.
Release packing gland 1248-12.
Unscrew breech ring cap 1240-7 and take off needle piece complete with springs and pressing discs,
pull out backwards.
Unscrew sealing retaining screw by using socket wrench SW 10 and replace in connection with sealing
ring 1240-25. At the same time check the ball on needle piece 1248-U3
Mounting of the parts according to these steps vice versa.
(see illustration 4)
Positive Pressure
For short positive pressures of 10 - 12 bar ( 143 – 170 psi ) at the air supply and higher pump pressures (above 250 bar
– 3.556 psi material pressure) there is no danger of the destruction of the high pressure spray gun.
Positive pressure in the material area are compensated by automatic release of the paint needle.
( Note: Leaving spraying material)
12.
Workstation related sound pressure level
Technical equipment - total air adjustment 1248 - U6 on max. –
Measured values:
Round jet
1,0 bar = 67 dB/A
1,5 bar = 71 dB/A
2,5 bar = 78 dB/A
Flat jet
1,0 bar = 69 dB/A
1,5 bar = 74 dB/A
2,5 bar = 79 dB/A
The measurements and datas are based on the following rules of the measuring technique:Regulation for equipment
safety law DIN 45635 Part 1/04.84
Manufactured by Bersch & Fratscher GmbH
9
Service Manual
OPTIMA 2100
version 10/2008
13.
Disposal
The high pressure spray gun is not subject to special disposal regulations.
14.
Trouble possiblilities
Functional disturbance
14.1. Decrease in paint flow
when spraying:
14.2. Irregular jet:
Possible cause
Repair
* Filter of gun clogged.
* Viscosity too high.
Clean the filter ( see point 9.3. )
Water down the paint.
* Too low material pressure.
Increase air inlet pressure of the pump.
* Airless nozzle clogged.
Replace nozzle ( see point. 10.4. )
* Filter of gun clogged.
Clean the filter ( see point 9.3. ) or change the filter.
* Nozzle to wide or worn out.
Insert new nozzle ( see point 10.4. )
* Viscosity to high.
Water down the paint.
* No, or not enough atomizer air.
Open regulation no. 1248 – U6 ( see point 8.4)
* Air slits dirty.
Clean with a brush. Do not u use a wire brush!
* Atomizer air pressure to high or too low. Adjust pressure regulation valve.
14.3. Spray gun still sprays
when closing:
* Seal washer or needle ball worn out.
Change parts ( see point 10.1 to 10.5. )
* Needle spring has lost stress.
* Needle seal too strong thus needle can
Replace spring ( see point 10.1. )
not be moved through the spring.
14.4. Spray gun leaks paint
on needle seal:
* Needle and needle sealing dirty.
Change sealings ( see point 10.2 )
* Needle seal worn.
Replace sealings ( see point 10.2. )
* Packing gland is not installed
Tighten packing gland.
tight enough.
14.5. Spray gun is blowing:
14.6. Spray gun has no or to little
pre-air:
* Valve spring fatigue.
Replace spring no.1136 -20
* Valve sealing worn.
Change valve sealing ( see point 10.3. )
* Valve defective.
Change valve.
* Pre-air stroke screw not properly Adjust pre-air ( see point 8.10. )
adjusted.
Regularly cleansing and servicing prolongs the life-span of the high pressure spray
gun. For a general cleansing we offer a professional service in our company.
15.
Order number
Available accessories
Insert filter
50 µm / 295 msh red colour
100 µm / 150 msh yellow colour
150 µm / 80 msh white colour
001233-74
001233-75
001233-76
Nozzle carrier complete
with nozzle bores in diameters
0,18 ; 0,23 ; 0,28 ; 0,33 ; 0,38 ; 0,43 mm
(and further sizes in different spraying angles
are also on stock available,
deviating nozzle bores on request.
01248-U8
Nozzle cleaning needles
7,5 meter , G1/4“air connection
NPS1/4“ material connection
000345-44
AirCombi hose pair
AirCombi soft hose pair
7,5 meter , G1/4“air connection
NPS1/4“ material connection
Repair kit
Air hose
2462-U1
2462-U2
000345-172
Pk 6 endless
003633.05
(cut to length on request and on both sides G ¼ “union nut).
Manufactured by Bersch & Fratscher GmbH
10
Service Manual
OPTIMA 2100
version 10/2008
Current nozzle sizes:
Spray angle
20 °
30 °
40 °
50 °
60 °
0,18 mm
218
318
418
-
-
0,23 mm
223
323
423
523
623
0,28 mm
0,33 mm
228
233
328
333
428
433
528
533
628
633
0,38 mm
238
338
438
538
638
0,43 mm
243
343
443
543
643
Orifice size
Other sizes available upon request.
16.
Declaration of conformity
CE 08
DECLARATION OF CONFORMITY
according to the EC-Guide-Line Machines
We, manufacturer
BEFRAG
Bersch & Fratscher GmbH
Spezialfabrik für Lackiertechnik
63791 Karlstein
declare under our sole responsibility that the product
HIGH PRESSURE Spray Gun AIR COMBI OPTIMA 2100 ( 250 bar ) no. 001248
•
•
Conform with the relevant regulations of the EC-machine guideline (98/37/EG), including their changes at this time period.
Conform with further relevant regulations of the EC-machine guideline including their changes at this time period.
Î Directive 94/9/EC – Equipment in explosion endangered environments. Use in zone 1; equipment of category 2
•
•
•
•
following harmonized standards ( or parts from this ) were used.
Î DIN EN ISO 12100, 2004-04 Part 1 and 2: Safety of machines.
Î EN 349 Minimum distances to avoid stem presses.
Î EN 23741 Noise formation
Î EN 457 Noise protection regulations.
Î pr EN 349 Engineering safety regulations.
Î pr EN 1953, 1998-12 Spraying apparatus for coating materials – Safety requirements.
Î DIN EN 13463-1 Non electric devices for using in explosion endangered areas.
following national technical standards and specifications were used.
Î pr EN 614-1 Ergonomic formation basic principles.
Karlstein, date
01.10. 2008
Manufactured by Bersch & Fratscher GmbH
(Mr. Bernward Keller, head of department spraying machines)
11
Service Manual
version 10/2008
OPTIMA 2100
illustration 4: Explosion drawing OPTIMA 2100
Manufactured by Bersch & Fratscher GmbH
12
Service Manual
OPTIMA 2100
version 10/2008
17.
Declaration of guarantee
Bersch & Fratscher grants a warranty to the following extent for paint spray guns:
The warranty extends to the material values of parts with fabric-malfunctions or material defects, which turn out within the
guarantee period. Those defective parts (excluding wearing parts) are at our choice repaired free of charge or new supplied,
which are substantially impaired in usability, in a time period of 24 months with one-shift operation, 12 months with two-shift
operation or 8 months with three-shift operation starting from delivery date to the end user – in particular because of fabricmalfunctions- material defects – which are unusable or handicapped in their functionality. That means that we decide, if we
exchange or repair the complete unit or single parts ot this unit. The warranty extends to the materials value of these parts.
Further requirements of any kind, in particular on compensation, are impossible. That applies also to damages, which occurs
during consultation, training and demonstration. If the buyer wishes immediately a repair or replacement, before an obligation
to indemnify was determined in the context of the work warranty, then the replacement or repair takes place against charging
and payment of the respective current market price. If the warranty claim exists, after checking the item, the seller will provide a
credit note for the charged repair job or substituted items. The parts for we supplied a replacement, change into our property,
Claims or other complaints will not authorize the buyer and/or orderer to refuse or retard the payment.
Returning of the claimed item has to take place to us free of charges. We cannot cover assembly costs (work time and travel
costs) as well as freight and packing costs. Here our assembly conditions apply.
We do not take over any warranty for damages which caused by the following reasons or were along-caused:
Unsuitable or inappropriate usage, incorrect assembly and/or initial start-up by the buyer or through third persons or parties.
Normal wear, incorrect treatment or maintenance, use of force, damage by third parties or by contaminant, damage by ignoring
of the users manual, interferences and changes in the product, unsuitable coating material/spraying materials, exchange
materials and chemical, electro-chemical or electrical influences, if the damage is not caused by us.
Grinding coatings /-spraying materials like e.g. Menninge, dispersions, glazes, liquid emery, zinc-rich paints etc. reduce the life
span of valves, packings, spray guns, nozzles, cylinder, piston etc.
Wear which can be led back on that is not covered by this warranty.
Components, which were not built by B&F, are subj ect to the original manufacturer warranty.
The exchange of suche a part does not extend the guarantee period of the equipment. The warranty expires with influences by
third-parties.
The equipment is to be examined immediately after receipt.
Claims must be advised to us in written form within 14 day s after receipt of the equipment under indication of the model
description and the serial number.
We reserve the rights to fulfill the warranty by a partner company. The achievement of this warranty depends on the proof of
the invoice. If the warranty claim validly made by the warranty taker is not confirmed, the repair invoice goes to the buyer.
Additionally the buyer has to refund all costs by not entitled claims to the manufacturer . This declaration of guarantee does not
place a restriction of the legal and/or. the requirements agreed upon contractually by our general delivery conditions.
Stockholm 08-629 07 00
Härnösand 0611-214 63
Karlstad 054-10 15 40
Manufactured by Bersch & Fratscher GmbH
Malmö 040-18 70 22
Göteborg 031-779 73 30
www.anti-corrosion.com
13